What did you do to your GMT today?

Status
Not open for further replies.

brianlibby791

Member
Feb 25, 2017
239
New Jersey
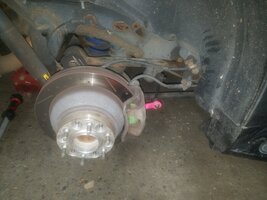
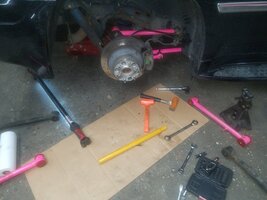
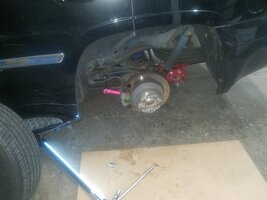
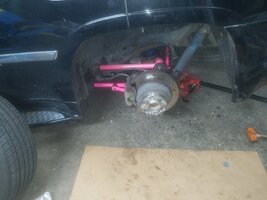
If you need advice on how to do these, let me know (PM is OK) - I just did these on my 1500HD - but as I look at your 3500 in your sig, you probably won't have any issue at all.

As for 'what I did'... besides getting it back from the alignment shop, I changed out the rear diff fluid. Probably the easiest thing I've done with the Sierra, besides checking the air filter. Thankfully, my '03 has a drain plug. And both it and the fill plug came out w/o trouble.

Took about 2.6-2.7 quarts (about 500ml left in bottle #3), and checking the level pre-drain, it was within spec (so no leaks, also 'thankfully').
Honestly I cannot remember if mine has a drain plug.. I’ll have to look later when i get home. This coming spring im gonna do wheel seals and a fluid change on her, since it hasn’t been done in 4 years.

I finished everything last night and its a lot better in the front end along the lines of steering play, and as well as the ride. To be completely honest, the front end feels like a Cadillac :2thumbsup:

The old arms took a beating to remove them as the truck came from upstate NY. Ask @littleblazer , the passenger side didnt want anything to do with coming out.

Ill Make a post on my build thread most likely next week on how everything is after the alignment.

Thank you for the advice and offer of help! Sorry it’s about a week late of a reply, just been caught up with schools and stuffs.
 

xavierny25

Member
Mar 16, 2014
6,372
Staten Island, N.Y
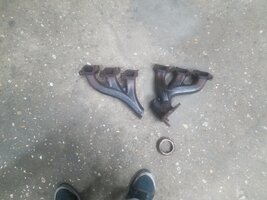
Replaced the exhaust manifold. I started at 1pm and got done just shy of 10:30pm. Dew to a few broken headless bolts on both ends of the exhaust manifold.The right size set of vise grips really did the trick along with a lot of PB blaster. The exhaust was also leaking out from both ends of the manifold do to the headless bolts, wish I would of got a pic of the gasket.20181027_162700.jpg
That is one hell of a cracked manifold.20181027_175235.jpg
1 of the hardest parts of removing the manifold is if you've got headless bolts.20181026_095928.jpg
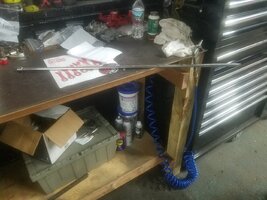
Used this long azz extension to get at some of the lower bolts when installing. Made life a little easier going in through the wheel well20181027_162715.jpg
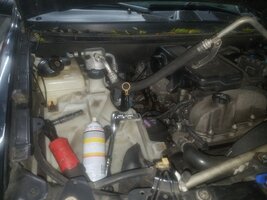
A small part of the mess I had to make to get this done.20181027_223044.jpg
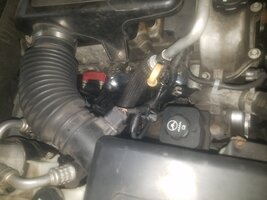
Bad pic but.... SUCCESS!!! It's done and I'm over it, all torqued down and running right as rain.
I didn't take a pic of it but the cat is just slightly plugged up. It's on the to do list along with a cat back exhaust.
 

Mike534x

Member
Apr 9, 2012
1,019
Removed the bug guard on the hood, the foam adhesive by lund failed and kept causing it to "thunk" against the hood despite being screwed in. Also need to get more of those little "nubs" that are supposed to protect the paint from the visor hitting the hood/fender, but keep forgetting to contact them to get more. I also feel better having it off for the winter, maybe I'm wrong, but it felt like keeping it on only helps rust form quicker at the tip of the hood if you don't be keep it cleared constantly.

Also received both upper rear control arms from RockAuto, and the Front + Rear sway bar bushings. Hoping the rear bushings/arms solve the annoying squeak I've been chasing for the past year.
 
  • Like
Reactions: Matt and Mooseman

Mooseman

Moderator
Dec 4, 2011
26,123
Ottawa, ON
Yesterday, pulled the front axles out of the Saab. Started with the right side. Tried to cut corners by just pulling the upper ball joint (nope), then undid the lower ball joint from the knuckle, yeah, that worked but now I had the full weight of the knuckle, brake rotor and caliper to try and hold up to put the lower BJ nut back on. So off came the caliper, bracket and rotor. Much better. From lessons learned from that side, tackled the left. Went much faster BUT just when I was putting on the lower BJ nut, it stripped :mad:. Was too late to try and find a replacement and it started snowing :hopeless:. Today, I'll pull the front driveshaft so all that'll be left is getting the winters installed.

I think I know which brand it was when I replaced it (MAS) so I might buy another to use the nut and keep the BJ as a spare. I'll know just by the size as it used a 1 1/4" (~32mm) socket. The other side used a 22mm.
 

Mike534x

Member
Apr 9, 2012
1,019
Just finished up replacing the rear control arms, funny how much easier it is to slide the one in the frame out when the bolt & clip for the parking brake is removed. Also managed to knock out the sway bar bushings, took off the bracket and the old ones just fell right off the bar with plenty of play and flexibility so I'm sure those are way gone. After spending 30 minutes of cursing the bushings finally popped onto the bar, tightened it up and took it for a test drive and the squeak I've been hearing seems to be gone finally and feels a lot tighter around the corners. :2thumbsup:

Think I'll be taking her over to the local shop and seeing what they'll charge to do the front sway bar bushings. I'm not too keen on going through that ordeal again, and I think my fingers will thank me for it. :whiteflag:
 

smt 59

Member
Just finished up replacing the rear control arms, funny how much easier it is to slide the one in the frame out when the bolt & clip for the parking brake is removed. Also managed to knock out the sway bar bushings, took off the bracket and the old ones just fell right off the bar with plenty of play and flexibility so I'm sure those are way gone. After spending 30 minutes of cursing the bushings finally popped onto the bar, tightened it up and took it for a test drive and the squeak I've been hearing seems to be gone finally and feels a lot tighter around the corners. :2thumbsup:

Think I'll be taking her over to the local shop and seeing what they'll charge to do the front sway bar bushings. I'm not too keen on going through that ordeal again, and I think my fingers will thank me for it. :whiteflag:
If you were able to do all this why would you not do the fronts yourself as they are super easy. 4 bolts to remove the cap then re and re. Just saying..
 

xavierny25

Member
Mar 16, 2014
6,372
Staten Island, N.Y
Freshly powder coated parts went in this afternoon.20181028_131406.jpg
passenger side before.20181028_135052.jpg
and after.20181028_140450.jpg
Drivers side before.20181028_152726.jpg
and after.20181028_153246.jpg
Lastly the panhard bar.

I'm going to order a stock rear diff cover for the other axle I've got and have that coated. That should just about do it back there.20181028_172253.jpg
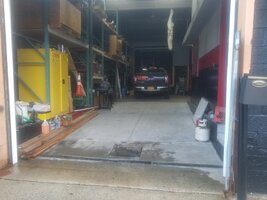
Tucked my brothers truck inside his shop for safe keeping till he gets back from Vegas.20181028_172304.jpg
While I had the hose and cleaning supplies at the gate to the shop figured why not wash of all the fingerprints, grease and grim I got on it.

Think I'll be taking her over to the local shop and seeing what they'll charge to do the front sway bar bushings. I'm not too keen on going through that ordeal again, and I think my fingers will thank me for it. :whiteflag:
The nerve.
 

Mike534x

Member
Apr 9, 2012
1,019
If you were able to do all this why would you not do the fronts yourself as they are super easy. 4 bolts to remove the cap then re and re. Just saying..

I'll try giving it a second shot this week, hopefully the fronts are easier to get on then the rears. What a pain that was.
 

xavierny25

Member
Mar 16, 2014
6,372
Staten Island, N.Y
Failed horribly at trying to replace the driver side temp actuator. I cant see or figure out a way to get to the upper screw with out drilling a hole threw some metal in my way. I even tried getting through the radio pocket with no visible way of doing it.20181029_171121.jpg
Sometimes it's the small crap that will kill you and have you saying some off the wall shyt.
 

Mike534x

Member
Apr 9, 2012
1,019
Failed horribly at trying to replace the driver side temp actuator. I cant see or figure out a way to get to the upper screw with out drilling a hole threw some metal in my way. I even tried getting through the radio pocket with no visible way of doing it.View attachment 86387
Sometimes it's the small crap that will kill you and have you saying some off the wall shyt.

I may be wrong, but I recall someone mentioning on an older post that you should be able to reach that one by going under the driver side kick panel and reaching up to get at it? I dread doing mine in the Spring, it hasn't failed *yet* but it does make a click/pop noise when switching between floor -> top vents -> floor/defroster.
 

Sparky

Member
Dec 4, 2011
12,927
The mode actuator isn't "bad" (as far as actuators go) but the temp actuators are worse.

On my GMT900 full size, the driver side temp actuator is actually the easiest to get to, and that's the one that failed on me. Lucky twice that both times I had a failed actuator on either vehicle it was the "easy" one.
 

Matt

Member
Dec 2, 2011
4,039
If it's the blend door actuator that you're talking about, behind the metal brace, then yes, it's a son of a bitch. I think I used the 5.5mm socket by itself without the ratchet, just got lucky and was able to turn it with my fingers. Lost a lot of blood doing that one.

The only other thing you could to is drill the hole or start cutting a notch out.
 
  • Like
Reactions: xavierny25

Mooseman

Moderator
Dec 4, 2011
26,123
Ottawa, ON
Failed horribly at trying to replace the driver side temp actuator. I cant see or figure out a way to get to the upper screw with out drilling a hole threw some metal in my way. I even tried getting through the radio pocket with no visible way of doing it.

On the Saab, there are 2 or 3 bolts that hold a metal brace that the TB's don't have. Maybe the Voy's have this same brace. I did not reinstall the top bolt afterwards because it was too much of a b!tch. Feel behind the brace for some 10mm bolts.

And my own failure today, finally got a replacement nut for the lower BJ on the Saab after stripping the original one. Took it for a drive and the exact same hum is still there.. WTF!!! There are no axles and the noise is almost definitely coming from the left front. Only things left is possibly the right bearing and the transfer case. I drained the TC fluid and it was nice and blue, albeit a little low.

I've just about had it with this thing. I;m gonna turn it into a lawn ornament and use the TB this winter. I might fix the Saab for next winter but I'm just getting tired of it, except for its 5.3.
 

Sparky

Member
Dec 4, 2011
12,927
Sure it isn't just a funny tire?
 

Mooseman

Moderator
Dec 4, 2011
26,123
Ottawa, ON
Possibility. But my confidence level of this truck is not high right now and I need something reliable for the winter since I don't have a garage to work in.
 

xavierny25

Member
Mar 16, 2014
6,372
Staten Island, N.Y
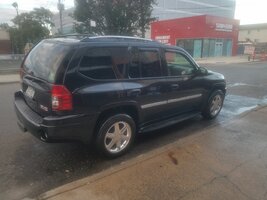
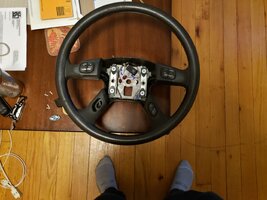
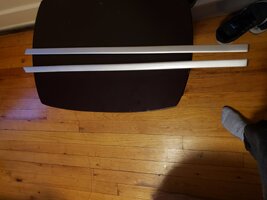
Not to the Voy but for the Voy. Found a guy on craigslist local to me that was parting out an SS, so I grabbed the steering wheel with buttons since the lights work and mine dont. Also grabbed the 2 complete front struts and the 2 roof plastic moldings I've been searching for since I did the Saab roof rail swap.20181031_204946.jpg
Going to swap the boards with working lights to the Voy since these buttons dont look as nice as mine. Then I'll work on putting LEDs in my original boards. I sure hope @Blckshdw points me in the right direction on doing this.
20181031_210220.jpg
I've got a rattle can of matching paint just for small projects like these.
 

Blckshdw

Moderator
Nov 20, 2011
10,771
Tampa Bay Area, FL
Going to swap the boards with working lights to the Voy since these buttons dont look as nice as mine. Then I'll work on putting LEDs in my original boards. I sure hope @Blckshdw points me in the right direction on doing this

:thumbsup: piece of cake. I used the mini pcb LEDs that had the resistors already on them. That got rid of any issues with space inside the button housing. Downside was they were noticeably brighter than the 5mm LEDs I used everywhere else, so I had to swap all the other LEDs too :bonk:

Polarity pics are in the LED mod thread... Somewhere... :rolleyes:
 

Sparky

Member
Dec 4, 2011
12,927
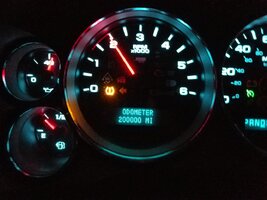
Ticked over 200k. Never mind the TPMS light, I have a failing sensor that keeps dropping out. New one will go in when I get new tires.

20181102.jpg
 

Mike534x

Member
Apr 9, 2012
1,019
Spent most of the afternoon under the Envoy trying to track down my rear squeak that comes out over every single bump (thought it was gone after doing the arms and bushings). Shocks, sway bar links, sway bar bushings and upper control arms are new. Going to try greasing the chassis mounts in the rear if I can reach them, and see if I can get a look at the rear spring isolators to see if they shifted and is the source of the noise. Otherwise I'm at a loss.


Besides that, I've been monitoring oil consumption since the new valve cover install in the Spring. I'm 1,200 miles in and haven't had to add a half quart like I was doing before hand, but its not usually until its 2-3k in when I start seeing it increase big time, but so far so good. Still have the occasional puff of smoke when accelerating.
 

Matt

Member
Dec 2, 2011
4,039
Replaced the RainX wiper blades with PIAA Si-Tech on the front and Super Silicone one the back.
 

Reprise

Lifetime VIP Donor
Supporting Donor
Member
Jul 22, 2015
2,724
Replaced the RainX wiper blades with PIAA Si-Tech on the front and Super Silicone one the back.

Let us know with a follow-up how you like the PIAAs. I've had the Rain-X and was 'meh', myself.
Need to replace the blades on the Sierra, and probably should treat the Voy to a new pair (as I think of it, they're due, as well).

As for me...
Finished installing the backup cam in the Sierra. Added a wireless transmitter to eliminate the video cable run from tailgate to H/U (when you've got a 156" WB, it starts to matter...lol)

Activated it and discovered it worked like crap. Actually, the picture on my screen would look better if I rubbed crap on the display. Unusable. Back to a conventional cable run. :Banghead:
 
  • Like
Reactions: Matt

Mike534x

Member
Apr 9, 2012
1,019
Managed to replace one of the front sway bar bushings before it started pouring out, going to tackle the other side tomorrow morning. Used a little Permatex brake caliper grease to help slide it on, which seemed to do the trick. Going to take it apart again tomorrow and give the bracket a good cleaning, since I did a rush job of it, but I know I got the right size bushings at least.


Before doing the bushings, I got in and started her up and everything on the dash was dim with the voltage gauge reading 9v before shooting to 14. Went over to Advanced and the reman alternator failed the test, which showed it was fine like 3 weeks ago after getting it tested. Called Amazon who is letting me send it back for a full refund, but found a new Delco alternator with a 20% coupon ($143 after tax, vs $112 for the reman) so it only came out to be about $31 more then what I spent on the reman so here's to hoping I can finally get past this pesky intermittent voltage issue I've been chasing down for 3 months.

Also...had a strange occurrence twice today while shopping. Anyone else ever come across a loud bang/thump that feels like its coming from under the truck? Twice its happened about 5-10 seconds after start up and made me jump out of my seat both times thinking I was hit, or something had hit the truck. Never heard, or experienced it until today. :hopeless:
 
  • Like
Reactions: Matt and Redbeard

Matt

Member
Dec 2, 2011
4,039
Also...had a strange occurrence twice today while shopping. Anyone else ever come across a loud bang/thump that feels like its coming from under the truck? Twice its happened about 5-10 seconds after start up and made me jump out of my seat both times thinking I was hit, or something had hit the truck. Never heard, or experienced it until today. :hopeless:

Do you have the SAIS system? Not 100% sure but it could be that.

Let us know with a follow-up how you like the PIAAs. I've had the Rain-X and was 'meh', myself.

Will do. I've always had the RainX but I've read a lot of good things about the PIAA's and they apparently last years rather than about 6 months.
 

Mike534x

Member
Apr 9, 2012
1,019
Do you have the SAIS system? Not 100% sure but it could be that..

I have the 5.3, I don't believe it came with the SAIS?


Finally have the front bushings done, pulled both brackets and cleaned the layer of rust/crude, applied a little grease inside the bushings and on the sway bar and got her all back together. Took it for a test drive and I'm very happy with how its handling and the front squeak I was getting is finally gone! Now I just need to take care of the lower control arms + ball joints and that should be it for the front end until its time to replace the CV joints. I am almost positive I found the source of my rear squeak this time, maybe it was the angle I was at underneath but the passenger side looks like the spring has a bend to it. Lower is fine, but once you get to the middle/upper it seems to be jutting out a tad bit, so I'm wondering if the isolator isn't positioned correctly, or it shifted when the previous owner converted it from the airbags. I felt the top half and it feels like the spring is sitting at the very corner of the isolator, where as the driver side seems to be perfectly center. :Banghead:
 
  • Like
Reactions: Matt

TollKeeper

Supporting Donor
Member
Dec 3, 2011
8,267
Brighton, CO
I let it sit... As I do every weekend. Dont have 2 baby seats, so im stuck driving the Aztek on the weekends.. Man I miss my V8 on the weekends!
 

Mooseman

Moderator
Dec 4, 2011
26,123
Ottawa, ON
I installed the running boards I picked up at the u-pull a few weeks ago but , as I discovered, they don't fit as they came from an Envoy. :mad: Too much time elapsed to return them so headed to the u-pull as they had one '06 LT. Get there and the passenger side is missing the plastic cover. :mad: :mad: However did score a pair of mirrors with the smoke turn signals to replace the amber ones I have now. :yaay: Also, it has a DIC so will return this week to get that along with dash panel (mine has holes from cop radio mike) and the whole steering column with leather wheel with switches. :yaay::yaay:

So now I have the driver side running board installed but plastic cover isn't on solid so will add screws. I think I may have found another one with running boards in another yard but is about an hour away.
 

Capote

Supporting Donor
Member
Jul 14, 2014
24,227
Atlanta, GA
Replaced all my yellow led's in my headlights, mirrors, and rear with white 6k ones, I finally got bored of them. Broke the two tiny tabs on driver's side mirror turn signal lens in the process (forgot you just slide the lense forward, been years) I'm just going to say **** it and put a tiny dab of super glue to keep the very end closed. I'm not going to spend $60 on one clear lens, no way! Only thing holding it on is the screw towards the middle. After all that, I just wiped down and vacuumed out the engine bay. Turns out I left a funnel in there, which got ate all to hell by the fan for a week. That fan has taken a beating the past year; 3rd time it's had to eat away at something due to me not having a clear head while working. My intake bracket also seemed to fail, so I had to find another bolt and nut to fasten it all together again. Added a zip tie as a fail-safe, just in-case there is another failure.
 

fletch09

Member
Nov 20, 2011
1,982
Busy weekend. cleaned throttle body, recharged K&N air filter, oil change and put on winter rims and tires. which after checking my records, was a month earlier than usual.
 
  • Like
Reactions: xavierny25

HARDTRAILZ

Moderator
Nov 18, 2011
49,665
Pulled the junk projectors after having an LED die and then going back to halogen and seeing how crappy they really are. Went back to the ebay stock replacements with sylvania fancy bulbs that still suck. Need to go thru and retro a set so I can use HID again properly and have good lights.
 

BrianF

Member
Jul 24, 2013
1,265
West central Sask.
Just been driving her lately. Got to order up the steering wheel position sensor still as the lights come on more frequently... she is dying. Aired up the rear tires, looks like they might have a slow leak. The grid roads decimate tires so I have to get a new set for her.
 

HARDTRAILZ

Moderator
Nov 18, 2011
49,665
Found some bearing noise and the tires are a bit cupped. Guess i should turn the radio down and pay more attention. Good thing is I got a free warranty pair on the shelf.
 

Sparky

Member
Dec 4, 2011
12,927
Drove it to work. I'm liking the new tires so far. Then on the way home I started getting this weird grind noise from the front left that reminds me of whem the tire rubs the mud flap at full lock. But, the flaps are fine and nothing looked loose. I'm suspecting maybe the hub has decided to give up, but at 200k on what appears to be the original set I'm not mad. The timing to have anything go bad sucks because weather is cold now and I have little time.

Going to yank the wheel tomorrow to hopefully see exactly what is wrong.
 
  • Like
Reactions: Matt

Mike534x

Member
Apr 9, 2012
1,019
Replaced the ignition lock cylinder in the steering column. Lost my key at work about a month ago, ordered a matching door lock + ignition set on eBay. Did the door lock weeks ago, along with getting a new remote fob programmed and the old ones cleared. No more worrying about prying eyes trying to figure out which GM truck it goes to. No idea how it happened, but I feel at ease now.

Also received the new alternator, just waiting on the OBD memory saver to arrive so I can do the swap.
 
  • Like
Reactions: Mooseman

Matt

Member
Dec 2, 2011
4,039
just waiting on the OBD memory saver to arrive so I can do the swap

Out of curiosity, why are you getting that? If it's because of the AC actuators, just do it and let them fail because they were going to anyway.
 
  • Like
Reactions: Reprise

Mike534x

Member
Apr 9, 2012
1,019
Out of curiosity, why are you getting that? If it's because of the AC actuators, just do it and let them fail because they were going to anyway.

I was going to do that, but the actuator that has does make noise but only when changing modes is the one that is not easy to get to. I'd rather keep its life going a bit more until its warmer out before attempting to replace it. I think its the blend door on top on the drivers side.
 
  • Like
Reactions: Matt

Mooseman

Moderator
Dec 4, 2011
26,123
Ottawa, ON
Watched the CEL come on. Immediately fired up Torque on my Android HU (had my BT OBD adapter already plugged in) got a P0304. Went to the misfire counts, historical had over 6000 and current only registered misfires during idle. So tomorrow, plugs, a throttle cleaning and swap #4 coil with another and see what happens.

Weird it's only at idle though :confused:
 

Matt

Member
Dec 2, 2011
4,039
I was going to do that, but the actuator that has does make noise but only when changing modes is the one that is not easy to get to. I'd rather keep its life going a bit more until its warmer out before attempting to replace it. I think its the blend door on top on the drivers side.

OK, that's a complete bastard to change. Get a blood transfusion and your arsenal of swear words ready. :biggrin:
 
  • Like
Reactions: Reprise

Blckshdw

Moderator
Nov 20, 2011
10,771
Tampa Bay Area, FL
With mom coming this week, decided to get up before the rush and get the EXT washed and waxed. Timed it perfectly too, got the 2nd to last open bay, before about 5 vehicles pulled in a couple minutes later. Planned on snapping some soapy pics, but I hate it when I'm waiting in line for something and people are screwing around, so I handled my business and got outta there.

Hit the gas station near the house on the way back, since I'm at a quarter tank, but the pumps wouldn't stay on. Managed to get a few gallons in and gave up. Will try a different spot this afternoon.
 
Status
Not open for further replies.

Forum Statistics

Threads
23,726
Posts
642,693
Members
19,262
Latest member
TruTru1

Members Online