What did you do to your GMT today?

Status
Not open for further replies.

brianlibby791

Member
Feb 25, 2017
239
New Jersey

littleblazer

Member
Jul 6, 2014
9,267
  • Like
Reactions: xavierny25

Mooseman

Moderator
Dec 4, 2011
26,129
Ottawa, ON
Yesterday, replaced the oil pressure sensor as it was always showing max pressure and giving a code for sensor range problem. Pressure now back to normal but still getting the code because now it's too low due to me using the wrong oil pump when I did the DOD delete. It goes away when I change the oil but not due yet.
 

Shaw520

Member
Sep 20, 2017
289
Northeast
Installed rotors and pads on rear of the Tahoe,..took care of the annoying brake pulsation it had when i bought it last week. Sprayed the under carriage with fluid film,..and moved the DDX Kenwood head unit fromvthe TB to the Tahoe.0306181710.jpg
 

Locksmith

Member
Nov 19, 2017
76
Columbia,SC
As Rodney Dangerfield said, " My cars got more miles up and down on the lift, than on the road !".
 
  • Like
Reactions: Reprise

Sparky

Member
Dec 4, 2011
12,927
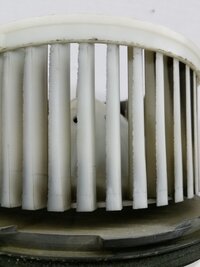
Replaced the blower in my truck at lunch. The old blower was making a very annoying squeak-screech noise at low speeds. The new one is blissfully quiet, and even the air movement is quieter too. Probably because the blades are smooth instead of looking like they've been chewed on by a crew of tiny beavers.

20180312_124231.jpg
 

Martyelzz4

Member
Jan 3, 2013
67
Sprague, WA
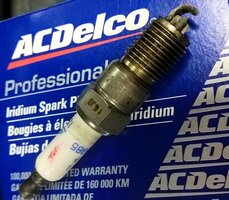
Well, after spending 3 days cussing out GM engineers I finally got all my spark plugs changed yesterday. So today, I decided to tackle adjusting my airbags... Ok, so today I decided to lower the rear height of my 5.3i as the measurement at the front fender wells were 31.5 both sides. The right rear was 34 and the left rear about 33¼. The factory method works just fine... in a way.. After loosening the rear lug nuts, I jacked one side at a time and put a jack stand (up 2 notches) under both sides of the rear axle. Since all I had in small steel stock was a length of thread stock. I made one exactly 4.33" and another 5.33". After removing the rear tires/rims.. Turned on the ignition and waited for 2 minutes for the airbags to settle, then turned off the ignition (if you go longer than 2 minutes, it start adding air again.) The 2nd time I used a kitchen timer; then turned it off just prior to 2 minutes.
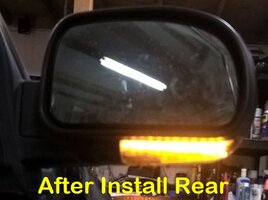
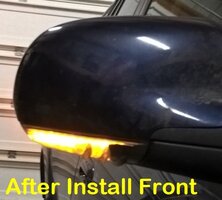
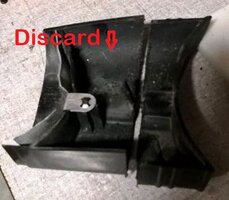
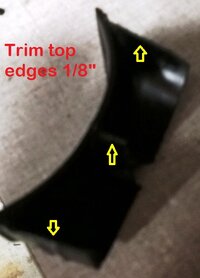
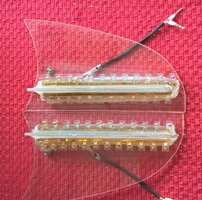
After pulling the 2 fuses (Manual say 48 for the body fuse box but it was 49 in my 08 for the 4wd) The Drivers side was right at the 4.33" so I adjust the sensor which was quite a bit off. Going over to the passenger side, it was still about an inch high so I jacked up the side of the car about 6" and dropped it fast. Now it was a bit low .. so I raised the frame a little at a time until it was at the 4.33". Adjusted that sensor. Jacked up each side mounting the tires and removing the jack stands. Put both fuses back in. Measured both at the top of the fender well; both were at 32" (not on the bump stop) front was still at 31.5. Started the car the air pump came on.. when it finished the rear fender wells were still at 32" (Yay!) exactly and not even off a 32nd of an inch. . now that is what I call within tolerances despite what the "Dealers" have told people. About 15 minutes later I took it out for a road test over some rough uneven roads and when I came back the rear measurement were still at 32"! I won't include the Air suspension manual but the picture is of the 5.33" and 4.33" measuring "tools" Oh also between one day of the spark plugs circus I installed a set of the Great LED turn signals of TXBlazer. I'd installed a pair on my previous Rainier but these new ones are even better!
 

Attachments

  • D Height2.jpg
    D Height2.jpg
    82.3 KB · Views: 4
  • Misfire1_2.jpg
    Misfire1_2.jpg
    220.5 KB · Views: 4
  • D Height2.jpg
    D Height2.jpg
    82.3 KB · Views: 4
  • AfterSignal1.jpg
    AfterSignal1.jpg
    97.9 KB · Views: 2
  • BeforeSignal.JPG
    BeforeSignal.JPG
    35.7 KB · Views: 2
  • AfterSignal2.jpg
    AfterSignal2.jpg
    94.6 KB · Views: 2
  • BeforeSignal2.JPG
    BeforeSignal2.JPG
    45.9 KB · Views: 1
  • Cutinsert1.JPG
    Cutinsert1.JPG
    45.8 KB · Views: 1
  • Cutoff1.jpg
    Cutoff1.jpg
    121.8 KB · Views: 1
  • Insert3.jpg
    Insert3.jpg
    114.5 KB · Views: 1
  • TXBlazer's LED Mirror Inserts.jpg
    TXBlazer's LED Mirror Inserts.jpg
    235.5 KB · Views: 1

Reprise

Lifetime VIP Donor
Supporting Donor
Member
Jul 22, 2015
2,724
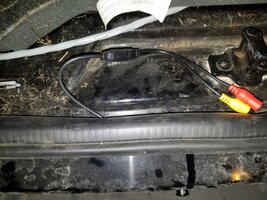
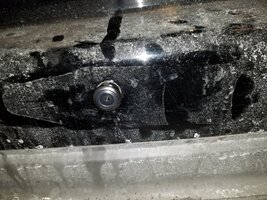
Finished my rear camera install, and called in the RMA to exchange the chrome headers for the ceramic ones (found out after I ordered the chrome that the ceramics would perform a little bit better and not cook the engine compartment so much (starter, as one example)
Tomorrow, I drive down to the land of RVs (Indiana) to look at a travel trailer.
 

littleblazer

Member
Jul 6, 2014
9,267
I did the plugs in the escalade yesterday actually. 1 and 8 kind of sucked. The tubes off the accumulator drier on the firewall prevented me from getting to the plug by hand. until I jammed it through. I don't have huge hands but I ended up leaving a nice dent in my wrist from it. On 1 it was the stupid jump start terminal. Took about an hour. 15 minutes for the 6 and 45 for those 2. Not the worst I've seen though.
 

Matt

Member
Dec 2, 2011
4,040
Finished my rear camera install,
Have you got pics of where and how you installed it? I'm doing mine Saturday and am probably putting it in the "step" of the bumper.
 

Reprise

Lifetime VIP Donor
Supporting Donor
Member
Jul 22, 2015
2,724
Well... yes and no. I stared taking pics, but don't have a complete series. But what I have should help.

I have an Envoy, so I had to run down underneath the bumper cover to access the reverse lamp wiring. So that part will be easier for you.

I'm off to Indiana today, but since I know you're looking for info, I will do a writeup once I get back tonight. It's not terrible; just takes time. BTW, mine is a license mount cam; I'll prolly put a different one in when all is said and done.
 
  • Like
Reactions: Matt

Matt

Member
Dec 2, 2011
4,040
Sweet, thanks!
 

Matt

Member
Dec 2, 2011
4,040
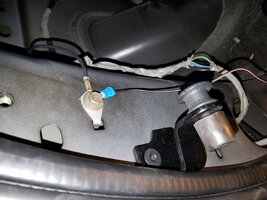
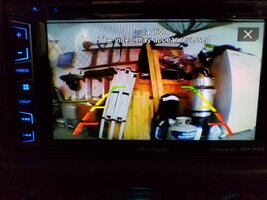
Installed the backup camera. I put it in the step of the bumper but had to offset it because right in the middle is part of the impact bar under the cover, but 2 inches to the left is a hole that let the camera sit there. My Pioneer is a level down from allowing you to turn the camera on whenever you like, but that's cool.

I found a convenient ground right where I was going to run the wires, I also taped everything up so it's nice and neat. so far, I like it.20180317_104446.jpg20180317_135708.jpg20180317_104501.jpg20180317_110843.jpg20180317_132344.jpg
 

littleblazer

Member
Jul 6, 2014
9,267
Motor mounts. Feels like a brand new truck...
20180317_144710.jpg
 

Mounce

Member
Mar 29, 2014
13,667
Tuscaloosa, AL
Big 3 on the Silverado with no apparent resolve for dimming. Have upgraded alternator and wiring now and still dims severely over a 450w Amp. Last thing to upgrade would be battery I guess but it's still cranking great so I'd hate to. That or second battery and I'd hate that as well...
 

dna59

Member
Nov 20, 2015
327
Belize
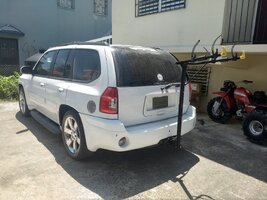
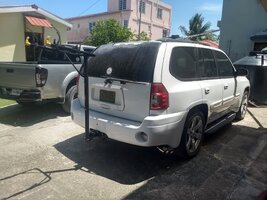
Trying out my new bike rack. Used some parts that were laying around and had a friend weld it all up. It doesn't fold up like the ones sold, but that's no issue for me. I had to come up with a solution to have I not sway side to side, but that was easy. Made my own device after some Google inspiration.IMG_20180319_123444.jpgIMG_20180319_123432.jpgIMG_20180319_123456.jpg
 

tsmith1156

Member
Jul 9, 2013
803
Lebanon, Ohio
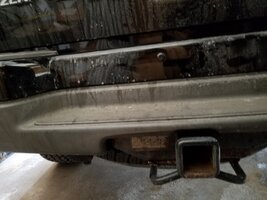
Put in my new hitch d ring. Now I need to drop the spare from under there and chop the resonator off!
 

Attachments

  • 63012E4F-117E-4927-8492-5BAF1A7E2532.jpeg
    63012E4F-117E-4927-8492-5BAF1A7E2532.jpeg
    1 MB · Views: 9
  • Like
Reactions: Blckshdw

djthumper

Administrator
Nov 20, 2011
14,956
North Las Vegas
Just break out the hack saw and cut it off. I did mine with the tire up there.
 
  • Like
Reactions: Blckshdw

Blckshdw

Moderator
Nov 20, 2011
10,771
Tampa Bay Area, FL
Anyone else got a set up like this?

Haven't seen a setup like that in one of our trucks in a long time. What are those,15"s? That's gotta rattle the windows for sure.
 

djthumper

Administrator
Nov 20, 2011
14,956
North Las Vegas
  • Like
Reactions: tsmith1156

CaptainKD

Member
Jan 13, 2012
31,990
Eastern NC
Let me know how it sounds with the resonator off, I’ve been thinking about doing it

Stop thinking about it and just do it.
:iagree: Just do it.

In my opinion, it sounds nice on a cold start - rough and throaty. I'm sure it sounds like a ricer to people that you drive by while pressing the gas but I don't know for sure sicne I'm inside driving. Keep in mind that it's not a 8 cylinder and you'll never get that deep rumbly sound from it.

The biggest reason to do it is to clean up the back end. It looks so much better without the trash can hanging under the bumper.
 

HARDTRAILZ

Moderator
Nov 18, 2011
49,665
I dont think you can tell when one drives by if it has the resonator or not. Never could tell at a meet n greet by sound, just when you saw the ugly thing hanging down.
 

Daniel644

Member
Feb 27, 2015
594
Anyone else got a set up like this?
well i'm a bit bigger of a setup. This is when I had the 12's but I've since swapped out to some DC Audio Level 3 15's


recieved my new lift shocks for the rear hatch and rear glass but one of the rear glass ones is defective and binding up so I just started a warranty claim with Rockauto to get a replacement shipped out.
 

Attachments

  • 0227160408d.jpg
    0227160408d.jpg
    190.2 KB · Views: 3
  • Like
Reactions: Mounce

Adamc0909

Member
Dec 14, 2017
93
Monticello ga
well i'm a bit bigger of a setup. This is when I had the 12's but I've since swapped out to some DC Audio Level 3 15's


recieved my new lift shocks for the rear hatch and rear glass but one of the rear glass ones is defective and binding up so I just started a warranty claim with Rockauto to get a replacement shipped out.
Nice and I just had to replace my factory gas shocks for the back glass
 

djthumper

Administrator
Nov 20, 2011
14,956
North Las Vegas
Okay, well I figured out what I’m doing this weekend 😂
Hack saw on the resonator side of the hangar takes about 7 minutes because of the slightly tight space.
 
  • Like
Reactions: tsmith1156
Status
Not open for further replies.

Forum Statistics

Threads
23,730
Posts
642,711
Members
19,269
Latest member
nonote

Members Online