You are using an out of date browser. It may not display this or other websites correctly.
You should upgrade or use an alternative browser.
You should upgrade or use an alternative browser.
What did you do to your GMT today?
- Thread starter MAY03LT
- Start date
- Status
- Not open for further replies.
z71 1500 LT with max tow package, with the integrated trailer brakes and the all star package, uphill & downhill start assist and movable pedals. They only found 1 within 500 miles.
littleblazer
Member
- Joined
- Jul 6, 2014
- Posts
- 9,274
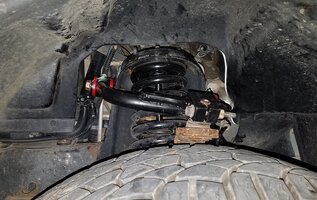
After four days of kicking myself... control arm bushings are done.
Here is me suffering for reference.
Here is me suffering for reference.

xavierny25
Member
Not mine but last night helped my Irish neighbor start his chevy 4500 small dump truck which is a mirror image of the Isuzu npr. With my trusty field piece amp probe started at the batteries and worked my way to 2 busted fuses. One mega fuse 80 amps and a small 15amp fuse. After making an auto zone run and going over all the electrical wiring that may of caused these 2 to pop. I couldn't find anything wrong other than a few loose terminal screws. I replaced the 2 and the truck started up like a champ. So everything is right in the irish mans world once again. He hit me with a 100 bill that i honestly declined to take but he shoved it in my pocket and invited me and the wife over for some beers and food. I had to say no cause the wife had already started to whip up some grub and it was getting late.
SnowBlazer
Member
xavierny25
Member
Put on some new front and rear brake pads. I also removed and replaced guide pin boots. Cleaned all the old caliper grease out and added some new grease.
I'll breaking the pads in shortly.
EBC green stuff pads for the win.
Then I replaced the alternator since it was the original that came with the truck. I got a 8hr drive coming up in the next few weeks and thats the last thing i want to worry about.

I'll breaking the pads in shortly.
EBC green stuff pads for the win.
Then I replaced the alternator since it was the original that came with the truck. I got a 8hr drive coming up in the next few weeks and thats the last thing i want to worry about.

Posted on a couple of other threads related to this but thought i'd post here since it is what I've done lately !
replaced both front wheel hub/bearing assemblies. Only L. was bad but thought I'd get in front of the next one before it went. Went with Mooseman's recommendation and got Timkin brand on amazon for a really good price for 2. Funny,, of all the things I thought would give me problems, those damn little clips for the wires fought me tooth & nail !! Had to get jiggy with them. 3 more bolts and an axle nut more than a brake job is what that amounts to.
Next day (yesterday ) narrowed down a whine type of noise in the front of the engine to a pulley under the alternator ( idler ? ). Trip to Advance Auto and a quick easy fix. Got 179,000 miles out of both so can't complain. NEXT !! ??
Put on some new front and rear brake pads. I also removed and replaced guide pin boots. Cleaned all the old caliper grease out and added some new grease.View attachment 80884
I'll breaking the pads in shortly.
EBC green stuff pads for the win.
Then I replaced the alternator since it was the original that came with the truck. I got a 8hr drive coming up in the next few weeks and thats the last thing i want to worry about.View attachment 80885
Hi, just wondering how involved this alternator swap was ? I would imagine I'm looking at doing this in the not too distant future seeing I'm 179,000+ mi. tryin' to keep the ole' girl running ! ;-)
xavierny25
Member
Hi, just wondering how involved this alternator swap was ? I would imagine I'm looking at doing this in the not too distant future seeing I'm 179,000+ mi. tryin' to keep the ole' girl running ! ;-)
It's not to bad at all then again I've had to get it out of the way twice to replace the thermostat. Lol. Only big issue with this is getting at the bottom alternator bolt. There's a few write ups on the site about how to and I'm sure there's a video out there some where in the interwebs or youtube.
$ Khalid ! 9130
Member
Went out today and got the underbody greased, feels really smooth now, also did the doors and no more creaky doors
@Capote Got it lubed !!!
Pics should be up in a while, although they are probably insignificant
@Capote Got it lubed !!!

Pics should be up in a while, although they are probably insignificant

It's not to bad at all then again I've had to get it out of the way twice to replace the thermostat. Lol. Only big issue with this is getting at the bottom alternator bolt. There's a few write ups on the site about how to and I'm sure there's a video out there some where in the interwebs or youtube.
Thanks for the response, hopefully I won't have to concern myself with this too soon.
xavierny25
Member
Hell man I wish my black paint was even 1/4 good as yours, mine is so effing embarrassing being a car guy & enthusiast. It's beyond paint correction unfortunately for me. An amazing detailer I met couldn't even work his magic really, he was sweating his ass off in an A/C climate controlled garage trying too. Lord knows I want a new Satin Black paint job more than anything. Sooo easy to take care of vs. gloss paint.All day yesterday..... clay bar, spot work on minor scratch with 3M's trizact 5000 system(btw worked beautifully I recommend it). Full compound with my 4" d.a. polish with my 7" d.a and lastly wax. View attachment 80952 View attachment 80953
I took these pic's this morning after a night of pollen and water from the skies got all over it.
Installed my LED Headlights, man they look the perfect shade White! The cooling fans are soooooo quite, didn't even hear them running. Pure white as advertised, not like a luck of the draw when it comes to HID's. I can't wait to see how they look tonight! Pumped!
tsmith1156
Member
With the help of @HARDTRAILZ got it up in the air today! Couple little things still gotta be done but good for now! Thanks for the help Kyle!
Attachments
Over the last week, I noticed my lift gate handle has gotten loose on the right side...
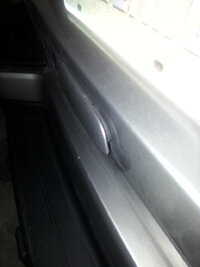
So today finally committed to pulling the inside panel and taking a peek. As expected the pin had worked itself a bit loose...

So I pulled the LP pocket out and worked the pin back into place.

Some of the foam insulation at the bottom had worked itself loose too, so I cleaned up the dirt, and applied a small bead of glue before securing the LP pocket back on the truck. Much mo betta!

So today finally committed to pulling the inside panel and taking a peek. As expected the pin had worked itself a bit loose...

So I pulled the LP pocket out and worked the pin back into place.

Some of the foam insulation at the bottom had worked itself loose too, so I cleaned up the dirt, and applied a small bead of glue before securing the LP pocket back on the truck. Much mo betta!

$ Khalid ! 9130
Member
Went out hunting for things for the TB. Found a shop that would do the retrofit for me, said no thanks!! Went looking for some throttle body cleaner. Really surprised I couldn't find it anywhere!! Looked for some fuse taps, same!! Got in contact with the projectors guy, turns out he's a nice 30 minute drive from my house....... Hopefully will be going to check them out this week. Cleaned the interior again, gets dirty real quick over here
rizzo20
Member
xavierny25
Member
Nice job @rizzo20  . I have the same djm uca's I'm just wanting to get a 2nd set of shock knuckles so I can have them all power coated before I install it all. I already have a set of calipers and brackets aswell as two complete lower control arms to get done in a blue metallic.
Lucky for me my brother owns the powder coat shop I us.
 . I have the same djm uca's I'm just wanting to get a 2nd set of shock knuckles so I can have them all power coated before I install it all. I already have a set of calipers and brackets aswell as two complete lower control arms to get done in a blue metallic.
 Lucky for me my brother owns the powder coat shop I us.

$ Khalid ! 9130
Member
Quite a bit, got some better quality stickers ordered for the TB, did the brake lights, all of them work now. Had to replace one, the other one just worked after I nudged what seemed to be the brake switch! Dad left his car home today, so I detailed the interior and removed some of the many dings and scratches on his doors

And SUCCESS!!!!

And SUCCESS!!!!
Tiggerr
Member
Pulled the 1 shim out of AC clutch that there was....
Now I need a hot day to see if it's a success or if I need to go source a clutch...
Now I need a hot day to see if it's a success or if I need to go source a clutch...
$ Khalid ! 9130
Member
Nothing ground breaking, got tired of the yellowish faded looking Chevy logo on the steering wheel. With a little help from my brother got three variations done
Version : 1 :
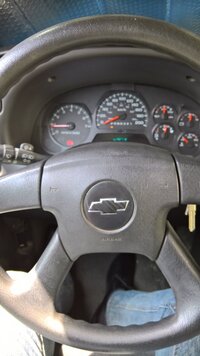
Version : 2 :

Version : 3 :
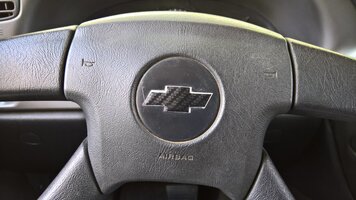
And it's currently rocking version 3 at the moment. Tried to do the gear shifter as well. Was next to impossible with the shifter still connected in the car. Any ideas and comments are welcome
Version : 1 :

Version : 2 :

Version : 3 :

And it's currently rocking version 3 at the moment. Tried to do the gear shifter as well. Was next to impossible with the shifter still connected in the car. Any ideas and comments are welcome

Tried to do the gear shifter as well. Was next to impossible with the shifter still connected in the car. Any ideas and comments are welcome
There's a very small hex head set-screw holding the shift knob in place, I don't recall the size. Be careful not to lose it.

$ Khalid ! 9130
Member
Is that when you're removing the shifter from the console or taking the shifter apart. Cause from what I know, there's a torx screw to remove the shifter from the consoleThere's a very small hex head set-screw holding the shift knob in place, I don't recall the size. Be careful not to lose it.

$ Khalid ! 9130
Member
Got a new GMTNation sticker made!!! This time its been done right! Waterproof, dustproof you name it. The shop owner told me it's an epoxy sticker, kinda like the dealership badge on my TB and that's been there for 8-9 years and still looks good as new

Noice!
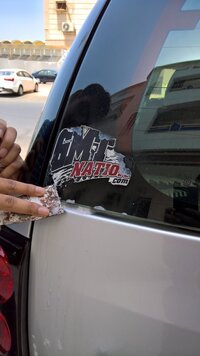
Scrape....
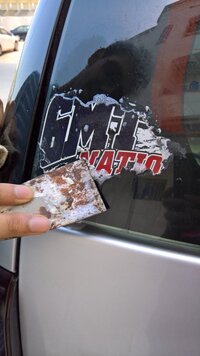
Scrape, Scrape......
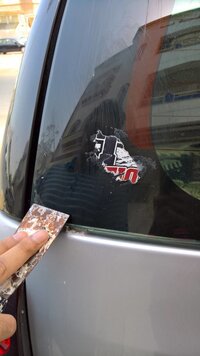
Almost done........

Done. Looks so clean
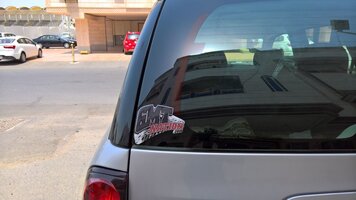
New sticker on

Another shot, you can see the dealership sticker above the Trailblazer emblem, the new sticker is of the same material
Time to update my build thread

Noice!

Scrape....

Scrape, Scrape......

Almost done........

Done. Looks so clean


New sticker on

Another shot, you can see the dealership sticker above the Trailblazer emblem, the new sticker is of the same material
Time to update my build thread

smt 59
Member
Replaced my 5 year old Interstate battery with a new Canadian Tire Eliminator Ultra AGM today. As well replaced a burnt out fog light.
The old battery was acting up a little with some weak starts after sitting over the weekend.
The old battery was acting up a little with some weak starts after sitting over the weekend.
Replaced the Alternator due to the "Battery Not Charging" Message in the display. My list of new parts is getting longer by the week, (Maybe a "You know you're a TB owner when" Post...) lol Now if I could find a way to explain to my wife that a 13 year old vehicle with 130,000 miles on it is going to need "A few things fixed" I'd be all set. lol
(Maybe a "You know you're a TB owner when" Post...)
You mean this thread?
You know you're a GMT owner when...
That's the one I was trying to remember.You mean this thread?
You know you're a GMT owner when...
Mike534x
Member
- Joined
- Apr 9, 2012
- Posts
- 1,062
Replaced upper radiator hose, kept finding small droplets of coolant pooling up under where the hose hugs the neck. Didn't see any cracks or chips in the neck, or on the hose itself. Hoping this clears it up, got tired of smelling anti-freeze and watching the reservoir slowly deplete since I last topped it off.
I was hoping to get a nice wash and wax done, after taking a road trip over the weekend. Hate seeing bugs caked to the windshield and front of the truck.
I was hoping to get a nice wash and wax done, after taking a road trip over the weekend. Hate seeing bugs caked to the windshield and front of the truck.
Replaced the receiver/dryer in the Saab, pulled a vacuum and did the redneck refrigerant transfer from the old TB to the Saab as per this
http://gmtnation.com/forums/threads/how-to-recover-r134a.17119/#post-535997
Worked fairly well.
http://gmtnation.com/forums/threads/how-to-recover-r134a.17119/#post-535997
Worked fairly well.
$ Khalid ! 9130
Member
tsmith1156
Member
carshinebob
Member
- Joined
- Jun 13, 2014
- Posts
- 154
$ Khalid ! 9130
Member
Gonna climb under it and look for the damn hole in my gas tank since the gas seemingly just falls out right after it goes in
That's not good

Check the filler neck, if it's not that and you find a hole J-B Weld can stop the leak.Gonna climb under it and look for the damn hole in my gas tank since the gas seemingly just falls out right after it goes in
reedtchsrv
Member
- Joined
- May 24, 2013
- Posts
- 54
Today, I tried to get my spare tire to lower. Fail. Apparently you need to lower it more often than once every ten years. So, after 30 minutes and a grinder, and what looks to be a really cool new scar, the only keeping my tire from the ground was my head. With that done, I decided that the spare would live in the roof basket from now on. I removed the hoist assembly remains, then stood back and looked at the truck. The left side looked great while doing nothing but shame the right side. So, out comes the sawzall. Two bent blades later, the resonator was deleted! Now the underside looked great. Due to my irrational fear of carbon monoxide poisoning, I grabbed Short Bus' pictures and headed to the local muffler shop for more pipe. Thirty minutes later and I have what's shown in the pictures. I'll remove the tire heat shield and hit the pipe with black paint this weekend and it should look even sweeter.
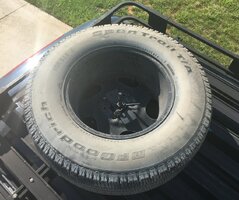
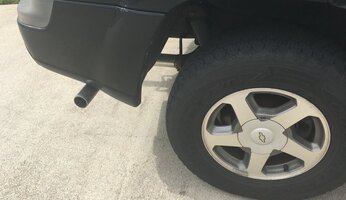
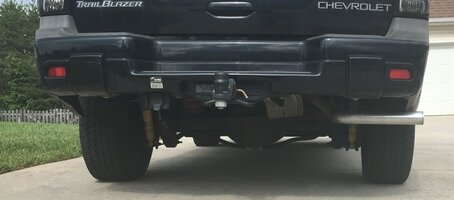
OK, so it's still today, but just like my grandmom always said, "Who needs to wait for the weekend for paint fumes and beer."
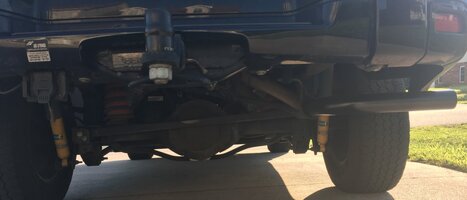
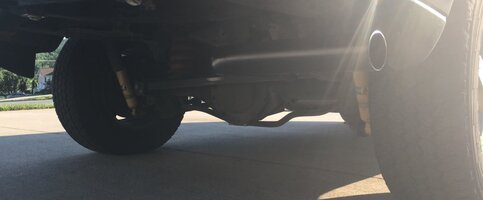


OK, so it's still today, but just like my grandmom always said, "Who needs to wait for the weekend for paint fumes and beer."


Last edited:
$ Khalid ! 9130
Member
Today, I tried to get my spare tire to lower. Fail. Apparently you need to lower it more often than once every ten years. So, after 30 minutes and a grinder, and what looks to be a really cool new scar, the only keeping my tire from the ground was my head. With that done, I decided that the spare would live in the roof basket from now on. I removed the hoist assembly remains, then stood back and looked at the truck. The left side looked great while doing nothing but shame the right side. So, out comes the sawzall. Two bent blades later, the resonator was deleted! Now the underside looked great. Due to my irrational fear of carbon monoxide poisoning, I grabbed Short Bus' pictures and headed to the local muffler shop for more pipe. Thirty minutes later and I have what's shown in the pictures. I'll remove the tire heat shield and hit the pipe with black paint this weekend and it should look even sweeter.
View attachment 81067 View attachment 81068
View attachment 81069
OK, so it's still today, but just like my grandmom always said, "Who needs to wait for the weekend for paint fumes and beer."
View attachment 81070 View attachment 81071
No sound clip

- Status
- Not open for further replies.


