What did you do to your GMT today?

Status
Not open for further replies.

mcsteven

Member
Apr 18, 2012
6,584
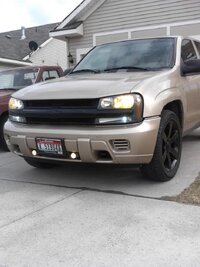
Added a rear bumper protector (mostly to protect against folks who can't parallel park) and the HIDs in the fog lamps today. I'll do the relay for the DRL killer this weekend and put the HIDs into the low beams as well. I also remounted the passenger side cornering light. The car had been hit in a parking lot, cracked the cover, and the light had popped out. I didn't realize how easy it was to reinstall until I pulled both headlights out.

Right now the bumper protector is chrome/stainless. The truck is black, so I'm not sure about painting the protector. I want people to see it. I figure once it gets banged and scratched up a bit I'll dip it like I did the grille.

I'll post a pic tomorrow of the protector. The fogs are OMG bright.
 

dmanns67

Member
Apr 3, 2013
32,979
Ohio
HARDTRAILZ said:
SS wheels?

:2thumbsup:

Yes sir. I have been looking for Months on Craig's List. Finally found a set of OE the guy took of his wife's TBSS for a great deal. He is even including TPM sensors, center caps, and decent tires. They are plasti-dipped currently, not sure if I will keep them that way or not. They have the polished finish underneath.
 

Envoy_04

Member
Jul 1, 2013
749
dmanns67 said:
:2thumbsup:

Yes sir. I have been looking for Months on Craig's List. Finally found a set of OE the guy took of his wife's TBSS for a great deal. He is even including TPM sensors, center caps, and decent tires. They are plasti-dipped currently, not sure if I will keep them that way or not. They have the polished finish underneath.

Oh man, polished SS wheels would look KILLER on your TB!
 

dmanns67

Member
Apr 3, 2013
32,979
Ohio
Envoy_04 said:
Oh man, polished SS wheels would look KILLER on your TB!

Thats what I am thinking. I might install or sit the wheels in front of my current wheels to see if I like them plasti-dipped. Most likely will go ahead and peel it off. The guy said they have been plasti-dipped for a while, so hopefully that help protect the stock finish of the wheels. We shall see, I will post some pics tomorrow morning after picking them up. Not looking forward to the 3hr drive after getting off work in the morning, but it will be worth it.
 

Sparky

Member
Dec 4, 2011
12,927
Hopefully no surprises under the dip.
 

dmanns67

Member
Apr 3, 2013
32,979
Ohio
Sparky said:
Hopefully no surprises under the dip.

Yeah good point. He has showed me pics of the wheels before they were plasti-dipped and looked good. He said there was no peeling of the clear coat and no curbing. He seems like a decent guy. I will definitely examine them thoroughly when I get there.

yodaddy4200 said:
dmann67 congrats on the SS wheels man! I absolutely fell in love the first time a saw them on the OS. Can't wait for pics!
:biggrin:

View attachment 21348

They are not mine yet, but hopefully in the next 12hrs they will be :biggrin:. I will def be posting some pics.
 

blazinlow89

Member
Jan 25, 2012
2,088
Parked it for the next few weeks so I can do whatever free or cheap maintenance I can.

On the list figure out what is making the strange noises from the driver side and hopefully replace, put a SS hose clamp on the passenger side CV boot, change front and rear dif fluid as I already have the stuff for it, fix the terrible cut off on my projectors, and clean up my rats nest under the hood that I call wiring.
 

Blckshdw

Moderator
Nov 20, 2011
10,779
Tampa Bay Area, FL
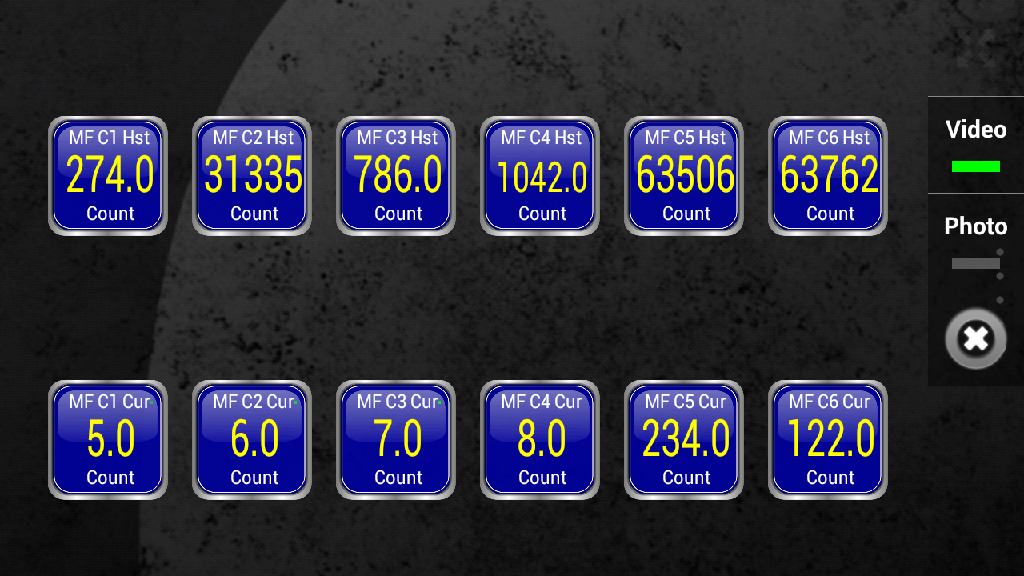
After seeing another member do this with their Torque App, I copied the idea and made a page for current/historical misfires and let it run on my commute home. It was running in the background behind a few other apps I keep running while I drive, so I didn't see it until I got home. :wowfaint:

I have some investigating/tinkering to do this weekend :yes: :worried: I know Torque isn't completely accurate, because the current misfire numbers would go up and then back down as I idled in the driveway before shutting down.
Screenshot_2014-03-28-16-10-59_zpsoucvydtz.png
 

DonnyDrywall

Member
Nov 26, 2013
95
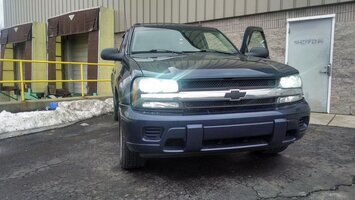
I did the quad high beam mod today.

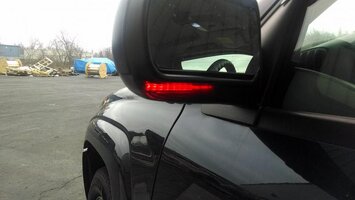
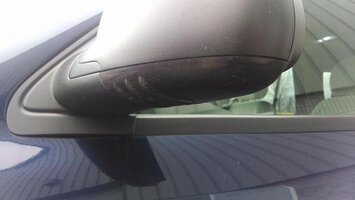
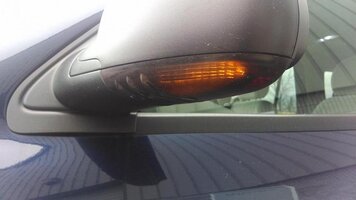
Also while I didn't do it today, I sold the clear lens that came with my mirrors. bought amber, smoked them with lens tent and I couldn't be happier with the result. while they don't look bright in the pictures during the day they are plenty bright enough to see.
 

Attachments

  • IMG_20140328_170132442_HDR.jpg
    IMG_20140328_170132442_HDR.jpg
    94 KB · Views: 24
  • IMG_20140328_170345726.jpg
    IMG_20140328_170345726.jpg
    46.9 KB · Views: 23
  • IMG_20140328_170345309.jpg
    IMG_20140328_170345309.jpg
    49.1 KB · Views: 23
  • IMG_20140328_170350216.jpg
    IMG_20140328_170350216.jpg
    53.5 KB · Views: 23

Envoy_04

Member
Jul 1, 2013
749
Put the new intermediate shaft in the Voy today and still no solution to the incessant rattling and wandering, but I've ruled almost everything else out. :undecided: Starting to think maybe something in the rack??? I really hope not, that'd be a real PITA to have to deal with right now.

Enough of my problems, Dmanns, we need pics of the new wheels!!! :pictures:
 

Fire06

Member
Dec 18, 2011
7,223
Envoy_04 said:
Put the new intermediate shaft in the Voy today and still no solution to the incessant rattling and wandering, but I've ruled almost everything else out. :undecided: Starting to think maybe something in the rack??? I really hope not, that'd be a real PITA to have to deal with right now.
Enough of my problems, Dmanns, we need pics of the new wheels!!! :pictures:

You have checked the front wheel bearings, tie rods ,and ball joints
 

Envoy_04

Member
Jul 1, 2013
749
Fire06 said:
You have checked the front wheel bearings, tie rods ,and ball joints

Yep, those were the first things I went after, I was hoping like crazy it was actually something like that because it would've been relatively easy to fix. :yes:
 

0u812

Member
Feb 23, 2014
6
Today.... the plan is valve cover gasket and intake manifold gasket. the leak around the valve cover seems to have expanded and cannot be ignored by someone like me... so while I have to be there... the manifold gasket will also get my attention.:thumbsup:
 

dmanns67

Member
Apr 3, 2013
32,979
Ohio
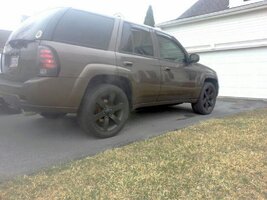
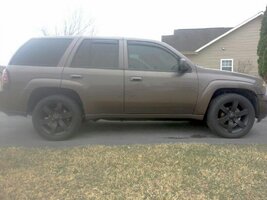
Installed some new shoes (TBSS OEM) :wootwoot: and ran it through the car wash.

After talking to the guy found out he is a member on TBSSowners. His 06 SS is sweet all blacked out. I mentioned Carlisle Truck Nats so hopefully he shows up.

Still debating on keeping the plasti-dip or not. All opinions are welcome :thumbsup:

View attachment 33803

View attachment 33804
 

Attachments

  • uploadfromtaptalk1396108369967.jpg
    uploadfromtaptalk1396108369967.jpg
    76.4 KB · Views: 51
  • uploadfromtaptalk1396108475581.jpg
    uploadfromtaptalk1396108475581.jpg
    65.1 KB · Views: 50

gmcman

Member
Dec 12, 2011
4,673
Going to get an oil pressure socket and test the oil pressure at cold startup and when hot. Have this odd knock when cold but doesn't sound like a rod, goes away above idle and more pronounced when cold. Not sure what the tensioner sounds like when worn or a piston slap since this motor has been quiet most of it's life.

I know I have a worn lash adjuster so maybe it doesn't fully close the gap when it stops ticking...does this on a cold start up on occasion. Also have exhaust leak since the last manifold bolt in rear is busted. Water pump is good, just many variables right now so I want to narrow this down.
 

yodaddy4200

Member
Feb 3, 2013
350
dmanns67 said:
Installed some new shoes (TBSS OEM) :wootwoot: and ran it through the car wash.

After talking to the guy found out he is a member on TBSSowners. His 06 SS is sweet all blacked out. I mentioned Carlisle Truck Nats so hopefully he shows up.

Still debating on keeping the plasti-dip or not. All opinions are welcome :thumbsup:

View attachment 21399

View attachment 21400


Looks killer! I like the dip! :biggrin:
 

jrSS

Member
Dec 4, 2011
3,950
dmanns67 said:
Installed some new shoes (TBSS OEM) :wootwoot: and ran it through the car wash.

After talking to the guy found out he is a member on TBSSowners. His 06 SS is sweet all blacked out. I mentioned Carlisle Truck Nats so hopefully he shows up.

Still debating on keeping the plasti-dip or not. All opinions are welcome :thumbsup:

View attachment 21399

View attachment 21400

Not gonna lie...after I did p-dip i hated it. But it did make up my mind that I wanted black wheels when i did. Truck looks good man....needs low
 

mcsteven

Member
Apr 18, 2012
6,584
dmanns67 said:
Installed some new shoes (TBSS OEM) :wootwoot: and ran it through the car wash.

After talking to the guy found out he is a member on TBSSowners. His 06 SS is sweet all blacked out. I mentioned Carlisle Truck Nats so hopefully he shows up.

Still debating on keeping the plasti-dip or not. All opinions are welcome :thumbsup:

View attachment 21399

View attachment 21400

Those look great with your darker ride. It'd be nice to see it lowered, but I also see it's 4wd and I know a lot of folks don't want to lower a 4wd so they can keep some clearance. Keep the dip.:thumbsup:
 

Envoy_04

Member
Jul 1, 2013
749
Dmanns, you know I'm personally a fan of the polished look on TBSS wheels, but with the color of your TB and the black grille you've got, the dip works. Good thing about the plastidip is that you can always peel 'em and try polished for a while, and then decide which you like better and re-dip 'em if you like the black look best.


Today I put my 3600 lumen Cree LED headlights in the highs and lows on my Envoy. The fogs are a project for next weekend as the surrounding plastic at the back of the housing is going to need a bit of dremel work. Pics and a few details are in the Cree Headlight thread.
 

mike_k

Member
Dec 5, 2011
242
Figured out my electrical issue finally. Put the stock radio and a satelite radio receiver in and got the wires ready for the big 3 upgrade.
 

HARDTRAILZ

Moderator
Nov 18, 2011
49,665
dmanns67 said:
Installed some new shoes (TBSS OEM) :wootwoot: and ran it through the car wash.

After talking to the guy found out he is a member on TBSSowners. His 06 SS is sweet all blacked out. I mentioned Carlisle Truck Nats so hopefully he shows up.

Still debating on keeping the plasti-dip or not. All opinions are welcome :thumbsup:

View attachment 21399

View attachment 21400

Lose the dip. Wheels look like spare SS wheels. Let the polish shine!!! Or at least go gloss black.
 

Playsinsnow

Member
Nov 17, 2012
9,727
dmanns67 said:
Installed some new shoes (TBSS OEM) :wootwoot: and ran it through the car wash.

After talking to the guy found out he is a member on TBSSowners. His 06 SS is sweet all blacked out. I mentioned Carlisle Truck Nats so hopefully he shows up.

Still debating on keeping the plasti-dip or not. All opinions are welcome :thumbsup:

View attachment 21399

View attachment 21400


Flat black, gloss black, or gunmetal in no particular order. :2thumbsup:


Looks good Manns! :yes:

Edit: picture for contest #25?
 

Harpo

Member
Dec 4, 2011
419
Sweden
I have cleaned and adjusted the parking brakes today. Got the annual inspection tomorrow

I got a minor leak at the axle on drivers side that completely soak the parking brake pads over a year. Never use it other than the yearly inspection.

Hope all goes well tomorrow.

If everything goes well and no reinspection is needed my summer 20"
wheels will be on the truck next weekend. Can't use them at the inspection cause they add to much width to be approved.:no::frown:
 

Mark20

Member
Dec 6, 2011
1,630
Leaving a shopping center last night I decided to line up the tail end with the windows of a dark store to give a quick light check. Looked light one on the right side was out. It was raining pretty well so there were a few choice words about having to replace the bulb.

Checked again when I got home with a brick on the brake peddle (and me standing in the rain) but both sides looked good. I'm going to have to wait for decent weather to take a closer look.
 

Blckshdw

Moderator
Nov 20, 2011
10,779
Tampa Bay Area, FL
Broke it... Well a piece of a very important part on it anyway... I was going to check the torque on the valve cover bolts and intake manifold today. Started taking things apart, and just after I got the PCM disconnected, realized I couldn't find my 1/4" to 3/8" adapter, to use my 10mm socket with the appropriate torque wrench :mad: So I went to put everything back together, figuring I could borrow someone's later.
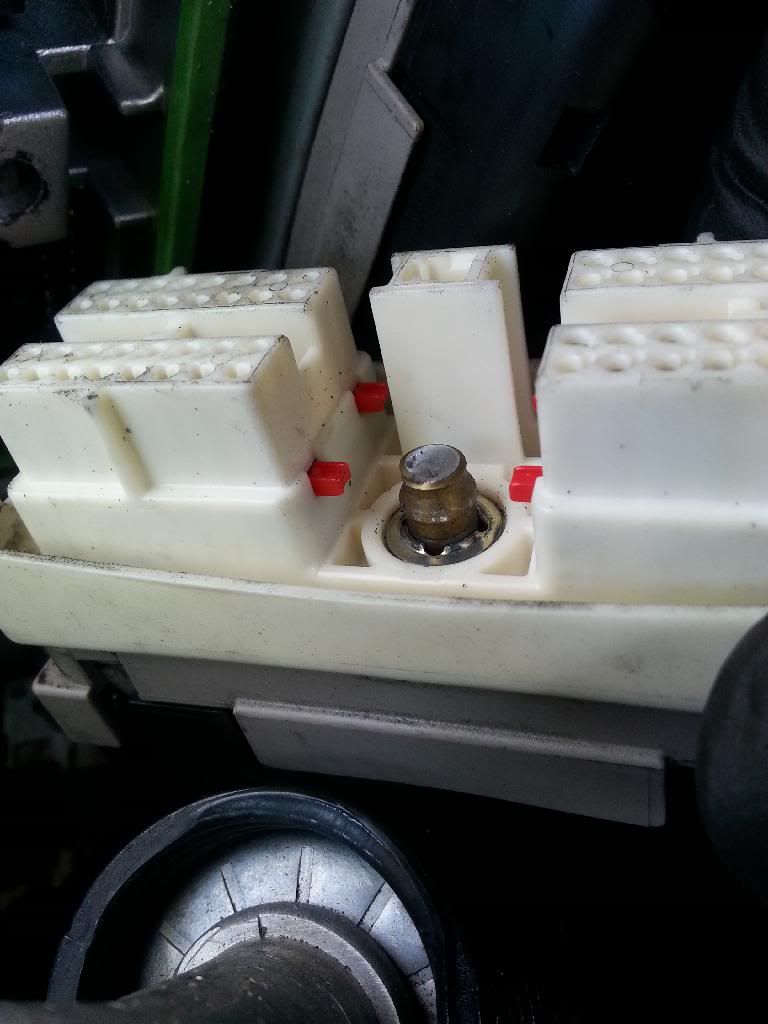
Start mounting the PCM, and putting the connectors on. As I'm tightening the connector bolts, it seemed like I was tightening it more than I thought it should without clicking. Then I remembered some of the reviews on the 1/4" Harbor Freight one that I have, where a few people complained about it over torquing. Before I could finish thinking, "I should stop here..." **SNAP** :hissyfit:

:banghead: So now one of my PCM connectors is being held in place by some daisy chained zip ties, until I can figure out how to fix this correctly. I'll have to hit up Limequat and see if he has any PCM connector bolts he can sell me. :undecided:

20140330_1208200_zpslenm0flb.jpg
 

Boricua SS

Member
Nov 20, 2011
3,080
Ohio
I started wrapping up my clear corner headlight mod. I've had the headlights apart for weeks now, painted my bezels black, fixed my broken "bouncy" reflective housing and made my clear lenses last week. I just got lazy with work and all, but im off today so I decided to seal everything up. I put my first bead of RTV on the inside of the lens to make a seal from the inside out. Then I laid a pretty thick bead on the outside. When it dries, i'll go over it visually again and see if I have any pin holes or openings, but more then likely, I'll just run a whole other bead around everything just to make sure everything is sealed up. That RTV is just messy!!! If you touch just one spot, it's following you everywhere. While this mod has been fun, gratifying, for the most part free, and just overall awesome, I will never do this again :rotfl: what a PITA!

20140330_112306_zpsf3ymdo3h.jpg


if you look on the inside, you can see the crack where the housing separated therefore making the reflector bounce when I hit bumps.
20140330_112318_zpskupd3ld3.jpg


I shot a screw all the way through and now everything is nice and tight again and stays put now. No more bouncing.
20140330_112324_zpsfb7j48g6.jpg


Just to make me happy before I seal them up.
20140330_121231_zpsgkdxwvke.jpg


and now onto the sealing...
20140330_125910_zpsgd3jwltq.jpg

20140330_125903_zpsjblnjkr1.jpg


They're curing as we speak. If not tomorrow, I'll hit with some more sealant sometime this week so I can put it everything back together on the beaSSt.
 

Blckshdw

Moderator
Nov 20, 2011
10,779
Tampa Bay Area, FL
Boricua SS said:
I started wrapping up my clear corner headlight mod. I've had the headlights apart for weeks now, painted my bezels black, fixed my broken "bouncy" reflective housing and made my clear lenses last week. I just got lazy with work and all, but im off today so I decided to seal everything up. I put my first bead of RTV on the inside of the lens to make a seal from the inside out. Then I laid a pretty thick bead on the outside. When it dries, i'll go over it visually again and see if I have any pin holes or openings, but more then likely, I'll just run a whole other bead around everything just to make sure everything is sealed up. That RTV is just messy!!! If you touch just one spot, it's following you everywhere. While this mod has been fun, gratifying, for the most part free, and just overall awesome, I will never do this again :rotfl: what a PITA!

<snip>

They're curing as we speak. If not tomorrow, I'll hit with some more sealant sometime this week so I can put it everything back together on the beaSSt.

Yeah, it's a time consuming mod, and a royal pain when something doesn't go according to plan. I too said to myself that I'd never open headlights again, and you see how that turned out.

:Rumour: Just between me and you, I already have my 2nd projector retrofit all priced out :hopeless:
 

Boricua SS

Member
Nov 20, 2011
3,080
Ohio
Blckshdw said:
Yeah, it's a time consuming mod, and a royal pain when something doesn't go according to plan. I too said to myself that I'd never open headlights again, and you see how that turned out.

:Rumour: Just between me and you, I already have my 2nd projector retrofit all priced out :hopeless:

well, like you said, if there is a next time around, all I have to do is cut the rtv :rotfl:. there better not be a next time! This is all I want to do for my lights. Once she becomes a drag truck, I probably wont even have headlights on her :rotfl:
 

Blckshdw

Moderator
Nov 20, 2011
10,779
Tampa Bay Area, FL
Boricua SS said:
well, like you said, if there is a next time around, all I have to do is cut the rtv :rotfl:. there better not be a next time! This is all I want to do for my lights. Once she becomes a drag truck, I probably wont even have headlights on her :rotfl:

Ha ha, well make sure you've got a drag truck by the time I'm ready to pull the trigger on my next retrofit and I might buy em off you. My current front lenses are shot. :sadcry:
 

Sparky

Member
Dec 4, 2011
12,927
I don't want to open mine back up, but I need to this year to fix the alignment. Horiztonal is swept to the side on the passenger light and it annoys me. Plus, I want to improve my turn signals.

Wonder how hard it will be to open my lights again since I used clear RTV on the lens channel to seal it up! Doubt heat will work to soften that...
 

Blckshdw

Moderator
Nov 20, 2011
10,779
Tampa Bay Area, FL
Sparky said:
I don't want to open mine back up, but I need to this year to fix the alignment. Horiztonal is swept to the side on the passenger light and it annoys me. Plus, I want to improve my turn signals.

Wonder how hard it will be to open my lights again since I used clear RTV on the lens channel to seal it up! Doubt heat will work to soften that...

:undecided: Yeah, isn't this stuff supposed to be able to handle a lot of heat?

I'm fairly certain I'll always use the cut method, just cuz I'm impatient like that. After seeing the bolt and angled aluminum mounting style, I want to try that next. Would be nice to be able to make micro adjustments after you get them put on the truck for testing :yes:
 

Sparky

Member
Dec 4, 2011
12,927
Blckshdw said:
:undecided: Yeah, isn't this stuff supposed to be able to handle a lot of heat?

I'm fairly certain I'll always use the cut method, just cuz I'm impatient like that. After seeing the bolt and angled aluminum mounting style, I want to try that next. Would be nice to be able to make micro adjustments after you get them put on the truck for testing :yes:

Well I used aftermarket housings on mine, so I initially just baked them open. I might have to actually cut them open this second time around as I have my doubts about the RTV letting go easily :lipsrsealed:
 

Mark20

Member
Dec 6, 2011
1,630
Drove it and checked the rear lights again. All lit. Maybe I was wrong thinking a bulb was out.
 

mcsteven

Member
Apr 18, 2012
6,584
Mark20 said:
Drove it and checked the rear lights again. All lit. Maybe I was wrong thinking a bulb was out.

I've done that - looked and saw a light out that was actually lit. Turned out the window it was reflecting in was angled a little. The brake/tails were in one, wide, and the backups were in separate smaller windows. Of course, it's where I usually park, so it drove me nuts for about 3 tries doing this until I hit the ebrake, turned the key to run, put it in reverse, and saw that it worked without seeing a reflection. Then I noticed the angle of the windows was just enough away on that panel so I couldn't see it. :hissyfit:
 
Status
Not open for further replies.

Forum Statistics

Threads
23,750
Posts
642,950
Members
19,336
Latest member
BCH

Members Online