You may have noticed that I wasn't as active on the forum for the past week or so. Been busy!
I was asked by my nephew to roast a 150lbs pig for his wedding that was being done at the family's 50 acre wooded lot. All summer they've been prepping for this and built their own tables, benches and wedding venue. I had zero experience roasting a pig. I told my nephew that I was giving no guarantees and that he should have a backup plan in case it goes south. I watched a bunch of YT videos and chatted with ChatGPT to try and gain some knowledge on the process. For that size of a pig, it would be a 12-16 hour cook so would have to start the evening prior.
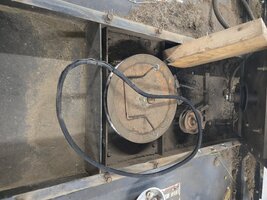
He rented the pit, which was a homemade thing that was poorly designed. The spit was down too close to the fire, it had 3 holding prongs, which was different than all the videos that had two prongs to be able to properly insert into the butts and shoulders, it was an enclosed type and didn't include any back braces.
I enlisted the assistance of a friend to help me with this thing, who also didn't have any experience. So around 7pm, started prepping the pig. Olive oil, salt, pepper and some Chinese Char Siu BBQ sauce seasoned the inside. Filled the cavity with onions, green onions, garlic, more oil, salt and pepper. Closed it up with SS wire and got the fire going. Put the rod through but because of the three prongs, I couldn't put it through the mouth so we just put it through the hole in the neck and tried to insert the prongs into some meat. Oiled the skin with some more salt and pepper. Get the fire going with three bags for briquettes. The pig went onto the fire around 9pm.
It was flopping around way too much and the back would be falling apart if we left it that way. We took it back off and we put a piece of all thread rod on the back and used chicken wire to hold it all together. Back on the fire, it turned much better, for a while...
View attachment 117747
View attachment 117746
The fire was way too hot as the skin was already burning. Took out a lot of the coals to bring the temp down. Once we got that under control, we settled in for the night, checking the fire and the pig once in a while, as well as spraying it down with a mix of apple cider vinegar and water.
At some point in the middle of the night, the pig lost its legs. They just fell off and were dangling from the wire. And the head was flopping around something fierce and would have fallen off. It was burnt black. My two Meater probes were telling me that the front shoulders were much more done that the butts and the fire was too hot at the front. The rear was way behind. We made the executive decision to stop the spit and just put a pile of coals near the butt. We were just going to use the spit as an oven because the prongs were just destroying the meat and flopping too much. We were able to control the temps and get the butt done. And we were bringing it to over 200f to be able to pull it all.
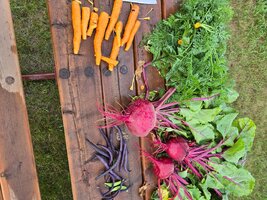
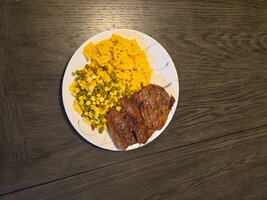
At the end, it was ugly. Lots of burnt skin, the head was an unholy black. The wedding ceremony started at 3pm and we took the pig out at the same time as we didn't want anybody seeing this thing. Started stripping it, the head basically just fell off and we unceremoniously dumped it in the bucket. The skin was as hard as hard candy for the most part. However, the meat inside was excellent! The shoulders were a bit dry but the butts and ribs were beautiful. It all pulled nicely. The veggies also came out great and turned into an excellent topping for the sandwiches. Unfortunately I didn't get any after pics but I certainly did not want any of the whole pig as it was ugly.
Oh, and I didn't sleep at all! My buddy had a 1.5 hour snooze sometime in the early morning hours but I didn't all. I had been awake since about 7am Fri. By 5pm Sat, I was totally wasted. Went to the trailer where I slept for about 14 hours.
After that, me and Mrs Moose went to a campground on the St-Lawrence for a few days of R&R. It was alright except that the park was mostly empty and the weather was mostly grey and cool with a fire ban so we couldn't have a campfire. Just got back yesterday.
Tomorrow morning, heading to the cottage for the long weekend, back on Monday and work on Tue.


 older photos before the hood scoops.


 And I was just about to ask, if you were able to lift a vehicle with that one arm...