Tool Talk

mrrsm

Lifetime VIP Donor
Supporting Donor
Member
Oct 22, 2015
8,267
Tampa Bay Area
Paraphrasing Shakespeare... (Hamlet, Act 4, Scene 7)

"That we 'WOOD' Do, We SHOULD Do When We 'WOOD'... For THIS 'WOOD' Changes..."


If Wood Building Materials and Deck Screws are ALL that you've got available and the immediate need arises for having a Safe, Working, E-Z-2 Build Set of Car-Truck Ramps, THIS Video shows us a Very Clever Way to Do The Job:

 
Last edited:

mrrsm

Lifetime VIP Donor
Supporting Donor
Member
Oct 22, 2015
8,267
Tampa Bay Area
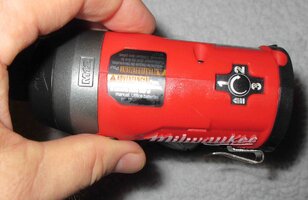
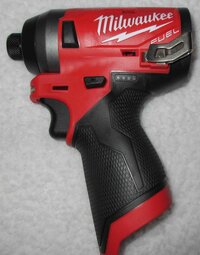
Back on Page #9 (Post #287 and Post #289), after getting this Milwaukee "FUEL" M12 Nut Driver Tool and a handful of 1/4", 3/8" and 1/2" Adapters for another typical Magnetic Inserted Metric Nut Driver Set...

https://gmtnation.com/forums/threads/tool-talk.10781/page-8

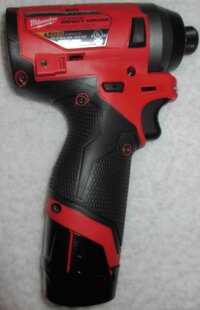
Milwaukee M-12 2553-20 1/4” Hex Driver Impact Gun;

MILWAUKEEFUELTOOL6.jpgMILWAUKEEFUELTOOL4.jpgMILWAUKEEFUELTOOL1.jpg

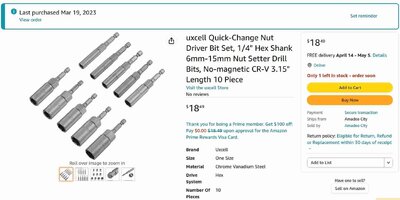
... I really did have every intention of also getting some Chrome Vanadium Forged 1/4" Drive Nut Driver Metric 'Half-Deep' Sockets on Molded 1/4" X 3.15" Drive Shafts running from M6 through M15.

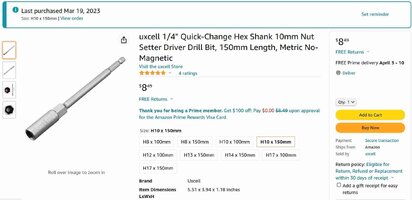
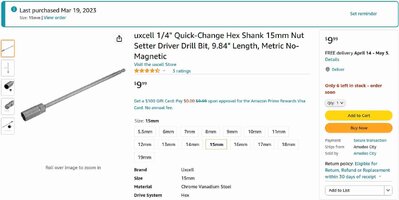
So I looked them up over on Amazon and tagged them all individually along with just a few Extra Long ones in 14mm & 15mm (and 10mm, too). BUT... at the Cost of around $10.00 a piece or so... I decided I'd better hold off for the longest time.

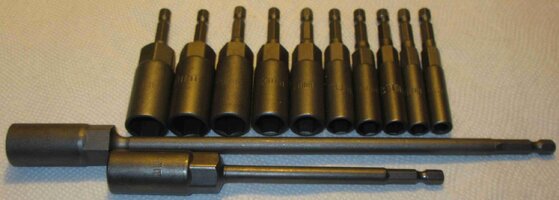
Later on...THIS Complete "Half-Deep" Chrome-Vanadium Steel Metric Nut Driver Set became available for Under $20.00 ... so I finally decided it was time to get them:

UXCELLMETRCISOCKETSET3.jpgUXCELLMETRCISOCKETSET2.jpgUXCELLMETRCISOCKETSET1.jpgMETRICQTRINCHDRIVERSOCKETS3.jpgMETRICQTRINCHDRIVERSOCKETS1.jpg
METRICQTRINCHDRIVERSOCKETS2.jpg
 
Last edited:

mrrsm

Lifetime VIP Donor
Supporting Donor
Member
Oct 22, 2015
8,267
Tampa Bay Area
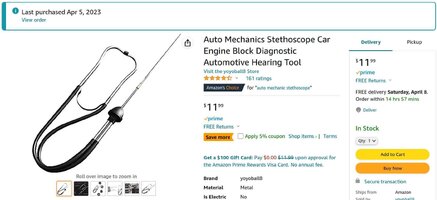
I purchased one of each of these "Mechanic's Stethoscopes" from Amazon last week. One cost around $12.00 and the Other was only around $6.50. I wanted to see if there were any design and performance differences between them. They BOTH arrived on the same day and during Un-Boxing... I could see that they were IDENTICAL in every single aspect.

It turned out that the only difference to be found was in the Amazon Sales Image of the more expensive one... where the lower threaded "Pointer" section had already been screwed into the upper Female Brass Cylinder portion.

Also... it is worth mentioning that I had just watched a Dude over on YouTube using this "Thing" to diagnose an Odd Engine Head Valve Train Noise after he piped the sounds coming from the Engine via the 'Black Plastic Ear-Bud Ends" on the Stethoscope into the Microphone of his Cellphone... and you Really COULD tell there was a significant difference when compared to the sounds coming from the other, nominal Upper Cylinder Head sections.

So It looks like @Mooseman was RIGHT all along... (Naturally, of course) that THIS Inexpensive Tool is yet another Useful Diagnostic Aid very much worth having somewhere inside of your Tool Chest. But speaking as an aside... courtesy my "Extra Wallet Digging" exercise... know that the Cheaper One was made by the very same Folks over in China. Oh Well... One simply MUST have enough of the Right Tools to cover EVERY situation. :>)


STHOSCOPE0.jpgSTHOSCOPE1.jpg
 
Last edited:

movietvet

Member
Dec 21, 2022
486
Oregon
I bought this one, to replace one that I have had for literally 30 years because I love this tool, that has the listening cone attachment. That attachment really accelerates the sound loudness in the ears. If you have parking sensors and one is out, you can activate the system and hold the cone to it and you will hear the pulsing Geiger Counter sound of one that is working and the silence of the one or two that is not working. I recently did this on a 2009 Tahoe at the rear sensors and fixed the failed one. It is a "noise finding beast" of a tool.

 
  • Like
Reactions: Beacon and mrrsm

movietvet

Member
Dec 21, 2022
486
Oregon
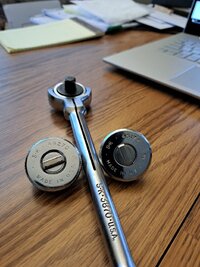
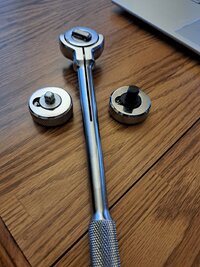
Bought these recently because I missed having them. I used to have quite a bunch of SK tools and loved these particular tools. The pivot head ratchet is 10.5" long. Best ratchet I ever had for adjusting valves. The two 1/4" and 3/8" thumbwheel ratchets are very handy for getting hard to reach bolts started and for confined space ratcheting. The part numbers are readable in one of the two pics. The 3/8" thumbwheel is available new at Amazon but the 1/4" thumbwheel and pivot head ratchet were at ebay.


20230424_193135.jpg20230424_193156.jpg
 

northcreek

Member
Jan 15, 2012
3,378
WNY
The pivot head ratchet is 10.5" long. Best ratchet I ever had for adjusting valves.
You're right on that, I've had one of those forever and they just don't break, that's my go to ratchet for most jobs... :2thumbsup:
 
  • Like
Reactions: movietvet

movietvet

Member
Dec 21, 2022
486
Oregon
You're right on that, I've had one of those forever and they just don't break, that's my go to ratchet for most jobs... :2thumbsup:
Because they don't make them anymore, I was planning on likely getting another one, now that I know good quality used ones are out there, and having it for a back up. Just in case. Did they make them in 1/4" and 1/2" drive?
 

mrrsm

Lifetime VIP Donor
Supporting Donor
Member
Oct 22, 2015
8,267
Tampa Bay Area
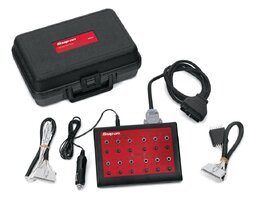
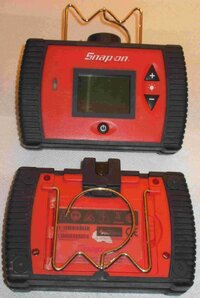
Recently, I discovered that at one time... Snap-On actually produced a Data Bus Fault Finder Analyzer Tool Kit for diagnosing problems with the Class 2 Network. Product Videos, OEM Images and Snap-On OEM Information and Specs PDFs are attached below:


snapondatabusfaultfindernoeeff_10633254.jpg

Knowing the frequency of having to deal with Class 2 Issues... I poked around the Internet and could NOT find this Kit ANYWHERE. Of course, Will Robinson's Classy, Classic YT Class 2 Diagnostics Video shows the bracing alternative of pulling the Two Data Bus Splice Pack "Shorting Bars" AKA Combs and then carefully probing the paired wires leading to the addtion of each Class 2 modules back onto the Network:


But DAMMIT, Guys! THIS.... "Thing" From Another World ... would make figuring out WHICH Module is The FUBAR -Bad Guy VERY QUICKLY. Hell... I'd Like to Have One... Just to HAVE ONE! :>(

I'm also going to address this information later on over at THIS Link as being On Topic:


Attachments

  • EEFF500_npa.pdf
    465.1 KB · Views: 1
  • New_Snap_on_Data_Bus_Fault_Finder___EEFF500_12_06_11_final.pdf
    106.3 KB · Views: 1
Last edited:
  • Like
Reactions: movietvet
For reinstalling I just used a dead blow. I've used every harmonic balancer installer I could find and have pulled the threads out of plenty of cranks to know the deadblow and a block of wood works best. :hopeless: not fun helicoiling a 1000$ crank...
Don't screw-up the crankshaft thrust bearing beating on the crank/damper. The thrust bearing and the mating part of the crank is absorbing that shock.

Don't screw-up the bonded-rubber between a hub and inertia ring on some dampers. You pound on the inertia ring, the force is transmitted directly through the bonded rubber. You pound on the hub, the inertia ring vibrates in sympathy, also stressing the rubber.

Recommendation: Just don't hammer the damper on.

It may be cast steel instead of iron as well.
"Cast steel" is rare. Do not be fooled by advertising for cheap-junk crankshafts. What is being advertised as "cast steel" is NOT STEEL. It's got enormously more carbon in it than "steel" has, making it a grade of "cast iron".

Genuine steel is very difficult (therefore expensive) to cast. Which is why most "steel" products are extruded, forged, machined from "billet", etc.

I like that it has the side terminal load testers.
Battery load testers--REAL load testers, not the "electronic" kind--are very helpful, but need to have a realistic capacity compared to the battery they're testing. For automotive use, they'd better have a carbon pile that can dissipate ~400+ ampereres, more is better. Inexpensive "load testers" typically have a capacity of ~125 amperes.

You'd test a lead-acid battery at 1/2 the Cold-Cranking Amperage (CCA) rating; or three times the Reserve Capacity rating, for fifteen seconds, then check the voltage to see if it met minimum spec. Reserve Capacity isn't a big advertising point any more, so CCA rules.

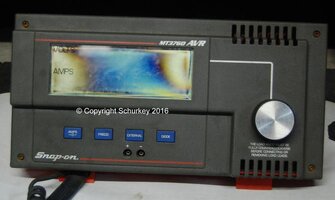
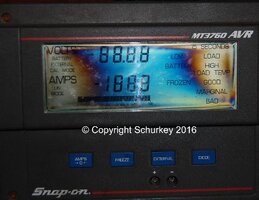
Bought this off of a seller on eBay years ago. Worked great, although it needs some lovin' at present--voltmeter isn't accurate now. The blue-ish color distortion on the display is an artifact of camera flash, it doesn't actually exist in real life. I can't get a photo of the display that doesn't have the distortion.

Snap-On_AVR_MT3760_01.jpg

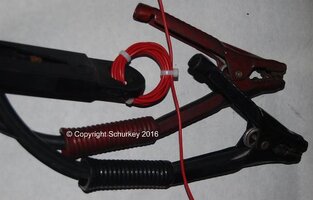
A coil of primary wire with ten wraps and alligator clips on the ends adds sensitivity to the inductive amperage probe, when used for lower-amperage jobs. Realistically, this is not the tool for low-amperage jobs. The tool is specialized for battery testing up to about a thousand CCA, starter draw (automotive = 150--250 amps) and alternator output including undesireable "ripple".
Snap-On_AVR_MT3760_03.jpg

Snap-On_AVR_MT3760_04.jpg

These were common on eBay for a while, shops were dumping them in favor of "electonic" testing of batteries. The hand-held device would play Van Halen into the battery until it submitted, which the tester would translate and display as a number representing the CCA of the battery. I have no faith in that style equipment, but they sure sell a lot of 'em.

Low-amperage testing is done better with specialized equipment. When it was me, I bought a unit from www.aeswave.com.

I added a BNC-to-Banana adapter, so I can plug it directly into a multimeter...


...but the real joy is using the amperage probe with an oscilloscope for diagnosing electric motor/solenoid issues. I will not drop a gas tank to replace an electric fuel pump without verifying the electric part with a voltmeter, oscilloscope, and this current probe. Approximately the same for buried HVAC blower motors; any electric motor where access to the stupid thing is worse than the price of a new motor.

Given a digital storage 'scope, and a current-probe, a person can assess the current draw of EACH INDIVIDUAL ARMATURE BAR of the electric motor; and also calculate motor RPM.

Fuel_Pump_scope4sm.JPG
The "humps" form a repeating pattern. The "humps" are like fingerprints. They all look the same to a janitor, they all look different to a Detective.

In this case, the electric fuel pump pattern repeats every eight "humps". That means the armature has eight bars. All the humps are relatively uniform, and with acceptable amperage draw of 6.44 amps peak, average amperage of just under 6A, and RPM--indicating the electric motor of this pump, and the vehicle wiring/power supply to it is OK. The pump section of the electric fuel pump may or may not be OK, but I know that the pump has adequate power to operate properly. If there's a pressure or volume problem, and the fuel filter isn't plugged, I know the problem is inside the gas tank.

RPM is calculated using the cursor bars of the 'scope, and determining the time it takes for the pattern to repeat. In this case, it's taking 10.16 milliseconds. 60,000 (milliseconds in a minute) / 10.16 = 5906 rpm. You'll never find specs for this, so it's essential to test "known good" electric motors to build your own database of what's acceptable.
 
Last edited:

mrrsm

Lifetime VIP Donor
Supporting Donor
Member
Oct 22, 2015
8,267
Tampa Bay Area
Not certain if THIS deserves its own Thread... But... Since we have quite a few Owners of Milwaukee Battery Powered M12 and M18 FUEL TOOLS... FWIW... Here Goes Nothing:

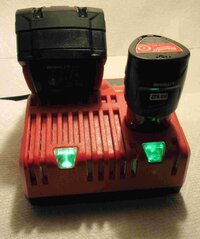
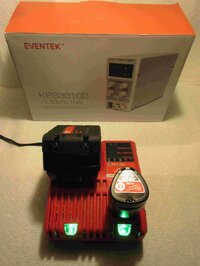
This is the Pictorial Story of a Milwaukee Fuel M18 Battery Rescue that was long overdue and unsolved since I last plugged - in this Three Year Old M18 Battery Pack along with another M12 Battery Pack into their respective places on the OEM Dual Charging Station.The M12 behaved normally and *Glowed RED* as a Discharged Battery right up until it finally took a Complete Charge ...and then it's Condition Light *Glowed SOLID GREEN*.

However, the M18 Battery just sat there... Flashing *RED--To--GREEN* incessantly and it also maintained only 3 out of the 4 possible Charge Level Lights that are ALL supposed to *Glow RED* when the Charging has completed.. It is no secret that this Milwaukee Battery Powered "FUEL" Gear is AWESOME and DURABLE... right up until it's NOT. What is particularly annoying is NOT KNOWING WTF the Charging Station is actually DOING to those Batteries...or WHY it will NOT Work!.

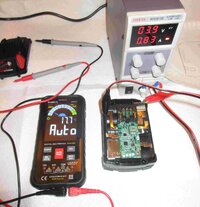
So after reviewing ALL of the Linked Videos; most of which concern the Battery Re-Build Steps, I opted to use my own 30 Volt - 10 Amp Bench Top Power Supply that I've used time and again while programming PCMs with my Tech 2 & TIS2000 Dedicated Dell Precision M65 Work Station along with lots of other Gear well described over in the Tech 2 Section(s). With all of that said... Here are the recommended steps I chose to take that are not exactly in line with what the Videos describe or recommend:

(1) Obtain a decent Desk Top Work Area and populate it with EVERYTHING you'll need B4 You Start!

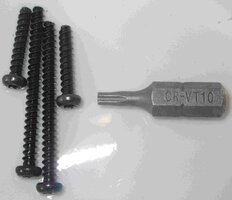
(2) Obtain a *Security* T-10 (Hollow Tip) TorX Bit and its Driver ( Get the LONG version if you need to purchase any). You will also need your favorite Digital Multi-Meter along with a Pair of Positive and Negative Pin Probe Leads

(3) Set Up your 110 Volt AC to 30 Volts DC- 10 AMPS Variable Power Supply and set your Output Voltage to 4 Volts and adjust the *Fine Tuning* on the Amperage to no more than 1/2 Amp (Zero Point Five Zero) or as close to 'Half-An-Amp' as you can get it.

(4) LEAVE THE EXISTING CHARGE (...if anything is left) ON THE BATTERY... As THIS will allow for a more rapid turn around time while you are Balance Charging the internal Sub-Packs.

(5) Clear an area where there are No Loose Wires or Conductive Tools nearby and use the T-10 *Security* Bit to remove the Two Long and Two Short Black Mild Steel Screws holding the Lower Plate to the Main Battery Pack and lift the Cover Plate Free setting it aside. Keep track of those Screws and watch how you install them later as they WILL VERY-EE-ZL-EE GET FUBARed
!.

(6) Contrary to ALL of the Linked Videos... it is NOT necessary to completely remove the Naked Batteries as a block from inside of the Tall Black -N-Red Battery Casement. Set the Battery Pack in front of your on the Work Space with the *Shiny Side Up*, You should see an asymmetric set of contacts along the upper plate layout.

(7) Then... WATCH THIS VIDEO from Start to Finish and TAKE NOTES on the various positions where the Positive and Negative Charging Leads MUST be attached ...One sub-pack at a Time...in order to ENSURE PROPER POLARITY.

DO NOT SHORT-CIRCUIT THIS BATTERY PACK... and MIND Where you Touch Those Tools!


(8) After you identify WHERE each Sub-Pack (+) and (-) Leads Attach for EACH Sub-Pack... Use the DMM to Identify ALL of their Unique Charge Voltages and JOT THEM DOWN. Next... Hook up these Two Leads from the Variable Power Supply after Double Checking that your Volts DC is NO GREATER THAN 4 Volts DC and that your Amperage is as close as you can get to (point) Five (0.50) Amps.... MIND WHAT YOU TOUCH WITH THOSE POWER LEADS!!!

(9) Start by Charging the One with the LOWEST Voltage Readout of all those Sub-Battery Packs. Watch as your Settings WILL CHANGE over time as the Battery Sub-Packs take the Low Amp Charge and the Voltage stays just under 4.00 Volts DC. It might take a LONG TIME if ANY of those Sub-Packs have a VERY LOW CHARGE... So... Just Give It Time ...and Monitor your Voltage and Amperage Settings keeping as close to the 4 Volts DC and at 0.50 Amps as Possible while Charging. Do THIS for EACH Battery Sub-Pack.

(10) Make Frequent Checks on the "Battery Life Button"...and as soon as you can See *FOUR RED LIGHTS* ...Turn Off the Variable AC -> DC Power Supply and Remove the Charging Leads. Then... Re-Assemble the Battery and PLUG it Right back into the Milwaukee Charging Station. If you can see a SOLID GREEN Light.... Leave that Battery On The Charger for about an Hour and THEN Attach it to a LOAD of some kind of from a Power Tool. Work the Battery Power down ...without overdoing it. Then put it right back onto the Charging Station and let it Fully Charge from RED to GREEN. If it works like this repeatedly afterwards... you will have a Recovered Milwaukee M18 Battery Pack.


Here are the "Proof of a Successful Battery Pack Recovery" Images:


FIXANM18B ATTERYPACK1.jpgFIXANM18B ATTERYPACK2.jpgFIXANM18B ATTERYPACK3.jpgFIXANM18B ATTERYPACK4.jpgFIXANM18B ATTERYPACK5.jpgFIXANM18B ATTERYPACK6.jpgFIXANM18B ATTERYPACK8.jpgFIXANM18B ATTERYPACK9.jpgFIXANM18B ATTERYPACK10.jpgFIXANM18B ATTERYPACK11.jpgFIXANM18B ATTERYPACK12.jpgFIXANM18B ATTERYPACK14.jpg

SAFETY FIRST!!! Keep a Fire Extinguisher Handy and set the Battery Pack inside of Ceramic Bowl jik it Starts to get WARM. Have a Plan to Carry that Battery Pack OUTSIDE the House is ANYTHING inside of it Starts to Spark or Ignite... GET IT FAR AWAY FROM PEOPLE, ANIMALS AND PROPERTY... AND JUST LET IT BURN ....AFTER YOU BURY IT... DO NOT APPLY WATER TO A LITHIUM OXIDE BATTERY FIRE!

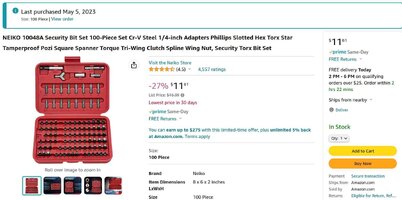
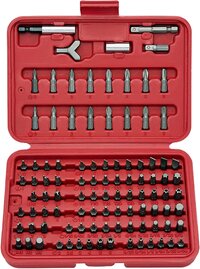
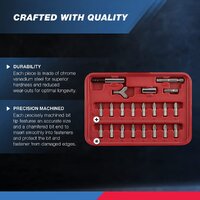
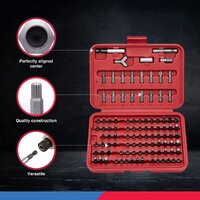
Neiko 100 Piece Security Bit Tool Set = FTW! On Sale for Under $12.00... Use the Link below from GMT Nation right over to Amazon for this Deal!

NEIKOSECURITYTORXSET.jpg


71YnDoUrUPL._AC_SL1500_.jpg71HXLGylXzL._AC_SL1500_.jpg71clyw3n6YL._AC_SL1500_.jpg71bGyA0sKKL._AC_SL1500_.jpg
 
Last edited:
  • Like
Reactions: movietvet

littleblazer

Member
Jul 6, 2014
9,267
Don't screw-up the crankshaft thrust bearing beating on the crank/damper. The thrust bearing and the mating part of the crank is absorbing that shock.

Don't screw-up the bonded-rubber between a hub and inertia ring on some dampers. You pound on the inertia ring, the force is transmitted directly through the bonded rubber. You pound on the hub, the inertia ring vibrates in sympathy, also stressing the rubber.

Recommendation: Just don't hammer the damper on.


"Cast steel" is rare. Do not be fooled by advertising for cheap-junk crankshafts. What is being advertised as "cast steel" is NOT STEEL. It's got enormously more carbon in it than "steel" has, making it a grade of "cast iron".

Genuine steel is very difficult (therefore expensive) to cast. Which is why most "steel" products are extruded, forged, machined from "billet", etc.
I've seen a few vintage cast steel pieces but yes, exceedingly rare these days. And it's kind of obsolete given all the choices we have in materials today.

As for hammering on a balancer... well to each there own. Heat the hub cool the crank and give it a smack or two and it's on. Obviously I'm not going to beat the ever loving f*** out of the thing. Last few parts I worked on I had the interface honed to the larger end of the spec and they just slip all the way on when heated. No beating needed. If I were running a blower or spinning the thing high I'd leave the interference alone as long as it checks out.
 
  • Like
Reactions: movietvet

mrrsm

Lifetime VIP Donor
Supporting Donor
Member
Oct 22, 2015
8,267
Tampa Bay Area
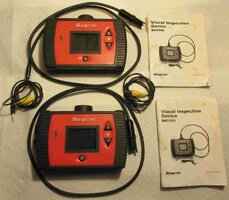
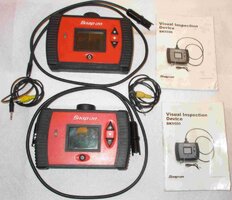
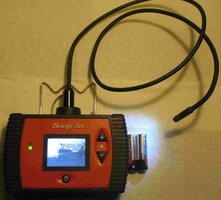
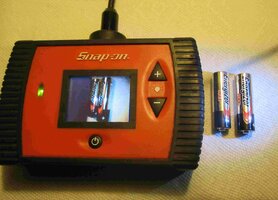
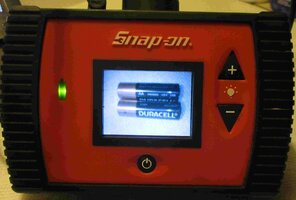
During another one of my *Endless Searches for GOK (God Only Knows) Tool Deals*, my focus was on getting as much of the Snap-On MODIS Tool Kit Support Gear that I NEEDED as possible (well... that I WANTED, actually) which really IS the same thing, Right? And logically, I should do so at the least possible expense. And in THIS case, I really managed to do this acquisition Swimmingly Well because the Vendor who sold me all of this Snap-On Modus *Stuff* also threw in ... Not ONE ...but TWO Complete Snap-On Model# BK5500 Visual Inspection Devices for FREE for reasons that I can only imagine being? He thought they were...

*BOTH BROKEN BEYOND REPAIR...*

Music to Our Ears... Right, Guys? EEeeeeeYUP!


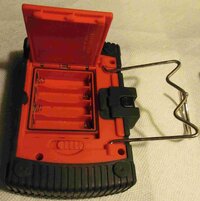
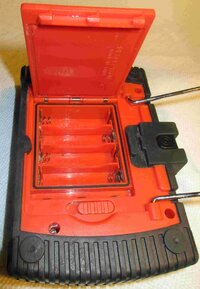
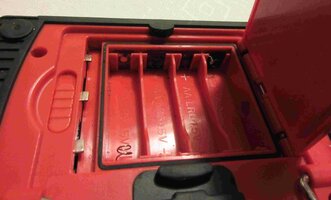
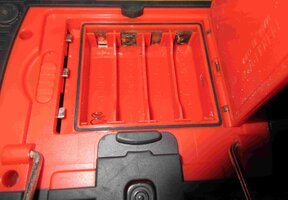
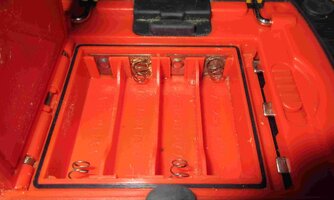
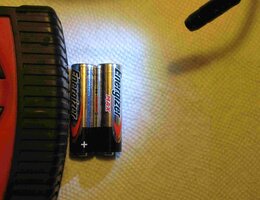
THIS is because these otherwise expensive Color Fiber-Optic Camera Tools are powered NOT by a USB Port... but instead via Four AA Batteries tucked underneath inside of rubber grommet hermetically sealed panel section. And as we all know, in time ALL Lead Acid Paste Emulsion designed AA Batteries WILL decay and dissolve from the inside out and if possible...They WILL Rust away at their contact metal parts via Galvanic Corrosion.

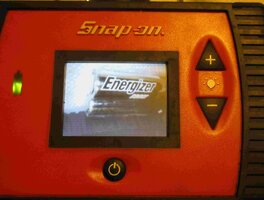
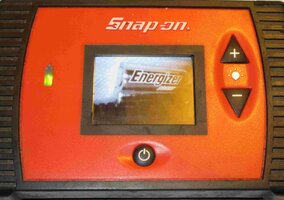
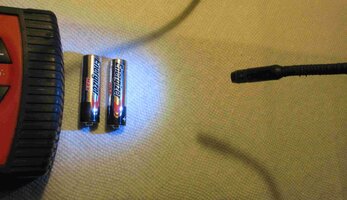
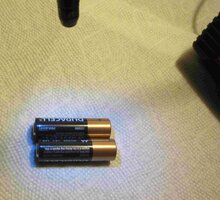
Such was the case with one Unit in the EXTREME and only slightly advanced in the other. After finding these conditions during a very close inspection, I cleaned up these issues using 'Q'-Tips and some Arm & Hammer Baking Soda as a wet paste and then took close up images before popping in Four Fresh AA Batteries and giving them BOTH a Whirl. Then I took the images shown below of these results.

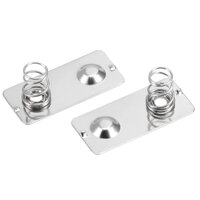
Note that while one of them needed a Good Cleaning...including the Protective Mineral Glass Covers that were FILLED with Grease and Dirt and works PERFECTLY Well... The Other will need to have the In-Series Battery Contact Plates R&Rd as soon as I can find suitable repair replacement parts. Don't Forget to CHECK ON EBAY for these are very available now ...probably due to these very same reasons...but they are STILL salvageable at LOW Prices!

SNAPONINSPECTIONCAM1.jpgSNAPONINSPECTIONCAM2.jpgSNAPONINSPECTIONCAM3.jpgSNAPONINSPECTIONCAM4.jpgSNAPONINSPECTIONCAM5.jpgSNAPONINSPECTIONCAM6.jpgSNAPONINSPECTIONCAM7.jpgSNAPONINSPECTIONCAM8.jpgSNAPONINSPECTIONCAM9.jpgSNAPONINSPECTIONCAM10.jpgSNAPONINSPECTIONCAM11.jpgSNAPONINSPECTIONCAM12.jpgSNAPONINSPECTIONCAM14.jpg


EDIT and UPDATE , Thursday, May 18th, 2023:

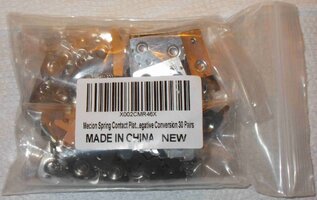
After Checking over on eBay... I found an inexpensive set of Replacement Conductive Chrome Plated (20 Count Pack for $11.00) Inserts that will certainly work for repairing the other Dead Snap-On BK-5500 Optical Probe Unit:

CONDUCTPLATES1.jpgCONDUCTPLATES2.jpgCONDUCTPLATES3.jpg

These match the shape and design of the Snap-On OEM inserts very closely and I'll be using them to replace and solder them in and see if this works to revive this 2nd Tool. :>)


Attachments

  • SNAPONINSPECTIONCAM15.jpg
    SNAPONINSPECTIONCAM15.jpg
    409 KB · Views: 5
  • SNAPONINSPECTIONCAM16.jpg
    SNAPONINSPECTIONCAM16.jpg
    445.7 KB · Views: 5
  • SNAPONINSPECTIONCAM17.jpg
    SNAPONINSPECTIONCAM17.jpg
    387.7 KB · Views: 5
  • SNAPONINSPECTIONCAM18.jpg
    SNAPONINSPECTIONCAM18.jpg
    400.3 KB · Views: 5
Last edited:
  • Like
Reactions: Beacon

mrrsm

Lifetime VIP Donor
Supporting Donor
Member
Oct 22, 2015
8,267
Tampa Bay Area
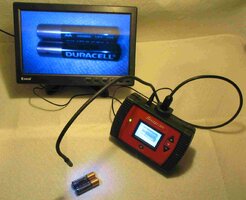
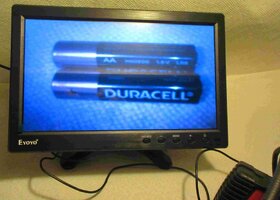
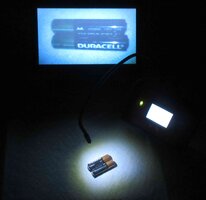
That $71.00 - 10.1" TFT SVGA HDMI Screen came in for the Snap-On MODIS... So I thought I'd try using the convenient VGA OUT cable on the Snap-On Model# BK5500 Optical Camera first... Observe that no matter which position you put the Fiber Optic Feed Line in... It STAYS RIGHT THERE... Right where you WANT it to STAY:

SNAPONCAMANDEXTERNALTV1.jpgSNAPONCAMANDEXTERNALTV2.jpgSNAPONCAMANDEXTERNALTV3.jpgSNAPONCAMANDEXTERNALTV4.jpg
SNAPONCAMANDEXTERNALTV5.jpg

How Many Times... have we had to do "Blind Repairs" while *fiddling with fasteners* in Tight Spots of an Almost Impossible to Reach area where having THIS kind of Gear would have made those jobs Just a "SNAP" to get them "ON"? (Pun Intended)
 
Last edited:

mrrsm

Lifetime VIP Donor
Supporting Donor
Member
Oct 22, 2015
8,267
Tampa Bay Area
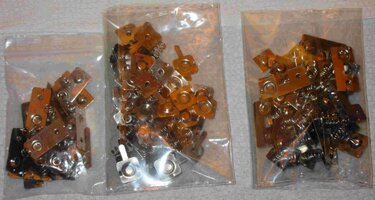
Following up on Post #814... The various packets containing the variety of possible 1.5 Volt DC Battery Contact Plates arrived and is living proof that if you can get any of these *inoperable* Snap-On Model #BK5500 Optical Scopes for Dirt Cheap over on eBay, then performing simple R&R Solder & Repair of any *Acid Corroded and Dissolved Electrical Contact Plates* ...really IS Possible...and for Not Too Much Moolah:


SNAPONBK5500BATCONTACTS5.jpg
SNAPONBK5500BATCONTACTS1.jpgSNAPONBK5500BATCONTACTS2.jpgSNAPONBK5500BATCONTACTS3.jpgSNAPONBK5500BATCONTACTS4.jpg

The OTHER Cool Discovery here was that since the Snap-On Model# BK5500 Unit has a Universal, very solidly designed "Push-To-Release" Locking Button on the top of the Unique Visual Aid Tool... You can install a wide variety (Length-Wise) of Optional Fiber-Optic Camera 8.5mm "Tube" lenses.

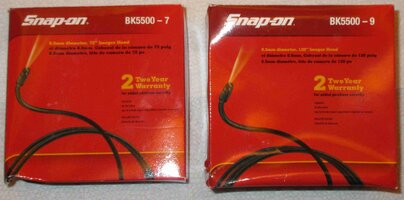
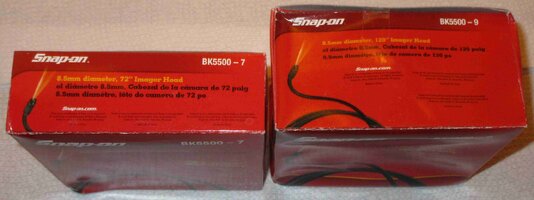
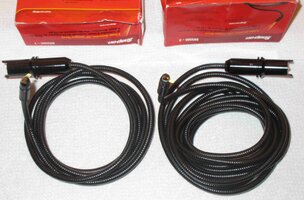
I saw THESE two BNIB (Brand New In Box) over on eBay for Forty Bucks each with more available; one having a 72" Reach and the other having a 120" Reach. Don't Kid yourself... If you put your mind to it...especially for Owners of GMT800 Full Size Trucks and SUVs ... You can well imagine how advantageous having these extended length Cams at hand can be:

SNAPONBK5500IMAGER1.jpgSNAPONBK5500IMAGER2.jpgSNAPONBK5500IMAGER3.jpg
SNAPONBK5500IMAGER4.jpgSNAPONBK5500IMAGER5.jpgSNAPONBK5500IMAGER6.jpgSNAPONBK5500IMAGER7.jpg

Watch THIS AFM FUBAR'd LS Motor Repair as the VOP begins around 14:20 to use the LATER Model Snap-On Model #BK6500 Bore-Scope to Inspect the Camshaft Bearings inside this engine. Note that piping the Video out via the Single Wire SVGA External Screen Port is another advantage of having the Snap-On Model #BK5500 Bore-Scope for a LARGER View of what things look like in there:

 
Last edited:

Beacon

Member
Mar 22, 2019
456
SouthWestern PA

Lang Kastar LG1465​

I bought this set of retaining ring pliers a while ago, because I wanted a complete set. Today was the first time I used them and they are pretty sweet. I used the largest pair to r/r the retaining ring for the upper ball joint, what sets this pair apart from other pliers is a ratcheting lock mechanism that will hold the ring open (or closed, if you need it). I wish the other 2 pliers in the set had this feature, but being that they are for smaller rings, I understand why this feature was omitted.


littleblazer

Member
Jul 6, 2014
9,267
Got a cheap optical tachometer to check against the tach in the boat. It matched another digital tach I used so I guess the now 10 year old boat tach is off. Harbor freight 1, my optimism 0.
 

Blckshdw

Moderator
Nov 20, 2011
10,767
Tampa Bay Area, FL
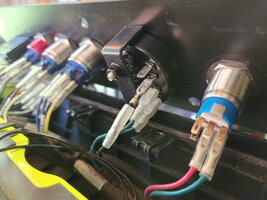
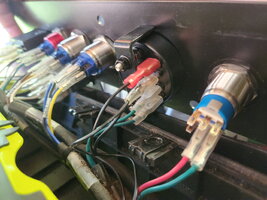
Got my riding mower reassembled after replacing one of the batteries. Decided to let the mod bug play a little bit, and I put in a little upgrade. There's a hack for the digital readout, that defaults to telling you how many hours the unit has run, above a battery gauge. The gauge also has the ability to tell you voltage, and battery capacity, you just have to make the connection.

I had a few momentary buttons in a bin, from my original DIC mod before I got the steering wheel upgrade. Grabbed one, some spare wire and a couple of terminals. Drilled a hole in the side of the plastic panel where the controls are. There's a cap on the unused pin, just had to connect that via the button to the ground pin next to it. Didn't feel like doing anything special for the ground pin, so just pulled back the insulator and stuffed the bare wire into it

20230723_090203_resize.jpg20230723_090359_resize.jpg


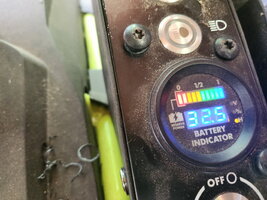
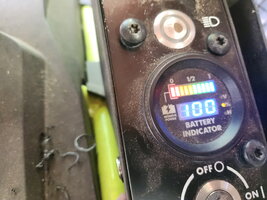
Turned the key for a quick test, comes up with hours, as expected. Couple of taps on the button, cycles to volts, and then capacity. Easy peasy. @mrrsm could be useful leading up to battery replacement time :twocents:

20230723_091355_resize.jpg20230723_091403_resize.jpg20230723_091406_resize.jpg
 

northcreek

Member
Jan 15, 2012
3,378
WNY
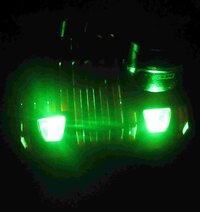
Bought a couple of these lights for hands free working on vehicles . They are crazy bright and well thought out. This was the best deal that I could find, bought them on eBay but, they came through Amazon. I might add that they are very light and comfortable but, so far only used them to scare my dog....:lightbulb:


Mooseman

Moderator
Dec 4, 2011
26,107
Ottawa, ON

mrrsm

Lifetime VIP Donor
Supporting Donor
Member
Oct 22, 2015
8,267
Tampa Bay Area
Even as unlikely as this purchase might be... for the sake of those among us who do moderate amounts of 3-D Printing, Metal Working and Fabrication Welding... Viewing what happens next will definitely hold your "Precision Tools" Interest. Besides that... Working on a 3-D Project in any kind of Metal (while using the *4th State of Matter* like an Oragami Puzzle Piece Cutter) is just Pretty Effen Cool:

 
  • Wow
Reactions: movietvet

mrrsm

Lifetime VIP Donor
Supporting Donor
Member
Oct 22, 2015
8,267
Tampa Bay Area
Around September 27th, 2022, Hurricane IAN Blew through along the Gulf Coast of Florida and the upper 20 Feet of a 100 Foot Tall Rotting Pine Tree in my Neighbor's Yard leaning over my Back Fence broke off in the powerful south to northbound gusting wind vector and struck the outer roof and rain gutter of my Back Porch causing some damage:

HURRICANEIAN.jpeg

I later brought this to the attention of my Millionaire Neighbor's Grounds Keeper and he Swore on the Souls of his Children that he would "Have that Tree taken down." He did nothing. But you see... my Rich Neighbor is a Quadriplegic who has had enough grief in his life to worry about, so I decided that when the time was right, I'd have that tree removed, along with all of the Big Overgrowth on my property, including *tuning up* the Large Oak Tree (think... "Sleepy Hollow" Scary looking here) threatening to damage the front roof area of my residence.

So a few weeks ago... Enter the "Sherwood Tree Service", a Licensed and Insured Genuine Arborist and the Owner Tom and his Intrepid Crew soon worked tirelessly over a two day stretch while being pelted with Icy Rain and while climbing these tall, slippery trees so very precariously at times that at one point, I asked them to stop before anyone got hurt.

They smiled and to a man said, "MRRSM... We do THIS Stuff ALL The Time..." When the work was finished...My Huge Oak Tree was damned near "A Work of Arboreal Art". This was an amazing outcome considering they were charging about half as much as the many other estimates from Tom's competition. When the huge job was completed, I insisted on adding in a very considerable Bonus for the Crew because of the Terrible Hazards they overcame while laboring so earnestly on my behalf.

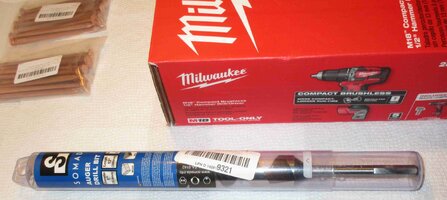
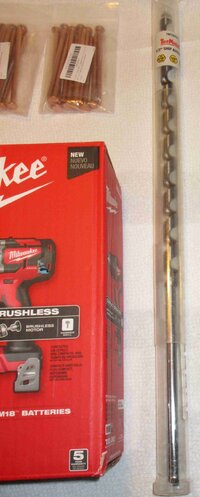
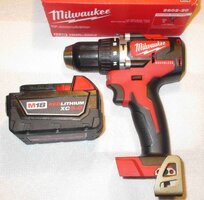
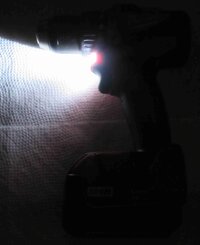
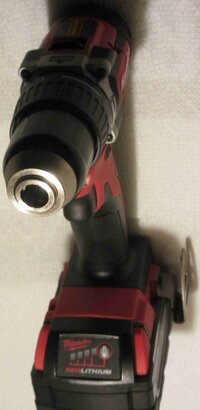
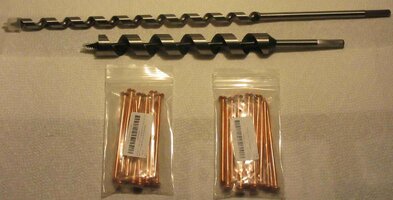
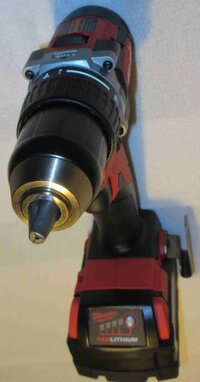
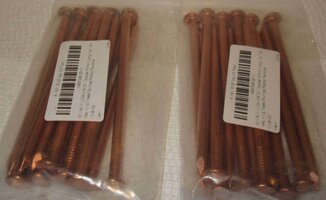
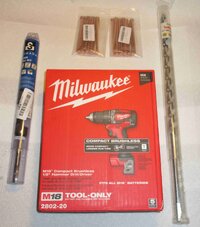
And that leads to "The Tools" featured in this post as a Milwaukee 1/2" M18 FUEL Brush-less Hand Hammer-Drill capable of turning both of the Brand New 12" X 1" and 18" X 1/2" "Ship's Augers" necessary to drill deep into the Tree Stumps that I definitely wanted Killed Off. In most Horror Stories involving putting down Dracula, the Tool of Choice is NOT Holy Water and a Silver Cross of Christ...but instead... A Humble Wooden Stake driven straight through the Vampire's Heart. The same can be said for Killing Stumps..."DRT".... (Dead...Right THERE...) but the "Stakes" needed here are Pure Copper Nails.
TREEDRILLING3.jpg

A few years back, one of my Other Neighbors... not so affectionately known to all as "Wacko-One" (draw your own conclusions) sported a HUGE and imposing Pine Tree that was decorating her neighbors Vehicles with Pine Sap. The outcome was that for some strange reason...THAT Giant Pine Tree wound up being "DRT" almost overnight.

And as the rumors would have it... The Tree Surgeons working on the Removal Job damaged the Power Saws they were using after accidentally running them over some array of "Copper Spikes" with their powered blades and finding tout right then that somebody driven those Cooper Death Spike deep into the Trunk of that Big Ol' Pine Tree.

So, I've seen first hand what these "Copper Nails" can REALLY Do... (probably due to the Copper-Oxide or Copper-Sulfate Leeching out of them inside the Xylem and Phloem). So I will be using them HERE in about a week or so after the Potassium Nitrate gets introduced. The reason I obtained several packets of them is that now that the Trees have been cut down to the ground, I want them to STAY that way... especially those few Malignant Brazilian Pepper Trees that are dug in along my Fence Line.

To accomplish this, I first need to Drill Down DEEP into the Hearts of the Huge Sable Palms, Live Oaks and Florida Holly Tree Stumps and then pour in a LOT of Potassium Nitrate via the "Spectracide Stump Remover" Dispenser Bottle in order to desiccate the cores of the Tree Stumps and thus, invite the Special Fungi that will move in right away "Chasing the Nitrogen" as a Fertilizer and wind up Eating those Stumps from the Inside - Out. The Trick though is getting enough of the *Stuff* as deep inside the base roots as possible to make this work.


So I was guessing that a 1/2" Hand Hammer Drill with a LOT of Torque and Durable Battery Power along with the proper Long Wood Drill Bits-Augers would be required and thus, I am adding these to my collection of Splendid Milwaukee M18 "Fuel Tools" and Specialty Drills, hoping they will be my BFF to get all of this work done and NOT have any New Tree Growth haunting my back yard, come Spring:
TREEDRILLING1.jpgTREEDRILLING2.jpgTREEDRILLING3.jpgTREEDRILLING4.jpgTREEDRILLING5.jpgTREEDRILLING6.jpgTREEDRILLING7.jpgTREEDRILLING8.jpgTREEDRILLING9.jpgTREEDRILLING10.jpgTREEDRILLING11.jpgTREEDRILLING12.jpgTREEDRILLING14.jpgTREEDRILLING15.jpgTREEDRILLING16.jpgTREEDRILLING17.jpg

Same Day Follow Up on Monday, 11/27/2023 @ 12:50 PM EST:

AWESOME TOOL COMBINATION !!!

I used the LONG 1/2 OD "Ship's Auger" to drill the FULL 18" Deep into the bases of the Sable Palms, Live Oak and Brazilian Pepper Tree Bases... and with Two Fully Charged M-18 Batteries at hand... THAT Drill went all the way in LIKE Butter. The holes were drilled in a stellate pattern around their "hearts" and then I filled each one with 18" X 1/2" DEEP of the Spectracide Potassium Nitrate Powder.

It only took about 30 Minutes to do Two Sable Palms, One Live Oak and Three Florida Holly (Brazilian Pepper) Tree bases. It helps to stop occasionally to allow the Milwaukee Drill to *Cool Down* just a 'BIT' and to extract any root and trunk fiber windings from the coring Drill Flutes as often as they build up... But other than THAT... This Ideal-Tool-Combination worked out swimmingly well. I could NOT be Happier if I was TWINS!
 

Attachments

  • 7d807309-8330-427c-8c47-91a7a46eefac.pdf
    93.7 KB · Views: 2
Last edited:

mrrsm

Lifetime VIP Donor
Supporting Donor
Member
Oct 22, 2015
8,267
Tampa Bay Area
During the very height of the Covid-19 Pandemic... My Wife and I had to figure out the best ways of getting ALL of our foods delivered to our home and minimize exposure to the entire world. Amazon Fresh solved MOST of those requirements..
However...When it came to getting High Quality Meat Products, we found a company online called "MYERMARKET.COM" that would not only guarantee the freshness and the quality of their products... they PROVED this out time and again by Triple Insulating their Shipping Packages. Nested inside of these Large Boxes, keeping the Frozen Food SOLID were Large, Finely Sewn, Zippered Red Fabric Carry Bags packed with large blocks of Dry Ice. This Company is AMAZING... and they actually were able to BEAT Amazon's Meat Prices, too.
The follow-on subject that we should care about HERE developed from an event that happened about two weeks ago when I was Posting about the need to Drill Down inside some Tree Stumps ...and what-not. Of course, like so many other repairs and work we discuss here, it involves the need for using Heavy, Battery Powered Tools. But seldom have we ever actually discussed their means of being transported TO and FROM the work locations involved. So... "Bring 0n the Tool Juggling" actions necessary to accomplish these tasks.
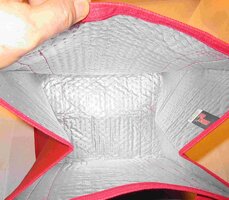
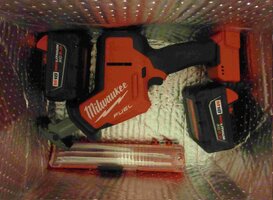
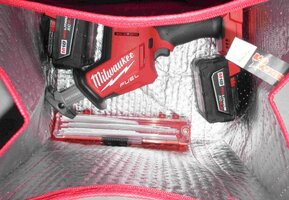
What happened NEXT was "PDN" (Pretty Damned Neat). I was gathering up what I needed before venturing into the Back Yard after having my vision absolute BOMBARDED with the Distinct, Signature Bright Red Color of my Milwaukee Power Tools... and around the same time I was walking past several Red Fabric Bags hanging on the arm of one of the Kitchen Stools. And suddenly, I stopped and a *Light-Bulb of Inspiration* popped into view over my Coconut. So I was Smiling ...and Laughing Out Loud... and right then, I GRABBED One of THEM and did THIS:

REDBAG1.jpgREDBAG3.jpgREDBAG4.jpgREDBAG5.jpgREDBAG6.jpgREDBAG7.jpgREDBAG8.jpg

What is really AWESOME about these Bags is that besides being made out of VERY Sturdy Materials... The Aluminized Insulated interior allows for the Viewing of these TOOLS in BRIGHT LIGHT (ambient as well as by Flashlight) instead of struggling with the usual Gloom & Darkness of having to Dig around inside of a collapsed Soft Canvas Bag.

Instead...these Cleverly Designed Red Bags... Stand UPRIGHT making it very easy to look right in and move Tools around in the bottom. The Red Bag could also be very convenient whenever carrying Parts prepared with Adhesives or Grease that needs to be kept VERY CLEAN and Dust or Dirt Free. These Bags STAY OPEN while you are looking around and allow you to view EVERYTHING in Plain Sight. Pretty Cool, Huh? Yup... "PDN"
 
Last edited:
  • Like
Reactions: Blckshdw

movietvet

Member
Dec 21, 2022
486
Oregon
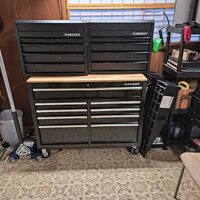
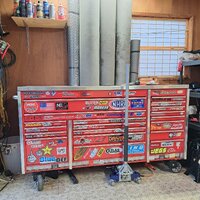
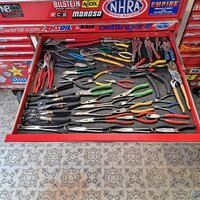
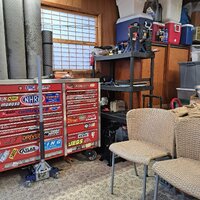
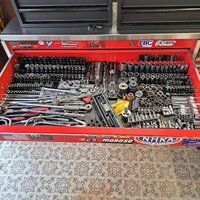
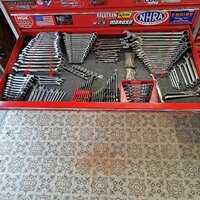
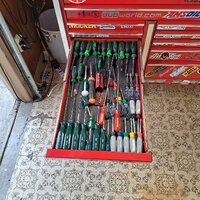
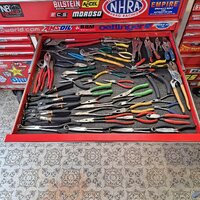
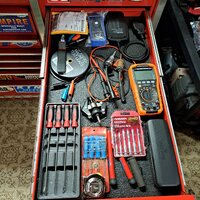
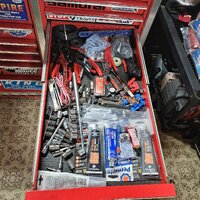
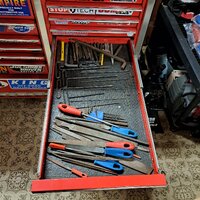
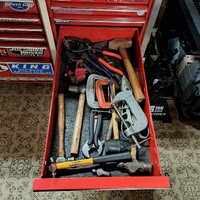
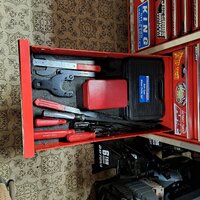
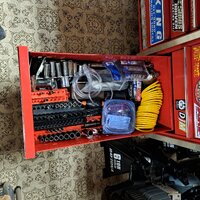
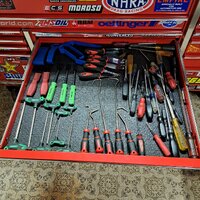
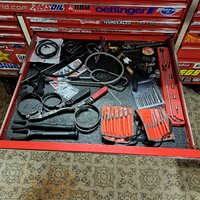
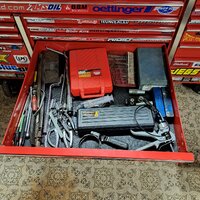
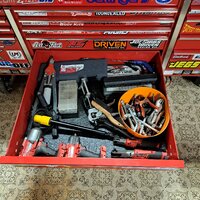
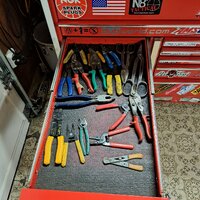
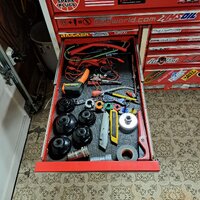
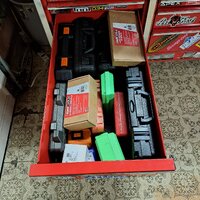
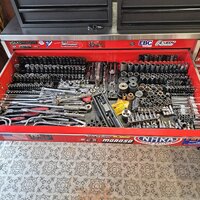
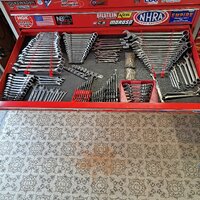
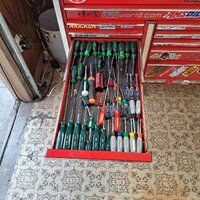
I bought a used 3 bay Snap On lower cabinet and now all my tools fit in the one box. I am in the process of selling the Husky boxes. The lower box is already gone. I am going to show just a sample of the room:

20231213_155258.jpg20231214_124129.jpg20231214_124210.jpg20231214_124245.jpg20231214_124312.jpg
 

Mooseman

Moderator
Dec 4, 2011
26,107
Ottawa, ON
And they also work better with all those stickers :biggrin:
 

mrrsm

Lifetime VIP Donor
Supporting Donor
Member
Oct 22, 2015
8,267
Tampa Bay Area
Looks like @movietvet and @Mounce may be "Blood Brothers" in the Garage when it comes to maintaining Organized Tool Chesting... :ok:
 
  • Like
Reactions: movietvet

movietvet

Member
Dec 21, 2022
486
Oregon
Looks like @movietvet and @Mounce may be "Blood Brothers" in the Garage when it comes to maintaining Organized Tool Chesting... :ok:
Yea, I was tired of needing a tool and having to move or dig thru other tools to get what I wanted. Now it is all exposed for easier picking. I got the 3 bay Snap On box from a friend for $3k. Stickers included.
 

movietvet

Member
Dec 21, 2022
486
Oregon
When I was making my living with my tools, I was single during the first years of that, so I owned nothing but Snap-On, Mac, Matco, SK, Proto and Thorsen, and such. except for some specialty tools by other brands like LIsle and such. I then ran shops for over 25+ years and sold off some tools that I just never used when they were stored at home and I worked from my garage. I still had some of those tools and now I am retired and still work at home on the side, for extra money. I still like quality, so I buy a lot of SK, Gearwrench and I especially like ICON. On my sockets, I have back up sets, just in case, that are USA made Craftsman.

The thing about good quality tools, is that yes, over time they can depreciate but the value is still there and eventually I will not turn wrenches at home and I have no one to leave them to, as of right now, but I can sell the whole lot for a sizeable chunk of money and get another tool that I also have and cherish, a quality firearm. My girl has her 2002 TrailBlazer and a 126k mile 1990 K2500 extended cab that runs great and does the job. She likes to do her little act of throwing her keys at me, "Hey, sweetheart, the-insert TB or K2500 here-needs oil change or look at this or that would ya". Thanks baby"! Built in tech at home for her is way better than being married to a lawyer or doctor. Her words, not mine.
 

Mooseman

Moderator
Dec 4, 2011
26,107
Ottawa, ON
Alright, now that's what I call tool pron!
:inlove:
:salivate:
 

Blckshdw

Moderator
Nov 20, 2011
10,767
Tampa Bay Area, FL
Edit: Never mind. That's a really nice setup, I have the husky box in my garage now, and it's almost full. Don't have the room for anything larger though
 

Mooseman

Moderator
Dec 4, 2011
26,107
Ottawa, ON
  • Like
Reactions: movietvet

movietvet

Member
Dec 21, 2022
486
Oregon
Switch the r and the o around. Didn't want to get flagged by any filters :biggrin:
Actually, I just figured that out just as I opened the thread for these two responses. I am a little thick upstairs sometimes.
 
  • Haha
Reactions: Mooseman

Forum Statistics

Threads
23,722
Posts
642,613
Members
19,255
Latest member
twkd2

Members Online