Tool Talk

mrrsm

Lifetime VIP Donor
Supporting Donor
Member
Oct 22, 2015
8,267
Tampa Bay Area
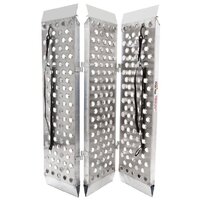
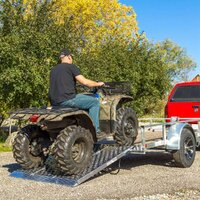
For anyone with a Riding Lawn Mower that requires a Ramp to get up to a decent elevation above "Ground Zero", be aware that recently, I was in the process of backing my Ryobi Electric Riding Lawn Mower down & out of my 10' X 14' Metal Shed on my 38" Wide X 48" Long Aluminum "Slip Proof" Ramp. This device solidly connects right to the threshold opening of my elevated Tool Shed.

But somehow, I 'Effed' Up REAL BAD ...and Managed to 'Get Sideways' on my Ryobi Riding Electric Lawn Mower. As I ambled it downwards at a very slow pace, the Unit Damned Near Turned Over Right On Top Of Me!!!

I was NOT being the LEAST Bit Careless at all when this happened.
But what must have occurred is that my Rear Tire Inflation was SO LOW that once the Tire Tread got a Decent Bite over the top of the Left Vertical Side Mini-Guard Rail ... it managed to almost completely climb over the Guard Rail and head "Right out into Nothing But AIR" This all happened Way TOO Fast!.... and I was like, "Uh Oh...! Whoa Nelly!"

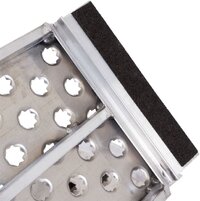
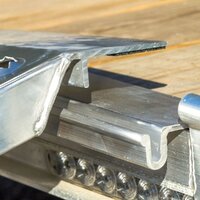
I'll tell you... THAT feeling Scared the Ripe Living SH*T... RTF out of ME! It has only taken this One Instance to make me want to take drastic action right away. So I searched around over on Amazon and Discovered there was a Large, Solid Aluminum Ramp sporting a nice 'Knife-Blade Thin' Leading On Ramp Edge and having a Strong, Substantial Front Entrance Off Ramp "Grippy" Ledge.

Man... *Whew* I shudder to think what I would have done if the Ryobi had managed to tip completely over on top of me and pinned me under there . That scene from the Movie "Dances With Wolves" comes to mind where the Conestoga Wagon Mule Driver says, "Why Don't He Write?" ... after spying a Bleached Human Skeleton stretched "Out on the Lone Prairie" near a 'Tipped Over Carriage' ...with a Paiute Indian Arrow sticking out through its Rib Cage.
:>(


I mention this because my Wife NEVER goes out into the Back Yard anymore and it might have taken some time for anyone to find whatever would be left of me back there. :>(

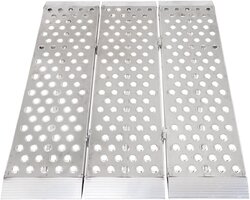
So, Hopefully... Since this New Ramp is 48" WIDE and 60" LONG, it will be good if it provides me with a MUCH greater amount of Free Ramp Motion that hopefully, won't ever jeopardize my life again, should I NOT be perfectly aligned while maneuvering within the spacing where Two Side Rails on the Existing Ramp are now located, This New Ramp has NO Such Side Rails at all.

The other feature THIS New Ramp DOES have is that it is Hinged and Tri-Folds together into a much More Portable Shape that can be easily unfolded, unfurled and secured. I'm very happy that it can support up to 2,000 Pounds, as the Ramp Itself Weighs Under 50 Pounds.

Whenever Me and The Ryobi are Cutting Grass... We also Cut a Pretty Trim Figure, mind you... But together We also Tip The Scales at around 1,000 Lbs. So I NEVER want to have to worry about "Taking A Header In The Grass" while I'm sitting on top of THAT Damned Thing and having it landing on me ...ever again.

So like I said... THIS incident has prompted me towards obtaining this VERY NICE, All ALUMINUM "BIG BOY" RAMP:
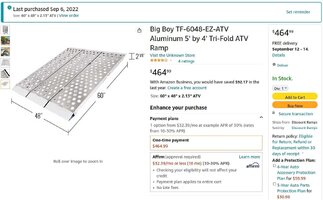
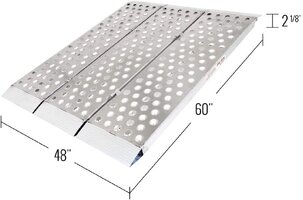
BIGBOYRAMP1.jpg51YxgLwVXML._AC_SL1000_.jpg18042ea4-3840-468b-aa85-897cb8654875_1.2472ab16aa8b9f68ce997648b442073e.jpeg61QNfukyvCL._AC_SL1000_.jpg619I-QdjjVL._AC_SL1000_.jpg819HQ+gK2EL._AC_SL1000_.jpg61NIZBw00wL._AC_SL1000_.jpg
 
Last edited:

mrrsm

Lifetime VIP Donor
Supporting Donor
Member
Oct 22, 2015
8,267
Tampa Bay Area
Had I more room to maneuver around in the Garage, I probably would have opted to Grind a Radius on the ends of some Bare, High Grade Steel 5/8" Rods I recently worked with by using my Wen Stand Mounted Bench Grinder.

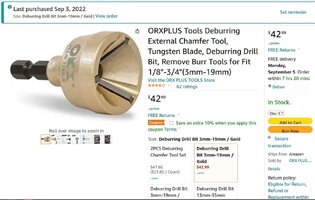
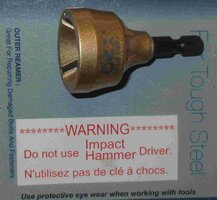
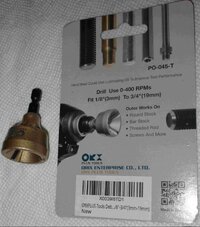
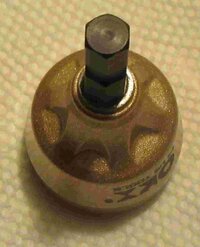
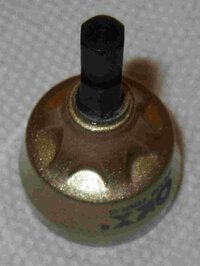
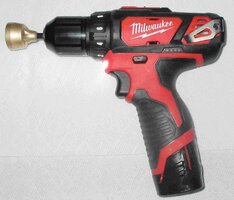
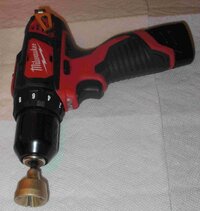
But instead... I decided to try out THIS ORX External Reamer:

ORXREAMERBUY.jpg


ORXREAMER1.jpgORXREAMER2.jpgORXREAMER3.jpgORXREAMER4.jpgORXREAMER5.jpgORXREAMER6.jpgORXREAMER7.jpgORXREAMER9.jpg


It works GREAT!!! But Remember to Solidly Restrain the Work Piece... And Don't be Tempted to Hold a Bolt Head by HAND. If the Reamer suddenly Grabs the work piece, it can Sling it Out and back towards your Head and Eyes. So... Wear Eye Protection ...and Go VERY EASY with that RPM!

THIS Tool WILL Cut a Perfect Radius Chamfer on Hardened and Stainless Steel items... Just Be Patient!
 

mrrsm

Lifetime VIP Donor
Supporting Donor
Member
Oct 22, 2015
8,267
Tampa Bay Area
Wow... With Christmas coming...I would've thought there would be a whole passel of "New Tool Buys and Reviews" posted here by now. But in THIS instance... THIS one was prompted after "She Who MUST Be OBEYED!" wanted the Very First Oil and Filter(s) Change we have ever performed upon her 2013 Nissan Altima S 3.5L V6 Engine, pending our Annual Christmas Holiday Trek up in North Florida to visit with our Family.

With just over 30K Miles on it (and less than 1,000 put on the Odometer since she bought it way back in 2015...) There has been very little necessity to bother with doing this maintenance. But, since Nissan throws the Altima Owners a Curve Ball with their Right Angle (Horizontal to Terra Firma) positioning of the Oil Filter in the Engine Block and with my immediate need to have "More Mechanical Advantage ...with LESS Effort" with its R&R after pulling off the RF Passenger Wheel to access the 'Plastic Modesty Panel'... I thought I'd better get THIS Most Reliable Version of the Tool.

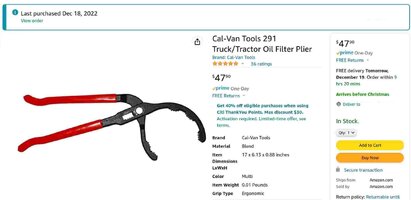
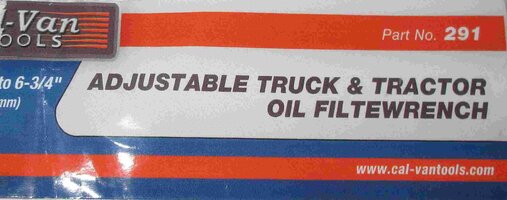
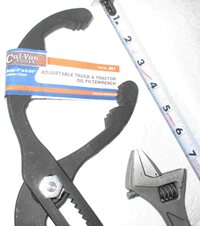
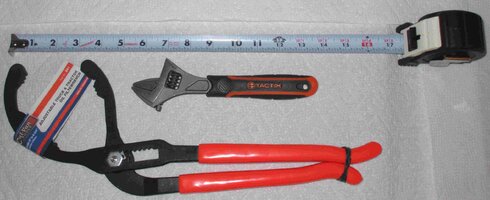
Amazon and many other vendors DO sell many other versions of these Things that can also Double as a HUGE Jar Lid Opener, starting at around $10.00... But since I like ALL my CAL-VAN High Quality Tools; what with their Cool Black & Orange Motif, don't you know...THIS Hefty, Well Made Adjustable, and "Grippy" One seemed worthwhile in making the nearly $50.00 Splurge Purchase:

calvanpliers0.jpgcalvanpliers1.jpgcalvanpliers2.jpgcalvanpliers3.jpg

Now I'm just waiting on the Nissan OEM Oil Filter, ACDelco Dexos1 Full Synthetic 5W-30 Motor Oil and the Engine Air Filter and Cabin Air Filter to arrive...
 

mrrsm

Lifetime VIP Donor
Supporting Donor
Member
Oct 22, 2015
8,267
Tampa Bay Area
Kurtis from "CEE" Cutting Edge Engineering renders this video of him using an incredible array of Bearing Pullers, Separators and Brass Hammer with Punch Tools while servicing his Giant Chinese Variable Speed Milling Machine hunting for that familiar "Bearing Growl" that we are all so keen to find and eliminate from our own Machines.

We don't often get the chance to see So Much Metal being dis-assembled, cleaned, greased and then re-fitted in logical orders; absent Kurtis having an Original Service Manual (Chinese...or otherwise...). But in this instance, it is Real Mechanics Eye Candy to behold something that is a Tue ASMR Holiday Treat to watch and learn from:


Blckshdw

Moderator
Nov 20, 2011
10,767
Tampa Bay Area, FL
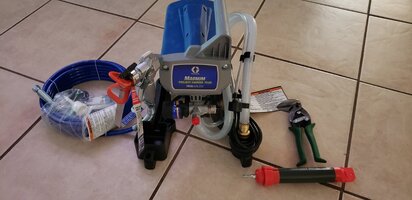
Gonna save the cross post for the mail thread. Collecting some goodies, and a few showed up in the last couple of days. Planning to paint my house, so have had an eye on airless paint sprayers, one I had on my wishlist was marked down (exactly what I was hoping for) so snatched that up.

Got one of those drill driven paint roller cleaners, which will help for the interior stuff and when I do some of the trim. Needed a set of vertical tin snips, as my gutters need some adjustment. The drip edge the roofers installed is shorter than what was originally up there, and in some areas allows water to drip behind the gutter instead of into them. This way I can cut the notches higher without having to take the whole gutter down

20221223_162348.jpg
 

movietvet

Member
Dec 21, 2022
486
Oregon
Nothing like the right tool for dealing with stubborn nuts.
My Glock collection is considered tools to me.

The hand tools are just what I use around the house now to work on my own and make a little money on the side. Before I retired from shops after 35+ years, I had a very major set of Snap On tools and boxes.
 
  • Like
Reactions: xavierny25

Mooseman

Moderator
Dec 4, 2011
26,107
Ottawa, ON
We already had a thread for tools so I moved your posts here.

Nice collection. Once I get better organized, I'll post mine. Way too many tools for the chest I have.
 

Mooseman

Moderator
Dec 4, 2011
26,107
Ottawa, ON
That's kinda true but not. Zimbabwe is banning the export of raw lithium to stop "artisanal" mining (i.e. backyard mines) and not processed lithium.


The notice said the ban does not apply to the export of lithium concentrates, which all the major lithium miners in the country plan to produce.

President Emmerson Mnangagwa has previously said the ban would target hordes of artisanal miners, who were drawn by the mineral's high prices and invading abandoned mines to dig for lithium-bearing rocks. Mnangagwa said the raw lithium was being exported through neighbouring countries.
So prices will not be effected by this measure. If anything, it should help stopping the stuff that she's opining about.
 

Blckshdw

Moderator
Nov 20, 2011
10,767
Tampa Bay Area, FL
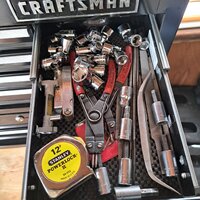
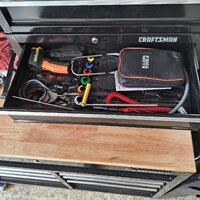
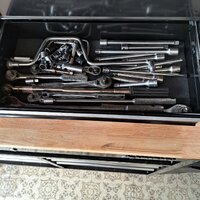
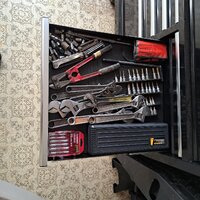
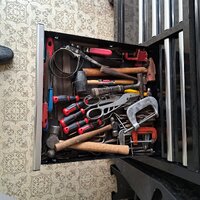
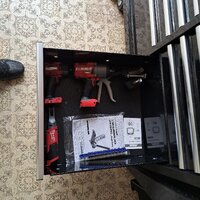
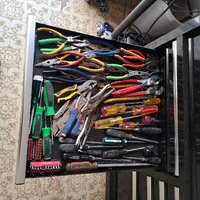
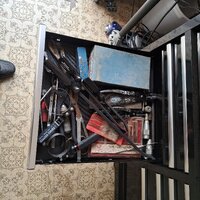
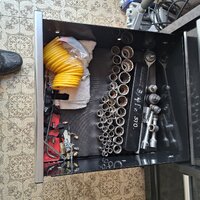
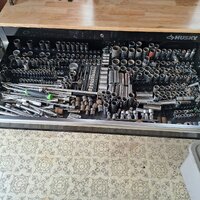
I need to organize my tools in the drawers better. For the most part, everything stays in the same place, but I've been wanting to add some foam and cutout spots for everything so they have their place.

I have the same Husky roller as @movietvet and my top drawer is a free-for-all hot mess. Really should go through that sometime, as a lot of the small items are probably better suited to go into bins instead of a drawer. :yes:
 

movietvet

Member
Dec 21, 2022
486
Oregon
We already had a thread for tools so I moved your posts here.

Nice collection. Once I get better organized, I'll post mine. Way too many tools for the chest I have.
Thanks, I did look before I posted but I guess I did not look hard enough.
 

TollKeeper

Supporting Donor
Member
Dec 3, 2011
8,265
Brighton, CO
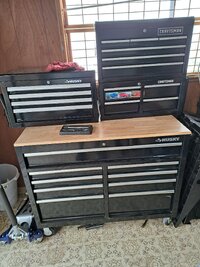
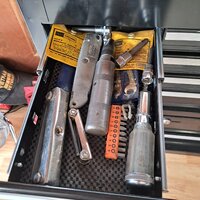
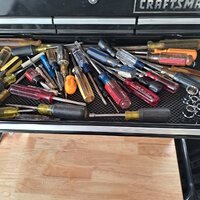
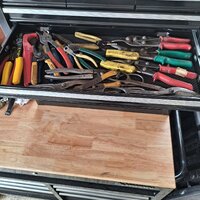
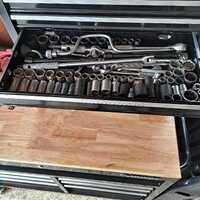
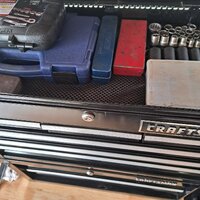
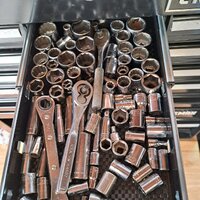
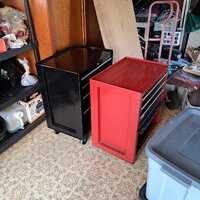
@movietvet - I wish my tool collection was as nice as yours, and some others around here. I got a Craftsman Toolbox on wheels, but no organizers, so everything is just kinda thrown in there. At least all the screwdrivers are in one drawer, and pliers and other similar tools are in one drawer.

This is my "yard" box..
Its an awesome box. Minus screwdrivers, and swivel extensions, it has any tool you could need at the yard. I have had it for 20 years now.

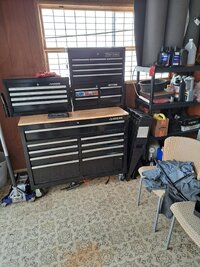
And my garage box is this..

Got it for a smashing deal. Normal retail on it is like 900 bucks. Local store went out of business, got it for 220.
 

flyboy2610

Member
Aug 24, 2021
534
Lincoln, Ne.
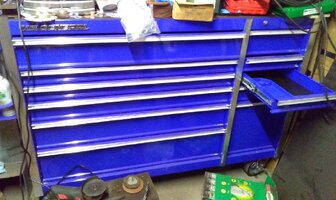
I bought this tool box from Harbor Freight:

I've been very happy with it. My Craftsman tool chest sits on top of it.
 

Beacon

Member
Mar 22, 2019
456
SouthWestern PA
I just got this box this summer, I haven't completely moved into it yet.
box.jpg

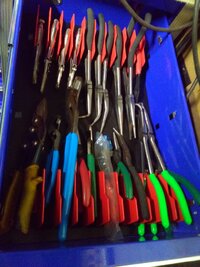
I really like these Plier racks from tekton, but I need 2 more
KIMG0635.JPG

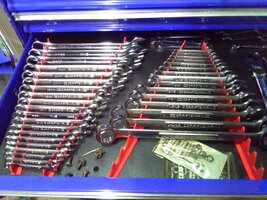
I got these magnetic wrench racks from harbor freight, mostly stick even through the drawer liners, and the weight of the wrenches does the rest. I like that each rail is separate, this allowed me to orient them, as in the picture to save space.KIMG0636.JPG

Got it for a smashing deal. Normal retail on it is like 900 bucks. Local store went out of business, got it for 220.
That was a GREAT deal!! Congrats
 

mrrsm

Lifetime VIP Donor
Supporting Donor
Member
Oct 22, 2015
8,267
Tampa Bay Area
If you've ever been trapped underneath either the Driver or Passenger sides of your Silverado, Escalade, Tahoe, Sierra, Trailblazer, Envoy (Pick YOUR Poison) while trying to remove Handfuls of Tiny, Self-Drilling Dashboard Black Screws (Are they SAE? Are they METRIC?) after setting down another Handful of Tiny Nut Driver Tools on the Floor Boards...

...AND you can't find the Right One?
...AND you could use some Extra Length?

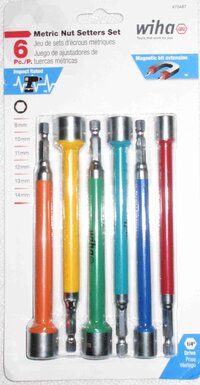
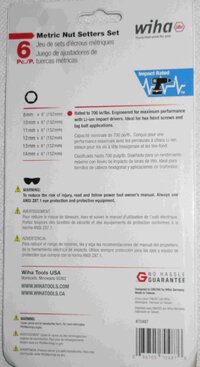
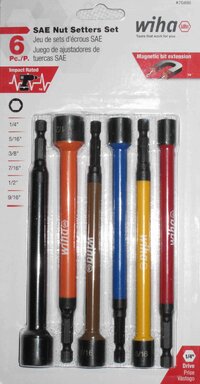
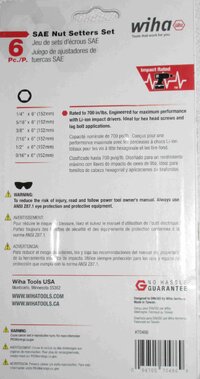
In just such situations...Wouldn't these WIHA Color-Coded Metric and SAE Extended Length Nut Driver Sets from Amazon come in Handy?

WIHANUTDRIVERSETMETRIC1.jpgWIHIANUTDRIVERSETMETRIC2.jpgWIHANUTDRIVERSETSAE1.jpgWIHANUTDRIVERSETSAE2.jpg

And...While we're at it...Wouldn't it be Nice if we had a Long, Slender Zip Lock Pouch to drop them all into that can easily rest on its narrow, stand-up bottom in between the seats or on top of the Dash or on the Center Console while you're working away at these jobs?

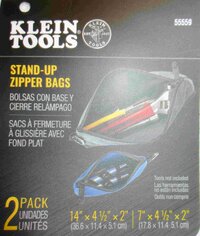
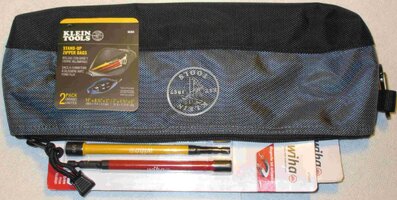
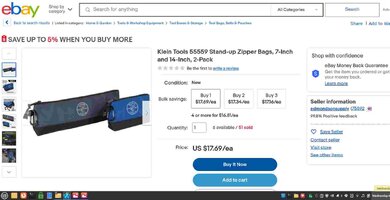
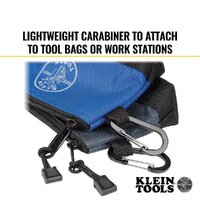
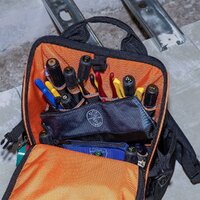
How about having TWO such Slender Stand-Up Tool Bags that come in an inexpensive Set, fitted with Cute Black Anodized Aluminum Spring Locking Carabiners for keeping those Lanyard Zippers from opening during those always inopportune times? Well... These are from Klein Tools and Amazon has them too, for not too much money:

KLEINSTANDUPZIPPERBAGSET0.jpgKLEINSTANDUPZIPPERBAGSET1.jpgKLEINSTANDUPZIPPERBAGSET3.jpgKLEINSTANDUPZIPPERBAGSET4.jpgKLEINSTANDUPZIPPERBAGSET5.jpg
 
Last edited:

mrrsm

Lifetime VIP Donor
Supporting Donor
Member
Oct 22, 2015
8,267
Tampa Bay Area
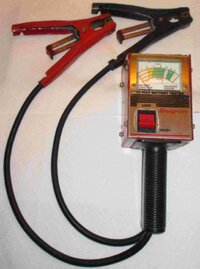
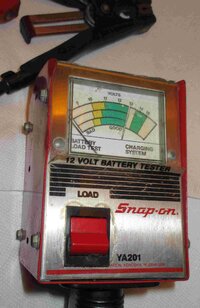
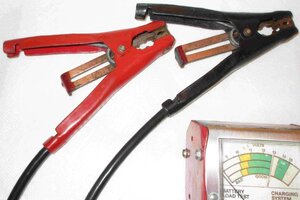
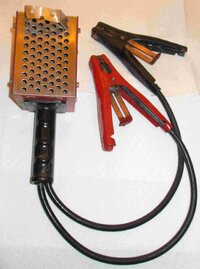
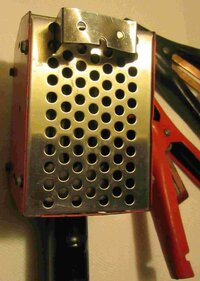
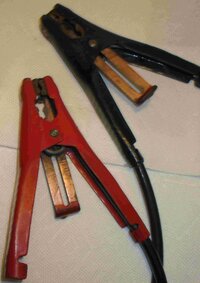
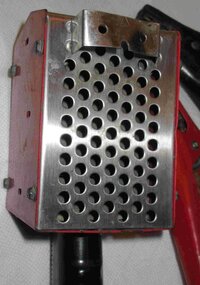
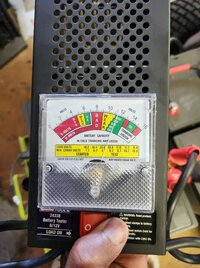
I saw a recent Thread involving a poorly investigated "Dead Battery" issue (from the perspective of the Vehicle Owner's Actions... NOT from any of our People, mind you) and the GMTN Helper Suggestion was made to "Use a Proper Battery Tester that WILL place a LOAD on that Battery and REALLY "Put It To The TEST". With that in mind... once again, while "Lurking...But NOT Shirking..." over on eBay, THIS OLD Snap-On Model# YA201 Battery Tester raised it's Big, Ugly Head and got my attention while priced at around $60.00. So I grabbed it just to have one handy:

SNAPON12VOLTBATTERYTESTER1.jpgSNAPON12VOLTBATTERYTESTER2.jpgSNAPON12VOLTBATTERYTESTER3.jpgSNAPON12VOLTBATTERYTESTER4.jpgSNAPON12VOLTBATTERYTESTER5.jpgSNAPON12VOLTBATTERYTESTER6.jpgSNAPON12VOLTBATTERYTESTER7.jpg

I want to be able to check things out should the Battery Power become unreliable or go sideways and use THIS "Thing" (or employ my other TOPDON Unit) on my 2000 "Blue Silvy" 1500 Long Bed. That Truck sports an Expensive AGM Battery that has survived a Near Crash quite a few years back that might eventually require some "Battery Power Stress Testing" in time.

Have a look below and let's see what Ya'll Think:

A Nice "One Over The World View":


Here is How to Actually Use it RIGHT:


And for The Sake of SAFETY... From "Eric The Car Guy"


And if for some reason I need to REBUILD IT? Here's How:

 
Last edited:
TollKeeper

Supporting Donor
Member
Dec 3, 2011
8,265
Brighton, CO
I like that it has the side terminal load testers.
 

mrrsm

Lifetime VIP Donor
Supporting Donor
Member
Oct 22, 2015
8,267
Tampa Bay Area
Hearkening back to Post #s 703 & 712… Courtesy Andrew Camarata introducing me to the *** “Halloween Pumpkin Orange and Midnight Black Urban Camo-Paint” on his Cal-Hawk 3/8” – ½” Drive Spud Ratchet Wrench… My addiction from then on to that Tool Paint Motif is unending. So when I spied THIS ASMR YouTube Video showing an AWESOME Ancient 1.5 Ton Orange & Black Colored Floor Jack *** Restoration...Well… My God… See what I mean?

ASMR Vintage Hydraulic Floor Jack Complete Restoration:


I have one I bought from HF about 30 years ago that looks a very similar to this one ...and it even though it was very CHEAP back then ...IT Does NOT work like this German Make version, either... :>(

*** PS... Here's Huey Lewis and The News with "I Want A New Drug"... BUT DUDE... CHECK OUT HUEY'S ON STAGE OUTFIT COLORS... DUDE!!!!

 
Last edited:
mrrsm

Lifetime VIP Donor
Supporting Donor
Member
Oct 22, 2015
8,267
Tampa Bay Area
Almost Forgot...

Found this Item for about Ten Bucks over on eBay... Imagine that... a Snap-On Model# YA249 Side Post 5/16" Ratcheting Battery Wrench... Labeled "For GM" :>)
 

Attachments

  • SNAPONGMSIDEPOSTBATTERYWRENCH1.jpg
    SNAPONGMSIDEPOSTBATTERYWRENCH1.jpg
    117.6 KB · Views: 8
  • SNAPONGMSIDEPOSTBATTERYWRENCH2.jpg
    SNAPONGMSIDEPOSTBATTERYWRENCH2.jpg
    113.9 KB · Views: 5

Blckshdw

Moderator
Nov 20, 2011
10,767
Tampa Bay Area, FL
:undecided: The battery load tester is a great idea, and might come in handy for me. I've had my Ryobi riding mower for 6 summers now, and the last few times I ran it, I couldn't finish mowing my 1/3 acre property before it lost juice. Brand new it's supposed to have 2.5 acre charge capacity. :worried:

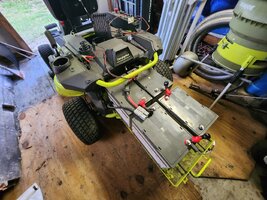
I was preparing myself to have to spring for 4 new 75Ah batteries, but came across a post that said to load test each battery, because if 1 gets a bad cell, the other 3 can still be good, but performance will decline quickly.

I've had this seemingly random partial power loss issue for the last 2 summers, where sometimes the cutting deck would shut off, and other times the drive motors would shut off. Both while the other motors were still running and there was power at the switch. Months of back and forth with tech support, swapped out some parts here and there, haven't been able to figure it out. Would be a kick in the pants if it was all because of a voltage issue due to a failing battery... :bonk:
 

mrrsm

Lifetime VIP Donor
Supporting Donor
Member
Oct 22, 2015
8,267
Tampa Bay Area
You Know... I initially though about this, too... But my Brain Fart said, "Hey Bobby... You can't use a 12 Volt DC Load Tester on a 48 Volt DC Battery... Dude!" But Hey... @Blckshdw ... I just realized now after your Post that it WILL work because, The Battery set-up in my Ryobi Electric Riding Lawn Mower is 12 VDC 100-AH Batteries X 4 = 48 Volts DC. So...YAY! Thanks, Man!!!
 
Last edited:

Blckshdw

Moderator
Nov 20, 2011
10,767
Tampa Bay Area, FL
Weather was nice, so tinkered with the mower for a bit. Had forgotten which all nuts/bolts I had to yank to get the battery tray out, but eventually got it slid out and supported on a jack stand so I can slide it back in easily. Disconnected them from each other, and did a little cleanup for the staged pics. It was ridiculously filthy in there, wishing I pulled it out of the shed to use the leaf blower. :pictures:

20230207_173541.jpg


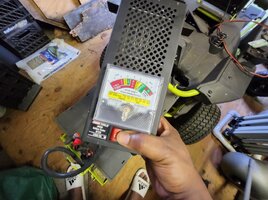
Just like I had read online about the replacement batteries, 3 of them tested fine (11V), and 1 tested weak under load (10V).

20230207_174549.jpg

:undecided: Not sure if it's just a coincidence, but the battery that tested weak, is also the battery I had the toggle switch for the tank sprayer's pump, hooked up to. Would make sense because there would be the extra load on just that one while spraying the yard.

For S&G, I may hook up my float charger on each of them, get them all up to full, then reconnect the series, and see how it behaves after we get some rain and the weeds start growing again.
 

Blckshdw

Moderator
Nov 20, 2011
10,767
Tampa Bay Area, FL
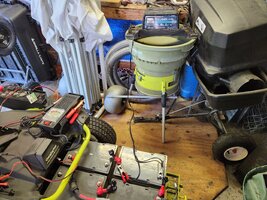
Before heading off to work this morning, slapped the charger on the low battery, figured let that run all day. On initial plug in, it read virtually full from the needle, but not on the indicator light. Got home, and the light was green, needle bouncing in float mode.

20230208_165701.jpg


Hooked up the tester, and it now tests good, so that's encouraging. Probably won't get a good test run until we get some rain, but if this is the solution, periodically boosting whichever battery the tank sprayer pump is connected to is simple enough.

20230208_165759.jpg
 

mrrsm

Lifetime VIP Donor
Supporting Donor
Member
Oct 22, 2015
8,267
Tampa Bay Area
Very Encouraging, Man... Replacing either the 75 Ah OR the 100 Ah AGM Batteries in these Riding Electric Mowers Costs a BUNDLE... so THIS really is Great News. Most of the Trick is keeping my Mower plugged into that Ryobi Pro Power Charging Unit whenever I'm not sitting on it and using it. I'm still "On My Honeymoon" with mine and as far as ever going back to Gas Burning, Oil Gunked Up 2 or 4 Cycle Engine Powered Gear? Fuhhggeddabbouddit!
 
  • Like
Reactions: movietvet

mrrsm

Lifetime VIP Donor
Supporting Donor
Member
Oct 22, 2015
8,267
Tampa Bay Area
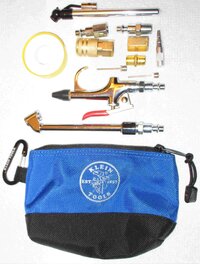
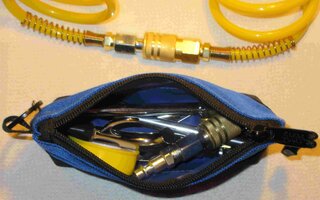
Back in Post #781 ... I made mention of getting Two Small Klein Tool Bags for around $17.00 via Amazon (EDIT: Nope... it was on eBay!!!) and failed to mention what use the Smallest Bag might actually (factually) serve (You Know...? Yeah... The One that looks like a Ladies Opera Purse).

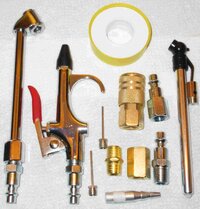
This matter leads to our mutual understanding of what happens after we "UN-Kit" all those myriad Parts & Pieces in any Pneumatic Tools Hardware Kit that are always necessary to prepare Air Tanks, Hoses and Pneumatic Shop Tools or whenever we have to Top Off Tire Pressure under all manner of Un-Godly conditions (Rain Or Shine, Dead Of Night... Poor Garage Lighting Conditions, etc.)

The Central Question remains: "What Do I DO with the Kit Left-Overs that I might need later on?"

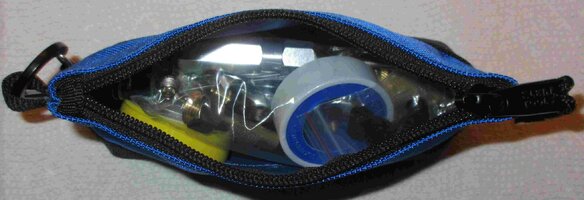
Well... THAT was answered by the appearance of the Deep Blue, Tiny-Shiny Black Klein Zip-Lock Tool Bag that turned out to be "The Goldie-Locks" Sized JUST RIGHT as THE BEST BAG for this particular Job. The Benefits come from having this 'Little Pneumatic Tool Kit" are that it comes with its handy attachment of a Locking Lanyard...So... Keeping IT in direct contact with the Air Tank AND the Yellow Flex-Hose Before and After using all of this "Stuff" ...Becomes E-Z-2-DO:

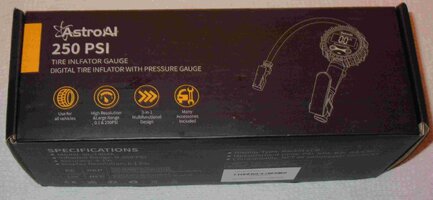
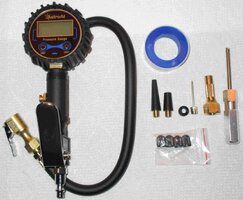
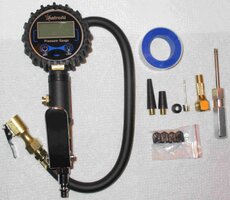
Also... Having the AAA Batteries Powered "ASTRO-AI" Air Pressure Gauge with a Locking Brass Air Fitting Hose and a Bright Neon Blue Back-Lit Gauge Lamp makes Quick Work of Topping Off the Tires and Not having to struggle for a Snug Fit ( Or a CLEAR READING) at each tire position:


AIRHOSEGEAR1.jpgAIRHOSEGEAR2.jpgAIRHOSEGEAR3.jpgAIRHOSEGEAR4.jpgAIRHOSEGEAR5.jpgAIRHOSEGEAR6.jpgAIRHOSEGEAR7.jpgAIRHOSEGEAR8.jpgAIRHOSEGEAR9.jpg

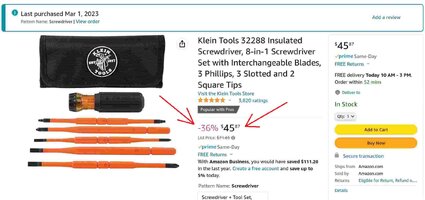
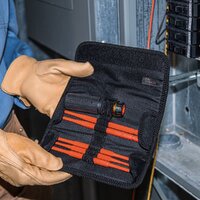
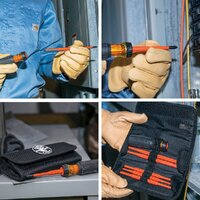
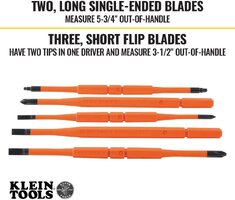
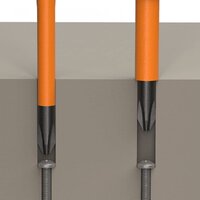
Oh... and the Klein OEM "Orange & Black" Tool Motif prompted getting THIS Combo Insulated Screw Driver Set, too... Check Out That 36% Price Drop!:


KLEINCOMBOSCREWDRIVERSET.jpg


61+siNL-a8L._AC_SL1000_.jpg61KbivuW2lL._AC_SL1000_.jpg


7171Q4c6jLL._AC_SL1000_.jpg71We+AM1sXL._AC_SL1000_.jpg
61Fq1qswgjL._AC_SL1000_.jpg51ncLHYmpUS._AC_SL1000_.jpg
 
Last edited:
mrrsm

Lifetime VIP Donor
Supporting Donor
Member
Oct 22, 2015
8,267
Tampa Bay Area

Blckshdw

Moderator
Nov 20, 2011
10,767
Tampa Bay Area, FL
Speaking of air tools... I finally decided to investigate the intermittent, but more frequent leak in my compressor. Sometimes it would leak down, most of the time it wouldn't, but got to the point that there was a pretty audible hiss coming from the regulator, unless I turned it to max pressure, or no pressure.

Long story short, the pressure plate behind the knob had some gunk in it where the O ring was seated. After disassembling and cleaning both, a little bit of lubricant, and reassembly, no more leaking. Also the sound made when adjusting the pressure knob was considerably less than before.

Problem solved, and no money spent. I had looked for a replacement manifold, just in case but couldn't find any. Was fearing if something was broken in there, that I'd have to cobble together a handful of fittings and components, glad I didn't have to go that far.
 

Blckshdw

Moderator
Nov 20, 2011
10,767
Tampa Bay Area, FL
After adding some lawn clippings (weeds mostly) to the compost pile last week, and running my pitchfork through it to mix things up, I found a lot of good material at the center and bottom, as you'd expect since I didn't touch it all last summer :dunce:

Figured it's probably time to get the good stuff out and put it to use, not to mention shrink the size of the pile cuz my tarp barely covers it as it is. In order to do so, I'd have to sift thoroughly first, as there is bits of trash, stuff that hasn't broken down yet, as well as roots from stuff that tried to sprout.

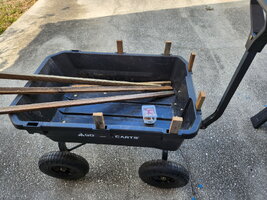
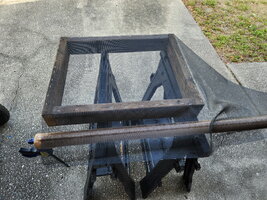
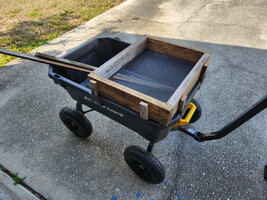
:undecided: Got the idea of building a sifting tray out of scrap wood, and what's left of the patio screen material I had, and making it mount to my dump cart. Took a couple measurements, grabbed some wood, and brought it up to the garage.

Cut up some old 1x2 to make legs to fit into the slots on the cart. Cut down some 2x4 to make a frame, and stapled some screen to it.

20230304_100208_resize.jpg
20230304_100217_resize.jpg
20230304_100702_resize.jpg

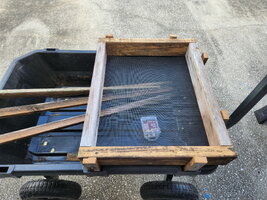
Initially I was gonna use it just like that, had plenty of room at the back of the cart to scoop out any material for immediate use, and I didn't need a giant tray, as I only have 2 hands anyway. But then I realized, even though there shouldn't be much weight or downward pressure on the screen, it would be my luck that I'd do something and rip it, then I'd be pissed off. :mad:

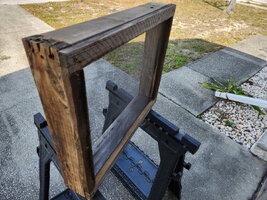
Since I had all that extra 1x2 just sitting there, cut a few pieces down to size, and screwed them into the bottom of the frame, clamping down the edges of the screen for better support/strength/strain relief. Gave it a test fit, and it's nice and snug, which is good for now. I planned to put a single screw at the top of each post, so when I put the tray away for storage, each one will rotate up along the frame. But I ran out of the screws I like, so I'll have to finish that part later. Due to good measurements (for a change) the friction fit is tight, and the cart moves before the tray does, so I'm good with that.

20230304_103049_resize.jpg

20230304_103207_resize.jpg

And most importantly, got it all done before I lost the shade on my driveway, cuz it was already hot out there 😓
 

Beacon

Member
Mar 22, 2019
456
SouthWestern PA
@Blckshdw can you find an electric motor somebody is junking? mount it to the wood frame, then add an off-center piece of metal to the shaft. maybe you could drill and tap the end of the shaft to bolt the metal on, kinda like a washer with an off center hole. hope that makes sense. it will speed up your processing time.
 
  • Like
Reactions: mrrsm and Blckshdw

Blckshdw

Moderator
Nov 20, 2011
10,767
Tampa Bay Area, FL
I briefly thought about trying to fab something up for mechanical sifting, like having something I could attach a drill to, but didn't want to put that much thought into it, since this was starting out as a free project.

Now that I'm looking at some YT videos, and seeing some people use a sawzall as the driving mechanism, that does give me some ideas. :undecided:
 
  • Like
Reactions: mrrsm and Beacon

mrrsm

Lifetime VIP Donor
Supporting Donor
Member
Oct 22, 2015
8,267
Tampa Bay Area
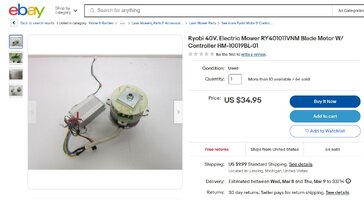
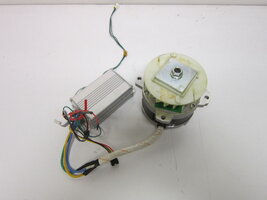
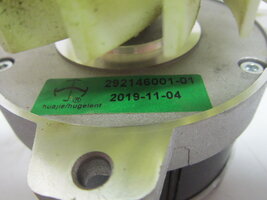
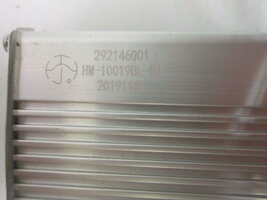
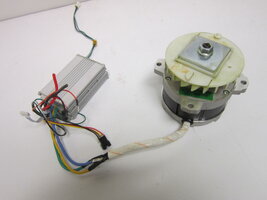
An Octagonal Tumbler made of Two By Fours (Bracketed Together with Screws) and fitted with Small Squares Wire Screen Panels from the INSIDE would work without requiring any complicated Reciprocating Mechanical Hardware.To Power this apparatus, eBay has this inexpensive Ryobi Electric Lawn Mower Motor (WITH the Controller Package) available for $35.00 and these Compost Tumbler Views might give you some other ideas for its design.

Besides that... You could use your Four 75 AH Batteries to Power it Right Off of your Ryobi Riding Lawn Mower and be able to Tow the Whole Rig right behind without needing any External Power Supplies like House Current, Power Cords and thus... it can be moved and used anywhere you like around your Property.


All you would need besides these things are an Old Clothes Drier for the sacrificial parts donations of the Clothes Tumbler Pulleys and Belt(s). Then, just bolt the Large Drier Tumbler Pulley onto the outside of the Octagon Box Frame and place-mount the Ryobi Electric Motor "In-Line" on the Lower Outer Frame with some means of adjustment. String the Drier Belt in between and adjust their positions for any necessary tightness and snug down the Motor Mounts.

THIS would allow for the Smaller Drier Pulley mounted on the Motor Shaft to Reduce the Ryobi Motor High RPM enough to make Slow, Powerful Octagon Tumbler Rotations under an ENORMOUS amount of Torque and easily turn this heavy, filled Eight Sided "Hopper". The Tumbler Rig will need a Length of 5/8" Steel Axle Rod running straight through the center of it and ride upon either Sealed Bearings or some Bronze Bushings, capped over the top and screwed or bolted into the opposing supports.

Then just create a stiffly mounted lower "A" frame to support the whole Rig. As it rolls the stuff around inside, the Clean Dirt just drops right through the Square Wire Mesh Screen Panels (at 9.8 MPS/PS) collecting right below inside of the Trailer and so... Everything would be Nice & Tidy.

et voilà!
COMPOSTUMBLER2.jpgCOMPOSTUMBLER1.jpg

RYOBIMOTORONEBAY.jpg


RYOBIMOTOR1.jpgRYOBIMOTOR2.jpgRYOBIMOTOR3.jpgRYOBIMOTOR4.jpg

Compost Tumbler:

 
Last edited:
Beacon

Member
Mar 22, 2019
456
SouthWestern PA
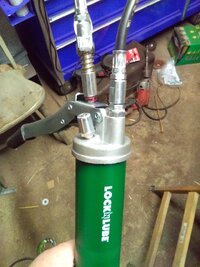
This has always been more of a want, than a need. I've had it in my amazon save for later cart for at least 2 years. Then MRRSM brought in up in another post, and it reminded me that I've wanted one for a long time. I used it today for the first time. I was able to grease the upper ball joints on the saab while only using one hand. I really love the fake zerk they mounted on the top, to store the end of the grease gun.
 

Attachments

  • KIMG0699.JPG
    KIMG0699.JPG
    433.3 KB · Views: 10
mrrsm

Lifetime VIP Donor
Supporting Donor
Member
Oct 22, 2015
8,267
Tampa Bay Area
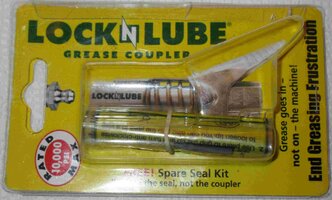
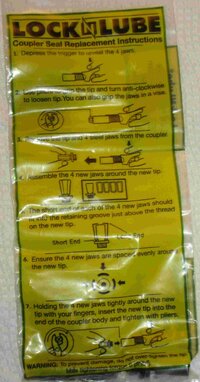
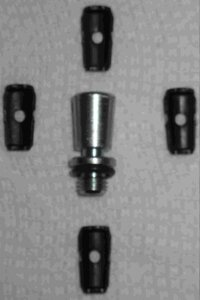
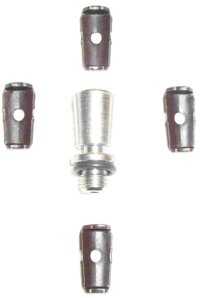
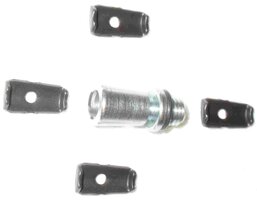
@Beacon ... Glad this idea helped you... and since you mentioned it... I'll "Go Yard" and display some close-up images and an Instructional Video from YouTube that well describe the EXTRA Cool Goodies that comes inside the Lock-N-Lube Kit for replacing the Inner *Fiddly-Bits* Components, should anything go sideways and the durable parts either become Loose, Worn Down or Lost under a Vehicle:

LOCKNLUBEREPAIRKIT1.jpgLOCKNLUBEREPAIRKIT2.jpgLOCKNLUBEREPAIRKIT3.jpgLOCKNLUBEREPAIRKIT4.jpgLOCKNLUBEREPAIRKIT5.jpgLOCKNLUBEREPAIRKIT6.jpg


Forum Statistics

Threads
23,722
Posts
642,618
Members
19,255
Latest member
twkd2

Members Online