I had to make/create room.Edit: Never mind. That's a really nice setup, I have the husky box in my garage now, and it's almost full. Don't have the room for anything larger though
You are using an out of date browser. It may not display this or other websites correctly.
You should upgrade or use an alternative browser.
You should upgrade or use an alternative browser.
Tool Talk
- Thread starter IllogicTC
- Start date
Sometimes???? Calling Mrs @movietvet for a second opinion! LOL!Actually, I just figured that out just as I opened the thread for these two responses. I am a little thick upstairs sometimes.

It is not often that we discuss certain "Specialty Tools" that would only be familiar to Carpenters among their usual fixation clamps for glue jobs, etc. I am speaking of course of the famous "ACME" Threaded Tools that might mistakenly conjure up images of "Wiley Coyote" and "The Road Runner" and the Canine Equivalent of having THE Best "ACME" Machines for the Tasks at Hand in capturing the Speedy, Flightless Bird... But No... Nay-Nay Bouquet.
The "ACME" Threaded Tool Kit that we occasionally encounter is the Kent-Moore Cylinder Extraction and Installation Press necessary for "Pulling and Pushing" New Cylinder Sleeves out of and into the Naked GM Atlas 4,5 & 6 Cylinder "Lost Foam" Cast Aluminum Engine Blocks. Then they require being shaved down afterwards to their correct Deck Heights.
But the interesting and edifying topic for us Tool Aficionados concerns "What IS an ACME Thread... and How Does such a "Thing" ever get Made?" THIS Video covers the Topic to a "T" and will become a nice break from watching endless "Christmas Shows" with too much food, candy and perhaps... libations. So... Why not grab another Fresh Cup of Coffee?... and Sit Back and Enjoy the ASMR involved here as well and obtain a new appreciation for the ways and means of achieving Sublime Screw Precision... the "ACME" Way:
Merry Christmas to ALL of the Tool Lovers among us... Hope Santa was GOOD to Y'all!
To Obtain Grade 1144 "Stress Proof" Steel Rods for Tool Making on your Home Metal Lathes:

 www.mcmaster.com
The "ACME" Threaded Tool Kit that we occasionally encounter is the Kent-Moore Cylinder Extraction and Installation Press necessary for "Pulling and Pushing" New Cylinder Sleeves out of and into the Naked GM Atlas 4,5 & 6 Cylinder "Lost Foam" Cast Aluminum Engine Blocks. Then they require being shaved down afterwards to their correct Deck Heights.
But the interesting and edifying topic for us Tool Aficionados concerns "What IS an ACME Thread... and How Does such a "Thing" ever get Made?" THIS Video covers the Topic to a "T" and will become a nice break from watching endless "Christmas Shows" with too much food, candy and perhaps... libations. So... Why not grab another Fresh Cup of Coffee?... and Sit Back and Enjoy the ASMR involved here as well and obtain a new appreciation for the ways and means of achieving Sublime Screw Precision... the "ACME" Way:
Merry Christmas to ALL of the Tool Lovers among us... Hope Santa was GOOD to Y'all!
To Obtain Grade 1144 "Stress Proof" Steel Rods for Tool Making on your Home Metal Lathes:
McMaster-Carr
McMaster-Carr is the complete source for your plant with over 595,000 products. 98% of products ordered ship from stock and deliver same or next day.
Last edited:
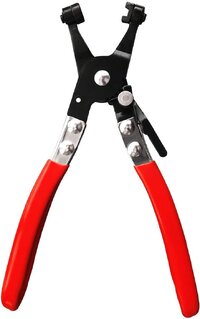
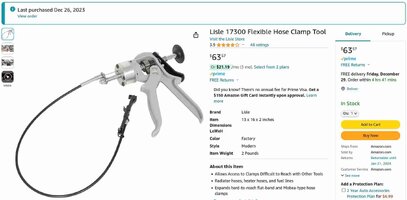
I am so glad I finally bought this tool. I used to fight the spring clamps on hoses and have to try and figure out what configuration of needle nose or adjustable pliers to use to release tension on the spring clamps. This tool fixes that decision. I no longer sweat the spring clamp.
Amen... Good Decision. And a great suggestion for anyone suffering with hand & finger tendon issues. Another reason for making this investment is that once you switch from the OEM Spring Steel Clamps (Which will NEVER Fail) over to the S/S "Rack & Pinion" Slotted Band Style Hose Clamps ... You'll never know whether or not they'll either "Hold Forever"... or eventually wind up Breaking and Failing from being over-tightened in ways that may NOT always be that obvious or occur in "Plain View" when convenient enough to make immediate repairs:

Last edited:
northcreek
Member
Yes!... and great for those lower rad. hose clamps that like to eat knuckles...And a great suggestion for anyone suffering with hand & finger tendon issues.

JayArr
Member
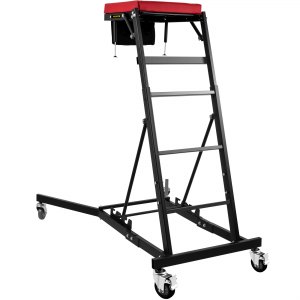
My wife bought me this for my birthday.
 www.vevor.ca
Now that we've got the Escalade there is very little I can do standing on the ground in front of it so this should be a big help.
I caught a further break and we got it for free. Fedex dropped it and the box was quite damaged and one of the feet was sticking out. We took pictures and did not unpack the box. This is incredibly important - that you NOT unpack a damaged box!
We emailed Vevor to get a replacement and they ghosted us. (they have a terrible reputation for returns or customer service) We contacted them a second time three days later and told them we wanted a replacement sent and they could have Fedex pick this damaged one back up. (still not opened). No response.
After 48 hours I called American Express. I had fulfilled my responsibility of attempting to get a settlement with the vendor. I sent Amex copies of the emails. I also sent copies of the pictures of the damage and that the box had not yet been opened.
Amex refunded the full amount of our purchase while I was still on the phone! They told me to not worry about it and they would deal with Vevor but that I should hold onto the item in case Vevor wanted to have it picked up.
We got a response from Vevor about two hours later. They offered us $20 off if we would keep the damaged item. We declined, informed them that we had made a claim with Amex and had already received a refund. (I suspect they already knew this)
The next day we received an email from Vevor telling us they did not want to have the item picked up and that we could keep it. This makes sense, why would they spend $$ to have Fedex bring back a damaged item that they can't sell.
I don't know if Vevor made a claim to Fedex or if they just ate the cost of the damage but I ended up with a free - although damaged - step creeper. I'll finally open the box and assemble it today!
JayArr

VEVOR Automotive Engine Creeper, Adjustable Height Foldable Creeper, 400 LBS Capacity High Top Engine Creeper, with Four 4 inches Casters, Padded Deck, for Home, Garage, Workshop Repair Maintenance | VEVOR CA
Buy VEVOR Automotive Engine Creeper, Adjustable Height Foldable Creeper, 400 LBS Capacity High Top Engine Creeper, with Four 4 inches Casters, Padded Deck, for Home, Garage, Workshop Repair Maintenance at cheap price online, with Youtube reviews and FAQs, we generally offer free shipping to...
Now that we've got the Escalade there is very little I can do standing on the ground in front of it so this should be a big help.
I caught a further break and we got it for free. Fedex dropped it and the box was quite damaged and one of the feet was sticking out. We took pictures and did not unpack the box. This is incredibly important - that you NOT unpack a damaged box!
We emailed Vevor to get a replacement and they ghosted us. (they have a terrible reputation for returns or customer service) We contacted them a second time three days later and told them we wanted a replacement sent and they could have Fedex pick this damaged one back up. (still not opened). No response.
After 48 hours I called American Express. I had fulfilled my responsibility of attempting to get a settlement with the vendor. I sent Amex copies of the emails. I also sent copies of the pictures of the damage and that the box had not yet been opened.
Amex refunded the full amount of our purchase while I was still on the phone! They told me to not worry about it and they would deal with Vevor but that I should hold onto the item in case Vevor wanted to have it picked up.
We got a response from Vevor about two hours later. They offered us $20 off if we would keep the damaged item. We declined, informed them that we had made a claim with Amex and had already received a refund. (I suspect they already knew this)
The next day we received an email from Vevor telling us they did not want to have the item picked up and that we could keep it. This makes sense, why would they spend $$ to have Fedex bring back a damaged item that they can't sell.
I don't know if Vevor made a claim to Fedex or if they just ate the cost of the damage but I ended up with a free - although damaged - step creeper. I'll finally open the box and assemble it today!
JayArr
Dunno how many others get the HF new product emails, usually I delete them but was bored this morning so opened this one. They've got some new nitrile gloves that have touchscreen compatible finger tips on them 
On plenty of occasions I've had mine on to keep my hands from getting dusty or grimey, and then needed to use my phone, but didn't want to yank the glove off and put it back on. These would really come in handy when not working with fluids or chemicals.


On plenty of occasions I've had mine on to keep my hands from getting dusty or grimey, and then needed to use my phone, but didn't want to yank the glove off and put it back on. These would really come in handy when not working with fluids or chemicals.

this coupon good until 2/4/2024

 go.harborfreight.com
For me I really like using these for oil changes and when cleaning dirty things (think bathroom) with caustic chemicals. At this price of twelve cents for both hands to stay clean I think is a bargain.
HARDY 5 Mil Nitrile Powder-Free Gloves, 100-Pack for $5.99

HARDY 5 Mil Nitrile Powder-Free Gloves, 100-Pack for $5.99
Buy the HARDY 5 mil Nitrile Powder-Free Gloves, 100 Pack (Item 64417) for $5.99 with coupon code 68457191, valid through February 4, 2024. See the coupon for details.Compare our price of $5.99 to H…
For me I really like using these for oil changes and when cleaning dirty things (think bathroom) with caustic chemicals. At this price of twelve cents for both hands to stay clean I think is a bargain.
No HF here. I use these but get them when on sale. The toughest and biggest ones I could find. Use them for car work and on the RV with the stinky slinky. They are expensive but worth it.
I know they're latex but I have no problem with that.
I know they're latex but I have no problem with that.
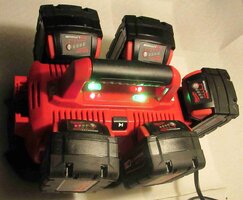
Once you’ve taken the “Milwaukee M18 - M12 Fuel Power Tools” Plunge… there is never any going back. But the problem with having a whole raft of these expensive tool sets though has emerged as one of Never Having Enough Battery Power to last long enough to get to the ends of any projects.
Consider every tool in the Milwaukee Arsenal as being VERY Power Hungry and even with durable and long lasting M18 and M12 Batteries in Ones and Twos, imagining they will take you from Start to Finish will become disappointing with only having either one or two of these Batteries in both versions.
Even with having Two Dual (M-18 & M12) Milwaukee Power Wall Chargers… they will still fall short of getting you there without any worries towards the end. Over time, the solution seemed to be to get more of these Expensive Batteries and after accumulating however many seemed to work, the problem morphs into dragging out the Two A/C Wall Chargers and juggling 3-6 Batteries over several hours and doing “Battery Charging Math” in your head. What a PITA!
Then… My Wife spied THIS RIG on Amazon and said… “I’m tired of having you plugging in those Little Red Chargers all over the place and cluttering up my counter tops with your Gear… Why not get one of THESE, instead?” I smiled broadly and told her… “Baby Sweet… You had me at “Why Don’t You GET…” .
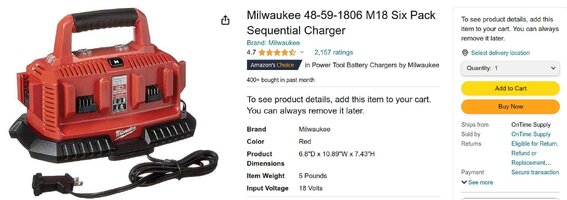
It followed on that while this item might SEEM a bit Pricey… when compared with the cost vs. benefits of the 6 to 1 Charging Ratio, plus the Sturdy, Portable Caddy it instantly becomes for moving ALL of them right to the work site, it just made great sense to get one that lets you know immediately by their Charging Status Lights...which ones to GRAB and which ones to Leave Alone:
https://www.amazon.com/dp/B00BYGHV0Q/?tag=gmtnation-20
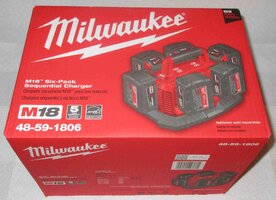
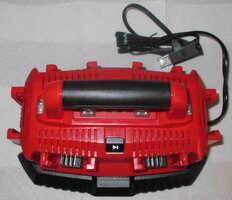
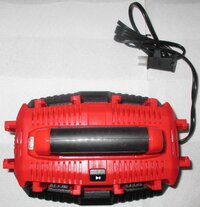
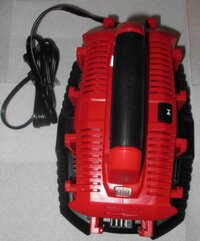
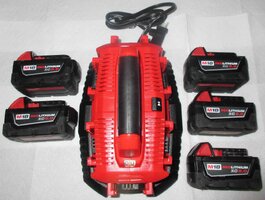
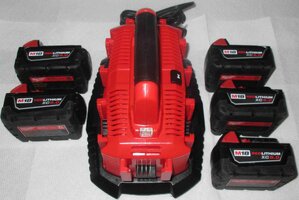
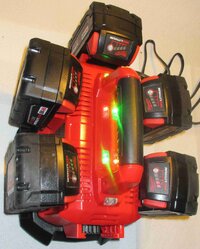


Consider every tool in the Milwaukee Arsenal as being VERY Power Hungry and even with durable and long lasting M18 and M12 Batteries in Ones and Twos, imagining they will take you from Start to Finish will become disappointing with only having either one or two of these Batteries in both versions.
Even with having Two Dual (M-18 & M12) Milwaukee Power Wall Chargers… they will still fall short of getting you there without any worries towards the end. Over time, the solution seemed to be to get more of these Expensive Batteries and after accumulating however many seemed to work, the problem morphs into dragging out the Two A/C Wall Chargers and juggling 3-6 Batteries over several hours and doing “Battery Charging Math” in your head. What a PITA!
Then… My Wife spied THIS RIG on Amazon and said… “I’m tired of having you plugging in those Little Red Chargers all over the place and cluttering up my counter tops with your Gear… Why not get one of THESE, instead?” I smiled broadly and told her… “Baby Sweet… You had me at “Why Don’t You GET…” .

It followed on that while this item might SEEM a bit Pricey… when compared with the cost vs. benefits of the 6 to 1 Charging Ratio, plus the Sturdy, Portable Caddy it instantly becomes for moving ALL of them right to the work site, it just made great sense to get one that lets you know immediately by their Charging Status Lights...which ones to GRAB and which ones to Leave Alone:
https://www.amazon.com/dp/B00BYGHV0Q/?tag=gmtnation-20


Last edited:
Luckily, because I only work on one vehicle at a time at home, I have 2 wall chargers at my home shop and they keep up fine. I also have two chargers for my EGO system for my mower and blower and trimmer. They all use the same batteries.
I am small potatoes compared to a full fledged shop and I am not a home repair kind of guy. I have no need for saws and other power tools like that. I have a plug in drill if needed.
I am small potatoes compared to a full fledged shop and I am not a home repair kind of guy. I have no need for saws and other power tools like that. I have a plug in drill if needed.
I think my biggest Ryobi battery has kicked the bucket on me. Had an overheating issue last summer that melted some of the casing plastic around one of the pins, causing the battery to get stuck coming off my string trimmer, and having some issues charging. Had cracked open the case and cleaned up the melted plastic, which gave it another season of reliable yard work, until this past weekend.
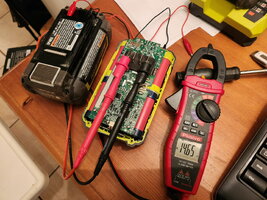
Went through the usual paces, and put it on the charger but it wouldn't charge. The way the lights on the battery was blinking, I knew it was an error code, but for the life of me couldn't find a definitive answer online what it meant. Opened the case again, and checked the voltage, it was down to 9V from 40V. On the hunch that the voltage was too low for the charger to accept it, I tried to boost it with a fully charged battery for a few hours....
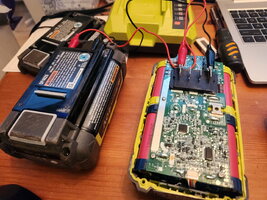
No real luck there, when disconnecting them and throwing the meter on it, it would read 12V and slowly move up over about a 10 minute period, stopping in the 14V range. Think I've had this one for almost 5 years, so it's had a good run. I had done research years ago on lipo battery packs, and if I had a spot welder, I might try to take it apart to identify which cells had gone bad so I could replace them. But since I don't... I won't be going down that road. I'm down to 2 batteries now, which will be fine for string trimming, hedge trimming, and blowing off the walkways, until another one bites the dust.
Went through the usual paces, and put it on the charger but it wouldn't charge. The way the lights on the battery was blinking, I knew it was an error code, but for the life of me couldn't find a definitive answer online what it meant. Opened the case again, and checked the voltage, it was down to 9V from 40V. On the hunch that the voltage was too low for the charger to accept it, I tried to boost it with a fully charged battery for a few hours....

No real luck there, when disconnecting them and throwing the meter on it, it would read 12V and slowly move up over about a 10 minute period, stopping in the 14V range. Think I've had this one for almost 5 years, so it's had a good run. I had done research years ago on lipo battery packs, and if I had a spot welder, I might try to take it apart to identify which cells had gone bad so I could replace them. But since I don't... I won't be going down that road. I'm down to 2 batteries now, which will be fine for string trimming, hedge trimming, and blowing off the walkways, until another one bites the dust.

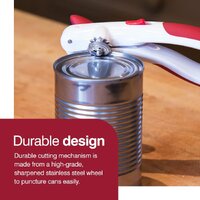
Back in Post #552... @Redbeard and I were discussing the Zyliss Manual Can Opener as being THE Best Hand Tool for getting into Canned Goods during the Covid-19 Crisis...and by extension... I have yet another more contemporary reason to tout its excellence. Since that time as I got closer to being here for 3/4's of a Century, "The Norwegian's Disease" called Dupuytren Contracture has finally all but crippled my left hand and has served to make playing chords on my guitars and using hand tools that require dual manual dexterity all but impossible now.
I'm not complaining mind you ...because I have been able to do a LOT of that stuff over so many decades and I have no kick coming now. However, besides our own needs for opening all manner of cans... with one Indoor Cat (Baby Bird) and four Outside Feral Cats that I try to help with food and milk each day... I STILL need to be able to open cans of food for them and as I said, for me and the "Lil Woman" as well.
Well... to my very great surprise and delight...I figured out that once the Zyliss Handles are squeezed down at the rim edges of the Food Cans and the metal lid gets pierced...instead of rolling the Hand Crank in the typical natural Right Hand turning in a Clockwise direction and then have it pop right off due to my issues with gripping the tool with enough force in my Left Hand... I tried rotating the unit BACKWARDS or Counter-Clockwise and By God.... it actually works BETTER and Cuts Like BUTTER!
So if you find yourself in a similar survival situation and possess this Zyliss Can opener... give this technique a try and you WILL be able to get inside the Cans that will feed you, your animals and of course, your family in any such "manual" crisis! :>)





Last edited:
Last edited:
vansmack2
Member
We normally rely upon local purchasing of tools for Automotive Repair via AutoZone and Home Depot as well as Harbor Freight and of course... Amazon and eBay for Buying in the Former and Selling in the Latter, etc, But drop in on THIS site if you are Buying...or Selling such things and-or just want to browse through whatever might still be available out and about.
I have neither made any such purchases nor sold anything through 2040-parts yet because even at this late time of life... I am STILL in my *Tool Acquisition Mode...* which translates to meaning: I NEVER Sell my Tools! :>) This particular category of Diagnostic Tools offered at this Link always holds my fascination and since many others might also want to "Look Around" in this Place... Drop In...And Check Out ALL of their other Categories, Too.
So Here Goes Nothing:
 www.2040-parts.com
 www.2040-parts.com
I have neither made any such purchases nor sold anything through 2040-parts yet because even at this late time of life... I am STILL in my *Tool Acquisition Mode...* which translates to meaning: I NEVER Sell my Tools! :>) This particular category of Diagnostic Tools offered at this Link always holds my fascination and since many others might also want to "Look Around" in this Place... Drop In...And Check Out ALL of their other Categories, Too.
So Here Goes Nothing:
Find or Sell Auto parts
Diagnostic Tools / Equipment for Sale / Find or Sell Auto parts
Last edited:
I live in Eugene, Oregon and know where this store is. I also know a guy in my American Legion that works as a concrete cutter. Just like @mrrsm said, my friend says the norm at his work is to have at least 2 people check various forms of equipment before using. He said that blade is not light and moving at that speed, would have went right thru a human being unless hitting a large leg bone. Even then, the damage would have been catastrophic.THIS is why We NEVER run a High Speed Chop Saw after a "co-worker" aka "Friend" aka "Helper" changes that Blade...without Double Checking the "Jesus Nut" for TIGHTNESS AND the Blade Shield for its proper position FIRST ...by ourselves:
"TRUST... But... VERIFY..."
View attachment 111859View attachment 111860
 Didn't someone just repair their liftgate trim/molding with something like that pretty recently?
You Two Guys... Are Freaking Me OUT!
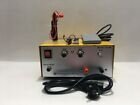
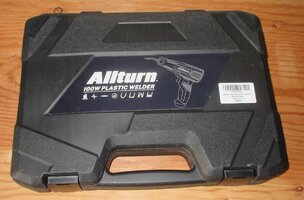
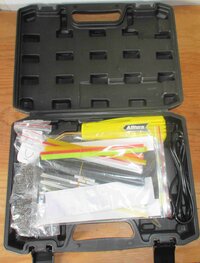
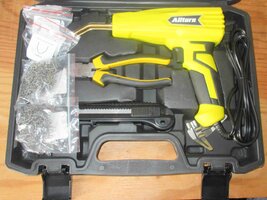
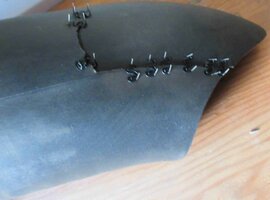
I JUST came in from the Garage after using THIS Gear on my Ryobi Grass Pick Up Dis-Charge Tube (Chute Segment) after finding a HUGE "L" Shaped Crack in it!. THIS version is only working at 100 Watts... BUT it gets hot enough to Melt Into Blow Molded Durable Plastic...and THIS is how things look up until it can Cool Down enough to use the Side Cutters.. I need to do more work on it to complete this Repair ...But at least you can see how it all behaves. Oh....and I guess I went a "Lil' Ova-board" on getting EXTRA S/S Wavy Thingeez... Hmmm... Stainless Steel Frankenstein Stitches!
PS... The Four New LI-FE-PO Batteries and LI Charger arrived Five Days Early via FEDEX S&H. :>)
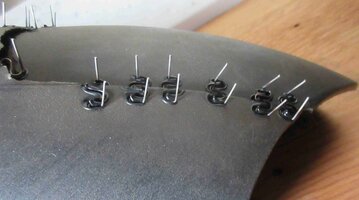
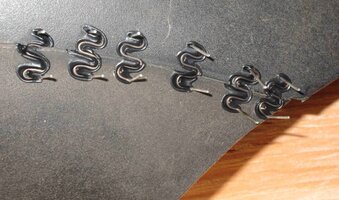
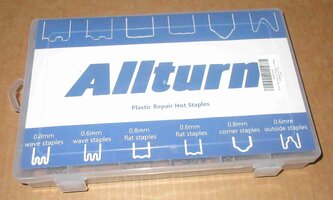
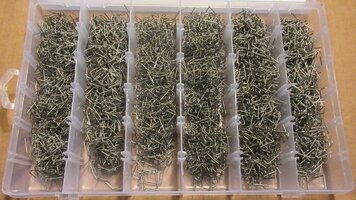
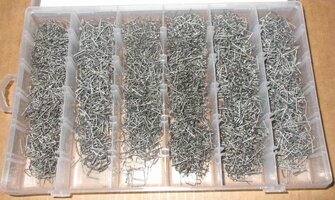


Last edited:
I feel a great responsibility to pass along The BEST and MOST Accurate information regarding making this transition from Lead Acid Batteries over to Lithium-Iron-Phosphate Batteries regarding THE USE OF EXISTING Typical, Standard 12 Volt DC Chargers. In the Fewest Words:
DO NOT DO THIS!
Here are the Reasons WHY you NEED to use a Dedicated LiFePO4 Charger:
One Other Safety Concern...
This transition from very heavy Lead Acid Batteries to LiFePO4 Batteries means a REDUCTION IN WEIGHT (APPROX 180 LBS LIGHTER) AND A RAISED CENTER OF GRAVITY. This means that if you were taking ANY Risks of Tipping Over on ANY Sloped Landscape...You must NOT Drive the Ryobi Riding Lawn Mower PARALLEL along the Slope. Instead ...you must drive the E-Mower at a Right Angle versus ANY Sloped Landscape (Uphill and Downhill) in order to Avoid Tipping or Toppling the Machine over on top of you!
Last edited:
The issue with not using Li-Fe-PO4 Batteries in Motor Vehicles has to do with the Length of Time it takes to move the Discharged Lithium Ions from one side of the Battery Plates back over to the Microscopic Carbon Lattices on the Opposite Sides of their Innards. Using them in an RV as Power Banks re-charged using Solar Panels has a MUCH Better result.
Depending upon the Amperage Charging Rate... it can vary from as little as Five Hours for a LiFePO4 @ 40 Amps ...up to DAYS at a time when set at a mere 5 Amps Rate of Charge. This Dude performed the various Tests at these varied rates and it took him Five Days to Charge and Discharge the Test Battery. What is also an astonishing discovery is just how supremely EFFICIENT these Batteries can be due to their ability to Charge and Discharge almost to 100%:
Depending upon the Amperage Charging Rate... it can vary from as little as Five Hours for a LiFePO4 @ 40 Amps ...up to DAYS at a time when set at a mere 5 Amps Rate of Charge. This Dude performed the various Tests at these varied rates and it took him Five Days to Charge and Discharge the Test Battery. What is also an astonishing discovery is just how supremely EFFICIENT these Batteries can be due to their ability to Charge and Discharge almost to 100%:
I promise to "Get Off The Electric Lawn Mower Carousel" ASAP...I just thought to add in THIS necessary Bit Of Kit if you Pull The Trigger on the Set of Four LiFePO4 Batteries ...and are clever enough to RTFM before trying to use the Dedicated 36Volt-48Volt version of the LiFePO4 Battery Charger on them as INDIVIDUAL Units:
Do NOT Do THAT!
It is recommended to Charge these Batteries INDIVIDUALLY ...FIRST and Check their Performance and Voltages BEFORE installing them onto the Ryobi RM480E Battery Cart. In order to do this RIGHT...invest in THIS 12 Volt 20 Amp Version of that LiFePO4 Battery Charger!
HTRC 12 Volt 20 Amp LiFePO4 Charger
https://www.amazon.com/dp/B0B3CV4S2Y/?tag=gmtnation-20
Last edited:
Of ALL the Tools we need and use from time to time... Arc Welders and Plasma Cutters can cause us to WORRY the most. The hardware (and ALL the Sub-Gear entailed) is often so prohibitively EXPENSIVE and the Results of using Unfamiliar and Technical Tools like these can often produce DISMAL RESULTS that may be destined to FAILURE. It can seem overwhelming.
In most cases... the Welder SETTINGS have to Be Just Right... and a certain amount of PRACTICE is prerequisite before actually doing REAL WORK. And the outcome of these expensive exercises in Products and Talent are often uncertain enough to frighten most of us away. The WORST aspect of these situations is that the work that we want to accomplish... may all be One Off Tasks.
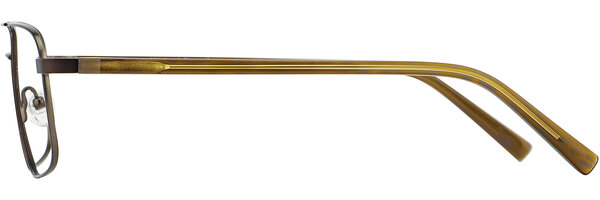
Such is the case this evening where I accidentally SNAPPED the Bridge Piece off of my Michael Ryen Stainless Steel Prescription Reading-Computer Glasses last week and I was in a PANIC thinking... "DAMMITT! I LOVE These Glasses... WTF am I gonna do NOW?".
So I ran headlong to "The Internets" and lucked out in finding an On-Line Prescription Outlet that just happened to have One Pair of THESE that match my existing Custom Lens Make Model, Lens Dimensions and were actually a Bargain at around $250.00...(No Lenses). So I Banged That Damned BUY Button HARD and I've been waiting with Bated Breath ever since for it to arrive:
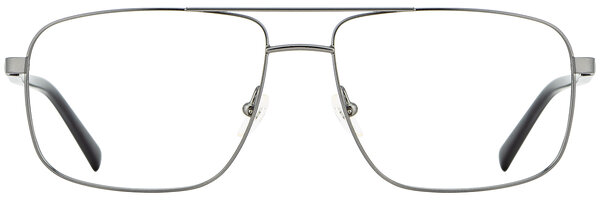
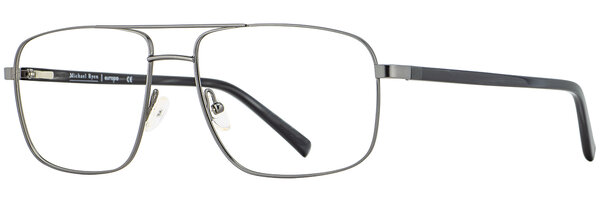
Of course it NEVER would occur to me to even TRY to perform a Repair on these expensive exotic things...that is...Until I started researching the possible means and ways of Welding the Broken Pieces back together.
At first, even with knowing this was futile, I wandered around in my Garage long enough to look at my Oxy-Acetelyene Torch Rig and my Mixed Gas Brazing Gear. Hell... I even looked over my Burn-Zo-Matic MAPP Gas Torch Kit and thought... "Naw... Too Brutal...and I might make matters worse just for trying out that Gear on Thin S/S Wire Frames."
Then YouTube came to my rescue by showing me that there IS a Jewelers' Spot Arc Welder Kit with matching easy to follow techniques that will almost guarantee a successful application and outcome. Oddly enough, for all intents and purposes it looks very much like TIG Welding, but it can be done WITHOUT any Argon & CO2 Gases.

So... I have made the Vendor-Sellor an OFFER on this item and await his response. There are MANY other eBay Sellers offering this equipment for around $140.00:

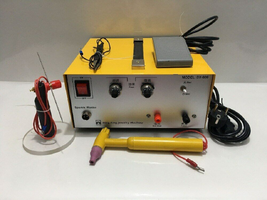
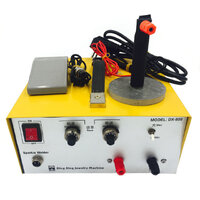
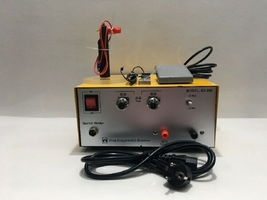
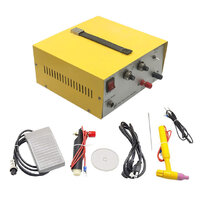
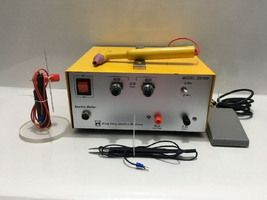
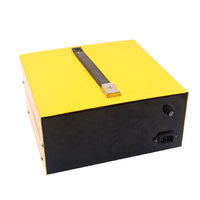
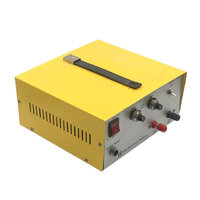
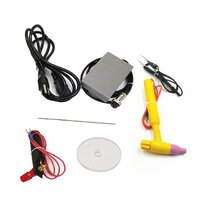
Not only that... practically ANYBODY watching THESE Folks can learn How to DO What They DO... in a very simple manner. The Gear as shown in the eBay link below is precisely what I require to get my OEM S/S Glasses Frames Welded back together ...and if you need to ...say... Weld up a Custom S/S Fuel Tank or Weld in an O2 Sensor Bung in that set of THIN WALLED S/S Exhaust Headers for your HP-Tuners Bosch Wide Band O2 Sensor. Well, Brothers... Think I'm KIDDING? OH HELL NO!... Just Watch What This Device CAN DO!
600W Jewelry Spot Welder Laser Welding Machine for Gold Silver Metal 1-80A
Some of the Machines shown below have a More Expensive Automatic Tugnsten Tip Action ...but for MY purposes...Paying $360.00 just to repair my Glasses Frame is just A BIT TOO RICH:
In most cases... the Welder SETTINGS have to Be Just Right... and a certain amount of PRACTICE is prerequisite before actually doing REAL WORK. And the outcome of these expensive exercises in Products and Talent are often uncertain enough to frighten most of us away. The WORST aspect of these situations is that the work that we want to accomplish... may all be One Off Tasks.
Such is the case this evening where I accidentally SNAPPED the Bridge Piece off of my Michael Ryen Stainless Steel Prescription Reading-Computer Glasses last week and I was in a PANIC thinking... "DAMMITT! I LOVE These Glasses... WTF am I gonna do NOW?".
So I ran headlong to "The Internets" and lucked out in finding an On-Line Prescription Outlet that just happened to have One Pair of THESE that match my existing Custom Lens Make Model, Lens Dimensions and were actually a Bargain at around $250.00...(No Lenses). So I Banged That Damned BUY Button HARD and I've been waiting with Bated Breath ever since for it to arrive:


Of course it NEVER would occur to me to even TRY to perform a Repair on these expensive exotic things...that is...Until I started researching the possible means and ways of Welding the Broken Pieces back together.
At first, even with knowing this was futile, I wandered around in my Garage long enough to look at my Oxy-Acetelyene Torch Rig and my Mixed Gas Brazing Gear. Hell... I even looked over my Burn-Zo-Matic MAPP Gas Torch Kit and thought... "Naw... Too Brutal...and I might make matters worse just for trying out that Gear on Thin S/S Wire Frames."
Then YouTube came to my rescue by showing me that there IS a Jewelers' Spot Arc Welder Kit with matching easy to follow techniques that will almost guarantee a successful application and outcome. Oddly enough, for all intents and purposes it looks very much like TIG Welding, but it can be done WITHOUT any Argon & CO2 Gases.

600W Jewelry Spot Welder Tengchong Welding Machine for Gold Silver Metal 1-80A | eBay
Specifications Material: Acrylic, Plastic, Sheet Metal, Iron, Tungsten Alloy Color: Yellow Surface Treatment: Baking Paint Power: 600W Voltage: 110V No-load Voltage: 4-5A Current: 1-80A Plug: US Standard Power Source: Corded Electric Welding Material Thickness: 0.5-1mm/0.01-0.03in Rough Output...
www.ebay.com
So... I have made the Vendor-Sellor an OFFER on this item and await his response. There are MANY other eBay Sellers offering this equipment for around $140.00:


Not only that... practically ANYBODY watching THESE Folks can learn How to DO What They DO... in a very simple manner. The Gear as shown in the eBay link below is precisely what I require to get my OEM S/S Glasses Frames Welded back together ...and if you need to ...say... Weld up a Custom S/S Fuel Tank or Weld in an O2 Sensor Bung in that set of THIN WALLED S/S Exhaust Headers for your HP-Tuners Bosch Wide Band O2 Sensor. Well, Brothers... Think I'm KIDDING? OH HELL NO!... Just Watch What This Device CAN DO!
600W Jewelry Spot Welder Laser Welding Machine for Gold Silver Metal 1-80A
Some of the Machines shown below have a More Expensive Automatic Tugnsten Tip Action ...but for MY purposes...Paying $360.00 just to repair my Glasses Frame is just A BIT TOO RICH:
Attachments
Last edited:
When you are "Down To One Good Hand..." for working with so many Tools... and after spending an Hour in my Doctor's Operating Theater today... being Poked into like a Pin Cushion during a drawn out local anesthesia session via Ultra-Sound for *Accuracy of Placement* while the Soft Tissue of my Left Hand was being plundered with multiple needles filled with *Speed Balls* of Novocaine and Cortical-Steroids... A Man come to REALLY appreciate what it means to be able to *Get Stuff Done* ... using Tools that Only Require One, Good Right Hand.
So when I got back this afternoon and... after hours of waiting for the numbness to wear off... I finally got to "Un-Wrap" all of THESE Goodies that arrived at my Door Step and which have all been acquired in pursuit of making it E-Z-R for me to get my Ryobe Model# RM480E Riding Electric Lawn Mower up and running again and working in such GOOD ORDER ... that I NEVER want to have to do any more Service or Re-Builds on any parts on it... for a VERY LONG TIME TO COME:
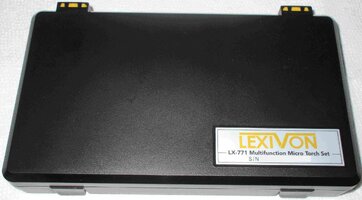

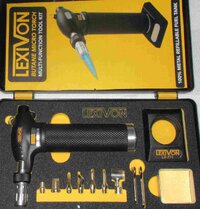
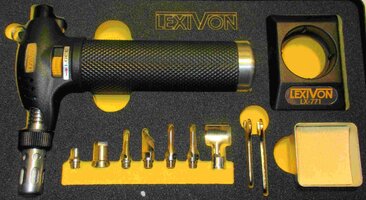
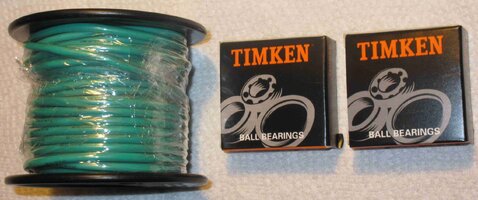
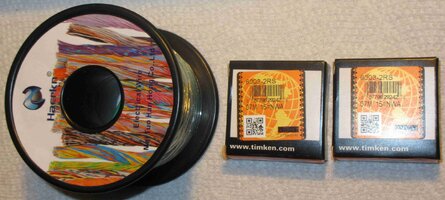
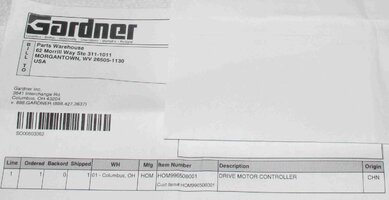
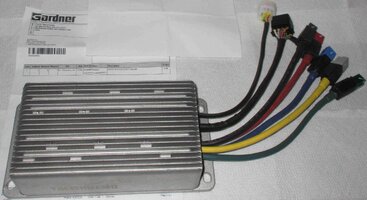
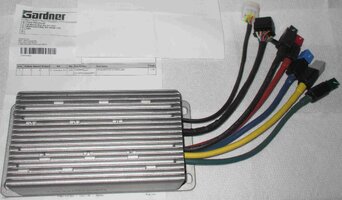
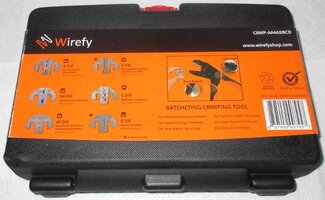
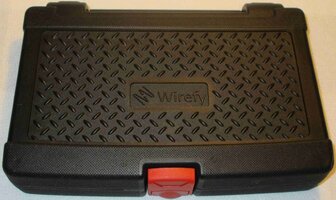
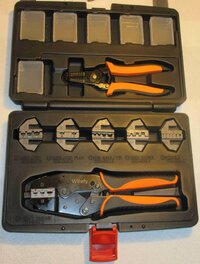
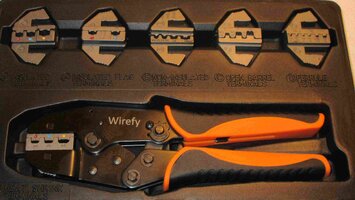
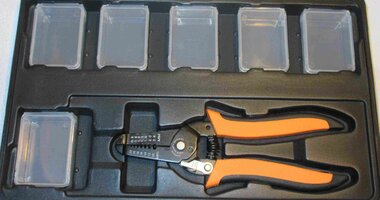
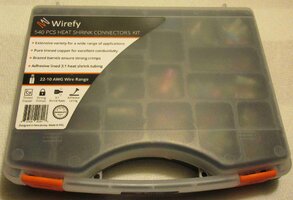
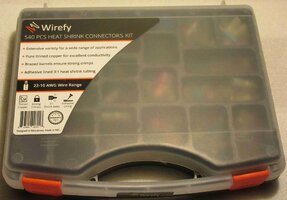
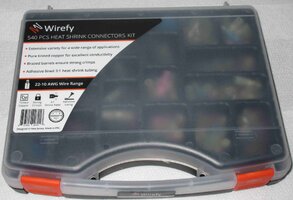
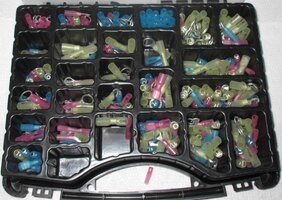
More "Goodies" To Follow for anyone who needs to get that Special LiFePO4 Power Pack AC-DC Charger necessary for any *SINGLE* 12 Volt DC LiFePO4 Battery as I described in the Prior Battery Prep Posts above ...and wants to Keep Track of IT & Protect all that Important Gear in Good Working Order...
So when I got back this afternoon and... after hours of waiting for the numbness to wear off... I finally got to "Un-Wrap" all of THESE Goodies that arrived at my Door Step and which have all been acquired in pursuit of making it E-Z-R for me to get my Ryobe Model# RM480E Riding Electric Lawn Mower up and running again and working in such GOOD ORDER ... that I NEVER want to have to do any more Service or Re-Builds on any parts on it... for a VERY LONG TIME TO COME:


More "Goodies" To Follow for anyone who needs to get that Special LiFePO4 Power Pack AC-DC Charger necessary for any *SINGLE* 12 Volt DC LiFePO4 Battery as I described in the Prior Battery Prep Posts above ...and wants to Keep Track of IT & Protect all that Important Gear in Good Working Order...
Last edited:
It is absolutely amazing how A Piece Of Gear meant to be used in a COMPLETELY Original Application...will often serve to fill an unintended need with other Hardware... and wind up being PERFECT for that Second Job. Such is the case with the need to ONLY USE AC to 12 Volt DC 20AH Designated LiFePO4 Chargers to Charge INDIVIDUAL LiFePO4 Batteries.
Of course, repacking all that stuff as it arrived in the OEM Box...Could Suffice to Keep It All Together in between times of need, I suppose. But if You can get your hands on a "Lil' DJI Mavic" Pro Drone Carry Bag instead... Well...take a look at just How Sweet THIS arrangement turned out to be (via eBay):
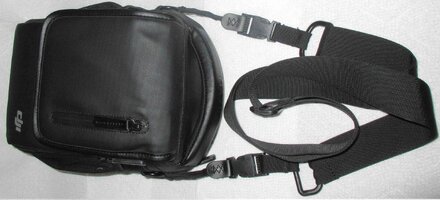
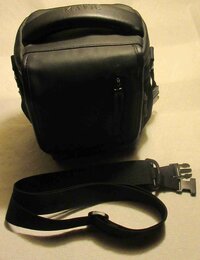
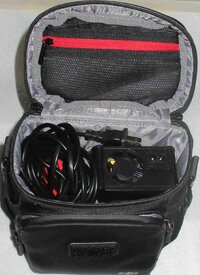
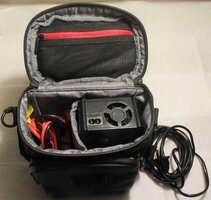
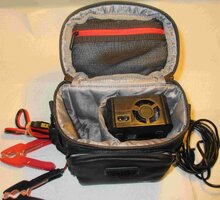
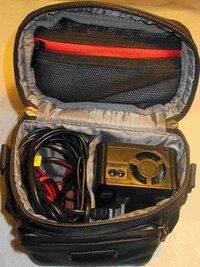
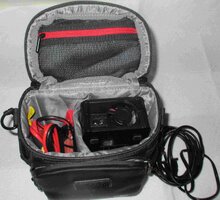
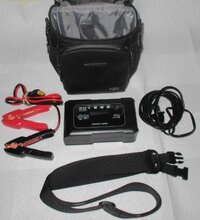
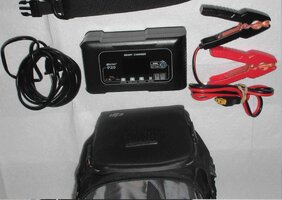
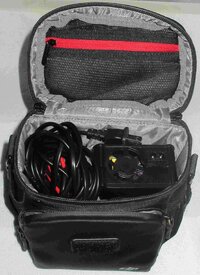
Of course, repacking all that stuff as it arrived in the OEM Box...Could Suffice to Keep It All Together in between times of need, I suppose. But if You can get your hands on a "Lil' DJI Mavic" Pro Drone Carry Bag instead... Well...take a look at just How Sweet THIS arrangement turned out to be (via eBay):


Last edited:
As a VERY Important Safety Issue Follow Up to Post #867...
That High Energy Micro-Pulse Arc Spot Welder may be working at what seems to be an EXTREMELY Small Time Scale when compared with a Typical MIG or Stick ARC Welder... so it might seem like one would not necessarily have to be very concerned with the impact upon their Vision and Eye Retinas from observing Ultra Bright Welding Arc-Light in VERY CLOSE PROXIMITY and when using A MAGNIFIED LENS surrounded by a Bright Circumferential Lighted Work Field.
BUT NOTHING COULD BE FURTHER FROM THE TRUTH.
As a fairly Elderly Man, I have endured multiple operations upon my eyes that included the full replacement of my Organic Eye Lenses due to having Blinding Cataracts... which resulted in my receiving some pretty sophisticated installments of UV Resistant Acrylic Lenses that will always need to be respected when it comes to any exposure to Ambient High Intensity Ultra-Violet (UV) Radiation.
Think of it THIS way... In the same way that Normal Headlights made of Acrylic Plastic can degrade into a Yellow Morass in the presence of Direct Sunlight...so too can the lenses inside of my own Eye Balls. And Not to belabor this much longer, but I should stress that I have also had additional Ophthalmic Surgeries to correct bi-lateral Astigmatism where the unfortunate "Egg Shape" at the front of my eyes and corneas required them being sliced into very fine concentric rings that once healed completely, allowed the clear front surfaces to become quite round and ...normal....and Crystal CLEAR.
What this meant to me was that I would never need to wear Corrective Lens Glasses for Distance Vision EVER again. This almost Super-Human Vision Transformation so much surprised my In-Laws up in North Florida a few years back while at their Home Grown Shooting Range, when I suddenly borrowed back a S&W Model 64 Revolver I used to carry when on Patrol back in the early 1970s just to prove a point during their Target Shooting meant to impress me.
Years earlier, I had passed that Weapon along to my Son... So when I asked to borrow it for a moment, he smiled wryly when he handed it over to his Old Dad. And in short order, from a distance of around 75 Yards... I rapid-fired all six rounds into a sand-filled Yellow Prestone Coolant Jug, well stuck into a Sand Bank Bullet Stop via Double Action at a Rapid Fire Pace. This elicited so much unexpected surprise from that previously 'belittling little crowd of observers' after hearing their prior comments of, "Naw... This OLD DUDE? ... He Probably Never Held a Gun in his Life!'".
When they retrieved that Yellow Plastic Jug soon after... they all turned towards me ...and just stared right at me after they all managed to cover up my Six Shot Shot Group ...with the Palms of their Hands. As I handed the Weapon (Top Strap First, Cylinder Open, Empties on the Ground) back to my Boy, l loudly told them all,
"Once an NRA Distinguished Expert... ALWAYS an NRA Distinguished Expert."
I mention all of this because those Eye Operations restored the vision I had as a Very Young Man...Only MUCH BETTER...and for the rest of my days ...I want to KEEP on enjoying that renewed ability. So the only way that can happen is if I am always mindful to wear Vision Protection via my Expensive Italian Real Glass Polarized Sun-Glasses during Daylight Hours. And...whenever I use any of my Welding Equipment, I ALWAYS wear the Highest Grade UV Resistant Welder's Mask Protective Lenses that I NEVER set any lower than Level "9".
These Very Same Principals also apply in the use of these Micro-Welders. THIS is what is needed to STAY Protected when peering though a Lighted Magnifying Lens and using this New Micro-Arc Welding Gear for Jewelry and Reading-Computer Glasses Frame Repairs:
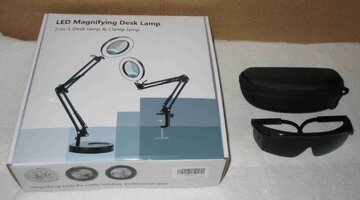
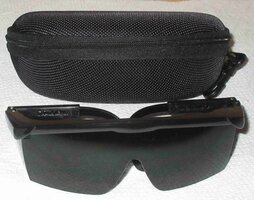
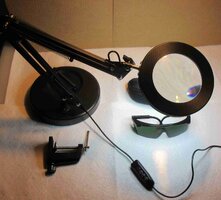
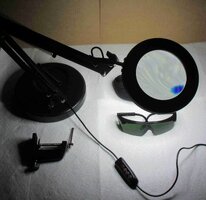
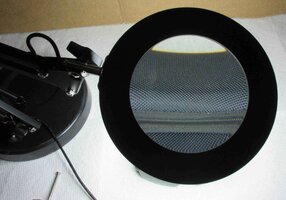
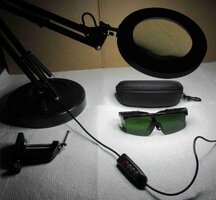
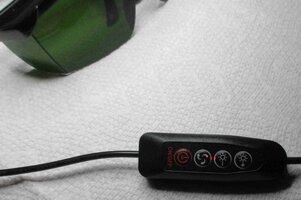
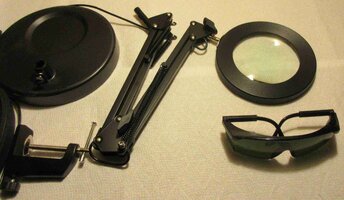
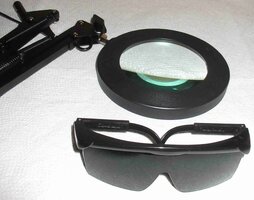
'Nuff Said...
That High Energy Micro-Pulse Arc Spot Welder may be working at what seems to be an EXTREMELY Small Time Scale when compared with a Typical MIG or Stick ARC Welder... so it might seem like one would not necessarily have to be very concerned with the impact upon their Vision and Eye Retinas from observing Ultra Bright Welding Arc-Light in VERY CLOSE PROXIMITY and when using A MAGNIFIED LENS surrounded by a Bright Circumferential Lighted Work Field.
BUT NOTHING COULD BE FURTHER FROM THE TRUTH.
As a fairly Elderly Man, I have endured multiple operations upon my eyes that included the full replacement of my Organic Eye Lenses due to having Blinding Cataracts... which resulted in my receiving some pretty sophisticated installments of UV Resistant Acrylic Lenses that will always need to be respected when it comes to any exposure to Ambient High Intensity Ultra-Violet (UV) Radiation.
Think of it THIS way... In the same way that Normal Headlights made of Acrylic Plastic can degrade into a Yellow Morass in the presence of Direct Sunlight...so too can the lenses inside of my own Eye Balls. And Not to belabor this much longer, but I should stress that I have also had additional Ophthalmic Surgeries to correct bi-lateral Astigmatism where the unfortunate "Egg Shape" at the front of my eyes and corneas required them being sliced into very fine concentric rings that once healed completely, allowed the clear front surfaces to become quite round and ...normal....and Crystal CLEAR.
What this meant to me was that I would never need to wear Corrective Lens Glasses for Distance Vision EVER again. This almost Super-Human Vision Transformation so much surprised my In-Laws up in North Florida a few years back while at their Home Grown Shooting Range, when I suddenly borrowed back a S&W Model 64 Revolver I used to carry when on Patrol back in the early 1970s just to prove a point during their Target Shooting meant to impress me.
Years earlier, I had passed that Weapon along to my Son... So when I asked to borrow it for a moment, he smiled wryly when he handed it over to his Old Dad. And in short order, from a distance of around 75 Yards... I rapid-fired all six rounds into a sand-filled Yellow Prestone Coolant Jug, well stuck into a Sand Bank Bullet Stop via Double Action at a Rapid Fire Pace. This elicited so much unexpected surprise from that previously 'belittling little crowd of observers' after hearing their prior comments of, "Naw... This OLD DUDE? ... He Probably Never Held a Gun in his Life!'".
When they retrieved that Yellow Plastic Jug soon after... they all turned towards me ...and just stared right at me after they all managed to cover up my Six Shot Shot Group ...with the Palms of their Hands. As I handed the Weapon (Top Strap First, Cylinder Open, Empties on the Ground) back to my Boy, l loudly told them all,
"Once an NRA Distinguished Expert... ALWAYS an NRA Distinguished Expert."
I mention all of this because those Eye Operations restored the vision I had as a Very Young Man...Only MUCH BETTER...and for the rest of my days ...I want to KEEP on enjoying that renewed ability. So the only way that can happen is if I am always mindful to wear Vision Protection via my Expensive Italian Real Glass Polarized Sun-Glasses during Daylight Hours. And...whenever I use any of my Welding Equipment, I ALWAYS wear the Highest Grade UV Resistant Welder's Mask Protective Lenses that I NEVER set any lower than Level "9".
These Very Same Principals also apply in the use of these Micro-Welders. THIS is what is needed to STAY Protected when peering though a Lighted Magnifying Lens and using this New Micro-Arc Welding Gear for Jewelry and Reading-Computer Glasses Frame Repairs:


'Nuff Said...
Last edited:
Whenever we get into trying out New Tool Technologies that seem quite familiar on the surface, they invariably bring along their own peculiarities and idiosyncrasies. For TIG (Tungsten Inert Gas) Welders...that involves the use of Sharpened Tungsten Electrodes that are NOT ordinarily consumed in the manner of *Stick* ARC Welding Rods and in fact rely mostly upon Melting the participant Base Metal and perhaps...Touch Adding in enough Filler Metal to make the Welds sized for the conditions as well as durable and perhaps, attractive.
Add to that the necessity of using some type of Low Pressure Inert Shielding Gas to prevent the focus of the Boiling Hot Liquid Metal from combining with Atmospheric Oxygen or Nitrogen and contaminating the Weld. When this occurs, the Welds can become Brittle and Unreliable.
With TIG Welding... a certain amount of attention must be paid to (A) How Far Out the Tungsten Electrode protrudes from the Nozzle ...and... (B) What Size Shielding Cup to use with the Argon (or Mixed Gas CO2) filling up and protecting that space around the Weld Joint with the Inert Gas... and ... (C) The Outside Diameter, the Grinding Angle and the Tip Shape of the Tungsten Electrode suited for the various Welding situations.
Now, even though the Amazon 600 WATT, 80 AMP Micro-Spot Welder being used in my situation does NOT necessarily require the EXACT TIG Conditions of using an Inert Gas around the Welding Field... it DOES require using a Fine Point Tungsten Rod as its Electrode. Thus, it will perhaps require more dedicated attention to it's cleanliness, since Black Carbon can build up around the tip when exposed to the open ambient atmosphere.
And that brings us Full Circle to the need of Cleaning, Grinding and Shaping the Tungsten Rod such that the Gold, Titanium or Stainless Steel Substrate is NOT being contaminated during each individual ARC Spot Weld Moment. But preparing these Tungsten Tips can prove difficult due to the unique properties of this Dense, Hard Metal. The Tip needs to be Ground Down to a VERY SHARP POINT at an Angle of around 20 Degrees.
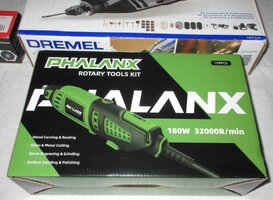
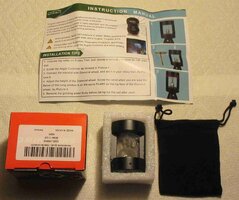
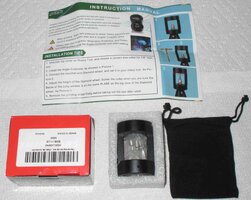
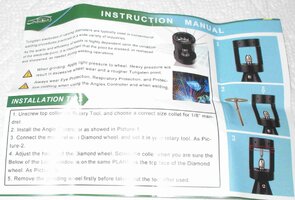
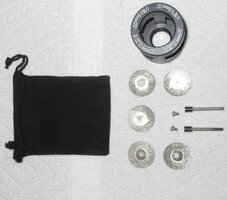
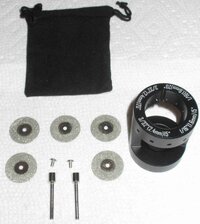
This necessarily involves using a Dremel Style Tool while holding the Tungsten Electrode Rod at that *Special Angle*. This action might prove difficult and even aggravating when in the middle of a Project and it can become a distraction if not performed correctly ending with Poor Welds in the offing. Wouldn't it be nice if there was a "Tool for THIS Tool" to Kill Two Birds with One Stone? Of course...There is.
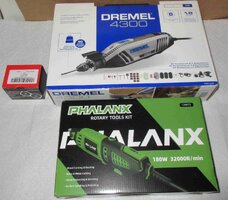
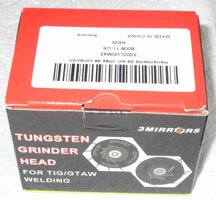
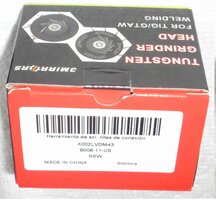
The images below show the Gear needed for this part of the Tungsten Electrode Prep is either an OEM Dremel Tool... or a reasonable facsimile thereof. AND... A Well Designed Tungsten Electrode Holder that can attach to the Top of the High Speed Dremel Tool and Hold the Electrodes of varied Thicknesses at the Proper Angle on the side of the Diamond Powder Impregnated Spinning Friction Discs included in this Tool Kit. All of this Gear makes it possible to quickly perform the Fine Grinding required to bring those Tungsten Electrode Tips back into their required Sharpness and Shapes:




Last edited:
Beacon
Member
"When The Mechanic is Away...The Mice WILL Play..."
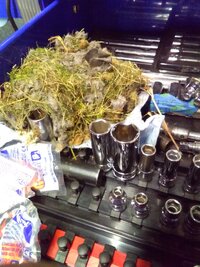
Beware the Occupants of that Nest as being the North American Deer Mouse...the main vector of the Hanta Virus... caused by the inhalation of desiccated Urine & Feces if disturbed by compressed or canned air. This disease is Fatal at nearly 40% of its infections and there are NO Medical Treatments or efficacious interventions for HPS
.
(Hantavirus Pulmonary Syndrome)
Even if one survives this infection, the organ damage and dismal recovery rate that can follow on for years will seriously reduce the quality of human life. Use Caution when finding and disposing of Dead Mice in Traps or elsewhere.
Carefully Collect any Nesting Materials into Sealed Zip-LOC Bags and only while Family Members are kept away from this location. Do NOT Sweep or Dust the Rafters or Floor Surfaces in the Garage or if found inside human occupied areas. Use Bleach or powdered Calcium Hydrochloride in a Water Solution to swab and mop surfaces clean to kill and remove the Virus Particles.
These are the Recommended Cleaning Procedures:
(1) A Bright Flash-Light
(2) M11 Nitrile Gloves (Protection from HANTA VIRUS carried by the NA Deer Mouse)
(3) N-95 Face Mask (Ditto) although a Full Mouth & Nose Respirator Filter Mask is BETTER
(4) Eye Protection (Ditto)
(5) LARGE Zip-LOC Baggie to Collect Nesting Materials (Ditto)
(6) Wet Wipes (NO VACUUM OR AEROSOL CANNED AIR!) (Ditto)
(7) Top Down Tool Box Inspection and Cleaning using Wet Wipes


 www.cdc.gov
Beware the Occupants of that Nest as being the North American Deer Mouse...the main vector of the Hanta Virus... caused by the inhalation of desiccated Urine & Feces if disturbed by compressed or canned air. This disease is Fatal at nearly 40% of its infections and there are NO Medical Treatments or efficacious interventions for HPS
.
(Hantavirus Pulmonary Syndrome)
Even if one survives this infection, the organ damage and dismal recovery rate that can follow on for years will seriously reduce the quality of human life. Use Caution when finding and disposing of Dead Mice in Traps or elsewhere.
Carefully Collect any Nesting Materials into Sealed Zip-LOC Bags and only while Family Members are kept away from this location. Do NOT Sweep or Dust the Rafters or Floor Surfaces in the Garage or if found inside human occupied areas. Use Bleach or powdered Calcium Hydrochloride in a Water Solution to swab and mop surfaces clean to kill and remove the Virus Particles.
These are the Recommended Cleaning Procedures:
(1) A Bright Flash-Light
(2) M11 Nitrile Gloves (Protection from HANTA VIRUS carried by the NA Deer Mouse)
(3) N-95 Face Mask (Ditto) although a Full Mouth & Nose Respirator Filter Mask is BETTER
(4) Eye Protection (Ditto)
(5) LARGE Zip-LOC Baggie to Collect Nesting Materials (Ditto)
(6) Wet Wipes (NO VACUUM OR AEROSOL CANNED AIR!) (Ditto)
(7) Top Down Tool Box Inspection and Cleaning using Wet Wipes


Hantavirus Prevention
How to clean up after pet rodents and safely clean up after infestations.
Last edited:
Most of our Folks know that if ever there are any Safety Issues when it comes to Buying and Using a wide array of Hand and Power Tools of every stripe... I make it my business to inform everyone as much as possible to describe what can go sideways if they are not "Handled With Care".
But sometimes, even the most Safety Conscious of us can Fall Prey to the circumstances where "Familiarity... Breeds Contempt"...and get themselves HURT...especially if the whole concept of using such tools...even the Most Basic...can slip our minds and result in HARM.
Around 15 Years ago... I was up to my eyeballs in Piles of Flattened (2D) Cardboard Boxes damned near all over the place and on one occasion in the "Wee, Wee Hours of the Morning..." (Frank Sinatra courtesy Johnny Mercer). I was witlessly wading through cutting them up with a Typical Dull Box Cutter circa Home Depot Style...and I got so tired that I had to pull up a folding Samsonite Chair and try to do this job sitting down. THIS turned out to be a Very Bad Idea.
As I had managed to get into a fairly decent "Cutting Rhythm" going by pulling cardboard sections across my lap... I got momentarily distracted and somehow managed to ....Bury that Razor Blade into the upper part of my Right Thigh around 6" above the knee ...and came within a Hair's Breadth of slicing through all the skin layers and then, right on down into the last tendon-fascia material covering the bare Red Quadriceps Muscles hiding below.
Now even though I had not severed any Arteries... there was enough tissue and vascular damage for it to bleed quite a bit ...and since the wound was spreading wide open ...it looked like it would need a few stitches to be closed back up. So ...off to the Emergency Room I went...and there I sat ...for Four Hours and Longer.
There is only so much time that could pass until it was finally too late for the distracted Emergency Staff (Must have been a Run On Free Car Accidents that night) to be cognizant enough to apply the necessary stitches and join the sides back together. And so after being Butter-Flied (and Butter-Fingered) back together... THIS ...is what happens when a slicing wound is NOT Closed Up within four hours of being injured via Simple Sutures:


Well... I haphazardly healed up in time...BUT... that Object Lesson in Carelessness never leaves me because it stares me in the face everyday as soon as I begin to pull up my trousers.
And THAT leads me to all the reasons that I should have obtained THIS Tool Kit long before being bitten so hard on my Left Hand by Dupuytren's Contracture and Trigger Fingers (and Thumb) that often makes Tool Use a Painful Exercise in FUTILITY when you suffer from "The Viking's Disease".
Returning to the Latest Cause & Origin of my discomfort centers around having to once again, reduce MOUNTAINS of Corrugated Cardboard into manageable sizes and shapes and vacate the house of these construction materials once or twice a week.
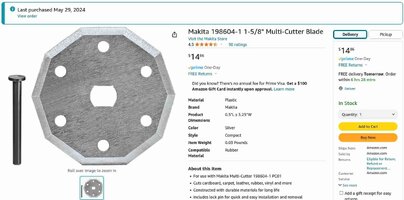
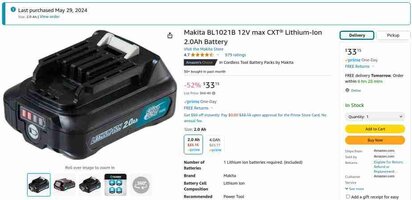
But since I have this "Daily Proof" of my Stupidity and Careless Use of SHARPS... I started thinking that it might be time to *Drop The Bucks* on a Decent Rotary Multi-Cutting Cordless Tool Kit and also become well supplied with at least Two Re-Chargeable Lithium Batteries and a Replacement Hexagonal Cutting Wheel as well.
At first, I thought I'd be able to find something consistent with my bewildering array of Milwaukee "FUEL" M18 and M12 Powered Tools and find something along those lines for Cardboard Box Cutting Tools....But NO! NEVER! ...NOT FOR $500.00. ...FTN!
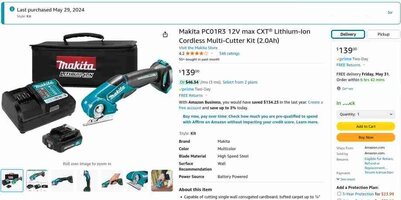
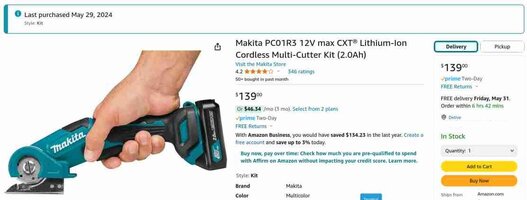
Anyhow... I skipped past the typical versions of these Fabric, Leather, Carpet and Cardboard Cutters available from "CHYNA" that have all of those Weird Names and all those Non-Standard Batteries and instead found this MAKITA Kit that really best suits my purposes:
Now... If this Tool Kit performs half as well as I'm hoping it will, then I'll finally be able to reduce all of this Cardboard Junk into Trash-Bag Sized Debris ...Packed Up Tighter Than a TICK in No Time FLAT ...and NOT risk getting ALL CUT UP by Accident in the Bargain! :>)
But sometimes, even the most Safety Conscious of us can Fall Prey to the circumstances where "Familiarity... Breeds Contempt"...and get themselves HURT...especially if the whole concept of using such tools...even the Most Basic...can slip our minds and result in HARM.
Around 15 Years ago... I was up to my eyeballs in Piles of Flattened (2D) Cardboard Boxes damned near all over the place and on one occasion in the "Wee, Wee Hours of the Morning..." (Frank Sinatra courtesy Johnny Mercer). I was witlessly wading through cutting them up with a Typical Dull Box Cutter circa Home Depot Style...and I got so tired that I had to pull up a folding Samsonite Chair and try to do this job sitting down. THIS turned out to be a Very Bad Idea.
As I had managed to get into a fairly decent "Cutting Rhythm" going by pulling cardboard sections across my lap... I got momentarily distracted and somehow managed to ....Bury that Razor Blade into the upper part of my Right Thigh around 6" above the knee ...and came within a Hair's Breadth of slicing through all the skin layers and then, right on down into the last tendon-fascia material covering the bare Red Quadriceps Muscles hiding below.
Now even though I had not severed any Arteries... there was enough tissue and vascular damage for it to bleed quite a bit ...and since the wound was spreading wide open ...it looked like it would need a few stitches to be closed back up. So ...off to the Emergency Room I went...and there I sat ...for Four Hours and Longer.
There is only so much time that could pass until it was finally too late for the distracted Emergency Staff (Must have been a Run On Free Car Accidents that night) to be cognizant enough to apply the necessary stitches and join the sides back together. And so after being Butter-Flied (and Butter-Fingered) back together... THIS ...is what happens when a slicing wound is NOT Closed Up within four hours of being injured via Simple Sutures:


Well... I haphazardly healed up in time...BUT... that Object Lesson in Carelessness never leaves me because it stares me in the face everyday as soon as I begin to pull up my trousers.
And THAT leads me to all the reasons that I should have obtained THIS Tool Kit long before being bitten so hard on my Left Hand by Dupuytren's Contracture and Trigger Fingers (and Thumb) that often makes Tool Use a Painful Exercise in FUTILITY when you suffer from "The Viking's Disease".
Returning to the Latest Cause & Origin of my discomfort centers around having to once again, reduce MOUNTAINS of Corrugated Cardboard into manageable sizes and shapes and vacate the house of these construction materials once or twice a week.
But since I have this "Daily Proof" of my Stupidity and Careless Use of SHARPS... I started thinking that it might be time to *Drop The Bucks* on a Decent Rotary Multi-Cutting Cordless Tool Kit and also become well supplied with at least Two Re-Chargeable Lithium Batteries and a Replacement Hexagonal Cutting Wheel as well.
At first, I thought I'd be able to find something consistent with my bewildering array of Milwaukee "FUEL" M18 and M12 Powered Tools and find something along those lines for Cardboard Box Cutting Tools....But NO! NEVER! ...NOT FOR $500.00. ...FTN!
Anyhow... I skipped past the typical versions of these Fabric, Leather, Carpet and Cardboard Cutters available from "CHYNA" that have all of those Weird Names and all those Non-Standard Batteries and instead found this MAKITA Kit that really best suits my purposes:
Now... If this Tool Kit performs half as well as I'm hoping it will, then I'll finally be able to reduce all of this Cardboard Junk into Trash-Bag Sized Debris ...Packed Up Tighter Than a TICK in No Time FLAT ...and NOT risk getting ALL CUT UP by Accident in the Bargain! :>)


Last edited:
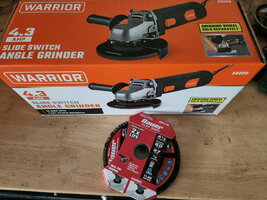
Got some goodies over the last couple of days. Stopped by HF earlier in the week and picked up their cheap angle grinder, along with a 60 grit flap disc. Got a grease joint rejuvenator with a short flex hose, to try and tackle my UBJs and end link dried zerk issues. Also got a lawn mower blade balancer and a blade sharpening jig.
Happened to flip through the instructions, and I'm glad I did. I was planning to mount it to the work bench in my shed where the mower is, instead of trying to mount it on my roller in the garage, and then saw a point in the instructions that basically said "If you have a vise, clamp it in THAT you bald headed dummy!"

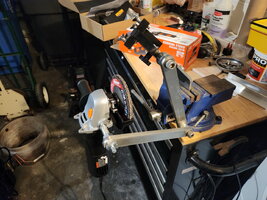
Happened to flip through the instructions, and I'm glad I did. I was planning to mount it to the work bench in my shed where the mower is, instead of trying to mount it on my roller in the garage, and then saw a point in the instructions that basically said "If you have a vise, clamp it in THAT you bald headed dummy!"


Interesting accessory for holding the grinder. Did it come with the grinder or did you purchase it separately?
Grabbed the cheap $10 one from harbor freight. This is probably the only thing I'll use it for. But if I ever need something for heavier duty, I'll probably buy something with more muscle to it.

Edit: Got the jig off Amazon
Beacon
Member
I got it off Amazon. Happened to see a blade sharpening video, and the guy used a similar one. The link he provided didn't work, but this one was more or less the same. It was easy to use, and did the job quickly, a good investment I think.Did you get the blade jig from HF? project farm tested a very similar looking one a few years ago. it was "very impressive"
northcreek
Member
Put six of these in my pole barn to replace the old energy eating green porcelain incandescent fixtures and man are they ever nice. Kicker is that I sold the old lights on CL for $600.
So better/efficient lighting and made $300....

 jclgl-led.com
So better/efficient lighting and made $300....


JC-LGL High Bay LED Lights: 100-240W Adjustable Brightness
Illuminate your space with JC-LGL High Bay LED Lights, featuring adjustable wattage from 100 to 240W for customized brightness. Emitting up to 36,000 lumens in a flicker-free, daylight-like 5000K color temperature, these lights offer superior heat dissipation, IP65 waterproofing, and a long...


