Tool Talk

Blckshdw

Moderator
Nov 20, 2011
10,747
Tampa Bay Area, FL
In other news... Replacing that O-ring on my jack didn't solve my leaky valve issue. I opened the valve slightly when grabbing the handle to move the jack the other day. Went to move it this morning before leaving for work, and again there was a tiny puddle under it. :hissyfit:

I know smashing it with a sledge hammer won't fix the issue, but sure as hell would make me feel better! lol
 

mrrsm

Lifetime VIP Donor
Supporting Donor
Member
Oct 22, 2015
8,202
Tampa Bay Area
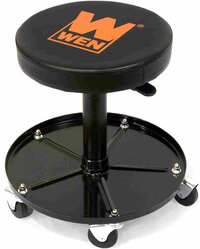
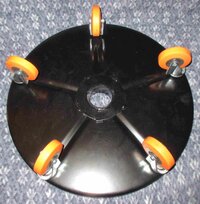
Now that I’ll be spending a lot of time working near or under the Wheel Wells of my Truck, I decided to order a WEN Mechanic’s Pneumatic, Adjustable 300 Lb Roll-around Stool that has ONE MORE than just the usual (4) Castor Wheels. That “5th Wheel” should divide up my considerable weight just a bit more and make it a little bit easier to move in and out and around the Wheel Wells for everything planned for my Y2K Truck:

https://www.amazon.com/dp/B0199R9WA8/?tag=gmtnation-20

WENROLLAROUNDSTOOL.jpg

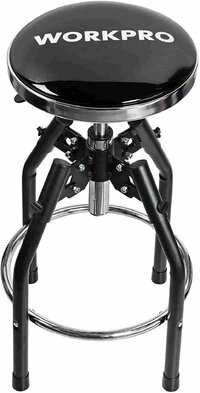
I also have a WORKPRO Mechanic’s Hydraulic, 330 Lb Adjustable Bar Stool coming too, as it won’t hurt to have the means to sit right in front of the Closed Lid and Fold Out Side Table of “ @Mounce ’s HF Red Roll-around Tool Cabinet ” when working on or preparing parts for installation and for taking "Pizza and Diet Coke" breaks ...from time to time.

It also affords me the chance to “Park” the Ass End of anyone who insists on hanging around and Gawking or Eye-Balling what is happening that might get in the way, or do more harm than good by “Helping”:

https://www.amazon.com/dp/B019O6TM0E/?tag=gmtnation-20

WORKPROBARSTOOL.jpg
 
Last edited:

Mounce

Member
Mar 29, 2014
13,667
Tuscaloosa, AL
FWIW, I have the HF pneumatic adjustable rolling stool and it also has 5 casters. I'm also regrettably north of the 300lb mark by a smidge but it seems to handle fine. Can't remember what it's weight 'limit' is, but on sale for $19.99 it was a deal and has gotten a good workout through the months.
 

Mooseman

Moderator
Dec 4, 2011
26,027
Ottawa, ON
@MRRSM , please let us know how that Wen stool works out. I have gone through a few of the four caster type stools and they don't stand up to my moose weight. My current one, a Big Red, the casters are starting to fail.
 

mrrsm

Lifetime VIP Donor
Supporting Donor
Member
Oct 22, 2015
8,202
Tampa Bay Area
Will Do... I tip the Scales at around 265 Lbs.... and I was thinking that within the free perimeter spaces between the existing (5) Wheels arrayed around of the "Pie" shaped Base.... it looks like it would be EZ to Drill out (5) Additional Mount Holes and find either (5) More matching Roller-Bearing Swivel Wheels at Harbor Freight, Lowes or Home Depot ... or get a Good Quality Matched Set of (10) Replacement Wheels to bolt up in there... and THAT would really do the Trick.

The Formula seems to be that by Adding up the Total Supported Weight + the Weight of the Roll-Around Stool itself and Dividing the Sum by (10) ... this would inform each of us as to just how much Weight each Wheel would have to Bear up under.

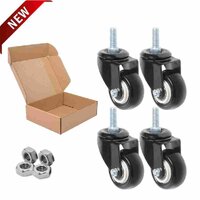
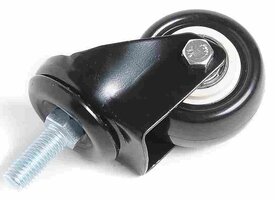
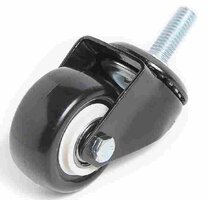
Perhaps a couple-three sets similar to these Swivel-Caster Wheels would work better, along with some Wide S/S Washers sandwiched under the Caster Fasteners- Lock-Nuts on Top of the Lower Tray to distribute the Force. Just One of these imaged Double Ball-Bearing, Swivel Casters can support 110 Lbs... So you'd probably only have to replace this set of (10) Swivel Casters ONCE ... and that should do it:

$14.00 per Set of (4) Casters at Amazon:


ANYKE1.jpgANYKE2.jpgANYKE3.jpgANYKE4.jpgANYKE5.jpgANYKE6.jpg
WENROLLAROUNDSTOOL.jpg

I say the More Wheels under there to share the load ...The Merrier ...(like Ball Bearings) ; especially on Concrete Pavement where those Damned 'Gummy Rubber-Plastic tires' tend to wear out like Pencil Erasers. I'll be glad to keep you informed about its initial performance over the next week.

The Two Mech-Stools are supposed to arrive either later tonight or tomorrow morning. The Weather is finally getting Good down here... and I want to get my Rear Brakes and ALL the Parking Brake and Cabling Hardware Installed underneath the Truck ...ASAP.
 
Last edited:

mrrsm

Lifetime VIP Donor
Supporting Donor
Member
Oct 22, 2015
8,202
Tampa Bay Area
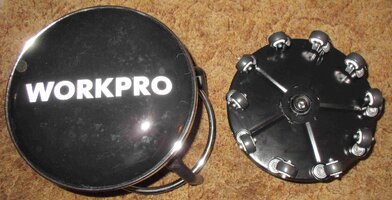
Okay... as previously mentioned, both Stools arrived a short time ago. Very little assembly required on putting the Wen Stool together. The Wheels come installed on the very sturdy feeling Lower Circular Metal Pan. The Hydro-Aero Cylinder just drops into place in the center of the Base with the Upper Seat likewise dropping on top. No additional Fasteners required. Everything is Well Made and Very STRONG.

I don't like the Height or Quality of the (5) Orange Wheels so I'm taking a Leaf out of my own Suggestion Book about drilling out (5) Additional Holes and installing the (10) Better Quality Black Wheels mentioned above. The seat has a remarkable vertical adjustment range that is pleasing... Just Don't sit down too far off Dead Center or towards the back of the Seat or you'll feel like it will fall over once you 'make your landing'.

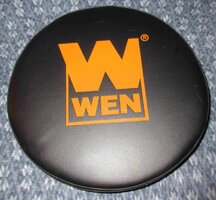
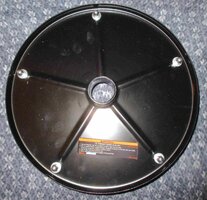
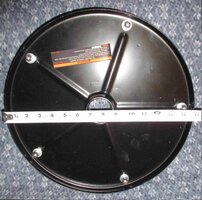
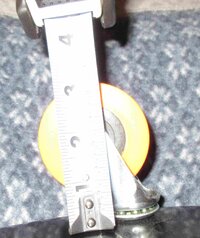
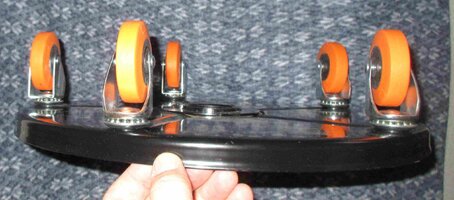
I don't mind the extra expense, as it is more important for me to have easy mobility than it will be to try to save any money and then have to fight with the Damned Thing to maneuver around. I'll use it in its present condition until the (3) Wheel Sets arrive and I can make the necessary Measurements and Bench Drill the works to get this all done. Here are some 'Vanity' and Measurement images of the assembling of the Wen Mechanic's Roll-around Stool:

WENSTOOL1.jpegWENSTOOL3.jpegWENSTOOL4.jpegWENSTOOL6.jpegWENSTOOL7.jpegWENSTOOL8.jpegWENSTOOL9.jpegWENSTOOL10.jpeg
 

mrrsm

Lifetime VIP Donor
Supporting Donor
Member
Oct 22, 2015
8,202
Tampa Bay Area
Following up on Post # 366, the Complete Set of Upgraded Roller-Bearing Wheels arrived on 11/12/2019. These are the necessary steps needed to Modify the Wenn Stool and Install them all evenly. Once completed, you'll find that the Wen Stool will glide around effortlessly and with stability across all surfaces ...like an Olympic Skater on Smooth Ice:

(1) Unbolt and remove the Cap Nuts, (3) Thin Steel Washers and Orange OEM Roller-Wheels.

(2) Measure 8" from the Center of the OEM (5) Squared Holes and from a Right Angle at 4" in between, Make a Center-Punch Mark 3/4" in from the Outer Edge of the Lower, Round Support Plate.

(3) Use a Drill Press if possible and employ (3) consecutively larger Drill Bits to bore out the (5) Center-Punched Marks, ending with using a 25/64" Size Drill Bit, as this will create holes JUST large enough for the Larger 10mm Bolt Shanks on the Upgraded Wheels to fit through and NOT wallow them out. This action applies of for these Specific Make-Brand-Model of Black Wheels.

(4) Use either the OEM Flat Washers... or as chosen here, slide Stainless Steel 20X10mm After-Market Washers on the Upper plate over the Roller-Wheel Bolts Shanks along with the (10) (17)mm Hex Head OEM 10mm X 1.25mm Nuts and tighten down all (10) fasteners. Then install After Market 10mm Locking Nuts on top to ensure the OEM Nuts will not loosen up from heavy use of the Wen Stool.

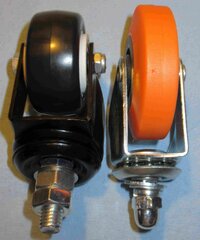
One of the attached images shows the obvious weaknesses in the design of the Orange OEM Wheels as having Non-Ball Bearing Centers, Excessive Height and the use of expanded Mild Steel, Center-Punched Push- Pins for their Axles versus the much more robust Threaded-Fastened Steel Axles through Steel Sleeves with Sealed Roller Bearings on the New Wheels.

These New Black Wheels have much larger Ball Bearing Upper Races that completely enshrouds and protects the more numerous Ball Bearings within and better distribute supported weight under motion. All in All... the Wen Stool can be modified in this manner without much effort ...and the results WILL much improve its Comfort, Functionality and Durability:

NEWWHEELS1.jpgNEWWHEELS2.jpgNEWWHEELS3.jpgNEWWHEELS4.jpgNEWWHEELS5.jpgNEWWHEELS6.jpgNEWWHEELS7.jpg
 
Last edited:

Maverick6587

Member
Dec 16, 2018
730
Sterling Heights, Michigan
I've been using a standard (cheap) air hose coupler for years now. As I am sure many of you have dealt with the difficulty of it being a battle to connect the coupler to your air tools in the middle of winter.

I decided to do some pretty extensive research to find a great coupler, without care of cost at this point. I found what I believe to be the best coupler I've ever seen!

You don't have to move anything to get the plug to go inside the coupler. You just push it in and push a button on either side of the coupler to release the plug from the coupler. It's a safety coupler, so it releases the pressure before it will release the plug.

I bought one from Amazon but, it won't be delivered until Monday. I couldn't find a faster delivery or a closer place for me to just pick it up.


  • Like
Reactions: Schurkey

mrrsm

Lifetime VIP Donor
Supporting Donor
Member
Oct 22, 2015
8,202
Tampa Bay Area
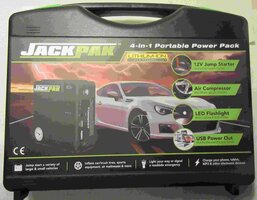
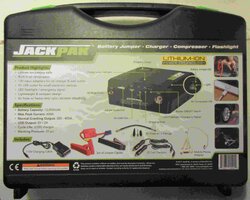
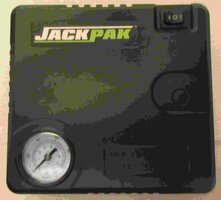
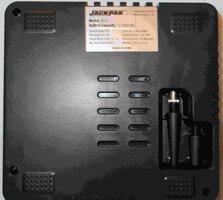
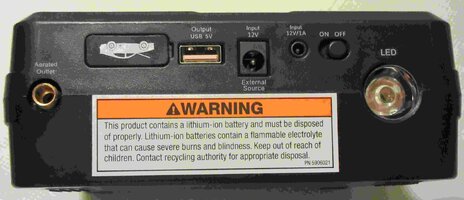
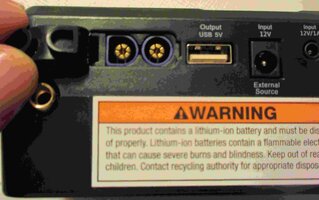
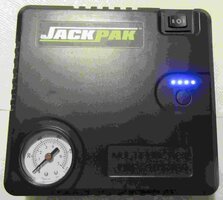
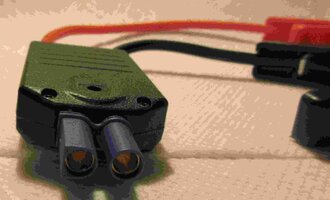
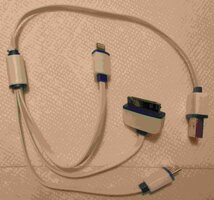
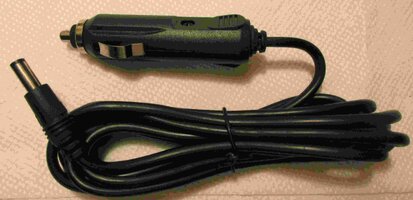
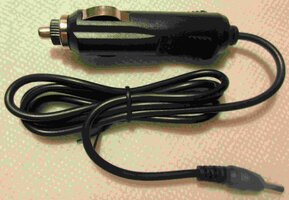
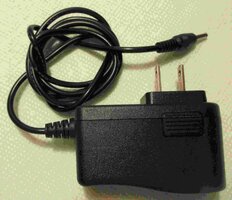
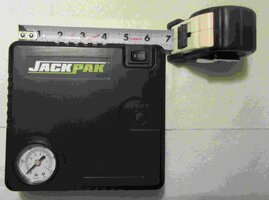
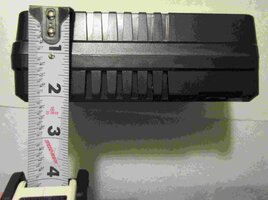
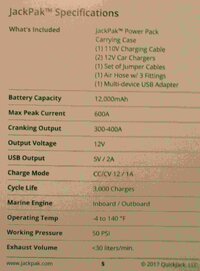
Recently, while watching the QuickJack OEM Set Up Instructional Video, I spied the narrator using a Very Compact, Portable JACKPAC Multi-Functional, 100 PSI Air Compressor, 600 AMP Battery Power Jump Box (with Cables), USB Charger with Common Power Adapter Cables, Built-In Bright LED Flashlight unit to pressurize the Two Pneumatic-Hydraulic Cylinders of the QuickJack BL-7000-EXT Vehicle Lift System up to 50 PSI.

I’m not a Fan of those “Ginsu Vegetable Chopper, Dish-Washer-Drier-Hopper” kinds of tools that act like Cheap Imitations of THE Classic, OEM Swiss Army Knife; always failing to deliver on the Promises made with a Money-Back Guarantee: “As Advertised”. This goes double when the asking Price for the Tool Kit is close to $110.00. I thought, “For THAT much Bread… THIS Damned Thing had BETTER Work!” It does. It Does EVERYTHING Just as Advertised… and quite impressively, too I might add.

At first blush, this ‘Thing’ might seem like every other Old Zayres-K-Mart Super-Market “Blue Light Special” Cheap Gimmicky, Junky Non-Working Thing… that is until you realize that in lieu of using Lead-Acid Batteries… It Stores LOTS of 12 Volts DC Power for up to 3,000 Re-Charges using LI-ion Batteries in the Unit… Packing The Substantial Punching Power of 12,000 mAh.

That represents having enough Real Juice to Pump Up the Truck Tires as needed when the Suspension Jobs get started and help to avoid the Mission Creep that ordinarily ensues with the need to set up the Air Compressor, Hoses, Fittings, Nozzle Fitting-Pressure Gauge and the time needed to WAIT for the Compressor to Fill Up The Air Tank. That usually means an Hour Gone even before beginning with the original work at hand. I like it...and it will find a home in the Truck for Emergency Use As Required:

https://www.quickjack.com/accessories/jackpak-power-pack/


EDIT: November 29, 2019

THIS Pneumatic JACKPAC Kit is ON SALE for a Reduced Price from $106.00 down to $95.00:

JACKPAC1.jpgJACKPAC2.jpgJACKPAC3.jpgJACKPAC4.jpgJACKPAC5.jpgJACKPAC6.jpgJACKPAC7.jpgJACKPAC8.jpgJACKPAC9.jpgJACKPAC10.jpgJACKPAC11.jpgJACKPAC12.jpgJACKPAC14.jpgJACKPAC15.jpgJACKPAC16.jpgJACKPAC17.jpgJACKPAC18.jpgJACKPAC19.jpgJACKPAC20.jpgJACKPAC21.jpg
 
Last edited:

mrrsm

Lifetime VIP Donor
Supporting Donor
Member
Oct 22, 2015
8,202
Tampa Bay Area
This is Important...

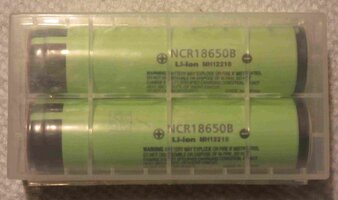
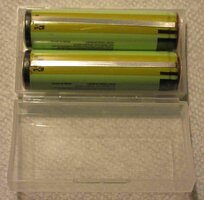
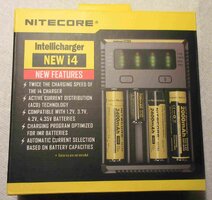
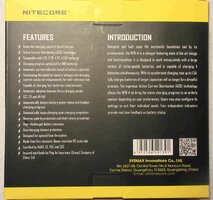
Re: Powering the KKMOON Oscilloscope... I'm suggesting the Use of the Nitecore i4 LI-ion NMHD Battery Charger and the Safer version of the NCR-18650B LI-ion Batteries. The focus of my concern is about using Standard, LI-ion Batteries that might get Reverse-Charged or Over-Charged via a Sub-Standard, Un-safe Battery Charger and creating conditions that might invite a Dangerous Fire or Explosion Event.

The Video and attached Images help to describe the Safety Strip feature of these NCR LI-ion Batteries and the features of the NITECORE i4 Unit or those like them of similar higher quality that might make for a Safer Choice for use in all applications with LI-ion Batteries:


NITECOREI4A.jpgNITECOREI4B.jpgNITECOREI4C.jpgNITECOREI4D.jpgNITECOREI4E.jpg
 

Mounce

Member
Mar 29, 2014
13,667
Tuscaloosa, AL
I've been using a standard (cheap) air hose coupler for years now. As I am sure many of you have dealt with the difficulty of it being a battle to connect the coupler to your air tools in the middle of winter.

I decided to do some pretty extensive research to find a great coupler, without care of cost at this point. I found what I believe to be the best coupler I've ever seen!

You don't have to move anything to get the plug to go inside the coupler. You just push it in and push a button on either side of the coupler to release the plug from the coupler. It's a safety coupler, so it releases the pressure before it will release the plug.

I bought one from Amazon but, it won't be delivered until Monday. I couldn't find a faster delivery or a closer place for me to just pick it up.


I've got a set of these truflate high flow fittings on all my stuff at home, also the chuck will accept standard fittings but standard chucks will not accept the high flows. Pull the collar to release like standard but the collar stays back once released, push next tool in and the collar locks on its own. Simple, easy, and really pepped up my air tools.


Looks like my link says robot check? Interesting, it goes to Amazon though lol.
 

Maverick6587

Member
Dec 16, 2018
730
Sterling Heights, Michigan
I've got a set of these truflate high flow fittings on all my stuff at home, also the chuck will accept standard fittings but standard chucks will not accept the high flows. Pull the collar to release like standard but the collar stays back once released, push next tool in and the collar locks on its own. Simple, easy, and really pepped up my air tools.


Looks like my link says robot check? Interesting, it goes to Amazon though lol.
That is A LOT cheaper than the Prevost chucks and fittings! I will definitely be ordering those for my garage and my dad's barn! Thanks @Mounce
 
  • Like
Reactions: Mounce

Maverick6587

Member
Dec 16, 2018
730
Sterling Heights, Michigan
With the extreme cold approaching... I'm looking for a high-temp exhaust hose to evac exhaust out of the barn while the engine is running. I couldn't find anything on craigslist and amazon exhaust hoses are quite expensive.

Does anyone have any cheap ones that you use or DIY ideas for an exhaust hose to go from the tailpipe out the bottom of the garage door? I think I would need something around 10-15 ft in length.
 

Blckshdw

Moderator
Nov 20, 2011
10,747
Tampa Bay Area, FL
Does anyone have any cheap ones that you use or DIY ideas for an exhaust hose to go from the tailpipe out the bottom of the garage door? I think I would need something around 10-15 ft in length.

Might be a little big, but would an aluminum dryer vent tube work for you? May need to get creative clamping one end to the exhaust pipe, due to the difference in diameter, but it should hold up to the temp ranges you'd see.


Maverick6587

Member
Dec 16, 2018
730
Sterling Heights, Michigan
That's an amazing and cheap idea! Thanks @Blckshdw !

I might just use a big magnet to keep it attached to the tailpipe.
 

mrrsm

Lifetime VIP Donor
Supporting Donor
Member
Oct 22, 2015
8,202
Tampa Bay Area
On the outside chance that the Exhaust Out-Gassing and Carbon Monoxide might get pulled-vacuumed back into the house via your roof-edge eaves... Installing a half-dozen Battery Powered CO Detectors inside the house and garage placed strategically around would be worth having to warn if any of the fumes manage to migrate back into the living quarters of your home. These are Cheap Insurance against this problem. Using S/S Band Clamps that run in adaptive sizes for under $10.00 per item offers another soft pipe to exhaust tail pipe connection option. These are available in great variety on eBay and Amazon.
 
Last edited:

Mooseman

Moderator
Dec 4, 2011
26,027
Ottawa, ON
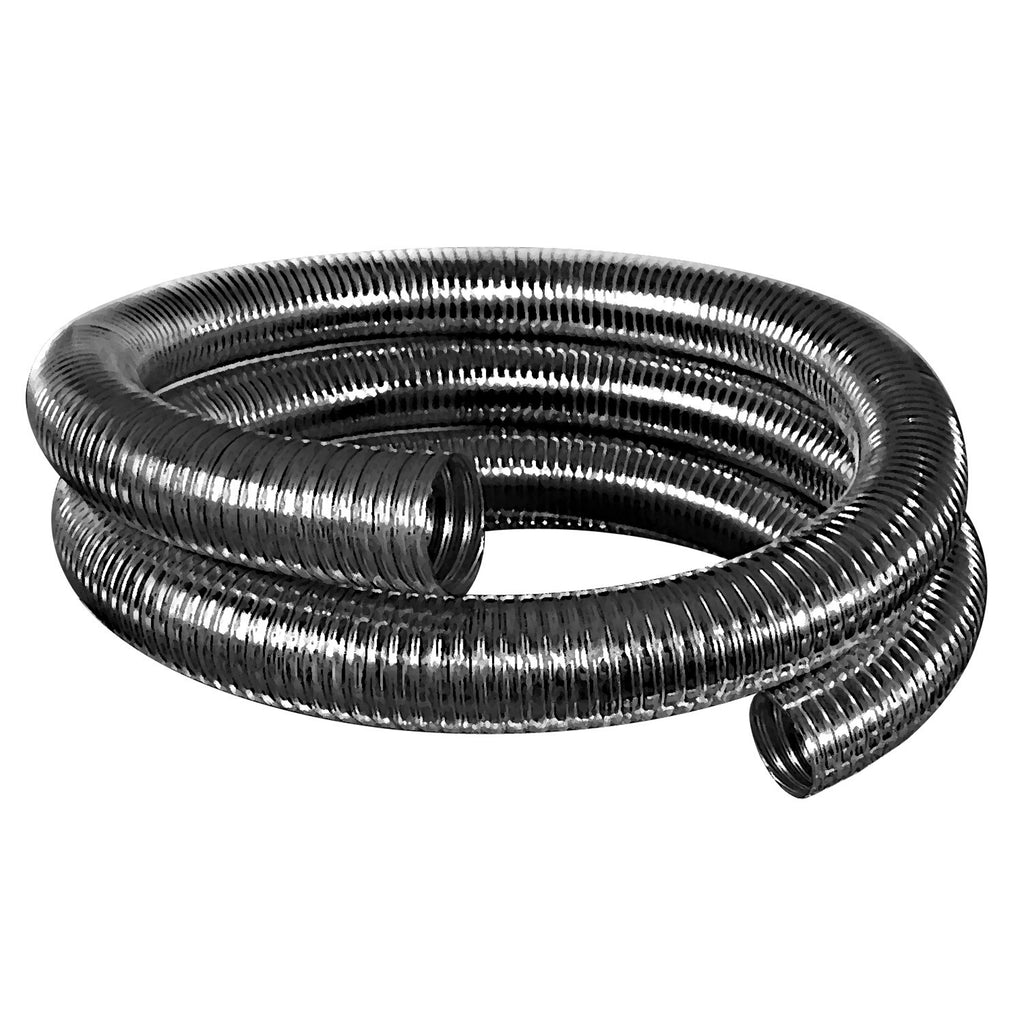
Years ago, I used this type flexible exhaust pipe. Works well if you have a relatively straight shot out the door since it doesn't bend that sharply. Only thing though is that you'd need one for each size of exhaust pipe you encounter and wouldn't work on anything with tips.

8989_T_50c0e5cf-5d1a-43ca-bc78-9ece6a94e94f_1024x1024.jpeg

That idea of the dryer exhaust hose is excellent. Just have to figure a way to seal it on the exhaust pipe. Just have to be sure it's actual aluminum rather than foiled type plastic.
 

Blckshdw

Moderator
Nov 20, 2011
10,747
Tampa Bay Area, FL
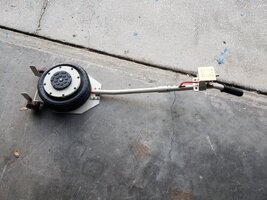
As mentioned here, and in other threads, I've been curious about pneumatic floor jacks. I've seen the air assisted, hydraulic bottle jack style which are usually 12 or 20 tons, but too tall to get under the front of our trucks. Came across the air bag style. They're a dime a dozen on Ebay and Amazon, with varying degrees of positive/negative reviews. My main thing was to find one with some kinda warranty in case I got a dud. For the longest, many were being priced right around $100, but right before Thanksgiving the prices started going up. :confused:

Found this one with a listed 1 year warranty, and pulled the trigger. FedEx dropped it off this afternoon. Here it is unboxed, and then assembled. Conveniently, it stands up on end for space saving storage.
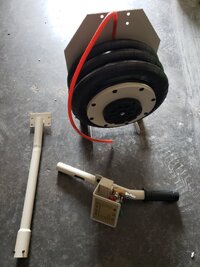
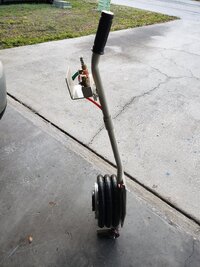
20191206_165556.jpg20191206_170345.jpg

20191206_170628.jpg


We've often referred to stuff bought online as cheap Chinese crap... Well at least I know, this ain't that! :rotfl:

20191206_165613.jpg


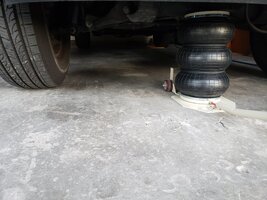
Now to the business end. I knew ahead of time, this wasn't going to provide as much vertical lift as our traditional hydraulic jacks. Max height is about 12". I started off trying to lift the truck by the frame at the B pillar, as expected, not enough reach, it did relax the suspension, but couldn't lift the tires off the ground. It inflates quickly and gets to max height in a couple of seconds with the inlet valve wide open. Deflation is slower and more controlled which is probably a good thing.

Went around to the rear and lifted by the diff, as expected plenty of clearance to throw a pair of jack stands under the axle. (I see I missed a spot cleaning up that tranny fluid leak from the summer :ugh: )

20191206_171903.jpg


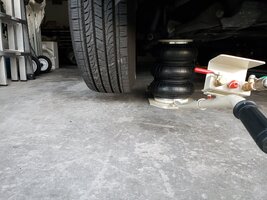
Came around to the front, and didn't have quite enough reach. At max height, the tires are barely touching the floor... So I'd have to lift from the control arm
20191206_172144.jpg

20191206_172316.jpg


My idea was, since the base is just a flat piece of sheet metal, build a riser out of some spare 2x4s to give it a boost, maybe about 4-6". When the bag is fully inflated, it does flex and lean a bit depending on how centered your lift point is on the cradle, so not having to go max height would be good stability wise.

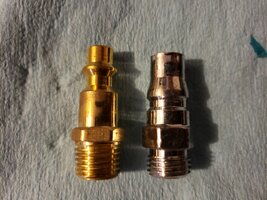
One consistent complaint I saw in many of the reviews, is the air line fitting that comes with it, is some funky unknown size, other than your typical 1/4. In some ads, the sellers swapped in the right fitting, this one wasn't the case. I have spares so not an issue. The oddball fitting is on the right.
20191206_172836.jpg


It uses a pair of ball valves for the inlet and outlet. I read of some buyers swapping these out for trigger style valves, and I think that's the route I'm gonna take as well. Only got to use it for messing around so far, but I like it. Much easier to make height adjustments, raise it a little here, drop it just a touch there with a quick reach and twist. That's convenient for me, since my knees like to complain if I get up off the ground a number of times. That's usually the case trying to get the cradle positioned where I want it prior to lifting, with my other jack. It's gonna get its fair share of use over the next few weeks, so I'll be able to give a better review.

20191206_172924.jpg
 

Blckshdw

Moderator
Nov 20, 2011
10,747
Tampa Bay Area, FL
Temporary solution to my air jack height issue, use the small harbor freight furniture dolly under it. :cool: Perfect for lifting the front end. It did sag a little bit under the weight but it held up fine. And due to the casters, similarly to our hydraulic floor jacks, when the load shifted, it rolled along with it, keeping the bag vertical and no tilting.

Question for anyone who happens to be on right now, is there a workaround for pressing out ball joints, when the press kit you borrowed doesn't seem to have an adapter small enough to pop out the old one? Found the right size to push the new one in, and tried combinations of stuff, but I end up running out of space. Luckily the joints don't have any play, so I won't feel too bad about putting everything back together for now, but it's a bit annoying with the time wasted.
 

littleblazer

Member
Jul 6, 2014
9,267
Temporary solution to my air jack height issue, use the small harbor freight furniture dolly under it. :cool: Perfect for lifting the front end. It did sag a little bit under the weight but it held up fine. And due to the casters, similarly to our hydraulic floor jacks, when the load shifted, it rolled along with it, keeping the bag vertical and no tilting.

Question for anyone who happens to be on right now, is there a workaround for pressing out ball joints, when the press kit you borrowed doesn't seem to have an adapter small enough to pop out the old one? Found the right size to push the new one in, and tried combinations of stuff, but I end up running out of space. Luckily the joints don't have any play, so I won't feel too bad about putting everything back together for now, but it's a bit annoying with the time wasted.
Like you can't get it out all the way? When I did mine I ended up pressing the last little bit by putting the threads of the press on the bolt/knuckle itself. Worked great. Also if you get it popped you can get a air hammer on it too for the rest.
 

Blckshdw

Moderator
Nov 20, 2011
10,747
Tampa Bay Area, FL
Like you can't get it out all the way? When I did mine I ended up pressing the last little bit by putting the threads of the press on the bolt/knuckle itself. Worked great. Also if you get it popped you can get a air hammer on it too for the rest.

None of the hollow tubes are small enough diameter to rest on the topside lip of the BJ to start pressing it out. I would assume that the smallest piece was just missing from the kit, but everything fits in the case with no spaces, so I think I have everything I'm supposed to. I don't want to try pressing it directly on the stud itself, cuz if it doesn't come out, and gets damaged in the process, then I'm really screwed. :ugh:
 

littleblazer

Member
Jul 6, 2014
9,267
None of the hollow tubes are small enough diameter to rest on the topside lip of the BJ to start pressing it out. I would assume that the smallest piece was just missing from the kit, but everything fits in the case with no spaces, so I think I have everything I'm supposed to. I don't want to try pressing it directly on the stud itself, cuz if it doesn't come out, and gets damaged in the process, then I'm really screwed. :ugh:
Is it the upper?
 

littleblazer

Member
Jul 6, 2014
9,267
Yeah, was gonna do both the uppers today, save me some time during the week when I do the lower arms.
The knuckle is pretty tough on those. You could use a deep impact style socket. That's how I started mine. :tiphat: The uppers aren't pressed all that tight. The lowers sucked on mine.
 
  • Love
Reactions: Blckshdw

littleblazer

Member
Jul 6, 2014
9,267
Great idea, hadn't thought of that! Gonna give that a shot right now.
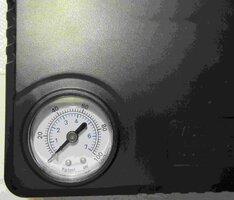
Just make sure it's a 3/8. My press would get chewed up on the end of a 1/2 socket. YMMV. :tiphat:
 

Blckshdw

Moderator
Nov 20, 2011
10,747
Tampa Bay Area, FL
The good news, I got the BJ in. The bad news, not only did I have to use a number of sockets to do it, I somehow messed up the grease threads, so I can't get the zerk fitting in. :hissyfit: This kit is a disaster, may work for many vehicles, but definitely not for ours. Not sure what I'm gonna do at this point, other than find out how long ball joints last without grease. :hahano:

We need a magic wand that makes problems go away. I would LOVE to have that in my toolbox!
 
  • Like
Reactions: littleblazer

littleblazer

Member
Jul 6, 2014
9,267
The good news, I got the BJ in. The bad news, not only did I have to use a number of sockets to do it, I somehow messed up the grease threads, so I can't get the zerk fitting in. :hissyfit: This kit is a disaster, may work for many vehicles, but definitely not for ours. Not sure what I'm gonna do at this point, other than find out how long ball joints last without grease. :hahano:

We need a magic wand that makes problems go away. I would LOVE to have that in my toolbox!
The ones I've dealt with are usually self tapping ish... just jam it and let her eat. Itll go.
 
  • Like
Reactions: xavierny25

Blckshdw

Moderator
Nov 20, 2011
10,747
Tampa Bay Area, FL
Have you tried getting a tap to clean-up the zerk fitting threads?

Unfortunately I don't have a tap and die set on hand. Been on the list of things to get, but low priority (until now :duh: )


The ones I've dealt with are usually self tapping ish... just jam it and let her eat. Itll go.

That's what I've been trying for the past hour and change. Just like when it seems like it's going to catch, it slips. The socket I used on the bottom to press the joint in, wasn't wide enough to catch the rim, so it sat on the base of the joint. Comparing to the old one, it's not slightly rounded, much flatter, and maybe even a little sunken in the center. Tried a couple gentle taps with a hammer to try and get it to seat, but I think I'm too afraid of making things worse.
 
  • Like
Reactions: littleblazer

Wooluf1952

Member
Nov 20, 2011
2,663
Milwaukee, Wisconsin
The extra Zerks that I have, use a 1/4-28 tap. I'm not sure if newer ones are metric. But take yours with you and for a few bucks you could get just the one tap from a hardware store.
 
  • Like
Reactions: Blckshdw and mrrsm

Mooseman

Moderator
Dec 4, 2011
26,027
Ottawa, ON
Unfortunately, the ball joint press sets in parts stores and HF don't have all the required attachments. However, I have one of those from HF and for the uppers, I never had any problems but I may have used sockets with it. The lowers is another story. I eventually modified one of the tubes with a notch so it rests on the ears and on the arm perfectly straight.

For trouble free work on these, you would need the master ball joint press kit like shown in this Chrisfix video. (IIRC, this was the video that introduced himself to us here as @dogfish )


mrrsm

Lifetime VIP Donor
Supporting Donor
Member
Oct 22, 2015
8,202
Tampa Bay Area
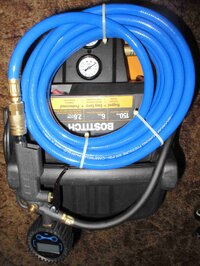
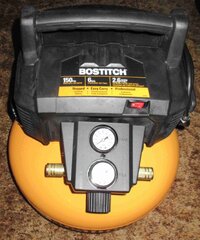
@Blckshdw ... As an Item to compliment your New Pneumatic Truck Lift… I’d like to suggest the one I recently got known as the Bostitch Model # BTFP02012 Pancake 150 PSI 6 Gallon Air Compressor. This rig could easily partner up with your “Air-Lift-Jack” in terms of added mobility and the advantage of BOTH having smaller footprints around the truck in the narrow confines of any Garage.

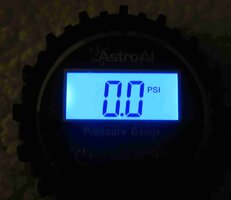
This Get-Up ends the need for dragging around and setting up the usually ostentatious Bulky 125-150 Gallon Air Compressor Tank that always becomes such a Big PITA. Here are a few images of this gear, noting that the Digital Tire Gauge and 25’ 300 PSI Proof-Tested Campbell Hausfield Air Line were separate item purchases:

BOSTICHAIRCOMPR1.jpgBOSTICHAIRCOMPR2.jpgBOSTICHAIRCOMPR3.jpgBOSTICHAIRCOMPR5.jpgBOSTICHAIRCOMPR7.jpgBOSTICHAIRCOMPR8.jpgBOSTICHAIRCOMPR9.jpg

The Unit delivers Air Pressure at 150 PSI with enough Volume to Inflate Truck Tires and has PLENTY of service power to satisfy the need to make numerous changes in position and elevation of your New Air-Lift-Jack under the SUV. It is available Brand New on Amazon for $99.00 with Free S&H:

https://www.amazon.com/dp/B00UHNM1R0/?tag=gmtnation-20

This combo could prove to be very handy for Highway-Roadside Tire-Wheel Repairs and Trailer Tire Fill-Ups at Rest Stops during extended Road-Towing Trips. It uses 110 VAC and the Compressor can fill the Tank to 150 PSI in around 3 Minutes. It also makes much less noise than the comparable Campbell-Hausfield 8.+ Gallon Bullet Tank from Harbor Freight, which may unfortunately also be incapable of actually Airing Up SUV Tires:

Here is an Un-Boxing and Decibel Comparison Video of the Bostitch vs. the Campbell-Hausfield Air Compressors from a Hands-On User:


Blckshdw

Moderator
Nov 20, 2011
10,747
Tampa Bay Area, FL
My 30 gallon compressor sits in the corner of the garage right behind my truck, so it's pretty convenient in that regard. Only limitation is the 25' air hose, as I have to be conscious about which side I want to run it to get to my destination since it doesn't reach all the way around. I have a 100" line that I keep in the shed out back, used that when fixing the fence gates years ago and needed a ton of reach.

For trouble free work on these, you would need the master ball joint press kit like shown in this Chrisfix video. (IIRC, this was the video that introduced himself to us here as @dogfish )

Yeah that was one of the videos I watched beforehand and figured it would go just the same way, minus the axle nut stuff. Also found out that I'd like my snap ring pliers to have a little bit more range. Had to use pick tools and screw drivers to get the new one back on. I might grind down some of the interior metal where the handles makes contact, to gain a few millimeters. :undecided:
 

Mounce

Member
Mar 29, 2014
13,667
Tuscaloosa, AL
Unfortunately, the ball joint press sets in parts stores and HF don't have all the required attachments.
Advance Auto at my side of the continent keeps multiples of the master ball joint press sets in stock for purchase/rental. Powerbuilt brand and they're very nice, surprisingly.

IMPORTANT: check the kit before you leave with it. Depending on age/use of the set, more pieces will be missing. The clerk tried to give me the first set they found and it was trashed. They were already having a hard time finding what I was asking for so I scooted behind the counter and ransacked their selection until I found a cream puff that had maybe been used once. Not sure how they felt about that but they didn't complain and I left happy with my rental.
 

littleblazer

Member
Jul 6, 2014
9,267
Advance Auto at my side of the continent keeps multiples of the master ball joint press sets in stock for purchase/rental. Powerbuilt brand and they're very nice, surprisingly.

IMPORTANT: check the kit before you leave with it. Depending on age/use of the set, more pieces will be missing. The clerk tried to give me the first set they found and it was trashed. They were already having a hard time finding what I was asking for so I scooted behind the counter and ransacked their selection until I found a cream puff that had maybe been used once. Not sure how they felt about that but they didn't complain and I left happy with my rental.
I cut the tape and zip tie off the one I rented from advance and still had to use a socket. Case weighted like 20 lbs to boot just couldn't get the right combo I guess. Maybe it varies by region?
 

Mounce

Member
Mar 29, 2014
13,667
Tuscaloosa, AL
Got some new toys recently...

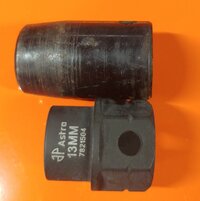
Astro pneumatic 1/2 nano impact sockets:

20191210_133533_HDR(1).jpg
20191210_133335_HDR(1).jpg

As you an see they're shorter than their standard sized cousins, makes for easy fitment in tighter spaces, even has wrench flats made onto them if the space is that tight. I also have these in 3/8. Both are nice full sets with no skips and both come on a blue aluminum socket rail as seen.

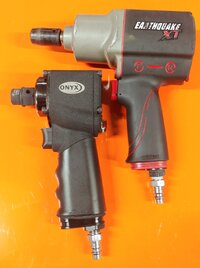
Astro pneumatic 1/2 inch nano onyx impact:

20191210_133315_HDR(1).jpg

20191210_133445_HDR(1).jpg

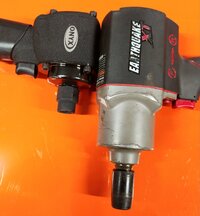
As seen, she's tiny. Not as strong as the full size earthquake but is rated for 450ftlbs and will beat the hell out of a wrench or ratchet doing brakes and other suspension work that the big girl won't fit in.

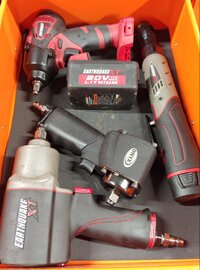
Here's a shot of my favorite drawer in my roll cart.

20191210_134001_HDR(1).jpg
 

Forum Statistics

Threads
23,681
Posts
641,977
Members
19,138
Latest member
wentzben

Members Online