LED Mod Thread

dmanns67

Member
Apr 3, 2013
32,979
Ohio
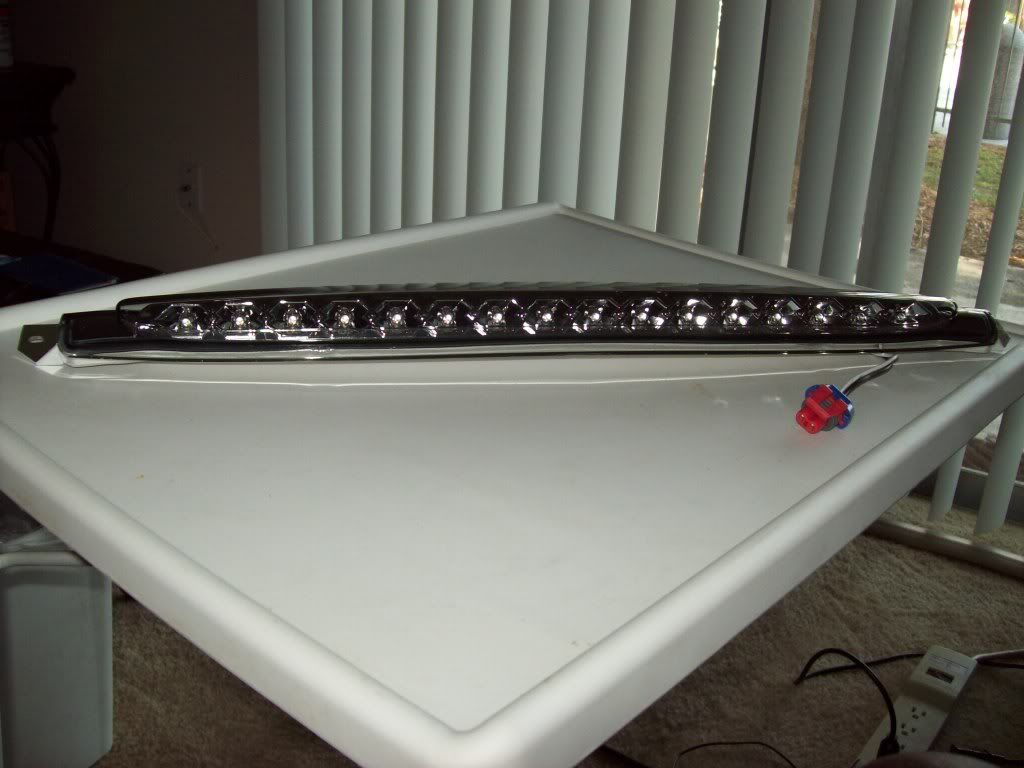
As I was searching through old threads, the mod bug bit me when I came across some members who have swapped out their 3rd brake light with an aftermarket one for the Avalanche. Just wondering if any members have used one made by IPCW Bermuda Black or Spec-D? I have their LED tails and would like the 3rd brake light to match. Below is a pic of the brake light. The other option is the Spec-D in pic #2.

IPCW, Bermuda Black (Looks like the LEDs are recessed and there is no cover over them)
View attachment 27566


Spec-D, Smoked
View attachment 27567
 

Attachments

  • 21G+8zroJlL.jpg
    21G+8zroJlL.jpg
    7.6 KB · Views: 135
  • 41ZIWHj-8CL.jpg
    41ZIWHj-8CL.jpg
    11.5 KB · Views: 135
  • Like
Reactions: CaptainKD

Blckshdw

Original poster
Moderator
Nov 20, 2011
10,747
Tampa Bay Area, FL
dmanns67 said:
As I was searching through old threads, the mod bug bit me when I came across some members who have swapped out their 3rd brake light with an aftermarket one for the Avalanche. Just wondering if any members have used one made by IPCW Bermuda Black or Spec-D? I have their LED tails and would like the 3rd brake light to match. Below is a pic of the brake light. The other option is the Spec-D in pic #2.

IPCW, Bermuda Black (Looks like the LEDs are recessed and there is no cover over them)
View attachment 13840


Spec-D, Smoked
View attachment 13842

:undecided: I think BoTieSS has the ICPW one (in chrome, but Niteshaded) on his TBSS. It has less LEDs in it, so minus points for that :tongue:

A1.jpg


A4.jpg


A5.jpg


The Spec-D one, is the more common style, made/sold by a bunch of other companies. That's also the model I have. The "smoke" is barely tinted at all, and when you first look at it, if you weren't expecting it to be there, you'd think there wasn't anything on it. :mad:

100_0247.jpg


That's why I modded mine as you may have seen in the article, so it matches my Depo tails. :biggrin: :thumbsup:
 

dmanns67

Member
Apr 3, 2013
32,979
Ohio
fr34kout said:
I've had a 2nd one for about a year now, I just never got around to splicing it in lmao. I'll probably do that saturday or sunday.

Dmann if you'd like I can snap a pic of how the license plate lights look tomorrow. As far as on / off, I have a shorted wire somewhere (I'm assuming in my headliner, shorted on my second skin) so I can't just click them on and off unless I turn them on with the knob. But if I turn them on with the knob, or a door is opened, I can turn them on/off individually like you normally would.

:yes:, if you have time to take a pic. I would like to see how you have the license plate lights set up and see how bright they are.

Short Bus said:
This is normal with GMT360/370s :yes: I like it because I can use the map light and not be blinded while driving.
I like the IPCW :thumbsup:

Thanks for the info. I was not sure if it was normal or if it was just my truck. You are right that is a good feature. The wife likes to read while on road trips and it helps that the light is dimmer when driving. I like the IPCW Bermuda black as well, but I cannot find any pictures with it installed on a TB or Avalanche. I was hoping a member on here might have one. Looks to have a different shape compared to others and would like to see how it looks installed.

Blckshdw said:
:undecided: I think BoTieSS has the ICPW one (in chrome, but Niteshaded) on his TBSS. It has less LEDs in it, so minus points for that :tongue:
The Spec-D one, is the more common style, made/sold by a bunch of other companies. That's also the model I have. The "smoke" is barely tinted at all, and when you first look at it, if you weren't expecting it to be there, you'd think there wasn't anything on it. :mad: That's why I modded mine as you may have seen in the article, so it matches my Depo tails. :biggrin: :thumbsup:

Your write up was the first thread that I came across talking about swapping the 3rd brake light with an Avalanche brake light. Great write up by the way :thumbsup:. I did notice that the Spec-Ds are about half the price of the IPCWs brake light. I have the same tail lights as BoTieSS and looking for a good brake light to match. His looks good so I might just go his route and get the "smoked" brake light and night shade it. After seeing BoTieSS's tail lights, now I am on the fence about night shading those as well. His look good with the black SS. Not sure how they would look on Desert Metallic LT :undecided: I did see your Depo tails and they look good!
 

fr34kout

Member
Jan 6, 2012
662
Took some pics for you guys.

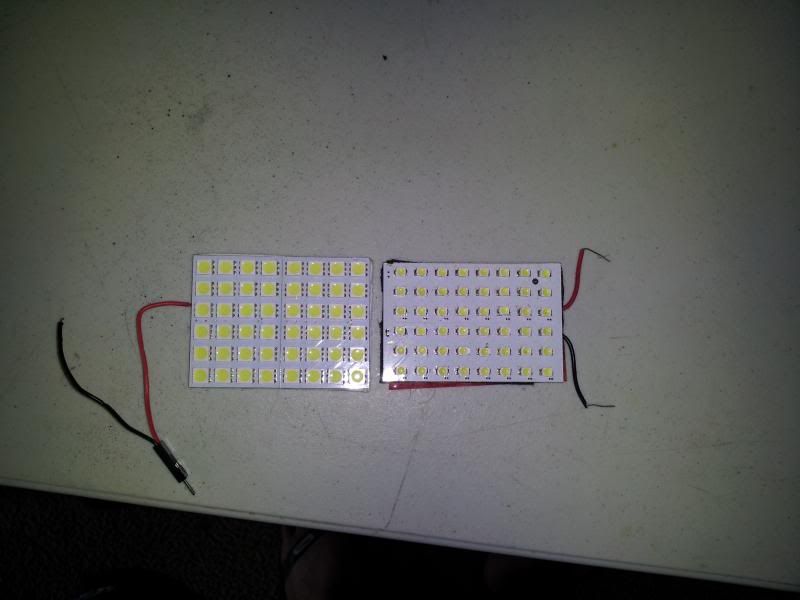
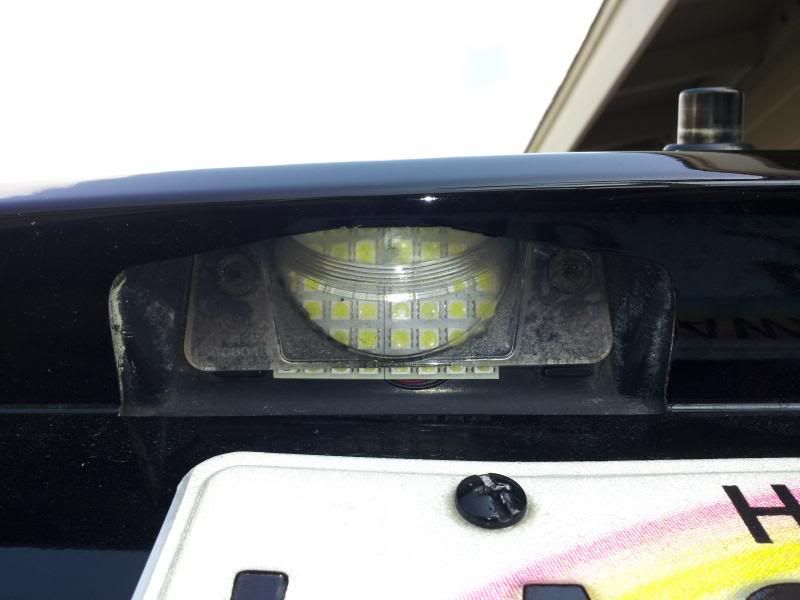
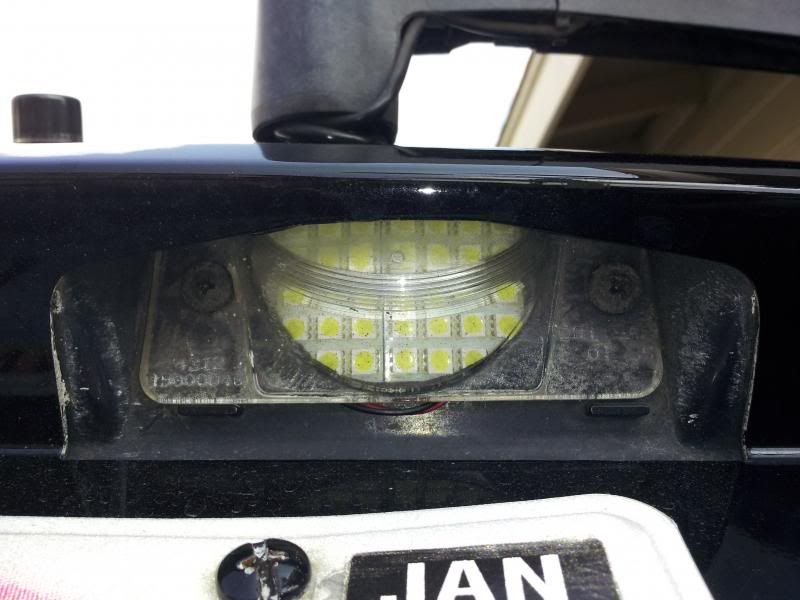
These are the 48 5050 SMD panels in my license plate lights. This is what I meant by they "fit" lmao. The one on the left could be positioned a little better, and I could finesse the wires to go behind the board a little better, but it works so whatever lmao.


Here's a comparison of the 48 3528 panels vs the 48 5050 panels. The 5050 SMD's actually have 3 LED chips for each individual unit, and the 3528's only have one. If you look closely, you can see that each of the 5050 SMD's have 3 prongs on either side instead of only one.


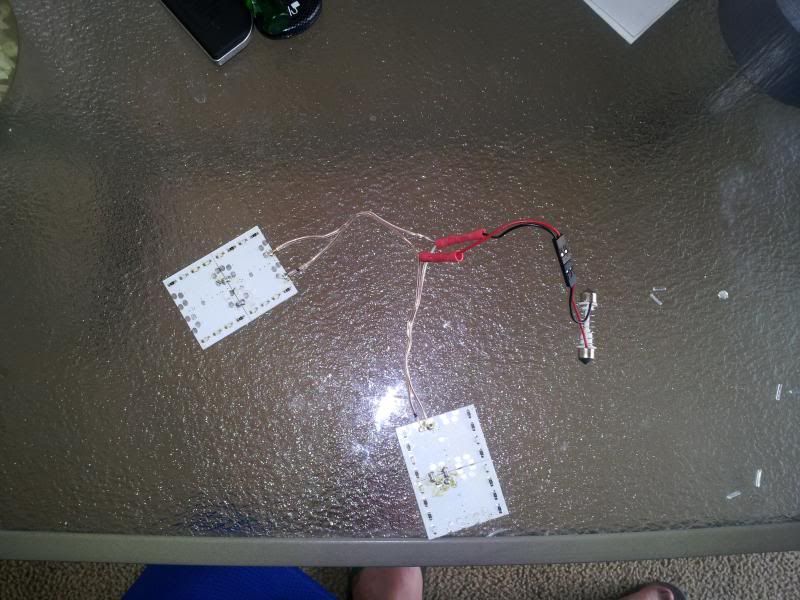
Finally wired up the cargo area for 2 panels


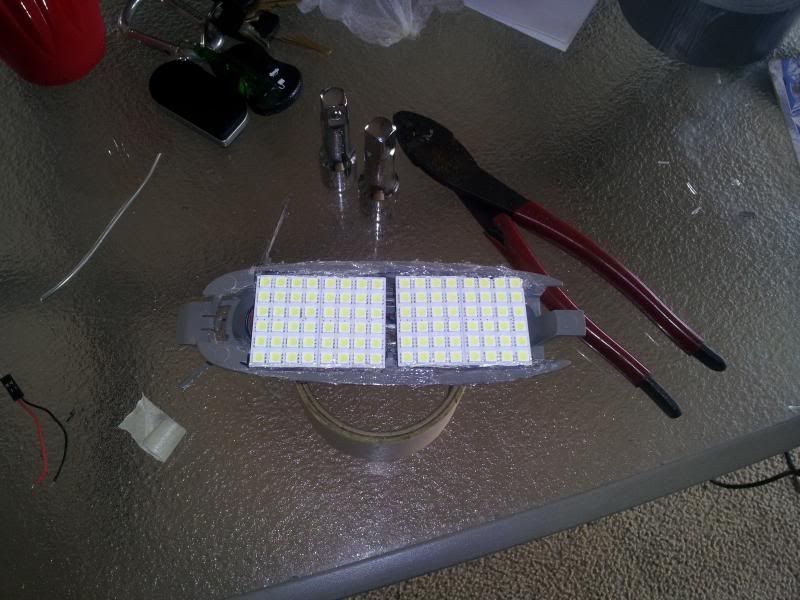
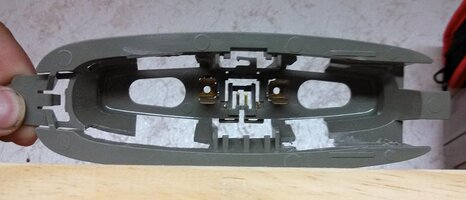
Modified the plastic housing to fit the 2 panels nicely, and siliconed them into place


Finally utilizing all my panels lol


fr34kout

Member
Jan 6, 2012
662
dmanns67 said:
Thanks for the pics. I see what you mean by "fit" now lol. Have you had any issues with the LEDs due to moisture or direct contact with water? Also, how did you end up removing the light cover for the cargo area? I have tried, but it does not want to budge and I am afraid I will break it. When I installed my LED bulb back there I had to pull down the head liner and install it from the top. Definitely a pain.
On the right side of the cover, there is a small slot where you can fit a flathead. Use that to gently pry it down, and while you're doing that gently pull only on that side. The right side is like a push fit, the left side swivels. So once you get the right side to pop off, you swing it down and then you can slide it to the right to pull it out.

I've never had any issues with moisture or water with the license plate LED's, only 1 time I had a wire get pinched because of the way I placed it behind the board. Just had to go back in there and bend the wires to the side.

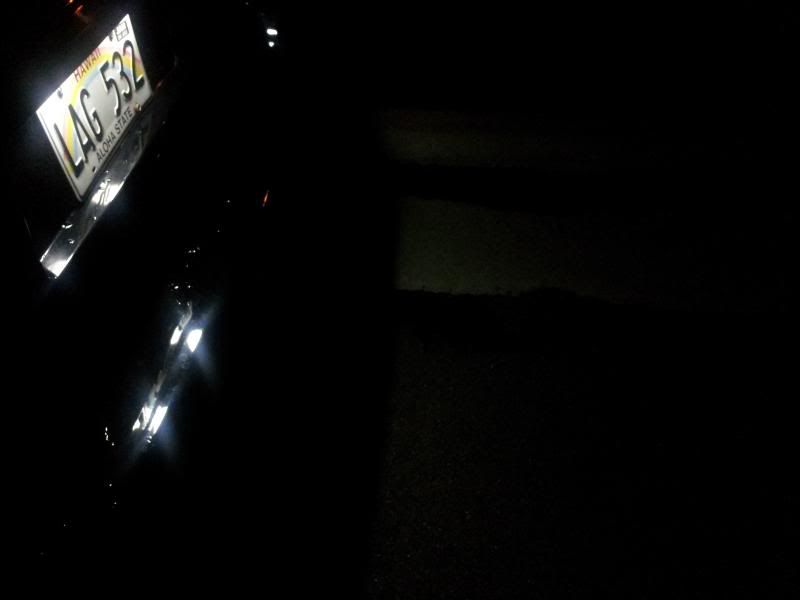
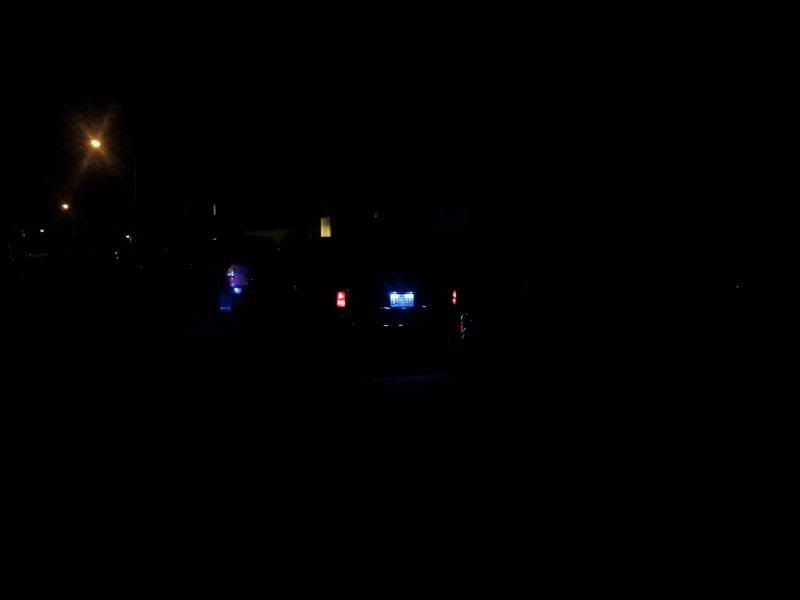
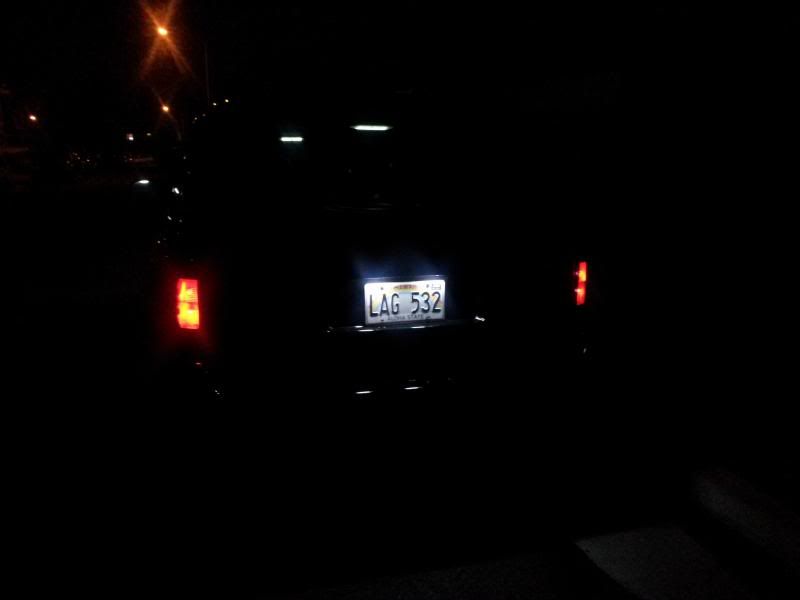
I took a couple pics a few minutes ago when I got home from work, but the camera on my phone does it no justice. In person they're pretty ridiculous, they light up the entire license plate and project light onto the ground behind my truck. You can clearly see the cut-off line where the light gets cut off by the bumper, and a good 5-8 ft behind my truck is illuminated pretty well.

Like I said, these pictures don't appear as bright as they actually are.

From about 50 ft away


Up close


Reflection off the bumper / Illuminating the ground


Grimor

Member
Mar 28, 2013
954
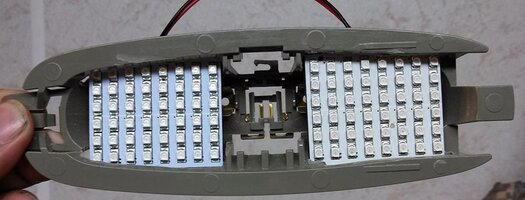
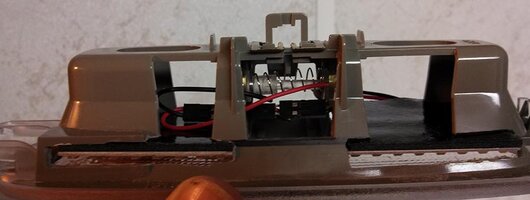
Just the basic LED swap. took about 3 min.
View attachment 27652
View attachment 27653
I didn't realize that the push on is a lower voltage...
View attachment 27654
I had already planned on adding some round push on/off white lights on either side of the sunroof switch, but not sure how much light the lower voltage is gonna put out.

Come with the bulb blade and adhesive back. 48 LED
[EBAY]181016576999[/EBAY]

I ordered a couple 24 LED ones too for misc lighting.
 

Attachments

  • IMG_20130422_184052_675.jpg
    IMG_20130422_184052_675.jpg
    62 KB · Views: 46
  • IMG_20130422_184144_496.jpg
    IMG_20130422_184144_496.jpg
    87.9 KB · Views: 42
  • IMG_20130422_184059_914.jpg
    IMG_20130422_184059_914.jpg
    62.7 KB · Views: 41

Grimor

Member
Mar 28, 2013
954
Short Bus said:
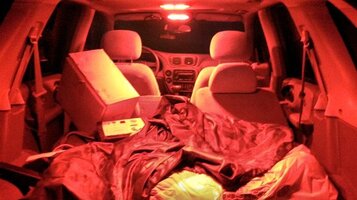
Can you post a night pic with it all lit up? I like the red, but how bright is it?

Is your name Roxanne?
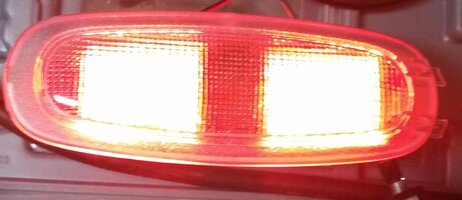
It's actually crazy bright with the dome light on. The tap on/off is basically nothing. You can see it glow but not really any light. I like the look, looks way better than I was expecting. Just gotta get the smaller lights in for the cargo area and add a couple white domes with a switch for those times when the red light district isn't where ya wanna go.
View attachment 27657
View attachment 27658
View attachment 27659
 

Attachments

  • DSC_0002.JPG
    DSC_0002.JPG
    37 KB · Views: 46
  • IMG_20130422_214512_158.jpg
    IMG_20130422_214512_158.jpg
    57.7 KB · Views: 42
  • IMG_20130422_214534_348.jpg
    IMG_20130422_214534_348.jpg
    79.1 KB · Views: 40

DFWWIZ

Member
Dec 5, 2011
516
Got some new 3157 SRCK tail light bulbs in. These are a combination of 5050 chips-12 of them around the base for low side; the Cree 7 watt 500 lumen comes on for the high side-signals or brakes. This should work well for those with tinted tails.
$24/pair shipped
$45 for 2 pairs shipped. These will need resistors for signals only 1 pair for $6
Pkg deal-$50 for 2 pairs lights and 1 pair resistors.
low side on


high side on with low side also
 

Grimor

Member
Mar 28, 2013
954
Short Bus said:
:iagree: And the ebay listing is in his post (it's buy it now)
Here's the smaller ones I got for the back
[EBAY]390532896357[/EBAY]

And here are some install pictures...
Step one is to remove the rear light housing and notch the sides to allow for the lights to slide in
View attachment 27691
View attachment 27693
Stick the lights in (they come with foam tape on the back)
View attachment 27694
View attachment 27695
And light em up
View attachment 27697
View attachment 27698
And installed....
View attachment 27699
 

Attachments

  • IMG_20130423_215407_243.jpg
    IMG_20130423_215407_243.jpg
    45.1 KB · Views: 22
  • IMG_20130423_215436_998.jpg
    IMG_20130423_215436_998.jpg
    61 KB · Views: 21
  • IMG_20130423_220022_649.jpg
    IMG_20130423_220022_649.jpg
    72.9 KB · Views: 21
  • IMG_20130423_220502_987.jpg
    IMG_20130423_220502_987.jpg
    54.8 KB · Views: 23
  • IMG_20130423_220050_608.jpg
    IMG_20130423_220050_608.jpg
    52.2 KB · Views: 22
  • IMG_20130423_220126_843.jpg
    IMG_20130423_220126_843.jpg
    71.4 KB · Views: 21
  • IMG_20130423_220835_584.jpg
    IMG_20130423_220835_584.jpg
    66.3 KB · Views: 22

Blckshdw

Original poster
Moderator
Nov 20, 2011
10,747
Tampa Bay Area, FL
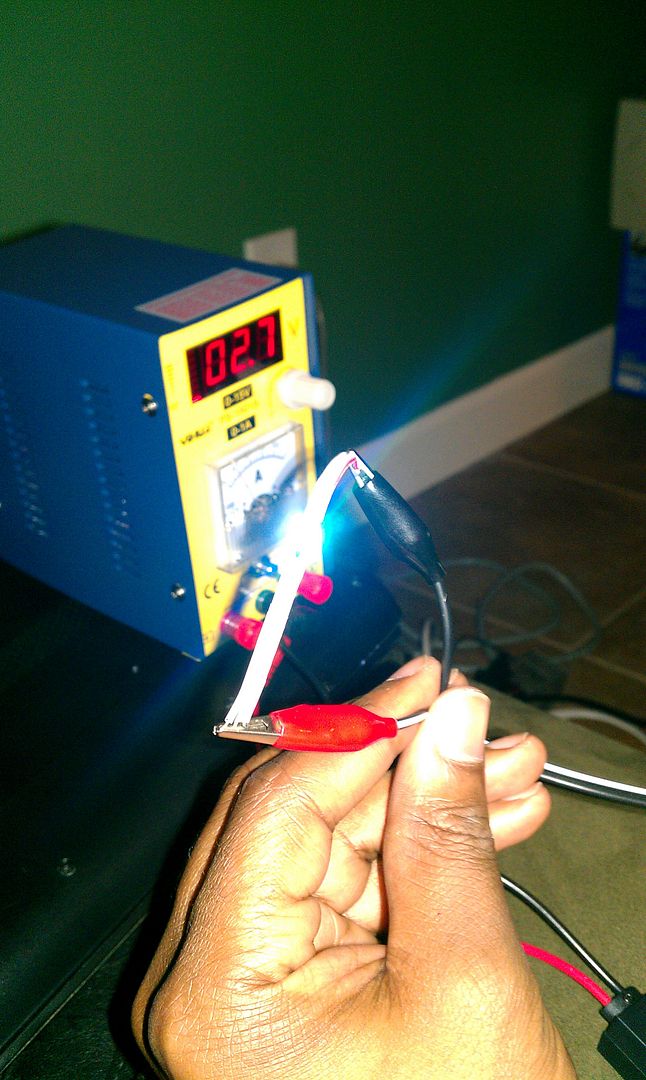
Decided to experiment with some RGB SMD LEDs. I used a 28AWG ribbon cable, stripped down into 3 wire pieces as my harness. (if any of you who wanna try it, have any old IDE or floppy cables laying around, you can cannibalize them for this :thumbsup:)

Look... pretty!! :cool:
IMAG0596_zpsc0ec2a8c.jpg


But I was disappointed, that when I ran the supply voltage through the 20ma LED driver, I could never get all 3 chips to fire at once. I would get red by itself (voltmeter would read 2.6V on each lead), or green and blue together (higher voltage reading). But when I varied the voltage manually and removed the driver, they were bright as :lipsrsealed:

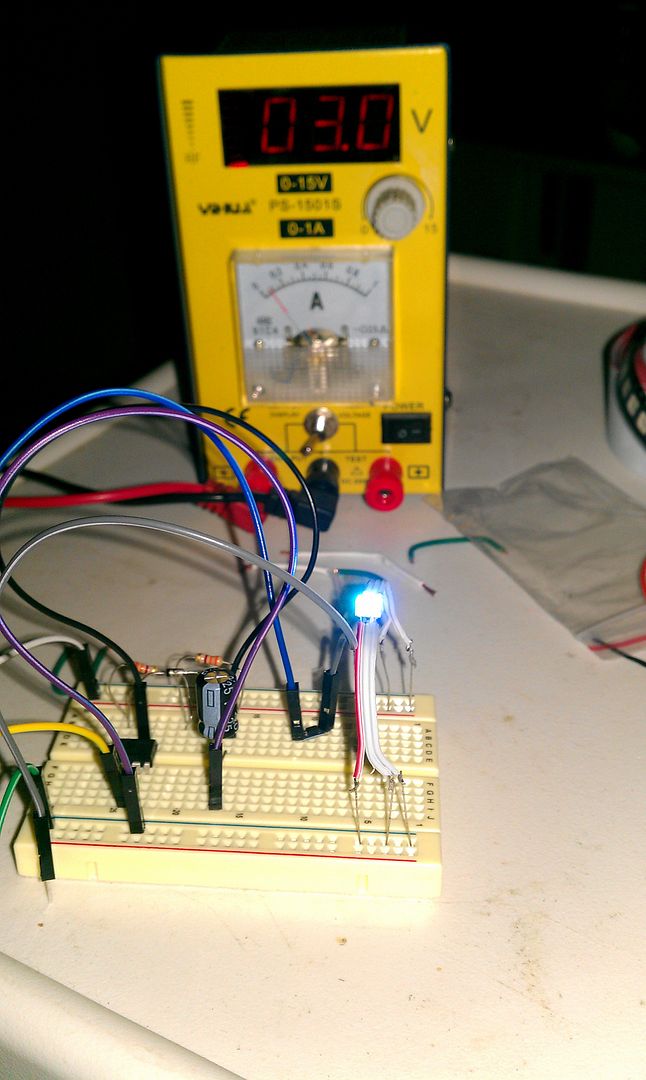
Please ignore all the other crap on my bread board, I didn't feel like disconnecting it to test out the LED.

3V gives a cool white color

IMAG0600_zpsd6d63288.jpg


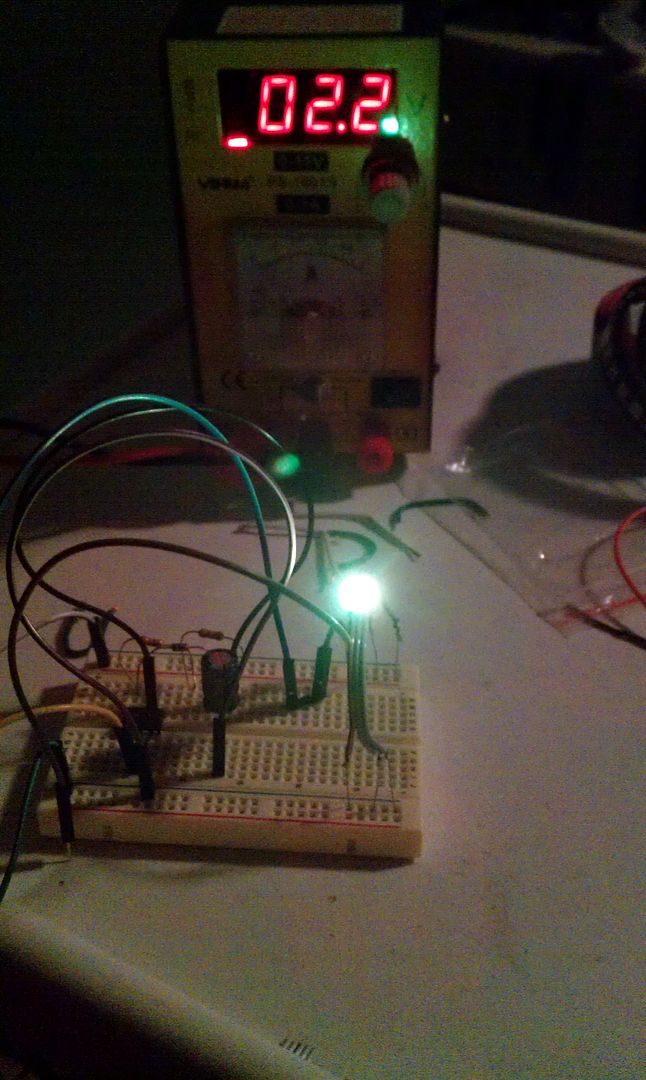
Just over 2V gives more of a green

IMAG0602_zps4fe19afc.jpg


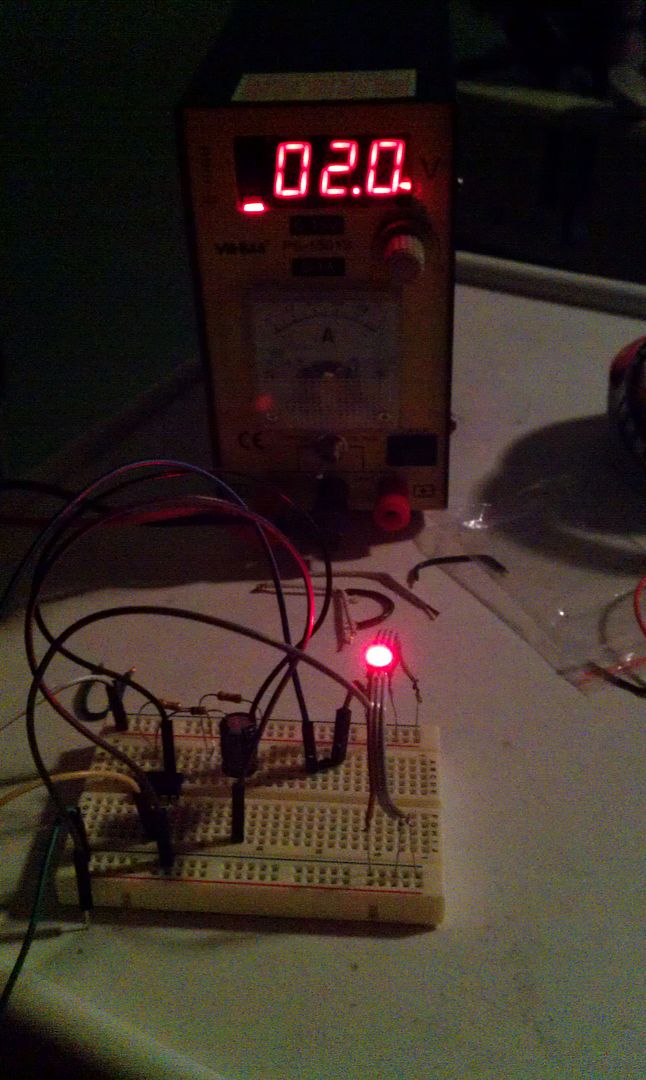
And 2V on the nose gives you red

IMAG0603_zpse6ca512f.jpg


According to Photoshop, putting red with green and no blue, should give me yellow. According to my LED, that ain't the case, at least not with them getting the same power either directly, or through the LED driver. Tomorrow, I think I'll try 1 LED driver for the red, and another 1 for green and blue together, see what happens there. I may have to look into some kinda cheap RGB controllers, and see if I can tie them together if the multi-driver approach doesn't work. :book:
 
  • Like
Reactions: CaptainKD

NinjuhhNutz

Member
Oct 15, 2012
720
I read through the thread, well a few different times lol...but haven't found a way around the hot spot issue (maybe I just didn't see it?)
anyone tried sanding down the top of the led and NOT polishing it back? I know a few have sanding down the round top led's to basically function as flat tops, but it just crossed my mind and I wondered if it might work?

nothing to do tonight, a few buddies are going catfishing, started to go :undecided: still might hahaha I figure if I'm not doing anything, might as well get something on the tb done :yes:


(ah, screw it...didn't think I would get a quick response this late at night during the week anyways...so I went for it :yes: )

doesn't look too bad, not EXACTLY how I wanted it, but I think when I finish the cluster lights and the hvac, and get the head unit in (blue/red as well) it'll look a lot better?
gonna think a bit on a way to even the light out, maybe add an led in-line with the other ones :yes:

big shoutout to BlckShdw for the writeup and always being around to help! :Lager Louts:
2013-04-26031425.jpg

2013-04-26031433.jpg

2013-04-26031445.jpg

2013-04-26031507.jpg
 
  • Like
Reactions: Blckshdw

ghenny440

Member
Dec 14, 2011
368
[video=youtube_share;5o5tsh1KAbI]http://youtu.be/5o5tsh1KAbI[/video]
[video=youtube_share;m5eaGZRRTOs]http://youtu.be/m5eaGZRRTOs[/video]
[video=youtube_share;YvmwGTl7hQw]http://youtu.be/YvmwGTl7hQw[/video]
Here ya go carlton, the first is a 2012 camaro ss i did last week
The second and 3rd are a TB i did today at work,
I built a false floor box with 2 shallow mount p3's and lit the bottom of the box and the port to flash with the bass, the more intense the bass the brighter it gets, and well the passenger compartment is pretty much self explanatory,
Heres a few outside shots of the 22's i put on it yesterday
We hooked him up wheels, tires, mounted, balanced, and installed for 1800$
dezuta5a.jpg

e8utuhy7.jpg

ema9ype5.jpg

unymumu3.jpg
 

Boricua SS

Member
Nov 20, 2011
3,080
Ohio
to give you an idea of grille LED lights.. a member did it on tbssowners and I think its the chit!!! see attachments below... and then here is ghenny440's Voy interior with LED's in the vents and floor, etc...
 

Attachments

  • Voy interior.jpg
    Voy interior.jpg
    25.8 KB · Views: 31
  • grille light 2.jpg
    grille light 2.jpg
    66.3 KB · Views: 26
  • gille light 1.jpg
    gille light 1.jpg
    64.4 KB · Views: 26

ghenny440

Member
Dec 14, 2011
368
Not exactly my cup of tea being its pink but thats what a friend wanted so thats what she got and i was extremely surprised how bright they are see for yourself

hubure5a.jpg

a2esyduz.jpg

u9a8e9us.jpg

8e2e4a5y.jpg


enery9e4.jpg
pe7y4u2y.jpg

So what do you guys think
 
  • Like
Reactions: CaptainKD

Conner299

Member
Jan 16, 2013
279
I finally started on a project, I've had kicking around in my brain, this last weekend. Had to replace two of my three blown door speakers, so had to take the door panels off, anyways. *Sidenote*- I think the aftermarket radio, I put in, blew the speakers. Im guessing more power than the stock one, and aging speakers contributed to this. Anyhow, back to the LED's. Ive wanted to add puddle lights for awhile, and decided to take the plunge. I absolutely hate the look of those LED strip lights, and wanted something a little cleaner looking. I know, the lights aren't in a perfectly straight line, but I think they look a heck of a lot better, than a strip stuck to the botom of the door. Ive run into a couple of "problems".

1) I originally planned for 11 lights in a parallel circuit. The LED calculator I used called for 560 ohm, 1/2 watt resistors. Wellll, for some reason i decided to put in 20, and didnt think about rechecking with the LED calculator. When I went back and recalculated, it spit this schematic, back at me.


I would really like to run all twenty, the way this schematic showed me, seeing as how they are now wired up like this.


I checked four or five calculators, trying to see if they would give me a schematic similar to the second one. All I get is schematics similar to the first one. Any ideas? Im going to take the panel back off, and hook up a 9v battery, and see what happens, tonight. Good Idea? Bad idea? I dont think my LEDs will blow.

2) Trying to figure out where the wiring will hook-up. Ground is pretty self explanatory. The postive wire is where Im stuck. I downloaded the service manual from here, and this is what Ive come up with. The wiring I want to tap into is for the door jamb switches, as can be found on page 46 of the PDF. Yes? No? And if so, where can these be found? I looked for anything resembling these and couldnt find them for the life of me. Not 100% certain, but Im pretty sure others have wired up puddle lights, and would really appreciate any help that could be offered up. The following are pictures of the work I got done on the puddle lights, this weekend...


  • Like
Reactions: CaptainKD

Blckshdw

Original poster
Moderator
Nov 20, 2011
10,747
Tampa Bay Area, FL
Conner299 said:
I finally started on a project, I've had kicking around in my brain, this last weekend. Had to replace two of my three blown door speakers, so had to take the door panels off, anyways. *Sidenote*- I think the aftermarket radio, I put in, blew the speakers. Im guessing more power than the stock one, and aging speakers contributed to this. Anyhow, back to the LED's. Ive wanted to add puddle lights for awhile, and decided to take the plunge. I absolutely hate the look of those LED strip lights, and wanted something a little cleaner looking. I know, the lights aren't in a perfectly straight line, but I think they look a heck of a lot better, than a strip stuck to the botom of the door. Ive run into a couple of "problems".

1) I originally planned for 11 lights in a parallel circuit. The LED calculator I used called for 560 ohm, 1/2 watt resistors. Wellll, for some reason i decided to put in 20, and didnt think about rechecking with the LED calculator. When I went back and recalculated, it spit this schematic, back at me.

<snip>

I would really like to run all twenty, the way this schematic showed me, seeing as how they are now wired up like this.


I checked four or five calculators, trying to see if they would give me a schematic similar to the second one. All I get is schematics similar to the first one. Any ideas? Im going to take the panel back off, and hook up a 9v battery, and see what happens, tonight. Good Idea? Bad idea? I dont think my LEDs will blow.

2) Trying to figure out where the wiring will hook-up. Ground is pretty self explanatory. The postive wire is where Im stuck. I downloaded the service manual from here, and this is what Ive come up with. The wiring I want to tap into is for the door jamb switches, as can be found on page 46 of the PDF. Yes? No? And if so, where can these be found? I looked for anything resembling these and couldnt find them for the life of me. Not 100% certain, but Im pretty sure others have wired up puddle lights, and would really appreciate any help that could be offered up. The following are pictures of the work I got done on the puddle lights, this weekend...

<snip>

I like what you're doing here. I don't see any problems with the way you're wiring them up in the panel, since you're doing a 1 to 1 setup. You can string together 30 in there if you wanted. Don't pay so much attention to what the image looks like, focus more on how YOU want to wire them up, and then find calculations based on that. For the resistor rating, I am assuming you're using white LEDs? For my blue ones, they call for 470ohm resistors.

For powering them up, I believe the door ajar switches are a ground signal (similar to how the DIC functions are triggered) so that wouldn't work for you. I haven't looked at the door wiring in quite a while though (since doing the door scuff plate mod), so confirm with a meter. Worst case scenario, you'll have to run your positive wire through the door's boot, into the cabin and up to a dome light. That's what I ended up doing.

I tried tapping into the rear fuse block, and the wires going up the B pillar with no success :twocents:
 

Conner299

Member
Jan 16, 2013
279
@blckshdw... Thank you for the tips. Highly appreciated, as always. Went back to playing around with the LED calculator again. When I plugged 1 LED in, 560 ohm came up. So... I'm 99% that my set up will work. Hooked a 9v up, and got some light. I figured it wouldn't be enough to light it all up. I moved my test leads up and down the line, and all LEDs fired. At least I have them all wired correctly. I think I'm going to take your advice, and run the wires to the dome light. PITA, but seems to be the "easiest" route. Thanks again. And thanks again for "liking what I'm doing". Means a lot coming from the LED Legend, himself. Hadn't seen anybody else do puddle lights this way, and I'm hoping I'm the first. Just wish I had ordered pure white, and not warm white lights.:duh:x2
 

NinjuhhNutz

Member
Oct 15, 2012
720
Blckshdw said:
I like what you're doing here. I don't see any problems with the way you're wiring them up in the panel, since you're doing a 1 to 1 setup. You can string together 30 in there if you wanted. Don't pay so much attention to what the image looks like, focus more on how YOU want to wire them up, and then find calculations based on that. For the resistor rating, I am assuming you're using white LEDs? For my blue ones, they call for 470ohm resistors.

For powering them up, I believe the door ajar switches are a ground signal (similar to how the DIC functions are triggered) so that wouldn't work for you. I haven't looked at the door wiring in quite a while though (since doing the door scuff plate mod), so confirm with a meter. Worst case scenario, you'll have to run your positive wire through the door's boot, into the cabin and up to a dome light. That's what I ended up doing.

I tried tapping into the rear fuse block, and the wires going up the B pillar with no success :twocents:

why not leave a constant 12v to the led's and let the door ajar signal trigger the ground for the circuit?
(just thinking in my head lol)
toggling a ground works just as effectively as toggling the positive, right? That's how the aux channels on all the remote start/alarm units are, the -200mA to trigger a relay for w/e purpose you want.
 

DDonnie

Member
Mar 26, 2012
2,631
First one down
 

Attachments

  • uploadfromtaptalk1368497335972.jpg
    uploadfromtaptalk1368497335972.jpg
    12.6 KB · Views: 17
  • Like
Reactions: CaptainKD

NinjuhhNutz

Member
Oct 15, 2012
720
Conner299 said:
Sorry, but you guys are both kinda speaking Greek to me right now... I kinda understand what you're talking about, but would need detailed instructions, and/or pics, to pull that off. I've been lucky so far, by just emulating the results of others. This has been my first mod, venturing into unchartered waters.
BlkShdw was saying that the door ajar wire was a ground. I would use the negative of the door ajar trigger, to complete the circuit for your led's.
Basically, 99.9% of the time, people run the positive wire to a switch, which toggles power to whatever they want to have. By using the door ajar wire as a trigger, you could make it simpler by running a constant positive wire to your led's, and wire the ground for your led circuit to the door ajar wire. Much easier to wire imo.
You could run a fused wire straight from the battery and do a 4-way split (one to each door) or use the fuse box. Lots of different options.
Trust us, lol once you do one or two mods, your curiosity takes over, and fear goes out of the window :raspberry:
make more sense that way?
DDonnie said:
First one down

looks good! the hot spots aren't as bad in yours as mine lol
I think the blue exaggerates the hot spots more so than the red...one day I'll get mine looking like BlkShdw's :eek:
 

Conner299

Member
Jan 16, 2013
279
@NinjuhhNutz... That makes much more sense, especially since I've had more time to mentally process the concept. Now... To try and figure out where the door ajar switch is.
 

jimmyjam

Member
Nov 18, 2011
1,634
Use C1 in each door for power and ground. those are the big wires for the window motors.

C2-A2 in each door is going to show ground when the door is open. now i don't like pushing a lot of current through those grounds because i don't know what that circuit looks like. the ground goes to the switch and back to B10, then goes "somewhere" and DDMs aren't cheap so a small relay is cheap insurance. also for small loads like LEDs a bosch style relay is overkill, a small reed relay can handle up to 500ma which is what, 25 LEDs in parallel, if you have an array of them you could run even more. but a reed relay is going to pull under 10ma, vs ~150ma+ for a bosch coil.

anyway so you'd hook 12v to one side of the relay coil and the other to A2, then feed your 12v (or ground, your choice) through the relay switch. voila

http://www.radioshack.com/product/index.jsp?productId=2062479

View attachment 28129
View attachment 28130
View attachment 28131
View attachment 28132
 

Attachments

  • ddm-c1.jpg
    ddm-c1.jpg
    19.8 KB · Views: 22
  • ddm-c2.jpg
    ddm-c2.jpg
    19.7 KB · Views: 24
  • fpdm-c1.jpg
    fpdm-c1.jpg
    19.6 KB · Views: 22
  • fpdm-c2.jpg
    fpdm-c2.jpg
    20.2 KB · Views: 22

DFWWIZ

Member
Dec 5, 2011
516
DFWWIZ said:
I think it needs the Hello Kitty under the door ghost lights. :biggrin:

I wasn't kidding. I do have those available if requested. Like my Decepticon under my hood and my rear bumper, they can be turned on at will.
rear

under hood
 
  • Like
Reactions: CaptainKD

DDonnie

Member
Mar 26, 2012
2,631
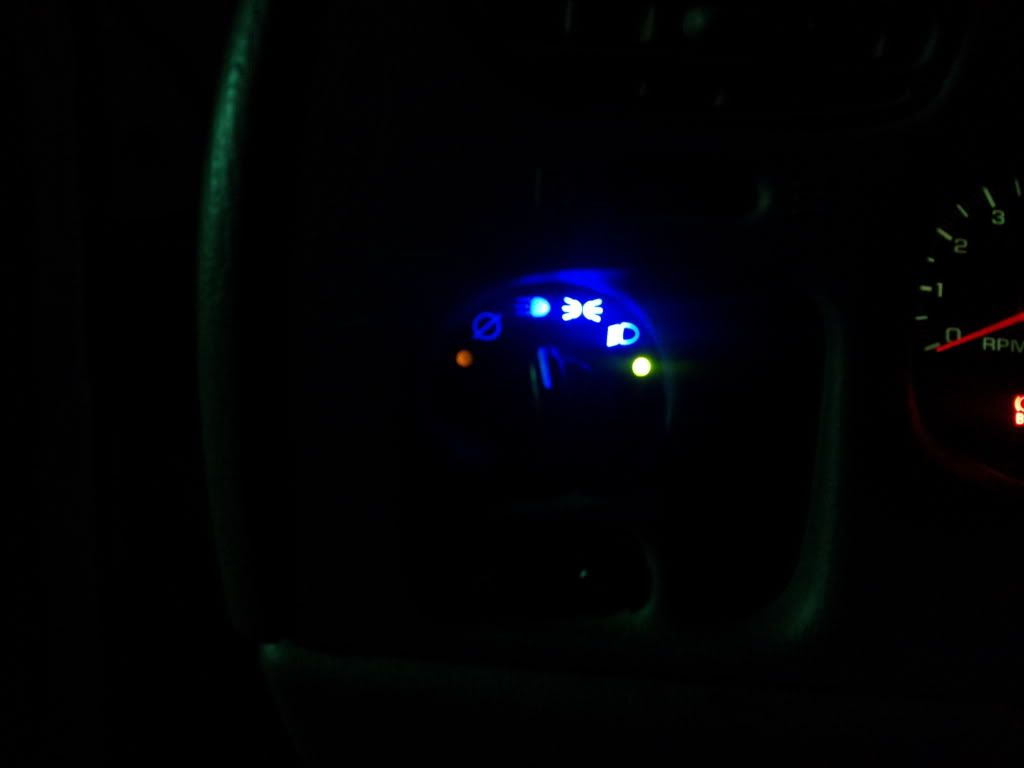
Anybody know how to remove the white pot switch in the headlight controller??

anujeqyb.jpg


Also, i fixed it

View attachment 28141
 

Attachments

  • 2013-05-14 21.33.42.jpg
    2013-05-14 21.33.42.jpg
    19.9 KB · Views: 25
  • Like
Reactions: CaptainKD

Conner299

Member
Jan 16, 2013
279
anujeqyb.jpg


That looks like the same headlight switch I have... I could only get the indicator lamps for headlights off and DRL's to work. If you have polarity pics for the other lights on this switch, I would appreciate it.
 

NinjuhhNutz

Member
Oct 15, 2012
720
Conner299 said:
anujeqyb.jpg


That looks like the same headlight switch I have... I could only get the indicator lamps for headlights off and DRL's to work. If you have polarity pics for the other lights on this switch, I would appreciate it.

I never managed to get mine off :no:
I just moved it around where I could get to the areas I needed to

I used Carlton's pic to do mine...worked for me :yes:
Blckshdw said:
Headlight switch. I did notice the circuit board is stamped for GMT370s, so there may be differences with the short wheel base versions. I know some have a light under the dimmer knob.
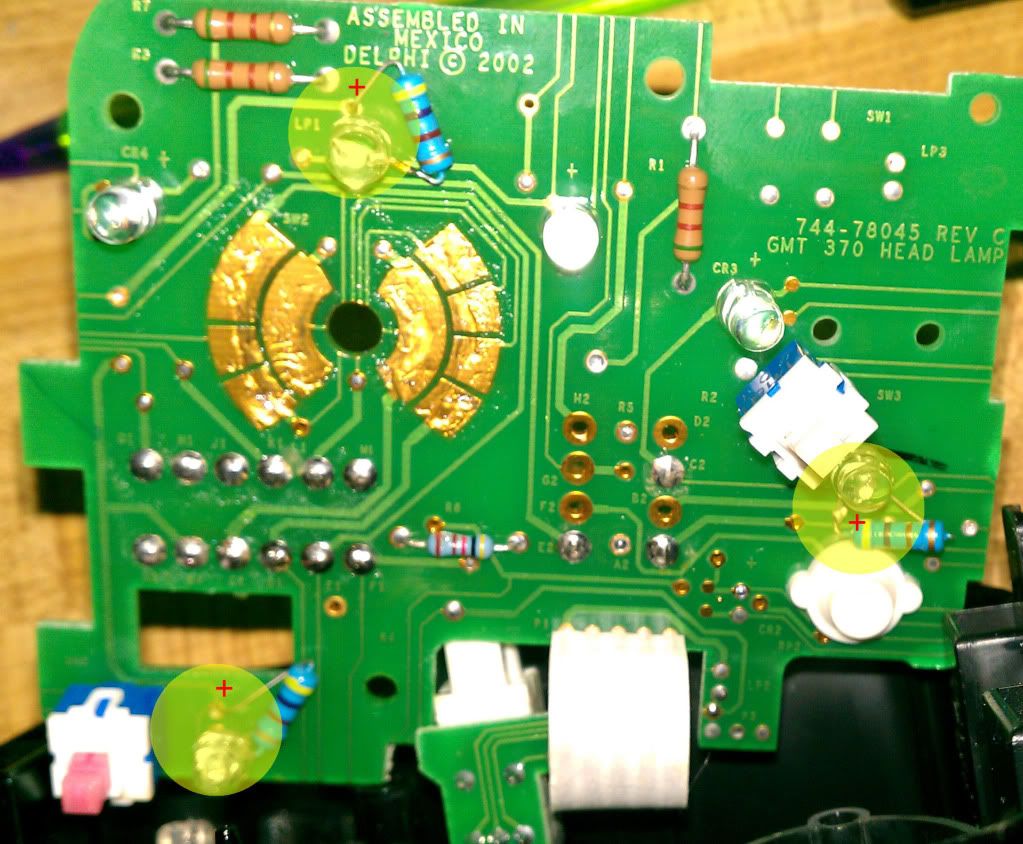
Polarity-HeadlampSwitch.jpg
 

Boricua SS

Member
Nov 20, 2011
3,080
Ohio
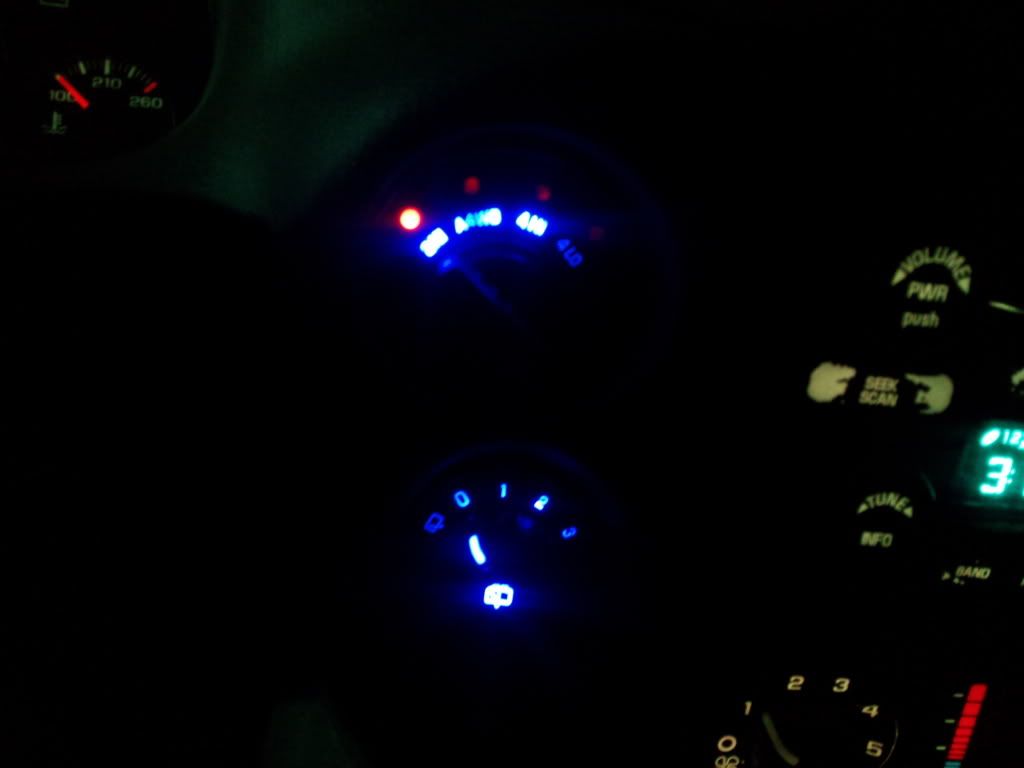
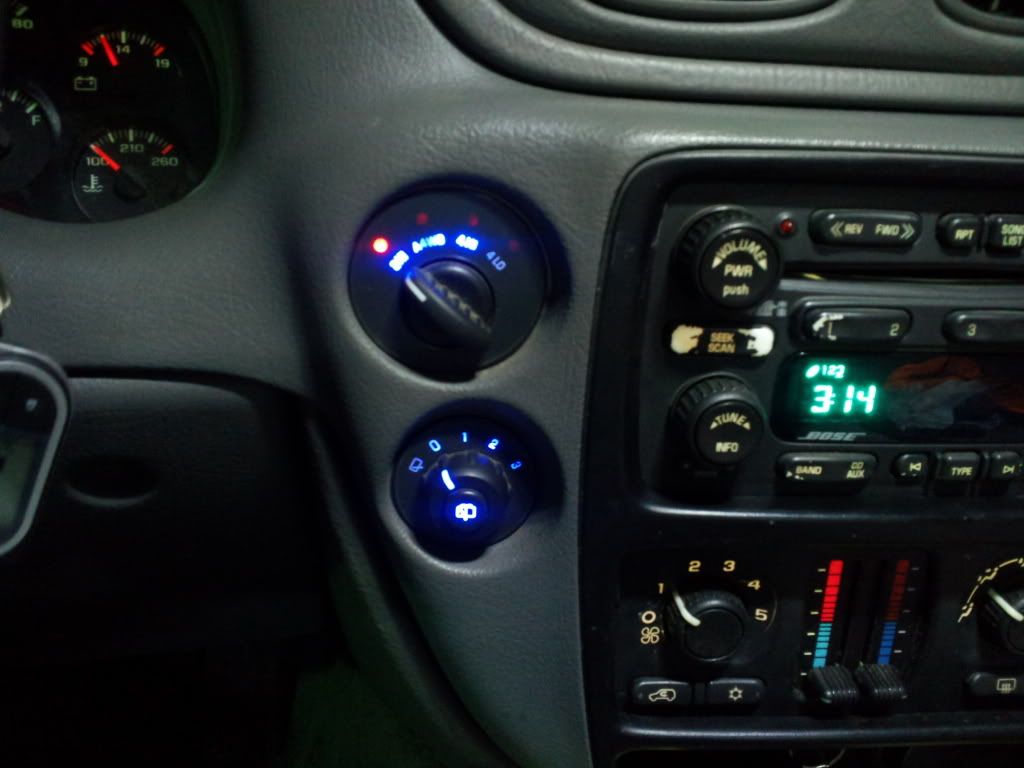
we just maneuvered my board around as well for the headlight switch... here's what I did for led's today...

20130515_162309_zpsf1ba2e8f.jpg

20130515_173955_zps4c120890.jpg

20130515_175622_zps216b8783.jpg

20130515_180150_zps8f0805f7.jpg

20130515_191358_zps50c4e049.jpg

20130515_191403_zpsdc512e53.jpg

20130515_191424_zps7746e0bd.jpg
 

DDonnie

Member
Mar 26, 2012
2,631
That's awesome!

Got the headlight switch done.
 

Attachments

  • uploadfromtaptalk1368682604800.jpg
    uploadfromtaptalk1368682604800.jpg
    14.8 KB · Views: 19
  • uploadfromtaptalk1368682659418.jpg
    uploadfromtaptalk1368682659418.jpg
    13.4 KB · Views: 19

NinjuhhNutz

Member
Oct 15, 2012
720
Boricua SS;138340 said:
There were not pre wired... they came in a 16' roll and ypu cut the to size then solder on your wires...

And shame on you!.. pruple leds in a blue SS :no: :rotfl:.. they are blue...

That's what I said, blue :rotfl:
My bad, my monitor might need some tweaking, I really couldn't tell lol ((or maybe slightly less wine after work :tongue:
Either way, looks damn good
 

DFWWIZ

Member
Dec 5, 2011
516
For anyone wanting a quicker way to wire leads to strips after you cut them, I have these for the 5050 and 3528 - wire lead clips. You take off 1/8" of the liquidome at the end and simply slip these on and then fold over the locking top.

 
  • Like
Reactions: CaptainKD

DDonnie

Member
Mar 26, 2012
2,631
Here's the mirror mod, i will do a write up sometime soon.

[video=youtube_share;lhtcn_NZNzk]http://youtu.be/lhtcn_NZNzk[/video]
 
  • Like
Reactions: Sib

ConeKilrAutoX

Member
Dec 8, 2011
1,179
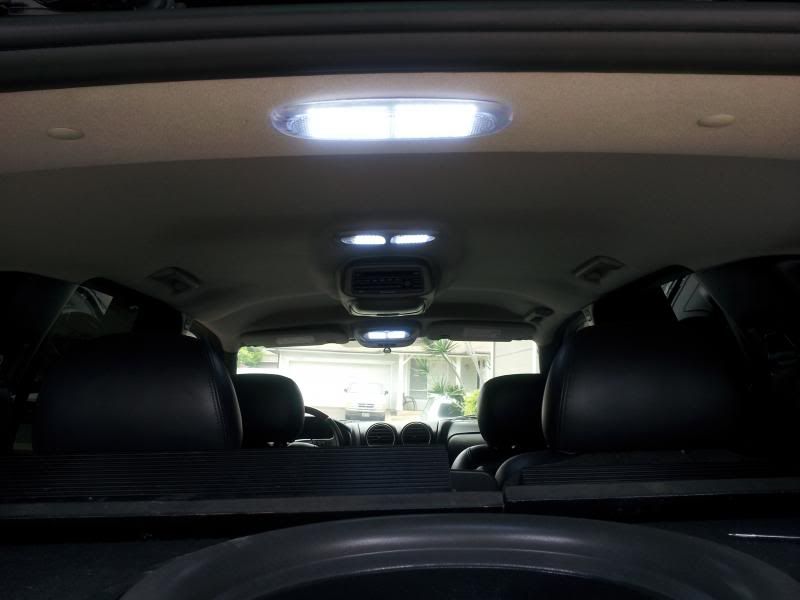
I needed some feeling of success while the build gets sorted out a few days ago SO put in dome LEDs :biggrin:
I start my new job tomorrow so I took out the window control/door lock controls and they will get the blue LED treatment my dash got last year this week after work
View attachment 28250
View attachment 28251
 

Attachments

  • 2013-05-19_17-39-22_314_resized.jpg
    2013-05-19_17-39-22_314_resized.jpg
    41.4 KB · Views: 46
  • 2013-05-19_17-39-46_872_resized.jpg
    2013-05-19_17-39-46_872_resized.jpg
    45.7 KB · Views: 48
  • Like
Reactions: Blckshdw

Forum Statistics

Threads
23,683
Posts
641,991
Members
19,142
Latest member
awhite144

Members Online