LED Mod Thread

ChevyTBLover

Member
Nov 21, 2011
116
jimmyjam said:
Are those etched or milled?

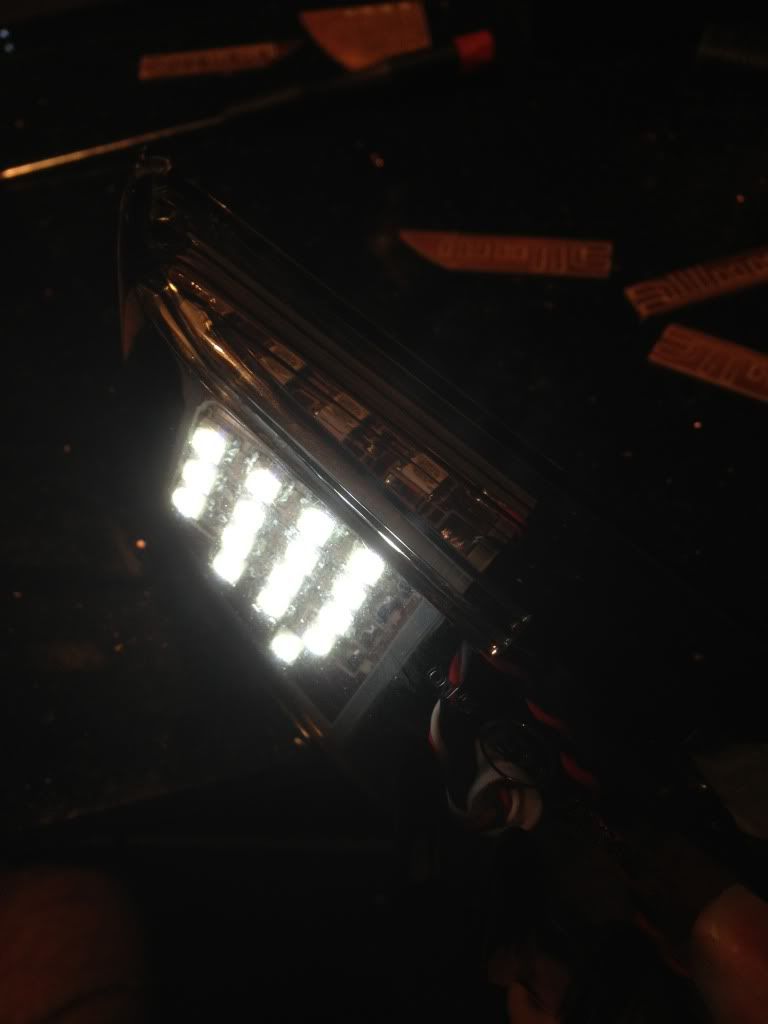
These are milled. Here's another teaser.
 

ghenny440

Member
Dec 14, 2011
368
Well it isnt EXACTLY led mod but the leds are lit up in the video
[video=youtube_share;KxmHVmKzexQ]http://youtu.be/KxmHVmKzexQ[/video]
Here is the ipad mini install we have been working on at my job, it just left today with the customer, and it worked flawlessly, what do uou guys think
 

Boricua SS

Member
Nov 20, 2011
3,080
Ohio
everybody is jumpin on the tablet wagon... hmmmm.. :undecided:, ideas are flowin lol... I think the wood needs to go on top and below it though... the painted fiberglass is standing out too much but if the whole cluster panel matched, I think it would look tits... clean install bro... :thumbsup:
 

ghenny440

Member
Dec 14, 2011
368
Boricua SS said:
everybody is jumpin on the tablet wagon... hmmmm.. :undecided:, ideas are flowin lol... I think the wood needs to go on top and below it though... the painted fiberglass is standing out too much but if the whole cluster panel matched, I think it would look tits... clean install bro... :thumbsup:

Thats what i said but the customer wanted it like that so thats what he got, there is actually a kenwood kdcx-597 behind the dash and the ipad plays through blutooth audio, and the steering wheel controls still work via an axxess awsc-1 module


9use3eqa.jpg

Heres a full pic of it, with the leds on and the full console
 

yodaddy4200

Member
Feb 3, 2013
350

Attachments

  • P1000888.jpg
    P1000888.jpg
    33 KB · Views: 14
  • P1000889.jpg
    P1000889.jpg
    54.2 KB · Views: 14
  • P1000890.jpg
    P1000890.jpg
    35 KB · Views: 14
  • P1000892.jpg
    P1000892.jpg
    16.4 KB · Views: 14
  • Like
Reactions: CaptainKD and Sua25

DDonnie

Member
Mar 26, 2012
2,631
My mod
 

Attachments

  • uploadfromtaptalk1372300387534.jpg
    uploadfromtaptalk1372300387534.jpg
    53.6 KB · Views: 34
  • uploadfromtaptalk1372300402611.jpg
    uploadfromtaptalk1372300402611.jpg
    12.6 KB · Views: 30
  • uploadfromtaptalk1372300414389.jpg
    uploadfromtaptalk1372300414389.jpg
    11.2 KB · Views: 29
  • Like
Reactions: Blckshdw

Blckshdw

Original poster
Moderator
Nov 20, 2011
10,776
Tampa Bay Area, FL
wesman43 said:
Is it more practical to buy the LED flasher than it is to use resistors?

You may experience issues with losing your cruise control with the LED flasher, if you also have LED bulbs in your brake lights. Aftermarket LED tails, like mine, have built in load resistors, so cruise control doesn't get lost.
 

Sparky

Member
Dec 4, 2011
12,927
wesman43 said:
Is it more practical to buy the LED flasher than it is to use resistors?

I just have load resistors on my tails (they came with them) and my fronts also (got a pair from ebay for like 8 bucks or something).
 

ghenny440

Member
Dec 14, 2011
368
[video=youtube_share;KeUedM_Q188]http://youtu.be/KeUedM_Q188[/video]
Heres a 6g i did today, we charge 199.99$ plus labor, tax, and shop fee for this 8 pc interior exterior kit, wireless remote and everything, what you guys think about the light output
 

ChevyTBLover

Member
Nov 21, 2011
116
ChevyTBLover said:
I've got something in the works :smile:

ChevyTBLover said:
These are milled. Here's another teaser.


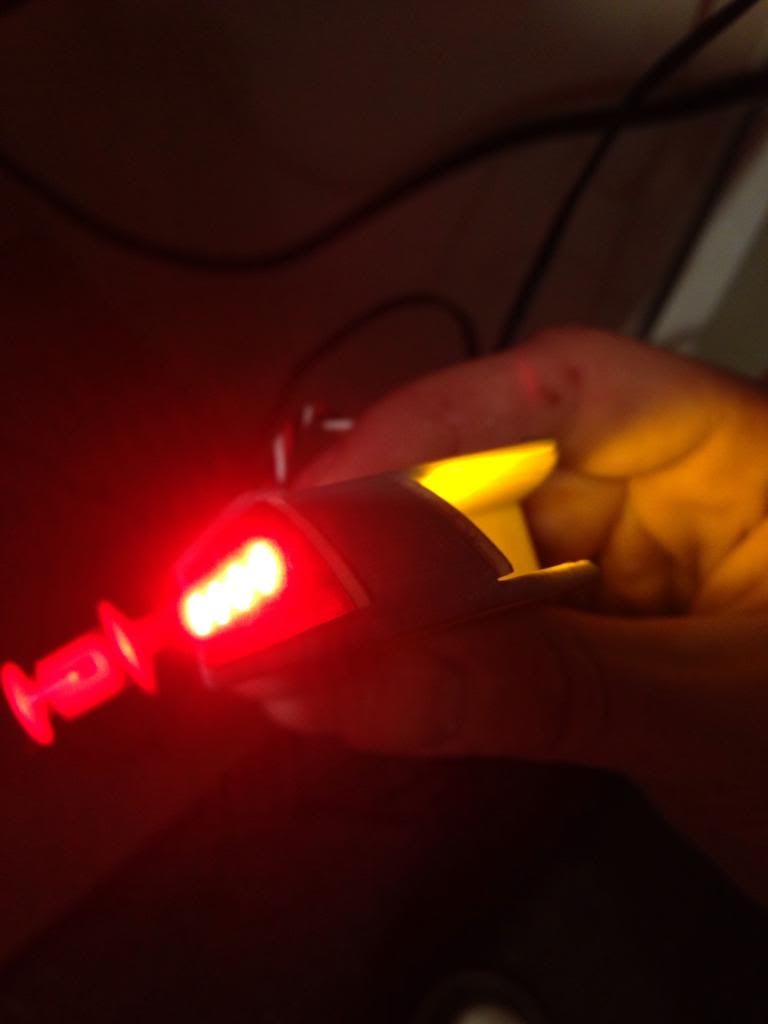
Making some more progress on these multi colored turn signals.
I had to wait a couple weeks for the amber errr, yellow LED samples to arrive... unfortunately they are more on the yellow side. Soo I'm going to try a version of white in the front.:thumbsup:


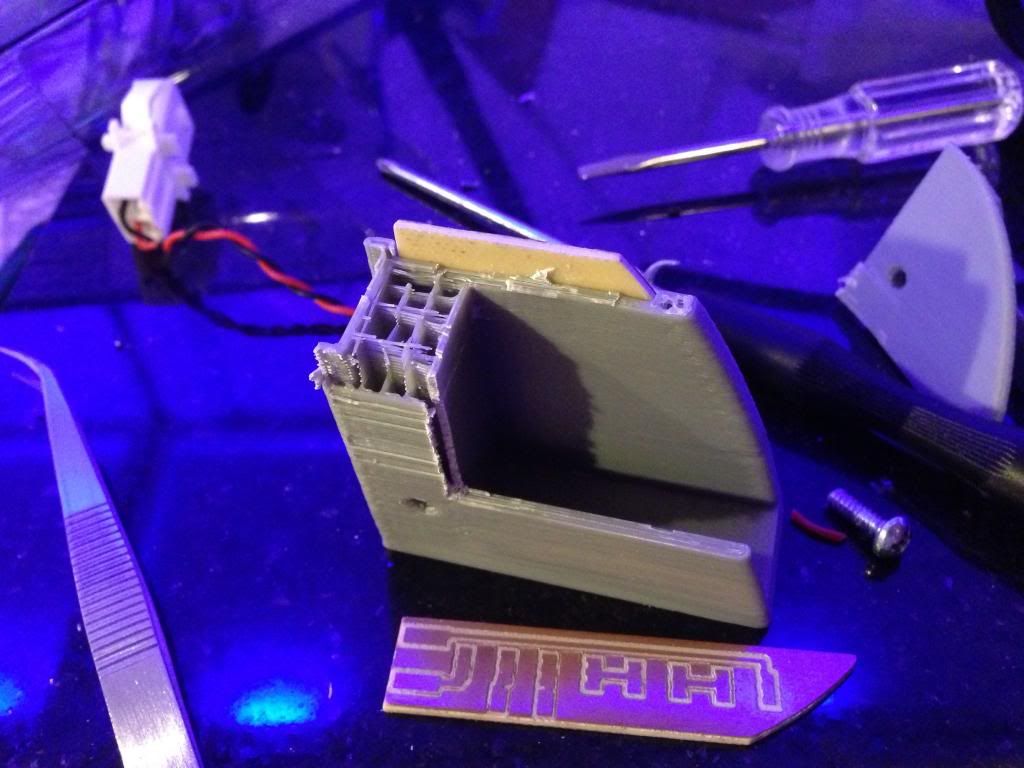
Here is a shot showing how these parts are 3D printed.
 

JCJARHEAD

Member
Dec 7, 2011
128
I have been perusing this thread through the years....wishing I could do more LEDs. I have the cabin lights done...that was relatively easy as those bulbs were plug and play. I also did the CHMSL with using the "Avalanche protocol." Works great!

I have since lost about 3 cluster lights....and I can't stand it! SO....Although I have NEVER soldered a thing in my life....I am going to attempt to do my cluster bulbs with some LEDs I got off of ebay. Thanks to Roadie I had purchased and learned to use a multi-meter a while back. If I can't figure LED polarity visually....I think I can set it to diode, attach leads, and see if bulb lights up.

I will report back once complete. I have some time this coming weekend so I hope to get underway with it. I have watched some "how to solder" and "gauge cluster" vids on Youtube to help my confidence and pick up any tips.

I looked into some of the services, and some seemed alright....but after seeing the process. I decided to try myself....I have purchased a solder iron, solder sucker, all LEDs (went with BLUE)..also bought the BLUE needles. I will also do the stepper motors eventhough mine are fine at 135l miles....since I am already in there? Got the latest model motors.

Dont even get me started on the HVAC controls...at least not yet!

Thanks to all who've posted in this thread...and mostly to Blckshdw for his relentless advocacy of LEDs!:thumbsup: You've given me the fevah (Maine accent)!:yes:
 

DDonnie

Member
Mar 26, 2012
2,631
JCJARHEAD said:
I have been perusing this thread through the years....wishing I could do more LEDs. I have the cabin lights done...that was relatively easy as those bulbs were plug and play. I also did the CHMSL with using the "Avalanche protocol." Works great!

I have since lost about 3 cluster lights....and I can't stand it! SO....Although I have NEVER soldered a thing in my life....I am going to attempt to do my cluster bulbs with some LEDs I got off of ebay. Thanks to Roadie I had purchased and learned to use a multi-meter a while back. If I can't figure LED polarity visually....I think I can set it to diode, attach leads, and see if bulb lights up.

I will report back once complete. I have some time this coming weekend so I hope to get underway with it. I have watched some "how to solder" and "gauge cluster" vids on Youtube to help my confidence and pick up any tips.

I looked into some of the services, and some seemed alright....but after seeing the process. I decided to try myself....I have purchased a solder iron, solder sucker, all LEDs (went with BLUE)..also bought the BLUE needles. I will also do the stepper motors eventhough mine are fine at 135l miles....since I am already in there? Got the latest model motors.

Dont even get me started on the HVAC controls...at least not yet!

Thanks to all who've posted in this thread...and mostly to Blckshdw for his relentless advocacy of LEDs!:thumbsup: You've given me the fevah (Maine accent)!:yes:

Have a link to the soldering iron you purchased?
 

DDonnie

Member
Mar 26, 2012
2,631
JCJARHEAD said:
GM Instrument Cluster Bulb Replacement Kit Gauge Speedometer Lamp Repair | eBay

If anyone has any feedback re these devices (the right power?).....or any other part of the process.....I always welcome the insightful advice of the knowledgeable GMT Nation!

This is just my suggesstion, but i think it's especially true for a beginner. I was frustrated for years and convinced i couldnt solder because i was using a cheap soldering iron. As soon as i bought a temp controlled iron, i realized i wasnt the one the couldnt solder, it was my soldering iron. I would strongly suggest purchasing a nicer iron as soon as you get a chance. They are pricier, but they are worth it. Also, a little bit of solder wick might work better for you than the solder sucker, but thats just my preference.
 

JCJARHEAD

Member
Dec 7, 2011
128
DDonnie said:
This is just my suggesstion, but i think it's especially true for a beginner. I was frustrated for years and convinced i couldnt solder because i was using a cheap soldering iron. As soon as i bought a temp controlled iron, i realized i wasnt the one the couldnt solder, it was my soldering iron. I would strongly suggest purchasing a nicer iron as soon as you get a chance. They are pricier, but they are worth it. Also, a little bit of solder wick might work better for you than the solder sucker, but thats just my preference.

Thanks for the advice! I will look into both. Can you suggest an appropriately calibrated iron for use on the gauge cluster? Or features to have in addition to temp control. To your point....we're breaking my solder cherry here so let's do it right!:wink:
 

Blckshdw

Original poster
Moderator
Nov 20, 2011
10,776
Tampa Bay Area, FL
JCJARHEAD said:
Thanks for the advice! I will look into both. Can you suggest an appropriately calibrated iron for use on the gauge cluster? Or features to have in addition to temp control. To your point....we're breaking my solder cherry here so let's do it right!:wink:

This is the iron I upgraded to, after (like DDonnie) I realized my Radio Shack starter iron was a POS. Also got some different shaped tips, which are very useful. :twocents:

[EBAY]270901702389[/EBAY] [EBAY]270771000535[/EBAY]
 
  • Like
Reactions: Sib

DDonnie

Member
Mar 26, 2012
2,631
Digital Soldering Station : Soldering tools & supplies | RadioShack.com

This is the one i have, i got it for 50 or 60 on sale. Basically, i would look for one that has a temp controller, changable tips, and a station to rest the iron as well as a tip cleaner.


You can get ones for much cheaper, but this seemed like a good iron for the price and i was in a hurry.
 

JCJARHEAD

Member
Dec 7, 2011
128
Thanks again for the input! I am hoping that when I successfully complete this, that it might encourage others like me who were somewhat intimidated by the soldering part to undertake this task. It looked like there were a fair amount of us drooling over the affect but reluctant to attempt. My vehicle is old enough and paid for enough (all in fact:biggrin:)....that I am getting a bit more brazen in my DIY attempts. And of course my GMT Nation safety blanket gives me confidence as well.:yes:
 

JCJARHEAD

Member
Dec 7, 2011
128
DDonnie said:
Digital Soldering Station : Soldering tools & supplies | RadioShack.com

This is the one i have, i got it for 50 or 60 on sale. Basically, i would look for one that has a temp controller, changable tips, and a station to rest the iron as well as a tip cleaner.


You can get ones for much cheaper, but this seemed like a good iron for the price and i was in a hurry.

One more important question? What temperature do you recommend for use on our cluster's circuit board? Read a lot about not getting carried away with heat and lifting the pad and such? Hoping to avoid that.:crazy:

Was hoping since the one I bought on eBay was marketed as GMC cluster repair, that it would be pre set or just the right power.
 

DDonnie

Member
Mar 26, 2012
2,631
JCJARHEAD said:
One more important question? What temperature do you recommend for use on our cluster's circuit board? Read a lot about not getting carried away with heat and lifting the pad and such? Hoping to avoid that.:crazy:

Was hoping since the one I bought on eBay was marketed as GMC cluster repair, that it would be pre set or just the right power.

I've done all my switches at 700, but i havent done my cluster yet so I don't know. Perhaps Carlton can chime in here.
 

JCJARHEAD

Member
Dec 7, 2011
128
Blckshdw said:
This is the iron I upgraded to, after (like DDonnie) I realized my Radio Shack starter iron was a POS. Also got some different shaped tips, which are very useful. :twocents:

[EBAY]270901702389[/EBAY] [EBAY]270771000535[/EBAY]

What does it say about me that I think I am actually looking forward to removing the cluster and driving around a bit. I think my 13 will freak when he looks over and notices there is something missing by the steering wheel. Same with the wife....I am tempted to take her car and she if she jumps in mine...and then she freaks when she notices. She is already convinced that eventually I am going to foul my ride as she is well aware of my mechanical limitations.:rotfl:
 

Blckshdw

Original poster
Moderator
Nov 20, 2011
10,776
Tampa Bay Area, FL
Everything I've done since getting the variable temp iron, has been at 400 degrees. (it maxes out at 450) Since I'm typically using small gauge wire, and PCB components (small), the solder melts quickly, so no need for higher temps. (for me)
 

Sparky

Member
Dec 4, 2011
12,927
A while ago I treated myself to this station:

Weller WESD51 Digital Soldering Station - Amazon.com

Night and day difference when soldering with it vs my old $5 wally world special!

A bit pricey but I don't think I'll ever really need to upgrade.

I've soldered at a bunch of different temperatures depending on what I'm working with (never needed 850 degrees however!). Lead-free solder takes more heat to melt. I don't solder with lead-free however, the lead-based stuff is easier to work with and a lot more forgiving. Lead free can be brittle when cool, a lot of electronics failures from a few years ago when they first really started pushing it can be traced to bad solder joints.
 

JCJARHEAD

Member
Dec 7, 2011
128
Blckshdw said:
This is the iron I upgraded to, after (like DDonnie) I realized my Radio Shack starter iron was a POS. Also got some different shaped tips, which are very useful. :twocents:

[EBAY]270901702389[/EBAY] [EBAY]270771000535[/EBAY]

I am sure even Picasso had to work his way up to horse hair?:smile: Do you have any more advice you would like to impart?

"be the ball"
"may the force be with you"


Anything like that?

Sparky said:
A while ago I treated myself to this station:

Weller WESD51 Digital Soldering Station - Amazon.com

Night and day difference when soldering with it vs my old $5 wally world special!

A bit pricey but I don't think I'll ever really need to upgrade.

I've soldered at a bunch of different temperatures depending on what I'm working with (never needed 850 degrees however!). Lead-free solder takes more heat to melt. I don't solder with lead-free however, the lead-based stuff is easier to work with and a lot more forgiving. Lead free can be brittle when cool, a lot of electronics failures from a few years ago when they first really started pushing it can be traced to bad solder joints.

The kit I linked above also included 1 ft of Kester solder......is this the right stuff?
 

Blckshdw

Original poster
Moderator
Nov 20, 2011
10,776
Tampa Bay Area, FL
JCJARHEAD said:
...Do you have any more advice you would like to impart?

Don't stress yourself out by sweating the itty bitty details so hard. If you already have that first iron on the way, use it for a while and figure out what your soldering technique is gonna be. You can upgrade later. If you have any busted electronics laying around, take/break the covers off them, and see if you can desolder some of the components off the boards. If you have scrap wiring anywhere, practice soldering ends together, and then desoldering them. It's all going to come down to practice, and repetition. You'll inevitably have an ah-ha moment, and you'll think this is all very easy. You just have to get in there and try it.

One other thing that could come in handy, is a set of helping hands. This way you're not trying to hold components/wires with your hands or fingers when they get hot. The magnifying glass just gets in the way for me, so I took mine off. :twocents:

[EBAY]251297653384[/EBAY]
 
  • Like
Reactions: Sib and CaptainKD

djthumper

Administrator
Nov 20, 2011
14,956
North Las Vegas
With some of the smaller components you may even want some smaller tips as well. I will have to find the part numbers to post them. I actually have a weller soldering station.
 

Blckshdw

Original poster
Moderator
Nov 20, 2011
10,776
Tampa Bay Area, FL
Getting back on topic... :tongue:

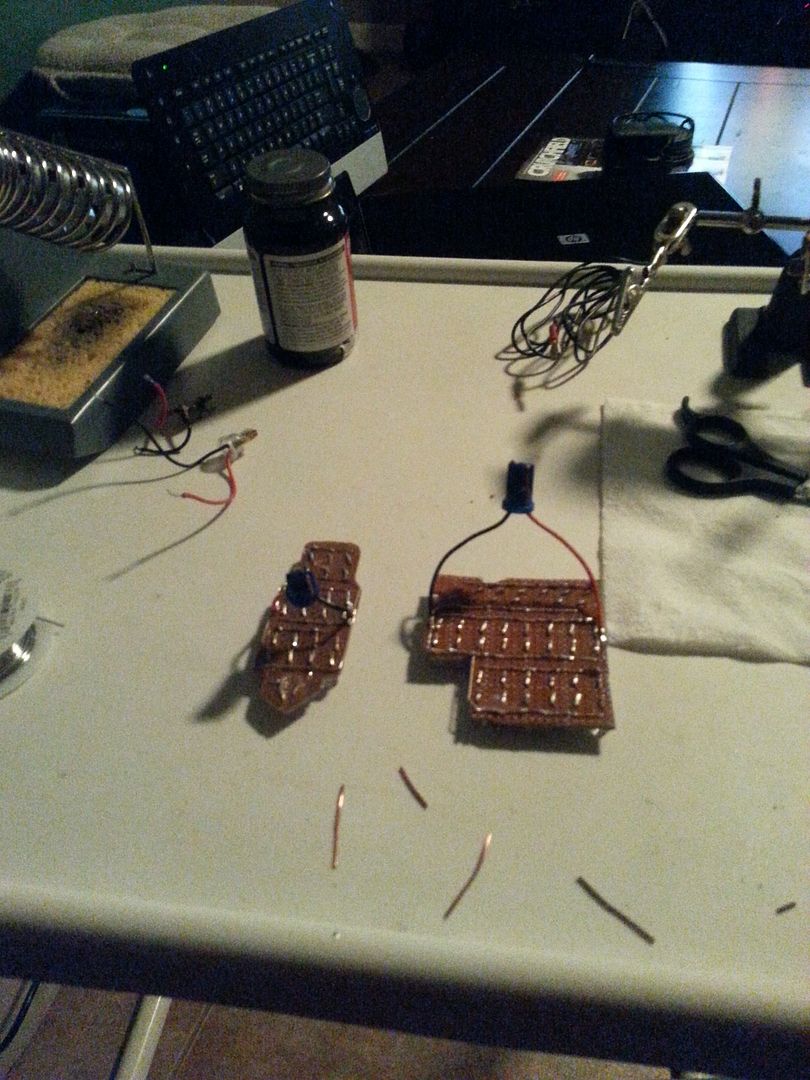
Fresh set of empty 194 bases showed up from China today, so time to fix my burnt up dome lights. One for the front row, one for the third row.
20130715_202706_zpsfe2b7668.jpg


Quick test with the power supply, much mo betta! :cool:
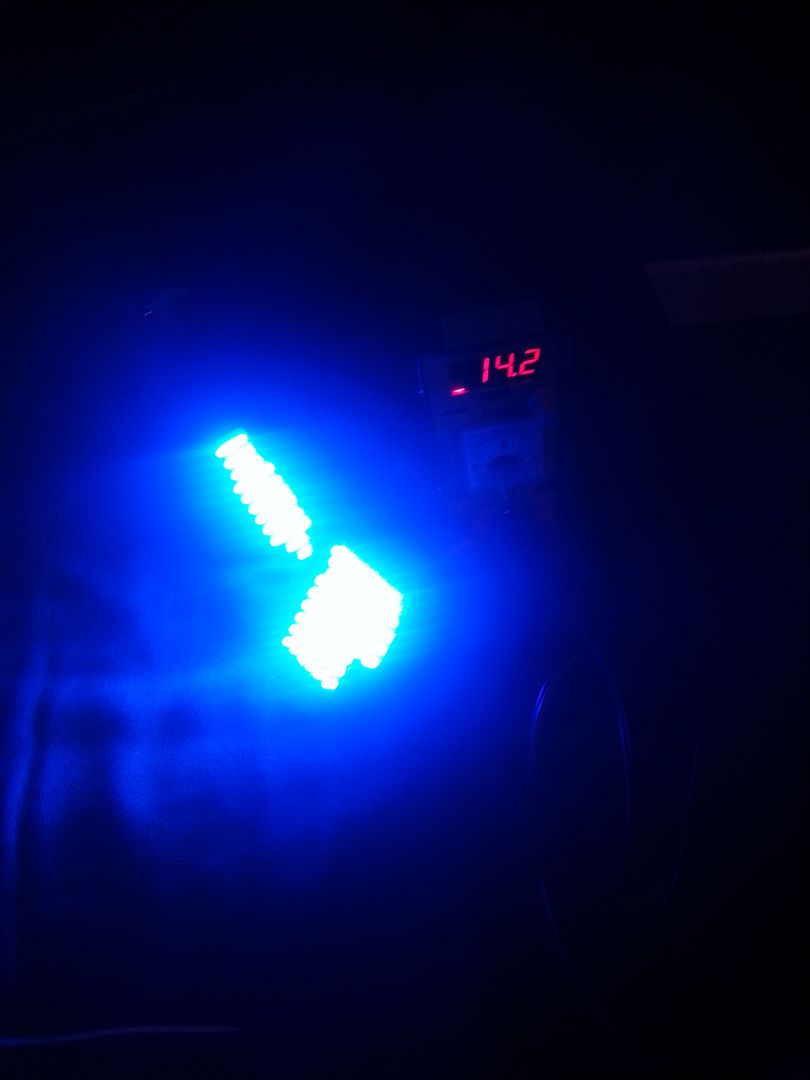
20130715_202555_zps667fbb74.jpg


Now to silicone the front row ones back in the overhead console, and let that set overnight so I can reinstall them tomorrow after work. :undecided:
 

DDonnie

Member
Mar 26, 2012
2,631
FYI, a set of helping hands can be had at harbor freight for about 3 bucks if you have one close to you.

Blckshdw said:
Getting back on topic... :tongue:

Fresh set of empty 194 bases showed up from China today, so time to fix my burnt up dome lights. One for the front row, one for the third row.

20130715_202706_zpsfe2b7668.jpg


Quick test with the power supply, much mo betta! :cool:

20130715_202555_zps667fbb74.jpg


Now to silicone the front row ones back in the overhead console, and let that set overnight so I can reinstall them tomorrow after work. :undecided:

Question, what do you use for your bench power supply? Right now, i have a rigged cigarette lighter power supply with a modified adapter.
 

Blckshdw

Original poster
Moderator
Nov 20, 2011
10,776
Tampa Bay Area, FL
DDonnie said:
Question, what do you use for your bench power supply? Right now, i have a rigged cigarette lighter power supply with a modified adapter.

I was using an old PC power supply for the longest time, until it finally died on me. Replaced that with this adjustable PS unit, much better for testing without resistors. Pumps out a max of 1A, so it's only good for small stuff like this.

[EBAY]370630154870[/EBAY]
 
  • Like
Reactions: Sib

Boricua SS

Member
Nov 20, 2011
3,080
Ohio
I sanded the tops of my bulbs and it virtually eliminated all hotspots on my HVAC controls...

20130515_191358_zps50c4e049.jpg


See the 2 hotspots on my rear wiper controls? I didn't sand those bulbs.. now look at my HVAC.. nothing but smooth output..
 
  • Like
Reactions: Sib and CaptainKD

Conner299

Member
Jan 16, 2013
279
@jcjarhead... The cluster was the easiest, yet most time consuming mod, for me. I wouldn't worry too much about the polarities. Just follow Carlton's polarity map, on the first or second page. For the cluster, the solder sucker shouldn't be needed. The easiest process I found was this. Drop a little extra solder on your first contact point, for me it was the negative. Then, attach the resistor to it. I held the resistor with a pair of needle nose pliers, and the iron, with my other hand. Next, drop some solder on the other end of the resistor. Reheat that solder joint, and attach your LED to it. Then, line up the other end of the LED and attach to the board. Just remember to keep your polarities all lined. You'll also have to do some trimming of the leads, to get it to fit all back together nicely. I started at four pm. Did wiper, 4x4, headlight cluster, and instrument cluster, all in a row. Finished at 1 am. And that was the first time I ever soldered anything. Did all mine at 750 heat. Hope this helps.
 
  • Like
Reactions: Sib

kjkim93

Member
Jan 1, 2012
696
Boricua SS said:
I sanded the tops of my bulbs and it virtually eliminated all hotspots on my HVAC controls...

20130515_191358_zps50c4e049.jpg


See the 2 hotspots on my rear wiper controls? I didn't sand those bulbs.. now look at my HVAC.. nothing but smooth output..

Even though I bought flat top LEDs? I'm going to do the cluster and headlight switch and wiper switch. Should I get a very high grit sand paper then?
 

Boricua SS

Member
Nov 20, 2011
3,080
Ohio
kjkim93 said:
Even though I bought flat top LEDs? I'm going to do the cluster and headlight switch and wiper switch. Should I get a very high grit sand paper then?

Oh then no... with flat tops, theyre already serving the purpose of sanding.. so just solder um up and enjoy the display...

DDonnie said:
dude, your vents turned out so much better than mine. I'm thinking about redoing them.

Lol.. thx bro... look fwd to the pix then :yes:
 

Blckshdw

Original poster
Moderator
Nov 20, 2011
10,776
Tampa Bay Area, FL
I remember a few of the alums on the OS did it. I believe you need a small screw driver to pop the switches from the wheel, and you'll have a short amount of slack in the wiring harness to disconnect it. I think the polarity assignments are still posted in the LED Mod thread over there, you'll have to do some digging though, as the thread is long. I wanna say it was infinitereality who posted the polarities originally. :undecided:
 

kjkim93

Member
Jan 1, 2012
696
Just thought this would be better served here. LED polarity map for the steering wheel controls View attachment 29985
 

Attachments

  • Z-STEERINGWHEEL-TOP.jpg
    Z-STEERINGWHEEL-TOP.jpg
    34.4 KB · Views: 20
  • Z-STEERINGWHEEL-BOTTOM.jpg
    Z-STEERINGWHEEL-BOTTOM.jpg
    32.2 KB · Views: 17
  • Like
Reactions: Sib

kjkim93

Member
Jan 1, 2012
696
So my leds and resistors have finally come in today. and tips or warnings before I do this next week? ive gathering all the information off this site which im thankful for.
 

Conner299

Member
Jan 16, 2013
279
kjkim93 said:
So my leds and resistors have finally come in today. and tips or warnings before I do this next week? ive gathering all the information off this site which im thankful for.

Polarity, polarity, polarity! I read this thread three times, before I did any mods. Follow the info you find here, and you should be fine. I had never soldered anything before. Polarity, polarity, polarity. It can be easy to forget what is positive and negative when it comes time to solder up the bulb, itself.
 
  • Like
Reactions: Sib

NinjuhhNutz

Member
Oct 15, 2012
720
:iagree: and this may sound trivial...but check your led's BEFORE soldering them in...nothing worse that taking your time and making everything look perfect, only to find out one of your bulbs is fubar :hissyfit:

but if I were to give any advice, just take your time...plan it out, and if you start getting irritated (like I often do with small projects like this) go have a beer, and come back in a few minutes :thumbsup:
 
  • Like
Reactions: Sib

Forum Statistics

Threads
23,746
Posts
642,872
Members
19,318
Latest member
soRadJad

Members Online