Try going around at different points on the ring with the air chisel. Eventually it will break the rust and will go. Or use a good ol' hammer and chisel.
You are using an out of date browser. It may not display this or other websites correctly.
You should upgrade or use an alternative browser.
You should upgrade or use an alternative browser.
Cranks but won't start
- Thread starter Dave347
- Start date


...and try to Maintain a 90 Degree Angle to the Pump Centerline when notched in at different locations around the Lock Ring to maximize the Force Vector of the Hammer-On-Drift Strikes into it ...as shown in this Illustration:

Last edited:
I found out on another forum that the actual tool is Kent-Moore J-45722 .
coolride
Member
I found out on another forum that the actual tool is Kent-Moore J-45722 .
That's what I was looking around for, but I also wasn't willing to pay $50. Almost identical, is the OTC-6599, and also similar is OEM Tools 24398.
Using a standard screw driver, I hammered the blade around the inside edge of the ring. There was lots of rust built up in the seam between the ring and the pump. Then I tried the hammer and punch again and it slowly spun free.

Last edited:
coolride
Member
I see there's o-rings and also plastic sleeves. Do these things come with the new pump?
Last edited:
The Green "O" Ring MAY be sold WITH the Fuel Pump. The Black Rubber version is ordinarily sold separately with ACDelco and Delphi Fuel Pumps. But... IF yours shows No Signs of Wearing, Tearing or Friction Erosion Damage... as long as IT and the in-dwelling areas around the edges and inner Lip of the Fuel Tank are well cleaned up FIRST... it can be re-used:

That Image of your Tank opening Does NOT Look RIGHT... So It may be that the Prior Owner replaced the Fuel Pump and just laid the Green "O" Ring over the Old One Piece Black Seal with its built in Rubber Drape below it.
If you want to perform a COMPLETE Clean Up of the Rusted Steel Locking Ring built into the top of the Plastic Fuel Tank... EvapoRust makes a GEL ($10.00 on Amazon via the Link below) that you can gently 'Schmutz' it around the remaining Steel Ring and passively but effectively dissolve away "The Rest of The Rust".
Doing so will ensure that the New Lock Ring will get the best grip it possibly can and prevent any Fuel Leaks. Additionally... If you have the time and inclination...you could also use a POR-15 Sampler Kit to treat that cleaned up Lock Portion AND The New Lock Ring with POR-15 Paint and it will NEVER Rot, Rust or Break Down EVER Again:
EvapoRust GEL $10.00 at Amazon:

https://www.amazon.com/dp/B0762WZDP7/?tag=gmtnation-20
POR-15 Sampler Kit $23.00 at Amazon:

I would recommend using the POR-15 System to prepare ALL New Full Pump Tops, Flanges and Lock Rings PRIOR to Installing the Pumps... and the RUSTING WILL NEVER HAVE A CHANCE TO HAPPEN ...PERIOD.
One Last "Boogey-Man" of worry that you may have to consider...
If you eventually discover that the ENTIRE set of Lock Tabs on the existing Mild Steel Ring have decayed completely and make it impossible to Safely Install and SECURE the Fuel Pump Flange to the Tank...DO NOT DESPAIR!
THIS Company makes a Replacement Seal that can overcome this Problem:

 gastankrenu.net
GM PLASTIC GAS TANK LOCK RING REPAIR TR7

gastankrenu.net

GM PLASTIC GAS TANK LOCK RING REPAIR #TR7-R
FIXES RUSTED OUT TABS ON GM PLASTIC TANKS
THIS REPLACEMENT LOCK RING WILL FIX THE RUSTED OUT TABS THAT HOLD IN THE FUEL PUMP ON MOST FULL SIZE GM CARS & TRUCKS WITH A PLASTIC TANK. NO TANK REMOVAL NEEDED ON PASSENGER CARS AS IT CAN BE ACCESSED THRU THE TRUNK. FITS ALL CARS LISTED BELOW PLUS MANY OTHER GM VEHICLES THAT USE A TR7 or TR27 LOCK RING TO HOLD THE PUMP IN PLACE
POWDERED COATED IN ANY COLOR YOU WANT AS LONG AS IT'S BLACK PART COMES COMPLETE WITH: SELF TAPPING SCREWS INSTRUCTIONS
YOU WILL NEED:
1 - TUBE OF PERMATEX 2 NON HARDENING FORM A GASKET FOR SCREW THREADS
1- NEW FUEL PUMP GASKET IF YOU ARE GOING TO REINSTALL THE OLD PUMP
FITS:
CHEVY / GMC CAB & CHASSIS 96-2006 AFT PLASTIC TANK
COLORADO / CANYON 2004-2005
AURORA 95-03
LESABRE 00-05
PARK AVE 95-05
DEVILLE 00-05
DTS 00-05
STS 00-05
SEVILLE 98-04
BONNEVILLE GXP 04-05
BONNEVILLE 00-05
RIVIERA 95-97
WE HAVE BEEN DEALING WITH THE RUSTED OUT TABS HERE IN MICHIGAN FOR A LONG TIME AND HAVE FOUND THIS TO BE AN INEXPENSIVE ALTERNATIVE TO REPLACING THE TANK .
That Image of your Tank opening Does NOT Look RIGHT... So It may be that the Prior Owner replaced the Fuel Pump and just laid the Green "O" Ring over the Old One Piece Black Seal with its built in Rubber Drape below it.
If you want to perform a COMPLETE Clean Up of the Rusted Steel Locking Ring built into the top of the Plastic Fuel Tank... EvapoRust makes a GEL ($10.00 on Amazon via the Link below) that you can gently 'Schmutz' it around the remaining Steel Ring and passively but effectively dissolve away "The Rest of The Rust".
Doing so will ensure that the New Lock Ring will get the best grip it possibly can and prevent any Fuel Leaks. Additionally... If you have the time and inclination...you could also use a POR-15 Sampler Kit to treat that cleaned up Lock Portion AND The New Lock Ring with POR-15 Paint and it will NEVER Rot, Rust or Break Down EVER Again:
EvapoRust GEL $10.00 at Amazon:
https://www.amazon.com/dp/B0762WZDP7/?tag=gmtnation-20
POR-15 Sampler Kit $23.00 at Amazon:
I would recommend using the POR-15 System to prepare ALL New Full Pump Tops, Flanges and Lock Rings PRIOR to Installing the Pumps... and the RUSTING WILL NEVER HAVE A CHANCE TO HAPPEN ...PERIOD.
One Last "Boogey-Man" of worry that you may have to consider...
If you eventually discover that the ENTIRE set of Lock Tabs on the existing Mild Steel Ring have decayed completely and make it impossible to Safely Install and SECURE the Fuel Pump Flange to the Tank...DO NOT DESPAIR!
THIS Company makes a Replacement Seal that can overcome this Problem:
GM PLASTIC GAS TANK LOCK RING REPAIR TR7
THIS REPLACEMENT LOCK RING WILL FIX THE RUSTED OUT TABS THAT HOLD IN THE FUEL PUMP ON MOST FULL SIZE GM CARS & TRUCKS WITH A PLASTIC TANK.
GM PLASTIC GAS TANK LOCK RING REPAIR TR7
GM PLASTIC GAS TANK LOCK RING REPAIR TR7
THIS REPLACEMENT LOCK RING WILL FIX THE RUSTED OUT TABS THAT HOLD IN THE FUEL PUMP ON MOST FULL SIZE GM CARS & TRUCKS WITH A PLASTIC TANK.
GM PLASTIC GAS TANK LOCK RING REPAIR #TR7-R
FIXES RUSTED OUT TABS ON GM PLASTIC TANKS
THIS REPLACEMENT LOCK RING WILL FIX THE RUSTED OUT TABS THAT HOLD IN THE FUEL PUMP ON MOST FULL SIZE GM CARS & TRUCKS WITH A PLASTIC TANK. NO TANK REMOVAL NEEDED ON PASSENGER CARS AS IT CAN BE ACCESSED THRU THE TRUNK. FITS ALL CARS LISTED BELOW PLUS MANY OTHER GM VEHICLES THAT USE A TR7 or TR27 LOCK RING TO HOLD THE PUMP IN PLACE
POWDERED COATED IN ANY COLOR YOU WANT AS LONG AS IT'S BLACK PART COMES COMPLETE WITH: SELF TAPPING SCREWS INSTRUCTIONS
YOU WILL NEED:
1 - TUBE OF PERMATEX 2 NON HARDENING FORM A GASKET FOR SCREW THREADS
1- NEW FUEL PUMP GASKET IF YOU ARE GOING TO REINSTALL THE OLD PUMP
FITS:
CHEVY / GMC CAB & CHASSIS 96-2006 AFT PLASTIC TANK
COLORADO / CANYON 2004-2005
AURORA 95-03
LESABRE 00-05
PARK AVE 95-05
DEVILLE 00-05
DTS 00-05
STS 00-05
SEVILLE 98-04
BONNEVILLE GXP 04-05
BONNEVILLE 00-05
RIVIERA 95-97
WE HAVE BEEN DEALING WITH THE RUSTED OUT TABS HERE IN MICHIGAN FOR A LONG TIME AND HAVE FOUND THIS TO BE AN INEXPENSIVE ALTERNATIVE TO REPLACING THE TANK .
Last edited:
NJTB
Member
Yes... And if you calculate the surface area of that neatly designed Seal, versus the concentrated locking spaces found between the Metal BaseTabs and the Original Locking Ring Tines... The Holding Power of the Grommets-Screws, adding to their Strength with using the Correct Permatex Fuel Proof RTV Adhesive ...You can well imagine that the Fuel Pump should have no trouble whatsoever in remaining where it should be for as long as it needs to be held firmly attached inside of the Tank.
Of Course... Like everything else though...the End Results often get determined entirely by how much Preparation the Mechanic is willing to go through in getting everything properly prepared first. These actions would include making all contact surfaces Spic-N-Span Clean and free from all Oil, Grease, Paint, Rust, Moisture, Corrosion and loose Dirt, long before applying the said Adhesive Sealing to the Fuel Pump Flange surfaces AND the free spaces around the perimeter of the opening into Black Plastic Nylon Fuel Tank.
Even at costing almost $50.00... It would be a damned side less expensive than trying locate a Replacement Tank that may prove to be no better than the one needing replacement...(and probably sitting outside somewhere in a Scrap Yard for the very same reasons that others having this problem may fail in the areas covering The Rust Belt and The Great White North...)
Last edited:
coolride
Member
Okay... Better and Better... So more than likely... Your Bosch Fuel Pump SHOULD arrive with a Brand New GREEN "O" Ring and after you conduct the requisite clean up to your standards and satisfaction, your steady progress will continue...
Thanks for the...
Thanks for the...
coolride
Member
I see there's o-rings and also plastic sleeves. Do these things come with the new pump?
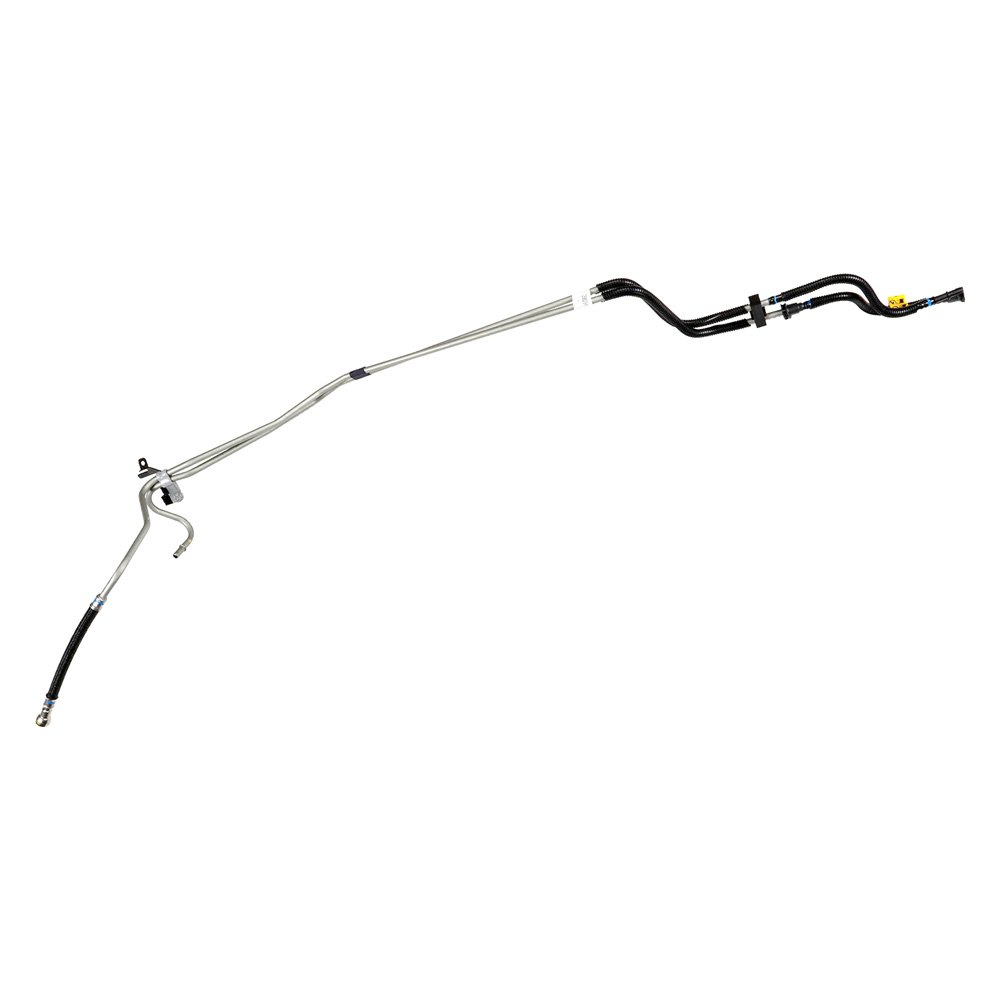
When I asked this question a few posts back, I was wondering about the fuel line connector parts (indicated in red.) This stuff has me a little worried. Anyone know where these replacement parts are sourced?
(Would these be called collets?)

Last edited:
Those only come with the complete fuel lines with connectors from the dealer. Or check with Dorman if they have connectors that you could use the innards from.
Look... These are the things that I wouldn't 'Pull a Hair' about just replacing them ALL outright. They are ALL ACDelco OEM 2006 Trailblazer Fuel System components that are readily available from CARID.COM via the Links and Product Information Images attached below.
Also, they really are NOT very Expensive. Why get lost in the weeds of trying to fix 14 Year Fuel Line Connectors that have obviously had to be Damned near YANKED Free ...when THESE are ALL readily available?:
 www.carid.com

 www.carid.com


Also, they really are NOT very Expensive. Why get lost in the weeds of trying to fix 14 Year Fuel Line Connectors that have obviously had to be Damned near YANKED Free ...when THESE are ALL readily available?:
ACDelco® - GM Original Equipment™ Fuel Line Set
Chevy Trailblazer 2006, GM Original Equipment™ Fuel Line Set by ACDelco®. At CARiD you can find a complete line of ACDelco products that ensure supreme reliability and top quality and deliver worry-free operation for years to come
ACDelco® 215-562 - GM Original Equipment™ Vapor Canister Vent Hose
GM Original Equipment™ Vapor Canister Vent Hose - Part Number 215-562 (215562) by ACDelco. Available in Parts Department at www.carid.com
Last edited:
coolride
Member
Money is tight. And the nylon lines appear to be aging well. If the lines were deteriorating, I'd replace all.
The issue is with the connectors. The little retainer clips, the o-rings and collets.
The issue is with the connectors. The little retainer clips, the o-rings and collets.
NP... At least you have the OEM Part Numbers to cross reference to any available Dorman Fittings.
Last edited:
coolride
Member
Try Poking around at this site...
 www.dormanproducts.com
This Dorman Instructional Video shows that performing the task of replacing or repairing the connectors on Fuel Lines can get to be an Elaborate, PITA Kind of a Process that may require Specialty Tools to ensure they go all the way in... and stay there:
Dorman Products - Aftermarket Auto Parts & OE Solutions - Search Results
Dorman gives auto repair professionals and vehicle owners greater freedom to fix cars and trucks by focusing on solutions first.
www.dormanproducts.com
This Dorman Instructional Video shows that performing the task of replacing or repairing the connectors on Fuel Lines can get to be an Elaborate, PITA Kind of a Process that may require Specialty Tools to ensure they go all the way in... and stay there:
Last edited:
coolride
Member
Look... These are the things that I wouldn't 'Pull a Hair' about just replacing them ALL outright. They are ALL ACDelco OEM 2006 Trailblazer Fuel System components that are readily available from CARID.COM via the Links and Product Information Images attached below.
Also, they really are NOT very Expensive. Why get lost in the weeds of trying to fix 14 Year Fuel Line Connectors that have obviously had to be Damned near YANKED Free ...when THESE are ALL readily available?:
ACDelco® - GM Original Equipment™ Fuel Line Set
Chevy Trailblazer 2006, GM Original Equipment™ Fuel Line Set by ACDelco®. At CARiD you can find a complete line of ACDelco products that ensure supreme reliability and top quality and deliver worry-free operation for years to come
View attachment 95733
ACDelco® 215-562 - GM Original Equipment™ Vapor Canister Vent Hose
GM Original Equipment™ Vapor Canister Vent Hose - Part Number 215-562 (215562) by ACDelco. Available in Parts Department at www.carid.com
View attachment 95735
View attachment 95734
Ok I can spring for these two lines. So, one is the fuel feed and one is the vent? (I was thinking that the vent tube is attached along the filler neck.)

Last edited:
coolride
Member
I think maybe the short pipe is the "fuel feed line," and the long pipe with the elbow is the "rear fuel return line?"
Last edited:
Correction... My Bad...
You Are CORRECT, Sir...
Your Vehicle sports a "Return-Less" Design in which any "Extra" Pumped Fuel via the Single Fuel Line gets immediately dumped right back into the Fuel Tank. Your Bosch Fuel Pump has the Fuel Pump Regulator Built right into The Pump and performs its work submerged within the Fuel Tank.
That SMALL Vertical Tube is the Primary Output for the Fuel Under Pressure delivering the Fuel from the Pump through that ONE Fuel Delivery Line and thence into the EFI Fuel Rail on the Intake side of the Engine.
The LARGE ELBOW PIPE connects to the Straight Nylon Pipe which carries the Excess Fuel Vapors through that LARGE LINE from inside the Fuel Tank, right back and into the Charcoal Canister fitted nearby; just in front of the Spare Tire where the Fumes stored in the Charcoal Media after the Vehicle shuts down.
This arrangement also prevents the Build Up of any Internal Vapor Pressure which would eventually force its way out of some weak sealing point of the Tank during sweltering Summer Road Heat.
Those Gasoline Fuel Fumes become immediately available upon Re-Start by getting drawn right into the Engine and Burned. This whole arrangement prevents any random Fuel Vapors from, "Venting to Atmosphere" (... putting smiles on the faces of those few members still left working at the EPA). The second EVAP Valve unit on the engine helps those fumes to get ingested into the Intake.
If you compare the OEM Fuel Pump design of your Bosch Pump with those of the 2002-2003 Trailblazers & Envoys... their's sport TWO Fuel Lines. One sends Fuel Forwards to the Engine Compartment and Primes-Feeds the Fuel Rail at around 50 PSI or so... and the Fuel Under Pressure gets regulated RIGHT THERE, right on the end of the Fuel Rail via a Vacuum assisted Fuel Pressure Regulator. Any excess Fuel Under Pressure gets returned Back to the Fuel Tank via a Separate Fuel Line.
Last edited:
coolride
Member
Got it figured out. I purchased from Amazon,
Fuel feed pipe (ACDelco 15200097.)
https://www.amazon.com/gp/product/B010GMSIEQ/?tag=gmtnation-20
Vapor canister vent hose (ACDelco 15909856.)
https://www.amazon.com/gp/product/B00S0GE77I/?tag=gmtnation-20
The vapor canister purge valve hose (ACDelco 15200095) is very hard to find. It looks like RockAuto has one, but I don't feel like paying $21.99 for shipping.
Last edited:
coolride
Member
Bump My Correction ... Your First Impression is CORRECT, Brother...
It was hard to find the right lines then I realized that the lines, are not all fuel lines. Some are emission lines. So they are listed under different sections of the parts catalog.
Last edited:
While its fresh in my mind... and the opportunity is EZR2DO with the Absent Fuel Tank:
BEFORE Re-Installing the Fuel Tank... Don't Forget to:
(1) Check ALL Fuses in ALL Three Fuse Panel Locations.
(2) Perform a Continuity Test with a "Scope On a Rope" and with the System LOADED.
(3) Use a 3+ Amp Head Lamp Bulb after attaching 12 Volt Power and Ground Wires soldered onto it ...and then Check the Powers and Ground in the Fuel Pump Electrical Circuit.
coolride
Member
I'm generally a Rustoleum guy. The Por-15 stuff is probably awesome, but I've been impressed with Rustoleum.
This is the first time I've applied Rustoleum to metal that's actually rusty (surface prep consisted of removing the scale with an air chisel,,,and done.) Applied to rusted metal, the paint had a different smell than I remember. And it dried much faster. Seems like different stuff.

Rust was removed everywhere around the gas tank area (inside the frame and out.) Oh brother,,,what a mess that was. Then paint was brushed on. Just seeing that I missed that spot on the front of the body mount.

This is the first time I've applied Rustoleum to metal that's actually rusty (surface prep consisted of removing the scale with an air chisel,,,and done.) Applied to rusted metal, the paint had a different smell than I remember. And it dried much faster. Seems like different stuff.
Rust was removed everywhere around the gas tank area (inside the frame and out.) Oh brother,,,what a mess that was. Then paint was brushed on. Just seeing that I missed that spot on the front of the body mount.
Last edited:
coolride
Member
Smoke grey on the cross bar and straps.

Almond on the gas tank rock guard.

Almond on the gas tank rock guard.
Last edited:
coolride
Member
Here's a good question for everyone. Is the filler neck installed as one piece, or does it have to be disassembled?

Last edited:
christo829
Member
I was able to do mine without disassembling it. As I recall, I loosened at least one of the clamps to adjust an angle, but nothing had to be pulled apart.
coolride
Member
I was able to do mine without disassembling it. As I recall, I loosened at least one of the clamps to adjust an angle, but nothing had to be pulled apart.
To remove the old one, I had to cut the rubber hose.
coolride
Member
This is what I like to see. Excellent packaging and lots of nice paperwork. The green card is a limited lifetime warranty.


coolride
Member
Best I can tell, this is called a Starlock Push Washer. Five of them hold the rock guard to the gas tank and I only have this one. Three were missing and one was rusted thin. Anyone know where to find these things?

Maybe a fastener supply store or a parts store that have a rack for oddball fasteners. There is another type similar to this that looks like a nut but is made of similar thin metal that screws on if you can find them. As a last resort, maybe use a close sized regular flange nut and screw it on that will cut its own threads into the plastic.
coolride
Member
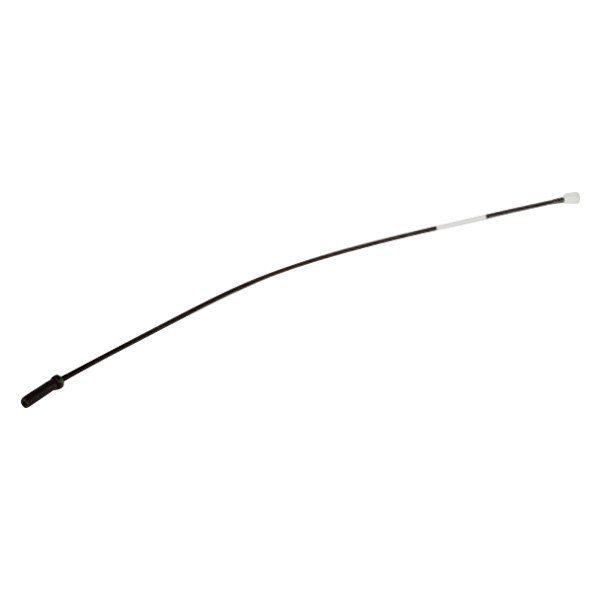
Pump installation instructions say to connect the in tank vent. Is there a vent in the tank that connects to the pump? I don't remember.
coolride
Member
Found these at Fastenal. I'll make it work. Plan B, is to cut threads onto the studs and then screw on regular nuts.

Last edited:
coolride
Member
Silicone grease on the o-ring and it's mating surfaces. Anti-seize on all metal to metal contact areas. The new lock ring spun into position with no problem.


coolride
Member


Per the bar code USA or Canada.
Bar Codes Can Help You Know Where Your Product is Made

My own purchases seem to cover the world. However, it is my preference to know where the product is manufactured. A friend passed on some information I felt useful to know.
The first three numbers on a bar code on a product label, let you know which country manufactured the product. For more details on ISBN bar codes take a look at Publishing Architect’s Blueprint: Self-Publishing Fundamentals.
These seem to be the codes people most frequently are interested in knowing:
690-692 … then it is MADE IN CHINA
00 – 09 … USA & CANADA
30 – 37 FRANCE
40 – 44 GERMANY
471 … TAIWAN
49 … JAPAN
50 … UK
 whereandwhatintheworld.com
Bar Codes Can Help You Know Where Your Product is Made
My own purchases seem to cover the world. However, it is my preference to know where the product is manufactured. A friend passed on some information I felt useful to know.
The first three numbers on a bar code on a product label, let you know which country manufactured the product. For more details on ISBN bar codes take a look at Publishing Architect’s Blueprint: Self-Publishing Fundamentals.
These seem to be the codes people most frequently are interested in knowing:
690-692 … then it is MADE IN CHINA
00 – 09 … USA & CANADA
30 – 37 FRANCE
40 – 44 GERMANY
471 … TAIWAN
49 … JAPAN
50 … UK
Bar Codes Can Help You Know Where Your Product is Made | WWITW
whereandwhatintheworld.com