You are using an out of date browser. It may not display this or other websites correctly.
You should upgrade or use an alternative browser.
You should upgrade or use an alternative browser.
What did you do to your GMT today?
- Thread starter MAY03LT
- Start date
- Status
- Not open for further replies.
BlazingTrails
Member
- Joined
- Apr 27, 2014
- Posts
- 19,409
Mounce
Member
Finally got a winner eh?Mounce said:6-hi mod is what I done to my GMT today.
Grimor
Member
- Joined
- Mar 28, 2013
- Posts
- 954
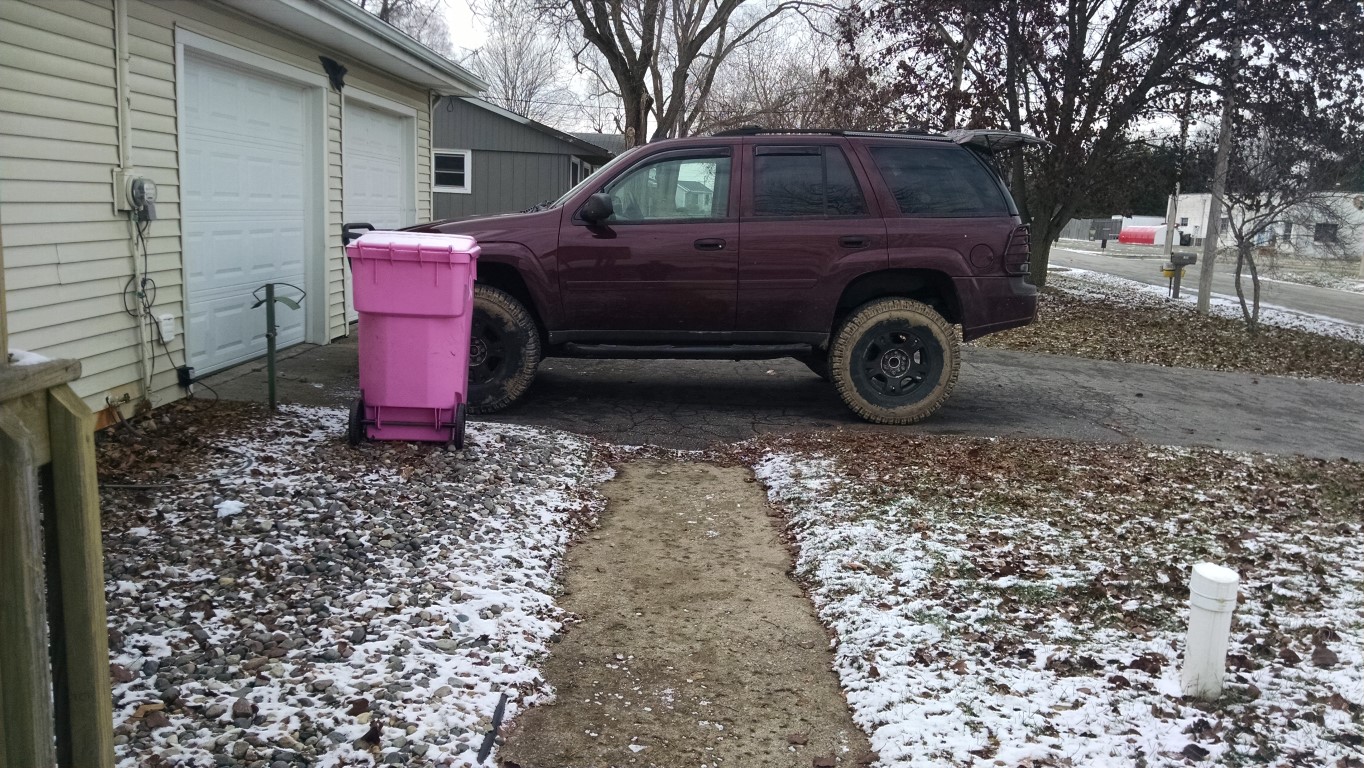
Was hoping the ground was a little more frozen, got about half way up a 20 degree incline before the soft ground started giving way. I knew i wasn't going to make it when the rear sank and all I could see was sky lol. Decent first 4wd test, not sure how much the front wheels were pulling though. Not sure the best way to check if the front is doing it's job.

Boricua SS
Member
Started the beaSSt for the first time in weeks. She fired right up thanks to the battery tender. I also ordered some more parts for her from Summit Racing.
Drove it to Brandon's, got a bad power steering leak somewhere, reservoir was practically empty when I stopped at O'Reilly's to get power steering fluid. It's all over my back windshield from driving 4hrs
Capote said:Drove it to Brandon's, got a bad power steering leak somewhere, reservoir was practically empty when I stopped at O'Reilly's to get power steering fluid. It's all over my back windshield from driving 4hrs
 Those parking lot peel out sessions didn't involve any doughnuts did they?
AManders6
Member
- Joined
- Jan 24, 2014
- Posts
- 638
had the same type of thing happen to me last year around this time. Was heading to Charlotte NC to visit my brother and started to have the power steering whine. Stopped and bought a case of fluid and had to put a new bottle in about every 2 hours. I had ended up having a huge hole in my power steering cooler that was leaking badlyCapote said:Drove it to Brandon's, got a bad power steering leak somewhere, reservoir was practically empty when I stopped at O'Reilly's to get power steering fluid. It's all over my back windshield from driving 4hrs
CaptainKD
Member
Gave the truck a wash to get off the road salt. Eff'ing midwest. 

- Joined
- Nov 18, 2011
- Posts
- 49,665
CaptainKD
Member
- Joined
- Nov 18, 2011
- Posts
- 49,665

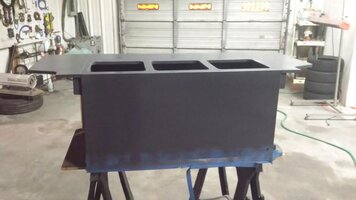
Started working on the trim panels for the box. I wasn't sure if I was going to keep this setup so I put this project on the backburner. That was 3 years ago. After pricing out my next system, well, it's going to be a while before I change anything lol so might as well get it looking halfway respectable. Well as respectable as a box with a single baffle and kicker woofers can be. I am worried that the tuning will change due to the trim panels which might make the area between the back of the box and the liftgate become an extension of the port.
Unrelated, my oven is on preheat right now. I'm attempting to cook one of the eagle eye headlights tonight.

Ordered a replacement shift linkage bushing. Broke it yesterday at Brandon's, and his jerry-rigged one held up for an hour and a 1/2 before popping out unfortunately. Actually drove it to work.... Yes it must look very awkward to people putting my TB in park lying on my back reaching up under [emoji38]
When I ordered mine, they sent me 2 of them, but only 1 e-clip. Been meaning to find another e-clip, and keep it in my glove box.Capote said:Ordered a replacement shift linkage bushing. Broke it yesterday at Brandon's, and his jerry-rigged one held up for an hour and a 1/2 before popping out unfortunately. Actually drove it to work.... Yes it must look very awkward to people putting my TB in park lying on my back reaching up under [emoji38]
littleblazer
Member
- Joined
- Jul 6, 2014
- Posts
- 9,274
Mounce
Member
Too late to mention it now but.. Have you seen this? Supposed to be a pretty straight forward process, there's a little tool they have that you use to put it in.Capote said:Ordered a replacement shift linkage bushing. Broke it yesterday at Brandon's, and his jerry-rigged one held up for an hour and a 1/2 before popping out unfortunately. Actually drove it to work.... Yes it must look very awkward to people putting my TB in park lying on my back reaching up under [emoji38]
http://www.bushingfix.com/chevrolet-trailblazer-shift-cable-bushing-repair-kit/
Mounce
Member
I was unaware of that. I was under the impression that it's hard to get it straight in the hole. How much did the bushing cost you?Capote said:I've seen people use no tool Garth, should slip right in.
Mounce
Member
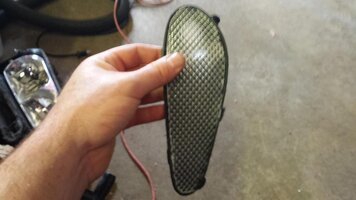
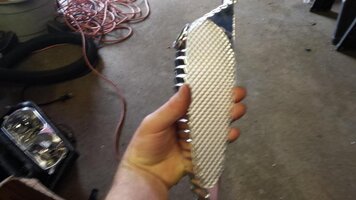
You might try some aluminum tape, for something quick and easy.MAY03LT said:Well I cooked one of the eagle eyes but still had problems with the center section. So I took one of oems apart to see how they ate held together. Practiced heating the acrylic and it went ok. I'm thinking about adding chrome to the turn signal bezel to give it more reflectiveness.

What time and temps did you use on your aftermarket lights? Mine had some initial resistance when I started prying them open, but once the lip came up about an inch, it all gave way.
BlazingTrails
Member
- Joined
- Apr 27, 2014
- Posts
- 19,409
I finally got my truck washed to day, the mud was just disgraceful.....they already turned off the car-wash at my apartments for the winter so I had to go spend some green 
but the shiny-ness is always worth it

but the shiny-ness is always worth it

smitty5150
Member
- Joined
- Nov 18, 2011
- Posts
- 1,069
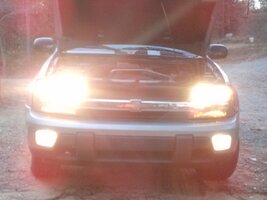
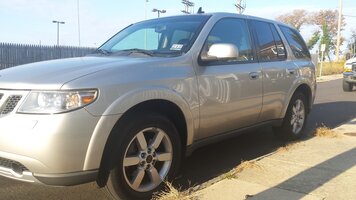
I "recalibrated" the rear air bags. I can already see rear spring conversion in the near future. For those who don't know what I'm rockin now, see below.
Those eagle eyes are a cake walk once you get it down. 250 degree for ten minutes. Pry by the corner lenses and get in there to pull. Those corners pop with some silver paint behind them. Need any help just ask. I've done a few sets in my day.MAY03LT said:20141201_142100.jpg
20141201_142137.jpg
Well I cooked one of the eagle eyes but still had problems with the center section. So I took one of oems apart to see how they ate held together. Practiced heating the acrylic and it went ok. I'm thinking about aadding chrome to the turn signal bezel to give it more reflectiveness.
Attachments
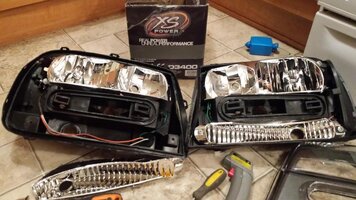
Success! Well, kinda.
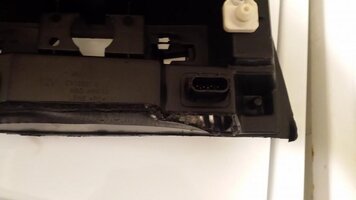
I dun goofed.
So I have to get the other OEM apart to get its housing. Without messing it up.
I sprayed it with silver and I'm sold on it now.Blckshdw said:You might try some aluminum tape, for something quick and easy.
What time and temps did you use on your aftermarket lights? Mine had some initial resistance when I started prying them open, but once the lip came up about an inch, it all gave way.

Last night it was 250 for 10, 275 for 8, and 300 for 8. I think the problem was that I didn't know a good place to pop the middle out from. When I cut open the OEM one today and looked it over I saw a good spot to pry from. 10 minutes at 325 got one and the other was in there for 15 minutes and melted. After reading smittys recommended temp I think I was a little high.
Thanks for chiming in! I wish I read this sooner. I thought they weren't getting hot enough. Once I had a place to pry it was easy. I went from the side to under the hi beam on the very small lip.smitty5150 said:I "recalibrated" the rear air bags. I can already see rear spring conversion in the near future. For those who don't know what I'm rockin now, see below.
Those eagle eyes are a cake walk once you get it down. 250 degree for ten minutes. Pry by the corner lenses and get in there to pull. Those corners pop with some silver paint behind them. Need any help just ask. I've done a few sets in my day.
BlazingTrails
Member
- Joined
- Apr 27, 2014
- Posts
- 19,409
You can do either, but baking seems to be easiest and the preferred method
smt 59
Member
smitty5150 said:Those eagle eyes are a cake walk once you get it down. 250 degree for ten minutes. Pry by the corner lenses and get in there to pull. Those corners pop with some silver paint behind them. Need any help just ask. I've done a few sets in my day.
When I did mine it was 200 for 20 minutes. I may try the 250 for 10 next time, cuz you know I'm impatient like that. But I was paranoid about melting something, or having it be too soft so it got deformed when prying the pieces apart. For the ones I've got now, I think I'll have to rebake the bezels, just to soften the butyl that's stuck to them so I can get it off before painting. Unless you guys know of an easier method?MAY03LT said:Success! Well, kinda.
I dun goofed.
So I have to get the other OEM apart to get its housing. Without messing it up.
I sprayed it with silver and I'm sold on it now.
Last night it was 250 for 10, 275 for 8, and 300 for 8. I think the problem was that I didn't know a good place to pop the middle out from. When I cut open the OEM one today and looked it over I saw a good spot to pry from. 10 minutes at 325 got one and the other was in there for 15 minutes and melted. After reading smittys recommended temp I think I was a little high.
Thanks for chiming in! I wish I read this sooner. I thought they weren't getting hot enough. Once I had a place to pry it was easy. I went from the side to under the hi beam on the very small lip.
smitty5150
Member
- Joined
- Nov 18, 2011
- Posts
- 1,069
Heat up the bezels so you can pull off the butyl. Then use mineral spirits to wipe the residue. That's what I've always hated. So easy to get the bezel out when the sealant is warm but it's a damn mess.
Matt
Member
- Joined
- Dec 2, 2011
- Posts
- 4,071
Microwave!Blckshdw said:When I did mine it was 200 for 20 minutes. I may try the 250 for 10 next time, cuz you know I'm impatient like that. Unless you guys know of an easier method?


Aarkon
Member
- Joined
- Nov 6, 2013
- Posts
- 5,607
I just heated them a little and used the extra butyl to pull the stragglers off or you could sand them if you are smoothing it out anyways too paintBlckshdw said:When I did mine it was 200 for 20 minutes. I may try the 250 for 10 next time, cuz you know I'm impatient like that. But I was paranoid about melting something, or having it be too soft so it got deformed when prying the pieces apart. For the ones I've got now, I think I'll have to rebake the bezels, just to soften the butyl that's stuck to them so I can get it off before painting. Unless you guys know of an easier method?
Attachments
BlazingTrails
Member
- Joined
- Apr 27, 2014
- Posts
- 19,409
You still hyperflashing or something?BlazingTrails said:Removed one of my tail light LED bulbs when I got to work to replace the resistor for the second time. going to go to a 1/2 watt resistor this time.
I tried to bake open an oem headlamp and...nope. After I considered it a lost cause but before I threw in the towel I got it hot enough that it was uncomfortable to hold with welding gloves and she still wouldn't give it up. I even worked the sweet spot that I used twice yesterday. So my goof up costed a cool $45.00. In other headlight news, after reading a super awesome thread about projectors I found out that someone makes clear lenses. So they're coming too.
- Status
- Not open for further replies.


