What did you do to your GMT today? [Part II]

BrianF

Member
Jul 24, 2013
1,302
West central Sask.
Got the Trailblazer back from the shop. AC system held pressure but they added dye anyways in case of a slow leak. They recharged it and she blows cold..... very cold, uncomfortable in fact. I had jumped the low pressure switch previous and compressor did not kick on, so I figured worse. Oh well.

They found the same things as myself on the ABS module issue. Power to the unit, good ground, battery tested good. Either the ignition switch (unlikely as it was swapped when the problem first popped up) or the module itself is bad.
 

flyboy2610

Member
Aug 24, 2021
603
Lincoln, Ne.
Gave the wife's '06 TB the same treatment I gave my '04 TB EXT: new brake pads front and rear, oil change, cleaned the throttle body, did the re-learn.
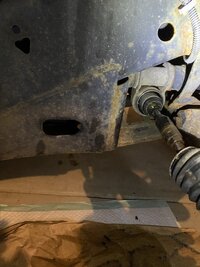
While I was doing the left front discovered that the CV axle boot was ripped up. Have 2 new axles coming now. While I'm in there changing the axle I'm going to go ahead and replace the left outer differential seal and bearing. I replaced those on my '04 last December, so I know what to expect. The parts aren't too expensive and I don't want to have to get back in there to do it later.
She's going to be going up to her mom's in northern Nebraska in 2 weeks for Memorial Day and I don't think I'll get to it before then. I may just cut the axle in half and pull the halves out, leaving the stubs in the diff and hub. That way I know it won't fail while she's out on the highway.
 

Zaab

Member
Apr 30, 2025
51
Ohio
Gave the wife's '06 TB the same treatment I gave my '04 TB EXT: new brake pads front and rear, oil change, cleaned the throttle body, did the re-learn.
While I was doing the left front discovered that the CV axle boot was ripped up. Have 2 new axles coming now. While I'm in there changing the axle I'm going to go ahead and replace the left outer differential seal and bearing. I replaced those on my '04 last December, so I know what to expect. The parts aren't too expensive and I don't want to have to get back in there to do it later.
She's going to be going up to her mom's in northern Nebraska in 2 weeks for Memorial Day and I don't think I'll get to it before then. I may just cut the axle in half and pull the halves out, leaving the stubs in the diff and hub. That way I know it won't fail while she's out on the highway.
May I ask if you do ecu relearn by scan tool or by disconnecting battery? Do I have to do the relearn after cleaning throttle body?
 

flyboy2610

Member
Aug 24, 2021
603
Lincoln, Ne.
May I ask if you do ecu relearn by scan tool or by disconnecting battery? Do I have to do the relearn after cleaning throttle body?
The relearn is done to get rid of the small adjustments that the computer makes to compensate for a dirty throttle body.
Before cleaning the throttle body, remove the PCM1 and PCMB fuses from the underhood fuse box. On our '06 and '04 TB's they are fuses 10 and 28. Leave them out for 30-45 minutes and the computer will forget the adjustments it's been accumulating.
After the throttle body has been cleaned and the fuses reinstalled turn the key to the run position but do not start the engine. Leave the key on for 2 minutes, then turn the key off for 1 minute. After 1 minute start the engine but do not depress the gas pedal. Let the engine do nothing but idle for 10 minutes, don't depress the gas pedal during this time. After 10 minutes I always turn the key off for 1 minute, then start the engine and go for a test drive.
Easy-peasy mac-n-cheesy! :2thumbsup:
 
  • Like
  • Love
Reactions: BrianF and Zaab

BrianF

Member
Jul 24, 2013
1,302
West central Sask.
Figured out the fan problem on the Trailblazer. Back in the winter it had some intermittent problems where it worked and didn't work. Then after getting the ac working, it failed completely. You could hear the relay or whatever it is clicking with movement of the fan switch.

I dug in and had no burnt connectors at the resister pack. I had power at the resister and at the fan connector. Then I found it. The damn connector at the fan jiggled around more than me trying to run. I used some thin plastic to shim the connector and now it works again.
 

dhanger

Member
Apr 8, 2025
23
Arizona
Compression test and leakdown test.
2004 TB LS I6 engine.
Compression 180-190
Leak test 76-86%, mostly heard from oil filler cap with a little from intake and exhaust so mostly rings I guess.
I don't know but that seems pretty decent for 191k miles. Would a top end soak help to improve the rings with this many miles?
 

flyboy2610

Member
Aug 24, 2021
603
Lincoln, Ne.
Time and weather finally cooperated long enough for me to change out the CV axle, differential seal, and bearing on the drivers side of the wife's '06 TB. The upper ball joint wasn't looking too great so I replaced that also. I didn't charge her any extra for that! :smile:
I'm glad I started on it early this morning because we're having a rain/hail shower right now.
 

Mooseman

Original poster
Moderator
Dec 4, 2011
26,597
Ottawa, ON
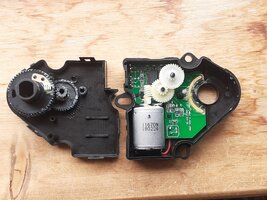
Yesterday I finished work early and decided to tackle the malfunctioning actuator for the defrost as it was stuck on defrost. I had tried to do a relearn in the past, which seemed to fix it, but it got stuck again. I got a new CCC actuator from scAmazon (yeah, yeah, I know :frown: ) and took apart the lower dash. Getting in there was a bitch as I'm not as flexible as I used to be (not that I was very flexible to be begin with :laugh: ). So get the actuator out, open it up and it looked fine, no broken gears or anything. Put in the chinesium actuator, do the relearn via the Tech2. Went through it but it was still on defrost. Huh? Thought maybe it's the other actuator, the one with the gear. Pull it out and confirm that it's for the floor and vents. Put it back in and now the vents don't work :mad: . Pull it out again (by now the screws practically come out by themselves) and the actuator is all the way to one end. Maybe I didn't put it in right and it jumped the gears. Open it up and the "timing" was off as per this post. Back together, relearn and the vents are now working. Back to the defrost, open up the old actuator and it's timing is also off. Set the gears right, slap it in, another relearn and it works.
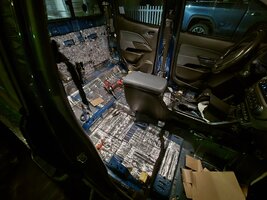
Opened up the CCC actuator and I can't make heads or tails of which way the gear with the dots should be as it's different than the OEM one. I might return it but it was just $25 and not worth the trouble. Then again, I might win the Amazon lottery and be told to keep it even with the refund.
 

littleblazer

Member
Jul 6, 2014
9,272
Changing a lightbulb. Think I did something wrong.
20250531_214746.jpg20250531_214850.jpg
 

TJBaker57

Lifetime VIP Donor
Member
Aug 16, 2015
3,456
Colorado
Open it up and the "timing" was off as per this post. Back together, relearn and the vents are now working. Back to the defrost, open up the old actuator and it's timing is also off.


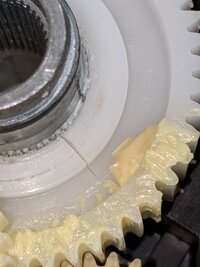
I have seen small cracks develop on the large 'final drive' gear right down where the plastic gear is splined to the drive hub. This loosens the 'grip' and the plastic gear can then rotate on the hub when under enough strain as happens during a relearn. Once it has slipped the plastic splines are compromised and lose their grip.

I have seen new actuator designs that eliminate the separate position potentiometer and I think they built that function into the final drive gear?

IMG_20190320_105943.jpg
 

Mooseman

Original poster
Moderator
Dec 4, 2011
26,597
Ottawa, ON
I have seen small cracks develop on the large 'final drive' gear right down where the plastic gear is splined to the drive hub. This loosens the 'grip' and the plastic gear can then rotate on the hub when under enough strain as happens during a relearn. Once it has slipped the plastic splines are compromised and lose their grip.
I checked for cracks on all the gears and they were fine so :confused: . I think maybe on a -30c morning, it was probably all stiff and jumped a tooth.
I have seen new actuator designs that eliminate the separate position potentiometer and I think they built that function into the final drive gear?
Mine has the pot gear. Its gear is just different with the numbers and the half moon missing, which helps me with the orientation of the dots. Maybe the one you got they were substituting the actuator for recirc which doesn't have it?
 
  • Like
Reactions: Matt

TJBaker57

Lifetime VIP Donor
Member
Aug 16, 2015
3,456
Colorado
Mine has the pot gear. Its gear is just different with the numbers and the half moon missing, which helps me with the orientation of the dots. Maybe the one you got they were substituting the actuator for recirc which doesn't have it?


I pulled this new spare from my shelves....

Looks like they built the positional sensing right into the final drive?? Next to the bright copper arc is a black resistive strip.


20250602_094609.jpg20250602_094544.jpg20250602_094122.jpg20250602_094252.jpg
 

Mooseman

Original poster
Moderator
Dec 4, 2011
26,597
Ottawa, ON
Oh , maybe that's the 2002 only version. Would explain why it's 2002 specific.
 
  • Like
Reactions: Matt

Zaab

Member
Apr 30, 2025
51
Ohio
Changing air filter for the first time on GMT360. To my surprise the dealer has put a pre-oiled STP paper filter in it. Swap with new Fram Ultra. Of course loss the bottom left screw despite me trying my best.
Another round of power steering fluid change. Empty the reservoir and put new clean fluid in. It's getting better.
 

Zaab

Member
Apr 30, 2025
51
Ohio
More interesting work!
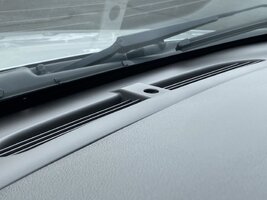
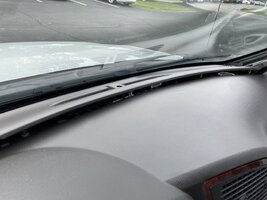
So I notice my vehicle always in night mode. Low beam on all the time. Dim DIC with dash light on all the time. And the ambient light sensor is absent.
1749343625501.jpeg
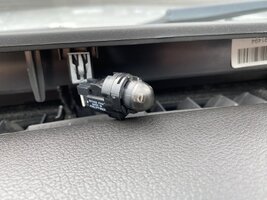
It's very easy to get the trim pieces off. Use anything with a flat head to pry open both A pillar cover hatches, unscrew the philip screw inside, take off the pillar cover then popping out the clip for the front trim piece. To my surprise, when I'm searching for the ambient light sensor wire, I feel the sensor still attached on it. Not sure why the last guy work here hides it. Maybe he's in a hurry and just do minimum to get the car on the road?
1749343766127.jpeg
It's not very pleasant to get the sensor on, mainly because working in limited space, and I just trimmed my nail so couldn't disconnect the sensor first and put it in. But I managed to get it in place after some struggle. Vola! Now my auto headlight works, and I can finally read my DIC under the sun.
1749343951368.jpeg1749344381301.png
1749344489598.png
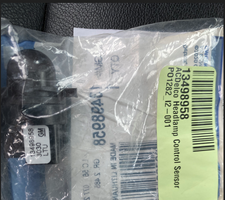
Wondering why the GM one has a blacked-out dome and mine is clear? Anyway, I saved ~$40 so not going to complaint.

PS: this poor guy get stuck on the A pillar for who knows how long... And when I took down the pillar cover, a LIVE dragon fly flew out (???
1749344580627.png
 

Mooseman

Original poster
Moderator
Dec 4, 2011
26,597
Ottawa, ON
It could have been pushed in accidentally while cleaning the dash or maybe rubbing it "real good" and oops. Or maybe just forgot to put it back in after some work. Anyway, you got it done right.
 
  • Like
Reactions: xavierny25 and Zaab

Mooseman

Original poster
Moderator
Dec 4, 2011
26,597
Ottawa, ON
I've been busy the past week or so installing air bags on the Sierra for towing the RV. I had a pair of air shocks to work with the weight distributing hitch but that system was a PITA, airing up the shocks to 150 psi (have blown 3 portable compressors) and setting up the WDH hitch itself. I found used bags like these for $350 instead of the $539+tax. I had also bought a used AirLift compressor like this one for $175 instead of $390+tax new. Couldn't use it with the shocks because it only goes to 100 psi but will work great with the bags. The original setup with the bags were two Schrader valves in the rear license plate.

Installed the airbags first and all I needed to get were some new hook bolts for the bottom plate. Put the compressor in the rear seat storage and ran the lines to the front. A pretty clean install.

PXL_20250622_145542558_resized4804079529520025181.jpgPXL_20250622_145506842_resized7418177040895217577.jpgPXL_20250622_145504661_resized2022830951286189528.jpg

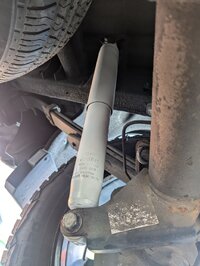
I had ordered some new Gabriel Ultra shocks for the rear to replace the air shocks. Good thing I did because I found out what was making that clunking noise.

PXL_20250622_145415552_resized3597753230125447413.jpgPXL_20250622_145238756_resized723415037764127479.jpgPXL_20250622_145230067_resized4369589405515369539.jpgPXL_20250622_145208476_resized583326004497409090.jpg

Already drove the trailer with this setup and at 70 psi in the bags, it rides as flat as Saskatchewan :biggrin: .Only thing though, and that was also with the previous setup, I find the front shocks too soft with a lot of porpoising. Gabriel doesn't make a front shock/strut for my truck yet so I think I'll go with some Bilsteins later.
 

BrianF

Member
Jul 24, 2013
1,302
West central Sask.
Awesome set up Moose!! One of the clients out at our place runs that same compressor on their similar year Chev 1500 gasser. Not sure how the underhood packaging is for the diesel but the gasser had this sweet little spot to mount it.
 

Mooseman

Original poster
Moderator
Dec 4, 2011
26,597
Ottawa, ON
Mine's mounted in the rear seat storage, nothing exposed except for the bags themselves. Had heard stories of exposed compressors dying.

So ordered a pair of 5100 Bilsteins for the front. Went a step up so that I can level the front up at the same time as firm up the suspension. Had ChatGPT search for the best deal for me at it was a TDot Performance. Ships free from Canada, got a 10% sitewide discount and no shipping or tariff BS. $531CAD taxes in for the pair. Man they got expensive!

 
  • Like
Reactions: BrianF

Zaab

Member
Apr 30, 2025
51
Ohio
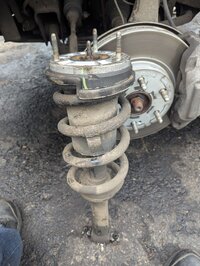
Work on a rusty gmt360 is harder than I thought. Have to fight every part and use hammer to persuade things to happen.

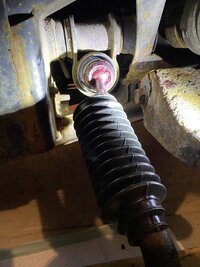
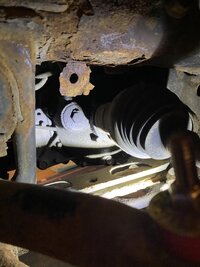
Try changing tire rods. Nope, completely sized up even with penetrate oil soaking for a day. Then found some guy twisted rack and pinion boot when replacing tire rod, which makes it tear. Bought new boot, clean the inside and apply new grease.
IMG_3194.jpeg
IMG_3195.jpeg
IMG_3196.jpeg


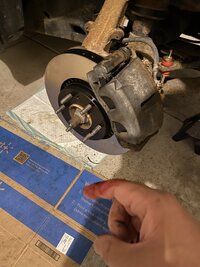
Then spent two hours on my first brake job. Learning thing on the fly. And cut my finger as sacrifice for the saab.
IMG_3197.jpeg
 

Mooseman

Original poster
Moderator
Dec 4, 2011
26,597
Ottawa, ON
There must be a blood sacrifice to Odin on your first laying of hands on a venerable Swedish'ish GMT. Welcome to the club :biggrin:
 

flyboy2610

Member
Aug 24, 2021
603
Lincoln, Ne.
One thing that irritates me is when a shop works on the tie rods or alignment is that they insist on using zip ties to secure the boot. "Oh, those will hold just fine." Noooooo they doesn't! :mad:
No matter how tight they try to get them every one of them has come loose! Fortunately I have the tools to put real clamps on the boots.

For the pliers it helps to push on the head while you start to tighten the clamp so the pliers don't slip off. They work pretty well.
No more loose boots! :celebrate:
 

Zaab

Member
Apr 30, 2025
51
Ohio
One thing that irritates me is when a shop works on the tie rods or alignment is that they insist on using zip ties to secure the boot. "Oh, those will hold just fine." Noooooo they doesn't! :mad:
No matter how tight they try to get them every one of them has come loose! Fortunately I have the tools to put real clamps on the boots.

For the pliers it helps to push on the head while you start to tighten the clamp so the pliers don't slip off. They work pretty well.
No more loose boots! :celebrate:
Was fighting with the stupid clamp for a good half hour. This could save my day (or midnight)!
 

Mooseman

Original poster
Moderator
Dec 4, 2011
26,597
Ottawa, ON
I've had a pair of those exact same pliers for over 30 years. A zip tie can be used temporarily in a pinch but the real clamp is a must.

Drove the Sierra to Princess Auto to get some drum bearing seals for the trailer when I noticed knocking in the right rear over bumps. Oh, maybe one of the shock bolts got loose. Get home, put it up on the ramps and the top bolt was gone. Well fook! Luckily I found an extra hardware store bolt but I used it at the bottom and used the lower original on top.

I wonder if it was the anti-seize that allowed it to get loose or I just didn't tighten it enough. The other side's bolts were all tight. Added some blue Loctite and torqued all them down to really goodentite.

Now to go and grease those trailer bearings.
 
Last edited:

littleblazer

Member
Jul 6, 2014
9,272
New company vehicle...
20250625_083225.jpg
 

Mooseman

Original poster
Moderator
Dec 4, 2011
26,597
Ottawa, ON
I saw it's a V8, please tell me it's not the 6.2! The 5.3 is safe.

Project Sierra suspension upgrade complete. Just installed the Bilsteins in front and at the second top most clip position, she's level. The job itself wasn't too bad except that the top bolts on the struts weren't accessible from the top because of stuff in the way except for the innermost one on the right side. All the others I had to remove with a wrench from the wheel wells. To get the suspension to droop down enough I had to unbolt the sway bar link from the lower control arm, and then I still had to use a pry bar to frop it down even further.

To remove the coil springs, I used three screw type spring compressors and I had to remember to compress them further as the spring perch was going to be higher than stock. These are some beefy springs. Surprisingly the compressors survived.

So the truck is level and the test drive was good. Front suspension is definitely firmer but not too firm. Felt weird driving it without that front rake. Hopefully I won't have to re-aim my headlights as they are stock LEDs.

PXL_20250628_151839546_resized5728466553222534946.jpgPXL_20250628_180007010.MP_resized2383170785182901493.jpgPXL_20250628_161649599_resized129575364752329215.jpg
 

littleblazer

Member
Jul 6, 2014
9,272
I saw it's a V8, please tell me it's not the 6.2! The 5.3 is safe.

Project Sierra suspension upgrade complete. Just installed the Bilsteins in front and at the second top most clip position, she's level. The job itself wasn't too bad except that the top bolts on the struts weren't accessible from the top because of stuff in the way except for the innermost one on the right side. All the others I had to remove with a wrench from the wheel wells. To get the suspension to droop down enough I had to unbolt the sway bar link from the lower control arm, and then I still had to use a pry bar to frop it down even further.

To remove the coil springs, I used three screw type spring compressors and I had to remember to compress them further as the spring perch was going to be higher than stock. These are some beefy springs. Surprisingly the compressors survived.

So the truck is level and the test drive was good. Front suspension is definitely firmer but not too firm. Felt weird driving it without that front rake. Hopefully I won't have to re-aim my headlights as they are stock LEDs.

View attachment 117406View attachment 117407View attachment 117408
Yeah 5.3L. Wanted the 6.2 badly and well being honest, if GM is owning it I'll gladly blow up a 6.2 lol. My understanding is it was a rod issue and also that the 5.3 and 6.2 both have the same rods. Its just the higher strung 6.2 had issues. Regardless that engine would've been beyond the effected Vin sequence... it was a May build. Dad had a tough time deciding which engine to get and was torn between the 2 V8s and the 3.0l. Only issue with the 3.0l is the emissions would have been an issue due to all the short trips it made. The adaptive ride control is really nice. Its honestly too nice for a work truck. And as much as it pains me to say it, I think his F150 is built a little better. But the overall setup on the denali is nicer. Its also 3 years newer.
 

Zaab

Member
Apr 30, 2025
51
Ohio
I saw it's a V8, please tell me it's not the 6.2! The 5.3 is safe.

Project Sierra suspension upgrade complete. Just installed the Bilsteins in front and at the second top most clip position, she's level. The job itself wasn't too bad except that the top bolts on the struts weren't accessible from the top because of stuff in the way except for the innermost one on the right side. All the others I had to remove with a wrench from the wheel wells. To get the suspension to droop down enough I had to unbolt the sway bar link from the lower control arm, and then I still had to use a pry bar to frop it down even further.

To remove the coil springs, I used three screw type spring compressors and I had to remember to compress them further as the spring perch was going to be higher than stock. These are some beefy springs. Surprisingly the compressors survived.

So the truck is level and the test drive was good. Front suspension is definitely firmer but not too firm. Felt weird driving it without that front rake. Hopefully I won't have to re-aim my headlights as they are stock LEDs.

View attachment 117406View attachment 117407View attachment 117408
Nice truck! Congrats
 

flyboy2610

Member
Aug 24, 2021
603
Lincoln, Ne.
View attachment 117409View attachment 117410
Completed brake work today and doing some diff fluid work. Front diff is bone dry, I drove like this for 700 miles. Pre 08 GM is tough.

Rear diff is worse. Fill plug is completely seized. Might need to find a shop to help me...
I couldn't get the fill plug out of the rear diff on the wife's '06 TB no matter what I tried, and trust me I tried EVERYTHING! So what I did what get a diff cover for an 8.6" rear diff, the part # is H078218565. I drilled a hole just to right of the '8' in that number, then installed a rubber diff plug (it was for a Jeep, IIRC).
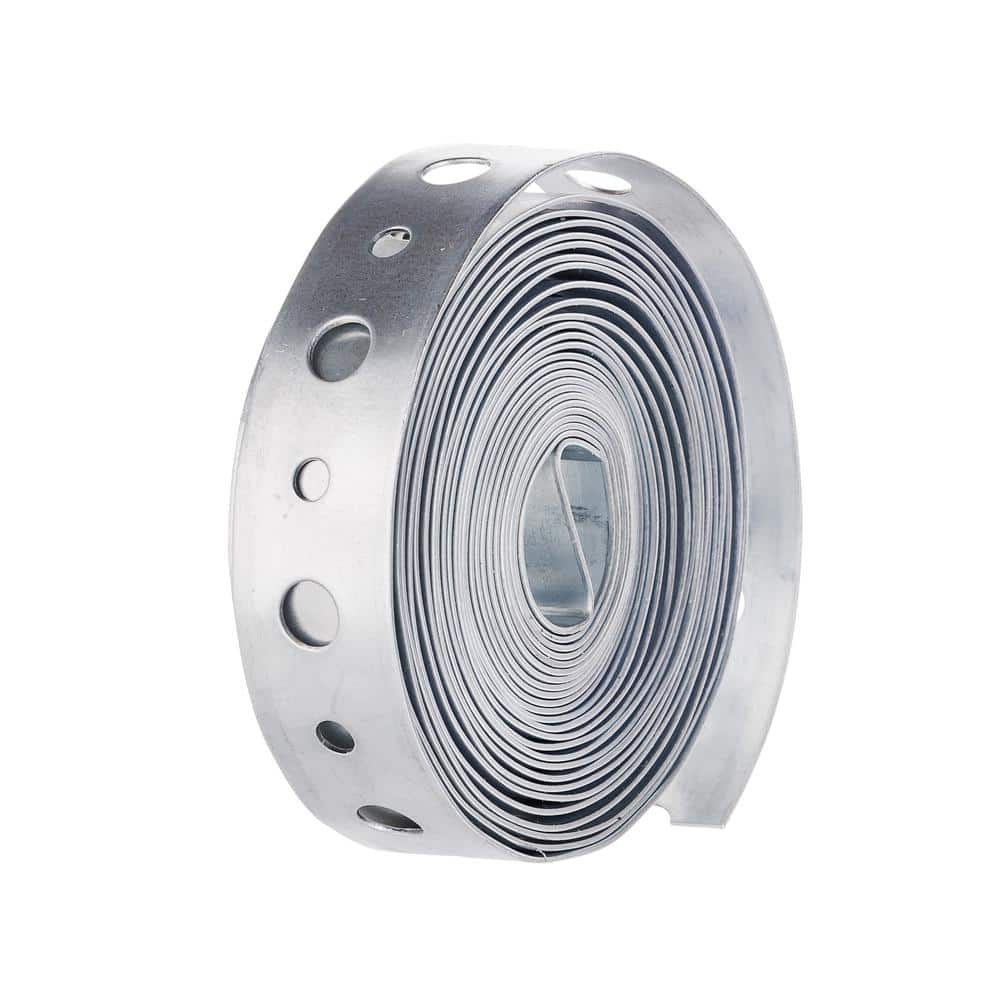
I changed the diff cover when I replaced the gear oil. When I bolted it on I used some pipe hanger strap, like this:
between two of the diff cover bolts, running it over the diff plug so it wouldn't come out.
Worked great! :celebrate:
You have to unbolt the cover anyway to get the old oil out.
 

Zaab

Member
Apr 30, 2025
51
Ohio
I couldn't get the fill plug out of the rear diff on the wife's '06 TB no matter what I tried, and trust me I tried EVERYTHING! So what I did what get a diff cover for an 8.6" rear diff, the part # is H078218565. I drilled a hole just to right of the '8' in that number, then installed a rubber diff plug (it was for a Jeep, IIRC).
I changed the diff cover when I replaced the gear oil. When I bolted it on I used some pipe hanger strap, like this:
between two of the diff cover bolts, running it over the diff plug so it wouldn't come out.
Worked great! :celebrate:
You have to unbolt the cover anyway to get the old oil out.
I was thinking if I can unbolt upper half of the cover, then pry a gap from the top that big enough for gear oil nozzle, but small enough to not deform the cover.

Yours work as well! What kind of drill bit is required?
 

flyboy2610

Member
Aug 24, 2021
603
Lincoln, Ne.
As I recall it was a 13/16 drill bit. But you'd need to get the rubber plug first check the diameter of the 'shaft' I guess you'd call it. The part that is actually going to contact the hole diameter. That might be different on the plug you use.
 

Mooseman

Original poster
Moderator
Dec 4, 2011
26,597
Ottawa, ON
You'll have to post the item number. Links from eBay don't work.
 

Mooseman

Original poster
Moderator
Dec 4, 2011
26,597
Ottawa, ON
Found it. It's item 315372212092. It's actually a Dorman part.

 
  • Like
Reactions: Zaab

TollKeeper

Supporting Donor
Member
Dec 3, 2011
8,372
Brighton, CO
Dont forget that you can also buy the diff covers with fill plugs, or a fill and drain plug.
 
  • Like
  • Love
Reactions: Matt and Zaab
Dec 8, 2021
42
Silver Spring, MD
Just replaced the upstream O2 sensor due to rough idle and actual engine stalling while parked! Worked like a charm. Took it out for an 80 mile round trip on a 95 degree day and it's back to purring again. I would like to thank everyone who posts working fixes to these wonderful rides. If I had not dropped the O2 removal tool down under the engine, it would have been an hour + 15 minute job. :duh:
 
Last edited:

Forum Statistics

Threads
23,937
Posts
644,934
Members
19,867
Latest member
btrujillo26

Members Online