Transmission removal inspection repair install

Uncleenvoy

Original poster
Member
Feb 12, 2020
545
Ny
After thinking about it..i think ill just leave the old one in..if i get codes or notice any slipping,the part in the valve body so i can just fix it under the truck or take off the valve body..im selling it so i really cant be stressing about what might happen to it a year from now..ill just be sure to tell the buyer what i did and didnt change
 

JayArr

Member
Sep 24, 2018
504
Mission BC Canada
The cheap fix is a new piston and springs, SK4L60E, it's for later models as well and it just replaces the current piston/spring. No tools, about $30. You can always put it in later but that's another fluid dump and working on your back under the vehicle.
 

Uncleenvoy

Original poster
Member
Feb 12, 2020
545
Ny
Went ahead and got the 3 new molded pieces..only 33bux kinda glad i did..one of them is supposed to be a tight fit around the hub of the piece where it goes over..the old one would stay on when put together and held upside down..but if i shook it then it would fall off but the new one wont fall off no matter how hard i shake it..its amazing how easy mechanic work is the second time around..got the lower half taken apart in 3 minitz using the brake spreader,flat steel bars and snap ring technique..cleaned up the drum and rest of parts but rain stopped any further progress..should be done by next clear day
 

Attachments

  • 20200929_112948.jpg
    20200929_112948.jpg
    345.7 KB · Views: 6
  • 20200929_092614.jpg
    20200929_092614.jpg
    459.2 KB · Views: 7
  • 20200929_092618.jpg
    20200929_092618.jpg
    408.4 KB · Views: 7
  • 20200929_092623.jpg
    20200929_092623.jpg
    389.4 KB · Views: 7
  • 20200929_092632.jpg
    20200929_092632.jpg
    358.9 KB · Views: 7
  • 20200929_092842.jpg
    20200929_092842.jpg
    385.3 KB · Views: 7
  • 20200929_112831.jpg
    20200929_112831.jpg
    486.3 KB · Views: 7
  • Like
Reactions: xavierny25

Uncleenvoy

Original poster
Member
Feb 12, 2020
545
Ny
Got her back together..but isnt there supposed to be a gap here for the pump to case o ring to slide into?also had to take apart these bearings they were ma3ling noise..turned out it was filled with the dirty strawberry shake water
 

Attachments

  • 20200930_130010.jpg
    20200930_130010.jpg
    409.7 KB · Views: 9
  • 20200930_130016.jpg
    20200930_130016.jpg
    461.3 KB · Views: 7
  • 20200930_164327.jpg
    20200930_164327.jpg
    352.5 KB · Views: 7

Uncleenvoy

Original poster
Member
Feb 12, 2020
545
Ny
I ended up putting the pump un with no ring..idont recall taking one off,none of the pics i have show a groove b4 disassemly and longwinded guys pump didnt have a groove..one note on the pump..you realy have to tighten it down in stages in the crisscross pattern..i tightend them down and by the time i got back to the first bolt its was totally loose..so were all the others had to make about 7-8 passes b4 they were all tight then torqued em..big problem im having here is that there is absolutely zero endplay..tried testing it using vice grip feeler gauge method but it doesnt budge..
 

Attachments

  • 20200930_185845.jpg
    20200930_185845.jpg
    248.1 KB · Views: 7
  • 20200930_185902.jpg
    20200930_185902.jpg
    230.1 KB · Views: 6
  • 20200930_185837.jpg
    20200930_185837.jpg
    172.2 KB · Views: 6

NJTB

Member
Aug 27, 2012
612
Flemington, NJ
No end play is a problem-somethings too tight. Push the shaft with your hands and try to pull it back out. There should be some movement.
Before I put it back in, I would definitly find out why. Too thick a thrust washer?
 

Uncleenvoy

Original poster
Member
Feb 12, 2020
545
Ny
From what ive looked up so far its a common problem when rebuilding..im gonna have to take it apart again and triple check if i put any bearings in upside down,measure the old steels and pressure plates against the new ones and measure frictions too maybe they swole from that dip in the tub..just gotta find my digital caliper..havent seen it in a while
 

Uncleenvoy

Original poster
Member
Feb 12, 2020
545
Ny
Aamco neighbor stopped by sais not to worry about the endplay as long as the shafts are turning so gonna trust him and mive forward..got most of it put together but tiday was veey unproductive for the most part..while torqueing down the 1-2 accomulator bolt the long one went fine torque wrench clicked move on to the shorter ones no click and just i was thinking"these are pretty tight why usnt it clicking?" Snap broke the bolt..used one of the valve body bolts same size and markings just so i can proceed..tightend them down real tight still no click on wrench though..spent hours trying to find a replacement bolt and bellhousing bolt that broke during disassembly..no luck..one place had the bellhousing bolts but you have to buy all of them for 30bux..so im missing one valve body bolt 6 o'clock in pic
 

Attachments

  • 20201001_174735.jpg
    20201001_174735.jpg
    462.9 KB · Views: 7

Uncleenvoy

Original poster
Member
Feb 12, 2020
545
Ny
Then figured ill put the servo in and go check dealership in the morn for the bolts b4 i order them online..when i put servo in it was too tall to put the snap ring in..o pressed and hammered no go..took it back out and saw a chip broke off on the piston and the gasket/ring was danaged..i took off the gaskets and left the big spring out just to do a dry fit..still too tall..after some head scratching and staring at the parts i realized when i disassembled the servo to check for damage i put it back together backwards..live and learn..gotta go get a new one..the pointy end of this rod/pin should be on the wider side
 

Attachments

  • 20201001_185603.jpg
    20201001_185603.jpg
    259.2 KB · Views: 7
  • 20201001_185618.jpg
    20201001_185618.jpg
    349 KB · Views: 7

Uncleenvoy

Original poster
Member
Feb 12, 2020
545
Ny
Aftee thinking about it and reading the book some..im gonna go ahead and take it apart to see if i put the bearing in properly if i did then im going to replace the selective washer..the one in there now is I.D. number 69..the one trans bench guy had was # 68..i ordered a 67 and 68 about 14bux each..check the chart pic to see the difference..67 will be here tmrw 68 next week..also got the a new servo piston this one is the upraded corvette one for 35bux..dealership wanted 84bux for the oem and 2 week delivery..amazon had an oem for 30 bux 2day delivery..this was hard to find by just googling it but once i got the actual part number(oem 864-2613) it was easy to find..forgot to order the 2 missing bolts gonna do that later
 

Attachments

  • 20201003_101341.jpg
    20201003_101341.jpg
    301.2 KB · Views: 6
  • 20201003_101400.jpg
    20201003_101400.jpg
    301.8 KB · Views: 6
  • 20201003_100956.jpg
    20201003_100956.jpg
    239 KB · Views: 5
  • 20201003_101003.jpg
    20201003_101003.jpg
    216.4 KB · Views: 5
  • 20201003_101012.jpg
    20201003_101012.jpg
    216.2 KB · Views: 6
  • 20201003_101319.jpg
    20201003_101319.jpg
    277.2 KB · Views: 5

Uncleenvoy

Original poster
Member
Feb 12, 2020
545
Ny
Took it apart..bearing was installed with the black side facing up..which is how it was done in vid..book illustration not very clear take a look let me know if u understand it. Good thing i took it apart again one of the teflon seals broke gotta replace those.so the problem of the day is i cant get the input drum out ..it came out easy last time after i got the band pin out.. but now it just wont come out..ive been twisting, pulling and shaking for an hour now..im spent.. shes heavy again. I wonder if that's contributing to the no endplay..well see tmrw if the #67 comes b4 sundown tmrw
 

Attachments

  • 20201003_163107.jpg
    20201003_163107.jpg
    183.3 KB · Views: 5
  • 20201003_163146.jpg
    20201003_163146.jpg
    145.4 KB · Views: 4
  • 20201003_163208.jpg
    20201003_163208.jpg
    171.6 KB · Views: 5
  • 20201003_163219.jpg
    20201003_163219.jpg
    174 KB · Views: 4
  • 20201003_155405.jpg
    20201003_155405.jpg
    231.4 KB · Views: 4
  • 20201003_155430.jpg
    20201003_155430.jpg
    235.6 KB · Views: 4
  • 20201003_155452.jpg
    20201003_155452.jpg
    361.7 KB · Views: 4
  • 20201003_155926.jpg
    20201003_155926.jpg
    450.7 KB · Views: 5

Uncleenvoy

Original poster
Member
Feb 12, 2020
545
Ny
Got the 2-4 servo reassembled..correctly this time..used screw,nut,socket ratchet, flat steel and wrench to compress spring and removed/replaced snap ring with screwdriver..so gonna stick this somewhere safe until its needed
 

Attachments

  • 20201003_164645.jpg
    20201003_164645.jpg
    317.8 KB · Views: 6
  • 20201003_164813.jpg
    20201003_164813.jpg
    332.4 KB · Views: 6
  • 20201003_165111.jpg
    20201003_165111.jpg
    297.9 KB · Views: 6
  • 20201003_165343.jpg
    20201003_165343.jpg
    318.6 KB · Views: 6
  • 20201003_165952.jpg
    20201003_165952.jpg
    373.2 KB · Views: 6
  • 20201003_170527.jpg
    20201003_170527.jpg
    310.4 KB · Views: 6
  • 20201003_164339.jpg
    20201003_164339.jpg
    320.8 KB · Views: 6
  • 20201003_164357.jpg
    20201003_164357.jpg
    303 KB · Views: 6
  • 20201003_164538.jpg
    20201003_164538.jpg
    322.6 KB · Views: 7

Uncleenvoy

Original poster
Member
Feb 12, 2020
545
Ny
# 67 came this morn.. gonna put er in and see if i get any endplay..figured out the illustration its a vertically cut cross section..so according to that, the bearing was installed correctly..input drum stiill wouldnt come out as of last attempt yest..maybe itll come out today..
 

Attachments

  • 20201004_095412.jpg
    20201004_095412.jpg
    290 KB · Views: 2

Uncleenvoy

Original poster
Member
Feb 12, 2020
545
Ny
Got the teflon seals on using oiled up cellophane paper..got one from an old photo album..tried using the zip tie only method to resize them but the zip ties kept slipping off so tightly wound electrical tape and zip ties should do the trick..gonna give it 15mins
 

Attachments

  • 20201004_105538.jpg
    20201004_105538.jpg
    299.2 KB · Views: 4
  • 20201004_102920.jpg
    20201004_102920.jpg
    287.3 KB · Views: 4
  • 20201004_103536.jpg
    20201004_103536.jpg
    309.7 KB · Views: 4
  • 20201004_104501.jpg
    20201004_104501.jpg
    310.6 KB · Views: 4

Uncleenvoy

Original poster
Member
Feb 12, 2020
545
Ny
Changed the ones on the pump too
 

Attachments

  • 20201004_110253.jpg
    20201004_110253.jpg
    351.6 KB · Views: 5
  • 20201004_111149.jpg
    20201004_111149.jpg
    277.2 KB · Views: 5
  • 20201004_111537.jpg
    20201004_111537.jpg
    350.6 KB · Views: 5

Uncleenvoy

Original poster
Member
Feb 12, 2020
545
Ny
Got a .016 in there a .017 gets in there really tight too but not all the way in.. .015 is the lowest in the range but at least i got something..gonna torque down the pump,put back on the valve body and accessories and wait for the missing screws to show up.4got to put in the band..so that first
 

Attachments

  • 20201004_135652.jpg
    20201004_135652.jpg
    265.4 KB · Views: 4

Uncleenvoy

Original poster
Member
Feb 12, 2020
545
Ny
All put back together..got the servo in and gonna drain and replace transfer case fluid tmrw..gonna go see if the giants plan on winning a game this season
 

Attachments

  • 20201004_155945.jpg
    20201004_155945.jpg
    414.2 KB · Views: 4
  • 20201004_160933.jpg
    20201004_160933.jpg
    601.1 KB · Views: 4

Uncleenvoy

Original poster
Member
Feb 12, 2020
545
Ny
Bolts came yesterday also went ahead and ordered a drainplug..i dont get why they didnt put a plug in at the factory..all put back together just gotta put it back up in there
 

Attachments

  • 20201007_135557.jpg
    20201007_135557.jpg
    374.1 KB · Views: 8
  • 20201007_141625.jpg
    20201007_141625.jpg
    314 KB · Views: 8
  • 20201007_114313.jpg
    20201007_114313.jpg
    221.5 KB · Views: 8
  • 20201007_141634.jpg
    20201007_141634.jpg
    195.6 KB · Views: 8
  • 20201007_142442.jpg
    20201007_142442.jpg
    400.7 KB · Views: 8
  • 20201007_153652.jpg
    20201007_153652.jpg
    409.9 KB · Views: 8
  • 20201008_093452.jpg
    20201008_093452.jpg
    414.2 KB · Views: 8
  • 20201007_114644.jpg
    20201007_114644.jpg
    317.6 KB · Views: 8
  • 20201007_120206.jpg
    20201007_120206.jpg
    455.7 KB · Views: 9
  • 20201007_134727.jpg
    20201007_134727.jpg
    395.2 KB · Views: 8
  • 20201007_135201.jpg
    20201007_135201.jpg
    440.3 KB · Views: 8
  • Like
Reactions: Mooseman

Uncleenvoy

Original poster
Member
Feb 12, 2020
545
Ny
Glad i went to change the transfer case fluid..it was bone dry..i dont know what size hex/allen bolts are needed here but way bigger than anything i had..was about to go buy a set and saw this pack of star bits i had. A T55 with an 8mm socket to attach to the other end worked perfectly
 

Attachments

  • 20201008_104209.jpg
    20201008_104209.jpg
    410.3 KB · Views: 7
  • 20201008_104648.jpg
    20201008_104648.jpg
    397 KB · Views: 7
  • 20201008_103821.jpg
    20201008_103821.jpg
    557.1 KB · Views: 7
  • 20201008_103909.jpg
    20201008_103909.jpg
    317.8 KB · Views: 7
  • 20201008_103930.jpg
    20201008_103930.jpg
    166.8 KB · Views: 7
  • 20201008_104202.jpg
    20201008_104202.jpg
    219.5 KB · Views: 7
  • Like
Reactions: Mooseman

Uncleenvoy

Original poster
Member
Feb 12, 2020
545
Ny
Just realizes transfer case was upside diwn in those last pics..still empty though
 

Attachments

  • 20201008_105230.jpg
    20201008_105230.jpg
    370 KB · Views: 5
  • Like
Reactions: Mooseman

Uncleenvoy

Original poster
Member
Feb 12, 2020
545
Ny
Using some ratchet straps just to get it high enuf to slide in jack with some boards on it
 

Attachments

  • 20201008_164340.jpg
    20201008_164340.jpg
    340.1 KB · Views: 12

Uncleenvoy

Original poster
Member
Feb 12, 2020
545
Ny
Almost in..tricky part is getting the top lip of bellhousing behind these bracket tabs..using a hanger to pull on the bracket while i slowly jack it up and tilt it..not much movement but i think it should be enough
 

Attachments

  • 20201014_102712.jpg
    20201014_102712.jpg
    254 KB · Views: 8
  • 20201014_102648.jpg
    20201014_102648.jpg
    235.3 KB · Views: 8
  • 20201014_104800.jpg
    20201014_104800.jpg
    382.7 KB · Views: 8
  • Like
Reactions: Mooseman

Uncleenvoy

Original poster
Member
Feb 12, 2020
545
Ny
@NJTB took a week off..forgot im not 20 years old anymore so after lifting the trans down and sliding it under the car my lower back reminded me the next morning..by the time i felt better it rained for 3 days...got her in..all housing to engine bolts torqued to 37lbs..torque converter bolts 44lbs..trans cooler lines,vent hose and dipstick reconnected.would if gotten more done but that lower cooler line was a pain and i couldnt find my plastic clip removal tool..also i thought i messed up the torque converter or something cause i couldnt get the bolt in...turns out there are 2 types of holes in the flexplate..hour and a half minimum to figure that out..gonna finish her up now..hopefully driving in a few hours
 

Attachments

  • 20201014_161539.jpg
    20201014_161539.jpg
    348.5 KB · Views: 10
  • 20201014_161525.jpg
    20201014_161525.jpg
    241.8 KB · Views: 9
  • 20201014_173828.jpg
    20201014_173828.jpg
    238.7 KB · Views: 9
  • 20201014_173834.jpg
    20201014_173834.jpg
    208 KB · Views: 9
  • Like
Reactions: gmcman and Mooseman

Uncleenvoy

Original poster
Member
Feb 12, 2020
545
Ny
Getting this thing in is gonna be a pain..i couldnt get it off b4 when the trans was on and i had to fight to get it off once the trans was out..in hindsight i shoulda left it in there
 

Attachments

  • 20201015_093741.jpg
    20201015_093741.jpg
    822.2 KB · Views: 11
  • Sad
Reactions: Mooseman

Uncleenvoy

Original poster
Member
Feb 12, 2020
545
Ny
Well damn..spoke too soon..used an old scissors jack to lift up exhaust.. hit the rubber and big metal pins that go in the holes with some pb blaster and done..now on to the transfer case
 

Attachments

  • 20201015_095843.jpg
    20201015_095843.jpg
    361.9 KB · Views: 7
  • 20201015_095828.jpg
    20201015_095828.jpg
    258.1 KB · Views: 7

Uncleenvoy

Original poster
Member
Feb 12, 2020
545
Ny
Though not necessary i disconnected the secondary air pump..found it was always in the way and kept bumping my head on it..crossmember is in so just transfer case and drive shafts and reconnect them electrics..took longer than expected no air compressor to drive those crossmember bolts in quick
 

Attachments

  • 20201015_111225.jpg
    20201015_111225.jpg
    479.8 KB · Views: 7
  • 20201015_124411.jpg
    20201015_124411.jpg
    255.8 KB · Views: 7
  • 20201015_112815.jpg
    20201015_112815.jpg
    759.7 KB · Views: 7
  • Like
Reactions: Mooseman

Uncleenvoy

Original poster
Member
Feb 12, 2020
545
Ny
Transfer case in..boy let me tell ya that was a task..no trans jack..used straps to get it up then slid under it loosenend straps..let it rest on my chest then bench pressed it in at an angle..took about 3 tries..lets see how i feel in the morn..driveshafts here i come
 

Attachments

  • 20201015_165703.jpg
    20201015_165703.jpg
    229.4 KB · Views: 7

Uncleenvoy

Original poster
Member
Feb 12, 2020
545
Ny
Rear drive shaft is in..having a hard time figuring out how the shift cable fits in its bracket b4 i put in the front drive shaft..mostly due to it getting dark and im tired..so tmrw we will be done
 

Uncleenvoy

Original poster
Member
Feb 12, 2020
545
Ny
Still functioning..nothing sprained,strained, pulled or sore from that transfer case bench press yesterday..starting early to beat the expected rain..looked up some vids regarding the shift cable bracket..everyone ive seen so far skips past the bracket installation part..anyway slid under the daily driver (an 04 envoy) to see what it should look like..i think i got it..should be done soon
 

Uncleenvoy

Original poster
Member
Feb 12, 2020
545
Ny
30 seconds..smh..fussing with it for 1/2 hour last night..technique..have to put it in nuetral slide the cable up in bracket put in park then insert metal clip
 

Attachments

  • 20201016_074424.jpg
    20201016_074424.jpg
    223.6 KB · Views: 8

Uncleenvoy

Original poster
Member
Feb 12, 2020
545
Ny
Front driveshaft in..just gotta secure dipstick bracket, put in tranny fluid and move all this stuff to pull her out..fingers crossed..hope all goes well
 

Attachments

  • 20201016_075746.jpg
    20201016_075746.jpg
    264.1 KB · Views: 5
  • 20201016_080423.jpg
    20201016_080423.jpg
    375 KB · Views: 5
  • 20201016_080131.jpg
    20201016_080131.jpg
    264.8 KB · Views: 5

Uncleenvoy

Original poster
Member
Feb 12, 2020
545
Ny
No luck fellas..still no reverse and now there's a noise..tried to upload a vid but sais something about extension not allowed..its a tapping noise about 3-4 taps per second at idle in every gear prnd321
 

JayArr

Member
Sep 24, 2018
504
Mission BC Canada
I'm no expert, I'm just following along and watching vids like you but...

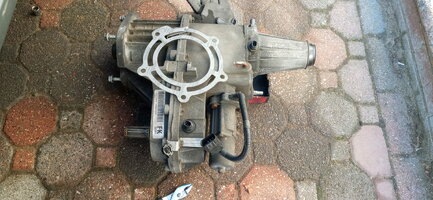
Try taking a pressure reading before you take it out. I'm not 100% sure how to do it but I remember seeing a vid where there was a place to put a pressure gauge to see what the internal pressure is.

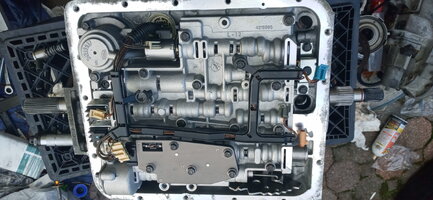
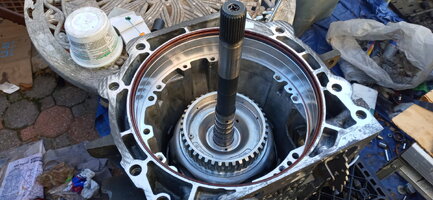
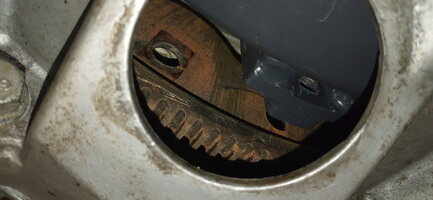
If there is no pressure from the pump nothing will work. Knowing that would allow you to concentrate on the pump and leave the rest of the gears/clutch packs alone.

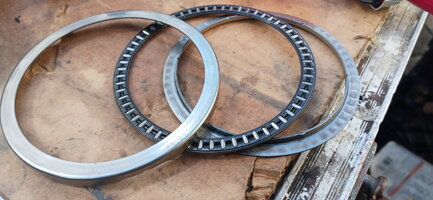
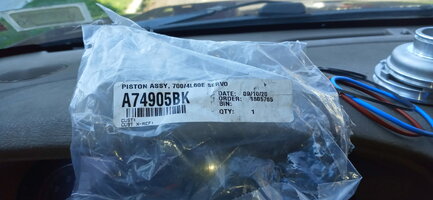
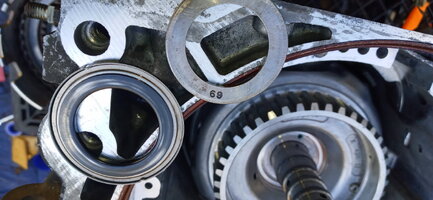
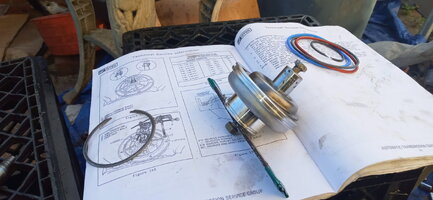
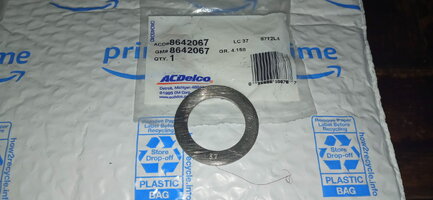
Didn't you end up with an extra seal or o-ring on the pump rebuild?

If there is pressure then you can ignore the pump and look for a reason why the clutch packs aren't engaging.

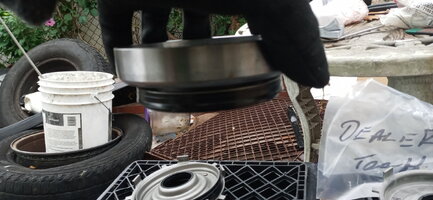
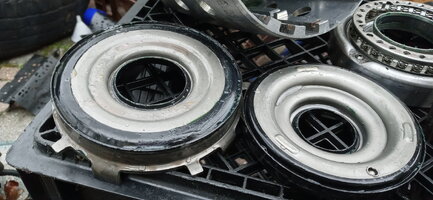
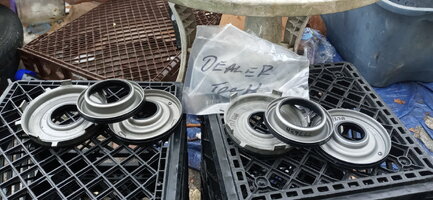
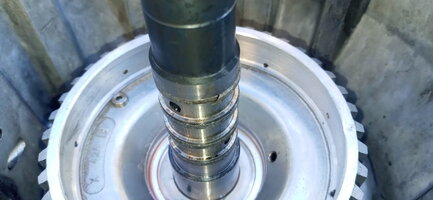
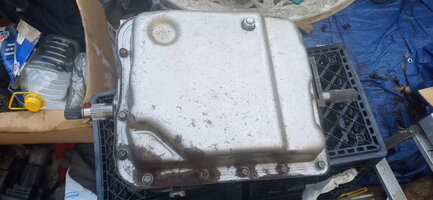
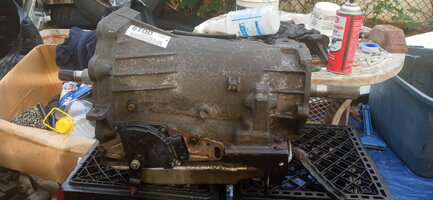
My bet is on the pump since all gears including reverse are out.

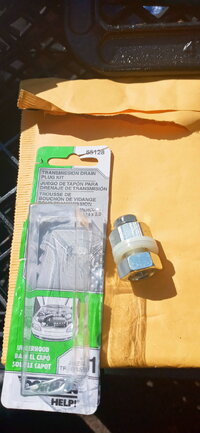
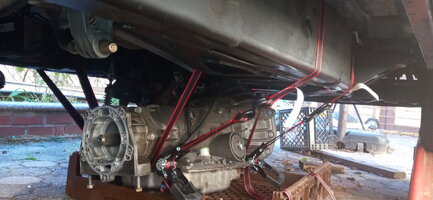
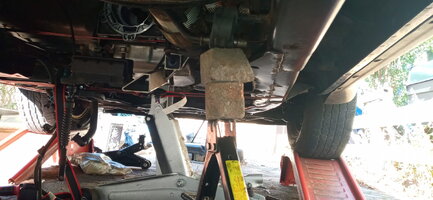
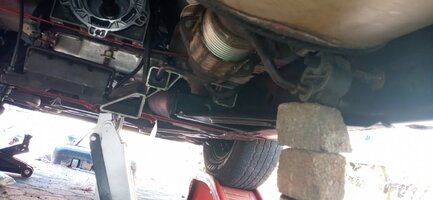
On the bright side... - aren't you glad you put that drain plug in!

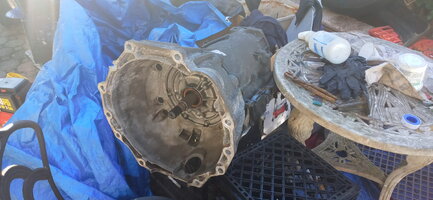
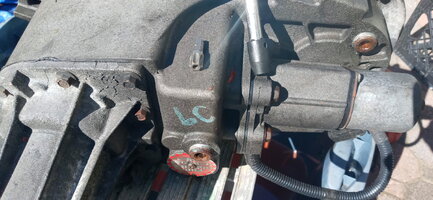
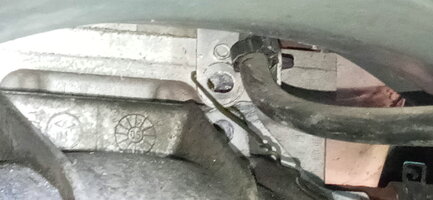
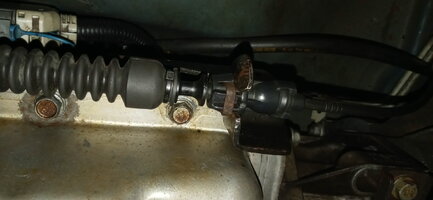
A note for the cable, I undid the nut on the end of the shaft and dropped the entire cable adjustment assembly. The shaft has a flat spot so it goes back indexed to where it was. This saves playing around with that adjustment.

I feel your pain, I've had to pull things twice before and pulling it the second time is rough but it's fresh in your mind and will go a lot faster this time.
 
  • Like
Reactions: W4UWC

Forum Statistics

Threads
23,314
Posts
637,847
Members
18,520
Latest member
Firebaugh86

Members Online