Tool Talk

Reprise

Lifetime VIP Donor
Supporting Donor
Member
Jul 22, 2015
2,724
@Reprise... Give this array of "LS Engine Harmonic Damper Pullers" a once over...you might find the right one at a much better price:


Umm... I dunno of a better price than 'free'... :laugh: (ok, it'll cost some gas, but it'll be good to get out of the house, and it'll keep me 'on schedule', such as it is)

If it was a tool I'd use even semi-regularly, I'd make the spend, trust me. Thanks for the suggestion, tho... :thankyou:
 
  • Like
Reactions: mrrsm

Redbeard

Member
Jan 26, 2013
3,591
Hey
Reprise
&
MRRSM,

Quick question for each of you. How long have these lasted for you? I have owned two can openers that don't leave the sharp edge like these, but their lift span plain sucked :sadcry: Only about 1 -1.5 years of easy use before needing to dis-guard them. I'm going back 10- 15 years and I believe I spent about $25 each on them. I don't mind (much lol) spending good $$$ if the tools hold up. But to spend money on them and they don't last gets my knickers twisted up. Each time I use the "old regular" can opener I do think about these that don't leave a sharp edge, so I was just a wondering if yours held up better than my old pair. (hopefully you don't owe stock in either of the companies come to think of it...). Thanks.


"You would not ordinarily consider this item as one of THE Most Important Tools to own... But under the present circumstances...it WILL work SO well that it WILL give you a sense of satisfaction each and every time you use it...In More Ways Than ONE:

The ZYLISS Manual Can Opener is just THAT Tool (...available for $15.50 on Amazon): "

&
I have an OXO can opener that was similar in price / design to the Xyliss - and I got it b/c it's specifically made for people who have trouble using one (arthritis, anyone?) And, yes, the OXO works as promised -
 

Reprise

Lifetime VIP Donor
Supporting Donor
Member
Jul 22, 2015
2,724
@Redbeard -- I've had my OXO opener for several years (maybe 10 -?) I don't use it daily, but I've done nothing to it besides occasionally throwing it in the dishwasher in all that time (no sharpening, maintenance, oiling, etc.)

I don't abuse it like a flat-bladed screwdriver, but neither do I treat it as well as my cooking knives, that's for sure. And to answer your question -- no, I don't work for them or own their stock, I swear. :no:

Actually, I looked at OXO's site just now, and they've both redesigned the opener, and expanded the line of them. The closest thing to what I have is here They list the MSRP at about $15; no idea about 'real world' pricing.

The most important thing (to me) is the locking mechanism, eliminating the need to use a death grip on the handles to keep it aligned & cutting. Ergonomic lever for turning, and soft grip handles help, too. I've examined the gear mechanism, and it doesn't look to be larger (or smaller) than any other brand.

BTW... my favorite OXO go-to kitchen gadget is this thing Fantastic for liquids; good for solids, too. It's in a size that is useful for me (they have smaller ones, too), and it's not heavy glass, like Pyrex.

I also actually have some Xyliss knives that I like - inexpensive and hold an edge quite well, for what they are. They're pretty much relegated to camper duty now, cause they're light, highly visible in bright colors, & inexpensive to replace... and I'd buy them again in a heartbeat if I broke or lost one. So their can opener is probably just as good as the OXO, is what I'm suggesting.
 
  • Like
Reactions: Redbeard

Blckshdw

Moderator
Nov 20, 2011
10,747
Tampa Bay Area, FL
BTW... my favorite OXO go-to kitchen gadget is this thing Fantastic for liquids; good for solids, too. It's in a size that is useful for me (they have smaller ones, too), and it's not heavy glass, like Pyrex.

I used to have this one. It disappeared years ago, I think someone helping with one of my moves, helped themselves to it. :mad:
 

Reprise

Lifetime VIP Donor
Supporting Donor
Member
Jul 22, 2015
2,724
@Reprise... Give this array of "LS Engine Harmonic Damper Pullers" a once over...you might find the right one at a much better price:


So... as it turns out, the one I rented... didn't do the job, either. Tried again with my own pullers, still no success.

Looked at the offerings you brought up, found one that is reported to work... but I'd have to wait until May 11th for it, and no option to get it quicker. No bueno.

Hopped on to the Bay and found the same one. *And* I'd get it quicker. But... it was actually an auction that was ending in a little over an hour. Hadn't seen one of those in forever and a day.

Settled down to watch a show I follow, and as it was ending, so was the auction.
Put my bid in with a few seconds left... winner, winner chicken dinner 🐔🍗 And even a couple of bucks cheaper than Amzn, too, all in. But I won't get it for about a week. Still beats May 11, though.

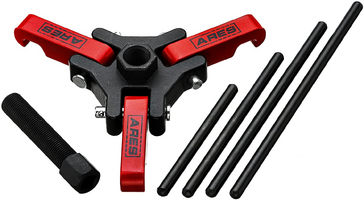
Keeping the thread on track, here's the item... basically the same as what I rented, but with two extra rods; the longest of which supposedly make it able to pull my balancer. Fingers crossed...

BTW... It's also supposed to work for the early (2002) 4.2L balancers, as well, according to one of the people who reviewed it.

1587351612479.png
 

Mooseman

Moderator
Dec 4, 2011
26,027
Ottawa, ON
I have one of those (different brand, probably from the same factory in China) and it works well. I was even able to pull the balancer from hell on my old 4.2 with it. However, it will not work on the very first generation of the 4.2 balancer (the one with the ring plate in front) and requires the Spent-Moore tool. It will work on all 4.2 and V8 balancers except that one.

I had destroyed the long rod with the balancer from hell. Now I have to use a bolt in the crank hole with a cut down short rod in the puller screw.
 
  • Like
Reactions: Reprise

Reprise

Lifetime VIP Donor
Supporting Donor
Member
Jul 22, 2015
2,724
I had destroyed the long rod with the balancer from hell. Now I have to use a bolt in the crank hole with a cut down short rod in the puller screw.

I've read a few reviews on this and another similar one; they say for the LS, start with the second longest rod, then switch out when it bottoms. If you start with the longest one, you'll bend the rod (and it supposedly doesn't straighten back out, even in a vise).

Glad I read the reviews and saw your post confirming same. I'll make sure I mention the rod swapout in my next update on the build thread. Been dying to finish putting that post together, but wanted the balancer & timing cover off, first.
 
  • Like
Reactions: Mooseman

Mounce

Member
Mar 29, 2014
13,667
Tuscaloosa, AL
So... as it turns out, the one I rented... didn't do the job, either. Tried again with my own pullers, still no success.
Which one did you rent? We had rented one at work and it didn't have a dowel long enough. Had many bolts of different grades and a coupler sleeve in the kit that would thread over one of the styles of bolts. I put the coupler/sleeve over a bolt and stuck it in the crank and used the puller (with 5h3 shortest dowel iirc) against the center of the bolt in the sleeve. Wasn't right but worked.

Then reinstalling was interesting also not having the right tool. Crank bolt wasn't long enough to catch threads so had to hammer the balancer in a ways till thread acquisition was achieved and ran it on down with an impact..
 

mrrsm

Lifetime VIP Donor
Supporting Donor
Member
Oct 22, 2015
8,202
Tampa Bay Area
Glad you found the Ares Kit... Hopefully coming with the Extra Long Internal Rod. And confirming the problem @Mounce identified about trying to Re-Install the Harmonic Balancer with the Used TTY Crankshaft Bolt... It is not possible to catch and thread the bolt inwards deep enough not to risk Stripping the Threads out of the end of the Crankshaft. If FUBARed, it would create a whole new problem that only a TIME-SERT Crankshaft Threaded Steel Cylinder Kit can repair.

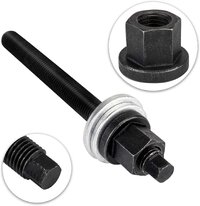
For an EZR Harmonic Balancer re-installation... This inexpensive, Extra Long Bolt and Gliding Washers Kit is the one you will need... available for under $20.00 via Amazon. In both cases of using these HB Removal and Install Tools... take a moment to lather up both hardened steel Bolts with some Moly-D Grease or some other Very High Pressure Grease... especially if you intend upon using an Impact Tool... which I do NOT recommend using in either direction:


LSHBINSTALLERKIT.jpg
 
Last edited:

mrrsm

Lifetime VIP Donor
Supporting Donor
Member
Oct 22, 2015
8,202
Tampa Bay Area
@Redbeard ...With all due respect to anyone who has a special desire to make use of the Military Field Can Opener and its added difficulties... Once you start living out of these things.... having a reliable and smooth Can Opener really does make a difference... especially for my wife. Before I got her the Zyliss version... I'd purchased practically everything that was offered... including Electric Can Openers that literally "walked around the lid" to cut their way into and around the lids on all of the Mild Steel Cans.

The problem with those other ones was that she could NEVER get the Rotor Teeth Gears to align properly with the Lid Ridge, Cinch in correctly and then STAY there. This translated into me having to come to the kitchen more often than not and then struggling with Butchered Metal Rims she managed to create while having pieces of steel shards falling down on top of the food as I re-did her efforts to get inside of those damned cans.

But the original Green Zyliss Can Opener I got almost 10 Years ago solved all of those problems. It Locked on easily, stayed secure while the EZ Turning Handle cut through like Butter and seemed to have decidedly better Mechanical Advantage that allowed the Sharp Roller Blade to unseal those Can Lids with ease. It might seem a bit pricey... but with stacks of canned foods we've accumulated all over the place for this Emergency Isolation.... if the Grocery Outlets become too difficult to receive goods from via Home Delivery... Eating out of Cans that still ship in quantity will have to become what keeps us going. Why make any of this repetitive task any more difficult than it needs to be? I still have the Green version (slightly larger than the Latest White & Green Version) and we use it if the other one is in the Dish Washer. BOTH work just the same... with the Roller Blade on the Older one being slightly duller now.
 
Last edited:
  • Like
Reactions: Redbeard

Mooseman

Moderator
Dec 4, 2011
26,027
Ottawa, ON
The reason mine bent on my 4.2 was because I had to heat the balancer around the crank snout with the torches while the puller was mounted. It was THAT stuck. Then, when I went to the yard to get a replacement, it came off like butter. Then on my 5.3, again, like butter. There's gotta be some that have slight defects or too much of an interference fit to get stuck on like this. Or they are torqued on so tight they sometimes get deformed.

I don't like these rods. They should supply a blank to block the snout's bolt hole, which is what I do with a slightly smaller bolt.
 

littleblazer

Member
Jul 6, 2014
9,267
Yeah... for mine I ended up using a socket extension and modded it to work. For reinstalling I just used a dead blow. I've used every harmonic balancer installer I could find and have pulled the threads out of plenty of cranks to know the deadblow and a block of wood works best. :hopeless: not fun helicoiling a 1000$ crank...
 
  • Like
Reactions: mrrsm

Reprise

Lifetime VIP Donor
Supporting Donor
Member
Jul 22, 2015
2,724
Which one did you rent? We had rented one at work and it didn't have a dowel long enough. Had many bolts of different grades and a coupler sleeve in the kit that would thread over one of the styles of bolts. I put the coupler/sleeve over a bolt and stuck it in the crank and used the puller (with 5h3 shortest dowel iirc) against the center of the bolt in the sleeve. Wasn't right but worked.

I got the one from AAP (Masterforce? - the brand they use for all their kits). It was the most complete, with different parts & such. And they give you 45 days to return.

O'Really's has a 48hr policy (WTF?), and Autobone only showed the 'duckfoot' type puller that requires the dampener to have threaded holes for pulling with bolts (like a stuck brake rotor). Which GM doesn't use on the LS dampeners (or any, apparently?) But they do have the notches in the back that the Chrysler tool can use, as well as the 'lips' at the edge of the three spokes that the Spent-More tool (as Moose likes to call them) connects with. But I'm not paying $100 for a freaking tool that I'll use 1-2 times in my life.

Ironically, I did try the coupler trick you mention - threaded the forcing screw on 1/2 of the coupler, and the extension (double-threaded) bolt on the other half of it. That didn't work for me, either, and the thrust washer that came with the kit, which could've helped me, was too wide.


I don't like these rods. They should supply a blank to block the snout's bolt hole, which is what I do with a slightly smaller bolt.

I don't like them either, and agree that something like a thrust washer would be optimal. But the one with the AAP kit above didn't fit (it was wider than the crank flange and extended into the balancer. I've already scored / galled the front of the flange (slightly) with the conical tips from my HF pullers (which are in various states of repair / breakage.) Thinking that I haven't ruined the crank yet, but don't want to keep pushing my luck. Internally, things are fine w/ threads, etc., and the new bolt will fit flush, as normal - no need for me to resurface the outer edge.

Thinking while writing here... I wonder if a socket of appropriate diameter would do the trick. Will try that today, along with @littleblazer's method below, if required. Would really like to get this thing off w/o having to wait a week to do so.


Yeah... for mine I ended up using a socket extension and modded it to work. For reinstalling I just used a dead blow. I've used every harmonic balancer installer I could find and have pulled the threads out of plenty of cranks to know the deadblow and a block of wood works best. :hopeless: not fun helicoiling a 1000$ crank...

I was confused for a minute...then I realized... you mean an extension bar. Probably with the smaller (socket) end to the back of the crank, and also ground into a round(er) shape, and the larger (ratchet) end that the rod supplied with the puller would go into (or maybe the puller itself, directly, with no rod between puller screw and extension bar. Did I guess right?

Thinking 3/8" would prolly be optimal, and maybe an impact-grade vs. chromium would be less apt to break. Thoughts? Thx. :tiphat:
 

littleblazer

Member
Jul 6, 2014
9,267
I got the one from AAP (Masterforce? - the brand they use for all their kits). It was the most complete, with different parts & such. And they give you 45 days to return.

O'Really's has a 48hr policy (WTF?), and Autobone only showed the 'duckfoot' type puller that requires the dampener to have threaded holes for pulling with bolts (like a stuck brake rotor). Which GM doesn't use on the LS dampeners (or any, apparently?) But they do have the notches in the back that the Chrysler tool can use, as well as the 'lips' at the edge of the three spokes that the Spent-More tool (as Moose likes to call them) connects with. But I'm not paying $100 for a freaking tool that I'll use 1-2 times in my life.

Ironically, I did try the coupler trick you mention - threaded the forcing screw on 1/2 of the coupler, and the extension (double-threaded) bolt on the other half of it. That didn't work for me, either, and the thrust washer that came with the kit, which could've helped me, was too wide.


I don't like them either, and agree that something like a thrust washer would be optimal. But the one with the AAP kit above didn't fit (it was wider than the crank flange and extended into the balancer. I've already scored / galled the front of the flange (slightly) with the conical tips from my HF pullers (which are in various states of repair / breakage.) Thinking that I haven't ruined the crank yet, but don't want to keep pushing my luck. Internally, things are fine w/ threads, etc., and the new bolt will fit flush, as normal - no need for me to resurface the outer edge.

Thinking while writing here... I wonder if a socket of appropriate diameter would do the trick. Will try that today, along with @littleblazer's method below, if required. Would really like to get this thing off w/o having to wait a week to do so.


I was confused for a minute...then I realized... you mean an extension bar. Probably with the smaller (socket) end to the back of the crank, and also ground into a round(er) shape, and the larger (ratchet) end that the rod supplied with the puller would go into (or maybe the puller itself, directly, with no rod between puller screw and extension bar. Did I guess right?

Thinking 3/8" would prolly be optimal, and maybe an impact-grade vs. chromium would be less apt to break. Thoughts? Thx. :tiphat:
Yup. An old low profile 3/8 where the hex end was larger than the shaft itself. It was broken anyway. I did also try it with a 1/4 drive but as you can imagine... didn't go well. I was tired, a little hungover, and worried about all the metal I found in the oil pan.
 
  • Like
Reactions: Reprise

Reprise

Lifetime VIP Donor
Supporting Donor
Member
Jul 22, 2015
2,724
Success! :wooot: :woohoo::wooot:

Took my largest 8" puller, and a 22mm (short) impact to do it.
No (further) damage to the crank.
Also took my electric impact gun to draw it -- I ratcheted by hand, but wasn't really going anywhere

Thanks to everyone for whatever input you provided!

With that, I got the timing cover off, and checked to see if anyone had upgraded previously (which is what I wanted to see before ordering the 'important' parts.

1/4" of sludge in the bottom corners of the cover, no 'Melling' or other idents on the oil pump, and nothing on the timing gear tells me, at least, that I'm looking at stock internals. Will confirm once I get the valve covers off, the rocker trays off and the cam out, but I'm feeling pretty good that I won't be wasting $$$ to order upgraded parts, at least.

There's a lot of caked on sludge on the timing cover. Was going to avoid pulling the oil pan, but now I'm thinking I should drop it and the windage tray, and do a good cleaning on it.

Can you tell I"m as happy as a pig in slop, right now? LMAO
 

mrrsm

Lifetime VIP Donor
Supporting Donor
Member
Oct 22, 2015
8,202
Tampa Bay Area
@Reprise... are you echoing this work over in your Build Thread?
 
  • Like
Reactions: Reprise

Reprise

Lifetime VIP Donor
Supporting Donor
Member
Jul 22, 2015
2,724
@Reprise... are you echoing this work over in your Build Thread?
I spent some time yesterday typing up the latest updates, along w/ a few photos.

E.g.; "Soon!"
PS: Nice to know someone's interested in that thread... lol.
 
  • Like
Reactions: Redbeard and mrrsm

Mounce

Member
Mar 29, 2014
13,667
Tuscaloosa, AL
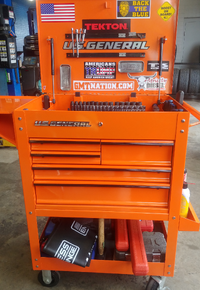
Painted the chrome drawer protectors on my cart black yesterday and slid them back on this morning. :inlove: Now if only I had enough patience to paint the heads on all the bolts... Would take a week or more having to just do a couple at a time when I had time and as mentioned, I don't have that kind of patience.
Screenshot_20200422-113455(1)(1).png
 

littleblazer

Member
Jul 6, 2014
9,267
Painted the chrome drawer protectors on my cart black yesterday and slid them back on this morning. :inlove: Now if only I had enough patience to paint the heads on all the bolts... Would take a week or more having to just do a couple at a time when I had time and as mentioned, I don't have that kind of patience.

View attachment 94229
Aside from the orange that actually made it look like dads old old craftsman. Very nice. The black is good because they you don't notice (at least for me) the greasy finger prints that eventually get over it.
 
  • Like
Reactions: Mounce and Redbeard

littleblazer

Member
Jul 6, 2014
9,267
@Mounce it would be cool if you could find some chrome letters, pop off the us and add Lee to the end, and of course, 01 on the side
Borrow a few from the floor model at harbor freight? :crackup:
 
  • Like
Reactions: Beacon and Redbeard

Mounce

Member
Mar 29, 2014
13,667
Tuscaloosa, AL
@Mounce it would be cool if you could find some chrome letters, pop off the us and add Lee to the end, and of course, 01 on the side
Believe it or not I'm slightly uncultured and haven't watched the dukes while old enough to remember it so I couldn't get behind that haha.

However I would like to paint the badge too but not sure I feel like dealing with the adhesive and re-adhering it. Might see if I can tape it off good enough to suit my ocd and run a few passes on it.
 
  • Haha
Reactions: Redbeard and mrrsm

mrrsm

Lifetime VIP Donor
Supporting Donor
Member
Oct 22, 2015
8,202
Tampa Bay Area
Here is a PDG (Pretty Damned Good) Video about Broken Bolt Extraction Tool Set Comparisons:

 
Last edited:

Mounce

Member
Mar 29, 2014
13,667
Tuscaloosa, AL
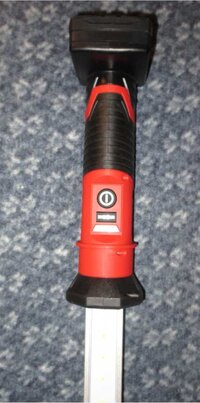
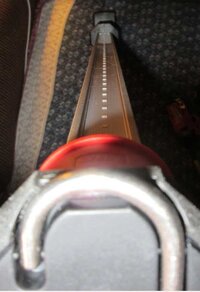
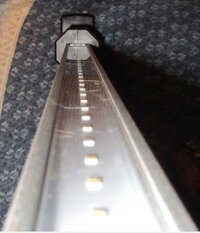
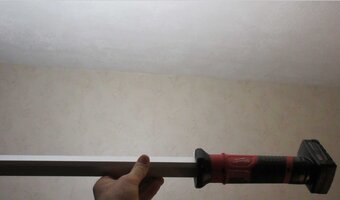
Got to use my underhood light for the first time this week and of course I love it lol. Drug it around under that trailer while running all new wires on it and used it for a tuneup on a Yukon and it is awesome. So nice having something large that spreads that much light and doesn't have to be held. Pop it off of the spring hood holder and lay it under the car/whatever with you and not worry about knocking it over or pointing it just right.
 

mrrsm

Lifetime VIP Donor
Supporting Donor
Member
Oct 22, 2015
8,202
Tampa Bay Area
What was your Tool Talk Thread Post # on that Item? I WANT ONE... :yes:
 

Mounce

Member
Mar 29, 2014
13,667
Tuscaloosa, AL
What was your Tool Talk Thread Post # on that Item? I WANT ONE... :yes:
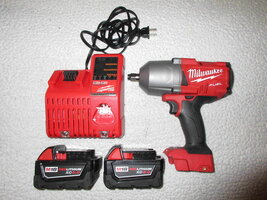
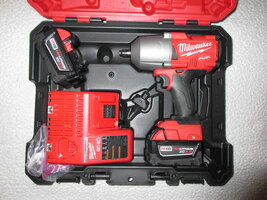
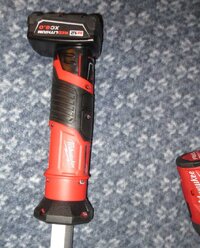
I actually only posted it in the 'what came in your mail today' thread. But here she is. Can be had on eBay for 165 w/ a small battery (not the 4.0ah pictured) without charger. Bought mine from a tool wholesaler out of new jersey for about the same price but no tax so I call that a win. Glad I bought into the Milwaukee line as they've got EVERY power tool imaginable, once you have the charger and a couple batteries you just buy the bare tools that you want. Shop around enough and you'll find deals including a battery sometimes and its almost always a discount.

2125-20 is the part number for bare tool but a lot of listing will include a battery.

20200503_124318_HDR(1)(1).jpg

20200503_124334_HDR(1)(1).jpg
 

mrrsm

Lifetime VIP Donor
Supporting Donor
Member
Oct 22, 2015
8,202
Tampa Bay Area
Thanks @Mounce... I just Pulled the Pin on eBay and since I have a large number of Milwaukee Fuel Tools (M18 & M12) versions for the very same reasons you describe... I've got several readily available Fuel Battery Chargers and Charged Batteries on hand to work well with this unit.

MILWAUKEEAUTOLIGHT.jpg

I apreeshee8choobrutha!
 

mrrsm

Lifetime VIP Donor
Supporting Donor
Member
Oct 22, 2015
8,202
Tampa Bay Area
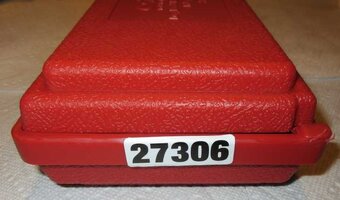
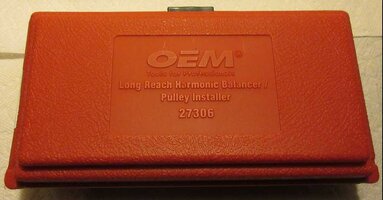
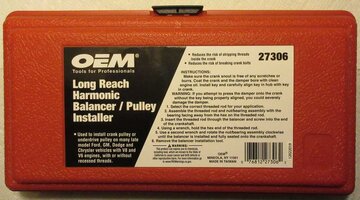
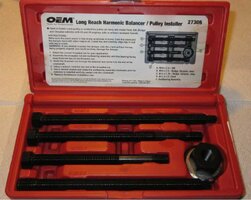
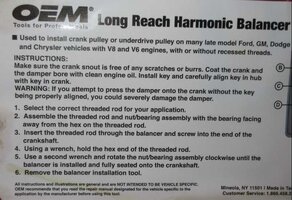
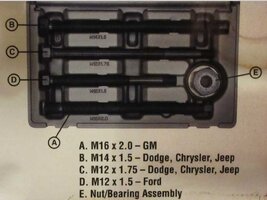
Based upon serious considerations raised in @Reprise 's Project Build Thread a few months ago... I decided back then to "Baby" the installation of a Brand New GM Stock Harmonic Balancer by ordering and later using the Long Reach Bolt Harmonic Balancer Installer Kit from OEM Brand Part # 27306. It just arrived today.

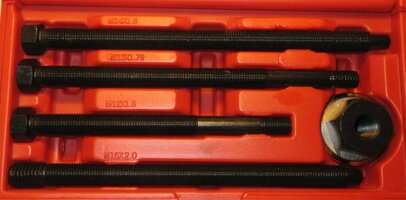
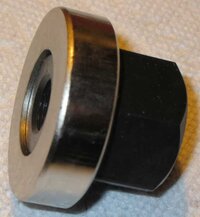
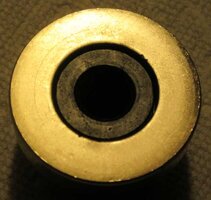
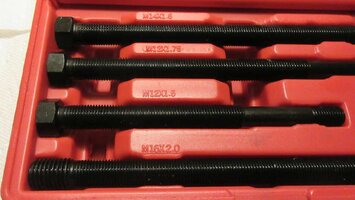
OEM does demonstrate Very High Quality here, using a solidly locking Blow Molded Case with the Metric Measurements cast right into the Bolt Case Slots, right along with the obviously High Quality Blued Steel Shank Threaded Bolts (everything was smothered in Light Machine Oil).

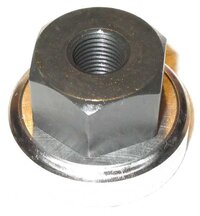
The centerpiece of this Kit is a VERY Sturdy Chrome Steel Encased Roller Bearing Thrust Washer & Nut Combo that, along with a nice application of Moly-D Grease on the Thread lines... should allow for a VERY Smooth and EZ HB Installation and NOT place the Internal Thread Bore inside the nose of the Nodular Crankshaft in any Jeopardy. The sense of relief that comes with this receiving Kit is worth it to me to Pay the Going Price of around $44.00 ...over on Amazon:


OEMHBINSTALLER1.jpgOEMHBINSTALLER2.jpgOEMHBINSTALLER3.jpgOEMHBINSTALLER4.jpgOEMHBINSTALLER5.jpgOEMHBINSTALLER6.jpgOEMHBINSTALLER7.jpgOEMHBINSTALLER8.jpgOEMHBINSTALLER9.jpgOEMHBINSTALLER10.jpgOEMHBINSTALLER11.jpgOEMHBINSTALLER12.jpg
 
Last edited:
  • Like
Reactions: Beacon

mrrsm

Lifetime VIP Donor
Supporting Donor
Member
Oct 22, 2015
8,202
Tampa Bay Area
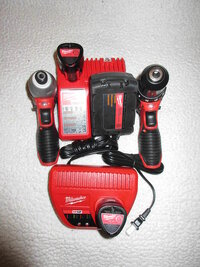
Back in Post #287 I mentioned getting a Milwaukee M12 Hex Bit Nut Driver to “round off the set” of these great tools.But apparently... NOT Quite. While attempting to remove the Front Support plate holding in the Broken Glove Box Door on my Blue Y2K Silverado yesterday… I discovered that the GM Assembly Line planted in 2-3 additional Steel Rivets (This was TOTALLY Redundant and a serious PITA to have to deal with because of the Cramped Quarters.)

This link to my “Flickr-Bucket” shows all of the M-18 & M-12 Milwaukee Gear:


47956701766_d9023873fa_c.jpg47956671408_c2438f2a1d_c.jpg47956701256_933239257b_c.jpg47956658922_1b1ebbd63f_c.jpg47956659182_b4a91b7e74_c.jpg47956701591_70ccf767d1_c.jpg47956701566_570bdb6820_c.jpg

Anyway... As you can see... There's NOT a Battery Powered Hand Drill among them. So… After getting PO’dI drubbed up my Green Ryobi Battery Powered Hand DrillBUT IT WOULD NOT FIT in between the space of the Passenger Side Leather Bucket Seat with the correct Cobalt Drill Bit at the proper angle to drill out those Damned Steel Rivet Heads!!!

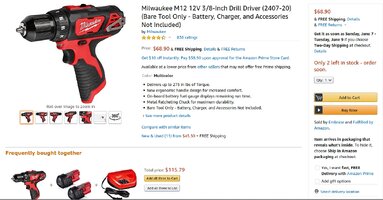
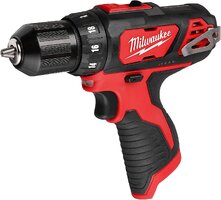
So … Now what ‘Better Excuse’ could there BE for getting the ‘proper tool for the proper job’ than by getting another Milwaukee M12 Tool ? In this case, their Hand Drill can handle those Teeny-Tiny Drill Bits along with the average sized once and like the others, it comes fitted with their adjustable clutch. With its BRIGHT (and much needed) LED Trigger Light and its compatibility with all my other Batteries and Chargers… How can I go wrong? At $69.00 for the Bare Tool... I thought the Price & Availability on Amazon was still Pretty Damned Good as well:

MILWAUKEEM12HANDRILL1.jpgMILWAUKEEM12HANDRILL2.jpg
 
  • Like
Reactions: Redbeard

mrrsm

Lifetime VIP Donor
Supporting Donor
Member
Oct 22, 2015
8,202
Tampa Bay Area
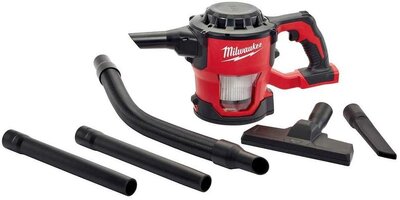
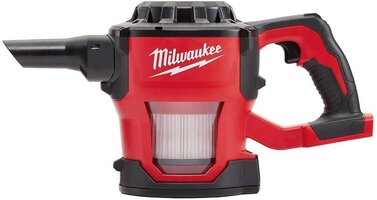
Having already invested in the Heavy Duty M18 Tools from Milwaukee with Two Charged Batteries on hand & always at the ready, I finally decided to get this Little $110.00 Hand-Held Shop Vacuum from off of their Line Up of Battery Powered Tools:

https://www.amazon.com/dp/B01N0C7NGC/?tag=gmtnation-20

MILWAUKEEM18SHOPVAC1.jpgMILWAUKEEM18SHOPVAC2.jpg

THIS MINI-SHOP VACUUM REALLY SUCKS! and I DO Mean that in a GOOD WAY!

It actually works AWESOME. It even has a Trigger Button Lock so you can set it down anywhere and work the Snaky Hose and Nice Vac-Doo-Dads in and around the places you want to thoroughly clean… NO CORDS AND NO HEAVY CANISTER UNIT TO HAVE TO DRAG AROUND.

The M18 Battery Design is a BEAST… It just keeps the Suction Power High and Cranking at Full-Tilt for a Very Long Time. I can’t get over how well this Kit puts all of the other ‘Hand-Held Vacs’ I’ve tried look like the useless weaklings they are. THIS Damned Thing can suck up the Sand on the Beach… and then Kick it right in their Faces! Have you ever tried using a Dust-Devil to clean up the Floor Boards only to have to quit and then have to drag out that PITA 110 AC Volt “R2D2” House Vacuum to get the job done right? NOT ANYMORE!!!
 

mrrsm

Lifetime VIP Donor
Supporting Donor
Member
Oct 22, 2015
8,202
Tampa Bay Area
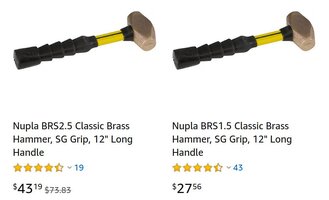
Last Week… I must have badly ‘pranged’ my right shoulder socket and ever since, I’ve been trying to work out the pain and stiffness in the Damned Thing. Ever since reading about all of the recent GMT Fuel Pump R&Rs… I thought about killing 2 Birds via 1 Stone and just get a 1.5 Lb Brass Hammer:

NUPLA1POINT5POUNDBRASSHAMMER.jpg


Right now, I’m not on intent upon safely pounding loose the Rusted Steel Ring from the Top of any Fuel Tanks in my GMTs without ‘Fear of Sparks’. But in the mean time...I can at least do some therapeutic right arm and shoulder exercises to UNFUBAR the pranged socket and sore tendons therein.

This Cool Brass Tool thingy is TOO Damned Cute by a Half… but I’ve decided to act on the side of precaution here and hide it from the plain sight of “My Lil’ Woman” ...lest she start getting any ideas when she gets mad at me and her COVID Isolation gets a little TOO much for her.
:bonk:(OUCH!)
https://www.amazon.com/s?k=nupla+brass+hammer&ref=nb_sb_noss_1&tag=elightbars-20
 

mrrsm

Lifetime VIP Donor
Supporting Donor
Member
Oct 22, 2015
8,202
Tampa Bay Area
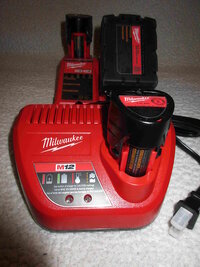
ATTENTION ALL MEMBER-OWNERS OF ANY MILWAUKEE M12 AND/OR M18 110 VOLT AC BATTERY PACKS WITH CHARGERS!

If you observe that any of your Official Milwaukee M12 and/or M18 Battery Chargers begins to FLASHING FROM RED to GREEN... The suggested remedies are:

(1) Replace a Defective Battery Pack (... Yup... even if the BPK is BRAND NEW!)

...or...

(2) Replace or Repair a Defective Battery Pack Charger (... Yup... even if the Charging Unit is BRAND NEW!)

THIS is Absolute RUBBISH!


The Solution:

(1) Get some Isopropyl Alcohol and some "Q" Tips.

(2) Unplug the Milwaukee Battery Pack Charger from the 110 AC Socket.

(3) Remove ALL Batteries and wait until the RED/GREEN Lights go completely Dim.

(4) Use the "Q" Tips soaked in the Alcohol to thoroughly clean ALL of the Battery Pack Charger Chrome Plated Contact Tips.

(5) Carefully clean and dry out the hollow receptacles without contaminating the Chromed Contacts***.

*** THE REAL PROBLEM IS THAT THESE AREAS MAY HAVE A RESIDUAL FACTORY SPRAY COATING OR SEALANT THAT MIGRATES ONTO THE CHROME CONTACTS AND EVENTUALLY INTERFERES WITH THEIR ELECTRICAL CONDUCTIVITY.

(5) Do NOT Plug in the Battery Pack Charger back in until ALL of the Battery Packs have been re-slotted into the Charging Unit... FIRMLY.

(6) Plug the Battery Pack Charger into the 110 Volt AC socket and observe that the RED Light will appear for the Battery Pack in need of a Re-Charge and the GREEN Light will appear for the Fully Re-Charged Battery Pack.

(7) The RED and GREEN Lights on the Multiple Battery Pack Charging Unit WILL stay on Solid Colors after taking this action.

(8) Repeat the Procedure as needed if 'the mystery stuff' ever re-contaminates the contact points.
 
  • Like
Reactions: Beacon

Mounce

Member
Mar 29, 2014
13,667
Tuscaloosa, AL
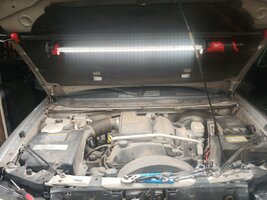
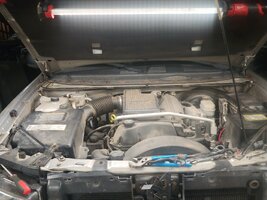
Speaking of Milwaukee I can't remember if I ever showed off the underhood light in action. I know I posted a pic of it on but not in a real world scenario. I captured that scenario this evening on the TB while fixing the headlights.

Not too obvious in pics but here's bright mode:

20200801_204604.jpg

Dim mode

20200801_204613.jpg

It detaches from the extendable hood bracket and I use it all the time under vehicles or standing up on its end (when using 4.0 or larger batteries with the bigger footprint to use for a base) next to me when doing suspension or brakes.
 

mrrsm

Lifetime VIP Donor
Supporting Donor
Member
Oct 22, 2015
8,202
Tampa Bay Area
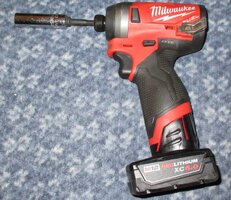
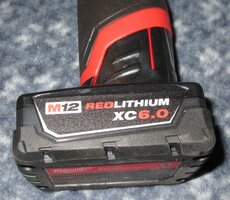
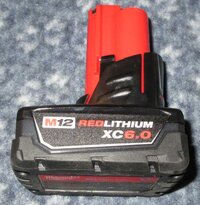
Likewise here, Brother ... and Thanks Again for the two suggestion about the Milwaukee Darth Vader "Light Saber" and the Lithium XC-60 Upgraded Battery. They all work well together and throw out what is Damned Near a DAY- Light-Bright coverage that fills a VERY LARGE Space...My Attic... My 10' X 14' Shed...(that Hanger set up in the Shed Roof Stringer is PERFECT for this job).

MILWAUKEEM12LIGHTWAND1.jpgMILWAUKEEM12LIGHTWAND2.jpgMILWAUKEEM12LIGHTWAND3.jpgMILWAUKEEM12LIGHTWAND4.jpgMILWAUKEEM12LIGHTWAND5.jpgMILWAUKEEM12LIGHTWAND6.jpg

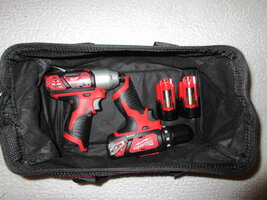
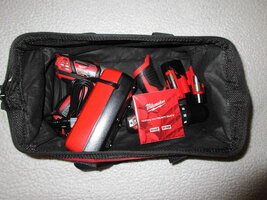
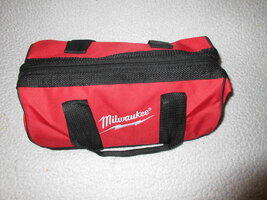
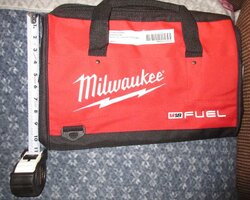
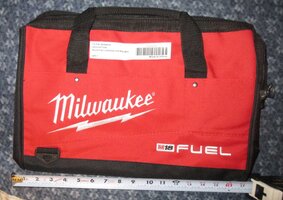
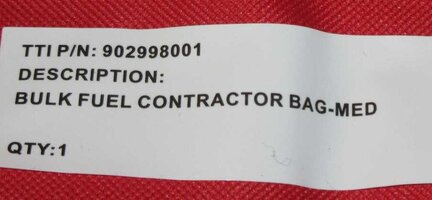
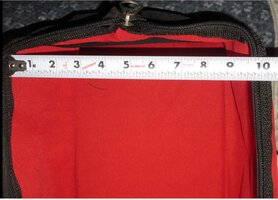
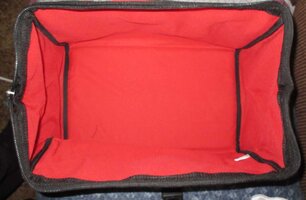
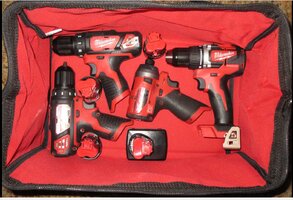
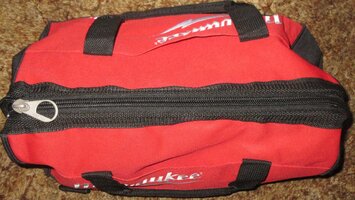
I thought I'd also catch up with suggesting the value of getting the Milwaukee Contractor's Heavy Duty Canvas Tool Bag ...good to go for ALL these Damned Expensive Tools and just the thing to coax you into wanting more of these amazing devices:

MILWAUKEEM18TOOLBAG.jpgMILWAUKEEM18TOOLBAG2.jpgMILWAUKEEM18TOOLBAG3.jpgMILWAUKEEM18TOOLBAG4.jpgMILWAUKEEM18TOOLBAG5.jpgMILWAUKEEM18TOOLBAG7.jpgMILWAUKEEM18TOOLBAG8.jpg

One Last Thing worth a mention here...

Yesterday afternoon, I dropped off to sleep after my Wife stuffed me absolutely clean full of Chicken, Baked Potatoes, Green Beans and Gravy... but I woke up in an absolute SWEAT. I checked the Thermostat and instead of her "66 Degrees"...it read out 83 Degrees. I knew in an instant what the issue was. The Condensate Cut-Off Switch did its job and shut off the HVAC System to prevent the collected trash water in the drain pipe from flooding the inner Evaporator Cabinet.

The problem was... ALL of the Old Ridgid Shop Vacs I have are BUSTED. So to try and rescue the situation ASAP... I plugged in the M18 Battery into the Milwaukee Mini Shop Vac I covered back in Post #590 that has turned out to be a GODSEND TOOL and went outside to try and Vacuum the usual Gelatinous Algae "Snot" that over time, manages to plug up the 40 or so feet of PVC Drain guiding the Cold Water Condensate to the outside world.

I discovered that the end of the Black Vac Tube slipped snugly over the outside PVC and after hitting the Switch AND the Lock for it...I walked away for about 5 Minutes. THAT Damned Vacuum coupled with its Brush-less Motor and the M18 Fuel Battery... Pulled that Sh*t out of the line like it was NOTHING. 30 Minutes later... my City Bus sized 4 Ton Evap Unit in the Attic finally brought the Swelter down to a nicer Chill ...pretty damned quick.

MIlwaukee Battery Powered M18 and M12 Tools... FTW!


MILWAUKEEREDLITHIUMXC60BATTERY1.jpgMILWAUKEEREDLITHIUMXC60BATTERY2.jpgMILWAUKEEREDLITHIUMXC60BATTERY3.jpg
 
  • Like
Reactions: gmcman

Redbeard

Member
Jan 26, 2013
3,591
Hey MRRSM I have a suggestion for the algea problem that works for me. Every couple of months I pour about a cup of bleach in the pan. It will keep the Gelatinous Algae "Snot" from forming in the drain pipe. The bleach doesn't stay long enough in the pan to allow odors to run through the house when the air handler is turned back on.
 

Blckshdw

Moderator
Nov 20, 2011
10,747
Tampa Bay Area, FL
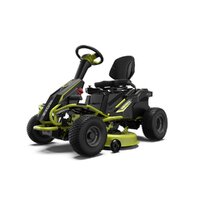
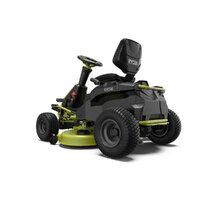
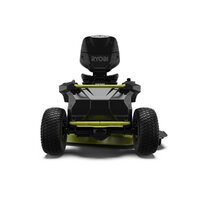
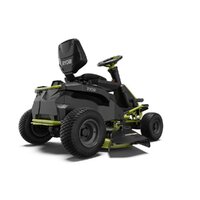
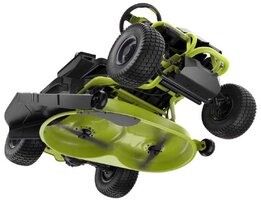
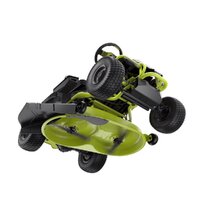
Hey @MRRSM how you liking the Ryobi mower so far? Figured with our increased rain, you've gotten several uses out of it by now.
 
  • Like
Reactions: mrrsm

mrrsm

Lifetime VIP Donor
Supporting Donor
Member
Oct 22, 2015
8,202
Tampa Bay Area
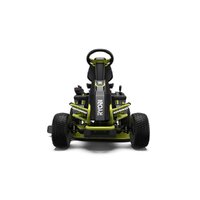
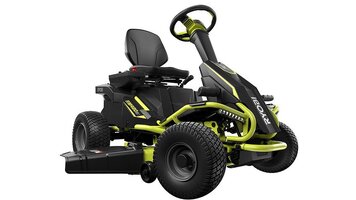
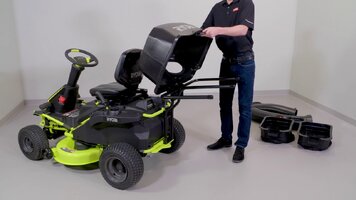
Thanks for asking, @Blckshdw... This will be as comprehensive as I can get:
ryobi-38in-100ah-rm480ex-4.jpgryobi-38in-100ah-rm480ex-1a.jpg
With the exception of my need to spend the first few days Getting My Head out of My A**... during the initial setting up and Charging Issues... the experience with this Thing has been Indescribably FLAWLESS.
ryobi-38in-100ah-rm480ex-5.jpgryobi-38in-100ah-rm480ex-7.jpg
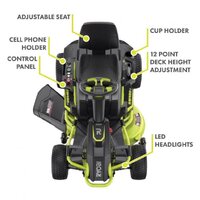
After realizing that the Driver Seat "Gravity" Cut Off Switch needed to be plugged in, as well as mating together the Battery Power Harness Male & Female Heavy Duty Connectors so the Damned Charger would work... I have NEVER seen ANYTHING that Runs On Batteries behave like THIS Awesome Riding Lawn Mower does!!!
ryobi-38in-100ah-rm480ex-3.jpgryobi-38in-100ah-rm480ex-8.jpg
I weigh the better part of 300 Pounds when fully dressed and with a heavy back brace strapped on me... so when I pressed on the Accelerator Pedal at low speed and activated those Counter-Rotating Electric Motor Driven Cutting Blades with a 36" wide "Ginzu" work area... I could NOT believe my eyes... I WAS CUTTING THROUGH GRASS AND TOUGH WEEDS ON MY PROPERTY THAT WERE ALMOST THREE FEET HIGH LIKE THEY WERE 3" TALL ...and the Ryobi Riding Mower Blades did not even so much as BURP...!!!
ryobi-38in-100ah-rm480ex-10.jpg

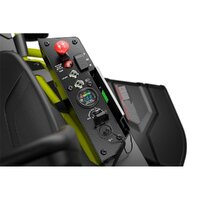
The Seat on this thing is VERY comfortable and forgiving and the Push Button Controls are well designed and almost impossible to get wrong while driving in forwards and reverse.In fact...if you pull to a stop while the Red Button is Lifted to keep the Blades turning...if you switch to drive in Reverse...the Blades will automatically Shut OFF...and there will be a Loud and Persistent Warning Tone during any motion while backing up. These are some VERY important Safety Features.

ryobi-38in-100ah-rm480ex-9.jpg

The entire Chassis on this this thing is constructed from inter-woven and welded Heavy Steel Tubing. The entire machine is Coated in a Beautiful Day-Glo Green HARD Ceramic Paint. The Front Suspension works easily and firmly and right off the bat, you begin to appreciate how nice it is to be able to make VERY Tight Turns and still stay on track within the cutting lanes. BUT IT IS NO TOY AND ITS VERY HEAVY!
Ryobi-RM480E-Frame-456x624.png160a6649-baad-4963-8238-cf439cf21547_1000-624x624.jpg

You'll have to be mindful when passing through 36" wide Wooden Fence Gates... and RAISE THE HINGED GRASS GUIDE CHUTE first before trying to drive on through, as there is a VERY Tight FIT in those locales.

So GO SLOWLY...
And Avoid driving Too FAST towards your Fence Lines. If you hit them with THIS Machine just know that it has enough Low End Torque to just "M1A Abrams Battle TANK" its way right right on through them!

In my front yard... the Dominant Feature is a Gigantic Oak Tree with these God Awful HUGE Roots snaking out for quite a distance in all directions. But navigating over or AROUND them was just a matter of popping down the Red Blade Control Knob to shut off the cutting action and then using the Lower 36" Cutting Platform Lift Handle to Raise the Whole Cutting Tray Assembly Up and Out of Harm's Way.
ryobi-38in-100ah-rm480ex-9.jpgryobi-38in-100ah-rm480ex-2.jpg
There is a rubber seal protected spot available to install a USB Device near the Right Side Button Panel that is handy for Cell Phones or whatever... and there is a VERY Deep Bottle Water Holder on the Left side rear access area handy for some 'Hydration'.

I spent almost 1.5 Hours of the rated 2 Hours and 15 Minutes of operation time going VERY slowly on sloped areas that should ALWAYS be taken head on and not ridden on up and down on any angles.

This Machine is bit top heavy... and yet was VERY Stable no matter WHAT I did to try and get bucked off!!! Way cool. And other than the Strong and Confident Whirring of the Brush-less Motors in the rear... It is as quiet as a Church Mouse and as Tireless as a Southern Baptist Preacher while wending its way through the work time.

:inlove: I LOVE THIS DAMNED THING!!! :inlove:

Last but not least, was just how easy it was to put away. With my New Aluminum 38" Wide - Sloped Ramp fitted to the wide front sliding doors of my elevated 10' X 14' Arrow Shed... I just slowly glided up inside there and just had to make certain to Duck My Head on the way in (...since Me and this Ryobi 'cut' a Very Fine, Tall Figure as a Pair going inside of its own, private "Covered Garage"...LOL)

71mI80ipA7L._AC_SL1500_.jpg

Once High and Dry... I just had to Run a 14 Gauge HD Drop Line from a 110 Volt AC 20 Amp Rated Outlet and mate it up to the Heavy Duty Solid Aluminum Body Ryobi Charger to re-supply the HUGE Ryobi Batteries with a Steady Re-Charge.

NO OIL OR GASOLINE FUMES... NO BELTS... NO PULL STARTERS... NO ENGINE STALLING... NO EXCESSIVE NOISE... AND FINALLY... ABSOLUTELY NO SWEAT!


If you are going wind up paying close to $4,000.00 for Yard Tool System Designed strictly for Cutting-Mulching Grass, Collecting-Vacuuming up Leaves or Towing Small Trailers for Hauling Cut Wood and Trash... It had BETTER BE THIS GOOD!!!

Remember... You'll need to Keep the Key(s) to this Mower in a Safe Place and NEVER allow Riders on Board with you ....EVER...!!!

EDIT:

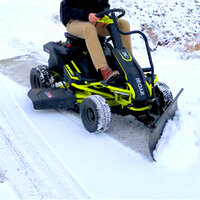
Need a Snow Plow that can EASILY clear your Sidewalks and Driveways when the Sky Is Falling?

Have a Look at THIS Accessory available from a DIFFERENT Company that could work with your Lawn Mower and START in the Dead of Winter to do the Job when the Gas Powered Slow Blower won't START:


avesake5xebhdiaqhpgx.jpg
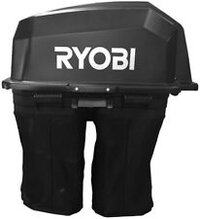
And for Gathering Autumn Leaves and Debris...a System that equips the Ryobi Riding Lawn Mower Accessory with a DOUBLE bagging Hopper Unit (Tacks on around $350.00 to the Final Price Tag):
maxresdefault.jpgs-l225.jpg
 
Last edited:
  • Love
Reactions: Redbeard

Mounce

Member
Mar 29, 2014
13,667
Tuscaloosa, AL
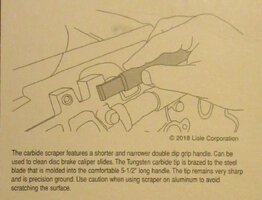
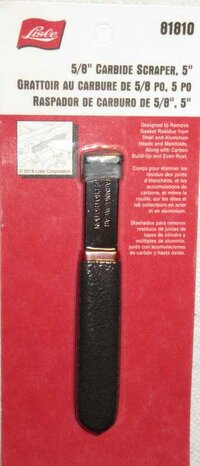
For anyone cleaning off any gasket or sealing surfaces this is possibly the most bada$$ scraper you'll find for the money. I was hesitant, it doesn't look like much but works like a hot knife. The carbide tip should never dull or chip unless abused, it won't cut you like a razor blade, plus it's pretty ergonomic compared to a razor blade and much less fatiguing to hold and use for an hour. With it being carbide it will slice through aluminum, must be conscious and aware of that and keep everything flat and level to the surface being cleaned. This has revolutionized gasket jobs for me, clean up before resealing was always the worst part to me that took forever and was a real chore, but this tool makes it child's play.


There is a two pack in the other option on the listing which is supposedly the same set that Matco sells after repackaging, I chose the smaller one due to price and size. I didn't want to spend a ton on a tool I wasn't sold on, plus the smaller size is more versatile.
 

mrrsm

Lifetime VIP Donor
Supporting Donor
Member
Oct 22, 2015
8,202
Tampa Bay Area
Thanks @Mounce... Mine just arrived. In hindsight, I could've really used this Little, Ultra Sharp Carbide Edged Scraper Tool when I was trying to scrape the Old GM OEM ACDelco Paper Gasket off of the Cast Iron Flange Surfaces of the Crusty, Dirty Diff' "Pumpkin" under my Silverado a while back.

Using Many Razor Blades 'BACKWARDS' while dragging them along the flanges of anything made out of Aluminum will still be my standard "Modus Operandi" in those repair and surface prepping instances:

LISLECARBIDESCRAPER1.jpgLISLECARBIDESCRAPER3.jpg

Also... Getting back to @Mounce 's Post about the Harbor Freight Wheeled Tool Chest that has also worked out so well AND where he mentioned this issue of "Getting Tool Drawer Liners...":

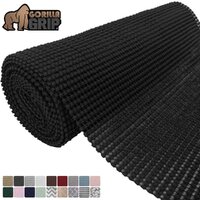
Amazon has Gorilla Grip "NON-Adhesive Tool, Shelf and Tray Liner in Basic Black or OTHER Colors, Too. This offer only costs $18.00 with Free S&H for a Roll that is 12" Wide with 20' Length:


GORILLAGRIPINBLACK.jpg
 

Attachments

  • LISLECARBIDESCRAPER2.jpg
    LISLECARBIDESCRAPER2.jpg
    39 KB · Views: 2
Last edited:

Mooseman

Moderator
Dec 4, 2011
26,027
Ottawa, ON
I just can't justify paying $47 for a scraper I'll use, at most, once per year.
 
  • Like
Reactions: mrrsm

Forum Statistics

Threads
23,681
Posts
641,976
Members
19,138
Latest member
wentzben

Members Online