The $85,000.00 GM 4.2L Engine Repair

mrrsm

Original poster
Lifetime VIP Donor
Supporting Donor
Member
Oct 22, 2015
8,192
Tampa Bay Area
I have just managed to solve this “Not-So-Funny” Metric Bolt Sizing Question for the GM Atlas 4.2L Engine, albeit in a kind of a “Funny” way... only because “Mr. Smarty-Pants”...(..errr ..that would be YOURS...TRULY...of course) should have realized the solution to this question all along. But like so may of us who can develop “Project Fatigue”; what with our noses pressed down so close to the road we are working on... that from time to time... we can manage to lose our way with realizing we're lost.

In this case... the answer to the question mentioned above came to me all of a sudden when I realized that at some point in the last five months...I had read an interesting Technical Article concerning the GM introduction and regular use of TTY Bolts as their Standard Fasteners, specifically addressing the problems being encountered with Head Bolts easily snapping off during repairs at both ends of the work when dis-assembly and/or re-assembly of the GM Atlas 4.2l Engine became necessary.

The author added much to my understanding by providing a detailed account of all of the Specialty Tools and Procedures to follow...that included the information on the necessary and very expensive Kent-Moore Head Bolt Extraction Kit.... and the two other required items for evacuating the Engine Block Bolt Holes using the exact size BOTTOMING TAPS to properly prepare the thread innards to accept a new set of TTY Bolts... and kill Two Birds with One Stone: (A) Clean out the Residual Broken Bolt Metal Remnants ...and... (B) Smooth all of the threads so that the new TTY Bolts would neither Grab nor Gall the Aluminum Block and have the same cascade failure cycle repeat itself.

The salient information I needed to be reminded of was this:

(A) A Bottoming Tap of with the Metric Thread Dimensions of M11 X 2.00 would be an absolute necessity for the Post-Removal Clean Up of the Bare Engine Block Head Face, while an entirely DIFFERENT Bottoming Tap would be necessary to deal with any Broken TTY Bolts holding in the Crankshaft Bearing Caps and Cage... also notorious for snapping off in the same fashion....and...

(B) I needed to be reminded that I had already purchased a short Machine Shop version of this tool last year and somehow, during the period in between, I had completely forgotten about buying the damned thing! Well...today, this memory came flooding back with a vengeance as I was mulling things over while considering the problem from the Block Side where the threads are instead of thinking about that damned complicated Aluminum Engine Head. HERE is ARP's BEST TOOL for this necessary clean-out job:


Naturally... the whole original idea was to locate Four Bolts of an M11 X 2.00 X 200MM variety to act as Top Down Guide Pins to ensure a correct SPACEX- like ”Falcon 9 Rocket Booster Landing” with a FLAWLESS alignment to get the Aluminum Engine Head perfectly in place...and thereby...cut out all the busy work of having to laboriously tear down the entire Factory Valve Train Installed Components...just to set the GD thing on the Engine Block!

This search proved to be even MORE serendipitous though, when I discovered that ARP sells a VERY LONG Thread Cleaning Tap with the dimensions of M11 X 2.00 X 180MM... and Hell...when you look at the image of this tool...you might think... “Bobby..Why not just get FOUR of THESE … use THEM as your Guide Pins...and be done with it?” ...and I WOULD …except that doing so would cost me around $60 X 4 = $240.00 Plus S&H... so no... the mission now moves back towards trying to find a set of Four Bolts long enough to get this job done..without having to Break the Bank at Monte Carlo. I just ordered one of these ARP Long Thread Cleaners. And so the search for these Four Mystery Guide Bolts will continue...

“All Solutions... Breed New Problems...”

Felpro provides their take on the burgeoning TTY Fasteners Market they will also be selling in:
http://www.felpro-only.com/blog/proper-installation-use-t-t-y-bolts/

Felpro Mechanic Testing TTY Bolts...

Felpro Mechanic Demonstrating "Which Side Is UP? How to Recognize Felpro Gasket Markings"
 
  • Like
Reactions: Mooseman

Mooseman

Moderator
Dec 4, 2011
25,996
Ottawa, ON
Hence the reason I suggested bolts with the heads cut off that you could also grind down to a rounded point to ease them into the head bolt holes in the head while lowering it.
 
  • Like
Reactions: mrrsm

mrrsm

Original poster
Lifetime VIP Donor
Supporting Donor
Member
Oct 22, 2015
8,192
Tampa Bay Area
Agreed... Indeed...my first though was to use your "Slenderizing of the Decapitated Bolt Heads" Idea... but the delay in identifying their full dimensions gave me enough of a pause about doing it that way and to reconsider my creative options. During that brief time of reflection and "fact finding", I realized that with the ends ground down... and with the Engine Head possibly swaying like a pendulum while suspended under the hood on The FrankenLifter" Hybrid Hoist.....there might be problem with having the sharpened bolts accidentally scraping against the underside face of the soft aluminum mating surfaces while maneuvering and adjusting that awkward 90 lb Rectangular Chunk of Metal over the Engine Block.

The other issue of concern is that once the head is finally aligned, lowered and settled onto the Engine Block... there might be a problem of getting all Four Guide Bolt-Pins removed due to not being able to get a good controlled grip on the narrowed ends and have a whole new set of problems to deal with. My thinking now is that as long as the Metric Guide Bolts are at least 8" in length... I could use the Top-Down Method and control the damage-removal problems at the same time.

If the GM Atlas Engine Block and Head were made of Cast Iron instead of Waste Foam Cast Aluminum... I would not have to be so damned fastidious about this procedure. But failing to find the exact M11 X 2.000 X 200MM Four Bolts to get on with this job... I am now considering a Third Alternative by simply getting my hands on either something close to 10MM OD Aluminum Rods... or even using Brass Stock Rods...and cut off Four 8" segments and then, after rounding off the sharp ends to a nice. smooth ball bearing round shape and polishing each one... then I could skip having to worry about locating any precisely threaded bolts to do the trick. Besides... I can always use them later as "Brass Drifts" if need be. Of course, I'm hoping that the Head Bolt Holes have been drilled "Blind" into the Engine Block...so these don't just fall all the way through the block to the bottom...out of sight and wind up hitting the Oil Pan and their final resting place. If that unfortunate event happened, then my problems will be..."Oh Brother...Where Art Thou?" I'll be... " ...in constant sorrow... all through my days!"

1ST EDIT:
Moose... You know what?...I JUST found out that Amazon sells a set of Four(4 Qty) 3/8" [.375] X 10" (9.75MM X 254mm) Lathe Stock Brass Rods for $26.00 with FREE S&H that I have just ordered to solve this problem of safe guidance... but nonetheless... if you can think of anything else that needs my consideration... I am always open to your "GUIDANCE". ;>)

2ND EDIT:
Eureka!... I know EXACTLY what I will do.... I'll lower one rod in through the top of the bare engine block and measure its length to its stopping point depth...then add THAT length to the thickness of the Engine Head. Then I'll Drill out a 5/64th" OR LARGER Hole in the rod just above their combined length point!. Once drilled... I can run Spring Steel Roll Pins (via a "SSRP Kit" for under $14.00 on Amazon) through those holes in each Brass Rod. And when the head is suspended up over the block...slip those Pinned Brass Rods down through the top at the Four Corners of the Head...and Lower Away. As the Brass Rods approach the block... I can maneuver all four around until they drop down in place ...and then continue lowering gradually until the head aligns with the Gasket Guide Pins...and that should work perfectly!

One last "point"... is that with the looseness of their sub-11mm thickness and the fact that the Brass Guide Pins will move easily Up and Down in the bored Head Bolt Holes... this lessens the chance of the Head Gasket getting scraped or damaged at the four corners during this "mating season". So even if turns out that the Engine Fastener Holes are NOT "Blind Drilled"... The Pinned Brass Guide Pins will only drop as deep as needed to get the job done right!


4 Piece Brass Rod Kit:
http://www.amazon.com/TEMCo-Brass-Round-Lathe-Stock/dp/B016R13642?SubscriptionId=AKIAILSHYYTFIVPWUY6Q&tag=duckduckgo-ffhp-20&linkCode=xm2&camp=2025&creative=165953&creativeASIN=B016R13642

Spring Steel Roll Pin Kit:
http://www.amazon.com/ATD-373-245-Piece-Roll-Pin-Assortment/dp/B000OUUG9G/ref=pd_sim_328_5?ie=UTF8&dpID=51DAvMnn2JL&dpSrc=sims&preST=_AC_UL160_SR118,160_&refRID=0RCZDEZ42AK626S1AFZJ
 

Mooseman

Moderator
Dec 4, 2011
25,996
Ottawa, ON
Those should work as long as the holes are blind. Even if you were to use some long headless bolts, as long as the bolts holes have been chased and they are long enough to grab, they should come out by hand, or at worst, with vice grips. All you need is something to guide the head on.
 

mrrsm

Original poster
Lifetime VIP Donor
Supporting Donor
Member
Oct 22, 2015
8,192
Tampa Bay Area
@Mooseman Yes... This entire job will definitely take two people to accomplish.... YOU...and ME!

Its an important thing to remember right now... that the most reluctance I ever had about doing this job from the very beginning had NOTHING to do with the difficulties with setting TDC, or using the CAM Holding Tools... or having "Zero Access" to the Timing Chain and Tensioner and VVT hardware without having to either pull the entire engine or at the very least... The Oil Pan in order to get the Front Cover off.

Nope.

Rather... it had to do with absurd necessity of removing, keeping track of.. and then having to dis-assemble THEN re-assemble in their exact original locations..the entire sub-valve train of camshafts, bearing caps, push-rods and rocker arms along with all that this would entail while having to BEND over the hood to do this work... just to get the GD head put back on the Engine Block in the exact same condition that its in right now!

So... If creating these New Specialty Tools and Methods winds up working as well as I hope they will...and doing it this way reduces the amount of Labor and the Backache that runs tandem with doing the job... Who Knows... it might even empower other Members to dive in and try this R&R themselves. I can tell you one other thing, too... I remember when all this started out back in October of 2015. I first visited some other site... I can't remember exactly... I think it was something called "TEEVEE"... or something like that... just to get some help. And all I got in response there was a Painful... Deafening Silence. But then...right afterwards... A Miracle!... I received a response and an invitation to come to GMT Nation from a Very Friendly GMT Nation Member. And so now... only Time will Tell if I can return his favor and really pull this off....and those people that run that other "TEEVEE" site?

Oh well... It's Too Bad...You missed your chance to be FIRST! ;>(|)

(See Related EDIT Above)

NEW EDIT:
Using the below listed "Math for Tololboxes" Link... I explored and finally ordered Four 13/32" X 12" Brass Rods for making the Special Tool Guide Pins after checking this handy SAE to Metric Conversion Chart to find out what the Closest Tolerance I could use in order to get a "snugger" fit in relation to the M11 sized threaded head bolt holes inside the Engine Block.

That Closest Tolerance to M11 can be met using Brass Rods of:

13/32" W = 10.319 mm W X 12" L
288302958.jpg


http://www.sosmath.com/tables/sae/sae.html

Here is what the Raw Brass Stock Pieces look like before rounding off their rough ends and pinning them with High Carbon Steel Roll Pins. When they are inserted through the Head Bolt Holes.... The are snug enough for a decent preliminary alignment... But not so tight as to require a perfect positional line up before they can begin to control the head on its way down and prevent the chance of damaging the open valves (#2 Intake & #3 Exhaust) or scraping the head against the engine block before the factory Gasket & Head Alignment Pins guide the two items perfectly together:


mrrsm

Original poster
Lifetime VIP Donor
Supporting Donor
Member
Oct 22, 2015
8,192
Tampa Bay Area
In the first "Predator" movie...There is scene where Dillon (Apollo Creed Sr.)... tells Dutch (Arnold Schwarzenegger) that the excuse to entangle him in looking through the jungle for a non-existent "Cabinet Minister" was just a ruse... and total "Bravo Sierra" ...and at one point his response to the decaying circumstances he says this with a sardonic smile:

"This Just Keeps Getting Better By The Minute..."

Welcome to "My World"...Arnold.

This afternoon... I managed to drag myself out to the TB and prop myself up long enough to test the Sub-10MM Mini-Camera using an Old IBM Thinkpad T-60P laptop I cobbled together from two broken T-60P systems that I bought just for this very experiment off of eBay last week for a mere $25 and Free S&H... Its amazing how simple it is to resurrect a Dead Laptop with a handful of Q-Tips, a Bottle of Isopropryl Alcohol, a few tiny Screw Drivers and a new tube of "Arctic Silver" Thermal Paste.

In any case... I formatted the HD with a solid Linux OS called Debian 8.3 and added the "necessaries" that included a WebCam APP called: "CAMARAMA". After plugging in the USB end of the camera (with a knurled, light control roller rheostat) ...I tested it in low light where I have to sit, sleep and recreate in my front Living Room due to my exigent physical limitations. The images you see of my favorite Coffee Cup have what looks like a Christmas Tree in the backdrop. Thats because there really IS a Christmas Tree there that I keep up and running... all year 'round simply because.. when you start getting on in life...you realize that you better "Eat your Dessert First... and look at the Pretty lights on the Christmas Tree" while you still can.

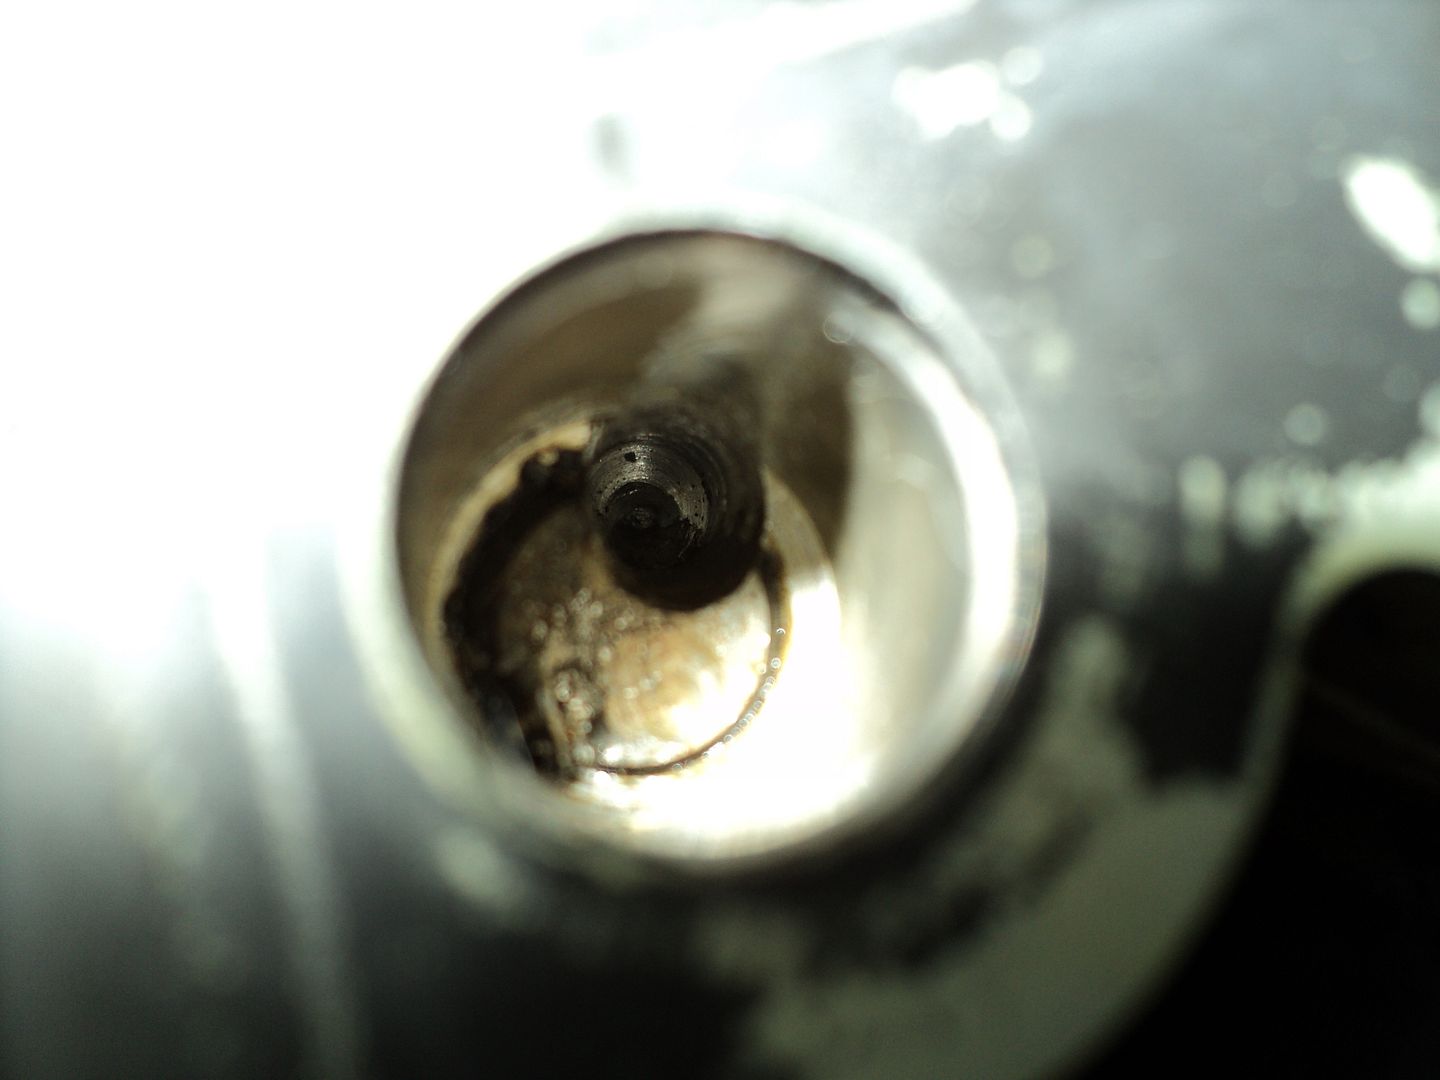
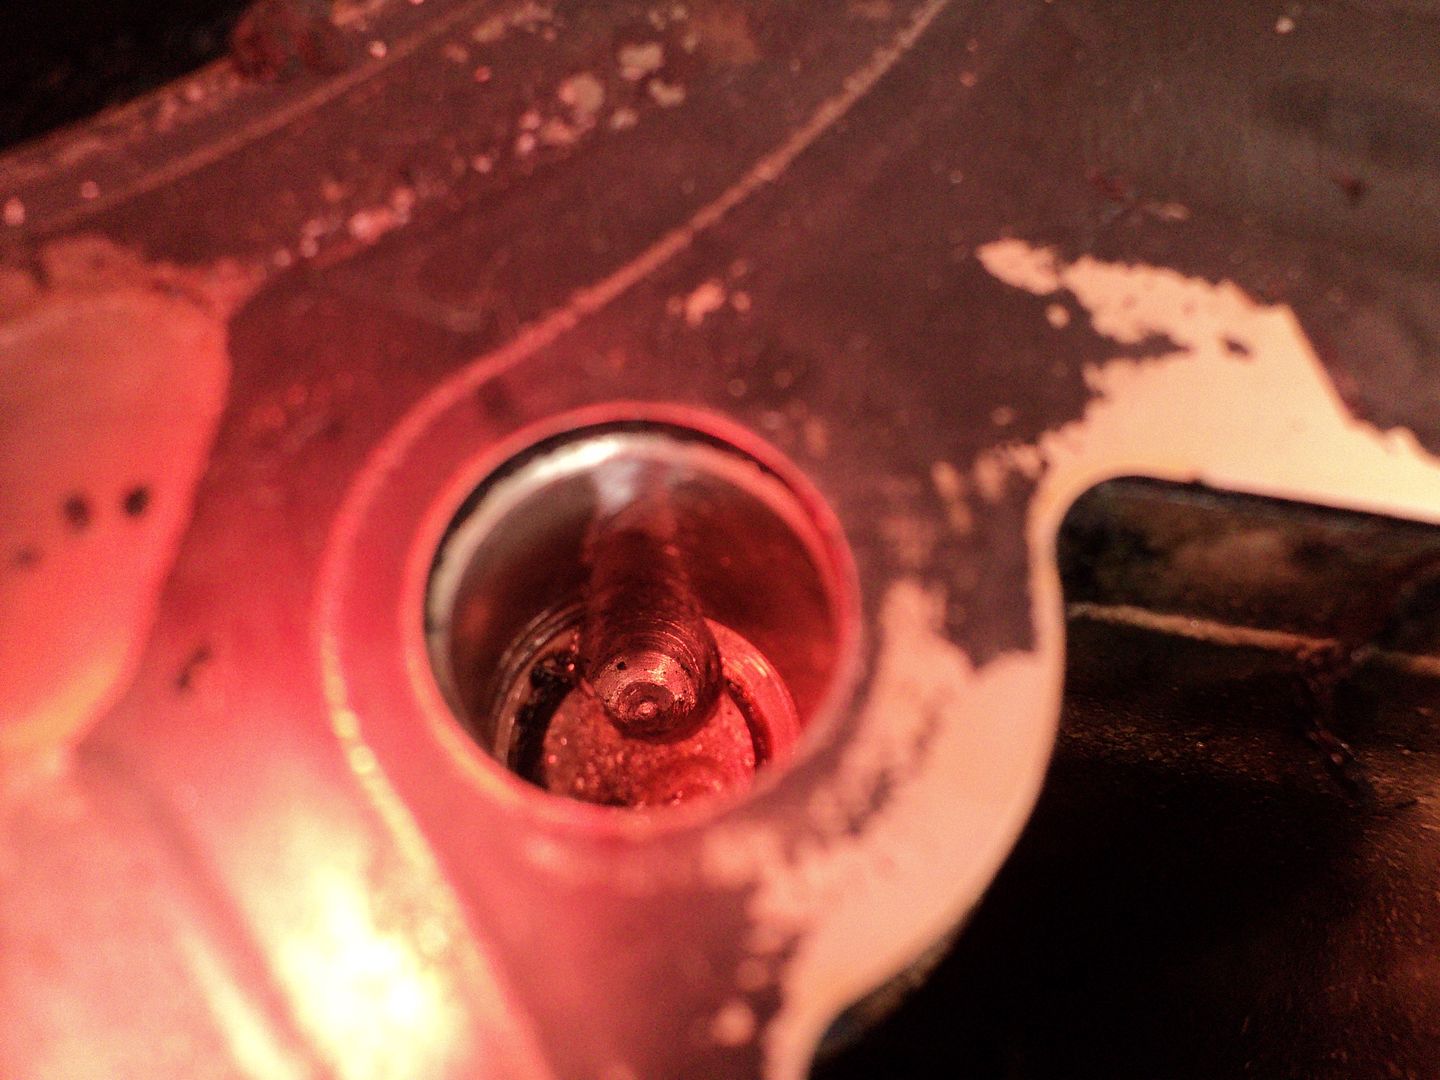
Anyhow... I set up the New Linux IBM T-60P with USB Mini-Webcam as recommended by @webdawg ...and it worked perfectly right out of the box as previously described. After spraying out the Three Holes where the Broken Head Bolt Shanks are located towards the front of the engine with Brake Cleaner, I used a Staples Brand "Can of Air" to aerate them of any wet residue. I then set the Thinkpad on top of the TB 4.2L Engine and began poking the thin Tube Camera end slowly down inside each of the three holes while watching my progress on the laptop screen. By the way...this job deserves to be done near to or just after sundown and before the bugs come out to bite in order to better see your progress on screen.

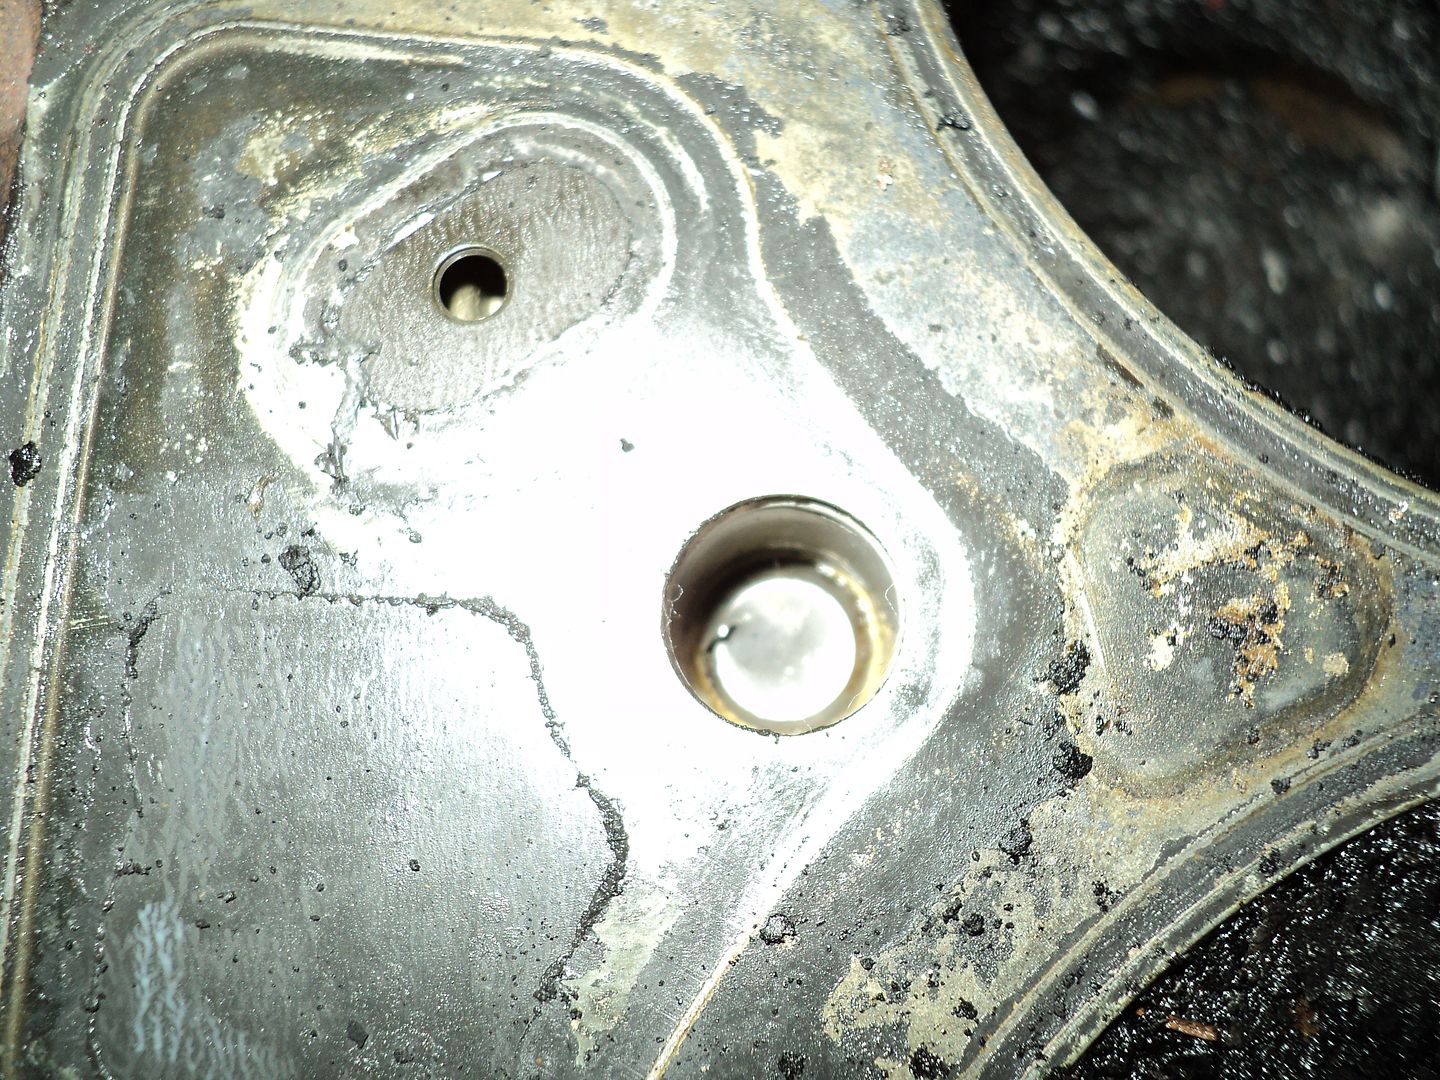
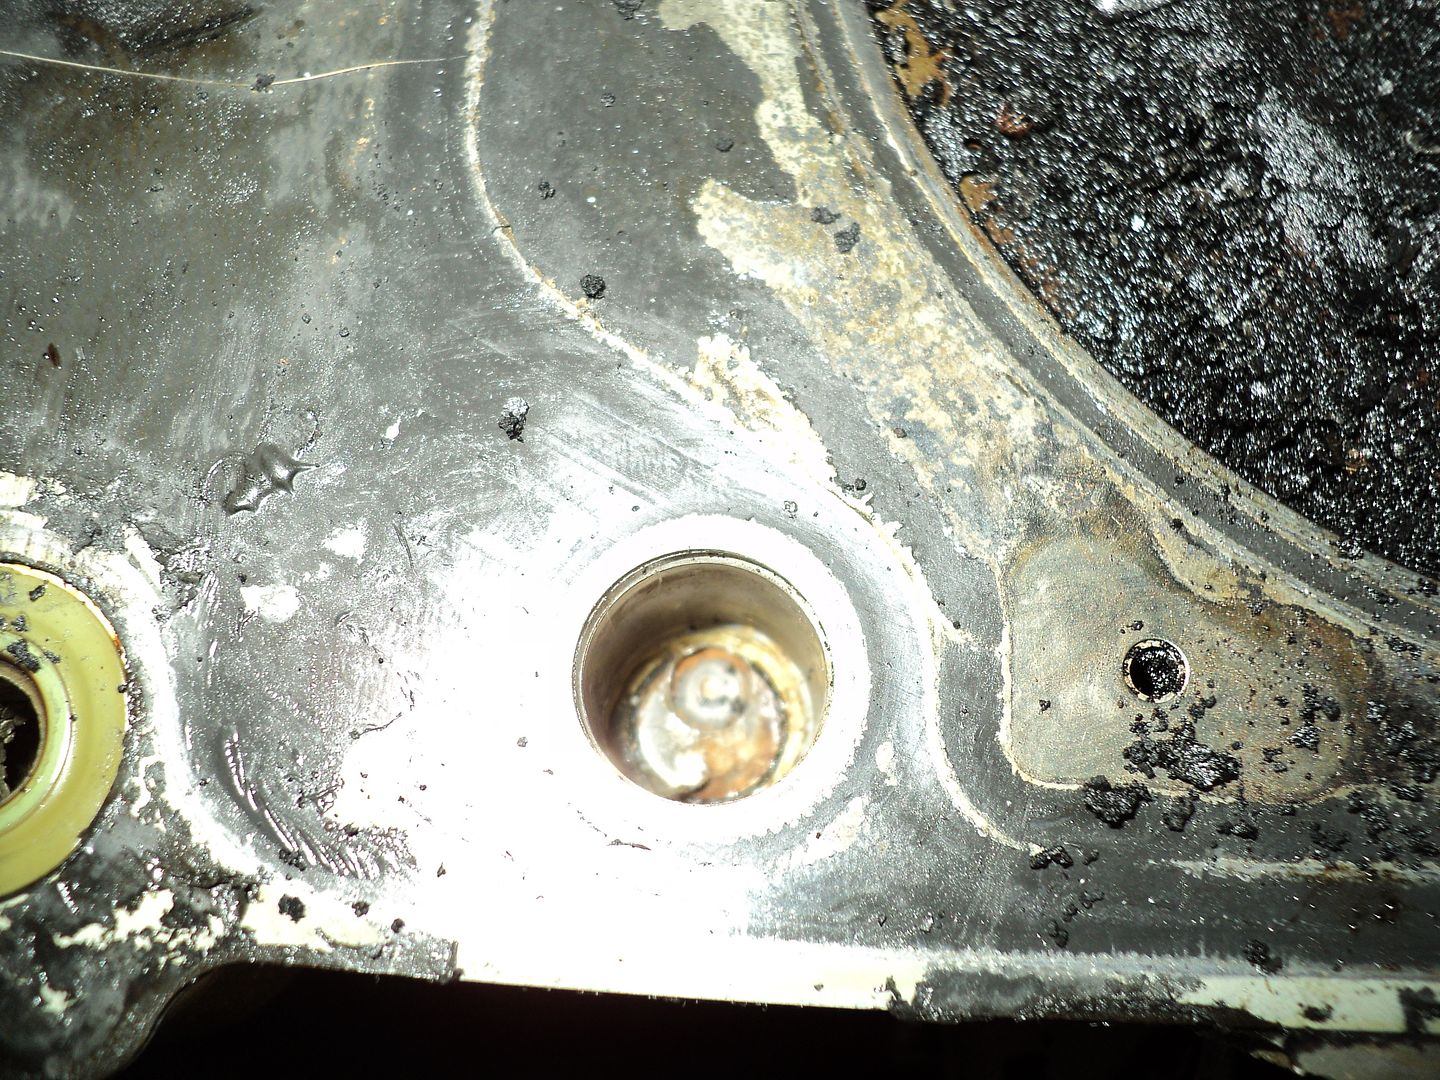
Once again... This is a "Good News-Bad News" situation as a quick view of what was happening down inside those holes while I imagined revealed how NOT SO WELL I was doing in preparing for the extraction of those remaining broken off bolt shanks.

The "Good News" is that:

(A) This Little Mini-Camera not only works...but should be considered an absolute necessity at less than $30.00. It is jaw-dropping to find out that such a tiny, simple and easy tool to use can provide us with so much profoundly revealing information about engine conditions that cannot otherwise be observed with the Naked Eye... Let alone photographed and memorialized for others to look at and benefit from....and

(B) Because these images are here for all mechanics to see that unless they choose to spend the $400 + for the EXACT BRAND NEW ATLAS ENGINE HEAD BOLT EXTRACTION KIT... they run the risk of suffering an identical unfortunate outcome should the Drill Bits glance off of the ultra-hard peaks that the snapped off bolts leave behind on the tops of each remaining bolt shank.

The "Bad News" is That: NO NEED TO DO THIS: JUST PULL THE HEAD OFF FIRST!

(A) My Brilliant Alternative Head Bolt Extraction procedures FAILED MISERABLY because I neglected to consider HOW VERY LONG THE ATLAS ENGINE TTY BOLTS REALLY ARE. This length plays a VERY important negative part here, because even with a "Drill Guide" in place... the SLIGHTEST off-center motion or pressure imparted while drilling downward on top of what looks in the photos like an Eruption Peak in the center of a Moon Meteor Crater...when using a Hand Held Drill...will invite a slippage off-center of the cutting ends of each drill and continue on that damned Off-Center- Wrong Angle Path...from then on.


NO NEED TO DO THIS: JUST PULL THE ENGINE HEAD FIRST!
What they SHOULD have invented was a Super-Snug LONG Centering Insert into which an Ultra-Hard Pin-Point Punch could be introduced and SLAMMED WITH HAMMER into the top of the damn fractured Bolt Shank and instantly penetrated DEAD CENTER AND DEEP! It follows that additional Punch Hits would ensure a preliminary centering HOLE that would wind up confining any other Drill Bit activity to the correct centered path through the remaining Broken Bolt Shank. Any other drilling would keep going downward in the correct manner from that "Point" forward.

NO NEED TO DO THIS: JUST PULL THE ENGINE HEAD FIRST!
Hell... You could almost build one of these things with a length of Machinist's 360 Round Stock Brass Rod 15/32" wide and long enough to reach from the very opening of each bolt hole at the top of the head... center-drilled through from end to end to allow for a hardened, sharply pointed punch to travel all the way down to the point where its Brass End would be in contact the face of the Broken Bolt Shank...almost like Bronze Bearing! Then, using that very hard, High Carbon Steel Rod...Really Sharpened to a Point that would easily remain centered and... after several Severe Smacks with a good size Ball Peen Hammer...it would perfectly become and remain... "Center-Punched". I am very, very sorry that I did NOT think of doing it this way... FIRST!

(B) I wish I had known about this Cool Camera... before I managed to bugger up the areas adjacent to the thread holes in the Aluminum Block. I have no idea how "Beefy" the adjacent support metal areas are to even tolerate a Helicoil Repair...should such an action be necessary for me to be able to Un-F**** myself... but I'm guessing that I'll know how much additional grief is in store for me to add to the present pile woes that accompany this accursed engine repair as soon as I can get the engine removed and clap eyes upon the upper engine block.

Besides the members who presently Hate me for detailing this unending agony in such minute detail by Chapter and Verse... if there is anyone else out there in GMT Nationland harboring ill will towards me... I sincerely apologize... and I'm begging you... Please... Just pull a few of the pins out of your Voodoo Doll for a few more weeks and as soon as I can get this damned engine fixed and running... I'll 'Fade to Black' ...and I promise... You'll never hear from me again!

Obviously... Now that I know what a deep hole it is that I have dug for myself... I'm tossing the shovels away... and as soon as the "Brass Guide Pin" hardware arrives and I can modify the Four Guide Pins... I will be getting the head removed using "The FrankenLifter Hybrid Hoist". When you examine these bolt hole images... please note that I took some other images that may be hard to place. The images where the six (6) LEDs are reflecting off the bottom of the Bolts Holes... those were taken in a few places on the head where the head bolts WERE successfully removed.

The other images I took today will be obvious to those familiar with the GM 4.2L Engine and more will follow later because I could not stand up for longer than it took to get today's work done. The images I really want to get next are at the back of the Engine Head between the Engine Block area and the Firewall... (I will try this again tomorrow). As soon as I can gather my thoughts... I'll go back through these posts and modify all the parts concerning Bolt Extraction with the Necessary FAIR WARNINGS to START by using this Little Webcam Device Right Away...and continue to CHECK your progress OFTEN!

Yup... "Dutch" was right... "This Just Keeps Getting Better By The Minute!"
 

mrrsm

Original poster
Lifetime VIP Donor
Supporting Donor
Member
Oct 22, 2015
8,192
Tampa Bay Area
I know I am getting a little ahead of the situation by assuming that the worst of all possible events will present itself as soon as the head is lifted clear of the engine block. But I have always believed that it is 'Better to Act... than to React' and while laying around here today of necessity after yesterday's "Digital Image Revelations"... I have been thinking of some possible ways to get out of this "Mechanical Purgatory"... This is the one that keeps coming to mind:

JB-WELD

http://www.jbweld.com/

I've had only a few instances where I used JB-WELD to perform some mechanical miracle rescues...and it seems to me that if I clean all dirt, oil, gas and metal remnants from around the related areas of any "Buggared Up" Head Bolt Holes made during my "Exploratory Drilling" debacle with Acetone... I should be able to repair those areas in the following manner:

(1) Remove the Aluminum Engine Head and Head Gasket and record the damaged areas with closeup digital images...showing the Before...Intermediate Clean and Prep... and Final Repair Results, one stage after another.

(2) Clean around the areas and down the Bolt Hole Threads with powerful cleaning sprays

(3) Mix up a proper amount of (GRAY!) JB-WELD in advance to apply it in, on, and around the affected areas.

(4) Only work on ONE BOLT HOLE AT A TIME! Thread in a Bottoming Tap that has been completely coated with Graphite Lock Lubricant...all the way down and in as far as it will travel in the Bolt Holes and position the Open Flutes adjacent any Damaged Threads or Voids in the Engine Block.

(5) Pack in the JB-WELD down inside the open Flutes and deep into the affected damaged areas.

(6) Allow the material to set up for 75% of its Hardening/Curing Time and then very carefully and gradually begin to back out the in-dwelling Bottoming Tap... just a little at a time in order to begin cutting and forming new matching threads into the JB-WELD.

(7) Using very slow and careful back and forth motions... work the Bottoming Tap in and out repeatedly and use either A Small Pick or Needle Tool to remove any extra over-burden of JB_WELD that collects inside the flutes... and keep up this motion-cleaning cycle until the tap can be completely backed out of the repaired bolt hole.

(8) After the tap and residue have been removed... allow the JB-WELD to COMPLETELY Cure Overnight.

(9) On the next day... spray down and the cleaned Bottoming Tap with more Graphite Powder Spray and re-introduce the tap into the Repaired Hole and run the tap up and down repeatedly while cleaning out the flutes to completely clean out all the threads.

(10) Install the Head "By the Book" and install the Head Bolts in their normal fashion.
 

Mooseman

Moderator
Dec 4, 2011
25,996
Ottawa, ON
Why not just fill the hole with JB Weld, let completely cure, drill and tap normally? But I don't see JB Weld being strong enough to hold.
 
  • Like
Reactions: mrrsm

mrrsm

Original poster
Lifetime VIP Donor
Supporting Donor
Member
Oct 22, 2015
8,192
Tampa Bay Area
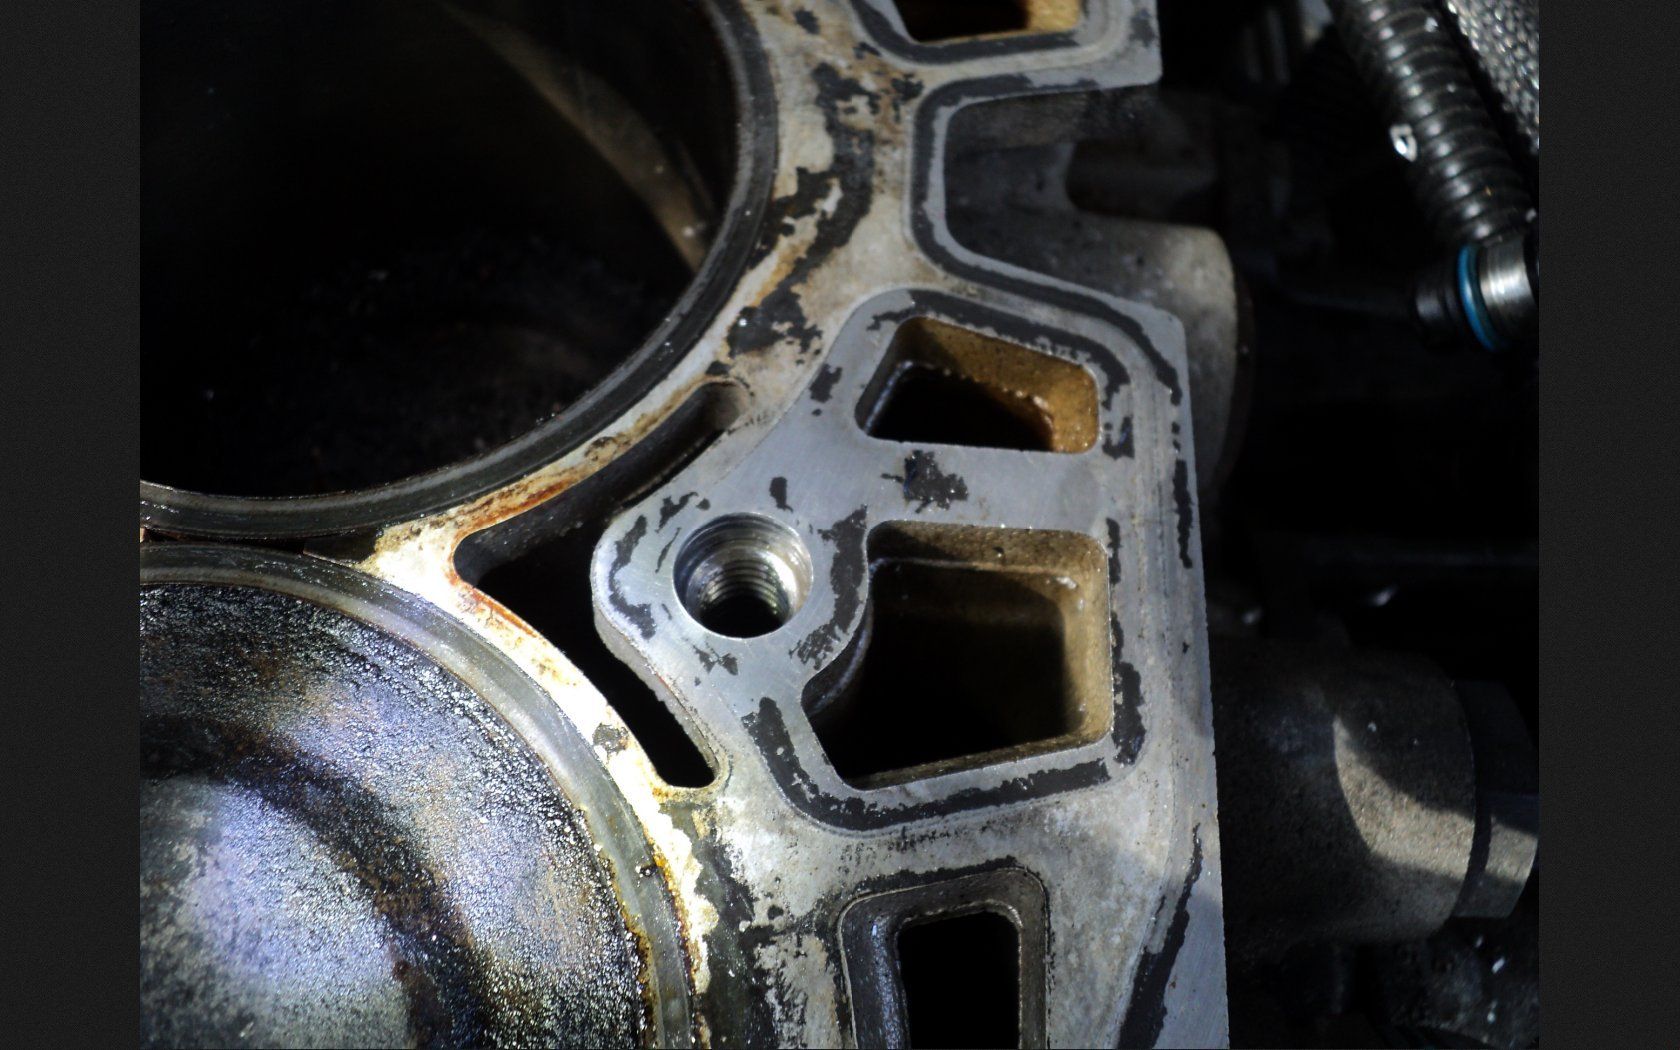
@Mooseman ...I've been poking around trying to find out more information about the present Broken Bolt Dilemma and I'm only guessing here since there are no closeup images of the GM Atlas 4.2L Aluminum Engine Block displaying actual broken off head Bolts... but am I not correct that THIS image is actually one of our motors suffering from this problem?

ai267-photobucket-com_albums_ii304_jsmith1984_col3-jpg.84095


I copped that image just now from this link:

http://www.nc4x4.com/forum/threads/...ech-thread-ll8-l52-llr-lk5-llv-engines.39853/

As soon as I grab a cup... and the Sea Fog clears out... I am going to pull the last three tiny bolts holding down the front of the Engine Head...and saddle up "The FrankenLifter Hoist" for its first taste of working under the hood of a GMT Vehicle... More to follow later today...
 

mrrsm

Original poster
Lifetime VIP Donor
Supporting Donor
Member
Oct 22, 2015
8,192
Tampa Bay Area
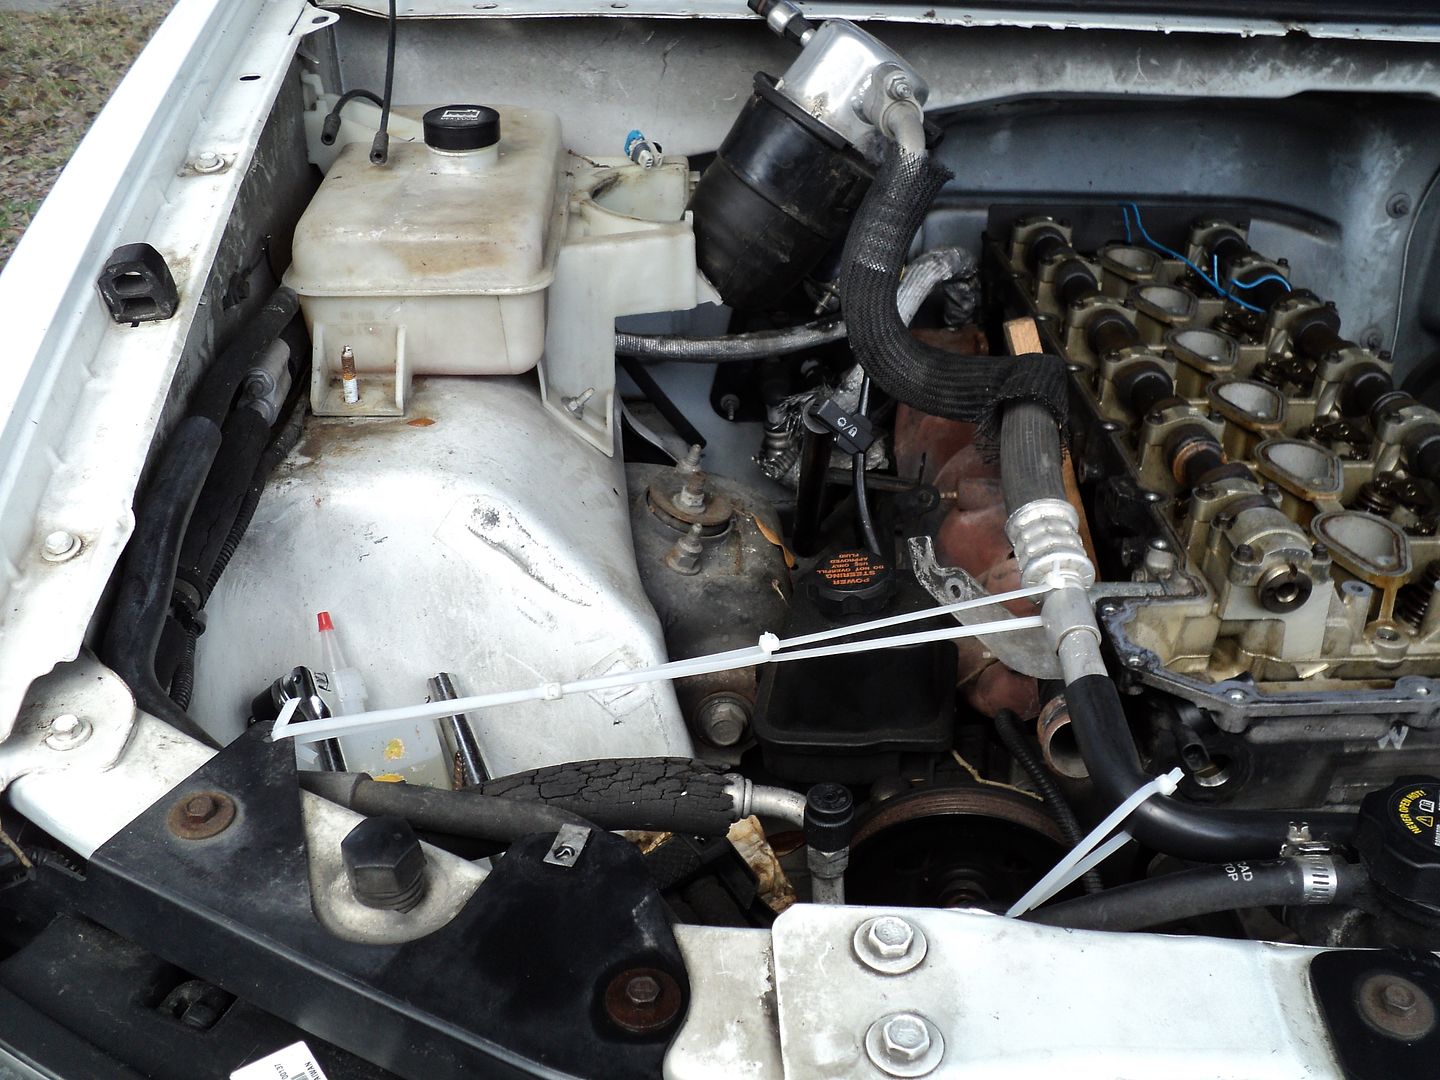
Okay... I made as much of a foray as possible today under the hood of the TB in order to remove the Last Five Fasteners (Three on the Head ... and Two holding the Timing Chain Guides). After covering the engine... I had to use a leaf blower to clean all the oak leaves from inside and around the open hood areas and wipe things down from to clear away the dust, dirt and debris that might fall or wind up inside the motor while the head removal procedure is underway.

I recently reviewed the Two Excellent Youtube videos I mentioned further back in the posts for being both brave and quite the best and most unique in describing the R&R of the Aluminum Engine Head on the Atlas LL8 Engine. During the highly sped up segments when the head was actually being elevated with a hydraulic lift... that at various times... even with two men constantly having to juggle and adjust things around... the most interference from anything occurred when the AC Accumulator and its large shielded Low Pressure Freon Return Line still holding proper pressure inside the AC System...was disconnected from its retained position, raised well above the engine under the hood... but remaining as a REAL PITA throughout and an impediment to just cranking the hoist lever straight up until the head could be raised up clear of the block and just rolled away.

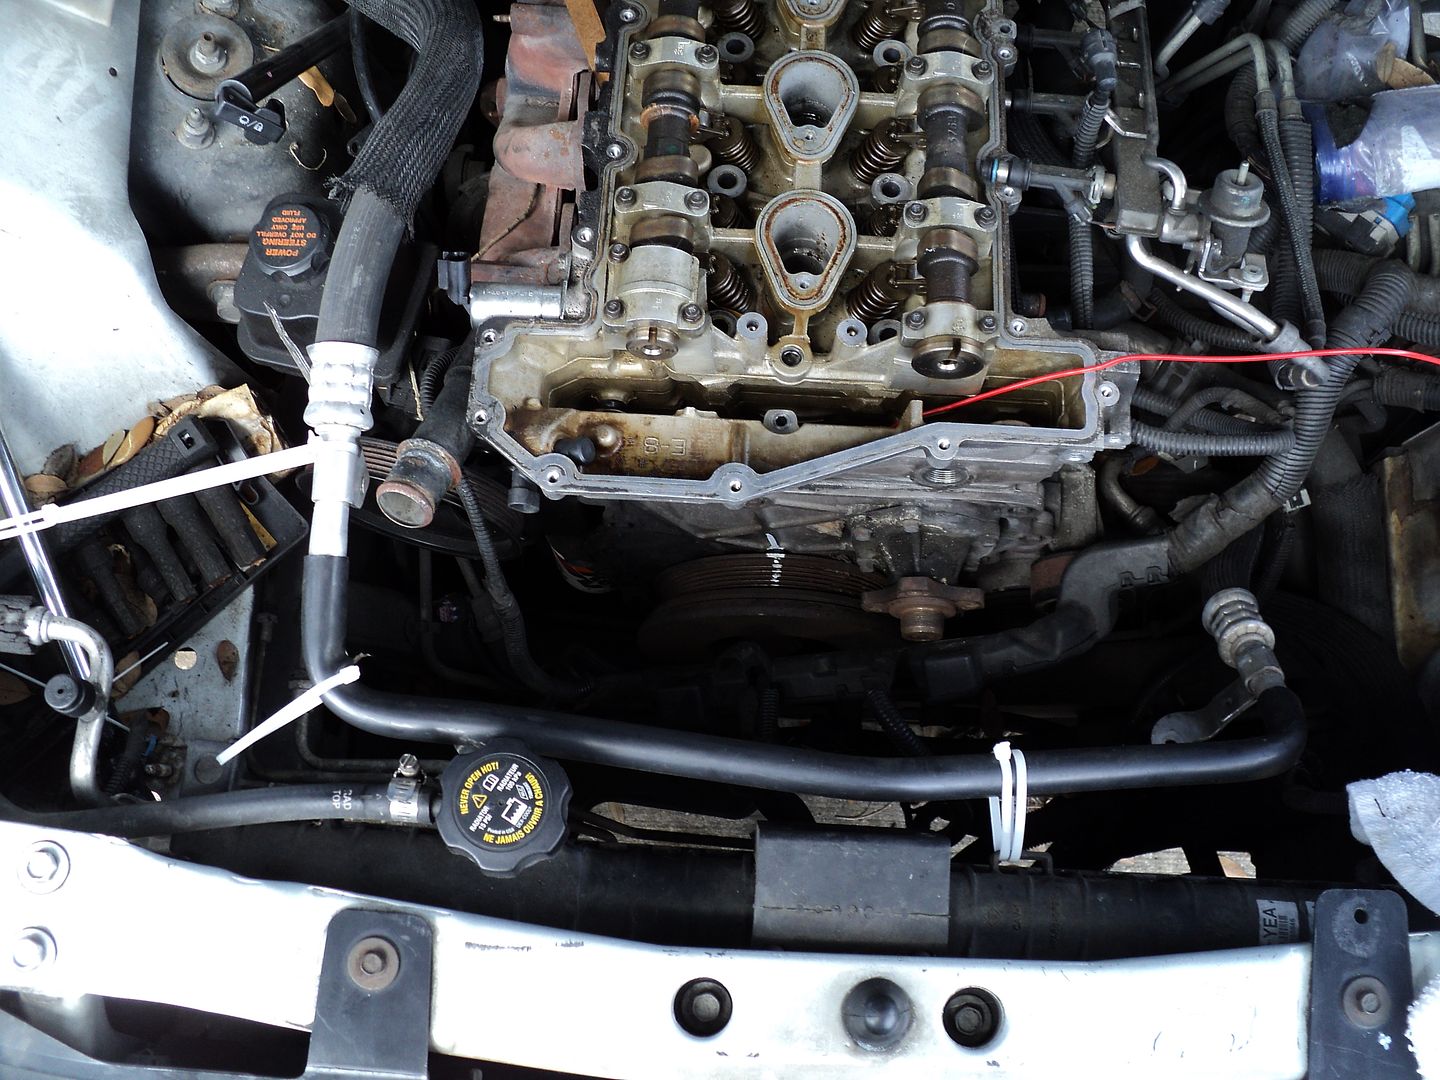
The problem I was observing was that all of this was being done unnecessarily... because had the Youtube OP just loosened the hold down clamp on the AC Accumulator Insulation Container and lifted it slowly up and out of the Molded Plastic Depression inside the Coolant Reservoir and then carefully lowered it nearby to allow the shorter line that reaches into the AC Evaporator from right at the firewall to extend very slightly and move just a little. After doing this... the short line will be able to rotate clockwise... and then there will be enough length added to pull the longer Hard Low Side Vapor Line towards the Radiator where it can be secured with Zip-Ties and free the area over the top of the Engine to lift the Engine Head straight up... and off of the Block.
DSC05401.jpg


This then allows for moving the AC hardware around and clear by using ZIP-TIES at three or four locations along the front of the engine and in the corner adjacent passenger side of the fender. In the meantime, the necessary free space and moving room improved JUST enough to allow freedom for the Accumulator and AC Flex Lines to be rotated and and extended move both FORWARD and to the RIGHT PASSENGER side and clear an unimpeded access area to continue with the Head Removal. I followed this procedure to the letter and now have a decent clear workspace above and around the engine to exploit for this R&R. I took relevant images of this work to illustrate that this method is exactly what is called for.
DSC05400.jpg


I removed the three remaining 10 MM Small Special TTY Head Bolts at the very front of the engine with a minimum amount of necessary force and also passed a 10 MM socket through the two threaded uncovered access ports in the Front Engine Cover to access the two Bushing Bolts securing the Rubber/Metal Curved Timing Chain Guides to the Aluminum Engine Head. These two bolts came undone without any difficulty and by doing so... the Engine Head is ready for the attachment of a Lift Harness held by "The FrankenLifter Hybrid Hoist" using ONLY the Hydraulic portion for this part of the head removal work. This last action and ultimate head removal must of needs be done tomorrow. The photos will illustrate how much easier this job would have been for the creators of the two videos if the AC hardware had been secured clear of the immediate space needed to lift that 90 Lb Chunk of Aluminum.. Up and Out of the TB.

http://s557.photobucket.com/user/60...INEREPAIR/TRAILBLAZEREPAIRTOOLS?sort=3&page=1
 
  • Like
Reactions: Mooseman

mrrsm

Original poster
Lifetime VIP Donor
Supporting Donor
Member
Oct 22, 2015
8,192
Tampa Bay Area
All Right... Fellow GMT Nation Members....

Considering that we started this project (just over two years ago now for me and since October of 2015 for us all after my joining up here on GMT Nation.).. It is worth taking an appropriate pause for me to make mention of the genuine appreciation I have for all the folks here who have been good enough to offer their ideas and encouragement... and even on occasion, some well-deserved chastisement, too. But it should come as no surprise that the Prime Movers in getting me going towards success with such a Difficult Mechanical Mountain to Climb... started from Day One with their Hearty Welcome coming from @BlazingTrails and @Blckshdw as well as many others...

But the One Standout Member is man possessed of the Very Essence, Heart and Soul of what it means to be a Contributing Member of GMT Nation. Without any hesitation...he offered his documented work to help me to get going ... and has remained present as a Guide and Mentor with REAL First Hand Experience as to "How to Resurrect a Broken Gm Atlas 4.2L Engine". More Importantly ...He was Willing to SHARE that knowledge... and when he was not pointing this work towards the direction of careful, thoughtful and rock-solid solutions at every step and turn.... He was cheering things on when on some days, I was unable to even walk across the room. So... Please recognize.. as sincerely I do... a Fellow Member with Great Character, Superb Mechanical Instincts and the Patience to put up with the likes of ME... (Oh Yeah...He's Definitely going Straight to Heaven...for that LAST One!)

Thanks...To @Mooseman ...

"No Man is a Failure... Who has Friends..."

Because of the latest developments being recorded today have a large number of Step-By-Step Images that are worth looking at BEFORE reading further... Here is the direct link... But please come back for the text that will provide some real color commentary on how this all of this work progressed:

http://s557.photobucket.com/user/60...INEREPAIR/TRAILBLAZEREPAIRTOOLS?sort=3&page=1

"There is ALWAYS... One More BOLT to Remove!"

With the presence of Good Weather.. I was able to start today's efforts around 10:30 AM... There was no haste in this activity and the work flowed at a reasonable clip and I was finished around 2:30 PM after doing things at a steady pace... including the necessary breaks for some rest and getting "Coffeed Up" with the Lil' Woman's New Mr.Coffee Kouerig Single Cup Coffee Maker...and THAT was a very efficient and pleasant flavor and quality surprise that punctuated my flagging endurance towards the end of the day.

The first observation I can make concerns the Question: By what means will you attempt to secure the Aluminum Engine Head to the Lift/Hoist?. I came up with a novel approach that almost did not happen because over the years, when "Cleaning Out the Garage" ... I would occasionally look over a Clear-Vinyl-Covered Bicycle Security Chain that I probably had for over 30 years...and at first... I'd think about tossing it with the rest of the usual junk. And then after a thoughtful pause... it would occur to me that, "I better hang onto this... I might need it for something else some day."

That day finally came in a very big way.... as I managed to try and worm the links inside the clear thick, protective, clear Vinyl cover UNDERNEATH the Intake and Exhaust Camshafts and routed the chain in such a way as to adjust for Weight and Balance during the lift procedure. Nothing else I could EVER Imagine engineering would have been any Simpler or as Effective as this Idea...!

I discovered that by lifting the head extremely slowly... THAT THERE WAS ONE MORE HIDDEN HEAD BOLT STILL FASTENED DOWN! The fact that I was taking my time and REALLY LOOKING THINGS OVER... AND REACTED BY LOWERING THE LIFT UPON MAKING THIS DISCOVERY...PREVENTED A DISASTER! With this precipitous observation... I managed to remove the Last Head Bolt from the Left Rear-Most Outboard Position... Without Snapping it Off inside the Engine Block and subsequently... with the HVAC Hardware tied conspicuously aside and out of the path... the rest of the removal process was a Breeze!

To avoid other problems... If you decide upon using the Bicycle Chain Lift Procedure... it is an ABSOLUT MUST THAT YOU INSTALL THE KENT-MOORE CAMSHAFT HOLDING TOOL... or you will run the risk of having the enormous Spring Tension built up in the camshafts suddenly release and not only injure your fingers and hands...but the sudden accidental release of rotation will cause the Valves in the #1 and #6 Cylinders to be damaged because they are BOTH in a Top Dead Center Position of necessity in the present circumstances! Once the Engine is Removed...you can use a Large Crescent Wrench to relieve the tension on both half Moon positions at the back of the camshafts as the Tool will be needed to set up the Brand New Head for Installation. @Mooseman ... Just an FYI...Thankfully There was NOTHING connected to the BACK OF THE ENGINE HEAD!

After the head was Free and Clear of the Engine Nacelle area... I took some close-up images of the Three Broken Head Bolt Shanks...and sure enough... in the case of two out of the three situations... my Failed Efforts at Broken Off Head Bolt Extraction With The Engine Head INSTALLED may still Doom this Project if the Off-Center Reverse Drilling penetrated deep enough to break through into the Coolant Passages or drilled out enough of the threads to cause the rest of the remaining threads enough of a compromise in strength to rip right out of the Engine Block when the New Head Bolts are installed.

I will certainly have to go back and eliminate a vast amount of well-intended information in order to discourage anyone from ever considering this approach. I intend to leave the Old Head Gasket in place as the partial means of protecting the head surface...regardless of whether I drill out and remove the bolts with Easy Outs ...or if I decide to MIG weld them to some large nuts and try to back them out using wrenches and CRC 'Freeze-Off" to coax the bolt shanks out of their "Caves". I think I have a pretty solid approach using either technique...so we'll see which one wins the Choice Battle. The Very First thing I want to do is Autopsy the Head and more closely examine the entire thing from top to bottom... left, right and sideways... and then report my findings for GMT Nation posterity in understanding the Wear and Tear that the GM 4.2L Atlas Engine Head had to endure after giving a quarter of a million miles of service.

The Old Saying Goes...

"The Road To Hell... Is Paved With GOOD INTENTIONS!"

The photos of the Piston Tops look like they are LOADED down with carbon...and of course... They are... However the piles of semi-circular looking pieces and other stacked up flats and chunks of the stuff appear to have accumulated inside each cylinder during the SERIOUS POUNDING VIBRATIONS TRANSMITTED THROUGH THE ENTIRE BLOCK WHEN I WAS BEATING DOWN ON EACH HEAD BOLT TO BREAK THEM LOOSE.

What is interesting is how easy that stuff dropped off from the "ceiling" dome from inside the engine head. When I dragged my finger through the stuff... it has the feel of very soft but thickened grease... and rather than smell of Gasoline... the stuff actually had the familiar odor of Mobil1 Oil...! Conversely... when I tried to rock the exposed TDC Pistons back and forth to establish any slop from excessive engine wear... There was absolutely not the SLIGHTEST movement whatsoever... even after performing for 240,000 Miles. I sprayed all down inside thoroughly with WD-40 to guard against any residual coolant drops or water vapor causing rust. I have a decent plan for how to completely remove all traces of carbon and will attend to The Motor Prep and have everything nice and clean and tidy in time for the New Head Installation. My main concern right now is getting those Three Broken Bolts extracted with the least fanfare and determine how to effectively repair any damage I have introduced earlier.

ALL the cylinder walls are still very smooth and un-scored... and so I do not anticipate any compression problems from having a badly worn bottom end. I cannot say with any certainty how the motor was treated when I bought it Used back in 2002... already with 40,000 Miles on the Odometer... but the last 200,000 Miles were accumulated with Mobil1 5W-30 Motor Oil and K&N Oil Filters every 3,000 Miles.

All of the Brass Rods have arrived... so tomorrow I'll set about measuring and preparing them (Cross-Drilled and Pinned with Spring Steel Roll Pins to act as guides for The New Head Installation. I'm a little worn down right now... but I promise to prepare a Battle Plan that will include what I have in mind to try and rescue the situation... without doing ANYTHING that makes matters worse. Also... I'm so tired right now that I cannot even think straight...Ergo...I think I'll stop for now and pick things up tomorrow with more edits and information!

All in all though... I have had a Very Good Day! :>
 

Mooseman

Moderator
Dec 4, 2011
25,996
Ottawa, ON
No certificate required. This is what it's all about brother! At least you got the bloody thing out!
 

mrrsm

Original poster
Lifetime VIP Donor
Supporting Donor
Member
Oct 22, 2015
8,192
Tampa Bay Area
Amen... LOL And it is with a fervent prayer that my "Self-Inflicted Wound" will not eventually come to having the need for this solution:

Time-Sert J-42385-100 M11 x 2.0 GEN 3 GM Head Bolt Thread Repair Kit


s-l1600.jpg


But... Since this is the ONLY Official "Stealership" Quality Head Bolt Repair Tooling Instruments made for the GM M11 X 2.00 Bolt Set that has all the Bells and Whistles required to do this job right...So... If I have do my usual inventive, Fancy-Shmancy "Bobby (slash) MacGyver" imitation to sort this out, then I am going to get into some REAL Trouble. I'm heading-hobbling out to look things over in a few minutes and see what I can come up with... Oh... I DID find this ONE thing on eBay for under $30.00 and it looks like it might be helpful with part of the job... So I grabbed one because before I can determine whether I need to go to the extent of requiring such an expensive kit... First ...I've to get "The Three Stooges" removed from the Aluminum Engine Block and I KNOW I can make use of this sub-item from that Big Repair Kit:

Kent-Moore Tools J-42385-401 GM Templates Fixture Plate Guide Head Bolt Repair
(Uhhh... There are only a few more of these left For Sale on ebay ...so if you find yourselves at some point in my unenviable position...having this item as part of the complete Time-Sert Tool Kit seems like a good place to start if you are contemplating doing this repair and need to collect the necessary sub-pieces of the Time-Sert Helicoil Repair.)


s-l1600.jpg


s-l500.jpg


s-l1600.jpg


s-l1600.jpg


s-l500.jpg


s-l500.jpg


s-l500.jpg


EDIT: I JUST bought this on eBay...The Owner accepted my $275.00 Offer!

THIS kit has ALL the Parts and Pieces:


s-l1600.jpg


I suspect that with the Wurth Time-Sert PDF Manual on this kit... after doping out the dimensions of the more critical pieces... you could probably cobble together many of these items from other sources for WHOLE LOT LESS than "Five Benjamins"

EDIT: ACTUALLY... HAVING PURCHASED THIS KIT AND EXAMINED THESE TOOLS IN DETAIL... THERE IS NO WAY THAT GENERIC TOOLS COULD EVER MEET OR EQUAL THE SPECIFIC PROBLEM SOLVING AND PERFORMANCE ASPECTS THAT THIS KIT PROVIDES. NOW...EVEN THOUGH I LUCKED OUT TO BUY THIS VERY OUTFIT FOR $275.00... REGARDLESS... IN THE END...I STILL WOULD HAVE HAD TO PURCHASE THIS KIT TO REPAIR THE DAMAGED BLOCK... OR THIS PROJECT WOULD HAVE ENDED RIGHT HERE... IN A COMPLETE FAILURE AND A DISASTER!

Here is what I mean... This company sells the Exact Rare M11 X 2 Inserts for around $40 for a 10 Pack... So... if it comes down to cases... I'm making progress towards getting or having ACCESS to the"Must Have" Parts and Pieces to cobble this kit together... More later tonight:

http://www.denlorstools.com/home/dt...112030_head_bolt_inserts_m11_x_2.0_pack_.html
 

mrrsm

Original poster
Lifetime VIP Donor
Supporting Donor
Member
Oct 22, 2015
8,192
Tampa Bay Area
This is what I am up against... and I have NO idea how close I am to penetrating the Water Jacket. What I DO know is that with a Steel Piston Cylinder Insert Wall thickness of only 1.5 MM and considering the sketchy method they use of a Styrofoam Cast Block Model that is replaced and burned away by BUCKETS of Liquid Aluminum... its anyone's guess as to just how much MEAT there is left around the drilled out Head Bolt Shank and surrounding aluminum block material.

My immediate thought is to literally PACK that "side channel to China" I stupidly managed to bore into with as much JB-Weld as I can stuff down there... then just level everything off and let it harden overnight. Afterwards... I'll prepare to use a proper alignment tool with a seriously small Tracon Ceramic Reverse Drill to penetrate down like an In-Line Pilot Hole and gradually increase drill size until the K&M Reverse Drill Bits can finish the prep and I can get a good bite down the centerline of the Broken Bolt Shank with an Easy Out and hope the damned thing will unwind. After that... I will re-do the adjacent non-threaded areas with more JB-Weld after cleaning it thoroughly with an Acetone Bath. Hopefully... the damned new Head Bolt won't pull of the threads out when I "Put The Music" during the Final TTY Stretch.

EDIT:

Considering how Bad the Jamb is that I've gotten myself involved with by proving without ANY doubt... "No GOOD DEED Goes Unpunished!" I consider that I am getting off lightly with the best possible solution for around 1/2 of the $505 this "MUST HAVE" Kit just cost me on eBay for $275.00... Free S&H... of the ONLY Factory Authorized Repair Solution available as a "Once Used Repair Kit"...Otherwise... It is Entirely Complete! Under the circumstances... I would rather have this kit on hand and NOT need it...than need it... and by NOT having it... Need to obtain a replacement engine as my only other recourse out of this self-imposed Hell...!:


Your order is confirmed, and you'll be notified when it ships. As a top customer, you're important to us - so thank you again for shopping with us.
View order details

TIME-SERT M11x2.0 Universal Head Bolt repair kit P/N 3700
Estimated delivery: Thu. Mar. 24
Free Shipping
Paid: $275.00 with Credit card


DSC05513.jpg%7Eoriginal


Yup... It REALLY is THAT BAD....When I screw anything up... I go ALL OUT!


DSC05512.jpg%7Eoriginal


DSC05502.jpg


DSC05509.jpg


DSC05507.jpg
 

mrrsm

Original poster
Lifetime VIP Donor
Supporting Donor
Member
Oct 22, 2015
8,192
Tampa Bay Area
Why use "The TIME-SERT Sytem" for Bolt Hole Repair ...instead of "HELICOIL"...?

Best Explanation of Principles Involved:

Best DAMAGED HEAD BOLT-DAMAGED ENGINE BLOCK EXAMPLE

Vendor Impressions:

Wurth "TIME-SERT" Manufacturer's Video
 

mrrsm

Original poster
Lifetime VIP Donor
Supporting Donor
Member
Oct 22, 2015
8,192
Tampa Bay Area
Good Day to All Who Dwell at GMT Nation...

Well... I was going to do some work outside and under the hood of the TB today... but I am discouraged from attempting anything out there after catching a glimpse of THIS coming our way:

http://www.tbo.com/weather/local/interactive-radar/

No Problem... I can continue the project in the garage after describing things below:

With the issue of the project becoming like a "Serpent Eating its Own Tail"... (...think of the Tattoo on Lilliana Tallifer's upper thigh in the movie "The Ninth Gate" from the book..."El Club Dumas"...) The process of getting more stuff done with its endless fits and starts continues. But while I am waiting for the arrival of the complete Time-Sert Threaded Hole Replacement Kit, I might have the means of starting with extracting the one UN-FUBARED Head Bolt Shank get the first of the three unstuck and removed.

I think this can be done by means of adapting a Common Hex-Head Bolt that has a "Goldilocks" sized Outside Diameter capable of fitting VERY snugly down inside the smooth bored portion of the head Bolt Holes inside the Aluminum Engine Block With those dimensions all satisfied.. .all that remains is to use a Digital Vernier Depth Gauge to determine the height from the flat surface of the Engine Block (WITH The Old Gasket STILL in place to protect its surface)...down to slightly above contact with the top surface of the FUBARED Broken Off Bolt Shanks.

After that, its just a matter of cutting off the shank of the Hex Bolt to the necessary length and after squaring off the face, finding the Dead Center on the top of the Hex Head of this Home Made Tool, and drilling it out to the right size accommodate the Small Reverse Drill Bit. I can then use a pair of Vice Grips to fix the head of the Hex Bolt securely while guiding the Reverse Twist Drill gradually downward through the very center of the Broken Bolt Shanks with frequent pauses to re-lube the Drill Bit and use a Magnet Tool to extract the Steel Shavings and Chips that otherwise would quickly build up underneath the Hex Bolt Tool.

And finally... after evacuating all of the old oil and metal grindings... I'll use a Reverse Twist Easy Out...to screw down inside the holes in the MIDDLE of the Broken Bolt Shanks ...and back them gradually (or grudgingly...as the case may be...). I'll post the images of the Tool Prep as soon as I can make the design and fabricate the damned thing in a few hours. Its beginning to rumble in the skies to the west right now off of the Gulf of Mexico...and just as the Little Mexican Lad told Sarah Connor at end of the movie "The Terminator"...

"Viene La Tormenta..." 'He says There is a Storm Coming...'

http://www.tbo.com/weather/local/interactive-radar/

EDIT:

I needed to order some Stop Collars from Amazon for an assortment of Metric and SAE Drill Bits so I don't make the added mistake of drilling town too deep and possibly on through the Broken Bolt Shanks and into the Blind Holes at the bottom of the Waste Foam Aluminum Engine Block Casting locations for each Engine Block Bolt Hole...Half way to China!:

51v5YGM17NL._SL1000_.jpg
 

Mooseman

Moderator
Dec 4, 2011
25,996
Ottawa, ON
The Time-Sert tool kit seems more complete for sure and better than Heli-Coils.

Now you know why we call Kent-Moore tools "Spent-Moore". After the job is done, you could turn around and resell it.
 
  • Like
Reactions: mrrsm

webdawg

Member
Jun 26, 2014
247
I have edited this to reflect some information below:

WARNING!
My only other concern about this fellow's experiment... is that if the heat regimen exceeds 900 degrees F and the pot interior is coated with TEFLON , it can vaporize and convert instantly into Highly Poisonous PHOSGENE GAS. Since un-alloyed Aluminum has a base melting point of 1,500 degrees F... There seems to be a Real Danger here in doing this experiment for practice with anything other than Uncoated, Cast Aluminum for the sake of safety and health. One whiff of this Highly Toxic Gas is enough to Kill at the worst...and cripple anyone... if the person inhaling this Awful Gas manages to survive.


I have never done a head. Too bad we can not find some CAD drawings of the head and block. You may want to contact a machine shop that regularly cleans up these heads and blocks and see if they have something they can give you.

Any way to measure the thickness of that metal after you drilled that hole?

It would be cool to find something better you could fill it with. Obviously you did not drill into the cooling passages so at this point I would think you would have more of a heatsink issue. Where it just was designed to have X amount of metal and transfer heat around inside the cooling passages in the head/block itself.

I supposed the block was designed for X amount of strength but I do not know how much that would matter in general construction strength. I can see how it would effect the strength of the bolt hole though.

Too bad you cannot do something like this:
 
Last edited:
  • Like
Reactions: mrrsm

mrrsm

Original poster
Lifetime VIP Donor
Supporting Donor
Member
Oct 22, 2015
8,192
Tampa Bay Area
The Time-Sert tool kit seems more complete for sure and better than Heli-Coils.

Now you know why we call Kent-Moore tools "Spent-Moore". After the job is done, you could turn around and resell it.

Yes Indeed... But since the New Kits cost $505.00 ..and THIS eBay seller's listing was shown at $350.00 with a chance to "Make an Offer"... I offered to pay $275.00...and he accepted... so at least that takes a little of the sting out of the need for these exclusive tools. From now on...if I make any more Huge Mistakes like this that keep punching me in the Head AND The Wallet...

I am going to use the term:

"Paying Through The 'KNOWS'..."

EDIT:
It is Important for me to mention that while I am not especially happy about having put myself in the position of magnifying the ever-present difficulties that are a Hand-In-Glove reality here... and that needs no explanation beyond what everyone has observed all along the way... I am glad that this happened to ME first... rather than to another Member who might have followed on and tried this and suffered as a result of my incorrect suggestions and recommendations.

I have since gone back through ALL of the posts relating to this portion of the entire project and admonished all using very prominent, Bold Red Text... to BEWARE ATTEMPTING TO REMOVE BROKEN HEAD BOLTS IN THE GM ATLAS 4.2... BEFORE FIRST REMOVING THE ALUMINUM ENGINE HEAD!
 

mrrsm

Original poster
Lifetime VIP Donor
Supporting Donor
Member
Oct 22, 2015
8,192
Tampa Bay Area
I have never done a head. Too bad we can not find some CAD drawings of the head and block. You may want to contact a machine shop that regularly cleans up these heads and blocks and see if they have something they can give you. Any way to measure the thickness of that metal after you drilled that hole?

It would be cool to find something better you could fill it with. Obviously you did not drill into the cooling passages so at this point I would think you would have more of a heat-sink issue. Where it just was designed to have X amount of metal and transfer heat around inside the cooling passages in the head/block itself. I suppose the block was designed for X amount of strength, but I do not know how much that would matter in general construction strength. I can see how it would effect the strength of the bolt hole though. Too bad you cannot do something like this:


@webdawg

Hey Dawg... Thanks for the interesting "How to Weld Aluminum" Video...!

My only REAL CONCERN is not knowing whether the composition of the Aluminum Alloy in the GM Atlas Engine Block contains enough Silicon to cause the adjacent metal areas to seriously weaken and distort the shape of the engine head...or worse...weaken and crack from melting in a dissimilar Aluminum metal substrate... and wind up cracking the Engine Block right there at the Bolt Hole. I really would prefer to fill in the hole with the native metal...but the risks for making bigger problems than I already have are too great for me to consider trying this out.

I like your thinking here and I believe that I really CAN take some action using an additional "sealer"...! With the use of the Time-Sert being a Solid Steel Threaded Cylinder rather than being of the Helicoil "Loose, Springy Wound Wire" design... there will be NO PLACE for any leak to enter through the side of the insert and the metal enclosure around the head bolt will maintain its circumferential strength by virtue of being a cylinder. Also helpful here is that the Time-Cert has a Lip that sits on on a counter sunk Ledge area that I can take advantage of now that I know I have all of the kit to do the work.


More Details about the various Time-Sert Inserts and their varied Applications:


What I have in mind to do AFTER extracting the remaining three broken off shanks is to clean that drilled out area with Acetone First... I'll prep the hole according to the Time-Cert Procedures. Next...I'll mix-up and pack the JB-Weld into and around the off-center hole...and then follow up immediately afterwards by Screwing in the Time-Cert Threaded Insert with High Temp Loctite around its exterior barrel threads at the base and tighten it correctly all the way down until the lower three threads Cold-Forge into the Aluminum Block. In doing so...the JB-Weld will be squeezed in and around the adjacent drilled out areas under the lip or flange of that insert and push the stuff deep inside the adjacent side drilled hole! I think that after sitting for another 24 Hours to allow everything to harden up.... the repair will be strong enough to do the job and be ready to handle the forces needed to secure the TTY Bolts.
 
  • Like
Reactions: webdawg

mrrsm

Original poster
Lifetime VIP Donor
Supporting Donor
Member
Oct 22, 2015
8,192
Tampa Bay Area
It is a little after 4 AM and against my better judgment... I'm laying here wide awake... and thinking of course... pretty much about nothing else other than conquering this project... I was running through the vast collection of images on my Photobucket. I mentioned in the previous post covering "The Head is FINALLY OFF..." images... that when time permitted.. I intend to conduct an "Autopsy" the engine head and report back with the findings. But since I spotted something quite glaring... I'll cover the issue now and add to the data later with a more complete analysis when the dust settles on the main job.

Remembering that this 2002 Trailblazer ended up in its present state after giving faithful and largely reliable daily service for 240 ,000 Miles... Besides this Engine head... there are two components (The Exhaust Manifold and The Catalytic Converter) that never got changed out for any reason; but upon reflection... come into question now as probably being part and parcel to the eventual failure of things. Have a close look at this particular image:


Notice anything strange about the difference in the "patency" differences between the #3 Cylinder Exhaust Port in the head and the ones exiting the #1 and #2 Cylinders? Patency is a fancy medical term relating to Atherosclerosis or "Hardening of the Arteries" or if the heart patient is very lucky...its absence when the blood vessels are "WIDE OPEN AND USEFULLY FREE OF OBSTRUCTION".

In this case, I'm drawing your attention to the enormous build-up of Carbon and unburned combustion by-products that have first been ingested as unburned gasoline vapor and Air...right along with all that CRAP being piped into the intake steam from the Lower Engine Burned Fuel and Oil Blow-By Gases..which eventually accumulated like a Fat, Black Carbon Donut...inside the ID of the Exhaust Ports and which is most pronounced and obvious on the #1 and #2 Exhaust Ports aand which, during all of the running time... may have also been involved in @webdawg 's issue with his Exhaust Manifold glowing Red Hot as investigated in his post here:

http://gmtnation.com/forums/threads/2004-tb-i6-4wd-manifold-red-hot.14795/page-2#post-486810

The similarities between the heavy build up of Carbon on the leading end of his CAT and the inside upper portions of the Combustion Chambers in the Head and on the Piston Tops in mine are unavoidable. It occurs to me that the only way this can happen is by the addition into the Intake Air-stream of the Blow-By Gases being recirculated BACK up into the Intake Manifold after many long years of driving and and high mileage use.

For lack of a better term here... "The Carbon Connection" I am trying to make here is that after seeing @webdawg 's excellent micro-cam images of the front intake side of his CAT would indicate that every 100,000 Miles or so... replacing the CAT AND the Exhaust Manifold.. right along with the O2 Sensors might relieve the excessive back-pressure that precipitates this extreme Carbon Build-Up and eventual Power Loss as the Atlas Engine enters the motor vehicle equivalence of "Turning 40".

God Almighty! Why doesn't somebody besides KOOK manufacture a Stainless Steel Exhaust Manifold that would NEVER end up having the "Rusted Flakes Break Off Clogging" that @webdawg 's CAT suffered as a result of the damned thing breaking down under normal use? I already have a Brand New Dorman Exhaust Manifold to install before the New Engine head goes in place on the motor... but now I realize that the CAT willalso have to be swapped out for a Brand New One as Well. When that happens... I will also do a photolog investigation of how clogged up it also must be inside...and try a De-Carbonizing Cleaning Experiment I have suggested in other topics and posts:

(1) TAPE OFF THE END OF THE EXHAUST EXIT PIPE OF THE CAT.

(2) STAND THE CAT IN AN UPRIGHT POSITION WITH THE INLET EXHAUST PIPE AT THE TOP.

(3) FILL UP THE ENTIRE INSIDE COLUMN OF THE CAT WITH A MIXTURE OF HOT WATER AND "PURPLE POWER" TO DISSOLVE AND EMULSIFY ALL THE CARBON BUILD-UP. LEAVE IT SIT FOR TWO DAYS BEFORE FLUSHING INTO A BUCKET TO EXAMINE THE CONTENTS AND PHOTOGRAPH WHAT COME OUT.

(4) FLUSH OUT THE CAT WITH VERY HOT, CLEAN WATER,,,AND USE A LOW VELOCITY HIGH VOLUME HOSE TO COMPLETELY FLUSH OUT THE CAT.

(5) LET THE CAT "DRIP DRY" WHILE STANDING ON END.

(6) USE THE WATER-PROOF MICRO-CAM TO EXAMINE AND PHOTOGRAPH THE INTERIOR OF THE CATE FOR THE RESULTS OF THIS EXPERIMENT.

(7) WASH, RINSE... AND REPEAT... UNTIL THE CORE CERAMIC CATALYTIC HONEYCOMBS ARE AS CLEAN AND FREE OF CARBON AND DEBRIS AS POSSIBLE.

(8) ONCE THE CAT IS BONE DRY.... HEAT IT UP WITH A PROPANE TORCH AND AFTER IT COOLS DOWN... GIVE IT A GENTLE "SHAKE TEST" TO ENSURE THAT THE CERAMIC BLOCKS INSIDE HAVE NOT LOOSENED ENOUGH TO "RATTLE" DUE TO THE CLEANING PROCEDURE.

(9) RE-INSTALL AND TEST UNDER NORMAL OPERATING CONDITIONS.
 
  • Like
Reactions: webdawg

mrrsm

Original poster
Lifetime VIP Donor
Supporting Donor
Member
Oct 22, 2015
8,192
Tampa Bay Area
Why not just fill the hole with JB Weld, let completely cure, drill and tap normally? But I don't see JB Weld being strong enough to hold.

I think that since the JB-Weld can handle temperatures up to 600 Degrees F without breaking down prompts me to want to take a chance and use it to augment the installation of the Time-Sert M11 X 2.00 Insert and letting cure for 24 Hours or even longer... and then lets see what follows on from the re-installation. Since the relationship between the new Head Bolt and the Insert will become Steel inside Steel instead of Steel Bolt vs. Aluminum Block... My thinking is that... with a proper Time-Sert Repair... and a careful, slow torquing and TTY procedure... this GM 4.2L Engine will survive my infamous drill-out mistake... and so will I.
 

mrrsm

Original poster
Lifetime VIP Donor
Supporting Donor
Member
Oct 22, 2015
8,192
Tampa Bay Area
I have never done a head. Too bad we can not find some CAD drawings of the head and block. You may want to contact a machine shop that regularly cleans up these heads and blocks and see if they have something they can give you.

Any way to measure the thickness of that metal after you drilled that hole?

It would be cool to find something better you could fill it with. Obviously you did not drill into the cooling passages so at this point I would think you would have more of a heatsink issue. Where it just was designed to have X amount of metal and transfer heat around inside the cooling passages in the head/block itself.

I supposed the block was designed for X amount of strength but I do not know how much that would matter in general construction strength. I can see how it would effect the strength of the bolt hole though.

Too bad you cannot do something like this:

WARNING!
My only other concern about this fellow's experiment... is that if the heat regimen exceeds 900 degrees F and the pot interior is coated with TEFLON , it can vaporize and convert instantly into Highly Poisonous PHOSGENE GAS. Since un-alloyed Aluminum has a base melting point of 1,500 degrees F... There seems to be a Real Danger here in doing this experiment for practice with anything other than Uncoated, Cast Aluminum for the sake of safety and health. One whiff of this Highly Toxic Gas is enough to Kill at the worst...and cripple anyone... if the person inhaling this Awful Gas manages to survive.
 

mrrsm

Original poster
Lifetime VIP Donor
Supporting Donor
Member
Oct 22, 2015
8,192
Tampa Bay Area
It is now the "13th Hour" since I woke up at around 4 AM ...and it is a Pure Pleasure to Report "Good News" instead of so much of the "Usual Bad News". You'll also be glad to know that I'm going to spare you the usual ponderous tome and limit my report to: The Highlights....The Tools... The Photos... and *The Inspired Procedure that pulled this Victory from Yesterday's Ashes of Defeat... with NO FANFARE OR BELLS & WHISTLES!:

The Highlights:
Success! The Unmarred Head Bolt Extracted with Ease... using some Basic Tools.
(One Down.... Two To Go!)

The Tools:
A Small Ball Peen Hammer, K&M Easy-Out with Tip Ground Off Short, Small Pair of Vise-Grips with Curved Jaws, Medium Center-Punch, * H-F 1/4" Metric Socket Set "Bit Driver Adapter", Tiny Telescoping Magnet, Digital Vernier Calipers, 13/64th" Black & Decker Drill Bit, A "Fancy" Tap Holder my Neighbor Gifted me... 1st Time Using this AMAZING TOOL!, Standard Electric Drill, Mobil1 5w30 for Drill Bit, Cotton Washcloths, Black Duct Tape, ARP M11 X 2.0 "CLEANOUT" A Top Shelf Thread Chaser, CRC Spray Brake Cleaner, LED Flashlight.

The Photos:
http://s557.photobucket.com/user/60...INEREPAIR/TRAILBLAZEREPAIRTOOLS?sort=3&page=1

The Inspired Procedures:
Sprayed out the Counter-Sunk Engine Block Bolt Hole with CRC Brake Cleaner (Size= .044")
Applied a few healthy drops of Mobil1 5w30 as Drill Lube
Found the 'Rough Center' of Pristine Broken Off Head Bolt & Center-Punched it HARD!
*Inserted H-F 1/4" Drive 'Hex Bit Adapter' to Center the Drill Bit,Lightly Hammered in Head!
Loaded 13/64" Black & Decker Drill Bit into Hand Drill, leveled straight & Drilled SLOWLY!
Frequent Clean-outs with Tiny Magnet & Brake Cleaner, then Re-Oiled after cleaning out Sprue from Drill Bit. Drilled in 30 Sec Increments until deep enough to insert K&M Easy-Out. This took 2 Tries. At 1/2"-9/16" Depth, Easy Out Held with "Fancy Tap Holder" A FANTASTIC TOOL TO USE!
In less that 1/2 Turn... The Broken Bolt Yielded and Unscrewed out of the Block with EASE!
 

mrrsm

Original poster
Lifetime VIP Donor
Supporting Donor
Member
Oct 22, 2015
8,192
Tampa Bay Area
Okay... "Same 'Drill'... Different Day..."

And ...following yesterday's identical format...we have these latest developments:

The Highlights:

Success! The Other Two Bolts Extracted with Ease... using some Basic Tools. Same procedures followed today... with TOTAL success in the extracting the Two Remaining Broken Bolt Shanks.The Most Difficult Bolt Shank Drilled out at Dead Center and I was very Relieved!

(THREE Down.... NONE To Go... Only the One Bolt Hole Requires a Time-Cert Repair!)

The Tools:
Added a 3/16th" Hitachi Drill Bit
...Everything else = Same as Prior Post

Photos:
See Attached...

The Inspired Procedures:
Same as Yesterday.... But even MORE CAREFULLY APPLIED!!

@webdawg ... I want to try out those "No Flux" Aluminum Rods on this very thick Aluminum Pump Housing Adapter Plate... because it seems MASSIVE ENOUGH to act like the Atlas Waste Foam Engine Block, if not MORE so. Also... I can emulate the shape of the damage by using the very same tools to create the conditions exactly as they are in the Engine Block. If nothing else... we'll know conclusively whether it would have worked or not... And I will add another notch to my Mechanic's Skill Set Handle if I can pull it off! The last thing is..when all of this is said and done... there will be no questions about What to do... What not to do not covered...and how to handle practically every reasonable FUBAR contingency from now on! This part of the project will have to wait for the other critical stuff to be done first.

Oh...and of course... I'll be BROKE!

Although having seen the buggered up hole with the Broken Head Bolt Shank removed... I really think that with a little dollop of the JB-Weld pressed in what little of the hole will be left just before the Time-Sert Fitting is screwed down and the lat few threads lock in place... the remaining small portion of the hole will be filled in and solidify properly. It is important to realize from that moment on...The relationship will be a fully enclosed Steel head Bolt UNIFORMLY HELD IN PLACE BY THE FULLY THREADED STEEL CYLINDER. This will be as strong if not STRONGER when I get the job done. You can see from the Post Broken Bolt Shank Removal images that the TIme-Sert will absolutely necessary here.
 

mrrsm

Original poster
Lifetime VIP Donor
Supporting Donor
Member
Oct 22, 2015
8,192
Tampa Bay Area
Ordinarily... I would only post once per day due the large size of most contributions... but I think I can afford to be less parsimonious tonight because... The Time-Sert Kit just arrived and I wanted to post some images of what I just paid $275.00 for. The attached images will bear out the idea that This Kit contains Serious Tools...for Serious Mechanics trying to solve a Serious Problem that the Run-Of-The-Mill Tools and Hardware we might choose over this target specific mechanical apparatus are simply inadequate and in this case... non-existent!

My sense of confidence that I will be able to completely rectify a problem of my own making as well as performing a "Very Rare Repair" on a GM Atlas 4.2L Engine that may prove invaluable to other GMT Nation Members down the road... is improving.

It has been said that there is a Plaque Over the Chained Gateway that leads down into Hell that reads something like this:

"Abandon Ye All Hope...Who Enter Here..."

This Specialty Kit from Wurth-Time-Sert... is my Last, Best Hope of climbing away from the precipice of coming so close to ruining an otherwise reparable engine... By My Own Hand. I will need some time to practice learning how this complex hardware functions because I am only going to get One Chance to do this repair...Right. To that end... I have a large, one inch thick piece of extruded Aluminum that I will work on to get familiar with how these tools cut and drill and clear the metal when being worked. This will be my next task before attempting the work on the actual Engine Block.

http://s557.photobucket.com/user/60...INEREPAIR/TRAILBLAZEREPAIRTOOLS?sort=3&page=1
 

mrrsm

Original poster
Lifetime VIP Donor
Supporting Donor
Member
Oct 22, 2015
8,192
Tampa Bay Area
I was looking over the Wurth-Time-Sert laminated Instruction Sheets and it occurred to me that much of the measurement complexity has to do with the startling idea that this tool set assumes there ARE NO BOLT SHANKS BROKEN OFF INSIDE THE ENGINE BLOCK...BECAUSE THE KIT IS DESIGNED WITH THE TOOLS MADE TO A MUCH GREATER LENGTH IN ORDER TO BE ABLE TO REACH THE WORK UNDER CONDITIONS WHERE THE RIPPED OUT THREADED HOLES ARE VERY DEEPLY RECESSED INSIDE THE ENGINE BLOCK.

This is certainly not the case here. As you can see from the prior provided images shown of these locations on the GM Atlas 4.2L block, the recessed relief above the start of the threaded portion begins at less than 3/4" from the flat surface of the Aluminum Engine Block. Once the sturdy, heavy anodized Aluminum Alignment Plate has been set and bolted down correctly, it should only be a matter of answering the following Critical Questions before attempting to use these tools and New Time-Sert Insert:

(1) What is the Thickness Measurement of the Anodized Aluminum Alignment Plate?
(2) What is the Depth of Measurement from the Flat Surface of the Bare Engine Block to the Start of the First Head Bolt Hole Thread Line?
(3) What is the Depth of Measurement from the Flat Surface of the Bare Engine Block to the VERY BOTTOM of the Blind Head Bolt Holes?
(4) What is the Length of the Wurth-Time-Sert Steel INSERT?
(5) What is the Length of the Lower, Smaller Head Bolt Thread Removal portion of the Two Stage Drill?
(6) What is the Measurement Length from the End of the Two-Stage Drill to the bottom for the Drill-Stop Collar to prevent over drilling?
(7) What is the Measurement length from the Very Bottom of the Head Bolt Holes at the Blind to the Start of the First Thread line below the Recessed Area of the Bolt Hole.


Now... You might imagine that many of these measurements could easily be determined by simply taking a Brand New Head Bolt and measuring IT. But the problem there is... those lengths are only relevant to the dimensions of the ENGINE HEAD itself... and the only part that interfaces the Engine Block...occur at the point where the M11 X 2.00 Threads start down and mate with the recessed threaded holes in the Engine Block.

I've been thinking about constructing what could be called a "Testbed Clamshell Cutaway Model" to familiarize myself and practice on with these tools. I will be using sections of 2- 2" X 4" X 8" made out of Hard Pine and then screwed tightly together like a Clamshell at the top, center and bottom outer edges and then secured in an inverted "T" like fashion to a section of 2"X 6" X 6" to act as a Sturdy Stand.

Then... Using all the necessary Time-Sert Tools from the Kit... transfer the obtained measurements to the Wood Model and then drill or bore down inside at the Dead Center Line between their two sides. Subsequently... The Clamshell Halves will be separated and examined to determine whether or not the "Measured Paper Dimensions" will produce the accurate, desired results when applied to the Aluminum Engine Block as there is NO MARGIN FOR ANY MORE MISTAKES!


One last Observation concerning the possible need to "Fill In" the Side-Glancing Hole evident in the images.... From the look of the size of the New Time-Sert Steel Insert...and the size of the Two Stage Drill... I feel pretty certain that there will not be very much left of it to fill, if at all , after the area is bored out and threaded for the introduction of the New Insert. This change in conditions will be very easy to examine immediately after the bored and threaded areas have been completed. If there is any remaining vacancy... I'll simply fill in the area with JB-Weld just before the final tightening of the Insert and be done with it! More than likely...if all goes well...this will be MOST secure fastening Point on the entire head after the Final TTY actions are done.
 

mrrsm

Original poster
Lifetime VIP Donor
Supporting Donor
Member
Oct 22, 2015
8,192
Tampa Bay Area
The Longer I work on this project... the more I realize how little the collective community in the GMT360 Arena knows about this engine internally... I suspect this because the Top End is so rarely repaired and consequently, it is a virtual "Undiscovered Country". This is also due to a combination of the limited experiences we have with taking the GM Atlas 4.2L Engine apart ...and the dearth of having any Complete Catalog of Imagery to edify us... without all of us actually having to tear down our own engines to get to the bottom of it!

Today for example... I answered (A) Two Questions... And solved...(B) A Mystery!

It has been unseasonably Windy and Cold down here in Florida over the last few days (...well ...cold for us Florida Weather P***ys...anyway...) and my concern over having any Pin Ok leaves, dirt and debris winding up being stuffed into every Open Coolant Passage and Bolt Hole in the Engine like a Gerbil that fell into a Big Bag of Kitty Chow prompted me to put on my "Bobby McGyver" Hat. After a few minutes to consider the problem, I came up with and alternative idea ... so I can get away from using Saran Wrap over and over, every time I want to work on the engine like I'm raiding the Refrigerator for Leftovers!

This is what I came up with:

Gently Remove the Old MLS Stainless Steel Head Gasket. (H-F Plastic Gasket Scraper!)
Use a Bosch (or equivalent) Vibrating Half-Moon Hacksaw & remove TC Gasket Tangs.
Clean the MLS Gasket Top & Bottom with Brake Cleaner
Use Duct Tape Down the sides & Bolt Holes with small DT Squares
Leave the Cylinders Open for Preliminary Cleaning & Carbon Evacuation
Use an Xzacto Knife or Razor Blade and cut out the two Alignment Pin Holes
Re-Install the gasket (Sticky Tape Side DOWN) and Saran Wrap the TC area.
All the Cylinders can be covered later with a length of cardboard and more Ductape.

Solutions to Problems:

(1) Quickly R&R HG for cleaning and protection at various times as needed.
(2) Minimizes Places for Aluminum Head Drilling Sprue to Contaminate and Lodge.

Mystery Solved!
(@webdawg will get a kick out of THIS!)

Question: How thick are the Engine Block Walls adjacent the Bolt Holes between Cylinders?

Answer: PULL THE HEAD GASKET AND EYE BALL THE SPACE!

The Steel Cylinder Inserts in the GM Atlas 4.2L Engine are 1.5 MM in thickness. Based upon this certainty... you can gauge the adjacent thickness of the Engine Block near the Damaged Bolt Hole to be around 5-7 MM thick... considering the angle the head was accidentally drilled out at.

And for @Mooseman ... The fact that the Waste Foam Aluminum Casting surrounding the Six Cylinders is actually THINNER than the Cylinders themselves gives me even MORE confidence that the Steel I/O Dual Threaded Time-Cert Cylinder will do just as well in this similar setting... strengthened by the presence of a New Head Bolt to push everything together. Here is hoping....


Man... The things you can find out... when you take things apart! LOL

http://s557.photobucket.com/user/60...INEREPAIR/TRAILBLAZEREPAIRTOOLS?sort=3&page=1
 
  • Like
Reactions: Mooseman

mrrsm

Original poster
Lifetime VIP Donor
Supporting Donor
Member
Oct 22, 2015
8,192
Tampa Bay Area
Man that kit is expensive, I wonder how much the refills are?
$30.00 for 12... The reason they charge so damned much is because if you own a Stealership... this Tool Set will let you "Hit Your Money-Maker" and Bang that "Cha-Ching Machine" all day long! That one guy on Youtube with the Instructional Video says he does "...over a Dozen of these repairs a month" on Toyota Camrys (with their SPECIFIC Time-Sert Kit of course). So... If he charges $350 a pop... Well... you get the idea. Besides that ...these tools are made of Very High Grade Norwegian Steel and very well made for this purpose. I intend to PROVE this very soon.

Can you imagine how many disabled High Performance Cars there are out there with Stripped Aluminum Engine Head Bolts ...that would BEG to pay somebody $350.00 to save their engines? What would a "Stealership" charge?... Hmmm ...I just wonder.
 

xavierny25

Member
Mar 16, 2014
6,369
Staten Island, N.Y
The Longer I work on this project... the more I realize how little the collective community in the GMT360 arena knows about this engine internally...

Not that I've read your thread entirely but I'm sure alot of us just want to maintain our trucks and keep them running as best we can. With out having to tear it apart and go through what you are experiencing. I've got close to 140k on my 08 envoy hoping to get another 5yrs or 60-80k if this happens I'll be more then happy. I don't baby my voy but I do keep up with it as much as possible.

Your thread along with all its unvalueble info is great and I'd never take anything away from it. And hell I'm sure it would help alot of guys who want to keep the tb/voy's when and if they need to do something like your doing.

Unfortunately not alot of us have the time,space or place to do something this in depth. Added the need to have another vehicle to run around and do our day to day things.

I just want to add that I'm not looking forward to having my engine go but when it does and I can't get a decent replacement the voy is done and gone and I'm on to the next one.
 

xavierny25

Member
Mar 16, 2014
6,369
Staten Island, N.Y
BTW I hope you have the guard for that Bosch grinder. With that wood metal blade you have on there it's a very dangers tool. All it takes is a little jerk for that thing be doing something it's not intended for. Safety first!!!
 
  • Like
Reactions: Mooseman and mrrsm

mrrsm

Original poster
Lifetime VIP Donor
Supporting Donor
Member
Oct 22, 2015
8,192
Tampa Bay Area
@xavierny25 Well Xav... Please don't take my comment(s) out of their intended context... I prepped with that very highlight... on purpose... to make the point I am just like everyone else here... Another Pilgrim seeking The Promised Land of Automotive Understanding. My lead in comments were intended to emphasizes the fact that I have been staring at this GD engine for almost two years now...and not once in all that time... have I EVER HEARD or READ any comments or SEEN any pictures of the GM Atlas 4.2L Engine Block... with the Head Gasket Removed... until I did it and photographed it... TODAY!

'GMT360 Arena'... is NOT Synonymous with 'GMT Nation'...!

By the way... The Bosch Tool is an OSCILLATING, VIBRATING Device... NOT a Rotational one... You will NEVER see me working a High Speed Cutting Device that SPINS...without Proper Protection for the Hands, Ears, and Eyes... and just as important:... a Properly Oriented and Tightened Blade or Disc GUARD.

I've been turning wrenches for over Half a Century...and I've NEVER seen the like of this Animal ...before or since... So there is certainly NO CRITICISM implied in mentioning how Odd and Arcane this Atlas Engine really is. The fact that so few people have much real hands-on experience with this engine speaks volumes against its Designers and bears no ill will whatsoever towards the GMT360 owners, especially the Members of GMT Nation who are My BROTHERS IN ARMS!

However... Most of us simply cannot deal with the expensive tools and parts and God-awful complications and all the time this requires to accomplish the job. Only a retiree like myself who arguably has the luxury of using the available time to chop and chip away at this tree-trunk thick of a problem... sometimes for only an hour at time... sometimes all day... day after day until I can finally turn the key in the ignition and hear the engine start up that WE worked on together.

But your post is important because it speaks to all of us here at GMT Nation and reminds us that when we figure out ways to work on such difficult projects together on these rare occasions and consolidate our efforts to work on one or more vehicles with the same problems...AS A GROUP PROJECT....who knows just how fast and economically things could get done? It IS possible to Eat This GM 4.2L Elephant... One Bite at a Time.... But the Shared Meal will progress MUCH quicker with more Mouths to Feed at the Carcass!

Like... A Short Term Rental a Storage Space to work on vehicles in ...Together...sharing the expenses and the labor.... Yeah... Now THAT is what I'm talking about!

When you think about the ACTUAL work involved here... it is really no different than any other Engine Repair Project...as long as members of the GMT360 Team doing the work are Knowledgeable, Efficient and have ALL THE SPECIALTY TOOLS and agree to be on time to meet at the place that allows them ALL to Bang Out The Work and Help Each Other's Vehicles with the sound understanding that:

"One Hand Washes The Other, Brother!"


I realize that sometimes ... Time and Great Distances separate those with the most common interests at any given moment... But there are many Clever Men here.. (and Women... Although fairly soft and unfortunately... silent... for the most part) ...and with just a little coaxing...and the ability and the desire to "Learn and Turn a Wrench or Two"...This ridiculously complicated job... that can even be done by a broken down old man like ME... should be a cakewalk for the younger, more physically capable GMT-Nation Mechanics in your area.

I want you to think about this... I was unable to walk for almost a year after my back operation... and yet ...way up there... in the Great White North is a man (A Brother, whom I have never met before)... who coaxed me to get up...get back on my own two feet...and get going...and so I did...and Here We Are... in spite of all the unexpected problems and expenses and difficulties and set-backs... Here We Are...Eating an Elephant... One Bite at a Time...Thanks to @Mooseman ... For reminding me almost daily to keep my CBS! attitude...and fix the Broken Trailblazer!

That stands for... Can't Be Stopped!

PS... Check with "Ben" over at www.60degreev6.com (SappySE107) for the information on "How to De-Carbonize Your Engine". If you look at the Post-Teardown Images I gathered last week...you will not believe how much carbon builds up over time and clogs the upper cylinder head of this I6 Engine...its Outrageous how much Harm and Weird Performance this will cause! Everything from changes in Compression Quench ...to Pre-Ignition from glowing Carbon Embers stuck up inside of the Combustion Chambers! I am only just beginning to REALLY understand why this engine failed ...and I'll cover this topic in more detail in the near future. All the Project Photos are parked here:

http://s557.photobucket.com/user/60...INEREPAIR/TRAILBLAZEREPAIRTOOLS?sort=3&page=1
 
  • Like
Reactions: xavierny25

Mooseman

Moderator
Dec 4, 2011
25,996
Ottawa, ON
@MRRSM , thank you for your kind words but this is all your doing. You just started with your first post and I just helped along with info and the encouragement considering all you have and still having to deal with. My petty little aches and pains are nothing. You are an Inspiration to us all sir.

Perseverance is the key to victory.
 

mrrsm

Original poster
Lifetime VIP Donor
Supporting Donor
Member
Oct 22, 2015
8,192
Tampa Bay Area
Yesterday.... we reached a Project Threshold point that placed things on a "Balance Beam of Uncertainty " as to whether the progress with the repairs would continue apace... or come to screeching halt... because your OP very badly damaged an area of the Engine Block involving Three (3) Head Bolt Holes and Broken Bolt Studs that required extrication.

Today ... it is my absolute pleasure to make this report of success...

....With ABSOLUTE "SERT" ANTY.... !

Nearly All the Way IN...
TIMESERTSULOTION28.jpg


Finally... ALL THE WAY DOWN AND... IN SOLID AND TIGHT!
TIMESERTSULOTION4.jpg


http://s557.photobucket.com/user/60...INEREPAIR/TRAILBLAZEREPAIRTOOLS?sort=3&page=1

The Time-Sert Insert Thread Repair Kit Worked like Mechanical Magic!. Unfortunately, there were a few circumstances that threw up some barriers to completing this job in a reasonable length of time... But I was able to overcome these problems during the day. The first bit of luck happened with my having an unusual and inexpensive Sub-Tool for this very job right at hand! I anticipated needing this item a few weeks back and obtained it from eBay as an impulse purchase.

I had to resort to using it instead because the Large OEM Time-Sert Black Anodized Bolt Adapter Plate was TOO Large to allow for at LEAST two points of alignment on the Engine Block for the Fasteners to just bolt right up and fix the alignment plate for the duration of the complicated machining to follow.

That Swap-Out moved the work ahead after that... until I realized that the very same plates required a Shorter Set of M11 X 2.00 Specialty Bolts to work right on the GMT . Because the kit was supplied with only two sets of longer and not-as-long bolts meant for use on a much larger engine. And so I dusted off my "Bobby McGyver" Thinking Cap... and...remembering that I NEVER throw away anything made out of METAL because I never know when an item that looks like a "Bauble or Bangle" one day... must of needs, occasionally be re-purposed to solve a problem.

That is the case here... in this strange bit of luck at having kept a Giant of a Roll Pin I burned out of the center of a pair of Old Motor Mounts God knows when or why... from a set of 1993 Chevrolet Camaro Z-28 LT-1 350 Rubber Engine Mounts. I measured the length of the Roll Pin at 48 MM and after mounting it in my Ancient Huge Vice... I cut it in half with H-F 7" Cutoff Tool. After it cooled down.... I just dressed up the four facing ends relatively flat with a Bastard Metal Hand File and then radius smoothed the razor-sharp edges so I would neither get cut while handling them, nor damage the Kent-Moore $30 Adapter Plate by virtue of their hazardous sharp edges.This choice proved out to be the PERFECT stand-in solutions in lieu of having the proper length shorter Bolts.

Other than maxing out on draining Four Cans of CRC Brake Cleaner and Four Cans Staples CRC Compressed "Air in a Can" while alternating the tasks in an endless but necessary procession of short cycles of Drilling and Clean-Outs and later following the same pattern of the Tapping and Clean-Outs procedures...I was also observing that the Two-Stage Drill was removing almost all of the main damage I created by angling the Reverse Drill Bit incorrectly into the side wall adjacent the Bolt Hole. When it came time to screw and lock the Time-Sert Insert in place... I filled the small concavity that was the last vestige of the problem with 500 Degree F Special Locktite Thread Locker and after covering the external threads and using the Special Insert Oil to lubricate the Insert Placement Tool... The repair was completed and no further problems will develop now that the Steel on Steel Fastener has been safely and properly installed. Using the Time-Sert Kit was absolutely necessary to make the engine block ready to accept the New Engine Head!

"Slowly, Slowly... Catchee Monkee!"

One last thing worth mentioning here is that the Time-Sert Kit contained two items not listed on the Laminated Kit Manifest... A Large Nut...and Locking Drill Collar Ring. After taking the risk of buying this expensive kit and then sweating every last detail while using it to rescue the Aluminum Engine Block... I suspect that the Large Nut was the Original Owners LEFT ONE... after he said to himself, "Why..."I'd give my Left.... To get this Engine Block FIXED!" The Collar Ring was probably something his Wife gave him... and put it through his nose with the idea that if he did NOT get the TB FIXED.... there was going to be HELL to PAY! LOL

As far as the FUBARed Bolt Hole is concerned...This "CASE" is now... CLOSED!


http://s557.photobucket.com/user/60...INEREPAIR/TRAILBLAZEREPAIRTOOLS?sort=3&page=1
 
  • Like
Reactions: Texan and Mooseman

Mooseman

Moderator
Dec 4, 2011
25,996
Ottawa, ON
:woohoo:

Don't you just love that feeling? Last time I had it was when I finished the timing chain and started her up. I had a feeling that the damage would be taken care of by the insert.
 
  • Like
Reactions: mrrsm

mrrsm

Original poster
Lifetime VIP Donor
Supporting Donor
Member
Oct 22, 2015
8,192
Tampa Bay Area
:woohoo:

Don't you just love that feeling? Last time I had it was when I finished the timing chain and started her up. I had a feeling that the damage would be taken care of by the insert.

@Mooseman Yessir...BUDDY!... You have an absolute understanding of just how RELIEVED I feel at this Very Moment... Its funny that you would use the exact expression that I was thinking as soon as the Insert drove home and locked in place..... Right out of the Movie... "KILL BILL".

Chalk One UP for The GMT Nation Team...!!!

This was one of the most Edge of Your Seat, Nail-Biting, Cliff Hangers and Difficult Problems to Solve that I have EVER had to do as a Mechanic in my life!

Once you start seeing the Aluminum Sprue and small, silvery chips flying out of that FUBARed Engine Block Location... You JUST KNOW...THAT THERE IS NOOOOO GOING BACK!

https://duckduckgo.com/?q=youtube+kill+bill+woohooo+song&t=ffhp&ia=videos&iai=aR6qvkDDBCg
 
  • Like
Reactions: Mooseman

mrrsm

Original poster
Lifetime VIP Donor
Supporting Donor
Member
Oct 22, 2015
8,192
Tampa Bay Area
Okay...Today had to be a "Light Duty" sort of day as yesterday.... I was so focused on the "FUBARed Head Bolt" debacle... I overdid it and now...I need to prop up my Captain Ahab Leg and take it easy... I can do that now and not feel too guilty...because I actually had a pretty damned good productive morning!

Last week .... For the "Head Guide Pin" portion I've been planning to do, I'd ordered two sets (4 Pieces Per Set) of 9.75MM and 10.35 mm Brass Rods that when checked for fit and function... all were way too "FAT" and would not pass through the threaded portions of the upper Engine Block Bolt Holes. But this morning I was ruminating on the matter and my mind was as unsettled as an Intoxicated Organ Grinder...and then... A Moment of Clarity ...and I realized that there should NEVER be any Guide Pins passing into ANY Threaded Bolt Holes ....EVER!

Whenever I ponder any problem that requires me to re-engineer things to work better... I generally lean towards "Over-Engineered Strength and Reliability". And the reason for this is that if I encounter something that is as chronically annoying as a Rock in my Shoe... then I want to come up with something as a FIX that will never make me have to think about the damned thing EVER again!. Here is an example ....And its one that right up to this very moment...has exceeded even my standards for a really nice working solution:

http://gmtnation.net/forums/threads/keep-your-drawers-on.14452/#post-471393

But in the case of this "Guide Pin" problem...I realized that what was called for was something that will (A) Only be used ONCE and for a VERY SHORT LENGTH OF TIME and...(B) Must actually be made out of a material that is NOT TOO STRONG or that might cause damage to the Threaded Bolt Holes in the Engine Block. (Trust me... after yesterday... when this project is in the can... I am not going to want to even LOOK at a Threaded Bolt... for a very long time). Well...I just HAD to come up with something else that would work!

And so for the solution... I decided that I would try to use a bit of scrap HVAC Gauge Liquid Line Copper Tubing that I still had from when I completely re-built the HVAC system in my house from scratch about five years ago (THAT experience is a worthwhile topic to cover later). The tubing is fairly thick-walled and yet, still malleable enough to bend and give if push came to shove and it had to be yanked out of the block before jamming up and doing any harm. The other aspect was that Copper... in any form ... is easy to "Hammer Adjust" to do different things on the opposite ends of the same pieces of pipe.

I measured the tubes to a cut-off length of 200 MM each, and after looking over the Engine Head and the Engine Block... I realized that I really only needed TWO Guide Pins... and those would work best if threaded down inside the Gasket Guide/Head Alignment Elevated Tubes jutting up from the Driver's Side of the Engine Block. I flared the ends of the Copper Tubing that will enter and pass all the way down to prevent the Copper Pipe ends from working their way down inside the Head Bolts Holes and scraping along the threads inside the Engine Block.

This left enough length for the Copper Guide Tubes to 'STAND ON THEIR OWN TWO FEET' and still be loose enough on their way down not to get jammed up or misaligned with any other bolt holes. I wrapped the "probing ends" with Blue Painter's Tape as a Visual Queues and tested how they acted once set into place inside the two short S/S Gasket Alignment Guides sticking up out of the Block. I marked the opposite ends 20 MM from edges of the pipes and after center-punching both with a spring-loaded scribe... I drilled them through and through with a small caliber bit and then hammered in two Spring Steel Roll Pins to prevent them from falling all the way through Engine Head before getting close to mating up with the top of the block.

I used a small Ball Peen Hammer to flatten the ends of the Tubing to provide me with a "Finger Purchase" that will be easy to recognize blind and twist around if I have to slightly adjust the TWO positions of both Guide Tubes just before the "Head Hits The Block". And so I like this way of doing the job much better that with FOUR Brass Rods. And now I am tired and I really think that this solution is just about as clever as I am allowed to get in a single day without being insufferable! :>).

This Video is a "One Over The World" composite view of why this wonderful Power-Plant is also Soooo Very Easy to HATE:


And so...Here are the Design and Test Images:

Tomorrow .. .I will be concentrating on "Engine Prep" and figuring out how to Clean all of the Mating Surfaces of the Engine in Chemically Neutral, non-abrasive manner:
 
  • Like
Reactions: Mooseman

mrrsm

Original poster
Lifetime VIP Donor
Supporting Donor
Member
Oct 22, 2015
8,192
Tampa Bay Area
It has been a pretty gloomy day around here... in more ways than the gray, overcast skies would imply... and since Today's Topic was meant to cover some of the important aspects involved in Cleaning and Prepping the GM Atlas 4.2L Engine and since I won't be able to do so in bad weather... I'll just work on the TB a bit with a scrub down using a Soft Brush, Water and Maguire's Car Wash.

With the TB Motor now rescued from an Engine Bone-Yard Visit courtesy the use of a Tiny, Time-Cert Thread Repair Insert... It seems fitting that for the very first time... I should show everyone where this engine has lived ever since it was installed back in 2002 at the GM Factory. Who would ever think that such a Pale, Demure Lady... could hide such an Awful Viper in her Bosom... the Dreaded.... Broken Atlas Engine:

(Edited for TAG Data... Naturally... For Privacy Issues...of Course)
View attachment 75170

She just had her hair washed...and can't do a THING with it!

View attachment 75169

View attachment 75171

These New Tires and Brakes...(NOW Very Badly Rusted Brakes) have not turned one single rotation in over 2 Years...

View attachment 75167

These New Tires and Brakes...(NOW Very Badly Rusted Brakes) have not turned one single rotation in over 2 Years...

View attachment 75168


This 4 Large Can Package of Compressed Air is an absolute necessity for cleaning out the Engine Block Bolt Holes during the Thread Chasing Pre-Assembly cleaning of the Engine Fastening Points... as THIS LEVEL OF CLEANLINESS WILL BE NEEDED TO PREVENT BREAKING OFF NEW HEAD BOLTS. Among the other procedures to be conducted... without thoroughly evacuating each thread-line of Dirt, Old OEM Thread-Locker, Rust, Steel Bolt Micro-Fragments and Trace Aluminum left from the block shedding this material... there will be a better than even chance that you will snap off the NEW fasteners "on their way in" as easily as the OLD fasteners snapped off "on their way out".

To that end, having Face and Eye Protection when working with powerful Chemical Spray Solvents being induced into each bolt hole and then ejected under High Pressure at close proximity, will be the wise way to guard against injury from the chemicals and sharp small metal particles, dirt and debris bing driven into the eyes and skin. Using the Canned AIr will be much easier and much more efficient than having to drag a filthy Compressed Air Line all over an Open Engine Top risking contamination with sand and dirt clinging to everything.

Besides having more control...the extra long and slender Plastic nozzle line will reach deep enough down inside each of the bolt holes and ensure a complete evacuation of the detritus within. Lastly...for only $10.00 for the Four Large Can Set via Amazon... kit will be a very economical investment and relieve the headache of having to wait for a ridiculously loud and distracting air compressor to run again and again to build up enough pressure to keep up with the demand. I have also been in the unenviable position of having Air Compressors break and cease to work right when I needed it the most:


View attachment 75178
 

Forum Statistics

Threads
23,664
Posts
641,768
Members
19,092
Latest member
jarmwire

Members Online