Electrical help needed

Adjustso3

Original poster
Member
Dec 10, 2017
112
Buffalo, NewYork
Hello everyone. I decided to give my 03 TB another try and see if I could figure out what’s going on with the electrical problems. Way back in the beginning of this post I listed that the power seats, heated seats, rear wiper, rear defog, and key fobs would not work. I did replace the lift gate module which made no difference so I left the original in the lift gate. I once again checked all the fuses in the rear fuse box and all ohmed out fine. I then checked the wires in the boot between the body and lift gate. There are 3 orange wires which I read should have 12 volts. There is a connector in the lift gate just outside of the rubber boot. These 3 orange wires are on the same side of the connector. The smallest gauge orange wire did not show any voltage. I even pierced the wire as far as I could on the other side of the boot where the wires come from and it still showed no voltage. I just wanted to see for shits and giggles if I ran a jumper wire from one of the orange wires that had 12 volts to the smaller orange wire that is supposed to have 12 volts. When I jumped the 12 volts, my seats work along with the key fob. I assume everything else would work now. I disconnected the jumper wire because I didn’t want to make a permanent connection before checking with you guys. A couple observations is when I connected the jumper wire, I heard a click from somewhere inside the interior. Another thing is now my interior lights will not turn off unless I press the round override button on the dash. What do you guys think ? Should I just jump 12 volts to that small orange wire with or without an inline fuse or is there a way to fix why that wire doesn’t have 12 volts ? Any ideas why the interior lights won’t fade to off anymore ? As always, many thanks in advance.
 

Mooseman

Moderator
Dec 4, 2011
25,347
Ottawa, ON
You should check the wiring schematics and find out where the break is instead of just Jerry rigging it. You might be backfeeding stuff like the seats because it should be fed directly from the fuse box rather than such a small wire. There might be a common circuit that's dead that is supposed to feed them. Could be something with the fuse box.
 
  • Like
Reactions: Blckshdw

budwich

Member
Jun 16, 2013
2,050
kanata
you are likely going to find a "lot more wonderful things" IF you do the "blind jumper trick". :smile:
One of them will likely be a dead battery happening sooner than later.

As suggested, trace the circuits involved with one of the problems and then check the electrical conditions in your truck to see if they match those from the circuit diagram.
 

Adjustso3

Original poster
Member
Dec 10, 2017
112
Buffalo, NewYork
Thanks for the suggestions guys. To be completely honest I’m not sure where to start. For some reason the wiring diagrams here won’t download. I do have a multi meter and know how to use it along with a test light. Is there any way to narrow down the origin of the small orange wire ? I’m guessing it’s 20 or 22 gauge. I apologize in advance for the questions and appreciate everyone’s time.
 

Mooseman

Moderator
Dec 4, 2011
25,347
Ottawa, ON
For the manuals, did you read the first post? Use the name and password posted, not your GMTN login.
 

mrrsm

Lifetime VIP Donor
Supporting Donor
Member
Oct 22, 2015
7,737
Tampa Bay Area
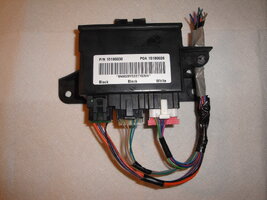
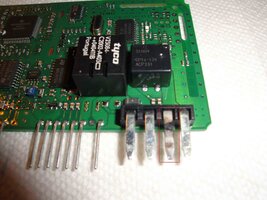
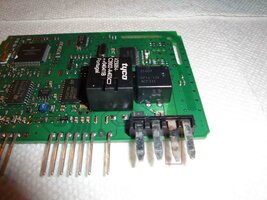
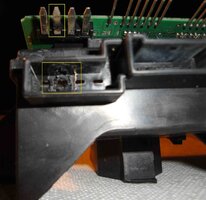
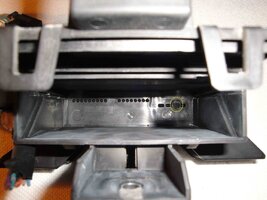
I'm keen on @budwich 's suggestion... and having some actual close-up images of the LGM AND the Wiring and Data-Bus schematic at hand as attached below should give you a better idea of where those bundled and confusing Broken Wires go...and what they do once they get there when connected to the Wiper Motor ...The Glass Door Latch and The Lift Gate Locking Mechanisms:

LGMWIRINGSCHEMATIC.jpgDSC01466.jpgDSC01473.jpg
 
Last edited:

Mooseman

Moderator
Dec 4, 2011
25,347
Ottawa, ON
As I suspected, you're backfeeding a bunch of stuff through that orange wire. Did you check for power coming from your mega fuse?
 

budwich

Member
Jun 16, 2013
2,050
kanata
thanks for the info, mrrsm. It shows the three oranges that are being currently "discussed". From that, it is likely that one can make their own "jumper" IF the splice point shown has been compromised. OF course, the key would be to choose the right orange wire to jump from.

However, I find that the schematic does NOT appear to agree with what was discussed... ie three orange wires going to plugs which terminate at the LGM... if I understand the "observations" post by the OP. The plugs show only 2 orange in the pictures. Anyways, perhaps I misunderstand and there is another plug going elsewhere that is not shown.

As far as the lights staying on, the likely cause of this is probably that either the state of the LGM is corrupt from playing with the wiring or there is a switch in the gate that is stuck in a state indicating the port is still open and hence the lights stay on.... which should be displayed in the dash.

As noted by mooseman, one needs to check what is going on in the wiper motor circuits to understand its electrical circuitry to ensure that there isn't something strange going on there.

Actually re-reading the "final observations" of the things that work with the jumper, the one about the seats working indicates as mooseman suggests that with the jumper to which ever wire you are connecting, that you are indeed back feeding into the rear fuse box somewhere since no seat controls are associated with the LGM. Hence, you have problems not associated with the LGM but with the rear fuse box and else where.
 
Last edited:
  • Like
Reactions: Mooseman

Adjustso3

Original poster
Member
Dec 10, 2017
112
Buffalo, NewYork
Hello again. Just to clarify the 3 orange wires. If I pull back the rubber boot for the lift gate and look at the section going into the liftgate, there is a connector with 3 orange wires, 1 black, 1 brown, and 1 light blue. There is no power to the small gauge orange wire. This is where I backfed a jumper wire from one larger gauge orange wire to the smallest orange wire that has no power. When I pulled out the other end of the rubber boot which leads to the (body) rear of the TB headliner, that small gauge orange wire still has no power so I don’t think it’s the common break in the wire. Maybe this will clear up any confusion. Way back, I was checking fuses in the rear fuse block and everything worked for 3 days.
 

Adjustso3

Original poster
Member
Dec 10, 2017
112
Buffalo, NewYork
Hello again. Just to clarify the 3 orange wires. If I pull back the rubber boot for the lift gate and look at the section going into the liftgate, there is a connector with 3 orange wires, 1 black, 1 brown, and 1 light blue. There is no power to the small gauge orange wire. This is where I backfed a jumper wire from one larger gauge orange wire to the smallest orange wire that has no power. When I pulled out the other end of the rubber boot which leads to the (body) rear of the TB headliner, that small gauge orange wire still has no power so I don’t think it’s the common break in the wire. The smallest gauge orange wire is not feeding the liftgate 12volts.
 

budwich

Member
Jun 16, 2013
2,050
kanata
ok... then, it would appear from this that you have an open port and the system is keeping the lights on for that. As to why your seat works... could be that the LGM was babbling before and causing issues on the data bus for certain components.... maybe.
 

mrrsm

Lifetime VIP Donor
Supporting Donor
Member
Oct 22, 2015
7,737
Tampa Bay Area
If you have not as yet obtained the Digital OEM GM Service Manual for your vehicle as previously addressed by @Mooseman 's Sig-Line...click on his link and follow his specific instructions to get in and get one:

https://gmtnation.com/forums/threads/need-service-manuals-get-them-here.361/

Next... since the rare schematic I found and posted here is for a 2008 flavor... the Third Orange Wire may or may not appear in the earlier modeled vehicles. I hope you do not have to go to the extreme of having to pull off the Inner Lift Gate Panel to access the LGM and all of the Electro-Mechanical Lock Works,,, but if you are NOT the OO of this SUV (Original Owner),,, God only knows what sort of electrical repairs may have been attempted by any predecessors. If you want to get a more intimate look at the LGM connectors.... have a look at the images I took of TWO different versions and once you know from the Schematic which one of the Three Connectors (C1, C2 & C3) service the rear Windshield Wiper Motor... then you can dope out what each of them do at any given time.

http://s557.photobucket.com/user/60...ERENGINEREPAIR/GMLIFTGATEMODULE?sort=2&page=1

It may well be that the reason you are not able to read power on both the Large and Small AGM Orange wires...is that it could be shorting out inside of the LGM. Everything MUST flow through IT before it goes on to the RWW to make it function. One last thing... the Serial Data-Bus Wires carry anywhere from 0 Volts to 7 Volts with varied Pulse Width Modulation courtesy The PCM -> BCM-> LGM for its communication path. Take your time with the LGM AND the Rear Windshield Wiper Motor Diagnostics pages...and those include reading how the TECH2 Diagnostic Tool is used to perform this step by step diagnosis on the provided Chart(s)... even if you do NOT possess a TECH2... studying the methodology GM uses may clue you in as to what to do next. RTFM...

,,,AND TAKE THAT CONNECTOR THE ORANGE WIRES MOVE THROUGH APART AND SEE IF ANY OF THE WIRE PINS -PLASTICS ARE MELTED AND SHORTING OUT INSIDE...
 
Last edited:

Adjustso3

Original poster
Member
Dec 10, 2017
112
Buffalo, NewYork
Thanks for all the reply’s. I believe there is still some confusion. Maybe it’s how I’m explaining the problem. When I saw there was no power to the small orange wire, I then jumped 12 volts from a llarger Orange wire to the small orange wire that had no voltage. With the jumper in place, everything worked as it should. I then removed the jumper and then with no voltage to the small orange wire noticed the interior lights not fading off. The schematic only shows two orange wires. One with a 30 amp fuse and one with.a 10 amp fuse. I don’t even see the connector in the schematic that houses the 6 wires leading to the liftgate. This connector is fine. There is no voltage to that small orange wire before the connector so I don’t think the problem is in the liftgate, but to wherever this small orange wire gets its feed from. I’m not the OO so I have no idea. I’ll take another look at the diagrams and hopefully can figure out where this small orange wire should be getting power from the rear fuse block. Thanks for everyone’s time. I really appreciate you guys.
 

mrrsm

Lifetime VIP Donor
Supporting Donor
Member
Oct 22, 2015
7,737
Tampa Bay Area
Why not take a break and watch a few videos covering the related Lift Gate Problem Areas for this ...and future repair points as needed to investigate once you sort out this Broken Orange Wire Issue.

If you watch the First Video closely,,, you should be able to see which Harness Connector to pull to RUN CONTINUITY CHECKS ON THE HARNESS WIRES TO AND FROM THE REAR WINDSHIELD WIPER MOTOR. ff you freeze frame the Second video... you should be able to see which Wire Colors are supposed to be coming through that LG Boot.

One more important thing worth mentioning is that just after those discreet C1, C2 & C3 Wire Connectors are fitted into the LGM... After they leave that point... they get divided into differentiated Wire Bundles that DO NOT MATCH what you can see right at those three separate connectors... but get blended and differentiated into three Different Wire Looms. This means that EACH Wire Loom MUST be Traced back to some ...or several ...or all three of the Shared Connector Origination Points.


  • Like
Reactions: cornchip

Adjustso3

Original poster
Member
Dec 10, 2017
112
Buffalo, NewYork
Thanks for the videos MRRSM. I may be confused but I don’t think the problem is in the liftgate itself. It appears to be loss of voltage that’s fed to that small orange wire coming from under the headliner. Unless you think that the small orange wire is split off of 12volts and is started in the liftgate. I’ll watch those videos and take a break. Thanks again
 

mrrsm

Lifetime VIP Donor
Supporting Donor
Member
Oct 22, 2015
7,737
Tampa Bay Area
The videos were just to break your concentration a minute and allow you to consider doing the following:

Check the Continuity of the Wiring Harness as Follows:

*** It is Important to remember that Solid Line Boxes on Electrical Diagrams mean that the ENTIRE component and circuitry are Contained within the Sold Line Space... Broken Line Boxes ---- indicate that the Circuit being viewed is only a PARTIAL view of a Much Larger System. These are indicated by the Names of those Circuits on the Schematic posted above that you will need to look at in your OEM Manual for more complete information.

(1) Use the Link to my Photobucket and DOWNLOAD ALL THE LGM COLOR WIRE TO CONNECTOR IMAGES.

(2) Identify ALL of the Wires By Color AT THE ELECTRICAL PLUG ON THE REAR WINDSHIELD WIPER CONNECTOR and Match them all up TO whichever C1, C2 & C3 attaches them all to the LGM.

(3) Then Trace All of those wires from the Rear Windshield washer Motor Connector back through the Wire Bundle...to ANY/ALL related LGM C1, C2 or C3 Connectors.

(4) Perform a Continuity Test on EACH Individual Wire inside that Bundle and look for any that FAIL the Test.

(5) If you do NOT find any Wire Breaks after performing the Continuity Test... then you will need to search further down the line for possible shorts, Burned Fuses or Broken Wires leading to the BCM.

(6) Refer to your various Chapters in your OEM GM Digital manual for the Complete Wiring Diagrams covering the wiring to and from the LGM.

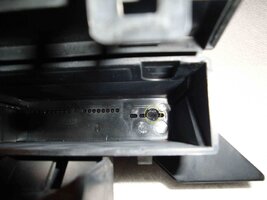
(7) Examine DEEP inside the LGM and of each and every Connector of the Harness C1, C2 & C3 for signs of any Burned-Melted Plastic and/or Burned or Scarred Blades indicating Internal Shorts to your Original LGM and do likewise at the Windshield Washer Motor Connector. Do this inspection to BOTH the Male AND the Female sides of the Connectors. THIS is what the hidden damage looks like:

DSC01451.jpgDSC01455.jpgDSC01456.jpgDSC01458.jpgDSC01460.jpgDSC01462.jpgDSC01459.jpg
 
Last edited:

Adjustso3

Original poster
Member
Dec 10, 2017
112
Buffalo, NewYork
Thanks for that detailed reply. I’m going to have to get my laptop back from my buddy. Using my phone for this isn’t going to work very well. Thanks again.
 

Adjustso3

Original poster
Member
Dec 10, 2017
112
Buffalo, NewYork
Hello again everyone. For once my stubbornness has worked in my favor. I just couldn’t get past why there wasn’t 12 volts on that small orange wire which I believed came from the rear fuse block and was fed to the top of the liftgates rubber boot. I started pulling fuses again and checking to see if any were blown. When I got to fuse #6 which is labeled LGM/DSM 10 amp, the fuse ohmed out fine. About 10 seconds after I installed fuse #6 my interior lights faded to off. Since they weren’t going off for some reason I pushed the power seat switch and it now moved ! So now all those electrical gremlins from the seats, heated seats, rear wiper, rear defog, and key fob now works. I bent the #6 fuse legs a little to see if the fuse socket may of been loose. Sure enough, I believe that’s all it was all this time. I can’t believe how hard it was to figure this out ! The socket had power and the fuse was good. So I moved on to the next fuse. Thank you to everyone who helped me with this. Now I can finally adjust the seat to where it’s comfortable. Next gremlin is the A/C which is in its own thread. Thanks again
 

Forum Statistics

Threads
23,332
Posts
638,005
Members
18,537
Latest member
moscoreli

Members Online