You are using an out of date browser. It may not display this or other websites correctly.
You should upgrade or use an alternative browser.
You should upgrade or use an alternative browser.
What did you do to your GMT today?
- Thread starter MAY03LT
- Start date
- Status
- Not open for further replies.

ShadowClutch
Member
- Joined
- Sep 5, 2012
- Posts
- 88
This was LONG overdue. I upgraded to Bilsteins. Once off, the OEM shocks (with 142k on them) could be pressed together easily with my barehands.

Will post the finished result once the front set are on, too.
I was amazed how easy the rears were. I didn't even have to remove the wheels. Just put the rear up on jack stands and supported the rear diff with the jack while I removed the top bolt, then the bottom. EASY. After taking it for a spin, WOW the smoothness in the rear is amazing. Not harsh one bit, it just rides very level and smooth. Can't wait to get the front on.
PS, a quick search yielded nothing, so if someone wouldn't mind shedding some insight, please do. The front set of bilsteins came with a bolt and nut combo, while the rears didn't. Since I haven't done the front yet, I'm not sure where this bolt/nut is needed...
The front is extremely different from the rear, it's a strut not just a shock. So you need a spring compressor to disassemble the strut to swap the shocks. The bottom of the shock has a machined groove that fits into the strut mount, then you use the nut and bolt to bolt it in place. Let me see if I posted the pics of me changing to Belltech Struts is on these forums.
http://gmtnation.com/f67/fr34kouts-08-envoy-denali-build-log-2809/ on post #25, don't know how to get it to go straight there lol
http://gmtnation.com/f67/fr34kouts-08-envoy-denali-build-log-2809/ on post #25, don't know how to get it to go straight there lol
ShadowClutch
Member
- Joined
- Sep 5, 2012
- Posts
- 88
fr34kout said:The front is extremely different from the rear, it's a strut not just a shock. So you need a spring compressor to disassemble the strut to swap the shocks. The bottom of the shock has a machined groove that fits into the strut mount, then you use the nut and bolt to bolt it in place. Let me see if I posted the pics of me changing to Belltech Struts is on these forums.
Yep. I've been using every resource I have to figure out how to do this right the first time. Going to try to rent the spring compressor tomorrow. I'm guessing the base of the front shock is larger in diameter than the OEM shock, so the bolt needs to be longer. Is this correct?
Thanks for the link. Cool build.
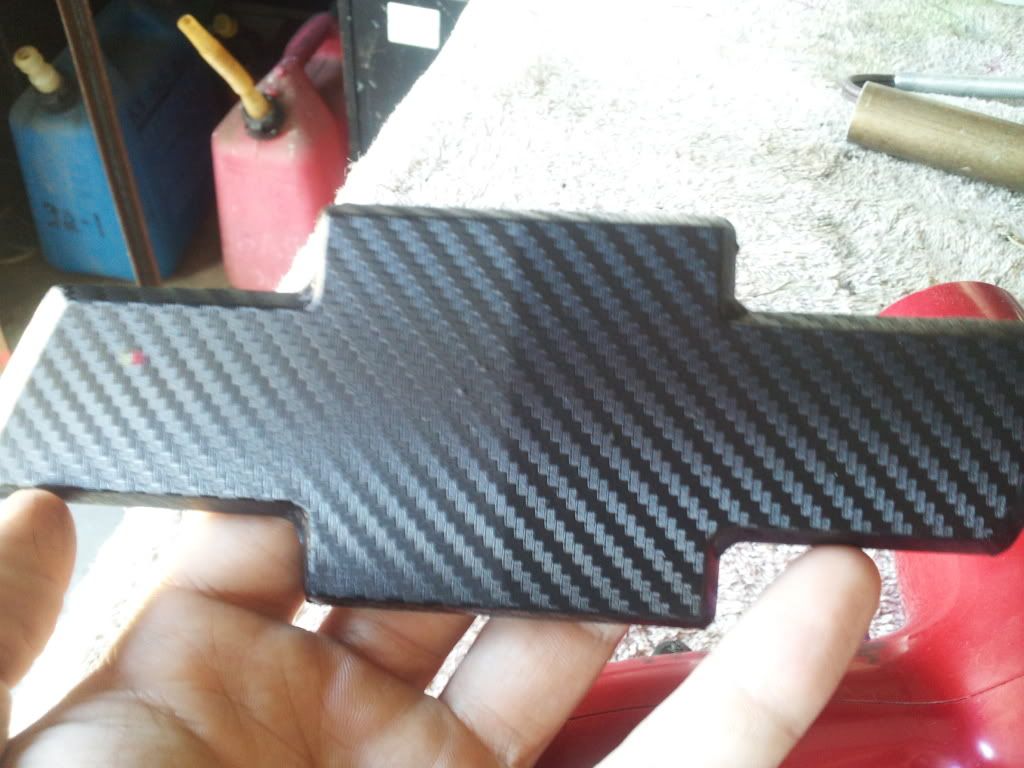
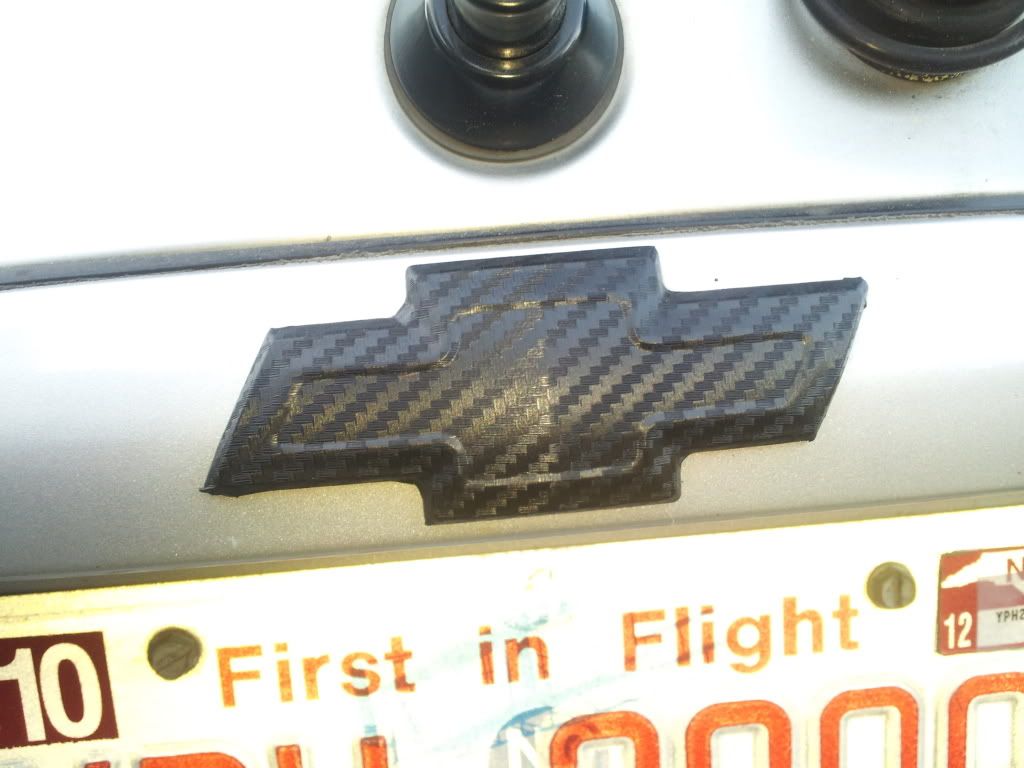
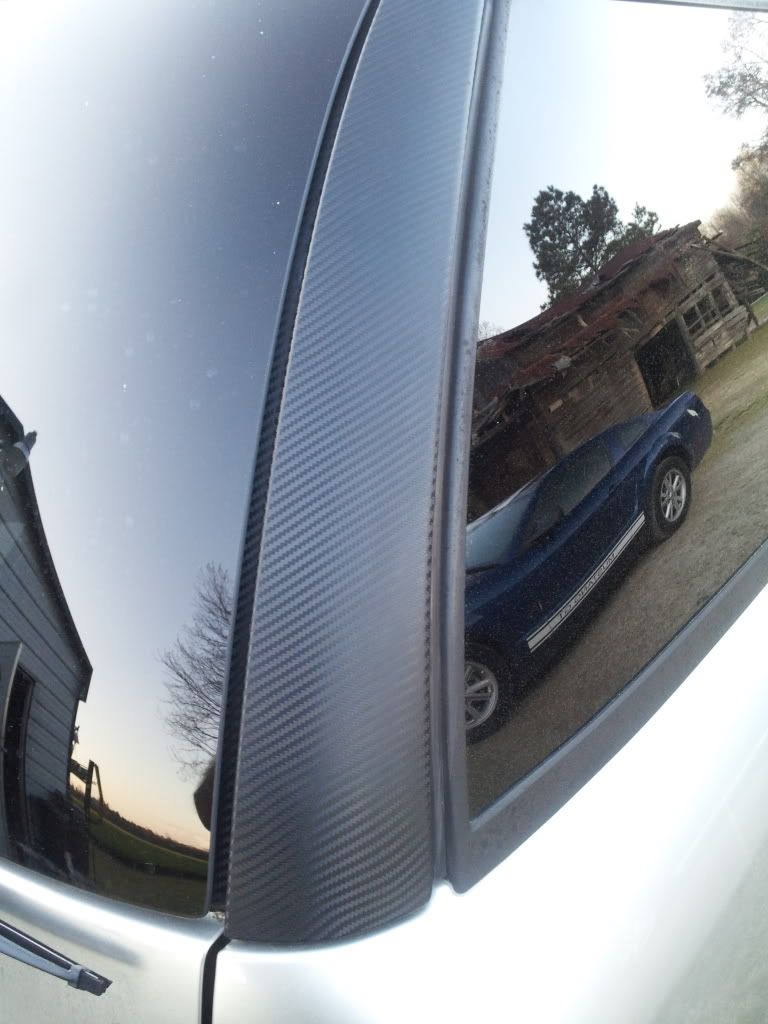
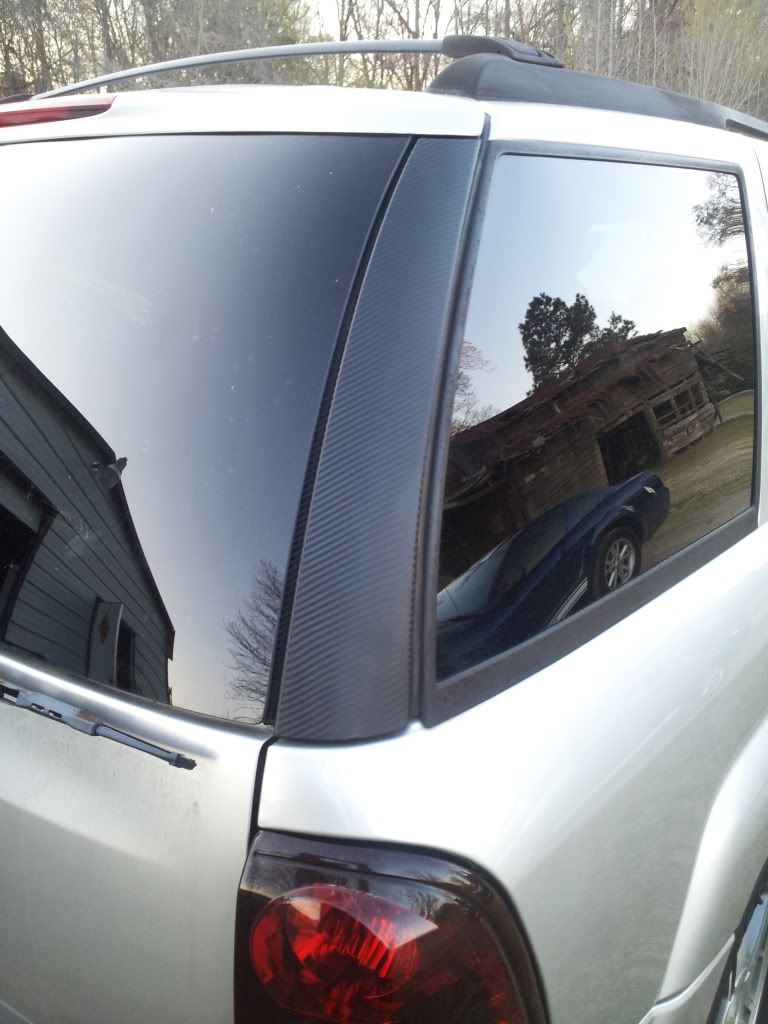
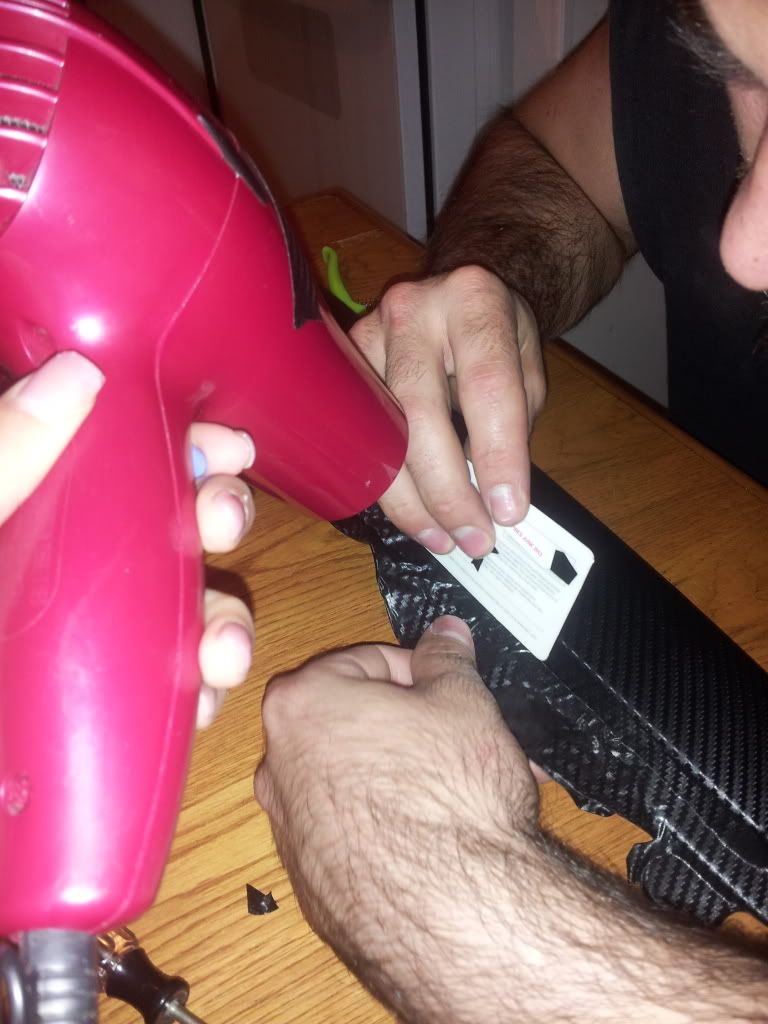
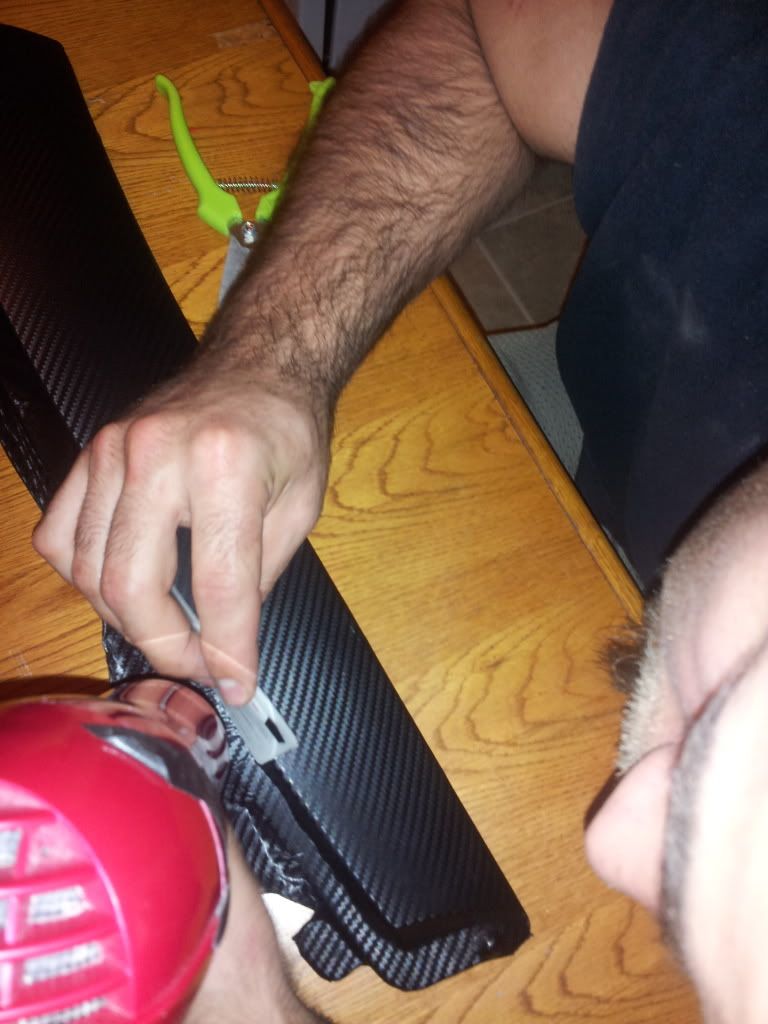
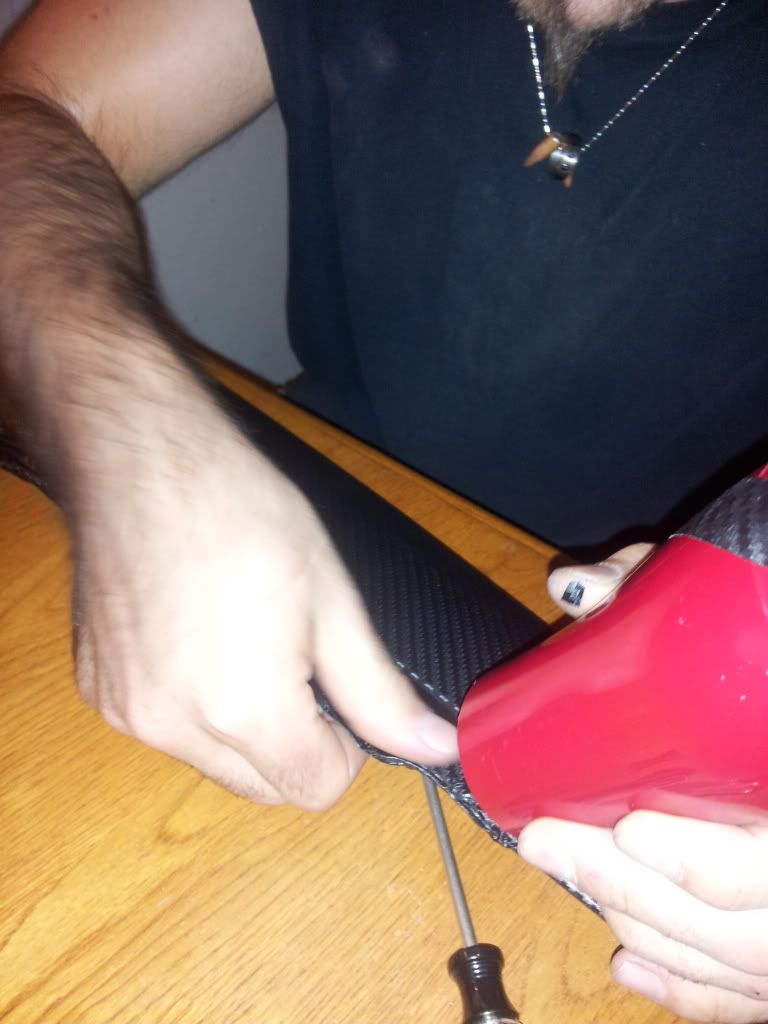
NinjuhhNutz said:My carbon fiber vinyl came in yesterday??? I was caught off guard, it showed up sometime while I was at work :wootwoot:
I had a few ideas as to what I wanted to do with it, and gf came over and was helping...got a lot done
didn't like how the black vinyl turned out on the front bowtie, sooooooo...I fixed it
((BlkShdw, I know I know, those headlights are coming out ASAP!!))
The amber colored bowtie came off of the rear emblem months ago, and I just cleaned up all the tape and called it a day. But today I figured why not? I LOVE the double lines on the bowtie in the CFI took it off and cleaned it up around teh edges after the pic, but you get the idea
p.s. YES I know my inspection is beyond dead
going this week, as the tb just recently came back to life and I haven't had a chance to get t done, my work schedule is insane right now...so shhhhhhh, no anonymous tips to the coppers
about to black out the windows 5% all around, and figured it would clash a bit with the black panels, so to spice it up a bit?
A few pics of the process
The gf was my picture taker and hair dryer engineer
She wrapped one of the rear hatch panels alsodeff a keeper hahahaha
all in all, an eventful day! Spent some time with her on my day off, got some work done on the tb, bbq ribs&chicken for dinner...no complaints my way
ANDDDDDDD tomorrow I'll post pics of the switch panel
guesses where it is?


I like how the back panels look. Where did you order the vinyl from? And what size?
ShadowClutch said:Yep. I've been using every resource I have to figure out how to do this right the first time. Going to try to rent the spring compressor tomorrow. I'm guessing the base of the front shock is larger in diameter than the OEM shock, so the bolt needs to be longer. Is this correct?
Thanks for the link. Cool build.
Nope the diameter should be exactly the same, or it won't fit in the mount. It might just be a stronger bolt, because the ones in the rear are pretty stout as it is. Here's an excellent guide for changing the shocks in the front. The only difference is the struts he are using are Belltech which come with collars that allow you to adjust the height, and in the first couple pictures there is the DJM 2" Drop Strut Mount. So the pics may look a little different, but the process will be the same.
How to On Belltech Drop Struts - TBSSOWNERS.com Forums - The #1 TrailblazerSS Dedicated Owners Forum
ShadowClutch
Member
- Joined
- Sep 5, 2012
- Posts
- 88
fr34kout said:Nope the diameter should be exactly the same, or it won't fit in the mount. It might just be a stronger bolt, because the ones in the rear are pretty stout as it is. Here's an excellent guide for changing the shocks in the front. The only difference is the struts he are using are Belltech which come with collars that allow you to adjust the height, and in the first couple pictures there is the DJM 2" Drop Strut Mount. So the pics may look a little different, but the process will be the same.
How to On Belltech Drop Struts - TBSSOWNERS.com Forums - The #1 TrailblazerSS Dedicated Owners Forum
Another good resource. Thanks. This honestly looks like it might take me about 45 for the first side, the 30 for the last side. I'm nervous about the spring compressor because of the numerous warnings about it, but I have yet to come across someone on any TB sites who had something catastrophic happen involving a spring compressor failure or misstep.
Thanks again! I'll be sure to post again once I'm through.
The spring compressor is pretty straight forward, Tony has even said that he has found that he could disassemble the TBSS Struts without using the spring compressor because there was very little force on them off the car. I would still recommend you use one, just showing that there isn't much to worry about.
The problem that I've always had issues with is removing the bottom strut mount from the lower control arm. The puller I had gave me issues, and on a friends TBSS I actually mushroomed the head of the bolt and was unable to thread the nut back on when we went to reinstall everything. I had to use a dremel and cut the first couple threads off to get everything back together. Since then I've just used a prybar with the assistance of a hammer to bang it out and help loosen it. Hopefully yours gives you less issues than mine did haha, good luck!
The problem that I've always had issues with is removing the bottom strut mount from the lower control arm. The puller I had gave me issues, and on a friends TBSS I actually mushroomed the head of the bolt and was unable to thread the nut back on when we went to reinstall everything. I had to use a dremel and cut the first couple threads off to get everything back together. Since then I've just used a prybar with the assistance of a hammer to bang it out and help loosen it. Hopefully yours gives you less issues than mine did haha, good luck!
NinjuhhNutz
Member
- Joined
- Oct 15, 2012
- Posts
- 720
kjkim93 said:I like how the back panels look. Where did you order the vinyl from? And what size?
60"x16" 3D Black Carbon Fibre Vinyl Film Wrap Toyota BMW Car Sticker Bubble Free | eBay
thanks bro, I like the cf look...and figured it would look good

it was pretty easy to do, the gf with an extra pair of hands to work the hair dryer helped though

didn't get any pics of the switch panel though :/ will get some tomorrow
fr34kout said:The problem that I've always had issues with is removing the bottom strut mount from the lower control arm. The puller I had gave me issues, and on a friends TBSS I actually mushroomed the head of the bolt and was unable to thread the nut back on when we went to reinstall everything. I had to use a dremel and cut the first couple threads off to get everything back together. Since then I've just used a prybar with the assistance of a hammer to bang it out and help loosen it. Hopefully yours gives you less issues than mine did haha, good luck!
My first try at this involved a pickle fork and lots of banging to no avail (from this guide: Strut and Shock Install - Truck Test Digest). My saving grace was the air hammer which worked wonders. 2nd time I only had to whack the driver's side a tad with a regular hammer for it to pop off but the passenger side was pretty stubborn. Ended up using brute force and a pry-bar to just pry it off the mount after several squirts of lubricant. I'm thinking a simple solution would be a pitman arm puller... anybody try this?
BTW, to keep this thread on topic... I got my recon today! No more "OH NO, FIVE-O" moments from now on. recon forum information FAQ | Hawaii's #1 Forums
NinjuhhNutz
Member
- Joined
- Oct 15, 2012
- Posts
- 720
KjKim, btw...i wrapped both panels, both bowties, and the switch panel, and still have a usable portion if threw first sheet left, in addition to the entire second sheet
All in all a pretty good deal if you ask me
All in all a pretty good deal if you ask me
WarGawd
Member
- Joined
- Sep 2, 2012
- Posts
- 471
ShadowClutch said:Yikes. I went with Moog all around (sway links and ball joints), and took mediocre care of them. Just inspected them last weekend after about 20k since their last lubing. Boots were in good shape, except for 1 which was torn and hanging on by the grease. But I flushed the old grease out of them and new grease in. I've got about 45k on them now and they're very stiff, so I'm very happy with the way they've lasted.
I sourced them from RockAuto.com, not sure about their CAN shipping policies.
Good luck.
Thx Shadow
") Moog was what seemed to be the consensus of what I found on my own as well.
Moog was what seemed to be the consensus of what I found on my own as well. And as it turns out I have some stuff waiting for pickup at my cross border drop spot about an hour away, so I think I'll track down a US source and have the stuff shipped there for pickup at the same time. (Update: RockAuto seems to slightly beat or at worst just match Amazon on all the parts prices I sourced, probably gonna go that route. Moog ES3675/6 tie rod ends, Moog K6663 lower ball joints qty 2, Moog K80824/5 end links)
Quick question though - the description of the tie rod ends (Moog ES3675 / ES3676) at RockAuto says "...jam nut not included". Was/is this an issue for you, and what do I need to do about it?
Thx again
EDIT - Skip that question, I figured it out
 :wootwoot:
tokahao said:My first try at this involved a pickle fork and lots of banging to no avail (from this guide: Strut and Shock Install - Truck Test Digest). My saving grace was the air hammer which worked wonders. 2nd time I only had to whack the driver's side a tad with a regular hammer for it to pop off but the passenger side was pretty stubborn. Ended up using brute force and a pry-bar to just pry it off the mount after several squirts of lubricant. I'm thinking a simple solution would be a pitman arm puller... anybody try this?
BTW, to keep this thread on topic... I got my recon today! No more "OH NO, FIVE-O" moments from now on. recon forum information FAQ | Hawaii's #1 Forums
I heard the Pitman Puller really helps, I was using a Gear Puller and it gave me trouble. Btw grats on the Recon, I didn't want to get one for a while but I'm glad my friends convinced me to. Haven't been bothered by the cops since I got it, knock on wood
WarGawd said:Thx Shadow
And as it turns out I have some stuff waiting for pickup at my cross border drop spot about an hour away, so I think I'll track down a US source and have the stuff shipped there for pickup at the same time. (Update: RockAuto seems to slightly beat or at worst just match Amazon on all the parts prices I sourced, probably gonna go that route. Moog ES3675/6 tie rod ends, Moog K6663 lower ball joints qty 2, Moog K80824/5 end links)
Quick question though - the description of the tie rod ends (Moog ES3675 / ES3676) at RockAuto says "...jam nut not included". Was/is this an issue for you, and what do I need to do about it?
Thx again
EDIT - Skip that question, I figured it out
I order all the time from Rockatuo and ship to my US pick up spot. They have no issue with it and it works well plus you safe a shit load of money by not paying admin fees to bring it into the country and just doing it yourself. :wootwoot::wootwoot:
NinjuhhNutz said:KjKim, btw...i wrapped both panels, both bowties, and the switch panel, and still have a usable portion if threw first sheet left, in addition to the entire second sheet
All in all a pretty good deal if you ask me
Thanks! I don't want to entirely copy you but it looks really good lol

Voymom said:I'm preparing to paint all my plastic pieces on the Envoy in the coming weeks...
 Inside pieces, or outside?
Voymom
Member
- Joined
- Feb 3, 2012
- Posts
- 2,523
Blckshdw said:
Outside for now...I'm wanting to paint over all my wood grain this summer too but I have to wait on that a little longer.
Phantom
Member
- Joined
- Jun 17, 2012
- Posts
- 277
Voymom said:I didn't do it, but I helped lol Mat painted his front bowtie and grille...
I'm preparing to paint all my plastic pieces on the Envoy in the coming weeks...
View attachment 27220
Attachments

ShadowClutch
Member
- Joined
- Sep 5, 2012
- Posts
- 88
I'm in the process of changing oil/ oil pressure sending unit right now.
Beer open. Music on (Pandora: Tool station)... Found a weird piece of broken plastic (large), and took some interesting pics along the way. Taking a break before I fill the engine up. There was so much oil on/around the filter/OPS area, it may have run down the oil pan. That said, there MAY be some evidence of the oil pan gasket being bad.... Pics to follow.
I'm streaming from my shitty 1.3 cam on my laptop. Pop in if you want to hang while I wrap things up.
Somewhere in GMTNation on USTREAM: Just working on my GM truck with a good beer and good tunes.. Lifecasting
The quality probably won't be great, but maybe I'll bring my 5mp 720p cam down when I do the front struts tomorrow.
BoldAdventure
Member
- Joined
- Jun 28, 2012
- Posts
- 1,634
Starting working on my rear storage and platform. Ripped out all the wasted space GM included in the back. Our cars are a joke, really.
Voymom said:Outside for now...I'm wanting to paint over all my wood grain this summer too but I have to wait on that a little longer.
I'm trying to think, what plastic do the voy's have on the outside to paint. Our TBs have that crap everywhere
I am happy with the SEM Bumper Coater I used on mine. No adhesion promoter, or primer needed, and it's got a flex additive so it won't flake up when the plastic bends (like a bumper cover does)Phantom said:
I'd say shoot the windshield wiper arms, or door handles, or something else small to go along with that. Needs another accent piece or two to tie it in with the rest of the truck
Phantom
Member
- Joined
- Jun 17, 2012
- Posts
- 277
Blckshdw said:I'm trying to think, what plastic do the voy's have on the outside to paint. Our TBs have that crap everywhere
I'd say shoot the windshield wiper arms, or door handles, or something else small to go along with that. Needs another accent piece or two to tie it in with the rest of the truck
I was planning on the wiper arms. then for the rims get color match and white and spray the rims like bigtwotones with the white down the middle and color match the rest. and color match the rest of the front bumper and wiper cowl.
Wooluf1952
Member
scottp8113 said:More yesterday than today, but replaced rear shocks and springs with bilsteins and Tahoe z71s, installed taillight guards and bull bar, and learned that advance auto gave me the wrong differential gasket... After I had drained the fluid of course...once the correct one shows up, I'm good to go finally. Nori just need to find out why it sounds likes turbine spinning up after a cold start and throws code p0411 after I just replaced the o2 sensor.
That is the Secondary Air Injection System.
The noise is normal at cold start. Throwing a code, is not.
Busy day today, was on my way to Vegas last weekend when I heard something break. Front axle 4wd disconnect snapped, and took out the actuator in the process. So today I got the disconnect in the mail, amazon had a pretty good deal around 300 bucks, picked up a new actuator from O'Reilly for another 100, and a couple new cv shaft assemblies, noticed the driver side's boot was torn so I may as well do both. Changed the front differential fluid while I was in there and have no clue when the last time it was done since I am 3rd owner. Tomorrow looking like rear differential fluid and hopefully getting to the dealership to get some fluid for the transfer case. So much for my week off in Vegas haha. Gotta give you all a big thanks if it wasn't for this site all of this would be a whole lot harder!
ShadowClutch
Member
- Joined
- Sep 5, 2012
- Posts
- 88
Changed the air filter, oil and pressure sensor due to leak (will post a how-to thread), and added some black spray painted bowties to my stock 16's.
I also ordered a set of Moog upper shock mounts in case the current set are shot, and rented the Pitman puller, the tie rod fork, and spring compressor set. I had to buy the Pitman puller, and the OPS socket, but I plan on returning them in very good condition. Advance is out of their goddamn mind if they think I want to own an Oil Pressure Sensor socket and an arm puller forever.
Next up; Billsteins up front.
NinjuhhNutz
Member
- Joined
- Oct 15, 2012
- Posts
- 720
kjkim93 said:Thanks! I don't want to entirely copy you but it looks really good lol
no worries, bro
that's what the mod bug is all about hahaha
you see something, you like it, and you put your own little tweak into it...
be sure you post pics, I'd like to see what direction you take it in
(though, I have to admit...when I made the switch panel, I REALLY wanted to have a raised bowtie in the design, but was talking to my gf as we were working on it, and completely forgot

oh, and today before work...I stopped by the stealership to schedule my appt to get some minor work done (covered, thankfully...so let them deal with it (yes) )
and asked the guy at the body shop, out of curiosity, how much it would cost to get my grille colormatched and the honeycomb resprayed in matte black
$300 he says, and after I stopped laughing after telling him I would rattle can it before I payed $300, he told me that if it were his truck, he would go to napa, and have the color shoot it (with the color matching camera??) and they could give me a paint so close that I wouldn't be able to tell a difference
all in all, GM is beyond proud of their paint, but not a bad guy to give me that heads up
(I was in no way going to get it done there anyways, but we were talking about my truck while waiting, so I figured why not
Installed cabin air filter and repaired airflow actuator (Dash vent). Large plastic gear inside had a couple of broken tooth. Pressed it out and turn it around 180 deg. Saved about $50.00 getting a new one. Not keen on the Cabin filter thought a lot less air flow, will try it and see if the SO complains.
Sparky
Member
- Joined
- Dec 4, 2011
- Posts
- 12,927
My airflow has seemed to be OK since I put in my cabin filter.
I think one of my air actuators is acting up as if I have it set to full vent then turn it even one notch towards floor it clacks loudly. Still works and goes into any mode I want it to, but I can't help but wonder if/when it'll break.
My change oil light just came on today, and Autozone was having a Mobil 1 oil special again, so I picked some up. I'll probably do the oil change Saturday morning at my parents' place as they have a concrete driveway. Or I'll just climb the truck onto my raised concrete patio again to help my neighbors reinforce the idea that I'm a little crazy Seriously, I've never used that patio for its original intent
I think one of my air actuators is acting up as if I have it set to full vent then turn it even one notch towards floor it clacks loudly. Still works and goes into any mode I want it to, but I can't help but wonder if/when it'll break.
My change oil light just came on today, and Autozone was having a Mobil 1 oil special again, so I picked some up. I'll probably do the oil change Saturday morning at my parents' place as they have a concrete driveway. Or I'll just climb the truck onto my raised concrete patio again to help my neighbors reinforce the idea that I'm a little crazy
Seriously, I've never used that patio for its original intent Voymom
Member
- Joined
- Feb 3, 2012
- Posts
- 2,523
I haven't done it yet...but once the kiddos are in bed I am planning on setting up a holder for my Icom's PTT, that way it doesn't dangle freely or it isn't put anywhere the button can be pushed on accident. I put my mag mount back on in preparation for Saturday's storms, just in case.
Had to unbolt the rear shocks and let the axle hang down so I could figure out what was going on with my Airlift helper bags. Ever since I put it back on the ground Thursday / Friday they wouldn't hold air, was expecting one bag to have a rip in it again. Once I got the springs out I saw that the air line had popped off on the driver side bag. I guess when my friend zip tied the excess line he pulled it a little too tight and didn't leave enough slack for suspension travel. Seems to be ok again
shrek77
Member
- Joined
- Mar 30, 2012
- Posts
- 252
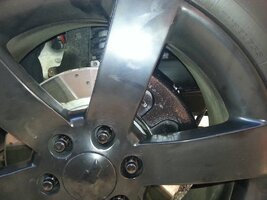
Changed passenger side hub, gave her a bath and painted the bowties on the center caps. Matched the silver on the rims themselves.View attachment 27241
Attachments

Boricua SS
Member
spoke to the dealership about my new crate motor... as if this shouldn't surprise me... GM hasn't shipped the motor out yet... I was supposed to get the truck back tomorrow... now it's lookin like next wknd... im beyond fed up with the situation and for the first time in this whole ordeal, I could care less what gets done to my SS...
NinjuhhNutz
Member
- Joined
- Oct 15, 2012
- Posts
- 720
Boricua, it sounds like you need to do some serious ass chewing to someone that makes things happen. Let the shit roll downhill, and get the service that is expected. I'm all about being patient and understanding, but there's a point where you have to throw the pleasantries out of the window
- Status
- Not open for further replies.