What are you doing today? [Part II]

TJBaker57

Lifetime VIP Donor
Member
Aug 16, 2015
3,327
Colorado
Got up at just before 5 AM to head to the U-Pull 3.5 hours away. They had just set out a 2014 Jeep Cherokee and we have been watching for one of these to hit the yard. I was there just minutes after the opening and got a full set of wheels (with Gorilla brand wheel bolts) plus spare with brand new tire, front passenger seat, a front fender flare trim piece and the inner fender/liner piece.

My lady bought a 2016 some months ago from a tow company that had recovered it after a theft. The insurance company basically abandoned it at the tow yard so they got a new title etc and sold it.

We only really needed one wheel but hell, since they were there I took them all! These don't hit the yard often.

I then trolled the Trailblazers and Envoys for the afternoon. I like practicing removal of this or that. Things I haven't dealt with before. This time I took a cluster out in 5 minutes!

Grabbed a couple of clusters, a spare HVAC blower fan with the PWM speed control module, and an ECAS unit from a 2002 Envoy. I was able to fish out all the wiring etc from the unit up through the floor pan to the switch and inflator port. I am guessing this is a working unit since air pressure was still present in the line(s) after the vehicle has sat on the yard since November 5th.

It was a good day.
 

Blckshdw

Moderator
Nov 20, 2011
10,768
Tampa Bay Area, FL
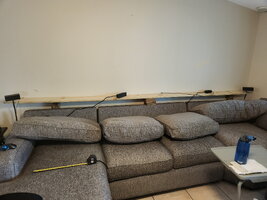
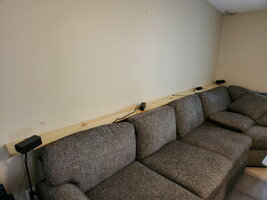
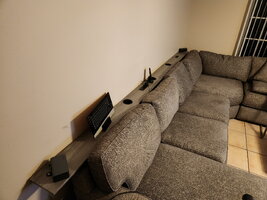
Decided to get started on another project, and this time take a few pics. I'm going to build a table to fit between my sectional and the walls, to put remotes, charge stuff, and hold drinks. Was originally going to use a 1"x6" as the table top and some 2"x4"s as the legs and spacers between the couch and the walls, but opted to go with a 1"x8" and 4"x4"s instead.

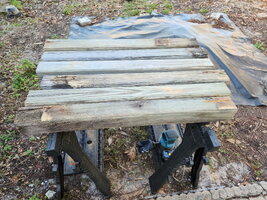
Kept a handful of the fence posts when the contractors tore out the old stuff. So cut them down to size with the help of a clamp guide to ensure they were all the same length.

20241209_154422_resize.jpg


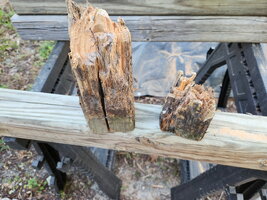
Did get lucky with the height that I needed, as that allowed me to cut just above some rotted /broken sections.

20241209_155317_resize.jpg

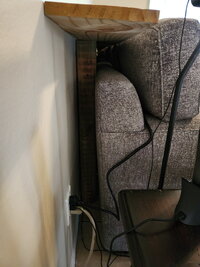
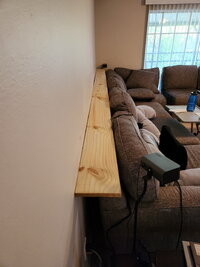
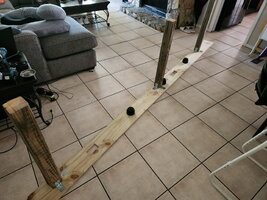
Hit them all with some 80 grit on the orbital sander to knock the weathering off, and since they'll be hidden from view, called them good enough. Brought everything inside for some mock up positioning. Figure I'll use 3 for the main section, and probably just 2 for the shorter one. (only working on the long section right now)

20241209_161312_resize.jpg

20241209_161318_resize.jpg

20241209_161920_resize.jpg20241209_161529_resize.jpg

Haven't fully decided if I'm going to stain it, or paint it. Probably paint, since that's easier/faster. Figure for the most part it will be out of sight, other than people seeing it for the first time, or looking for a cup holder or power port, so it doesn't need too much time and effort put into looks.

Cup holders are in route, and will go at the spots between the couch cushions, so 3 along the back wall, and eventually 2 on the side by the sliding door. Set of outlets with the wireless charging pad will be behind the 2nd seat, smaller one with a few more higher powered USB ports will go next to the corner seat. Surround sound speakers will sit on the ends, so I can ditch the stands.

Majority of the time, I'm on the chaise lounge on the left side, only potential issue I've found, is when I'm reclined on it, if I lay my head back, it does compress the top of the cushion enough that my head reaches the board. :mad: If I slouch down further, my feet dangle off the end... :no: So I may need to add some type of padding to the leading edge, thinking gray slit pool noodle, if I can find them :undecided:
 

northcreek

Member
Jan 15, 2012
3,378
WNY
Could cut little quarter moon shaped relief areas centered over each section, might give it a purpose built look. I know you didn’t ask for suggestions so please forgive.:biggrin:
 

Blckshdw

Moderator
Nov 20, 2011
10,768
Tampa Bay Area, FL
Could cut little quarter moon shaped relief areas centered over each section, might give it a purpose built look. I know you didn’t ask for suggestions so please forgive.:biggrin:

I thought about trying that, but knowing me, I'd screw something up, and have it looking lopsided. :hahano: Would be a lot easier if I had a router or a jig saw tho :undecided:
Worst comes to worst, I'll either just move the couch forward a bit, or put the guide on my circular saw and rip an inch off the front
 

mrrsm

Lifetime VIP Donor
Supporting Donor
Member
Oct 22, 2015
8,272
Tampa Bay Area
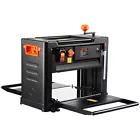
... and if you decide to get serious about Table Crafting... This Two Speed Wood Planer can handle 12" X 13" Wood Sections with Three Cutting Blades spinning close to 24,000 RPM... for around $300 as a Best Offer:

1733850423153.png


Blckshdw

Moderator
Nov 20, 2011
10,768
Tampa Bay Area, FL
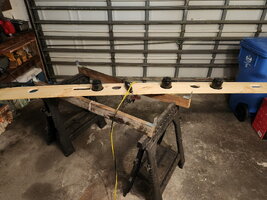
Got some more work done on the couch table. Cup holders arrived Wednesday night, had cut some 3.5" holes, but needed to widen them to about 3.75", so this morning put a sanding drum on the Dremel and used the vaccuum to keep the mess down. Considered cutting 4" holes, as the lips on the holders was slightly wider, but I didn't want the cup holders to come out when lifting a water bottle, since those have a tight fit. This way I was able to make sure the friction fit held them snuggly. :thumbsup:

20241212_101740_resize.jpg

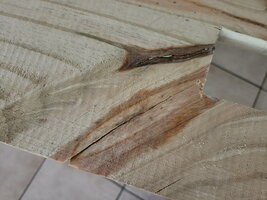
Got the holes cut for the outlets with my oscillating tool yesterday, but somewhere between moving the board from place to place, got a nice crack where one of the knots was. :mad: So I'll have to fill that in with some wood glue.

20241212_121152_resize.jpg


Did a test fit, and found that the gap between the bottom of the cup holders and the top of the couch was larger than expected, which allowed me to chop 2" off the bottom of the legs. Not only did that make the table slightly more hidden, which is what I wanted, but being lower behind the back cushions, there's no longer the issues of hitting my head on the front edge of the board when I lay back. :celebrate:

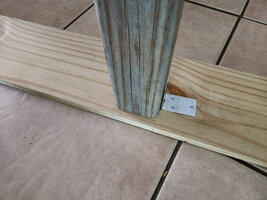
Opted to use some L brackets to attach them. Had some extra and repurposed some from an old project. Had enlarged some of the holes on the brackets to fit larger screws, so needed some washers with the smaller screws so they'd hold. Offset the legs a half inch to account for the base boards, so everything should fit flush when the couch is pushed back.

20241212_120136_resize.jpg
20241212_120211_resize.jpg

Due to that crack, I didn't want to try lifting the table by myself, with the legs being as heavy and as far apart as they were, so I had to slide the sections of the couch forward, stand the table up and slide it in from the side. Little more time consuming, but it got the job done.

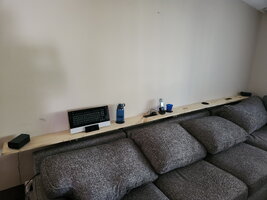
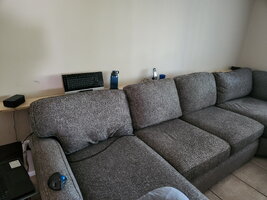
Much tighter gap with the shortened legs, keyboard for the HTPC and remote can move off the end table, and much less wiring in view. :biggrin:

20241212_124452_resize.jpg

With the cushions up, you almost can't see it. Decided for looks, I'm gonna find some gray woodgrain contact paper. Should blend in nicely, much quicker to apply than anything liquid, and no mess to clean up. Plus if I want to change it later, peel off and toss in the trash. :cool:
20241212_124556_resize.jpg
 

TollKeeper

Supporting Donor
Member
Dec 3, 2011
8,266
Brighton, CO
Didnt think you lived that close to @Mooseman
 

Mooseman

Moderator
Dec 4, 2011
26,114
Ottawa, ON
  • Haha
Reactions: Matt

Blckshdw

Moderator
Nov 20, 2011
10,768
Tampa Bay Area, FL
Pulled the generator out for some tinkering. I've always had the plan to add an exhaust extension to it and vent the fumes farther away, as some of my friends have done with theirs. I had taken measurements before, but it wasn't until last night that I learned the spark arrester has a cap that comes off of the muffler. :dunce: I won't go into detail about how complicated I was thinking this was gonna be due to the flared end. lol
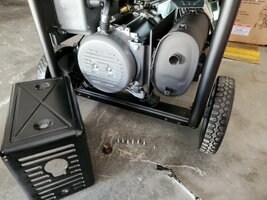
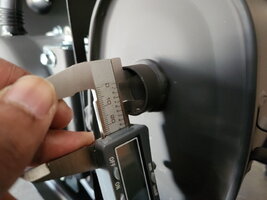
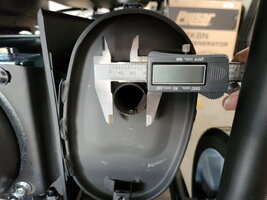
So I got the heat shield off, Pulsar really must not want consumers messing with stuff, cuz they made some of the bolts difficult to reach. The 2 on the top didn't allow a ratchet, or even a swivel extension to use with my impact. My ratcheting wrenches barely had clearance, and scratched up the powder coat on one, so I went with a regular wrench for the other.

20241219_111549_resize.jpg

With the spark arrester out of the way, took some new measurements, and got much more expected numbers. ID of the pipe is right on 1", OD comes in at maybe 1.15". :undecided:

20241219_111854_resize.jpg20241219_112003_resize.jpg

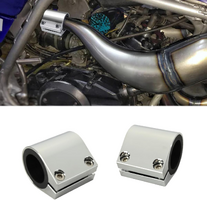
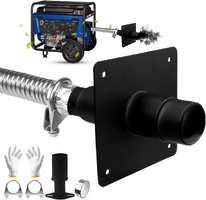
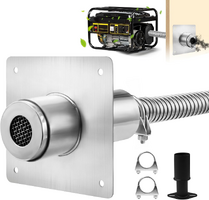
So my question to the lug nut gallery, is should I go with a 1" flex tube, and try to friction fit it inside the muffler port? Probably cut a relief slit to allow some compression... Or go with a 1.25" flex tube, clamp it down and maybe apply some high temp silicone so it doesn't leak?

If I could weld, I'd probably have much more flexibility, but that exhaust port is pretty thin. Definitely not something to try "learning" on. :nono:
 
  • Like
Reactions: azswiss

Matt

Member
Dec 2, 2011
4,039
Pulled the generator out for some tinkering. I've always had the plan to add an exhaust extension to it and vent the fumes farther away, as some of my friends have done with theirs. I had taken measurements before, but it wasn't until last night that I learned the spark arrester has a cap that comes off of the muffler. :dunce: I won't go into detail about how complicated I was thinking this was gonna be due to the flared end. lol

So I got the heat shield off, Pulsar really must not want consumers messing with stuff, cuz they made some of the bolts difficult to reach. The 2 on the top didn't allow a ratchet, or even a swivel extension to use with my impact. My ratcheting wrenches barely had clearance, and scratched up the powder coat on one, so I went with a regular wrench for the other.

View attachment 115426

With the spark arrester out of the way, took some new measurements, and got much more expected numbers. ID of the pipe is right on 1", OD comes in at maybe 1.15". :undecided:

View attachment 115427View attachment 115428

So my question to the lug nut gallery, is should I go with a 1" flex tube, and try to friction fit it inside the muffler port? Probably cut a relief slit to allow some compression... Or go with a 1.25" flex tube, clamp it down and maybe apply some high temp silicone so it doesn't leak?

If I could weld, I'd probably have much more flexibility, but that exhaust port is pretty thin. Definitely not something to try "learning" on. :nono:
I'd go 1.25", slit it and clamp then high temp RTV.
 

Mooseman

Moderator
Dec 4, 2011
26,114
Ottawa, ON
  • Like
Reactions: Blckshdw

Blckshdw

Moderator
Nov 20, 2011
10,768
Tampa Bay Area, FL
Have you looked at diesel heater exhaust pipes and mufflers? It might just fit in there.

:yes: Yep, the diesel heater hoses are my main options.
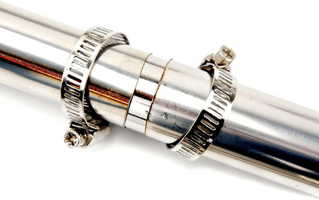
I did come across some possible options, found some SS couplers to go inside the pipes, some silicone sleeves that serve the same purpose, but on the outside, and some exhaust band clamps that have sleeves, so an all-in-one type deal. Of course those are a bit more pricey.

Edit: The actual hose I've got on my wish list is marked at 1", but if it also has that .94" OD, then it would fit perfectly as is. So that may get ordered at some point, and then see how it mates up. At least I've got time before next hurricane season gets here. 🙏
 

Attachments

  • 1734636902344.png
    1734636902344.png
    1.6 MB · Views: 1
  • 1734636324701.png
    1734636324701.png
    1.4 MB · Views: 1
Last edited:

Blckshdw

Moderator
Nov 20, 2011
10,768
Tampa Bay Area, FL
Almost forgot to post, got the vinyl put on earlier today. It was 15" x 20', and I should have measured and pre-cut it down to size first. Instead I lined up one end, and used a few clamps to hold it in place across the board. Started at one corner, peeled off the backing, stuck it down to get started. Peeled more backing at an angle and smoothed it as I went, which worked for the most part.

Cut off the excess at the roll, but still had a good 6" hanging off the front. Tried wrapping it underneath the front, but for some reason it didn't want to play nice with the front edge and would keep lifting in some spots. Hoping I can hit it with a heat gun to make the glue more tacky. Used an Exacto knife along the underside of the front and cleaned that up. Cut out the cup holder, and outlet holes with the blade. Located the screw holes with opened those up with a toothpick.

One more project off the list! :celebrate:

20241221_200717_resize.jpg
 

BrianF

Member
Jul 24, 2013
1,263
West central Sask.
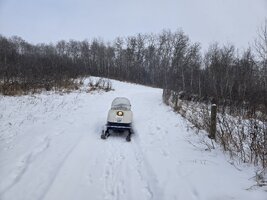
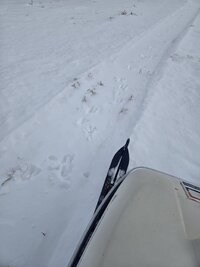
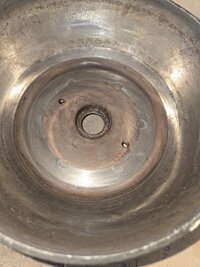
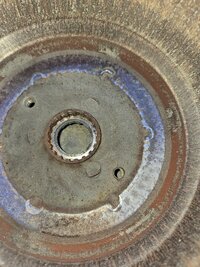
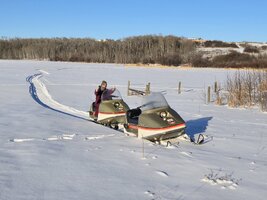
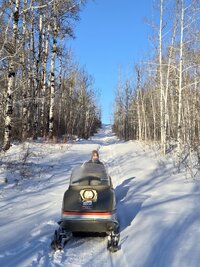
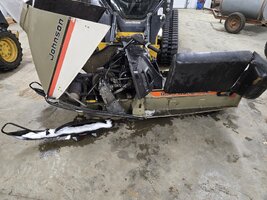
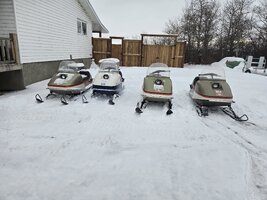
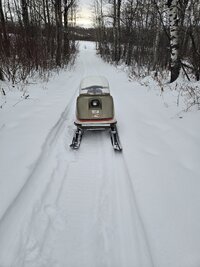
Since we got some powder the last couple of days, I checked the trails for some fresh air. Then parked Shaky Mike in the shop to check the clutch out. As the name implies, there is a vibration felt again through the handlebars. Found the main clutch bolt loose so gave it a service and was extra careful on reassembly.

Then went to give it a shake down and no spark. Traced it to some corrosion in the kill switch connector. Cleaned it up and she ran like a top! So to have some fun, my youngest and I did a night ride!
 

Attachments

  • 20241221_183912.jpg
    20241221_183912.jpg
    297.5 KB · Views: 2

Mooseman

Moderator
Dec 4, 2011
26,114
Ottawa, ON
Last edited:

TollKeeper

Supporting Donor
Member
Dec 3, 2011
8,266
Brighton, CO
Had a very rough weekend...

1000001632.jpg
 

Mooseman

Moderator
Dec 4, 2011
26,114
Ottawa, ON
Hope the driver is ok
 

mrrsm

Lifetime VIP Donor
Supporting Donor
Member
Oct 22, 2015
8,272
Tampa Bay Area
Last edited:
  • Like
Reactions: Redbeard

mrrsm

Lifetime VIP Donor
Supporting Donor
Member
Oct 22, 2015
8,272
Tampa Bay Area
Almost Forgot.... Thanks to Andrew Camarata's Yearly Visit to the Sussin Family Christmas Family Light Show and Walk Through The Wonderland for The Kids (Young and Old) :>)

Merry Christmas to All Who Dwell at ...and Visit... GMT Nation!

 
Last edited:

Forum Statistics

Threads
23,724
Posts
642,644
Members
19,257
Latest member
Uzusi_1xj4

Members Online