Ryobi Riding Mower Mods Chat Thread

mrrsm

Original poster
Lifetime VIP Donor
Supporting Donor
Member
Oct 22, 2015
8,272
Tampa Bay Area
For any of those in the "Curious Crowd" still riding the fence because of certain YT Videos mentioning 'sudden, inexplicable stoppages' while Mowing Along on the Ryobi Model# RM480E "RELM" (Riding Electric Lawn Mower)...THIS Video coming from a very intrepid "Aussie" will cover some of his interesting observations and describe some simple solutions if you find yourself facing any of these temporary impediments towards getting your RELM to finish the job of giving you "A Well Manicured, Properly Cut Lawn":


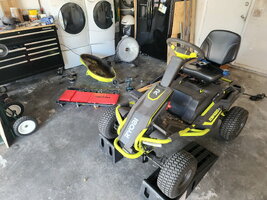
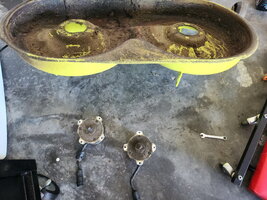
It follows on that in some instances, it will either be necessary to completely remove the Lower Double Blade Cutting Deck to easily perform the R&R of the Twin 20" Blades. If not... then elevating the RELM can become necessary... and... can be a bit tricky if not done with an eye towards caution and care... and risk injuring the Owner in the process. @Blckshdw has already posted his own cleverly conceived AUTO RAMP and Floor Jack solution as a safe lifting arrangement inside of his Garage.

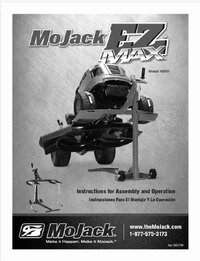
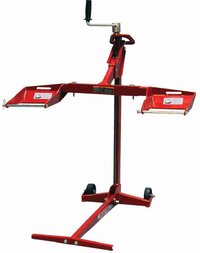
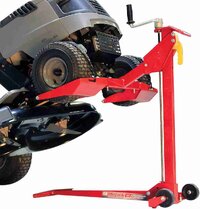
I'm taking his idea a step further by investing in a "MOJACK" which is this Collapsible, Hand Crank-able Heavy Mower Lift that slides under the Two Front Wheels as a Tractor-Mower Jacking Stand that can help whenever changing either the Twin Blades... or the 80W-90 GBO (Gear Box Oil) in that Hard To Access under-belly at the Rear of The RELM.


MOJACKBLACK1.jpg

There IS a Less Expensive Version...Here:
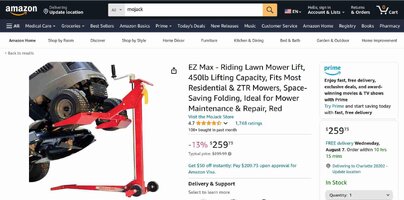

MOJACK1.jpg

When I ordered this RELM Jack Stand off of Amazon, I added in a Hand-Held Lawn Mower Blade Sharpener that can be dragged along the tired Blade Edges and quickly renew their sharpness... without having to resort to either Grinding or Filing:
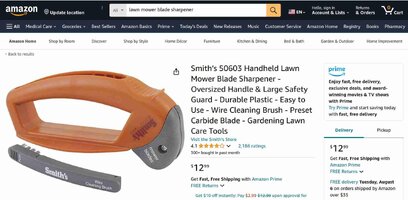
LAWNMOWERBLADESHARPENER.jpg
 
Last edited:

mrrsm

Original poster
Lifetime VIP Donor
Supporting Donor
Member
Oct 22, 2015
8,272
Tampa Bay Area
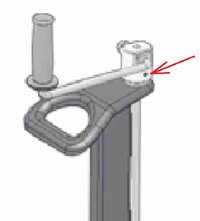
With the occasion of having run over some of those Oddball (Cast Iron HARD) Cypress Tree Root Ball Knots...I managed to Bend a Blade All To Bupkus!...and thus...it was time to Un-Box the NEW MOJACK RELM Lift and try out that Machine in the back yard atop some HUGE Cardboard sections:

MOJACKMANUAL.jpgMOJACK1.jpgMOJACK2.jpgMOJACK3.jpg

Unfortunately... while setting up the Unit and then trying to lower the Lift Body down onto the Deck...I managed to reach a point where it just would NOT go further down. So I puzzled over it momentarily with that Stupid "WTF?!" look & feel of total exasperation.... and then just settled down to inspecting things a bit closer.

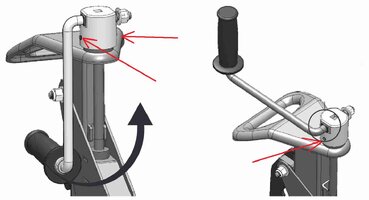
I came to realize that of the TWO M8 X 1.00 Extended Tip Allen Set Screws...Only ONE was completely threaded into the upper "Windlass" Chrome Head with Crank Handle that sits over the Case Hardened Steel ACME Threaded Rod Assembly. So the next progression involved getting out my Red Bondhus Metric Allen "T" Handle Tool Kit and trying to just run that Small Screw on home.

Nope. Dammit! And after a much closer inspection...I could see that not only had the OEM Factory Worker managed to mis-align the Two Opposing Allen Threaded Holes... but had also Cross-Threaded the Set Screw in so hard that I broke that Allen Key and then had to order a replacement kit (several, actually since they were fairly inexpensive on Amazon) and this problem also required getting a High Quality NEIKO Tap and Die Tool Set to handle re-threading those M8 X 1.00 Holes found in THESE Locations:

MOJACK4.jpgMOJACK5.jpg

MOJACK7.jpg

Several days passed before the Tool Kits finally arrived and today I was able to make Quick Work of the Job by using the NEIKO M8 X 1.00 Tap and Small "T" Handle Holder and then run both of the those Extended Tip Allen Set Screws on *home* into their Hollow Insert Positions after applying a liberal coating of Blue Lok-Tite #242 onto their Threads. And so, Now... The "ACME Screw Lift" Machine functions PERFECTLY . :>)

NOTE:

An Interesting Safety Feature is the Auto-Locking Yellow Handle STOP Latch that MUST be manually Held open and OFF of the ACME Screw Thread whenever Lowering the Device and carrying the weight of the Tractor or *RELM* ...as the Locking Pins WILL enter the Holes periodically arrayed along the Outer Edge of the Vertical Support Member to accommodate varied heights of support needing this additional Safety LOCK Mechanism.
 
Last edited:

mrrsm

Original poster
Lifetime VIP Donor
Supporting Donor
Member
Oct 22, 2015
8,272
Tampa Bay Area
Comparing what happened during "The Last Blade Change" prior to this latest change by Having the Requisite "Specialty Tool and Support Equipment" (Literally!) THIS time... is like comparing a Suffocating Nightmare... to a Perfect Dream!

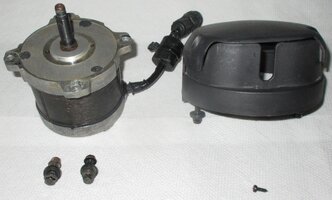
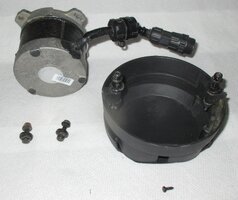
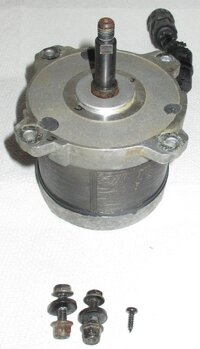
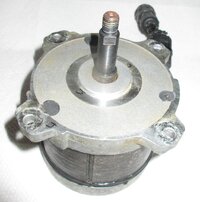
All during that LAST Episode... It always had to start with unscrewing the Two Electrical Harness Connectors from the Blade Motors hidden below the seat area and then removing the entire Dual Blade Motor Table via difficult process of trying to access the Four Cotter Pinned-In Bolts and then not lose them all. That was followed by having to Wrangle the Blade Tray out from underneath the RELM and then Flipping it over onto its back on top of a protective piece of Cardboard ... like a Heavy, Beached Green Sea Turtle ...

And then... Having to make certain to Prop the Blade(s) into one Hard-2-Find-a-Fixed-Position with a Chunk -A- Wood ---Safely Enough-- NOT to have the Blades Spin back around and Lop off a Man's Hand at the Wrist while applying over 75 Nm of Force and while trying to Break those 15mm Blade Fasteners Loose.

Well... THAT took all of around Two Hours to accomplish those actions, while I was hampered with additional difficulties while using Hand Tools since I am dealing with having "The Vikings Disease' that gives you damaged Hand Tendons.

Nope... You Can't Cut Grass Yet) ...until you've flipped that Damned Blade Motor Tray right side up and then slid it back up under the Mower... lifted it up high enough to secure it and re-installed those Four Pin Hangars & Cotter Keys underneath the RELM ...AND FINALLY... Re-connected the Two Electric Motor Barrell Connectors. Well... Jesus Palomino!...What a PITA!

But... Not THIS Time, Guys...

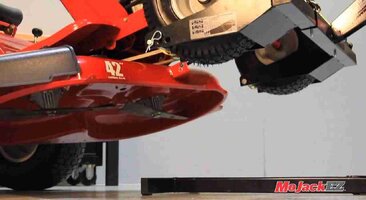
(1) One Minute to Park, Load & Secure & Raise the RELM Front Wheels on the MOJACK Lift.

(2) Two Minutes to "Lock" & Unbolt the Bent Blade & Securely Re-Tighten on the New Blade.

(3) Done!

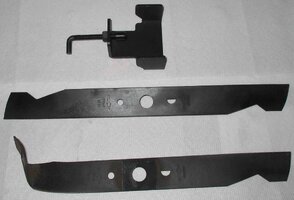
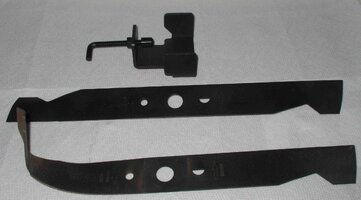
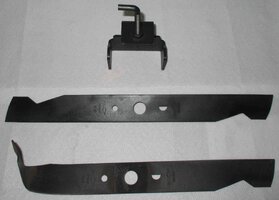
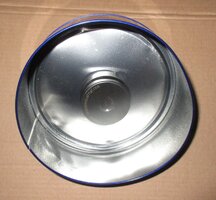
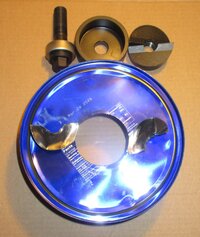
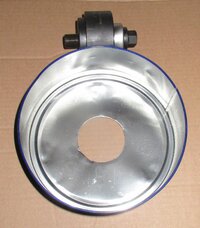
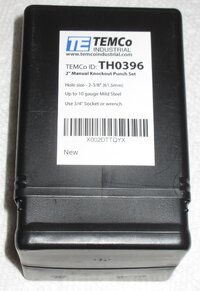
Pics taken with the Second New Blade of the Two Blade Set...and that Miracle Holder:

RYOBIBLADESANDHOLDINGTOOL1.jpgRYOBIBLADESANDHOLDINGTOOL2.jpgRYOBIBLADESANDHOLDINGTOOL3.jpg
 
Last edited:

mrrsm

Original poster
Lifetime VIP Donor
Supporting Donor
Member
Oct 22, 2015
8,272
Tampa Bay Area
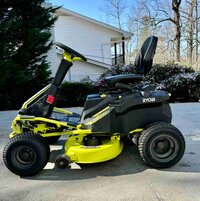
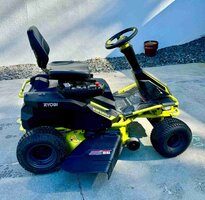
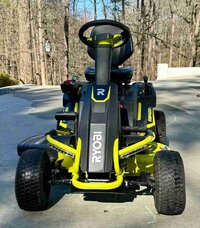
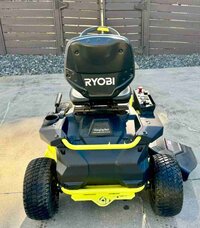
Now THIS is a Very Interesting "Make an Offer" listing at $1,699.00 over on eBay that should interest anyone serious about getting into having a Battery Powered Lawn Mower that ordinarily Retails for $5,500.00... especially for a Local Pick Up if you are a resident living nearby to this Seller:


s-l1600.jpgs-l16001.jpgs-l16002.jpgs-l16004.jpg

Since this Listing is an "OBO" ...it seems worth contacting the Seller...and if it STILL RUNS... Make Him An Offer He CAN'T Refuse!
 

mrrsm

Original poster
Lifetime VIP Donor
Supporting Donor
Member
Oct 22, 2015
8,272
Tampa Bay Area
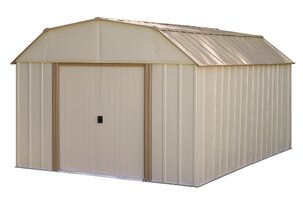
Not everyone with a shed like mine: An Arrow 10' X 14' Painted Steel Unit with Wide Double Doors is also going to have it constructed atop Eight - Buried - 10" Wide X 24" Deep Poured Concrete Cylinders along with a very sturdy, 3/4" Steel Bolt Anchored Wood Deck Platform built up underneath that Metal Building.

But... if You live in Sub-Tropical Climes all year round and You want to keep whatever You put inside of that Shed as "Bone Dry as the Gobi Desert..." then You'll consider the Time and Effort designing this layout as a Perfect Plan ...and "The Moolah" that You'll spend in order to make it this way ... will be VERY worthwhile:

ARROWWSHED10X14.jpeg

However, if you are doing this in favor of Protecting your Long Term *RELM* Investment, just know that since "ALL Solutions... Breed NEW Problems..." Beware of what damned near happened to ME the other day:

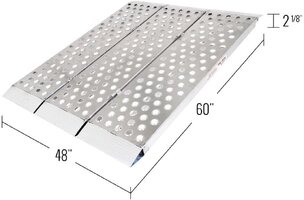
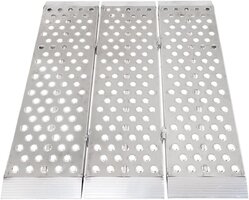
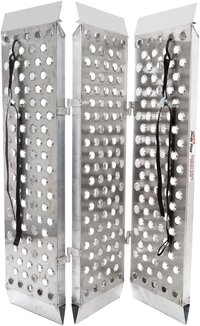
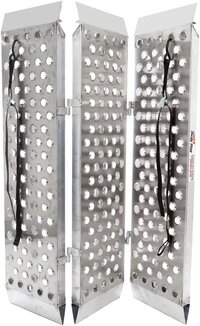
I had my Tri-Fold 48" X 60" Aluminum Ramp at the ready and I --- had just casually laid it over the narrow edge leading into the Shed --- and then, while heading up that Steep Angle, I *Gunned* the ACC Pedal to launch the now MUCH Lighter Weight Ryobi RM480E RELM and --- I Just BARELY cleared the edge of the entrance way with the Rear Wheels Churning & Gripping the Ramp "Teeth"--- when suddenly... The entire Aluminum Ramp sections lurched backwards and fell right out onto the ground!

TRIFOLDALUMRAMP2.jpgTRIFOLDALUMRAMP3.jpg

I thought... *Whew.... Boy... You DON'T Get THAT Lucky Every Day...WTF Dude...!!? So...YOU had Better DO Something about THIS!"

Now for the life of me, as fastidious about SAFETY as I usually am... I don't know why I did NOT investigate the design of the leading and trailing edges of the Tri-Ramp a bit more and come up with a SAFER means of Securing their Leading Edges so that incidents like THIS one can be prevented while STILL being able to completely Remove it to clear out Grass and Debris due to its ability to be just Lifted Up from "The Groove" and Folded into a Neat Pile of "Thirds":

TRIFOLDALUMRAMP1.jpg

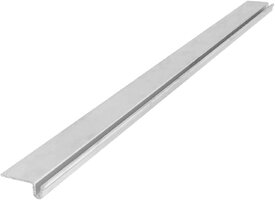
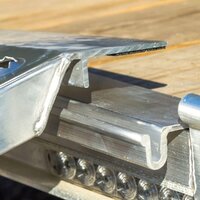
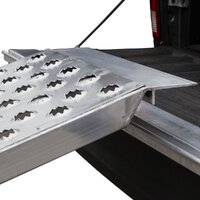
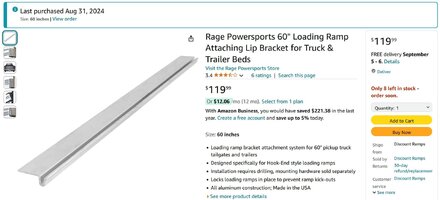
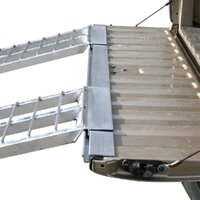
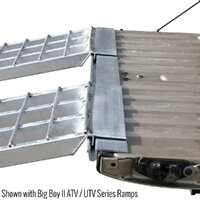
Well... it seemed to take forever to finally locate a Locking Aluminum Grooved Plate that can either be mounted upon the Rear of a Trailer, upon a Truck Tail Gate...or in THIS case... upon the outer portion of the Deck Entranceway leading into the Arrow Shed:

Comme ça ...

GROOVEDRAMPLOCK1.jpgTRIFOLDALUMRAMP4.jpgTRIFOLDALUMRAMP6.jpgTRUCKTAILGATERAMP1.jpg
TRUCKTAILGATERAMP2.jpgTRUCKTAILGATERAMP3.jpg

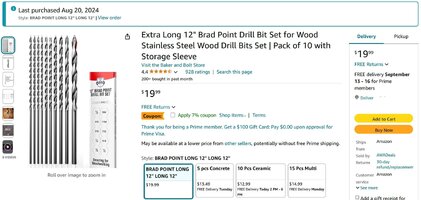
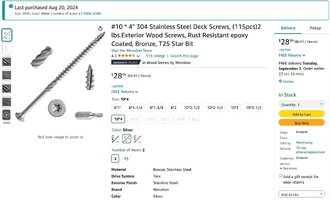
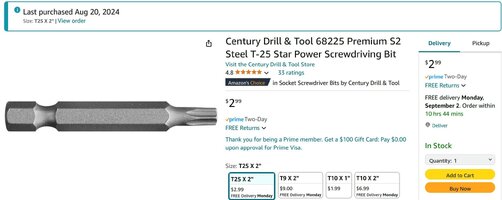
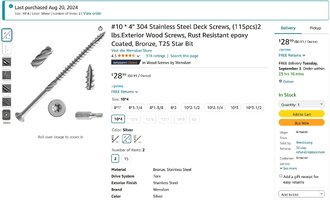
So I've ordered One Plate and of course... all of the gear needed to properly install it adjacent the Shed Threshold via Amazon...Thusly:

LOADINGRAMPLIPBRACKET1.jpg
BRADPOINTBITSPURCHASE.jpg
304SSCREWSPURCHASE.jpgTORX25BITS.jpg

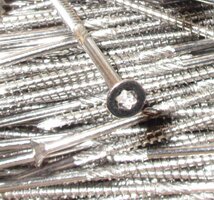
304LSSDECKSCREWS1.jpg
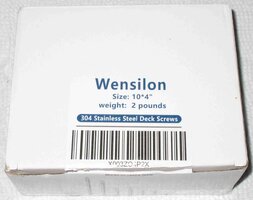
WENSILON2.jpg304LSSDECKSCREWS2.jpg
 

Attachments

  • 304SSCREWSPURCHASE.jpg
    304SSCREWSPURCHASE.jpg
    225.7 KB · Views: 6
  • TRIFOLDALUMRAMP1.jpg
    TRIFOLDALUMRAMP1.jpg
    78.1 KB · Views: 5
Last edited:

mrrsm

Original poster
Lifetime VIP Donor
Supporting Donor
Member
Oct 22, 2015
8,272
Tampa Bay Area
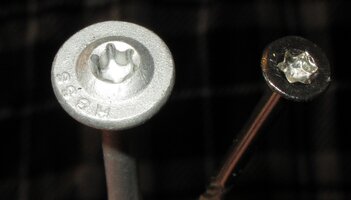
Since I Try My Best... NEVER To Do ANYTHING "By HALVES"... I took a second look at my Box of 304 S/S T-25 Aluminum Plate Fasteners and opted to search around again for something with a little more "BITE" to them.

These Construction Wood Fasteners are compatible with the 2" X 6" Treated Lumber I used to build my Platform Deck (15' X 11" x 2" X 6" Lumber - 14" On Centers for the Joyce Settings and covered in 3/4" Marine Plywood Decking). Such Fasteners are NEVER CHEAP...

(They Might Tear a Hundred Dollar Bill in HALF for a Full Box)

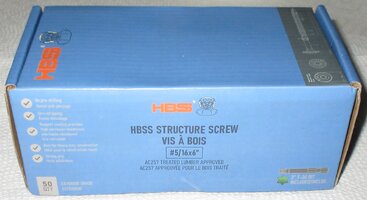
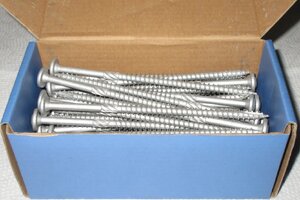
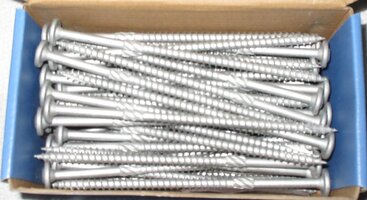
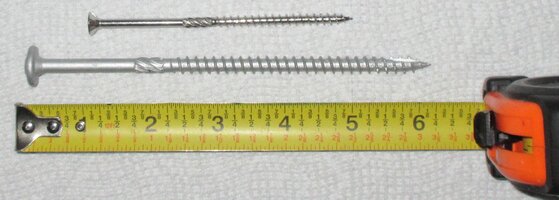
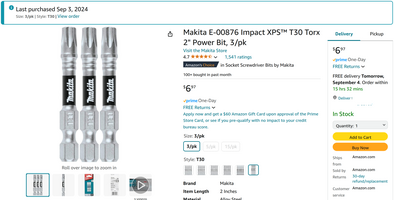
BUT... if the holes are Pre-Drilled, with a slightly smaller OD and then coating the Screw Thread Lines with a rake across some Bees Wax... then using my Milwaukee M18 Power Tools with the "Makita Impact Grade T-30 TorX Bits", I should be able to Drive home and sink in all 6" of their Length of the 4-6 Sturdy Screws required to ensure that the 60" Long Notched Aluminum Locking Plate will -- NEVER -- Shift or Come Loose with the repeated stresses placed upon the Tri-Fold Ramp ... For as Long as Grass...is GREEN...and Skies are BLUE! :>)

IMG_0992.jpgIMG_0993.JPGIMG_0994.JPGIMG_0997.JPGIMG_0999.JPGIMG_1005.JPGMAKITATORXT30BITS.png
 
Last edited:

Blckshdw

Moderator
Nov 20, 2011
10,771
Tampa Bay Area, FL
while heading up that Steep Angle, I *Gunned* the ACC Pedal to launch the now MUCH Lighter Weight Ryobi RM480E RELM and --- I Just BARELY cleared the edge of the entrance way with the Rear Wheels Churning & Gripping the Ramp "Teeth"--- when suddenly... The entire Aluminum Ramp sections lurched backwards and fell right out onto the ground!

I'm assuming you've got a somewhat smooth ground surface in front of your shed for that to happen, meaning not much grass to bite into. That was always something I feared happening when I first bought mine, so I made it a habit to back my mower into the shed, so the drive wheels would grip and pull the shed floor on entry, instead of pushing off the ramps.

Then again, I've got that soft sandy soil and plenty of weeds for the bottom of the ramps to dig into, so even the old wooden ramps I built didn't budge. The new steel ones I have now dig in a bit deeper, so no worries.

But I fully endorse everyone's mod bug to feed, and be merry. :biggrin:
 
  • Like
Reactions: mrrsm

mrrsm

Original poster
Lifetime VIP Donor
Supporting Donor
Member
Oct 22, 2015
8,272
Tampa Bay Area
Smooth Indeed... "As Smooth as D'Oyley Carte..." as William Shwenk Gilbert of 'Gilbert & Sullivan' was often wont to describe his 'Boss' Business Acumen' at managing the Savoy Hotel and the very famous Savoy Theater:

The Man...Himself (Mr. Richard D'Oyley Carte)

Richard-DOyly-Carte-768x1027-3029951326.jpg
And so too it was in my case, that the ground near to the Arrow Shed was likewise, ---Too Smooth By A Half--- since I previously had to Rip Out about 100 Miles of Wandering Vines in my back yard soil in anticipation of having a Brand New Fence installed around my yard,

This naturally left very little in the way of any solid anchorage for the base of my Aluminum Tri-Fold Ramp to be able grab any solid purchase there upon as the result of the Sandy Soil left behind... A Careless and soon to be obvious Dangerous Over-Sight on my part... But NOT for Much Longer!

**** The G&S Trivia continues with the fact that the Savoy Hotel was the First F*ve St*r Luxury Hotel to have a Bathroom with a Toilet Water Closet and Running Sink Water Plumbing in EVERY SINGLE ROOM... anywhere in the World.


5a94cd3591b4ecc3a4e0df0cc68e8a37-1545898718.jpg

As for the MOD BUG... It Ravages, Ravenously Onward... :>)
 

Attachments

  • The D'Oyly Carte Family.pdf
    304.8 KB · Views: 2
Last edited:

mrrsm

Original poster
Lifetime VIP Donor
Supporting Donor
Member
Oct 22, 2015
8,272
Tampa Bay Area
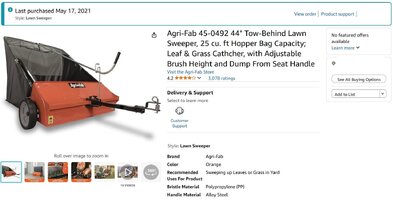
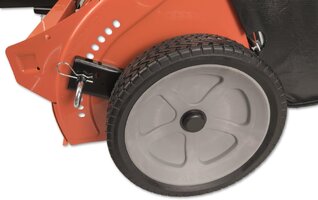
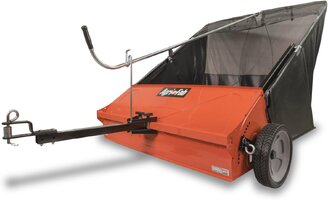
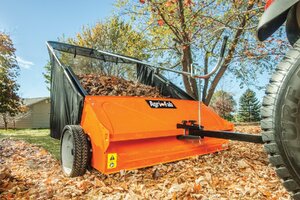
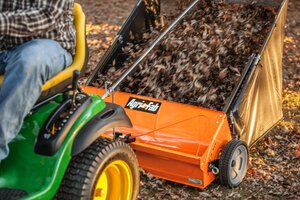
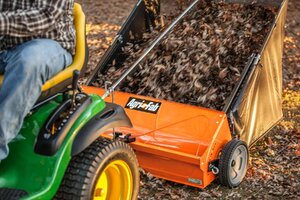
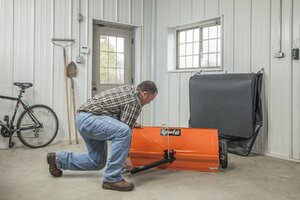
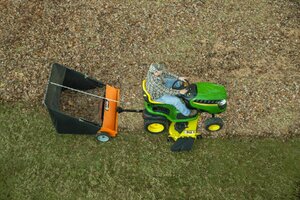
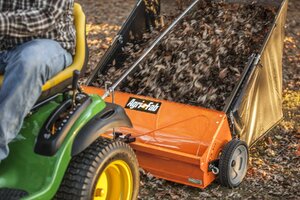
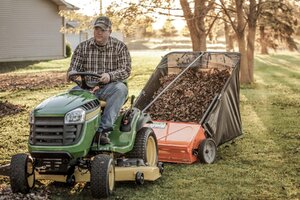
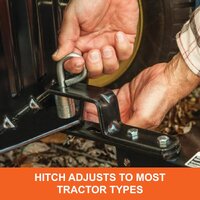
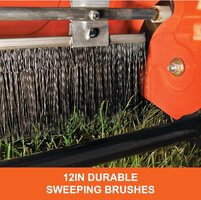
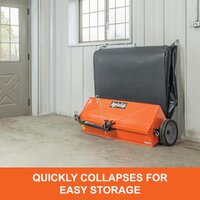
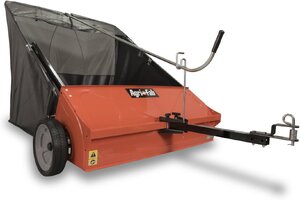
Well... Way Back In 2021... I decided that in order to deal with the problem of having to rake up leaves falling from my GIANT Pin-Oak Tree, I purchased THIS HUGE 44" Wide "Pull - From - Behind - A - Tractor" Agri-Fab Yard Sweeping Leaf Catcher:

AGRIFAB44INCHSWEEPER.jpg

71Febg+uD2L._AC_SL1500_.jpg614o7saJKnL._AC_SL1500_.jpg91ejGUcPBgL._AC_SL1500_.jpg71QEpOA9pJL._AC_SL1500_.jpg71ksHv3vCrL._AC_SL1500_.jpg71Wkg+O3txL._AC_SL1500_.jpg914eywQAISL._AC_SL1500_.jpg81Ct2LZX6XL._AC_SL1500_.jpg81HIxBPbaaL._AC_SL1500_.jpg81tfM0lZhuL._AC_SL1500_.jpg91j6vL7wOPL._AC_SL1500_.jpg81m5Z8R9wrL._AC_SL1500_.jpg619LnYdq0fL._AC_SL1500_.jpg

"The Thing" of it is... Ever since it arrived, I have never bothered with even "Un-Boxing" it or trying to use it because of these two Reasons:

(1) The Ryobi RM480E (when set to a HIGHER Blade Tray Level) WILL pick up those Damned Pin-Oak Leaves...and guide them into the Bagger Dual Bag Rear Unit ...with NO Trouble!

(2) The Width on my Single Cedar Wood Back Yard Gate was ONLY 36" Wide.

However, since then (...and apparently happening Only Every Seven Years in Between) My HUGE Oak Tree decided to "Fruit" this last year and consequently, produce an enormous quantity of Acorns that. to this very day, keep dropping from a height of around 75' and peppering our Roof Tops with these Heavy Hard Oval Organic "Rifled Slug" Sized Pellets.

In addition... I have NEVER seen so many Acorns wind up dropping into the Front Yard; so many in fact, that they act like Ball Bearings and will dump anyone not aware of this slippery problem ...right on their A***es! I suspect that having TWO Back-2-Back Hurricanes thrashing things around down here also managed to help to drop more of them down as well.

So for these Two New Reasons, I am going to Un-Box that Sweeper, Assemble it and hook it up to the back of the Ryobi RELM and then Drag it around behind the Lawn Mower with the Blade Tray Elevated as high as possible a few dozen times and see if IT can scoop up all of those Damned Acorns:

(1) My New Tan Vinyl Fence is equipped with TWO Five Foot Wide Gates, which should allow for E-Z Passage around and around both sides of the yard while doing this exercise.

(2) With the advent of having reduced the weight of the Ryobi by 260 Pounds via the Battery Swap from AGM over to the LiFePO4 Batteries, the Ryobi can easily pull that Sweeper around now and not get bogged down in the slightest. :>)

Oh...and Just In Case...it Does -=NOT=- Work... there is always THIS Tool to Handle A Nut Job:

NUTPLUCKER.jpg

PS...

The BIGGEST Reason for my taking more direct actions here is that while using my Milwaukee M-18 Weedeater... It was picking up those Damned Acorns and while hurling them around...one ricocheted off the Big Oak Tree Trunk ...and smacked me RIGHT in The C*ds! :wowfaint:
 
Last edited:
Blckshdw

Moderator
Nov 20, 2011
10,771
Tampa Bay Area, FL
I had been considering getting one of those sweepers. I have a giant mango tree out back, and it always dumps a ton of leaves right behind the house and in front of the shed. They get under all of the shorter trees and bushes, and accumulate along a short run of fencing, so I always have to dig back there with a rake to pull them out. I'll usually bag them, and run them through my lead shredder for free mulch, but I did try going over it with the mower, while the bag attachment was on it.

It did pick up and mulch a lot of it, but it also left a bunch of leaf clippings behind, and since my lawn is in terrible shape, any of the bare patches would be somewhat filled in by shredded leaf clippings, which are impossible to pick up at that point :duh:

With my set of yard bags showing their age and starting to deteriorate, I may revisit the idea of getting the sweeper. Just have to make some room in the shed, so it has a protected place to live :undecided:
 
  • Like
Reactions: mrrsm and Redbeard

mrrsm

Original poster
Lifetime VIP Donor
Supporting Donor
Member
Oct 22, 2015
8,272
Tampa Bay Area
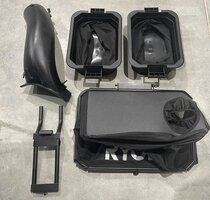
So...THIS is the Kind of Problem ...That Makes Me INSANE!!!

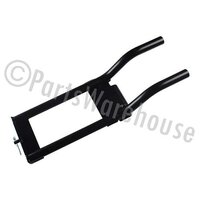
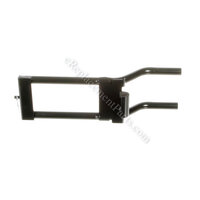
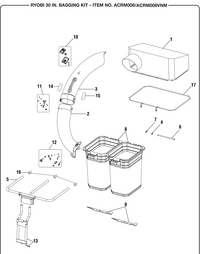
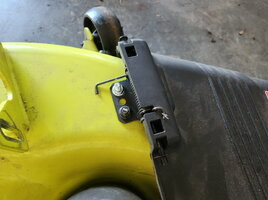
I caught the outer edge of my Double Bagger 38” Wide Plastic Shroud on my West Fence Gate… and wound up Bending THIS “Thing” ...Pretty FUBAR:

Bagger Assembly Lower Frame 120690001

HM-120690001-2.jpg3271503-02-01-342721202.jpgACRM008-1-3937770765.pngrs=w_600,h_600-2071903368.jpeg

https://www.ereplacementparts.com/bagger-assembly-lower-frame-p-3271503.html

BUT...NONE...of these Places carry that Part either… NOT ONE!!!

https://www.partswarehouse.com/Homelite-Ridgid-Ryobi-Lower-Attachment-Frame-Bagge-p/hm-120690001.htm

https://www.ombwarehouse.com/homelite-lower-attachment-frame-bagger-120690001.html

https://www.partstree.com/models/ac...agging-kit-rev-03-2018-12/general-assembly-0/

https://www.partstree.com/parts/homelite-120686001/

https://www.repairtoolparts.com/ryo...s/ryobi-120690001-bagger-assembly-lower-frame

https://www.repairtoolparts.com/ryobi-parts/ryobi-acrm001-(000997034)-parts-list

So ...it looks like if I cannot “Hammer” this Lower Bracket right back into a reasonable shape and condition, I may have to get the Base Tube and Plate Steel Materials and Weld up a Reasonable Facsimile ….But Jesus Palomino, Ryobi…??? You don’t even “Support -->The Supports” on your $5,550.00 Lawn Mower? COME ON!!! WTF Dudes!
 

Attachments

  • ACRM001-(000997034)-Ryobi-PB.pdf
    336.4 KB · Views: 3
Last edited:
Blckshdw

Moderator
Nov 20, 2011
10,771
Tampa Bay Area, FL
I caught the outer edge of my Double Bagger 38” Wide Plastic Shroud on my West Fence Gate… and wound up Bending THIS “Thing” ...Pretty FUBAR:

I did something similar, caught the corner of the bagger on something, and that curved bracket that holds the top of the frame on the mower got tweaked pretty good. It still holds onto the frame, but one side is stretched out, so the whole assembly can twist a few degrees. I attempted to fix it by placing it in my vice, and hoping to shrink the widest area, but it tried to close the whole radius, not just the part that was bent out of shape, so I left it.

I checked Gardner Inc, who's one of their partner suppliers, they don't have it either, so you may be S.O.L. unless you can fix it yourself.

 
  • Sad
Reactions: mrrsm

mrrsm

Original poster
Lifetime VIP Donor
Supporting Donor
Member
Oct 22, 2015
8,272
Tampa Bay Area
It may be the case that in many circumstances, the use of a Ryobi RM480E "RELM" might be either an -=expensive extravagance=- due to having a minimal amount of Yard... or just plain impractical for folks without enclosed Garages or Roomy Sheds.

Nonetheless, whether just a Patch of Grass or an expansive acreage, it all becomes unruly and all will still require a decent cutting and manicure if one enjoys "The Pride of Place" and the need to avoid the scrutiny of Angry Neighbors and-or diligent County Inspectors. So It follows on that after receiving a TXT from my son asking,

"Say Dad... Can I borrow the Ryobi today...?"

...since I had to get down to the business of finding a better solution, I cautioned him about the underpinning logistics of getting this Mini-Tractor Sized Gear that is the Ryobi "RELM" onto and off of either a Truck Bed or a Tow Trailer and so in lieu of this potential calamity, I offered him yet another more practical solution as an "80 Volt Battery Powered Gift" for this coming 2024 Christmas.

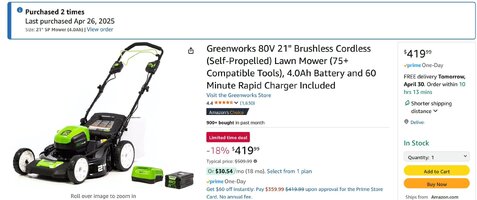
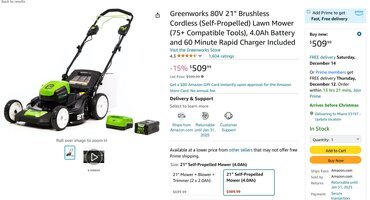
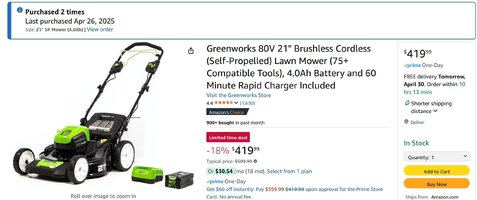
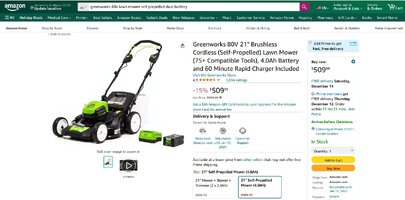
It follows on that by investigating this "In Kind" of Electrically Powered, self-propelled Lawn Mowing Gear... I settled upon getting him THIS Unit:


...and a Canadian's Perspective and Unboxing:


GREENWORKS80VOLTMOWER1.jpg

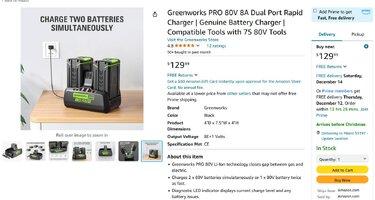
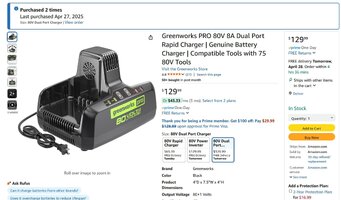
I also opted to include an additional Dual Battery FAST Charger that can Re-Charge BOTH Batteries in 45 Minutes:


GREENWORKS80VDUALBATTCHARGER1.jpg

...and One Additional 80 Volt DC Battery:


GREENWORKS80VOLTBATTERY1.jpg

Naturally, after he described the modest size of his back yard and reconsidering the other involved difficulties... this alternate idea greatly appealed to him and he thanked "The Old Man" for getting him out of the Dreaded "Get the Gasoline, Change the Oil, Replace the Spark-Plug and TRY to get it to START..." Routine... We settled on this Gear as the Best and Most Practical Solution... well and truly Clean, and Highly Powered by Reliable 80 Volt DC Batteries.
 
Last edited:
Forum Statistics

Threads
23,725
Posts
642,675
Members
19,260
Latest member
rezha

Members Online