"Hoping... For Loping..."

mrrsm

Original poster
Lifetime VIP Donor
Supporting Donor
Member
Oct 22, 2015
8,198
Tampa Bay Area
Wow... At around 4:45 into the viewing of his BBK Model #1709 Throttle Body Installation Video ... THIS Image Popped Up...


...and as soon as I saw THIS Vehicle:

REDSCHNELLFROMHELL2.jpg

...it Just FREAKED ME RTFO! I immediately thought back to @littleblazer and @brianlibby791 when they were working away like a House on Fire on their Red Truck Project courtesy THIS Link where Post #116 was my only modest contribution towards memorializing The Saga of Their Monumental Mechanical Efforts:


Damn... Son... Talk about "Deja Vu ...All Over Again..." ***Whew*** We Should ALL Have Successful Projects ...Like THAT One!
 

littleblazer

Member
Jul 6, 2014
9,267
Wow... At around 4:45 into the viewing of his BBK Model #1709 Throttle Body Installation Video ... THIS Image Popped Up...


...and as soon as I saw THIS Vehicle:

View attachment 90189

...it Just FREAKED ME RTFO! I immediately thought back to @littleblazer and @brianlibby791 when they were working away like a House on Fire on their Red Truck Project courtesy THIS Link where Post #116 was my only modest contribution towards memorializing The Saga of Their Monumental Mechanical Efforts:


Damn... Son... Talk about "Deja Vu ...All Over Again..." ***Whew*** We Should ALL Have Successful Projects ...Like THAT One!
Coming up next, red truck project #2, has anyone ever actually had to build a 4l80e?
 

mrrsm

Original poster
Lifetime VIP Donor
Supporting Donor
Member
Oct 22, 2015
8,198
Tampa Bay Area
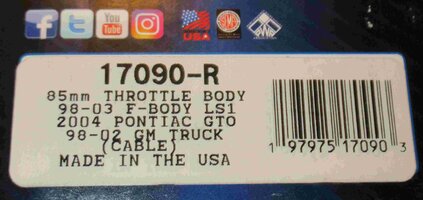
Okay… Ever since I spotted that Damned Factory Re-Furbished BBK Model #107090-R 85MM Cable Controlled Throttle Body over at their Main BBK Site… My Teeth have been Chattering (Yup...I still have ALL of them as OEM Issued....and a Few Friends in Town, Besides) to want to BUY that Friggin’ Thing. I was also wrestling with the problem of NOT having any Luck in finding any of the Very necessary Installation Hardware for the BBK Model #1709 that just arrived. So I banged out a simple “RFH” (Request For HELP!) Message over to the only confirmed and working BBK email address I could locate online as being:

tech@bbkperformance.com

After I explained what the situation was via making the eBay purchase… I realized from the reply I got back “Johnny On The Spot” from the BBK Tech Support Man that all I needed to do was “...supply a copy of the Original BBK Authorized Receipt of Purchase… and We’ll send you the Parts Free of Charge...”.

Uhhhh Ohhh ..Ruh Roh!

Oooops…
I soon realized that since this eBay Transaction was for a “USED” Throttle Body ...that the Folks at BBK might not appreciate the idea of anyone trying to sneak in through the back door to raid their “Parts Locker” for something not covered by any OEM Sales Agreement. But the more I thought about THIS:

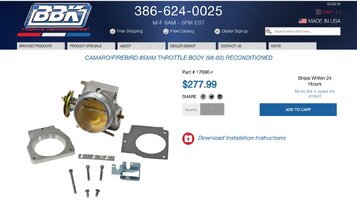
https://www.bbkperformance.com/camaro-firebird-85mm-throttle-body-98-02-reconditioned.html

...the MORE I still wanted to get my hands on THAT one, too. So I thought I might solve BOTH of these problems at the same time if I purchased the Refurbished Model #17090-R Unit, and then after receiving the Secondary Hardware for the BBK Model #1709, later on, I can install that 80MM Flavored TB on my son’s 2003 Chevrolet White Silverado 4.8L Engine.

Or… Maybe NOT, as I’m not certain that it uses the same Cable Controlled Throttle Body as the Y2K to 2002 Trucks do with their LS Engines. Finally, I thought… “Ahhh, What the Hell… I might as well just get the Damned 85MM Unit and be DONE with it.” So I Did.

And I THINK I can justify this move because so far, the Dominant Theme has been to focus my attention on the Cam Kit Increasing the Ability of the Engine to Move the Exhaust more efficiently via the Headers and Larger CAT-back System... Right Out The Back. Well… if that is the case, bringing in as MUCH AIR AS POSSIBLE through Front of the Intake Manifold makes just as much sense for improving the possibility of making More Horse Power and Torque. Like I said… “What The Hell...” Wow indeed... Talk about having to Make Changes to The VE Tables once the TSP Cam Kit gets installed.... HP Tuners... Here We Go.

BBK1790-R-BUY.jpg
 

mrrsm

Original poster
Lifetime VIP Donor
Supporting Donor
Member
Oct 22, 2015
8,198
Tampa Bay Area
  • Like
Reactions: littleblazer

mrrsm

Original poster
Lifetime VIP Donor
Supporting Donor
Member
Oct 22, 2015
8,198
Tampa Bay Area
Good News came with an email I received earlier today from the Customer Service Rep at BBK. He is sending the ENTIRE Kit for the eBay Purchased BBK Model # 1709 Free of Charge, including S&H. This means that If I wind ups selling that as a Package deal here to anyone interested (@Reprise...?) in Boosting their Stock GMT800 on the 1999-2002 Full Size Trucks with the 4.8L, 5.3L or 6L Trucks... it WILL be able to install just as the Brand New BBK 80MM TBs are designed to be... No Question about it!

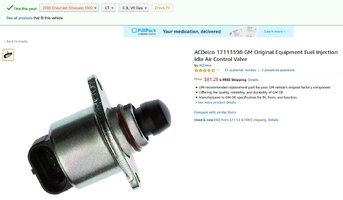
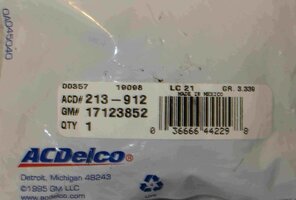
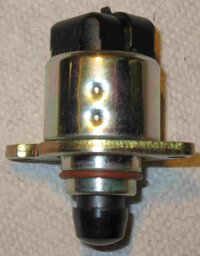
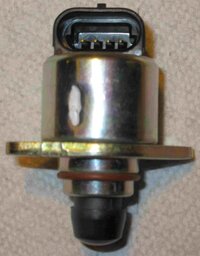
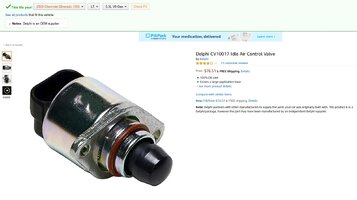
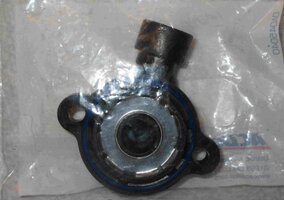
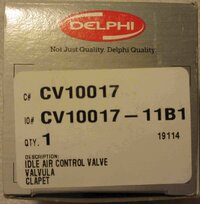
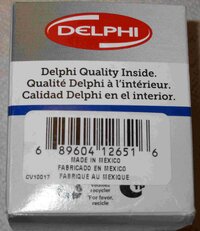
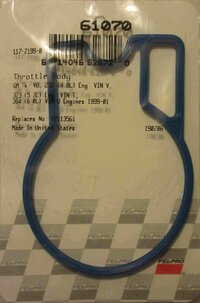
While I'm waiting for the arrival of the BBK Model #17090-R Re-manufactured 85MM Throttle Body Kit ... I was glad to receive the following items this evening that deserve to be installed as Brand New Components as well once they all get fitted to Intake Manifold for a Fresh Silicone "O" Ring Gasket Seal...and on the New TB using a New ACDelco TPS and New Delphi IAC Valve. I managed to Kill Two Birds with One Stone by getting the Better Quality Delphi IAC Valve (Made In Mexico) versus the ACDelco flavor offered on Amazon. That one looked to have less quality and it actually costs around $5,00 more than the Delphi replacement IAC Valve.

My other reason for wanting the Delphi is that while 'hitting the books' all this week and catching up on my HP-Tuners Training... some mention was made that when trying to make A/F adjustments to the Early Model Gen III LS Cable Controlled Throttle Bodies, regardless of which Tuning Method is selected to get the Truck to idle well and not stall or surge... the functional responses of the IAC component designs versus that of the Fully Electronically Controlled Throttle Bodies ...'tends to be a little sluggish or slow in reacting to any Tuning Adjustments or A/F Changes'. And so my choice will ALWAYS be to select Delphi Parts over the only other OEM ACDelco versions of such critical, electro-mechanical components ...any day of the week... YMMV:

ACDELCOIAC4Y2KTRUCK.jpgACDELCOTPS4Y2KSILVERADO1.jpgDELPHIAC4Y2KSILVERADO3.jpgDELPHIAC4Y2KSILVERADO4.jpgDELPHIAC4Y2KTRUCK.jpgACDELCOTPS4Y2KSILVERADO2.jpgDELPHIAC4Y2KSILVERADO1.jpgDELPHIAC4Y2KSILVERADO2.jpgFELPRO61070TBGASKET.jpg

One last mention concerns the apparent delay in my receiving (2) OEM Disk Sets of Microsoft Windows 2000 Professional; one to install right away on a New 2.5" Hitachi Hard Drive and the other to 'Tuck Away... For a Rainy Day'. The idea here is that since there are just so many sketchy and quite frankly completely unreliable early developmental legacy versions of Windows '95 and '98 still around that I wanted to get something instead in the way of a very familiar and friendly Business Grade MS Windows Operating System to install on my Dell Precision M65 Work Station. Nothing can ever Top Windows 2000 Professional for that aspect of having been the Sturdy and Reliable Work Horse of the Legacy Software once called Windows NT.

It follows on that I want to create a dedicated Installation of the Bosch OEM TIS2000 DVD on my Dell M65 Box and NOT have to be concerned with any BSODs or other absurd OS failures or problems during this second attempt at Cloning the Y2K Chevrolet Silverado 1500 PCM System with my matching VIN from the 2000 OEM Stock PCM ...as it functions very nicely right now inside of the Blue Y2K Chevy Truck.

If needs be... I want to be able to Swap them with each other and so keeping the Stock PCM in its current 'Pristine" state is critical. Then I'll Store that PCM right along with the GM OEM LM-7 Roller Camshaft and Pushrods ...just in case the Jackasses that keep trying to FUBAR Florida Residents over, year in and year out up in Tallahassee decide that they want to "Re-Institute SMOG Inspections" 24 Hours after I finally manage to finish getting this Damned, Fine Truck Performance Upgrade Project finished and Up and Running. If THAT PITA event comes to 'Pass' I'd be in very sad shape indeed, if I could NOT Return the Truck to its Stock Condition and 'Pass' any such State Inspections ever again.
 
Last edited:

littleblazer

Member
Jul 6, 2014
9,267
@MRRSM Just by chance, something you'd be interested in?

 
  • Like
Reactions: mrrsm

mrrsm

Original poster
Lifetime VIP Donor
Supporting Donor
Member
Oct 22, 2015
8,198
Tampa Bay Area
Damn... Now THAT is What I would call... A CAPACIOUS THROTTLE BODY... LOL. Thanks for the Link.

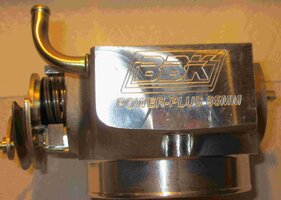
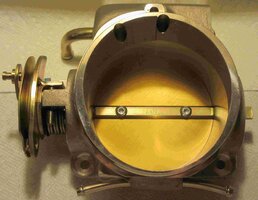
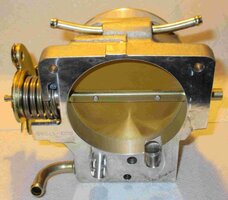
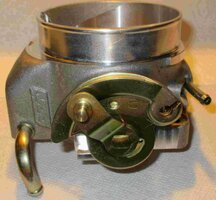
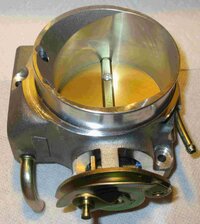
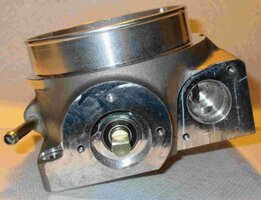
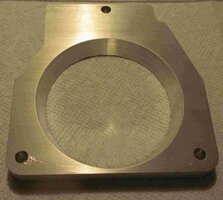
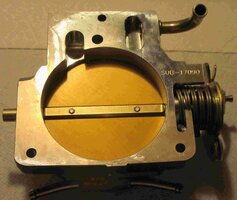
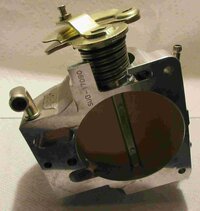
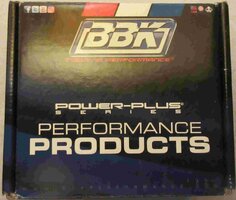
And its funny that you would provide that information just a few minutes after THIS item arrived from BBK in Less than 24 Hours after I pulled the trigger to get the BBK 85MM TB Flavor. I'll install the New ACDelco TPS and Delphi IAC on this thing tomorrow morning. I had to shrink down the resolution of all these images about 3 orders of magnitude just to get the Server to accept them...so many look quite "pixelated":

BBKMODEL17090R2.jpgBBKMODEL17090R4.jpgBBKMODEL17090R5.jpgBBKMODEL17090R6.jpgBBKMODEL17090R7.jpgBBKMODEL17090R9.jpgBBKMODEL17090R10.jpgBBKMODEL17090R12.jpgBBKMODEL17090R14.jpgBBKMODEL17090R15.jpgBBKMODEL17090R18.jpgBBKMODEL17090R19.jpgBBKMODEL17090R20.jpgBBKMODEL17090R21.jpgBBKMODEL17090R17.jpgBBKMODEL17090R16.jpgBBKMODEL17090R11.jpgBBKMODEL17090R8.jpgBBKMODEL17090R1.jpg

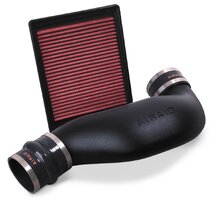
I've also been thinking after doing some research about installing a Larger "Airaid" Intake Pipe to replace the Bellows Designed OEM version and include a High Flow Dry Filter within the Stock Air Box, but without resorting to taking the CAI approach... Just to improve the last two major Air Intake Restrictions left that would probably get in the way of that BBK 85MM TB. This set runs about Two Bills:


Airaid 201-712 Direct Replacement Premium Dry Air Filter

61amfWX5DPL._SL1000_.jpg
 
Last edited:
  • Like
Reactions: littleblazer

Reprise

Lifetime VIP Donor
Supporting Donor
Member
Jul 22, 2015
2,724
This means that If I wind ups selling that as a Package deal here to anyone interested (@Reprise...?) in Boosting their Stock GMT800 on the 1999-2002 Full Size Trucks with the 4.8L, 5.3L or 6L Trucks... it WILL be able to install just as the Brand New BBK 80MM TBs are designed to be... No Question about it!

Appreciate the offer, but I'm good WRT Throttle Bodies - I got the TB with the TBSS intake that I purchased awhile back, and also just purchased the 3-to-4 bolt adapter which will allow me to use the existing stock TB & airbox with the TBSS intake, if I choose to go that route. So I don't have a need for the BBK one.

Looks like you're getting closer to finishing your build (and I'm getting farther away from starting mine... :sadcry:
Looking forward to seeing the end result! :2thumbsup:
 

mrrsm

Original poster
Lifetime VIP Donor
Supporting Donor
Member
Oct 22, 2015
8,198
Tampa Bay Area
Thanks. And of course, setting aside ALL of the information I've covered so far... and ALL of the images I've used to explain and document the Progression of my Project... You and I MUST be also informed by an aspect of "Uncertainty" and "Probability" that will serve to literally... let You Off The Hook for NOT Having Started YOUR Project.

What I'm referring to was coined early in the development of Fundamental Physics by Professor Werner Heisenberg using his "Uncertainty Principle". Stay with me on this for just a few minutes... and you'll see what We are BOTH uniquely up against:

Heisenberg's Theorem had to do with the Ancient idea that follows "Zeno's Paradox of The Arrow". That Greek Philosopher Beat Heisenberg to The Draw by Centuries with THIS Idea:

"If you try to Study an Arrow in Flight... if you can SEE the Arrow at any given Single Identifiable Point along its Trajectory... then you will NOT be able to know How Fast it is Moving. Likewise... if you can Measure the Speed of the Arrow ...then you will be unable to know precisely Where The Arrow IS at any given Moment in Time along its Trajectory."

In the early days of studying "Quantum Physics"... Heisenberg's "Uncertainty Principle" described the phenomena of the connections between Matter and Energy as involving "particles and waves" and he described this phenomena in Mathematical Terms using his elegant Formula:

HEISENBERGUNCERTAINTYPRINCIPLE..jpg

This problem concerns BOTH of us... as presently, We are at the Opposite Ends of the SAME Project. In my case... It took me almost an entire year before I realized that if I Did NOT get going on it... Due to my Advanced Age and the "Uncertainty" that since I've passed the age of 70 ...there is the real "Probability" that I may or may NOT Live Long Enough to Complete the Job and still be around to Enjoy the Fruits of my Labor. So I finally decided to "Just Get On With It..." or else my Inertia would carry me well past the Age where I might still be as Physically Robust, Healthy and STRONG as I now appear to be... long enough to perform all of the required Mechanical Work.

Perhaps more importantly, I would also need to Act Fast while I still possess the Mental Acuity and the Ability to Learn How to Use all of the Complex Hardware and Tuning Software of HP Tuners. I came to realize that if I wanted maintain control over ALL of the elements of the Project, I would need to make almost Daily Progress across the board in order to gather ALL of these New and Powerful Parts and Pieces to be installed within or Bolted onto the LM-7 5.3L Engine... First... and in the "meanwhile" ... literally... "Hit The Books" using a Professional HP Tuners Training Course within enough time to be able to ensure the achievement of having a Tuned, Smooth Running, Higher Performance Engine.

Meanwhile, in parallel efforts... I would also need to use my Mechanical Knowledge and Skill Set to choose these components wisely and NOT Start to Do the Work until EVERY SINGLE COMPONENT, TOOL AND ALL OF THE INTELLECTUAL SUPPORT MATERIALS HAVE ARRIVED. And this is where YOU and I must pay even closer attention to why following THIS approach will allow us to avoid becoming "Hostages to Uncertainty".

If I'm not mistaken... We BOTH live in The State of Florida... and unless I miss my guess... We will BOTH require the use of our Trucks should Hurricanes and Tornado Storms threaten our lives and our ability to escape from areas that will otherwise leave us Trapped and Stranded. To my way of thinking ... there is ALWAYS some level of "Uncertainty" that a Land Fall Hurricane will suddenly boil up in The Gulf of Mexico and horrendously visit us within a matter of only a few days. The LAST thing that either of us would want to face...would be the Vanity of Tearing into our Trucks ...Prematurely and Piece-Meal.. and then NOT be able to USE them should the immediate need arise.

And so it is very likely that I will NOT begin the work of assembling the Engine Camshaft Kit, Engine Roller Rocker and Valve Spring Work, Install the New Intake and Exhaust Headers and CAT-Back Hardware, etc... until such time as Heavy Weather issues manage to completely subside.

Historically, that can mean for some time around Late September or later still, in October. That also allows enough time for the subsidence of the Daily Heavy Thunder-Showers we've been enduring and for the arrival of hopefully Cooler Weather that sometimes arrives down here in The Fall. Those improved conditions can accelerate the work happening in the outside areas and the undersides of the Trucks... when it becomes less 'Tropical" and clammy, less attractive to Mosquitoes and a whole lot less uncomfortable to perform then during these Driving, Daily Rain Storms.

So with all of that said... the only thing that is "Certain" at this point is that I fully intend to Keep Moving Forward... Until I am able to Complete My Y2K Truck Performance Upgrade Project... and in the meantime, your situation will remain "Certain" .... "Probably" only as long as you keep having to put things off on Your Own Project. Join me as soon as you can...
 
Last edited:
  • Like
Reactions: Redbeard

mrrsm

Original poster
Lifetime VIP Donor
Supporting Donor
Member
Oct 22, 2015
8,198
Tampa Bay Area
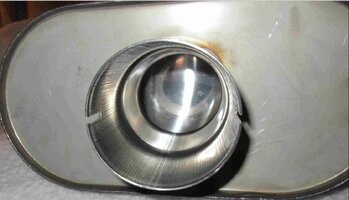
So its been a few months at least since I purchased the DNA Motoring Complete Stainless Steel CAT-Back Exhaust System Model # DNA CBE-CS99-V6V8-2DR and I just wanted to return to the only real issue that concerned me during the “Un-Boxing” and that was my search for an answer to THIS Question:

“Which End is 4 the Exhaust Stream Inlet- or- Which End is 4 the Exhaust Stream Outlet?”

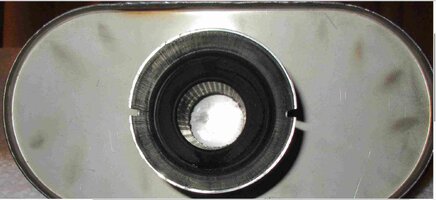
Hell… you don’t have to rely upon “The Law of Large Numbers” to conclude that you’ve got an Even 50-50 Chance of getting this either Right...or Wrong. But nonetheless… DAMMIT! there MUST be some good reason why the internal structures are physically different when viewed head on from either pipe end of this Stainless Steel Muffler.

At the time I posed this Question a while back, I was surprised to discover that among the After-Market Companies that Manufacture these Damned Things… It MUST be some kind to Trade Secret between them and the Guys who ell such systems to “The Great Unwashed” and the Retail Muffler Shops as Professional Installers who deeply desire to keep up THEIR healthy revenue stream by never embossing a simple → Directional Arrow to remove all doubt about the matter. It seems that one COULD install these equal sized inlets and outlets ‘Back-Asswards’… and STILL have a nominal flow of the exhaust stream ...unless the internal baffling is necessarily fitted with directional louvers.

Just as Liquor Stores and Bars never go Broke whether or not the Economic Times are Good...or Bad, neither do any of The Muffler Shops risk going out of Business. Having Decent, Working, Street Legal Exhaust Systems are NOT an Optional thing to do to any vehicles without them as Urban and Sub-Urban Societies (... and Neighbors in general) all tend to really frown on such things being ‘Too Much Out of Ordinary Repair'.

By the way… Just in case anybody is wondering “Jesus Palomino, Bobby... Why does your Exhaust System HAVE to be “Made of Stainless Steel”…?”

WHYILIKEASTAINLESSSTEELEXHAUST.jpg

Nuff Said?

So anyhow… I went back to poking around on “The ‘Nets” and found scant helpful information laying around as dialogues on this topic. But while THIS exchange does NOT address the specific issue… it comes just about as close to being REAL information as I am ever likely to find:

Mufflers <----> Over the Holes = Right Way…??? Into the Holes is Back Asswards ???

The first response made sense: (Paraphrased with some minor corrections for Grammar and syntax...)

What JFalkners said. I had the MBRP kit $169.00 at DPPI. I installed it myself using the ‘into the hole’ logic. Nothing wanted to line up right, so I went to the Local Muffler Shop for some custom bending. The muffler guy spoke to me in Broken English (as far as I could understand) and let me know that I was an Idiot ...and had it installed backwards. He pulled the muffler off and flipped around (over the holes) and every thing lined up perfect. So I have run the MBRP in both directions with absolutely no difference in noise levels.”

The second response made sense...and was made by an Expert in the field:

Actually, you'll get Better Sound Dampening with the Exhaust Stream Flowing Over the Louvers, as it creates a low pressure area and "sucks" the Sound Waves in to the Packing Material on the back side of the Louver, the “Reverse It” thing ...is an Old Wives Tale. “

So with THAT Sage Advice in mind ...I’ve decided to call THIS End The Inlet Side:

DNAMUFFLERINLETSIDE.jpg

….and call THIS End the Outlet Side:

DNAMUFFLEROUTLETSIDE.jpg

Realizing of course that as you can plainly see, BOTH sides of the DNA Muffler are equally center-spaced and have Identical Pipe Stub lengths and Outside Diamaters:

DNAHIGHFLOWMUFFLER.png

And if that arrangement turns out to be WRONG...then I’ll simply Reverse their Positions. :>)

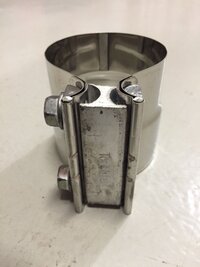
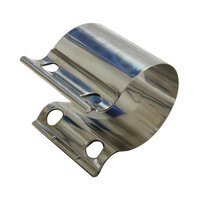
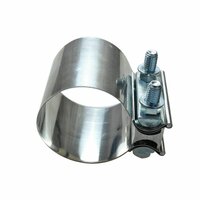
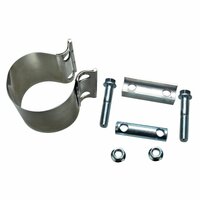
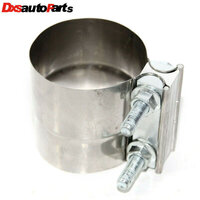
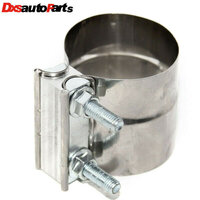
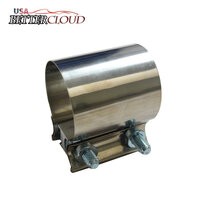
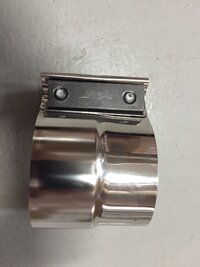
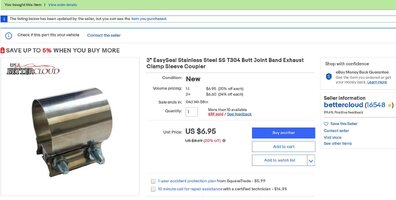
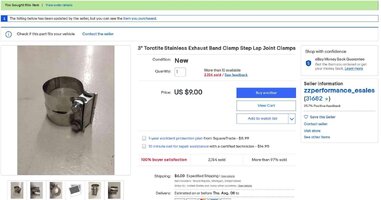
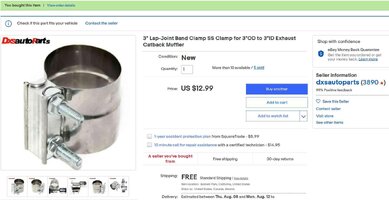
The only other “Exhaust System” issue that was pranging my thoughts was whether I would be able to improve all of the Stainless Steel Clamps as each and every juncture and reduce the chances for any Exhaust Leaks and also have a few Spares on hand besides. So I poked around on eBay and ordered three paired sets THESE:

s-l16003.jpgs-l16001.jpgs-l1600FF.jpgs-l1600DD.jpgs-l1600D.jpgs-l1600CC.jpgs-l1600C.jpgs-l1600BB.jpgs-l1600A.jpgs-l1600.jpgs-l1600AA.jpgs-l1600B.jpgs-l16002.jpgSTAINLESSTEELEXHAUSTCLAMP1.jpgSTAINLESSTEELEXHAUSTCLAMP2.jpgSTAINLESSTEELEXHAUSTCLAMP3.jpg

Here are some relevant, On Topic Long Tube Header and “Y” Pipe R&Rs for Full Size GM and GMC Trucks.

But First... This is Important:

At 14:00 into this First Video ... @xavierny25 and his Brother (and other concerned GMT Members) will appreciate watching how this Dude uses his "Tight Reach Wrench" in a Very Tight Spot while Removing his Exhaust manifold of a Full Size GM Truck V8 Engine. I ordered THIS least expensive version for the 3/8" Drive Sockets and Ratchet as it definitely looks like it WORKS!:

Tight Reach Wrench... $25.00 on Amazon:


So… How DOES a Muffler… Muffle?

 
Last edited:

mrrsm

Original poster
Lifetime VIP Donor
Supporting Donor
Member
Oct 22, 2015
8,198
Tampa Bay Area
This is just a "SWAG" here... (Scientific Wild Ass Guess)... But there MUST be some kind of GM "Shaman" ...who sits in an empty room at the Top Floor of GM Headquarters, swaddled in White Linen... His shaved head, smooth and glistening under the flesh-toned Fluorescent lighting as he floats weightlessly; a mere few inches above the Woven Bamboo Tatami (Japanese Floor Matting)...

And... with his eyes closed, he ponders his navel while in a Deep, Meditative Trance; existing in that Room... One Generation after Another as GM Vehicles keep coming off of the Endless Assembly Lines, while over and over... he loudly Hums this Mantra over the GM Corporate Loud Speakers:

Nam Yo Ho... Rengay Kyo

"Do NOT Create MORE Fasteners than absolutely NECESSARY... One Set Per Vehicle...."

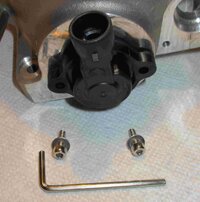
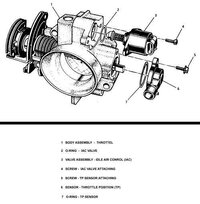
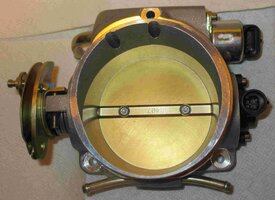
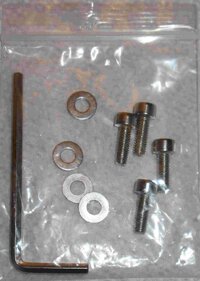
This HAS to be the case... otherwise ...WHY in the name of God's Holy Trousers would it become almost impossible to purchase the High Grade Steel Fasteners for our Vehicles?. Such is the case even with the Tiny Screws that hold the Throttle Position Sensor and the Idle Air Control Valve onto and inside of the Driver's Side of the Non-Electronically Controlled GM AND BBK After-Market Throttle Bodies.

I'm sure that you are thinking, "Bobby.... WTF? Why not scavenge the ones from your GM Stock LM-7 Throttle Body and call it even?" The simple answer is that they have (19) + years of Rust and Corrosion on them ...and even if I were to clean them right down to becoming as Bright and Shiny as they were almost 20 Years Ago... They would STILL NOT BE BRAND NEW.

My mild concerns from time to time involves an irrational superstition of certain "Numbers" and it has a weird behavioral companion whenever I am engaged with working on Major Mechanical Builds... and that is just THIS:

"Never Install Old Hardware on Brand New OEM Parts ...Unless it is a Dire Emergency..."

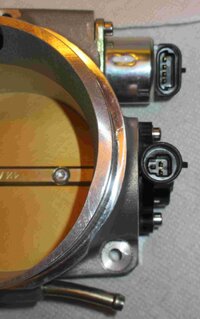
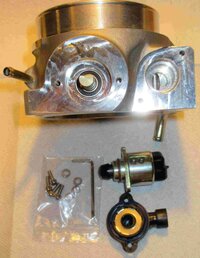
In this case, I actually had to resort to purchasing a very inexpensive TPS and Combo Kit from a USA based Chinese Vendor, because it was the ONLY place I could get my hands on containing a FULL SET of Brand New Fasteners to use when installing the Delphi IAC Valve and the ACDelco TPS. As you can see in the attached assembly images, these Diminutive Hex Head Fine Thread Screws are made of Polished Stainless Steel and they were very nicely snugged up during the alignment, mounting and threading in actions to secure the TPS and IAC components onto the BBK Model # 17090-R Throttle Body.

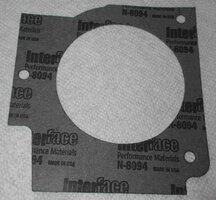
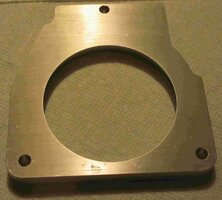
With these slight efforts completed early this morning... I can install that BBK TB onto the Y2K Truck Intake Manifold with the New Plate and the two OEM Quality BBK Flat Gasket and the Blue FelPro Silicone "O"Ring Style Gasket any time I want to do so. And with that little job done by following these minor "Baby Steps" ...we "inch-worm" our way closer to finishing the Y2K Silverado LM-7 Engine Performance Upgrades:


TPSIACINSTALLHARDWARE1.jpgTPSANDINSTALLHW.jpgGMOEMLSTHROTTLEBODY.jpgBBKTPSANDIACCONNECTORPOSITIONS.jpgBBKTBTPSIACANDHW.jpgBBKTBTPSANDIACINSTALLEDFRONTVIEW.jpgBBKTPSANDIACINSTALLED.jpgTPSIACINSTALLHARDWARE.jpg


More to Follow...

"Big Things... Have Small Beginnings" ...excerpt spoken by The Synthetic Man...David... "Alien: Prometheus"

BIGTHINGSHAVESMALLBEGINNINGS.jpg
 
Last edited:
  • Like
Reactions: Redbeard

mrrsm

Original poster
Lifetime VIP Donor
Supporting Donor
Member
Oct 22, 2015
8,198
Tampa Bay Area
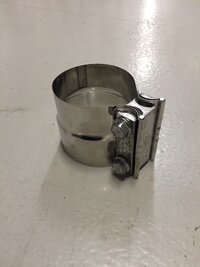
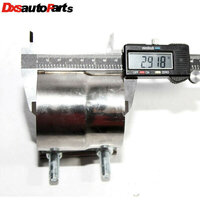
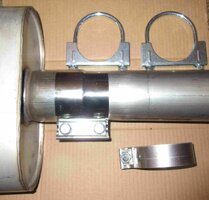
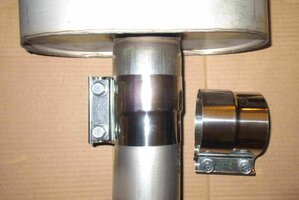
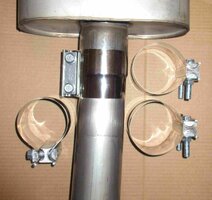
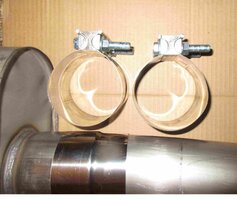
A few days ago...(2) of the (3) Sets of Stainless Steel Band Clamps I ordered arrived. Here are (11) Solid Reasons why it is worth investing the modest cost to purchase these Unique S/S Clamps... instead of "Phyddle-Ph**ing" around with those outdated "Ubiquitous U-Bolt Style" Muffler Clamps:

(1) "U" Bolt Clamps invariably become "Destructive" during the Install...Warping all Pipes.
(2) "U" Bolt Clamps are famous for their Inability to effectively seal in Exhaust Fumes.
(3) "U" Bolt Clamps require using BOTH hands to manipulate & tighten their Fasteners.
(4) "U" Bolt Clamps are incapable of being Uniformly Tightened without Great Effort to do so.
(5) Stainless Steel Band Clamps are NOT that Expensive to Buy anymore...$6.00 to $10.00 a piece.
(6) Stainless Steel Band Clamps can get installed with One Hand while manipulating the Piping.
(7) Stainless Steel Band Clamps apply Uniform Pressure around the Piping-Muffler Circumference.
(8) Stainless Steel Band Clamps Fastener are Low Profile & allow variability in clamped positions.
(9) Stainless Steel Band Clamps are far less prone to loosening after repeated Thermal Cycling.
(10) Stainless Steel Band Clamps LOOK Better on Piping in Plain View (Exhaust Tube Ends).
(11) The S/S Clamps with the Extra Long Bolts can be used to Fasten the CAT Flange to the Muffler.

DNASTAINLESSBANDCLAMPS1.jpgDNASTAINLESSBANDCLAMPS2.jpgDNASTAINLESSBANDCLAMPS3.jpgDNASTAINLESSBANDCLAMPS4.jpg
 
Last edited:
  • Like
Reactions: xavierny25

mrrsm

Original poster
Lifetime VIP Donor
Supporting Donor
Member
Oct 22, 2015
8,198
Tampa Bay Area
My thinking right now is that Every Once In A While... It is helpful and motivating to visit relevant videos that show "The End Game" of what this swirling activity, research and expense are meant to achieve... and be more than just an "Idle Lope Video". In THIS instance...this Dude has a 2000 Vintage Silverado that he dubbed, "Goldie Hawn" that he bought with about 4 Times as many Miles in the Rear View Mirror as my own Y2K "Blue Thunder" had when I pulled the trigger to get it well over a year and half ago.

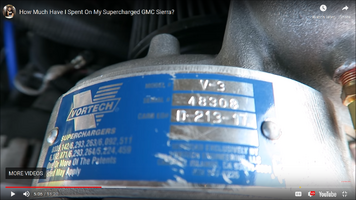
What I LIKE about this Guy is that his 'Hell Bent For Leather' approach to obtaining many similar Performance Parts and Pieces happens to be very close in the choices and parameters I decided to follow to develop a fairly strong NA Performance Build of my LS-LM-7 5.3L Engine. And that holds with accuracy, right up until the point where he 'leaped into the pit' by deciding to install a Super-Charger System on his Motor and ...bounce the Horse Power up to at LEAST 550 Ponies.

The other aspect near and dear to my heart is the approach he took to obtain and use the VERY Expensive HP-Tuners Suite exactly in the manner that I went after it ...although it may well be that he did not decide to follow things to completion by paying to get some Formal Training because HIS Vehicle is a Daily Work Driver. I DO realize that most people will not be able to afford taking any of these actions under advisement..

But in The Case of This Old Man... When I'm DEAD...I Won't Care if they have to Stick a Carrot in my Hiney... and let The Rabbits Drag Me Away... I'm not going to be able to hide any Cash or Gold Bars in there.. So... I might as well enjoy what little of it I may have left while I'm still Alive and Kicking well enough to appreciate all these performance possibilities!


This Dude has his own Youtube Channel covering the sub-topics of his "Goldie Hawn" Build if others have more interest in how he arrived with a Rusty Looking "Sleeper" than can literally... Melt Down Inches of Rubber Off of his Tires... any time he wants. And if THAT is all you want to see from this present Long Explanatory Post... SKIP to the Very End of THIS Video...and ENJOY!:


The Vortech V-3 Centrifugal Super-Charger ($2,000-$3,500):

90422

"Goldie Hawn" on Track Day:

 
Last edited:
  • Like
Reactions: Redbeard

mrrsm

Original poster
Lifetime VIP Donor
Supporting Donor
Member
Oct 22, 2015
8,198
Tampa Bay Area
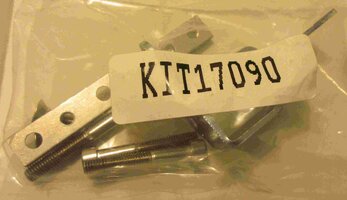
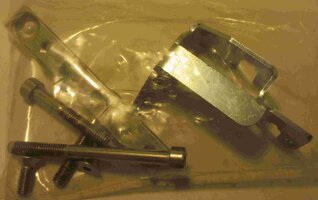
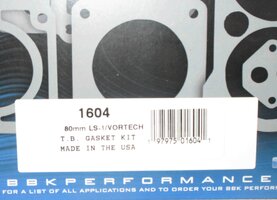
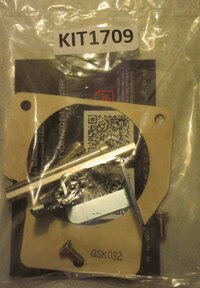
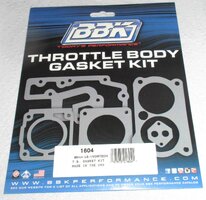
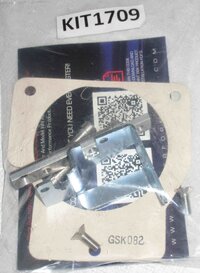
"A Thousand Thanks" (Tussen Takke) are mentioned here and meant for The BBK Performance Company in responding with such sincere generosity by sending me a Complete Installation Kit-1709 for the BBK Model #1709 80MM Performance Throttle Body ...FREE of Charge. I’ll include this with the eBay Purchase as a Lightly Used Unit.

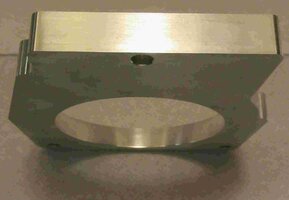
Now I can put this gear all together into its OEM Box on the Shelf ...should the need arise for others interested in trying out the Throttle Body Upgrade. In the mean time… I’ll stick with the 85MM Flavor for the Y2K Truck Project. I also purchased an additional Throttle Extension Plate Gasket as well. This gear arrived only a few days ago... and you just cannot beat BBK for Excellence in Customer Service like THIS:

BBK1709GASKET1604A.jpgBBKTBINSTALLKIT1709.jpgBBK1709GASKET1604.jpgBBKTBINSTALLKIT1709A.jpg
 
Last edited:

mrrsm

Original poster
Lifetime VIP Donor
Supporting Donor
Member
Oct 22, 2015
8,198
Tampa Bay Area
I can remember the moment so very clearly...

Back in 2018, almost as soon as I got my my hands on my 2000 Chevrolet Silverado... The Dream of "Hoping for Loping" gelled in my mind. I was almost talking out loud as I made my First Cup-A-Joe when my wife snapped me out of my thoughts. "What did you just say...Honey?" , She inquired. I distinctly recall saying to her, " Oh... I was just thinking about the coming Performance Upgrade I want to get to working on with "My New Truck"... and I just realized... You just watch... As SOON as I get going on Tearing into the Engine with the New Custom TSP Cam and Roller Rockers and whatnot... The State of Florida will probably pull a "Heisenberg" on me...and re-institute forcing us to drive through those Goddamned SMOG Inspection Stations again" and RUIN EVERYTHING!

Of course... anticipating this possibility for real is what prompted me to Keep My Original Roller-Camshaft and PCM against the possibility that this might ever occur. In the time since this prescient event occurred... I had tried to put this idea out of my mind and went headlong into investigating, researching and finally settling on a very nice, albeit, modest Performance Upgrade set up that has already been documented here... 'ad nauseum'... and this ended up with me making the full bore commitment to "Buy The Works" to make this happen.

The only thing that has been delaying my diving into this Job ...has been the Florida Summer Weather and a bit of planning needed to get my capacious Garage in order well enough to drive a Truck with an Eight Foot Long Bed on the back...far enough inside to close the Doors. With the recent purchase of the Quick-Jack BL-7000-EXT Heavy Hydraulic pair of Lifts... the added possibility of working on the Truck on my concrete drive was meant to speed these processes along.

Yet... within only a week of getting that purchase going... I just picked up the Morning Paper only to find THIS Article nested within:


For anyone curious of why I call this incident a "Heisenberg" ...it has to do with Professor Werner Heisenberg postulating his "Uncertainty Principle" back in the early 1920s when the study of Quantum Mechanics was just in its infancy. Basically... it boils down to this:

"What you study... You Also Change..."

Meaning that if you try to examine any observable phenomena in a Scientific Experiment ... the mere action of just LOOKING at anything... instantly changes it in very subtle ways that have to do with trying to make predictions in The Chaos of Phased Space. You don't even have to DO ANYTHING.

Just the mere fact that you STARED AT SOMETHING... Alters what it was...and where it is. I know... It sounds complicated and crazy... but this "Emissions" thing is The PERFECT example of this phenomena. We suffered under the yolk of Annual Smog Inspections as far back as the 1970s... right up until Governor Jeb Bush pulled the plug on these "Inspection Stations" back in 2000... the very year that MY Truck was being built in a Stateside GM Factory.

Re-Set "The Time Machine" back to today... October 15th, 2019...and almost at the very same time that I want to "Change" the performance of my vehicle... BAM! Here We Go AGAIN! Now I realize that everyone is going to think, "Right Bobby... The Universe sits in waiting for just such a moment to Spoil Your Performance Upgrade Fun." I Don't Know... The thought of doing all of this internal engine work and then being subjected to fines and the exclusion of being able to drive my Silverado...Tuned and Loping down the highways... is maddening.

What am I to Think? All I know is that way back when... The Great State of Florida threw up the construction of those Damned Inspection Stations almost overnight and it put EVERYONE in a big predicament and a panic at a time when their was virtually NO COMPUTER CONTROLLED FUEL INJECTED TECHNOLOGY. Everyone was running around trying to get their Carburetor 'ed Engines "Hand Timed and Tuned" ...you know... way back when the "Average Joe" could actually DO that to his Plain Old V8's and Inline or Slant 6's with a Strobe Light, some New "FAT Champion Spark Plugs" and a Set of Points for the Distributor... with NO complicated EVAP hardware and wires, tubes, etc. to complicate our lives.

In any case... now that this has happened, I'll STILL continue to work on the installation of the Headers, Roller-Rockers and Push-Rods, Custom Throttle Body and the Stainless CAT-Back Exhaust System... until I can dope out just how those "California Hot Rodders" manage to drive performance vehicles in the very state that the CARB Compliance Standards were born...and PASS THOSE STRINGENT EPA STANDARDS.

I just need to figure out How They Do It! This may actually come down to having to make the "Stock Camshaft and PCM" Swap AFTER passing any such Inspections each and every year... or use the HP Tuners SW and my AEM Wideband O2 Gauge to tune the engine as lean as possible to pull a PASS Sticker out of the Guy at the Smog Station. DAMMIT! ...I Do NOT want be Cheated Out of The LOPE!
 
Last edited:

mrrsm

Original poster
Lifetime VIP Donor
Supporting Donor
Member
Oct 22, 2015
8,198
Tampa Bay Area
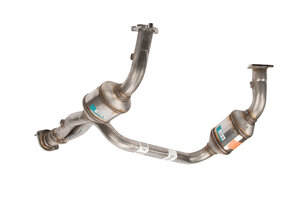
It should come as no surprise that now that the Dominant Political Party in Florida has been uncustomary with some very recent public "Saber Rattling" about Global Warming... You have no choice but to sit up and take notice. Its a given that I would NEVER, EVER consider building on an exhaust system for my 2000 Chevrolet Silverado 5.3L set up ...without including the GM OEM STOCK Y-Pipe with the Two In-Dwelling Catalytic Converters... or something BETTER.

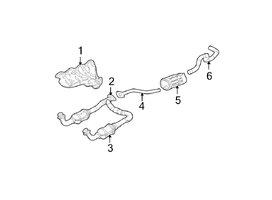
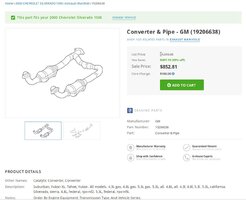
With that in mind , my concerns rose about whether or not I should purchase a BRAND NEW OEM "Y"-Pipe-2-CAT Combo. As depicted below, this idea lead me to think about just "refreshing" the system to be robust enough to handle anything that exits the S/S Headers and slips into the CATs needing some 'extra burning up' to clean the exhaust stream. I just want it to be good enough to Pass a SMOG Inspection. However, after pricing out what is available on the Market... it comes in at around $1,000.00 ...JUST for the GM OEM "Y"-Pipe & CATs Combo alone:

GMYPIPEWITHCATS1.jpg3919587.jpegGMYPIPEWITHCATS.jpg

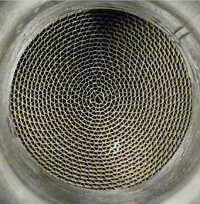
So my thinking now is that with only around 73,000 Miles in the Rear View Mirror of the Y2K,... perhaps I'll just keep on using my OEM Stock "Y" Pipe and CATs presently in the truck. I'm hoping that if Florida begins throwing up Inspection Stations after I finish the Engine Performance Upgrades... that those Old CATS will still be 'over-engineered' enough ...Ceramic Honeycomb-Wise... to handle the 'Gassy Trash' (Or is that 'Trashy Gas"...? ) exiting the S/S CAT-Back Exhaust. It's very discouraging to have to deal with this issue right now.
 

littleblazer

Member
Jul 6, 2014
9,267
It should come as no surprise that now that the Dominant Political Party in Florida has been uncustomary with some very recent public "Saber Rattling" about Global Warming... You have no choice but to sit up and take notice. Its a given that I would NEVER, EVER consider building on an exhaust system for my 2000 Chevrolet Silverado 5.3L set up ...without including the GM OEM STOCK Y-Pipe with the Two In-Dwelling Catalytic Converters... or something BETTER.

With that in mind , my concerns rose about whether or not I should purchase a BRAND NEW OEM "Y"-Pipe-2-CAT Combo. As depicted below, this idea lead me to think about just "refreshing" the system to be robust enough to handle anything that exits the S/S Headers and slips into the CATs needing some 'extra burning up' to clean the exhaust stream. I just want it to be good enough to Pass a SMOG Inspection. However, after pricing out what is available on the Market... it comes in at around $1,000.00 ...JUST for the GM OEM "Y"-Pipe & CATs Combo alone:

View attachment 91424View attachment 91425View attachment 91426

So my thinking now is that with only around 73,000 Miles in the Rear View Mirror of the Y2K,... perhaps I'll just keep on using my OEM Stock "Y" Pipe and CATs presently in the truck. I'm hoping that if Florida begins throwing up Inspection Stations after I finish the Engine Performance Upgrades... that those Old CATS will still be 'over-engineered' enough ...Ceramic Honeycomb-Wise... to handle the 'Gassy Trash' (Or is that 'Trashy Gas"...? ) exiting the S/S CAT-Back Exhaust. It's very discouraging to have to deal with this issue right now.
Why not switch to the OEM dual setup? The 6.0s got it and they're cheap enough. Real 3 inch pipe too. The magnaflow one is around 700$ at summit. Should bolt right up and is 48 state legal.
 
  • Like
Reactions: mrrsm

mrrsm

Original poster
Lifetime VIP Donor
Supporting Donor
Member
Oct 22, 2015
8,198
Tampa Bay Area
Thanks for the Heads Up on the 6.0L Dually Exhaust Idea. Unfortunately... I've already invested heavily in getting the S/S Shorty Headers for the 5.3Land the Stock "Y" Pipe to S/S CAT-Back Exhaust Hardware. If I'd known back in 2018 that a possible EPA "Monkey in The Wrench" MIGHT get hurled at all of us down here in Florida ... I might have gone with a 6.0L Exhaust Upgrade from the Jump. By the way... The 5.3L S/S Header to "Y" Pipe Flanges on my Truck would NOT bolt right up to the 6.0L Flavor "Y" Pipe and I would have had to MOD the Hell out of things to make it all work anyway.

So instead, I'm determined to keep on rolling with what I've already obtained and hope for the best. If nothing else... Once I've installed my AEM Wide Band O2 Sensor and Tune things up a bit, I should be able to get on those Stoich Numbers for a decent Idle and Cruise ASAP. After that, I'll try to Keep a very safe level of Power Enrichment in the HP Tuners Settings as well.

As time goes by... if I start seeing the "SMOG Shops" having 'lines of cars and trucks going around the block'... I'll make the necessary AFR adjustments accordingly and drive it through one of them just once to see what happens. Like I mentioned earlier... I'm KEEPING the GM OEM LM7 Camshaft and PCM Gear UNTOUCHED... Just in Case the Truck will NOT pass Inspection and I have to UNFUBAR the Whole Damned Thing just to be able to keep it Tagged, Insured... and Driveable. :Banghead:
 
Last edited:

littleblazer

Member
Jul 6, 2014
9,267
Thanks for the Heads Up on the 6.0L Dually Exhaust Idea. Unfortunately... I've already invested heavily in getting the S/S Shorty Headers for the 5.3Land the Stock "Y" Pipe to S/S CAT-Back Exhaust Hardware. If I'd known back in 2018 that a possible EPA "Monkey in The Wrench" MIGHT get hurled at all of us down here in Florida ... I might have gone with a 6.0L Exhaust Upgrade from the Jump. By the way... The 5.3L S/S Header to "Y" Pipe Flanges on my Truck would NOT bolt right up to the 6.0L Flavor "Y" Pipe and I would have had to MOD the Hell out of things to make it all work anyway.

So instead, I'm determined to keep on rolling with what I've already obtained and hope for the best. If nothing else... Once I've installed my AEM Wide Band O2 Sensor and Tune things up a bit, I should be able to get on those Stoich Numbers for a decent Idle and Cruise ASAP. After that, I'll try to Keep a very safe level of Power Enrichment in the HP Tuners Settings as well.

As time goes by... if I start seeing the "SMOG Shops" having 'lines of cars and trucks going around the block'... I'll make the necessary AFR adjustments accordingly and drive it through one of them just once to see what happens. Like I mentioned earlier... I'm KEEPING the GM OEM LM7 Camshaft and PCM Gear UNTOUCHED... Just in Case the Truck will NOT pass Inspection and I have to UNFUBAR the Whole Damned Thing just to be able to keep it Tagged, Insured... and Driveable. :Banghead:
Are the early 5.3s different than later ones? The manifolds and down pipes are identical on my 03 to the 5.3, they cross reference. The only difference is Y back and it wouldn't be terrible to do it. But I do understand if you're invested already.
 

mrrsm

Original poster
Lifetime VIP Donor
Supporting Donor
Member
Oct 22, 2015
8,198
Tampa Bay Area
Yes... and along the way, I scoured all of the Six Liter Shorty Header possibilities and had to do an awful lot of digging to find the RIGHT Header fitted with an EGR Take Off that would work. Remember ... I was trying to get a Custom Stainless Steel Header on a nearly 20 Year Old Truck that would not 'Break the Bank' via BBK or Hedman flavors, etc. The Bigger Displacement engines have flanges and attachments that did not match perfectly to the Y2K Truck 5.3L set up.

IIRC... Down here in the Florida pre-2000 Era, The SMOG Techs would frequently demand sitting in the Driver's Seat to work the ACC Pedal up to a certain RPM ...while looking for any Dash CELs occurring. Meanwhile, another SMOG Station Tech would be shoving the Gas Sampling Probe into the Tail Pipe, measuring for excessive levels of NO and CO. This article may interest those facing this same dilemma:


So before that comes to pass, the biggest thing I need to worry about is making the mistake of leaning out the AFR at raised RPM levels. If the Motor starts getting too lean at over 2,500 - 3,000 RPM, the engine could suffer damage. I'll continue searching for information from our Folks in California and see what they manage to do in order to get their Trucks through the CARB Compliance Standards Inspections.

The Tuning Choices between using either the MAF or the MAP Standards may make all of the difference. HP Tuners allows options for using use either method. As a Novice Tuner... I'm very happy to have and study the assistance offered in the Basic HP Tuners Course I obtained from "The Tuning School". I'll cover and report whatever I manage to cook up that works over in the related HP Tuners Thread. The HP Tuners videos on YouTube offered from "The Goat Rope Garage" will help everyone curious to know how all of this can work:

 
  • Like
Reactions: littleblazer

mrrsm

Original poster
Lifetime VIP Donor
Supporting Donor
Member
Oct 22, 2015
8,198
Tampa Bay Area
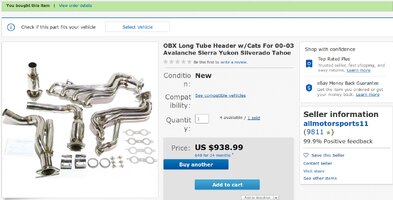
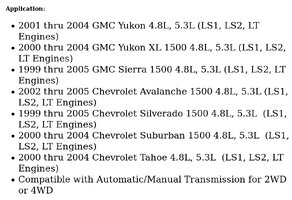
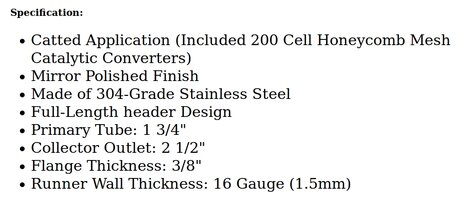
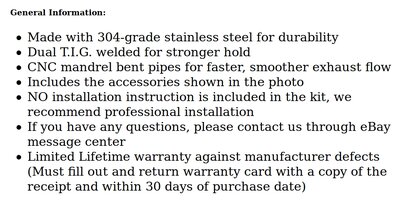
I'll soon be back to working on THIS Project when the Brakes are finished. I hovered for a while ...shopping around some more and after getting some recent (decent) input from @Mooseman & @littleblazer, I finally decided to 'Pull the Pin' after landing on a set of Very High Quality OBX Full Length, Polished Mirror Finish Stainless Steel, High-Flow Catted Headers for under $1,000.00 with Free S&H from eBay:

For the 00'-03' Silverados with the 4.8L to 5.3L Engines @ $938.99 with FREE S&H & RETURNS:


For the 00'-05' Denalis with the 6.0L Engine @ $838.93 with FREE S&H & RETURNS (NO CATS):


With the DNA CAT-Back Gear included... THIS decision finally changes out EVERYTHING from the Exhaust Ports on the Heads of this fairly well improved, Performance Modified LM-7 all the way out to the Rear Bumper by converting the entire Exhaust System over to ALL HQ Double TIG Welded 304 Stainless Steel. So now... THIS 5.3L Engine WILL be able to Breathe ...SO MUCH EZR :

OBXCATTEDHEADERSORDER1.jpgOBXCATTEDHEADERSORDER2.jpgOBXCATTEDHEADERSORDER3.jpgOBXCATTEDHEADERSORDER4.jpgOBXCATTEDHEADERSORDER5.jpgOBXCATTEDHEADERSORDER6.jpgOBXCATTEDHEADERSORDER7.jpg
 
Last edited:

mrrsm

Original poster
Lifetime VIP Donor
Supporting Donor
Member
Oct 22, 2015
8,198
Tampa Bay Area
Okay... Late this evening, all of the thoughtfully packaged OBX Stainless Steel, Long Tube Headers with CATs Complete with ALL Secondary Piping, S/S Band Clamps, S/S Fasteners, OBX Gaskets and other ancillary S/S Hardware arrived. After a complete and careful inspection, I found NO DENTS, NO SCRAPES and NO POOR QUALITY WELDS. These Mirror Shiny Tubes also came with (6) TIG Welded Oxygen Sensor Bungs!

Given the MILES of TIG Welding to join all of these segments together, the Sheer Physical Efforts involved by the Welders... and the hundreds of S/S Welding Rods that must have gone into the Making of these Highly Polished, 304 Heavy S/S Pipes and Thick Flanges... I was Very Pleasantly surprised at Just How Much Quality You REALLY CAN BUY for a little under $1,000.00 ...and NOT wind up finding the smallest disappointment with ANYTHING.

I should stop 'talking' about them ...and just let these 50+ Images Speak For Themselves:


Reprise

Lifetime VIP Donor
Supporting Donor
Member
Jul 22, 2015
2,724
Once you get them on, let us know how they are from a noise / loudness standpoint, compared to stock (subjective opinion is fine, unless you have a db meter - and don't go buying one just to measure for 'me'! LOL).

I looked at the ones for the 6.0L, but (as you mentioned) they have no cats. I suppose one could leave out the resonators and put cats in (makes me wonder why they included O2 bungs on the resonators (assuming that the owner will 'tune' the cats out), but 'whatever'... :biggrin: )

I took off the Flowmaster mine came with and put a regular muffler back on, a couple of months ago. Definitely felt a li'l more restriction / backpressure via the 'butt dyno', but the reduced drone was worth it; don't want to listen to that for hours / days on end on the interstate.

Once I get my cam / heads on, I hope I can just keep the stock exhaust on; we'll see. The 6.0L has duals to the muffler, and it's not exactly a 'silent' exhaust to start with (3" pipe, past the manifolds)
 

mrrsm

Original poster
Lifetime VIP Donor
Supporting Donor
Member
Oct 22, 2015
8,198
Tampa Bay Area
After some great advice from @Mooseman and @littleblazer...and after quite a lot of wading through BLOGS and visiting other GM Full Size Truck Forums... I read that the reason they ALL have the O2 Bungs welded in is that Customers may decide NOT to have the Circular HI-FLO Ceramic Coated inserts welded in on "The Human Assembly Line" and by NOT having to include them, the Manufacturers can save mightily on the Cost of the Rare Earth Metals without having to change their various Metal Alignment Jigs at the Factories to suit one or the other. Legally, they may also need to provide the O2 Ports on their Gear due to Federal EPA Rules and Regulations,

@littleblazer had previously asked about whether or not the Full Length Header set up would make more sense and give better performance if I installed the ones made for the 6.0+ Liter GM-GMC Motors. But having run these issues to ground... I confirmed that without having a Passenger Side EGR Stanchion Tube welded in and a few other subtle curves here and there... Those Six Liter versions would never work.

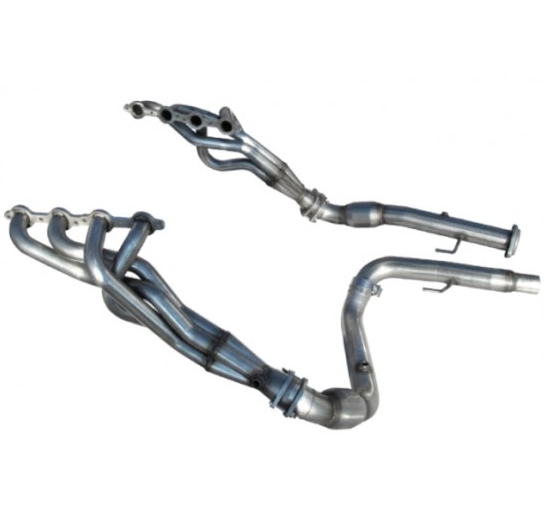
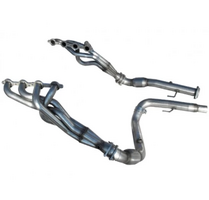
However, YOU benefit from that investigation NOW... because the ARH (American Racing Headers) Company created one for the 1999-2006 GM-GMC Full Size Trucks with Six Liter Engines WITH the HI-FLO CATS installed that, while not as *BLING* at first blush as the OBX set linked above... This system WILL be better at allowing your Engine to Breathe So Much EZR with these NEW LUNGS!

Besides that... YOU actually USE your Truck in the Real World where such trivial things like mere appearance lose their meaning during Long Pulls on the Highway. Here is an Image of the ones you might want (albeit... for around $1,700) and the Link to where to BUY. I'm very sorry about the Price being so much more than the offers from OBX... I wish it were otherwise.

1579105019428.png
 

mrrsm

Original poster
Lifetime VIP Donor
Supporting Donor
Member
Oct 22, 2015
8,198
Tampa Bay Area
I know that as soon as my Brakes are finally DONE... The NEXT work on the Blue Silverado WILL be the installation of my S/S Headers and CAT-Back Exhaust System. However, in the mean time, this Young Man's Video of the Camshaft Installation on his 5.3L Short Block (Torn Down to the Block) in his Chevrolet Tahoe involving the IDENTICAL Texas Speed and Performance Camshaft going inside of my Engine it TOO SWEET to overlook and Post here!

The other things I appreciate about this Dude are that:

(1) He Works CLEAN.
(2) He Works METHODICALLY.
(3) He Works CAREFULLY.
(3) He Works CREATIVELY. (Watch How he Solves The Problem of the Upper Oil Pump Bolt Install)

*** Check his 'Old School' Use of Two "Beam" Style Torque Wrenches***

... and for those of us who are New Mechanics, carefully observe his thoughtful approach when Handling and Lubricating New, Finely Machined Components as THESE are the Techniques WORTH Emulating whenever Wrenching on your OWN Projects. Slow is SMOOTH... SMOOTH is FAST!:

 
Last edited:

mrrsm

Original poster
Lifetime VIP Donor
Supporting Donor
Member
Oct 22, 2015
8,198
Tampa Bay Area
This is a Prequel to the Last Video on the 5.3L Tahoe Engine Tear Down as preliminary work for the VOP’s Texas Speed and Performance Camshaft Upgrade. The VOP has an interesting solution for catching ALL of the Coolant pouring out from his Engine Radiator and Water Pump Removal. This is an environmentally responsible approach when dealing with particularly hard to control Engine Block Draining Issues that always seem to make a huge PITA Mess.

This problem can also be solved by using Medium Size, Black Plastic Mud Mixing Pan available at Lowes for around $14.00:

SCEPTERMUDPAN.jpg
I will not have to perform 5.3L Engine Head Tear Down – R&R procedure on my Non-DOD Truck Motor. However, this information might prove useful to @HJackson concerning his present Collapsed Lifter - AFM-DOD Delete issues. While not necessarily involving the TS&P Camshaft Performance Upgrade activity intended here… the excellent visuals showing these Unavoidable Tear Down Steps for the Aluminum Engine Head(s) R&Rs are well worth watching. :


mrrsm

Original poster
Lifetime VIP Donor
Supporting Donor
Member
Oct 22, 2015
8,198
Tampa Bay Area
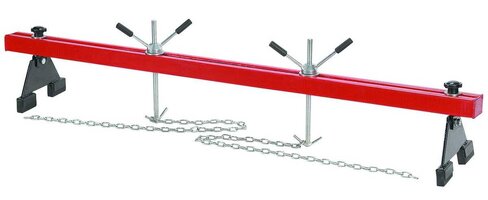
I’ve been worrying quite a bit lately over How To Suspend and Support my Full Length S/S Headers on either side of the Engine Bay while trying to get the Header Flanges and Dual gasket Segments aligned when hand-tightening down all of the "Grade 8" Exhaust Manifold Fasteners. But late today… I spied THIS Thing for $80.00 over on Harbor Freight and it seems perfectly suited (and adjustable) for this very purpose:

Pittsburgh Automotive 1,000 Lb Horizontal Engine Support Bar ($80.00 at Harbor Freight):

https://www.harborfreight.com/1000-lb-capacity-engine-support-bar-96524.html

HFHOISTBAR1.jpg
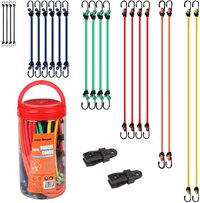
Then I figure that using a couple of well placed Bungee Cords wrapped around those S/S Pipes like “Suspenders” and then hung from this Bar will do the trick while this Thing acts like having a 2nd pair of Hands supporting them from above. This would be next to impossible to do while working underneath the Truck with the other "Y" Pipe and Sub- Pipe Segment Flanges also are being Aligned and Bolted together. This Adjustable Horizontal Bar can be placed either into the "Nose-to-Tail" position, or laid out straight across the Engine Bay in between the Front Fender Wells:

Cartman Bungee Cords ($11.00 on Amazon):

https://www.amazon.com/dp/B01DF3N4N8/?tag=gmtnation-20

HFBUNGEECORDS.jpg

Using these things in combination seems like a Good idea when having to work alone on what should ordinarily only be performed as a “Two Man Job”. With the soon completion of some other Major Suspension and Brake Work, I’m getting closer to being able to install the New Stainless Steel Headers, Catted "Y" Pipe and Complete Stainless Steel CAT-Back Exhaust System. THIS device should be a Very Big Help.
 
Last edited:
  • Like
Reactions: Redbeard

mrrsm

Original poster
Lifetime VIP Donor
Supporting Donor
Member
Oct 22, 2015
8,198
Tampa Bay Area
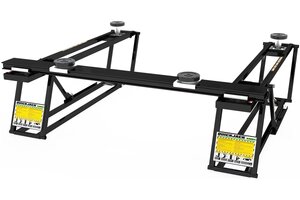
Continuing on the Theme of the S/S Exhaust Installation... I spent the afternoon dragging out the (3) Very Heavy QuickJack Hydraulic Lift Boxes and then went through all of the Set Up Procedures with NO Problems. The Videos covering "How To" set up this BL-7000 -XX Series of QuickJack Hardware are all over Youtube Like A RASH ...so I will not belabor those issues here.

The REAL PROBLEM I encountered after completing this Task though, was that Y2K LONG BED PICK-UP TRUCK HAS NO DECENT UNDER-BODY LIFT POINTS SPACED OUT IN ANY WAY TO ALIGN WITH THE QJ's UPPER FRAMING LIFT SUPPORTS AND SUPPLY A WEIGHT BALANCED OUTCOME.

The Y2K Truck only has VERY Short, Flat sections of Steel Boxed Frame Railing running down both sides of the Truck. They Start just Aft of the back sections of the Front Wheel Wells and then run further Aft for a VERY short length of around 4 Feet or so, then they suddenly Curve and Arc upwards under the Middle to the Rear section of Truck Bed.

This leaves NO "Square and Level" Locations that perfectly align with the Upper Frames of the QJ Lift(s). So I pondered this for a bit while remembering that if necessary... the QJs CAN be arranged from Side to Side to lift any Vehicle. However, I don't want to have to resort to that because placing them in such a position will obstruct my Open Access to the Exhaust System.

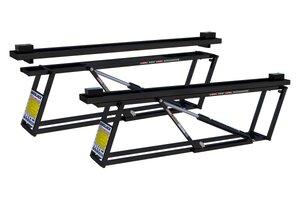
When I ran out of Daylight... I put up all of the QJ Gear (Quite Manageable ...Thanks to the Quick Disconnect Hydraulic Hoses in Four Locations on the Rig). A check on the Internet from the QuickJack Site revealed interesting Accessory Platforms that extend its overall length by 6 Inches (which does NOT help me). However, it has Rail Sections along its length that CAN be used in a way that the QJ Engineers may not have thought of... and solve the present problem. These Things are costing me an additional $260.00 w/S&H Included and look like THIS when added on top of the Existing QJ Lift(s). They should be here in about a week:

quickjack-slx-frame-extension-adapters-accessory.jpg
I'm also looking at their QuickJack CROSS-FRAME SUPPORTS, too since those can be arranged to support the entire vehicle for a TOTAL Front Suspension R&R ...or... to hold up Transmissions during Engine Installs when the need to Raise or Lower them might prove helpful or necessary. Again, If I need to get these too, they'd run another $250.00 + S&H ... but I'm not quite there yet:
quickjack-cross-beam-adapter-accessory.jpg
In the mean time... I'll work on other things in preparation for this portion of the Bigger Project.
 
Last edited:

mrrsm

Original poster
Lifetime VIP Donor
Supporting Donor
Member
Oct 22, 2015
8,198
Tampa Bay Area
The present COVID-19 Crisis has left me with even more time to SOMA (Sit On My Ass) than I probably should, given other physical limitations...and that can lead to thinking too much about yet another issue to delay the Engine Work on my Beloved Truck. That has lead to frequent explorations of YouTube for yet more ideas and information that I still don't know about this Y2K Blue Machine and its 5.3L Motor.

I have to resort to this imprisonment right now more than most of you because for some reason, the idiots in my Neighborhood have yet to grasp the idea that YES...you CAN get the Coronoa Virus while skipping down the local sidewalks in their Sunglasses, Capris and Bermuda Shorts ...but sans wearing any N95 or Home Made Face Masks or following any Social Distancing along the way.

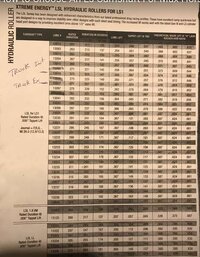
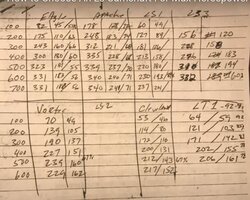
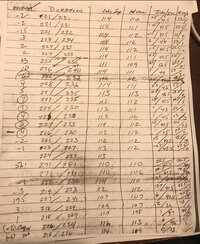
So this linked Video along with being able to scour the Screen Prints I made from it for Critical Charts and Cheat Sheets might prove a pleasant distraction for @Reprise and anyone else thinking about "Hoping for Loping" with their own LS1, LS2, or LS3 Motors. The VOP providing this 20 Minutes of "Hidden Secrets" Training is a Grizzled Old Performance Engine Builder with some great insights into All Three Flavors of the LS Engines and gives Good Guidance and Common Sense in how to get the Most HP & Torque out of these Engines and NOT drop into the "Big, Bigger, BIGGEST Camshaft" Pot Holes just waiting for the unsuspecting Engine Builder to fall into:

COMPCAMLSCAMCHEATSHEET.jpgLSCAMCHEATSHEET.jpgLSCAMLSAOVERLAPS.jpg


The Link to the "Wallace Racing Engine Builder Calculators":

 
  • Like
Reactions: Reprise

mrrsm

Original poster
Lifetime VIP Donor
Supporting Donor
Member
Oct 22, 2015
8,198
Tampa Bay Area
Every once in a while… I have to get a powerful shot of this “Loping El Ess" after I’ve been “Hoping” for my own over such a long time. There is nothing more inspiring than to listen to the Tuned, High Performance Motor inside of the Trailblazer owned and built by our GMTN Brother ...Joshua… @Boricua SS . Every time I hear his LS Engine Fire Up when I am wide awake in the wee hours of the Morning… I think:

El Sol apareció por la noche ...y me cantó..! '

The Sun appears at Night...and it Sings to me...!”

 
Last edited:

mrrsm

Original poster
Lifetime VIP Donor
Supporting Donor
Member
Oct 22, 2015
8,198
Tampa Bay Area
Last edited:

mrrsm

Original poster
Lifetime VIP Donor
Supporting Donor
Member
Oct 22, 2015
8,198
Tampa Bay Area
Okay... THIS is probably THE CLOSEST that I've been able to come to finding out just about how my Truck will sound when the Engine Internals and the Base Tune are worked out.

This Multi-Part Youtube Series involves watching a 1984 GMC Square Body Truck called "Pecos" getting a Cable-Throttled LS Engine + A4 Trans swapped into it that sports EXACTLY the same Texas Speed & Performance Roller Camshaft Specs intended for what my own LS Set Up will eventually become.

While I seriously recommend that ALL 'LS Engines for Trucks Builders' watch these Dudes over at "United By Trucks" perform this Engine & 4L60E Swap from Start to Finish (Parts 1-6?)... For now... Just check out “The Beef Cake Lope” running at idle scenes and then see the Power it makes at WOT in this Part Four segment right around 15:15 into this Video:


mrrsm

Original poster
Lifetime VIP Donor
Supporting Donor
Member
Oct 22, 2015
8,198
Tampa Bay Area
It is NEVER Too Late to get more information In The Mix about Building Performance into your LS Engine. And so THESE Links are worth looking at as yet One More Decent LS Engine Builder's Resource.

So I thought this YT Site called “The Driveway Engineer” would compliment what you are doing with your Engine Build ….and the Cool Part is... that THIS information comes as an LS FLOOD from one of our own GMT Nation Members: @Jrgunn5150

https://www.youtube.com/channel/UCOOxs8eWBHbih7Hxv-NmOQA

...and in particular... checkout his use of the LSDROID APP and 15 Part Instructional for being able to Tune via the Read-Write and Programming of the P01 and P59 ECM-PCM Units using Android Cell Phones:


Stuff like this is MINTED GOLD and worth Downloading and Saving in our "Mechanic's Libraries"
 
Last edited:

mrrsm

Original poster
Lifetime VIP Donor
Supporting Donor
Member
Oct 22, 2015
8,198
Tampa Bay Area
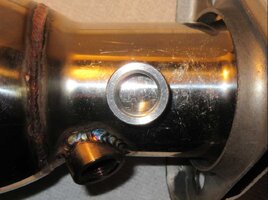
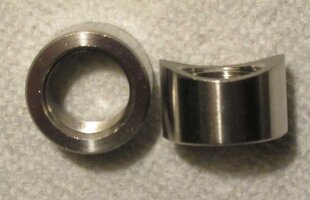
As a timely nod of "Congratulations!" to @gmcman on his recent acquisition of an AES Wideband O2 Sensor Kit... Here is some more "On Topic" information about the many considerations involved with Installing New O2 Sensor Bungs if doing so becomes necessary that FIT the requirements necessary for the more sensitive AEM Bosch Wide Band O2 Sensor. These are "The Top Ten":

(1) Placement and Angle of the O2 Sensor Bung is critical... especially with a Turbo-Charger installed. Placing them Too Close and/or Facing in the Wrong Direction or Angle will expose the Bosch Sensor to WAY TOO MUCH UNBURNED FUEL and cut short its Life Expectancy.

(2) TIG or Gas Welding in the Sensor Bung must take into consideration the thickness of the Pipe or adjacent manifold and focus most of the Electrode "Puddle" on the Thick Bung Adapter itself... and NOT on the Thin Walled Header Pipe WHICH WILL BURN THRU IN AN INSTANT.

(3) Due to the Spatter and 'noisy excitement' of "Red HOT Buck Shot & BBs" dropping down on top of you ...one should refrain from using a MIG or Flux-Core Welder while laying underneath the Vehicle. Flux-Core Welding should only be used if necessary when Welding on a Flat-Horizontal Plane. If the Sensor Bung can be fitted to a sub-component prior to the Complete Headers-Piping Installation while working on the Welder's Table... so much the better.

(4) It will be difficult in some case to run multiple beads in order to close up any 'Burn-Thrus" while laying on your back. Also, in most cases you should only make Single Passes when using Flux-Core Wire. 'Tack Welding' in One or Two 2 second bursts... sort of 'Connecting The Dots' will Kill Two Problems ...with "One String of Beads".

(5) Even on Fully Stainless Steel Exhaust Systems... the Sensor Bung placement should be made anywhere between the 3 O'clock to 9 O"clock Positions with the optimum positions being in between the 2 O'clock and 10 O'clock Positions. This will prevent the Water as a HUGE By-Product of Combustion from settling or collecting deep inside of the Sensitive Bosch O2 Sensor Zirconium Silica portion ...and damaging it.

(6) If the placement of the Sensor Bung is limited by crowded spacing... adjust the position of the Add-In Bung to be slightly forward and off angle form the Original and install the AES Bosch O2 Sensor in the Factory Bung location.

(7) Never Install a Wide Band O2 Sensor Bung AFTER the Catalytic Converter in the Outflow Pipe, as providing a TRUE Air to Fuel Ratio measurement AFTER "Letting The Horses Out of The Barn" will NOT work.

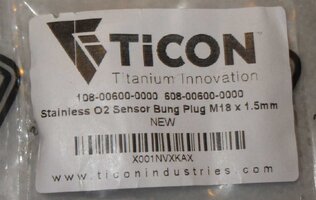
(8) Make certain to pick the right Shape and Angle of the Sensor-to-Piping interface using the correct shaping, curvature or arc to exactly match the shape of the Exhaust Piping. The Bosch Style O2 Sensor Design is longer than the Stock O2 Sensor with a Thread and Pitch Count of M18 X 1.50.The greater depth is an effort to exclude any chance for Atmospheric Oxygen getting ingested and contaminating the Exhaust Stream.

(9) Mind the choices you make for the Welder Equipment and Electrode Rods or Wire Gauge. Using a Sketchy Welding Technique may create Incomplete or Porous Weld Lines that will defeat the Bosch O2 Sensor via Very Small Leaks. Even a Pin-Holes Size Defect will confuse the outcomes after you spend all of your Time,Effort and Expense investing in HP-Tuners to get the VE Tables, MAF-IAT selections, Fuel Enrichment and a myriad of other problems that can be caused by a malfunctioning or mis-reading Bosch O2 Sensor.

(10) In some cases... it will be necessary to Close Off certain Extra O2 Sensor Bungs that will NOT be needed and yet, they will still require the same Attention to Detail for containing the Noxious Exhaust Fumes and deadly Carbon Monoxide (CO).

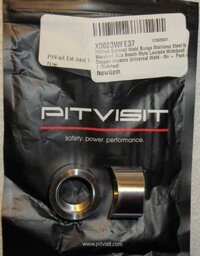
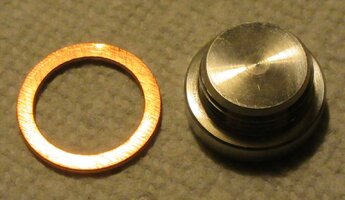
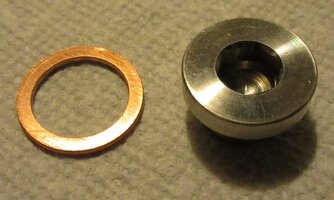
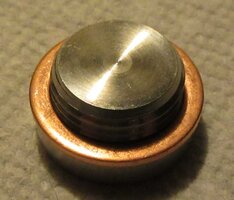
Choosing Non-Rusting, Stainless Steel O2 Bung Plugs with Copper Washers will make it easier in the long run to extract them later on if necessary and not have them all dissolve under Rusty Onslaught caused by exposure to Snow-Mud-Slushy Road Salt conditions.

Here are some images of High Quality S/S O2 Sensor Bungs and a Plug/Washer Combo:
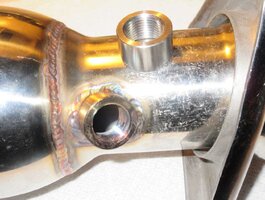
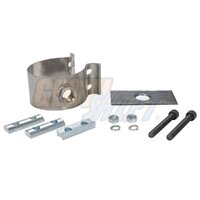
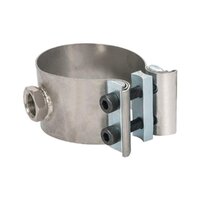
AESWBO2SENSORBUNG1.jpgAESWBO2SENSORBUNG2.jpgAESWBO2SENSORBUNG3.jpgAESWBO2SENSORBUNG4.jpgAESWBO2SENSORBUNG5.jpgAESWBO2SENSORBUNG6.jpgAESWBO2SENSORBUNG7.jpgAESWBO2SENSORBUNG8.jpg
 
Last edited:

Reprise

Lifetime VIP Donor
Supporting Donor
Member
Jul 22, 2015
2,724
I've started reading about wideband, myself (although I'm not needing / ready for it yet).

Seems like I only need to get 1 sensor, not one for each bank? (and if running a turbo, probably best to place it on the side farthest away from the turbo unit itself?)
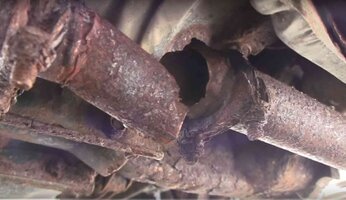
And this is a *3rd* O2, not replacing the two primaries, if you're retaining cats?
Otherwise, you wouldn't be talking about welding in an additional bung, I'm guessing.
 

mrrsm

Original poster
Lifetime VIP Donor
Supporting Donor
Member
Oct 22, 2015
8,198
Tampa Bay Area
Yes... One AEM WB Bosch O2 Sensor and Harness will Do the Trick... For Turbocharging Both Banks... a Dual Wide Band would be The Ticket positioned around 18" to 24" downstream from the Header Collector.

Somewhere back in this "Tome" are the Links and Videos showing how to route the AEM Harness to and from the Inner Cab and the 2nd O2 Sensor Bung and either mount the Three Gauge "A" Pillar Fascia.

Better yet in my case, I'll use the Pull Out Cup Holder in the Lower Dash as the Very Best Place to Mount the Single AEM A-F Meter. :>)

@Reprise.... This may work in your case, too:


Here are the REST of them for the AEM WBO2 Sensor and AFR Gauge Installation in the Full Size Trucks:

 
Last edited:

mrrsm

Original poster
Lifetime VIP Donor
Supporting Donor
Member
Oct 22, 2015
8,198
Tampa Bay Area
If you are still in the search for getting more out of your "Stock as Clock" 5.3L V8, during this Video from Scoggin-Dickey Parts Center, the VOP covers a variety of their OWN "Bump Sticks" and Intake Manifold Power Combinations that WILL interest anyone seeking more Horse Power and Torque WITHOUT having to switch to either a Higher Stall Torque Converter or having to re-gear "The Pumpkin" to make their Trucks and SUVs become more powerful and yet, remain quite useful and drive-able on a daily basis.

This also shows yet another After-Market Company that has explored CAM & Valve Springs that offer some other options you might want to consider besides Texas Speed & Performance OR COMPCam's Hardware. Silverado AND TBSS Owners might be very interested in the final outcome of these Dyno Tests SDPC conducts along with showing their Combo Charts all of these setups:

 
Last edited:

mrrsm

Original poster
Lifetime VIP Donor
Supporting Donor
Member
Oct 22, 2015
8,198
Tampa Bay Area
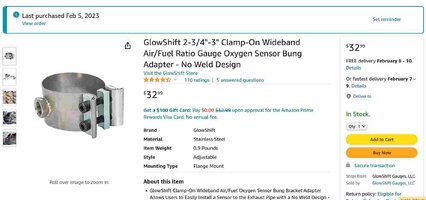
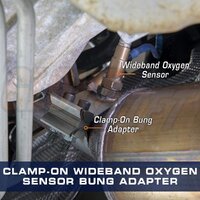
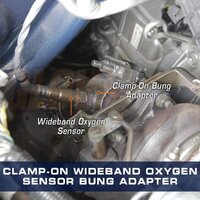
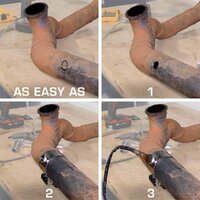
I saw yet another Inexpensive Option for a Wide-Band O2 Sensor Clamp (Clamp Only) over on Amazon that might be a little 'E-Z-R on a Man's Wallet' if anyone performing their Own ECM-PCM Tunes whether NA or Turbo-Charging and are still interested in... avoiding any "Header & Exhaust TIG Welding Entanglements".


NOWELDWIDEBANDO2SENSORCLAMP1.jpg61NllZDvuXL._SL1000_.jpg61Hx7y9c3RL._SL1000_.jpg610fn3U5ldL._SL1000_.jpg51WTrDkmC6L._SL1000_.jpg51JYoy3KBhL._SL1000_.jpg

For the Complete Glowshift Wide Band Gear....Visit HERE:


NOTE: This WB O2 Clamp Sale Neither Includes any OEM Bosch Wide Band O2 Sensor and the Sensor Harness, Nor the Glowshift WB Fuel Air Digital Gauge Set, Nor the GM Truck Pillar Gauge Pod Fascia.
 
Last edited:
  • Like
Reactions: azswiss

mrrsm

Original poster
Lifetime VIP Donor
Supporting Donor
Member
Oct 22, 2015
8,198
Tampa Bay Area
Almost Forgot.... Who's Got LOPE?

Britney's GOT "F" Body Lope! ( In MORE Ways Than ONE) ;>)


mrrsm

Original poster
Lifetime VIP Donor
Supporting Donor
Member
Oct 22, 2015
8,198
Tampa Bay Area
Got GM 4.2L LL8 Lope?

Well... It would seem so... But this Dude should NEVER practice "Snap Throttles" when an Engine is Mounted on a Test Stand and idling... UNLOADED with NO HEAVY TEST FLYWHEEL bolted onto the Crankshaft Flange. If he had just put Rings in this Damned Thing... Man ...He was just looking for trouble:


Calvin would NEVER put such a strain on HIS LL8 Motor... Right? :>)


"Softly...Softly ... Catchee Monkee..."
 
Last edited:

Forum Statistics

Threads
23,678
Posts
641,906
Members
19,128
Latest member
Bearwen

Members Online