Dead 4.2 swap to 6.0

Gerbil21

Member
May 28, 2014
839
gmcman said:
Nice job so far, now all the fun.

You may also consider replacing the steering rack while you have everything out, hoses also.

Is the rack different on the SS? Ratio? What about the pump? Does all this need to work together? Naturally the I6 steering pump isn't going back.
The ss rack is 16:1 ratio vs the I6 20:1 ratio you could also switch to the saab rack it's a 18:1 ratio
 

Tiggerr

Member
Jun 6, 2013
1,324
Perrysburg, OH
Gerbil21 said:
The ss rack is 16:1 ratio vs the I6 20:1 ratio you could also switch to the saab rack it's a 18:1 ratio
Will the SS rack and tie rods work with the older 6cyl knuckles? Is there any difference in them over the yrs? Wasn't sure if the tie rod was larger diameter at the knuckle mount
 

Mooseman

Moderator
Dec 4, 2011
25,257
Ottawa, ON
Only 2002 had a mid-year change from 14 to 16mm tie rods so you're OK. Oh, Saab 9-7x used the same rack.
 

Sparky

Member
Dec 4, 2011
12,927
Knuckles never changed either.
 

Decembersend

Original poster
Member
Dec 3, 2011
316
I honestly never thought about the steering rack. When I was doing research after gmcman posted about all I could find was the same part numbers for the 03' I6 and the 07' 6L.

I'm glad there wasn't another change, this thing is expensive as is.
 

gmcman

Member
Dec 12, 2011
4,656
Yeah, I know it's more $$$ but at the very least I would change the PS hoses since they are really tucked in around the frame.

And that rack looks like a chore with everything in place.
 

gmcman

Member
Dec 12, 2011
4,656
Also need to confirm the steering shaft will fit whatever rack you install other than whats spec'd for that model.
 

Gerbil21

Member
May 28, 2014
839
Any updates
 

Decembersend

Original poster
Member
Dec 3, 2011
316
I'm still waiting on the motor mounts to be made, however I did order some essentials.

Everything I ordered is from PCM of NC

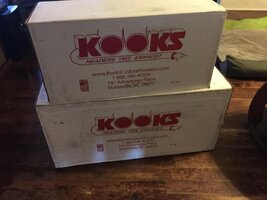
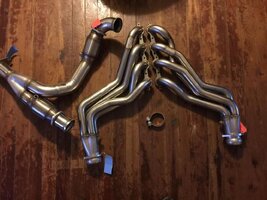
Kooks Headers 1 7/8" with Y pipe and High flow cat and GM gasket

NGK TR6 Spark Plugs

PCM of NC Performance wires and heat socks


A couple of weeks ago I took of the factory headers and in the process broke one bolt :hissyfit: . I was going to put PB Blaster on them if they took any more force than a hand tool (Ratchet and Socket). They all came of with very little effort except for the one that broke.

I tried several different things to remove the bolt like soaking it in PB Blaster then using a pair of locking plyers, using a punch to center the bolt and a left handed drill bit which eventually broke of on the inside due to being bound.

As of last night I took a set of torches home to apply a little heat to the block then using locking plyers to turn the bolt. Surprisingly enough it worked :wooot: , I would recommend to anyone if you broke a bolt of and can still get at the bolt use torches if you have access to them.
 
  • Like
Reactions: Mounce and Blckshdw

Blckshdw

Moderator
Nov 20, 2011
10,665
Tampa Bay Area, FL

Blckshdw

Moderator
Nov 20, 2011
10,665
Tampa Bay Area, FL
:duh: Oh yeah, I forgot...

I'm sure once you start getting the big stuff in, and the cooling system bumps towards the top of the priority list, you can do some doodling and come up with the necessary circuit. I remember when I was looking into it years back, I came up with one using a DPDT relay (for the series/parallel switch) and a SPDT relay. So basically the same thing. Never took a pic or scanned it though, and of course lost it. :hopeless:
 

Mooseman

Moderator
Dec 4, 2011
25,257
Ottawa, ON

Decembersend

Original poster
Member
Dec 3, 2011
316
I received my Spark Plug Wires yesterday along with the heat socks. Today I received the Spark plugs and gaskets for the headers (still waiting on kooks to ship them),

I went to pep boys to get some dry lube Teflon however they don't carry it but I grabbed some anti-seize for the spark plugs. I went to Lowes and found PB Blaster Dry Lube.

So when I got home I took the old plugs and wires off, then I put on the new ones.

IMG_6261.jpg

IMG_6260.jpg
 

Decembersend

Original poster
Member
Dec 3, 2011
316
I forgot to mention that I'm going to attempt to put the engine in weather pending.

It obviously won't be running but I should be in place.
 

Mooseman

Moderator
Dec 4, 2011
25,257
Ottawa, ON
I know that the I6 is sensitive to the type of plugs that are used (only ACDelco will do) but what about the V8's? I would think that the Iridium plugs would be better than those V plugs. Kind of old school as I remember using those in my '78 Z28 in the 80's when they first came out.
 

Sparky

Member
Dec 4, 2011
12,927
The only thing wrong with them is you have to change them more often. But for some applications the copper plugs are better.
 
  • Like
Reactions: BlazingTrails

24v 4.2

Member
Jan 16, 2013
430
Most of the SS guys seem to be running these, and I think they are being recommended/sold for the SS by PCM of NC. I have 8 of the same waiting to be installed.
 

Decembersend

Original poster
Member
Dec 3, 2011
316
The biggest reason why I bought those plugs over any other was that the SS guys seem to like them and after the engine is in there will be some mods that I will need these for.

They are copper core plugs and are only suppose to last 25k which I don't even come close to in a year. They're only $18 for the set and that's nothing every couple of years.
 
  • Like
Reactions: Blckshdw

Decembersend

Original poster
Member
Dec 3, 2011
316
I was going to put the engine in yesterday and discovered something I thought was only a slight issue. My fault for not looking into it further when I first noticed it.

A while back I noticed a hairline crack in the passenger side motor mount and thought that's all it was I went to go put the mount in the truck and noticed it's almost split in half.

I wanted custom ones from notquick (not for the split reason) on TBSS but he doesn't have them done and doesn't know when he will.

I ordered new ones from rock auto yesterday so now I wait.

I'm on my phone now so I can't post pics of the mount.
 

RedRocketZ28

Member
May 16, 2014
114
The LS based engines love the NGK plugs. For an N/A setup I always ran the TR55, mild nitrous and turbo setups ran TR6, and my 730 rwhp turbo 01 Z28 I ran the BR7EF non projected plug with E85. The TR55 and TR6 plugs I have ran for 50k miles with no issues. They last longer than most expect.

This is a cool project. Will be watching.
 
  • Like
Reactions: Decembersend

Decembersend

Original poster
Member
Dec 3, 2011
316
Milestone this weekend.

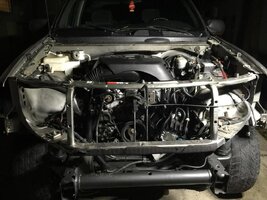
Got the engine in this weekend.

Saturday I got the engine mounts in between rain.
For those that are curious on how to change the brackets out that support the mounts its as follows.

Tools:
Hammer
3/8 in Socket Wrench x2
6" extension
Breaker Bar (I use my floor jack handle)
4 Way (optional)
13/16 in Socket
15mm Socket x 2
13mm Socket
19mm Socket
Flat Head
Floor Jack
Jack Stands
Wheel Chocks


1.Chock wheels

2. Use the 19mm Socket Wrench or 4 way Loosen lug nuts

3. Jack Vehicle up

4. Place jack stands in a secure location

5. Remove Lug nuts completely

6. Remove Wheel

7. Use flat head to open the secure fasteners that holds the break line to the control arm

8. Use the two 15mm Socket Wrenchs to loosen the upper ball joint from the control arm

9. Use the hammer to hit upwards on the UCA to break it free from the UBJ pull the CA toward the fender

10. Use the 13mm Socket wrench to loosen the two other nuts on the shocks in the engine bay (Do not loosen the one in the middle. No need to loosen the bottom of the shock

11.Push down and pull the shock towards the fender to gain access to the three bolts on the bracket

12. Use the 13/16 in Socket wrench with ext and breaker bar to remove the three bolts on the bracket

13. Repeat steps backwards to reassemble.

Engine Mounts use a 15mm nut.

On the SS mounts there are two on the top and two on the bottom

Now on to the Pics


Finally painted the front Caliper to match the rears
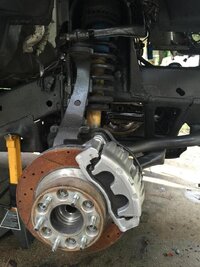
IMG_6290.2.jpg
Bought a Gorilla Cart 1200lbs cap to move the engine from the backyard to the truck
IMG_6291.2.jpg
Removing engine from Cart
IMG_6294.1.jpg
Engine in Close Shot
IMG_6297.1.jpg
Engine in whole shot
IMG_6299.1.jpg


Here are some pics of the mounts and a look at how to remove them.

UCA unbolted, Shock and Coil unbolted from the body and pushed out of the way, three bolts behind shock remove the motor mount brackets.
IMG_6280.1.jpg

endlink removed from LCA
IMG_6281.1.jpg

6.0L engine mount on the left and 4.2L engine mount on the right
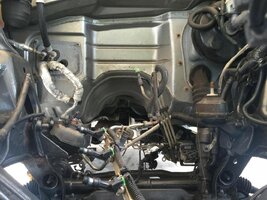
IMG_6283.1.jpg

6.0L engine mounts installed on both sides
IMG_6285.1.jpg
 

Decembersend

Original poster
Member
Dec 3, 2011
316
Finally after several weeks of waiting Kooks finally coughed up a tracking number.

More progress soon.

Thanks to Mark at PCMofNC for staying on top of my order.
 
  • Like
Reactions: Matt and Blckshdw

Decembersend

Original poster
Member
Dec 3, 2011
316
Hopefully I can get some incite on here instead of making a new thread.

I don't know why this just dawned on me but the air intake on the 4.2L and the 6.0L come out in different locations.

Any one have any suggests on what to do. Should I build my own 4" CAI or buy a new/used washer and new/used cover?

Anyone have pics of the inside of the SS washer and cover?
 

Mounce

Member
Mar 29, 2014
13,667
Tuscaloosa, AL
Maybe one of the cheap eBay cai's would come out okay near where the original was? That is unless you want to run the filter cover..then that wouldn't work.
 

Capote

Supporting Donor
Member
Jul 14, 2014
24,227
Atlanta, GA
Build your own bud [emoji14] [emoji106]
 
  • Like
Reactions: Blckshdw

Blckshdw

Moderator
Nov 20, 2011
10,665
Tampa Bay Area, FL
Dude!! You were supposed to build your own WAY back when I built mine remember? Better late than never big homie!! :deal:
 
  • Like
Reactions: Capote

Decembersend

Original poster
Member
Dec 3, 2011
316
I could build one but I was being lazy and I just planned on buying one from PCMofNC.

The 4.2 comes out of the top right and the 6.0 comes from the right center.

So if I use my current air box I'm going to have a crazy bend in it, I'm not sure how that'll effect performance.
 

Capote

Supporting Donor
Member
Jul 14, 2014
24,227
Atlanta, GA

dmanns67

Member
Apr 3, 2013
32,979
Ohio
Decembersend said:
I thought about doing the FWI but there are two issues I have.

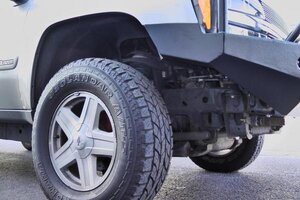
One is the way my bumper sits it offers zero protection for the Filter.

attachicon.gif
CAI bumper issue.jpg

Two Jimmyjam says he worries about is filter getting soaked anytime it rains.

I have read quite a few horror stories from TBSS owners who run the FWI intake. Unless it is going to be a garage/fair weather queen, I personally would strongly advise against the FWI.

I assume you will be off roading and with rocks/mug flinging around another reason not to put it there. What about a custom snorkel running up the passenger side A pillar :undecided:
 

Gearheadvr4

Member
Apr 17, 2013
63
How difficult did you think it was dropping the engine onto the new mounts? I fought mine for a while before it dropped in place.
 

Gerbil21

Member
May 28, 2014
839
So you only needed to unbolt to old mounts then bolt up the V8 mounts and drop the engine in?
 

Forum Statistics

Threads
23,271
Posts
637,476
Members
18,472
Latest member
MissCrutcher

Members Online

No members online now.