4.2L I6 Head Removal/Engine Restoration

OctaneRider03

Original poster
Member
Jul 31, 2012
430
What's up guys, my name's Lee and today I'm going to be starting a new thread based around the wonderful 4.2L's infamous misfiring issue "P0300--". I know the majority of us have all seen the discussions regarding this one particular issue before so I've decided to post my own input on the matter and throw a little insight on this out there to you all.

By no means am I a mechanic, so don't take my word on this to heart and please feel free to touch-up on a few things that I may say! I'm a U.S. Marine currently serving in the infantry. Since being stationed here on Camp Lejeune I've had my 2006 Trailblazer LT for the last four years. The misfire issue came up right as I got back from my previous deployment. Here's what happened and what I noticed..

The misfire code trips the check engine light. I can feel a slight to moderate vibration in the steering wheel as well as the rest of the truck as I sit tight at a stop-light waiting to go. I get the green light and progress down the road and decide to roll on over to our shop and get the code ran. P0300 series showed up as soon as I hooked our reader up, it said multiple cylinder misfire. I quickly began to investigate further and attempted to narrow my issue down. I was furious about the shaking. I felt like I was driving a semi down the road not a mid sized SUV. I went on a rage and purchased everything I thought it could possibly be, I would not advise doing this for all you readers out there. I bought a brand new starter, alternator, NGK laser iridium spark plugs, six brand new coil packs, a thermostat and two engine mounts. All of this was installed. It ran okay for all of one week and then began to misfire once more. I then replaced the intake solinoid. Nothing. The check engine light disappeared but the misfire still persisted...

I threw in the white towel after that guys. I took a trip to the dealership and paid for a compression test to be done. They said that starting from cylinders 1 through 6 the compression ratio was 90% 90% 65% 90% 65% 90%.. Cylinders three and five were firing low.. They stuck a scope down into the upper cylinder head and took a look at the combustion chamber. What they saw blew me away..

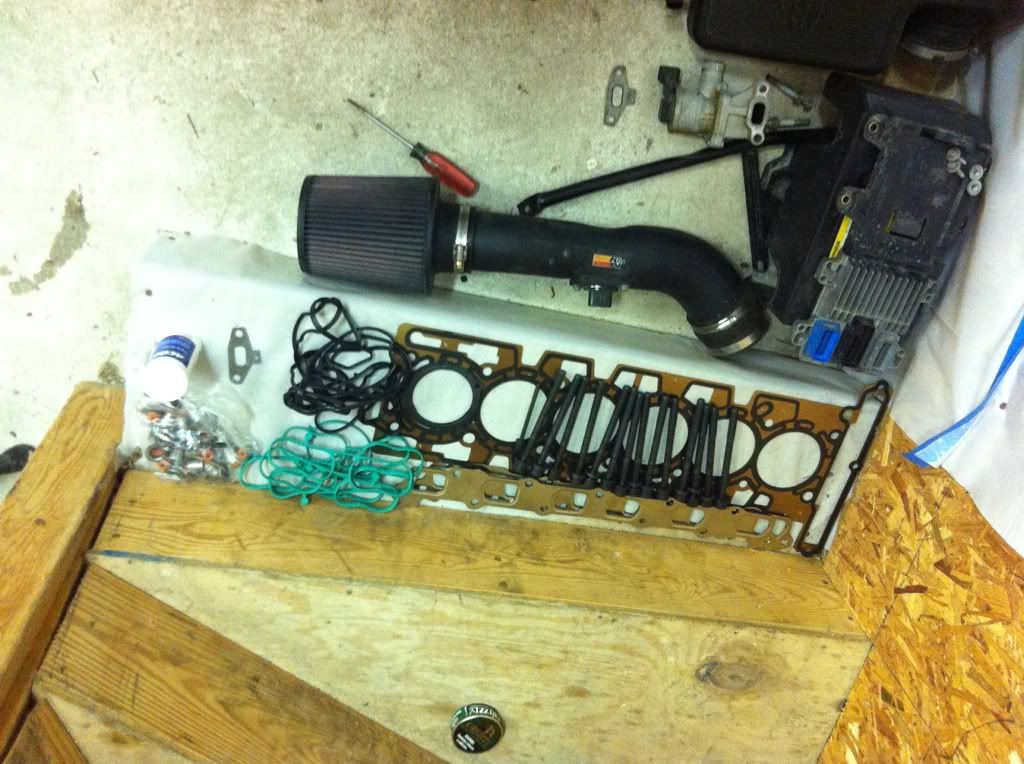
Now mind you, I don't drive my TB like a bat out of hell even though I did install a CAI and had a retune by PCm4less. I don't push it hard and I accept the fact (unlike others) that I drive an LT, not an SS. Moving on. They saw a ridiculous amount of carbon built up, and it had caused my valves to "stick" almost due to the build up. I purchased a brand new head gasket, and pretty much the entire upper cylinder rebuild kit. I'll be taking the upper cylinder head completely out, taking off the cams and sending it into a machine shop here in town to be cleaned and restored. While this is happening my friend and I will be working with the combustion chamber to clean out any gunk we can find all along keeping the combustion chamber covered and lubricated. We'll see what happens.

The guys at the machine shop know the 4.2L all too well. They told me they get about three to four a week for the same issue. I don't know if it's an issue with the seating or how the engine was built, but I do know that once we're done with the rebuild, all cylinders should be firing at 140% individually.

If any of you have any tips about this, share some word! I take each oppertunity as a learning experience and am open for input from others. Bottom line, once we get rid of the carbon, the cylinders don't misfire, there is no more shake. I'll be posting pictures as all this happens. Thanks guys. -Lee
 

RayVoy

Member
Nov 20, 2011
939
Before you take it apart, why not add some carbon cleaner and take it for a long drive to get the engine hot enough to burn out the carbon.

The build up is probably due to prolong sitting and short trip driving.
 

Wooluf1952

Member
Nov 20, 2011
2,663
Milwaukee, Wisconsin
RayVoy said:
Before you take it apart, why not add some carbon cleaner and take it for a long drive to get the engine hot enough to burn out the carbon.

The build up is probably due to prolong sitting and short trip driving.

^^ That ^^ A round of Seafoam would definitely be worth a try.
 

Matt

Member
Dec 2, 2011
4,035
This will not help with the carbon issue, but you might also want to get rid of the NGK spark plugs and get the AC Delco's...for some strange reason these trucks prefer them over any other brand.
 

OctaneRider03

Original poster
Member
Jul 31, 2012
430
Matt said:
This will not help with the carbon issue...

What do you mean? What won't help with the carbon, me taking the upper cylinder head to a machine shop and letting them restore/clean it or the type of spark plugs I have in? Yeah, you know I've always been told to stay away from Boshe (or however you spell the brand name). Apparently Trailblazer's don't work too well with them over time. To test your theory, I installed brand new iridium delco's before going with the NGK's. It misfired all the same, but I'm open to try them again after I get the cylinderhead back from the shop! Thanks bro! I really hope this works..
 

OctaneRider03

Original poster
Member
Jul 31, 2012
430
Code:

Hey guys, I'd say within the duration of the last three months, we've injected two cans of that stuff straight into the motor. I won't lie, that stuff DID break down a pretty significant amount of carbon. How do I know it was doing it's job? The people at the gas station next to our shop were running to their cars due to the smoke my TB was putting out. After taking all the necessary actions, the truck ran great. For about two weeks. All the cans did was hold my issue at bay for just a little while. Then it came back gentlemen.

We'll see what happens with this machine shop. I'll be sure to post pictures as we progress with everything.

This sucks though.. Now I've gotta find another ride into work every morning for about a week.. Heh!
 

OctaneRider03

Original poster
Member
Jul 31, 2012
430
strat81 said:
I've never tried it, but I hear GM Top Engine Cleaner can help with carbon deposits and related issues.

I've never heard of it bro. It sounds like something that would do the trick, but from what I saw, it needs to be taken care of by the machine shop. At least there they'll look at it, clean it, and if there's anything cracked or broken/breaking they'll replace with new parts. They're going to look at the seats and springs, the cams as well. I'm really curious to see what they can do! I just want my truck to run normal again you know?

It's cool though. If this addresses my problem, maybe it'll help somebody else out that's going in circles over it and being played by the dealership. For instance, when they told me what was and I was actually allowed to see it all for myself, they gave me an estimate of $3200 for repairs. That included the new head gasket and upper cylinder rebuild kit. I've already got all my new rubber gaskets, as well as the 14 head bolts. As soon as the shop returns the cylinder head back over to me and my friend and I have had time to clean out what we can from the combustion chamber we should be able to put everything back on and fire her up..

I paid close to $450 for all my gaskets and head bolts. I also found out that they were going to do the exact same thing I'm doing on my own.. Takin the cylinder head out and sending it into a machine shop. Ironically the SAME machine shop I'm sending it to. Funny how they don't mention any of that to you when you're standing there like a fool. The machine shop will cost me close to $400 depending on if thy replace anything or not.. Afterwards we put everything back together ourselves. $3200 = LABOR RIP OFF
 

Sparky

Member
Dec 4, 2011
12,927
How many miles out of curiosity? Seems strange that there is that much carbon build up.

Mine is at 162k and runs nearly perfectly. Needs another throttle body cleaning soon but that's about the only issue. Which actually, that makes me wonder if the crappy PCV system these trucks have has contributed to your excessive carbon build up. If there is that much crap on the throttle body I can only imagine the crap that collects through the whole intake stream.
 

OctaneRider03

Original poster
Member
Jul 31, 2012
430
I asked myself that same question brother. The K&N that's on it now has done well as far as filtration goes. In fact, since having it, getting to the throttle body has never been easier! I've kept it extremely clean since being able to reach in, push it open and spray. I'm not too sure what's caused the build up. I had a tech tell me that the 4.2's are known for it, but if that's the case I'll have to add that one to my wall of things 4.2's are "known for".

The carbon's there, and there's a lot of it. I've deployed to Afghanistan back to back for 7 months, 14 total. During that time all the TB did was sit and wait with the occasional crank every two weeks, then afterwards my friend would shut her down and disconnect the battery. I question if the truck sitting for so long while I was away had anything to do with it. But I doubt it.

The problem didn't occur until I drove from the coast here in North Carolina to the West side of the state where I-95 comes down. Probably about 150-200 miles total. As I was arriving to my destination, I remember feeling the truck shake, and at that time is was violent. I shut her down and decided to let her cool off while I looked around. Nothing. Since then I've installed everything listed above. Still nothing.

After months of attempting to solve the problem by myself, I reviewed a word of advice from a friend. Use Seafoam. After two cans spread apart between three months, my issue seemed to be taken care of. The white smoke flowing from my exhaust pretty much said it all. It calmed down for a period of time, but the more I drove it the faster the signs resurfaced. I took it to the dealership and now here we are. My last hope.

New head gasket, bolts and rubber gaskets, te whole kit plus a restored and cleaned upper cylinder head. If this doesn't do it, it's time to buy a motorcycle guys haha! -Lee
 

Sparky

Member
Dec 4, 2011
12,927
How did you use the seafoam? Through the brake booster line or in the gas tank?

I think there is an issue with the seafoam not reaching all the cylinders when used through the brake booster line. Mixed with the gas would let it get to all the cylinders but I don't know if it would be strong enough to break down all the carbon or only a little bit of it.

I think there was some other stuff people have mentioned using, some Mopar foaming cleaner that you spray in the intake (while the vehicle is off) and the foam expands, fills up the entire intake down to the valves, and dissolves carbon. Then after a while the foam has subsided and you start the vehicle up to burn it all out (doing some cleaning to the exhaust side at this point as well). I don't know how well it works but I remember reading something about it.
 

HARDTRAILZ

Moderator
Nov 18, 2011
49,665
Curious to see how this all turns out.
 

OctaneRider03

Original poster
Member
Jul 31, 2012
430
Interesting. I don't think I've heard of those methods either. Thanks for the heads up and I'll be sure to remember that information as future reference. We injected both cans using the brake line you spoke of. As I said, it worked for a period of time, but it only held the issues at bay. I'll be posting a video hopefully some time tonight on YouTube. I'll tag the link to it over here so you guys can take a gander too. If anything I'll be putting up pictures as we move forward with with things. I really appreciate you giving a little insight man. -Lee
 

OctaneRider03

Original poster
Member
Jul 31, 2012
430
Btw it's running at 122k at this time.
 

Opeth

Member
Mar 25, 2012
177
I just went through this back in April.... I got a new head installed because #6 cylinder had a massive carbon build up, but the rest were normal. I only had 74k miles on mine too.

Only thing I did notice while poking around, my intake manifold bolts near #6 were not even hand tight. The ones towards the front of the engine were tight. No clue how they loosened, not sure if that was allowing a vaccumm leak and lean condition/rich condition causing the failure.

I also only did oil changes when my idiot light told me to, and truck was always fed synthetic. But those will be put back to every 5k miles now, before it was like every 11k or once a year....

This was all covered under an extended warranty for me, and 14 out of the 16 head bolts broke along with every exhaust manifold bolt when the mechanic took them out. Paper work says 33hrs of work performed. $4300 repair, I only paied $304 for misc. bolts and fasteners which weren't covered.

Truck has a lot more balls now, it's noticed when towing.
 

Sparky

Member
Dec 4, 2011
12,927
I don't think oil change intervals will have any effect on carbon build up on the valves.
 

RayVoy

Member
Nov 20, 2011
939
Matt said:
but you might also want to get rid of the NGK spark plugs and get the AC Delco's....
AFAIK, NGK makes the ACDelco plugs.

Sparky said:
I don't think oil change intervals will have any effect on carbon build up on the valves.
Neither would having someone start the truck and letting it run for a short time, every two weeks.

Carbon build up is from incomplete combustion. Either the fuel is sub standard, or the F/A ratio is incorrect. I suspect the problem is the air leak from the lose screws on the intake.
 

OctaneRider03

Original poster
Member
Jul 31, 2012
430
RayVoy said:
AFAIK, NGK makes the ACDelco plugs.

Neither would having someone start the truck and letting it run for a short time, every two weeks.

Carbon build up is from incomplete combustion. Either the fuel is sub standard, or the F/A ratio is incorrect. I suspect the problem is the air leak from the lose screws on the intake.

It's good to see you guys leaving feedback. At Trailvoy this would have never happened. I'm just being honest. You guys are awesome, every last one of you. I really appreciate the help and the brainstorm action I see going on.

Listen, I've got some time before this happens. We start taking off the upper cylinder head on the 10th of this month. I'll have it in the machine shop no later than the 15th. Once we get it back and the install goes as planned, I'll be sure to touch base here with all of you to let you know of what all happens. Fingers crossed on this one gentlemen!
 

OctaneRider03

Original poster
Member
Jul 31, 2012
430
I forgot to mention, I've used fuel additives such as STP intake cleaner and Lucas. I'm talking about over time. Could this have had an effect on the combustion ratio by chance? Thanks again...
 

MacMan

Member
Mar 3, 2012
194
Matt said:
This will not help with the carbon issue, but you might also want to get rid of the NGK spark plugs and get the AC Delco's...for some strange reason these trucks prefer them over any other brand.
AC Delco spark plugs are made by NGK. I had the NGK's in my '02 for 93K and they ran just as well as the Delco's.
 

MacMan

Member
Mar 3, 2012
194
Sparky said:
I don't think oil change intervals will have any effect on carbon build up on the valves.

:iagree: I use the OLM and my usual changes are at around 10K. Always had synthetic in it since very first oil change (I'm the original owner), and have NO issues with carbon.....engine runs as smooth as when I bought it 11 years and 193K miles ago.

Changing to a 5K oil change will change nothing.
 

Sparky

Member
Dec 4, 2011
12,927
OctaneRider03 said:
It's good to see you guys leaving feedback. At Trailvoy this would have never happened. I'm just being honest. You guys are awesome, every last one of you. I really appreciate the help and the brainstorm action I see going on.

Listen, I've got some time before this happens. We start taking off the upper cylinder head on the 10th of this month. I'll have it in the machine shop no later than the 15th. Once we get it back and the install goes as planned, I'll be sure to touch base here with all of you to let you know of what all happens. Fingers crossed on this one gentlemen!

Well thank you :smile: But to be honest it would have happened at Trailvoy in the past, until vertical scope effectively ran us out of there :crazy:
 

Matt

Member
Dec 2, 2011
4,035
RayVoy said:
AFAIK, NGK makes the ACDelco plugs.

MacMan said:
AC Delco spark plugs are made by NGK. I had the NGK's in my '02 for 93K and they ran just as well as the Delco's.

Learn something new every day. I've NEVER seen that mentioned before.
 

Matt

Member
Dec 2, 2011
4,035
OctaneRider03 said:
What do you mean? What won't help with the carbon, me taking the upper cylinder head to a machine shop and letting them restore/clean it or the type of spark plugs I have in? Yeah, you know I've always been told to stay away from Boshe (or however you spell the brand name). Apparently Trailblazer's don't work too well with them over time. To test your theory, I installed brand new iridium delco's before going with the NGK's. It misfired all the same, but I'm open to try them again after I get the cylinderhead back from the shop! Thanks bro! I really hope this works..

The type of spark plugs...see ^^^, looks like the plugs are fine.
 

OctaneRider03

Original poster
Member
Jul 31, 2012
430
We shall see what happens...
 

McGMT

Member
Jun 17, 2012
621
There was a problem that GM was having, mostly with the northstars and the people who typically drove them. These days with tolerances the way they are and the ring setup in engines for power/emissions they had a big problem with the carbon build up in the northstar engines, so far that the rings would not seat and start burning oil. I have the suspicion that those factors plus the wonderful torque management system on the 4.2 (Not to mention the build up that all ready accumulates due to PCV systems and such) are all attributing to the problem in our 4.2s

The procedure for "fixing" the northstar was a upper engine cleaning (GMSPO seafoam)... After that the tech was instructed to drive the vehicle for 15 minutes at least and keep the RPM's above 3500... And the GM regional service manager out of Pitt instructed our techs to "Beat the hell out of the engine" to clean out the carbon and re-seat the piston rings. They usually would drive the hell outta those old caddies for and hour to get the rings set in good enough that the vehicle wouldn't come back and instruct the fogies to put the hammer down at least once in a while.

Just a bit of info for youns` and a little food for thought with all the carbon issues on our factory PCM babied engines....
 

OctaneRider03

Original poster
Member
Jul 31, 2012
430
McGMT said:
There was a problem that GM was having, mostly with the northstars and the people who typically drove them. These days with tolerances the way they are and the ring setup in engines for power/emissions they had a big problem with the carbon build up in the northstar engines, so far that the rings would not seat and start burning oil. I have the suspicion that those factors plus the wonderful torque management system on the 4.2 (Not to mention the build up that all ready accumulates due to PCV systems and such) are all attributing to the problem in our 4.2s

The procedure for "fixing" the northstar was a upper engine cleaning (GMSPO seafoam)... After that the tech was instructed to drive the vehicle for 15 minutes at least and keep the RPM's above 3500... And the GM regional service manager out of Pitt instructed our techs to "Beat the hell out of the engine" to clean out the carbon and re-seat the piston rings. They usually would drive the hell outta those old caddies for and hour to get the rings set in good enough that the vehicle wouldn't come back and instruct the fogies to put the hammer down at least once in a while.

Just a bit of info for youns` and a little food for thought with all the carbon issues on our factory PCM babied engines....

Thanks man, I appreciate the word up!

Five more days until we start taking the upper cylinder head off! I embrace a few broken head bolts in the process, let's hope things run smoothly! I'll let you guys know what's up! -Lee
 

OctaneRider03

Original poster
Member
Jul 31, 2012
430
OctaneRider03 said:
Thanks man, I appreciate the word up!

Five more days until we start taking the upper cylinder head off! I embrace a few broken head bolts in the process, let's hope things run smoothly! I'll let you guys know what's up! -Lee

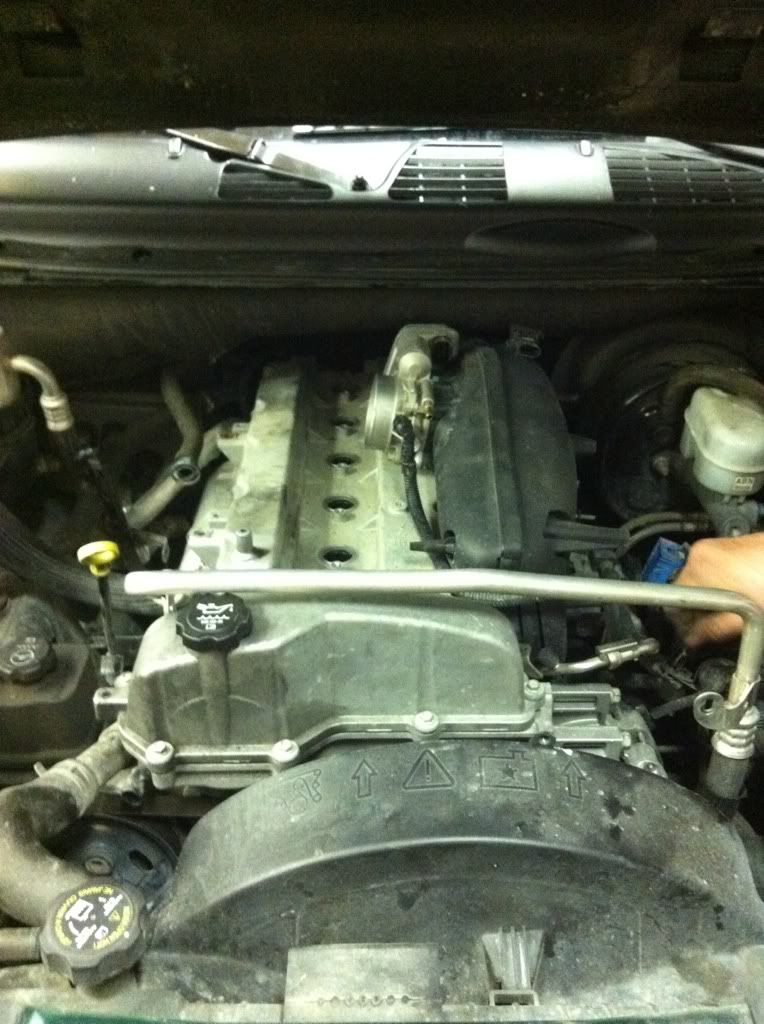
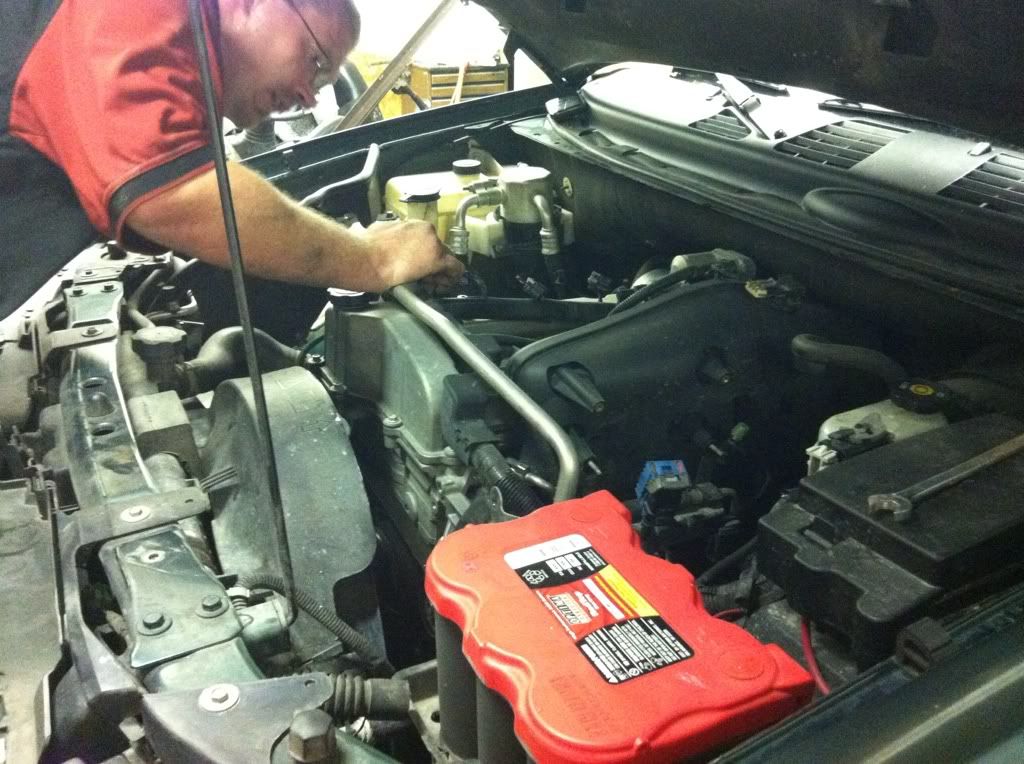
Guys! We started the process last night around nine PM eastern! I'm so stoked to say that we managed to get a pretty considerable amount done! The head is still on at this time, but everything around it minus the intake manifold/throttle body has been stripped!

I noticed a few parts that had noticeable carbon build up as well as wear. I did take photos but can't upload them here from my iPhone!! So far so good!! -Lee
 

OctaneRider03

Original poster
Member
Jul 31, 2012
430
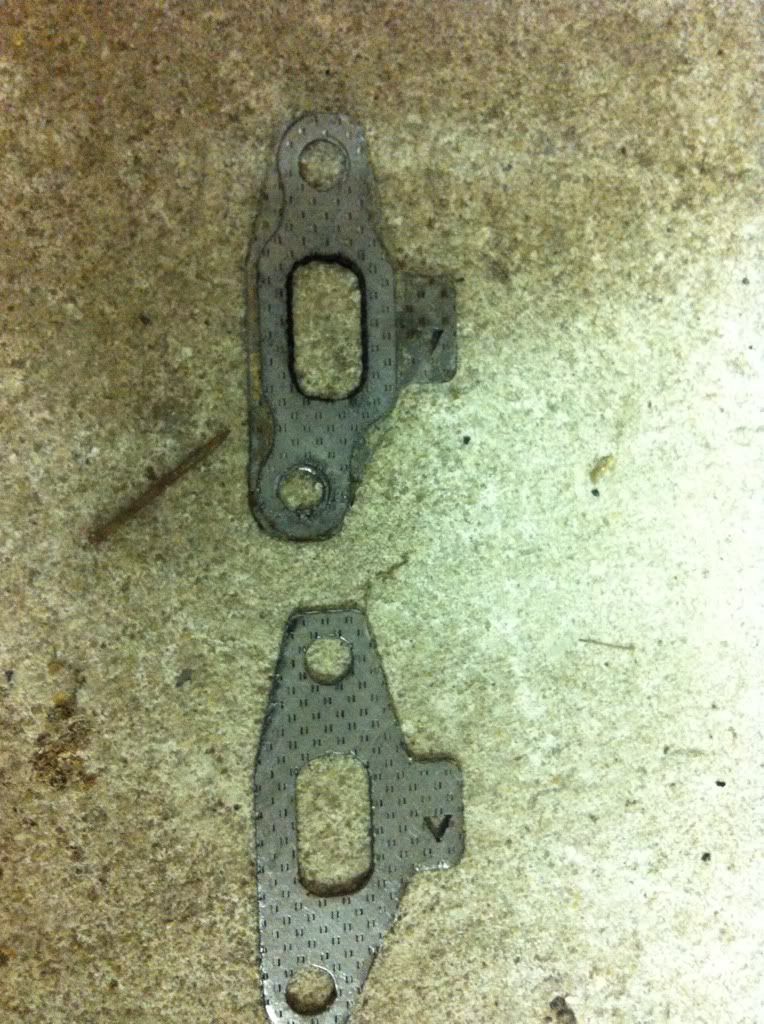
Here are a few pictures from last night guys! More to come!

2b7a3298.jpg


5fd136b3.jpg


7d648c6e.jpg


b11fc81a.jpg
 

MAY03LT

Member
Nov 18, 2011
3,426
Delmarva
OctaneRider03 - I swapped out the picture URL codes for the IMG codes. The IMG codes make the pics come up automatically. Good luck with the project and keep us posted!
 

OctaneRider03

Original poster
Member
Jul 31, 2012
430
MAY03LT said:
OctaneRider03 - I swapped out the picture URL codes for the IMG codes. The IMG codes make the pics come up automatically. Good luck with the project and keep us posted!

Yes sir, I really appreciate you doing that! I don't have access to a desktop so posting the link will have to do for now! If I were to do anymore please feel free to convert the rest!

We go back to the garage here in one hour for round two! Good looking out!
 

OctaneRider03

Original poster
Member
Jul 31, 2012
430
OctaneRider03 said:
Yes sir, I really appreciate you doing that! I don't have access to a desktop so posting the link will have to do for now! If I were to do anymore please feel free to convert the rest!

We go back to the garage here in one hour for round two! Good looking out!

To the member that said something about the intake screws being extremely loose, you were right! I just used my hand and unscrewed all of the screws in the intake manifold. Not cool! If you guys have a 4.2L, double check how tight those screws actually are! -Lee
 

OctaneRider03

Original poster
Member
Jul 31, 2012
430
Okay, now we're trying to loosen up the fan clutch.. Do any of you know if the thread is reverse thread or not? We're over here beating our wrench with a hammer trying to get it off! -Lee
 

strat81

Member
Dec 29, 2011
399
OctaneRider03 said:
Okay, now we're trying to loosen up the fan clutch.. Do any of you know if the thread is reverse thread or not? We're over here beating our wrench with a hammer trying to get it off! -Lee

On my 5.3L, I'm pretty sure we struck the wrench from right to left (counter clockwise) to break it loose. We had the belt still attached. Took about 3 HARD hits to get it loose. I could be misremembering though.

If your pump is slipping on the belt, you'll need the tool to hold the pulley in place.

Check the "Fan Clutch 101" thread at Trailvoy for more info.
 

OctaneRider03

Original poster
Member
Jul 31, 2012
430
MAY03LT said:
x3 on the beat the living crap out of it:yes:

Hehe, you guys are too funny I swear! You were right, we stuck a pair of pliers at the bottom as a wedge and literally went to town on it for about ten minutes or so. It finally broke loose and we were able to progress.

In summary of tonight, we took out the alternator, cam-shaft sensor, exhaust manifold, blah blah blah until we reached the point of removing the head cover. I've found heavy deposits of carbon near the intake manifold ports as well as a few key places that were really surprising...

We'll pick this back up again on Tuesday night gentlemen! I'm going to post pictures from tonight soon and give you all a better idea of what all occurred and what was taken out!

OctaneRider03 said:
Hehe, you guys are too funny I swear! You were right, we stuck a pair of pliers at the bottom as a wedge and literally went to town on it for about ten minutes or so. It finally broke loose and we were able to progress.

In summary of tonight, we took out the alternator, cam-shaft sensor, exhaust manifold, blah blah blah until we reached the point of removing the head cover. I've found heavy deposits of carbon near the intake manifold ports as well as a few key places that were really surprising...

We'll pick this back up again on Tuesday night gentlemen! I'm going to post pictures from tonight soon and give you all a better idea of what all occurred and what was taken out!


Oh yeah, the power steering pump is gone, washer fluid resivoir is out, fan and fan housing unit gone and gone. It's been a good night. Alright I'm going bed... Tuesday gents!
 

OctaneRider03

Original poster
Member
Jul 31, 2012
430
I'm about to post a few more pictures from last night here momentarily. They'll demonstrate what all we took out and the point of progress we reached. Really stoked about this..

For any of the new readers out there that may or may not be members of GMTNATION, allow me to give you a brief summary on what all's been going on.

My 06 Trailblazer started misfiring right after I returned from Aghanistan earlier this year. We've attempted troubleshooting the issue several times by installing new parts here and there only to go nowhere with it. After investigating a little further we found out that my cylinders were misfiring (causing the entire truck to vibrate or "shake") which resulted in my check engine light coming on throwing up the "Multiple Cylinder Misfire" code. After going through a few cans of Seafoam and allowing the dealership to run a compression test as well as sticking a scope down towards the combustion chamber, we realized that there was an ungodly amount of carbon built up inside. I'm talking pure black sludge and sand that has built over time..

The dealership quoted me $3,200 for repairs, saying that they would be taking the upper cylinder head or just "head" off and sending it into a machine shop to be sandblasted and cleaned here in town. I said no way to that offer and chose to go about things my own way to cut the total cost of repairs in half.

What you are about to see are photos of our progress as we take the head off the motor and send it in to be cleaned ourselves. Once it gets back to us, we'll be reinstalling the head along with the cylinder head rebuild kit purchased from the dealership.

Side notes: Intake manifold screws were hand tight when we attempted to take them out. This possibly allowed a leak, there WAS a caked up amount of carbon/sand around the intake manifold ports.

A few of the smaller gaskets that were taken out were covered in carbon, almost completely burnt in coloration and worn. The vehical's mileage is at 120k. Is this normal?

Upon wacking the living daylights out of the fan clutch to get it loose, I DID find that the bolt was in fact NOT reverse thread! If that's you out there trying to get it off, don't push/pull/slam/beat to the right! You're only tightening it!

Once we removed the top cover of the head exposing the dual cams set up, I took note of the gears and chain I saw which reminded me once we take the head off we'll have to do a better job at marking the timing other than using the small little indicators close to the teeth of the gears. Any input on how to make sure the timing is correct once we put everything back on?

The pictures are about to be posted, can I get somebody to convert the URL codes to IMG please as I don't have access to a desktop. Thanks -Lee
 

OctaneRider03

Original poster
Member
Jul 31, 2012
430
dc8420ed.jpg


96fa557d.jpg


267fbd3d.jpg


0e8c1345.jpg


28f9a064.jpg


61b3a110.jpg


e6aafa0a.jpg


c3f53693.jpg
 

Forum Statistics

Threads
23,659
Posts
641,714
Members
19,085
Latest member
ChevyCG

Members Online