What did you do to your GMT today?

Status
Not open for further replies.

Matt

Member
Dec 2, 2011
4,025
Checked continuity on the climate control last night and it looks like the actual control unit is toast. I ordered a remanned one from Ebay last night, so that should fix my dash vents not working...2 new actuators and it's the control head, go figure.

Today I'm going to remove the rear sway bar.
 
Feb 18, 2017
104
Shreveport, LA
Checked continuity on the climate control last night and it looks like the actual control unit is toast. I ordered a remanned one from Ebay last night, so that should fix my dash vents not working...2 new actuators and it's the control head, go figure.

Today I'm going to remove the rear sway bar.

Dealing with the same thing with my 4wd. Replaced 2 actuators and still need the control head. I swapped in a known good one from my 2wd trailblazer and I still have a little issue it seems like. When I put it on defrost, it blows out of the vents, too. On vents, it doesn't seem like it's blowing as hard as it should be. Like there's a door not sealing or something. Can't compare it to how the 2wd ac blows because the 2wd just got a valve job and new valve in the head and still needs the head put back on.


Ugh.
 
  • Like
Reactions: Matt

HARDTRAILZ

Moderator
Nov 18, 2011
49,665
Getting pissed after checking the tracking on the hubs i ordered. Wanted to get some CVs and hubs tossed on it, but they show Monday not Sat like I hoped. Still may tear the thing apart though.
 
Feb 18, 2017
104
Shreveport, LA
That just happened to me on a thread tap I bought on Amazon.

Drilled the 2 broken head bolts in my engine block this morning. I need to finish the 2nd one. Then back them out with the EZ out. I'm done for today, though. Back at it on Monday.
 
  • Like
Reactions: Redbeard

Matt

Member
Dec 2, 2011
4,025
Dealing with the same thing with my 4wd. Replaced 2 actuators and still need the control head. I swapped in a known good one from my 2wd trailblazer and I still have a little issue it seems like. When I put it on defrost, it blows out of the vents, too. On vents, it doesn't seem like it's blowing as hard as it should be. Like there's a door not sealing or something. Can't compare it to how the 2wd ac blows because the 2wd just got a valve job and new valve in the head and still needs the head put back on.


Ugh.

Is yours auto climate control or manual with the sliders for temp?
 

Matt

Member
Dec 2, 2011
4,025
Got new boots today. Cooper Discoverer AT3 265/65R17.

20170225_100753_zpsxetin4k2.jpg


20170225_100807_zpsr1j4gbzq.jpg


20170225_100820_zps5wv6mftd.jpg


20170225_100946_zpsoxrjd5jh.jpg
 

Blckshdw

Moderator
Nov 20, 2011
10,688
Tampa Bay Area, FL
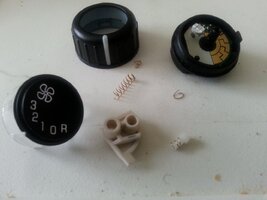
Pulled the driver's rear HVAC control knob (again) for some modding. Years ago when I disassembled it to put in an LED, I dropped the spring that pushes a plastic peg against the inside of the dial to give you the 'click' feel as you go from one fan speed setting to the next. This resulted in a lot of unwanted changes when brushing against the dial :mad:

Ended up taking the spring out of a dried up retractable ink pen, and cutting it down a couple of times to the desirable length. The diameter was a bit too big, so tried to twist it a bit to tighten it up. Didn't quite work exactly how I wanted, but I got it to fit inside the switch mechanism, and lift the peg with a satisfactory amount of force for a good tactile response when turning the dial. :thumbsup:

20170225_104204.jpg
 

Sparky

Member
Dec 4, 2011
12,927
Just ran some MCCC through the engine top end. The engine pinging has gotten worse so trying to find a way to clean out the crap without having to pull something apart and scrub it manually.

We'll see if it does anything. I really need to pull the plugs and check the cylinders with the snazzy borescope I got, just to verify I'm right on my assumptions and not barking up the wrong tree.
 
  • Like
Reactions: Redbeard
Feb 18, 2017
104
Shreveport, LA
Is yours auto climate control or manual with the sliders for temp?
Manual with the sliders. I've got some sort of intermittent issue with the temp control. If I reset the system, it works fine for a bit. Then it won't change when I go from cool to heat or vice versa unless I take the slider and go up and down, from top to bottom, about 10 or 20 times and it will usually change to the desired temp.


Edit: what did I do to it today? I drove it to pick up my new puppy, an AKC registered female Chocolate Lab like the one I had that passed away 10 days ago.


16991819_10154460180254389_7006671669598987565_o.jpg


She's gorgeous! Her dad was a big, block headed chocolate lab and her mom was yellow. They had yellow, black, and choc in one litter. Only 1 chocolate female and I got pick of the litter, being the first to buy one. So, so glad I have another puppy. I've had dogs since I was 5 and I'm 35 now so it didn't feel right coming home to an empty house. Anyway. I haven't named her yet. I can only come up with BJ, which is a play on my last dog's name, Babe. I figured BJ could be Babe Jr lol. Yea, I know I'm dumb haha
 
Last edited:

Matt

Member
Dec 2, 2011
4,025
Manual with the sliders. I've got some sort of intermittent issue with the temp control. If I reset the system, it works fine for a bit. Then it won't change when I go from cool to heat or vice versa unless I take the slider and go up and down, from top to bottom, about 10 or 20 times and it will usually change to the desired temp.

Two things I'd suggest. Pull the control head and see if you can get at the sliders internally and look if they've got some corrosion. Also, do a continuity test for the drivers door mode actuator. In my auto climate control it's the Light Green wire on the actuator side to pin A5in the Light Blue connector. Then the Tan wire to pin B4. If the readings come back at 000 then there's an issue with the control head. If it changes from 000, then it's one of those two wires.
 

Mounce

Member
Mar 29, 2014
13,667
Tuscaloosa, AL
Drove it around truck shopping, didn't find much worth my time. Silverado "classic's" (03-07) are hard to come by in decent shape without 200,000 miles. Such a shame.

However, I did find the brake squeak in the rear decided to turn in to a brake grind as I was driving so that's scheduled for Sunday after I get paid.
 

Sir ffeJ

Member
Dec 1, 2011
543
Gave her a bath at the touch less car wash.
Even tried to get smooth with the wife during the soaping process. Guess they call it touch less for a reason.
Ouch lol

Don't know how it ended up in the other thread. Thanks for the move.
 
Last edited:
  • Like
Reactions: Redbeard and Matt

xavierny25

Member
Mar 16, 2014
6,336
Staten Island, N.Y
Finally pulled the trigger on getting it tuned by Jeremy of limeswap.

Also bought her a set of djm upper control arms.
I'm not sure who is better at spending my money the Voy or my wife.:laugh:
 
Last edited:

Capote

Supporting Donor
Member
Jul 14, 2014
24,227
Atlanta, GA
Showed my Honda buddy that his tiny lil civic isn't faster than a 4000Ibs truck.
Confirmed my tune shuts off the a/c after 3500rpm.
 

HARDTRAILZ

Moderator
Nov 18, 2011
49,665
What is wrong with your tune?


EDIT--Nevermind...i see it is actually a standard thing for the AC to cutout at certain % throttle or RPM. Never noticed on mine
 
  • Like
Reactions: Redbeard

Capote

Supporting Donor
Member
Jul 14, 2014
24,227
Atlanta, GA

HARDTRAILZ

Moderator
Nov 18, 2011
49,665
Found some interesting bits and now will likely watch for it...

LS1--"AC compressors aren't designed to be spinning at the higher revolutions so it disengages over 4k rpms and also at a certain percentage throttle opening. Its more for longevity of the compressor than performance. Just about all cars will cut the AC in this manner. Even my '93 GMC pickup does the same."

The electricity to the AC clutch is cut off, disengaging the AC clutch. It doesn't shut off because it's trying to free up power for you. It shuts off to save the a/c compressor from damage.

Makes sense.
 
  • Like
Reactions: Redbeard

Capote

Supporting Donor
Member
Jul 14, 2014
24,227
Atlanta, GA
Found some interesting bits and now will likely watch for it...

LS1--"AC compressors aren't designed to be spinning at the higher revolutions so it disengages over 4k rpms and also at a certain percentage throttle opening. Its more for longevity of the compressor than performance. Just about all cars will cut the AC in this manner. Even my '93 GMC pickup does the same."

The electricity to the AC clutch is cut off, disengaging the AC clutch. It doesn't shut off because it's trying to free up power for you. It shuts off to save the a/c compressor from damage.

Makes sense.
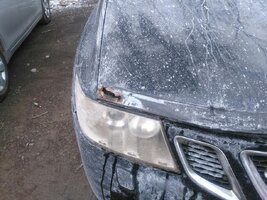
That's correct

And to stay on topic, cleaned bird caca off it
 
  • Like
Reactions: Redbeard

Mooseman

Moderator
Dec 4, 2011
25,403
Ottawa, ON
Cleaned interior out before me and my bud head down to NY to pick up my hood and shop a little at Harbor Freight tomorrow. The Moose is invading the States!
 

Mooseman

Moderator
Dec 4, 2011
25,403
Ottawa, ON
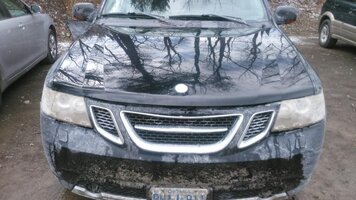
Drove it to Cooperstown NY and replaced the hood from this:
DSC_0420.JPG DSC_0422.JPG

To this:
DSC_0423.JPG

Then drove to Syracuse and stopped at the famous Dinosaur BBQ for lunch. I needed a cigarette after that and I don't even smoke it was that good! Then on to Harbor Fright and bought some stuff like jack stands, bench, ratchets, tool bag. Then back to Ogdensburg to pick up an O2 sensor I ordered on Amazon for the CR-V, which was half price than in Canuckistan. Then a quick blast through Wally World for some oil, Ozark tumblers, Dickies T-shirts and socks. Then go to the border, CBSA didn't even charge me anything. It was a very good day! :2thumbsup:
 

Capote

Supporting Donor
Member
Jul 14, 2014
24,227
Atlanta, GA
As with all Fridays after work or Monday mornings before work between the hours ranging from 12am to 3am; washing the truck for at least 2hrs. The temperature is usually between 25°F - 40°F.... The neighbors for sure think i'm a bit strange....
 

Matt

Member
Dec 2, 2011
4,025
Changing out the A/C control head for the reco one, hopefully that will fix the vent issue.

At the same time, I'm installing my new HU, Pioneer AVH-X2800BS. Soldered the harnesses together last night, taped everything up and it's ready to go.
 

Sparky

Member
Dec 4, 2011
12,927
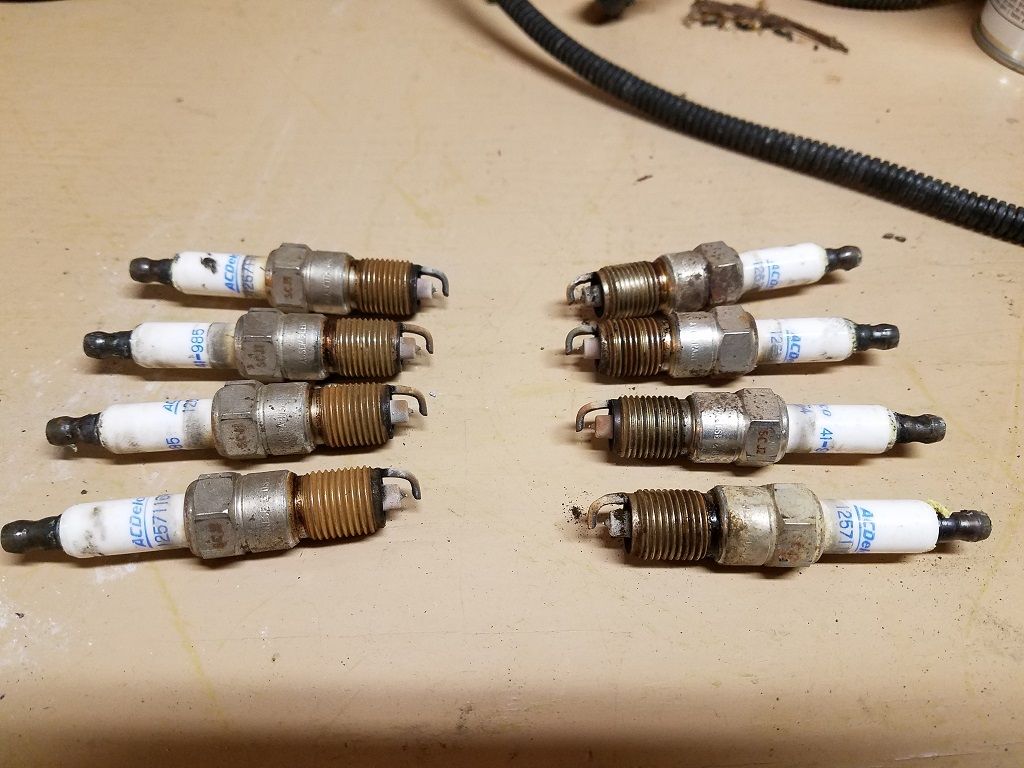
Did an oil change and spark plug change. With how it seemed to be running fine over all - aside from the minor pinging once warmed up - I figured the plugs were probably changed on time. Well, I guess not! Original old part number, and well worn.

Plugs are in order as you'd see when looking at the engine from the front of the truck.

20170304_163739_zpsyr96ruls.jpg


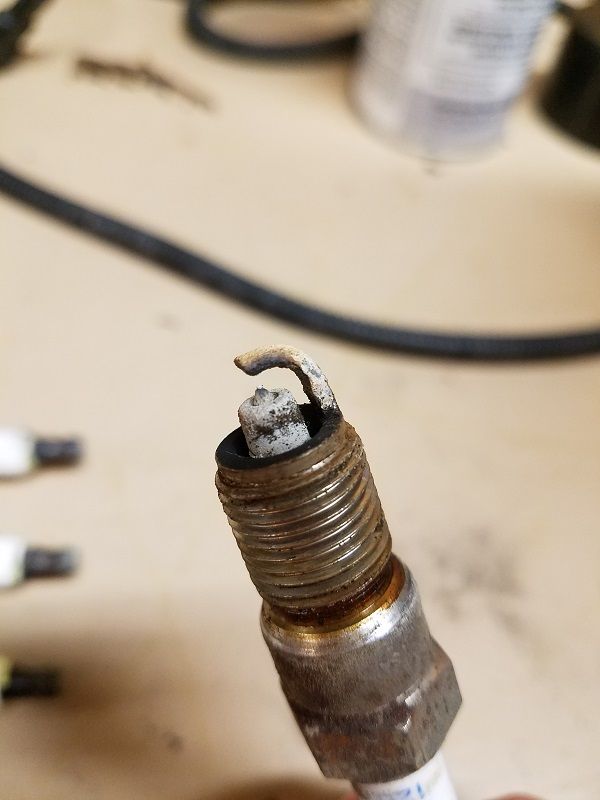
So this is what a plug looks like from a cylinder that had been burning oil. #1 and #7 both were like this. With AFM now turned off and oil usage being very minimal I'm hopeful the new ones won't get all nasty like this.

20170304_163841_zpsyh2u5md7.jpg


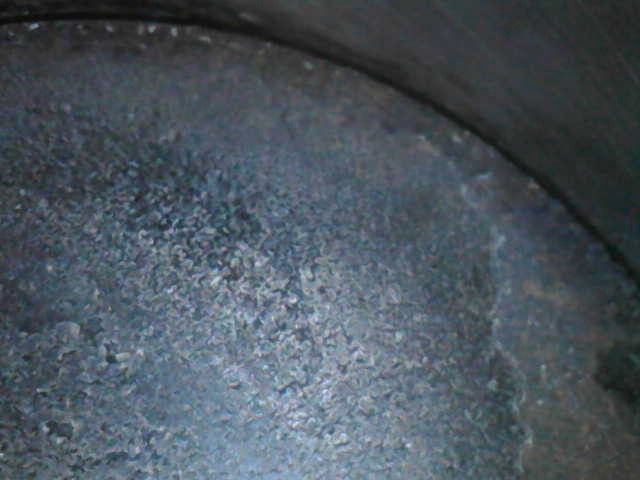
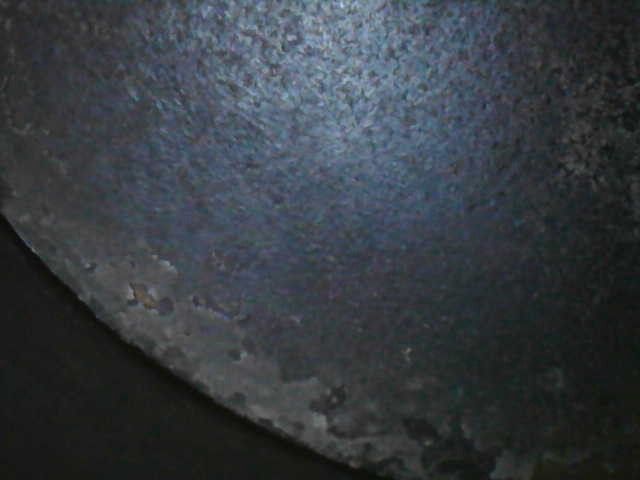
I used my borescope to check out the pistons as well as I could through the plug holes on the driver side, as that's where I had been hearing the pinging, and all 4 on that side looked similar. So... maybe the pinging was being caused not by excessive carbon build up on the pistons, but rather the nasty cooked plugs on 1 and 7. No pinging noise from the passenger side, so I didn't bother scoping those. Plus, I was getting cold!

Pics are in order, cylinders 1, 3, 5, 7.

cyl1_zpsfhxozxao.jpg

cyl3_zps0the3ebs.jpg

cyl5_zpsezyi3gdf.jpg

cyl7_zpsjjchdk78.jpg


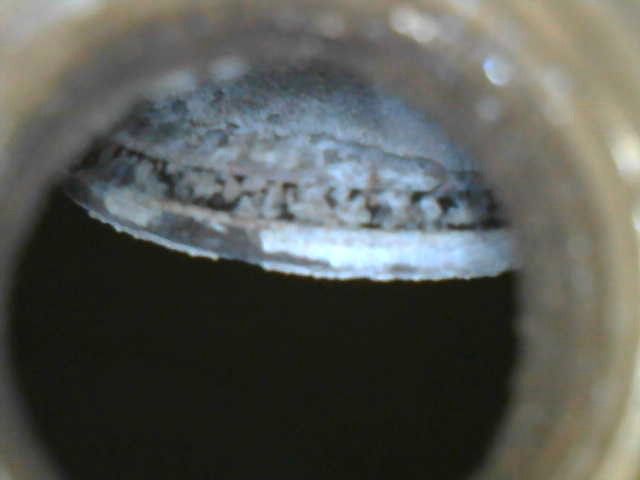
Cylinder 1 also had a valve open that was visible on the scope, so, tried grabbing a pic just because. Came out iffy, but w/e

cyl1valve_zps0indyf2c.jpg


Guess we'll see if it runs any better now or not. I'd think it should given the plug condition.
 

xavierny25

Member
Mar 16, 2014
6,336
Staten Island, N.Y
Drove it from Brooklyn to Staten island 15miles and all was good with the loaner tune. Then we leave to got to the dinner and the cel light came on. Of course I always have my BT odb2 connected. So I checked what the cel was for and I got a P0300. Just great. So I'm going to wait till I get my pcm back from limeswap and see if the code comes back. I'm hoping not because this Voy has never had any issues before I did the pcm swap.
I'm not going to start pulling coil packs and plugs just yet. I'll just let her do her thing and hope for it post to what cylinder is missing.
 

Mounce

Member
Mar 29, 2014
13,667
Tuscaloosa, AL
Replaced the rear pads and rotors. Advance/Carquest rotors and Carquest platinum ceramic pads. Also adjusted the parking brake since it was pretty much useless beforehand. Rolled the adjuster out a good eighth of an inch or more on each side and it'll still barely hold on a hill, better than it was though. Oh well, was my first time messing with the parking brakes so it was all new to me.
 

Blackwater

Member
Aug 14, 2015
477
Lawton, OK
new LED turn signals on the front. new Tail light lenses and LED bulbs.
 
  • Like
Reactions: Capote and Matt

RTTBLT1

Member
Jan 25, 2016
512
Louisburg, KS
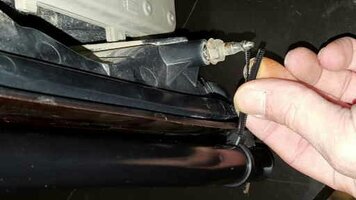
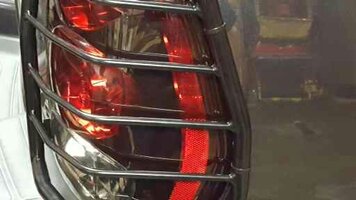
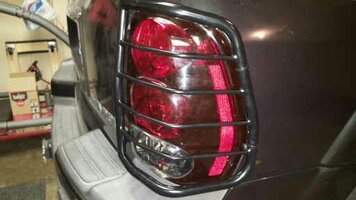
After installing the Grill/Brush Guard (pictures under my build thread) it was time to get the matching Black Steel Taillight Guards mounted...but didn't care for the fact the Black Horse brand Taillight Guards I purchased had no mounting setup for the rear (closest to rear tires) of the guards, just a rubber bumper that rested on the Taillight Lens.

And was not fond of drilling/tapping into the sheet metal to mount them like Roadie, although I was not ruling it out.

I was just looking to mount them snug to the Taillights so wind, bumps, people's clothing ect didn't have the guards bouncing/rubbing the lens. They are mounted with a breaking point so that in a event of a wreck, parking lot rub, heavy tree branch ect it's less chance of the whole Taillight being ripped off and for the guards just to get bent back.

So here is what I came up with, keep in mind I had very little to no options besides Roadies trick...
1489020897768.jpg
On the back of the Taillight assembly are 2 mounting guides, I decided to back out the 2 guides and use those areas for my mounting...
1489020896737.jpg
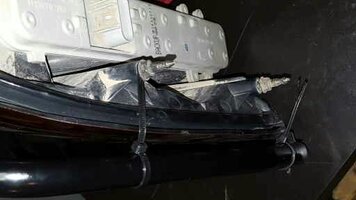
Using zip ties, I secured a zip tie to the guard tightly, ran the end of the zip tie to the Taillight mounting guides, cut the end of the zip tie down the middle, slipped it under (similar to mounting a ground wire to metal) the mounting guides bolt and then tightened the mounting guide bolt...

And here is the results when installed...
1489020897914.jpg
1489020898041.jpg
They are hardly noticeable and they are secured to the Taillight assembly pretty tight. I'm a happy camper! :2thumbsup:

I will post better pictures in the next few days in my build thread. Thanks and hope everyone has a great week!
 

Capote

Supporting Donor
Member
Jul 14, 2014
24,227
Atlanta, GA
Cleaned bird crap off it...
 

Matt

Member
Dec 2, 2011
4,025
Wheel alignment today.
 
Status
Not open for further replies.

Forum Statistics

Threads
23,357
Posts
638,392
Members
18,567
Latest member
Adungyyy

Staff Online