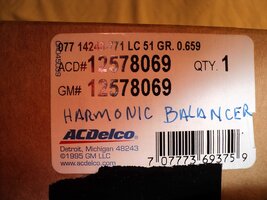
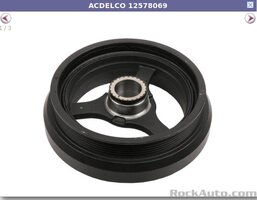
Just a 'few' more things come to mind...
(Ten + 1 Steps... Actually)
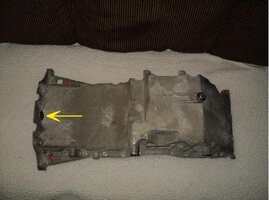
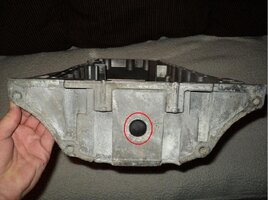
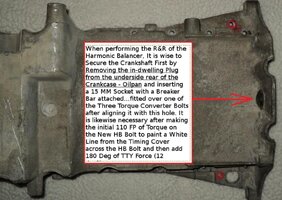
After you Secure the Holding Position on the Crankshaft by Passing a 15mm Deep Socket attached to Breaker Bar THROUGH the Center Hole in the Underside of the Crankcase-Oil-Pan and over one of the aligned Three Torque Converter-to Flex-Plate Bolts:
(1) Do NOT Forget to Install the Brand New Seal in the Timing Cover Case
BEFORE ever touching that New Harmonic Balancer! After cleaning up the front of the Timing Cover Case around the HB Seal Opening with Brake-Kleen, use a Dollop of
High Temp Permatex Black Silicone Sealant (courtesy
@Mooseman's idea...) on the inner edges of the TC Seal insert hollow.
(2) Then, after placing a 4" Square section of 2"X4" Wood over the face of the HB Seal, Tap it in uniformly with a Hammer until the edges of the TC Seal Metal Lip are fairly flush with the outer surface of the Timing Cover.And just as he said before,
"Put a SMALL amount of Grease on the inner edges of the PTFE TC Seal..."
DO NOT HIT THE OUTER SEAL FLANGE WITH TOO MUCH FORCE ...OR YOU MIGHT DISLODGE THE INTERNAL EXPANSION SPRING LOOSELY OUT ONTO THE OD OF CRANKSHAFT, DEFEATING WHAT MAKES THE SEAL WORK PROPERLY... AND YOU WILL NEVER KNOW THAT THIS HAPPENED ...UNTIL THE OIL STARTS POURING OUT ...ALL OVER AGAIN.
SINCE THIS WAS A REPLACEMENT HARMONIC BALANCER DONE BY SOMEONE ELSE BEFORE YOUR OWNERSHIP ...PERHAPS THIS IS WHAT STARTED THE WHOLE "HB OIL NOSE BLEED" PROBLEM IN THE FIRST PLACE. SO TAPPING THESE KINDS OF SEALS IN WITH 'JUST ENOUGH' ENERGY TO UNIFORMLY SEAT THEM HOME IS ALWAYS THE 'BEST PRACTICE'.
LOOK FOR A LOOSE TIMING COVER SEAL COMPRESSION SPRING THAT MIGHT JUST BE HANGING ONTO THE OUTER EDGES OF THE CRANKSHAFT (LIKE A CHARM BRACELET ON A DEBUTANTE'S WRIST) JUST AFTER YOU PULL THE TIMING COVER SEAL CASING OUT OF THE TIMING COVER.
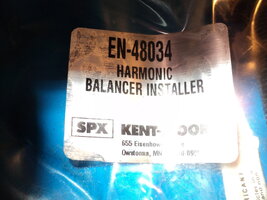
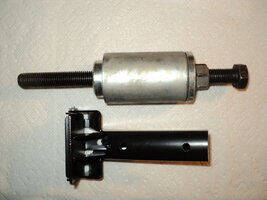
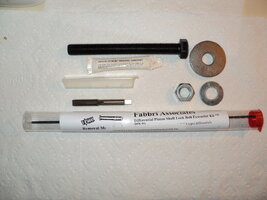
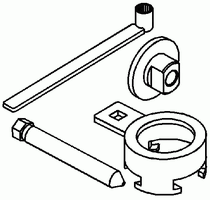
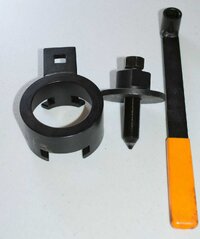
(3) Okay... using the components in the HB Installation Tool Kit, thread the Large Nut onto the Lubricated Threaded Bolt FIRST, followed by installing the Dual Thrust Washers Combo and then run all three almost all the way up towards the underside of the HB Installation Tool Hex Bolt Head. Be advised that since there is NO SLOTTED WOODRUFF KEY in this Design...the HB can be mounted in any of its possible 360 Degrees of position. Therefore, FRICTION is paramount here.
MAKE CERTAIN TO WIPE THE FACE OF SPECIAL FRICTION WASHER ON THE INSIDE OF THE INNER HARMONIC BALANCER SNOUT AND THE NOSE OF THE CRANKSHAFT WHERE THEY MATE TOGETHER WITH A PAPER TOWEL SOAKED IN BRAKE-KLEEN. THIS WILL ENSURE THAT BOTH SURFACES ARE COMPLETELY FREE OF ANY OIL OR GREASE.
(4) Follow this by holding up the Harmonic Balancer CLOSE to the TC Seal Opening and while supporting the Weight of the HB from its underside with one hand, use the other one to carefully guide the HB Installation Tool Bolt smoothly through the Timing Cover Seal Opening and begin threading the Bolt into the Nose of the Crankshaft and as far down inside as it will go BY HAND
and then make it EVER SO SLIGHTLY TIGHTER with a Wrench and then ...STOP.
You DO NOT want to Over-Tighten that Bolt, or you will NOT be able to unwind it from inside of the Crankshaft!
(5) Next, begin to Hand Tighten down the Large Nut over the Two, Lubed Thrust Washers until you can feel things getting pretty snugged up as they make first contact with the outer surface of the Harmonic Balancer.
BE VERY CAREFUL HERE NOT TO ALLOW THE HB TO WOBBLE AROUND TOO MUCH AND ACCIDENTALLY DISLODGE THE SPECIAL FRICTION WASHER.
(6) It follows on that while holding the HB Installation Hex Bolt Head with a Box End Wrench, use either an Open End Wrench or a Large Crescent Wrench to slowly turn down the Large Nut & Dual Thrust Washer Combo inwards in a Clockwise direction.
Make certain to Square Up the HB to the Nose of the Crankshaft FIRST as you tighten down the Large Nut so that it properly glides onto the OD on the end of the Crankshaft.
(7) Keep turning the Large Nut until you can feel and see the HB passing through the TC Seal and follow its progress inwards ...until it STOPS. Use reasonable force here, but remember... The HB Installation Tool is NOT meant to be over-tightened, as it will be the Final Tightening and Stretching of the HB TTY BOLT that will finally seat the HB all the way in! Once the HB is seated home... Remove the HB Installation Kit Bolt and Large Nut & Washer Combo Tool Set.
USE PLENTY OF BRAKE-KLEEN TO FLUSH OUT THE THREADED HOLE INSIDE OF THE NOSE OF THE CRANKSHAFT ALL THE WAY DOWN INSIDE TO REMOVE ANY AND ALL GREASE AND OIL. OTHERWISE...YOU MIGHT ACCIDENTALLY HYDRO-LOCK THE TTY BOLT AND FAIL TO THREAD THE BOLT INWARDS AS FAR INSIDE OF THE CRANKSHAFT AS POSSIBLE DURING THE NEXT PROCEDURES RESULTING IN HAVING A COMPLETELY LOOSE HB INSTALLATION:
(8) Remember, ,... from hereon, use ONLY an
Impact Grade Metric Socket when installing the Crankshaft-HB Bolt
....But Do NOT Use an Impact Gun! Tighten the Bolt initially with a Reliable, Ratcheting 1/2" Torque Wrench to 110 Foot Pounds. Then, use a well-shaken and agitated White Paint Pen to make a GOOD Mark as a Straight Up & Down Vertical Line on the Lower Timing Cover Case just above the Crankshaft Bolt and run the Paint Pen on over the Hex Bolt, ending as a Straight Vertical Line on the bottom of the Timing Cover.
(9) Finally, use a
Proper Fitting Metric Socket and ANOTHER Long Breaker Bar and
Gradually Rotate that TTY Bolt Clockwise, 180 Degrees while watching as the Line on the Bolt traverses like the Minute Hand from the 12:00 O'clock Position right around to the 6:00 O'clock Position --Re-Aligning the White Painted Straight Line vertical once more ...at 'The Finish Line".
(10) Clean up the front areas of the Engine and related Pulleys, etc, with Brake-Kleen and remember to
Install a Brand New Gates Serpentine Belt before trying to start the engine.
And...Brother... THAT should do it!


