Repairing 1997 S-10 LS Blazer

Off Road Bella

Original poster
Member
Jan 4, 2012
76
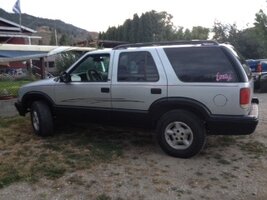
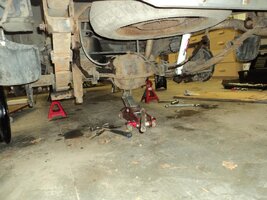
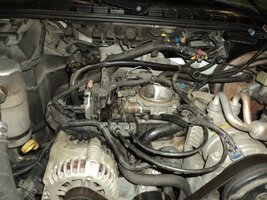
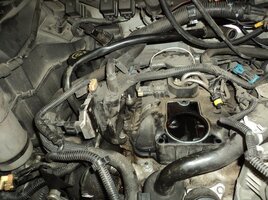
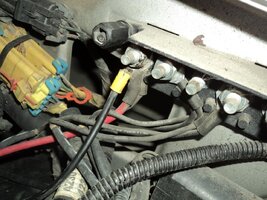
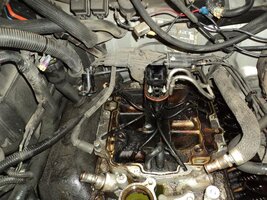
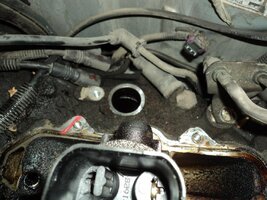
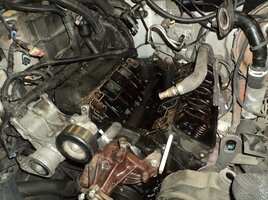
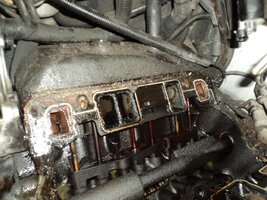
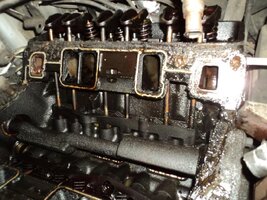
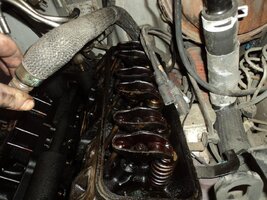
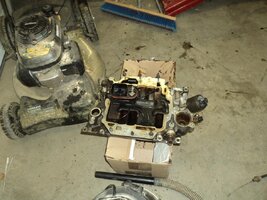
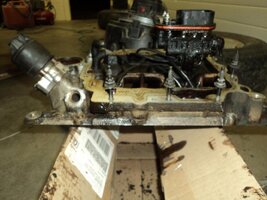
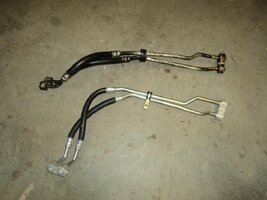
I had to park my Blazer, (I really miss driving it), it was burning motor anti-freeze really bad and there is an oil leak as well. so far have been told
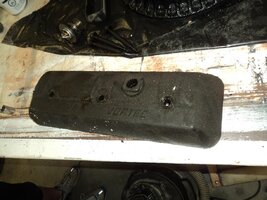
that the intake manifold gasket needs replacing, oil cooler lines adapter, oil cooler line Rad, (wondering if its the same thing), valve cover gasket also leaking.
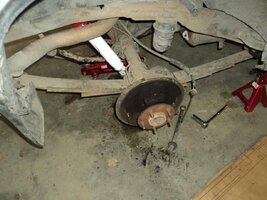
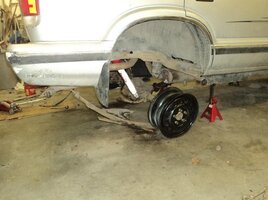
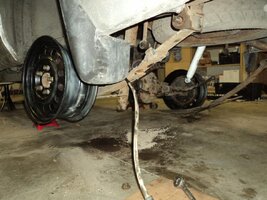
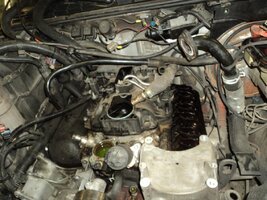
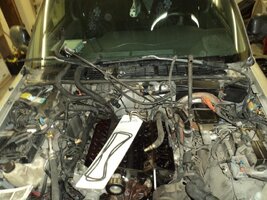
so my question is, this truck has over 314000kms on it right now, what other areas should be looked at that needs to be replaced with that kinda mileage and what to keep an eye on. I have had a rad flush done, idler, pitman air replaced upper and lower ball joints, I know there were other repairs made as well, which I would have to find the paperwork for. and any advise you may have would be greatly appreciated thank you so much.
 

Mooseman

Moderator
Dec 4, 2011
25,257
Ottawa, ON
I had a cracked head on my 2000 Jimmy so that is also a possibility. You should do a compression test to be sure.
 

Chickenhawk

Member
Dec 6, 2011
779
If you get clunking under the floor pan, replace the rubber mounts for the torsion bars.

You pretty much need a lift because you have to use a long pry bar to get the new ones in. If you are doing it yourself, if they can't slide in, try grinding off the ends of the mounting bolts a bit. (Once you try it, you will see what I mean.)
 

bigytwotone

Member
Dec 7, 2011
489
Dawson creek BC Canada
So is there more to look at??? im thinking U joints, front suspension, rear suspension, 4x4, compression, spark plugs, fuel filter, diff fluid's front and rear, transmission fluid. what else am i missing??? oh how hard is it to do the transfer case fluid change??
 

Mooseman

Moderator
Dec 4, 2011
25,257
Ottawa, ON
Yeah, they're nice little trucks. I actually miss mine because it didn't suck as much gas and a lot less trouble than my current TB.
 

Chickenhawk

Member
Dec 6, 2011
779
If you are changing plugs, budget two full hours for five of the six plugs plus four additional hours for the sixth. (I am not kidding.)
 

AbsoluteZero

Member
Nov 21, 2011
211
I suspect there's enough similarity between your 97 and my 95 engine that my experience might apply.

I've changed the lower manifold gasket twice. Once because their was an external leak where coolant was dripping on the garage floor. Again when I thought there was a leak but was wrong... another story. On the 95 the distributor has to be removed to get the lower manifold off. Since I don't do this for a living I took several pictures to mark the relative position of the distributor and rotor. When reinstalling it will only go back in one way and have the correct alignment. I found when removing, the helical distributor gear would slghtly turn the oil pump that drives the distributor. It took some trial and error to align correctly. In fact I made a tool using a long piece of 1/2 copper tubing that I could slip down the hole and turn the oil pump slightly.

If you have the remote oil filter and in-radiator oil cooler there's 2 sets of lines, one from the engine to the oil filter adapter and another set from the oil filter adaptor to the radiator.
Dorman makes replacement assemblies for both. I had to replace the engine to oil filter adapter because of leaks. On the 95 there's a brace that couples the engine to the transmission that had to be removed. Clearance was tight. It helps to have a stubby swivel-head ratchet for the bolt on the block. Also it took a very long extension setup to reach the bolt holding the adapter to the block.

The spark plug Chickenhawk is referring to is probably the one behind the steering shaft. I found if I removed the lower steering shaft it made access easy for several of the plugs. I had removed this shaft previously to rebuilt the rag joint so it was fairly easy since I've done it before. Most don't do it this way and use a universal on the plug socket. Many plugs were more easily accessed thru the wheel well.
By the way if you determine you rag joint is worn I probably can find a link or some photos of how I rebuilt mine using a Dorman part and some 3/8" bolts.
Hope some of this is helpful
 

bigytwotone

Member
Dec 7, 2011
489
Dawson creek BC Canada
Any pic's would be great we are slowly going over this truck from bumper to bumper and even though we are not mechanic's we are gong to try and fix everything so what ever tips you got post them up we would love to see pic's to thanks guys.
 

AbsoluteZero

Member
Nov 21, 2011
211
I had some play in the steering. After investigating I found over time the rag joint had some play. It's attached to the lower steering shaft and only replaced as an unit.... expensive.
Anyway I took some pictures of how I replaced the coupling. I don't recall dimensions so you should verify the Dorman 31002 couple has the correct dimensions for the 97.
I drilled and ground off the rivets in the original joint and replaced the coupler with the Dorman 31002 and put back together with 3/8" bolts.
You can see if the lower steering shaft is removed it gives access to the plug with close clearance.
 

Attachments

  • coupling removal.jpg
    coupling removal.jpg
    48.3 KB · Views: 193
  • Modified RagJoint.jpg
    Modified RagJoint.jpg
    26.1 KB · Views: 192
  • Original RagJoint.jpg
    Original RagJoint.jpg
    23.4 KB · Views: 193
  • s10steeringcouplerwz5.jpg
    s10steeringcouplerwz5.jpg
    46 KB · Views: 193

jrSS

Member
Dec 4, 2011
3,950
I know a guy from where I work that is selling his 2000 blazer. Really nice condition. White and only thing he's done after market wise was added some 20" wheels
 

Off Road Bella

Original poster
Member
Jan 4, 2012
76
Here are Pictures, of process with repairing the Blazer, Sorry I am just sticking these pictures on for now, hopefully that is alright until I can get more familiar with parts and part names etc... This chicky is learning and wow there is so much to learn and trying to wrap my brain around the whats what... but most of all its just nice to see how everything comes together and understand whats being said and how to solve the problem or fix it in my case. so cool....

View attachment 19360:thumbsup:

Throttle was so dirt I couldn't Believe how dirty it was...
 

Attachments

  • 2012 468.jpg
    2012 468.jpg
    71.6 KB · Views: 8
  • 2012 469.jpg
    2012 469.jpg
    81 KB · Views: 8
  • 2012 470.jpg
    2012 470.jpg
    66.8 KB · Views: 8
  • 2012 471.jpg
    2012 471.jpg
    90.9 KB · Views: 7
  • 2012 472.jpg
    2012 472.jpg
    92.7 KB · Views: 6
  • 2012 473.jpg
    2012 473.jpg
    54.1 KB · Views: 7
  • 2012 474.jpg
    2012 474.jpg
    56.6 KB · Views: 7
  • 2012 475.jpg
    2012 475.jpg
    61.5 KB · Views: 8
  • 2012 476.jpg
    2012 476.jpg
    79.2 KB · Views: 6
  • 2012 477.jpg
    2012 477.jpg
    92.8 KB · Views: 7
  • 2012 478.jpg
    2012 478.jpg
    63.3 KB · Views: 5
  • 2012 479.jpg
    2012 479.jpg
    30.2 KB · Views: 6
  • 2012 480.jpg
    2012 480.jpg
    94.7 KB · Views: 7
  • 2012 481.jpg
    2012 481.jpg
    91.7 KB · Views: 8
  • 2012 482.jpg
    2012 482.jpg
    97.3 KB · Views: 7
  • 2012 483.jpg
    2012 483.jpg
    97.7 KB · Views: 6
  • 2012 485.jpg
    2012 485.jpg
    75.6 KB · Views: 7
  • 2012 486.jpg
    2012 486.jpg
    87.6 KB · Views: 7
  • 2012 487.jpg
    2012 487.jpg
    79.3 KB · Views: 8
  • 2012 488.jpg
    2012 488.jpg
    89.5 KB · Views: 8
  • 2012 489.jpg
    2012 489.jpg
    99 KB · Views: 7
  • 2012 490.jpg
    2012 490.jpg
    88 KB · Views: 8
  • 2012 491.jpg
    2012 491.jpg
    94.7 KB · Views: 8
  • 2012 492.jpg
    2012 492.jpg
    66.4 KB · Views: 8

HTUSA

Member
Dec 28, 2011
34
Chickenhawk said:
If you are changing plugs, budget two full hours for five of the six plugs plus four additional hours for the sixth. (I am not kidding.)

Remove the drivers side wheel, and then peel back the fender cover. Makes changing that spark plug so much easier. When I figured this out after changing plugs for the 4th time, I wanted to scream. Changing that plug now would take me less than 10 minutes with a good swivel.
 

Off Road Bella

Original poster
Member
Jan 4, 2012
76
Thanks for your advice, greatly appreciated.... We are doing that this weekend, I an going to download more pictures, with the progress.
 

woody79

Member
Dec 3, 2011
351
Love following along with your project. Hands on is the only way to get experience in my opinion. I started with close to knowing nothing about fixing cars, but have learned a lot from this community:thumbsup:

Keep the pics coming :yes:
 

Off Road Bella

Original poster
Member
Jan 4, 2012
76
Here are some more Pictures; the back end the def. is going to be spray painted black I think it will look great and will clean it up a bit.

View attachment 19458

right now cleaning up the parts and replacing new parts, its so nice to see how it is coming together ..... so cool.....
 

Attachments

  • 2012 494.jpg
    2012 494.jpg
    86 KB · Views: 5
  • 2012 495.jpg
    2012 495.jpg
    83.2 KB · Views: 5
  • 2012 496.jpg
    2012 496.jpg
    90.6 KB · Views: 3
  • 2012 497.jpg
    2012 497.jpg
    90.4 KB · Views: 5
  • 2012 498.jpg
    2012 498.jpg
    83.3 KB · Views: 5
  • 2012 499.jpg
    2012 499.jpg
    82.2 KB · Views: 4
  • 2012 500.jpg
    2012 500.jpg
    97.8 KB · Views: 5
  • 2012 501.jpg
    2012 501.jpg
    96.7 KB · Views: 6
  • 2012 502.jpg
    2012 502.jpg
    95.2 KB · Views: 5
  • 2012 503.jpg
    2012 503.jpg
    97.8 KB · Views: 5
  • 2012 504.jpg
    2012 504.jpg
    96.5 KB · Views: 4
  • 2012 505.jpg
    2012 505.jpg
    93.3 KB · Views: 5
  • 2012 506.jpg
    2012 506.jpg
    91.8 KB · Views: 5
  • 2012 507.jpg
    2012 507.jpg
    95.6 KB · Views: 6
  • 2012 508.jpg
    2012 508.jpg
    93.4 KB · Views: 5
  • 2012 509.jpg
    2012 509.jpg
    99.7 KB · Views: 6
  • 2012 510.jpg
    2012 510.jpg
    97.9 KB · Views: 5
  • 2012 511.jpg
    2012 511.jpg
    94.7 KB · Views: 6
  • 2012 512.jpg
    2012 512.jpg
    93.9 KB · Views: 5

Off Road Bella

Original poster
Member
Jan 4, 2012
76
the Manifold gaskett is completely shot, its being replaced for sure, and the bolt that is holding the leaf springs is a stubborn piece of you know what%&^&^, using a hack saw to cut it, tried to hammer it won't even move a inch. well one way or another its coming out.

View attachment 19469:thumbsup::ok:
 

Attachments

  • 2012 513.jpg
    2012 513.jpg
    99.4 KB · Views: 4
  • 2012 514.jpg
    2012 514.jpg
    96.6 KB · Views: 4
  • 2012 515.jpg
    2012 515.jpg
    96.7 KB · Views: 2
  • 2012 516.jpg
    2012 516.jpg
    99.5 KB · Views: 5
  • 2012 517.jpg
    2012 517.jpg
    98.1 KB · Views: 3
  • 2012 518.jpg
    2012 518.jpg
    96.9 KB · Views: 3
  • 2012 519.jpg
    2012 519.jpg
    94.3 KB · Views: 2
  • 2012 520.jpg
    2012 520.jpg
    79.2 KB · Views: 4
  • 2012 521.jpg
    2012 521.jpg
    97.3 KB · Views: 3
  • 2012 522.jpg
    2012 522.jpg
    74.9 KB · Views: 3
  • 2012 523.jpg
    2012 523.jpg
    91.3 KB · Views: 4

Mooseman

Moderator
Dec 4, 2011
25,257
Ottawa, ON
Good project you have going there. Seeing that engine open brings back memories of when I had to do mine with the cracked head. It was a good little truck after that.
 

Off Road Bella

Original poster
Member
Jan 4, 2012
76
yeah sure is a project, having a rough time with cutting the bolt off the leaf springs, next weekend, going to try a different blade to cut off that bolt. and also hope to try and get U bolts for the leaf springs, hope I can get them..... the spark plugs are in... broke my first spark plug, (crap!!!!)... tighten it way to much.... learned quickly though, and so is the manifold gasket. so nice to see the truck coming back together again.....
 

Mooseman

Moderator
Dec 4, 2011
25,257
Ottawa, ON
Learned a long time ago to use antiseize on just about everything, including spark plugs :biggrin:
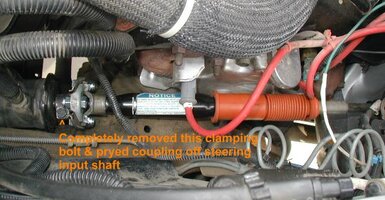
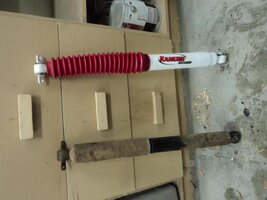
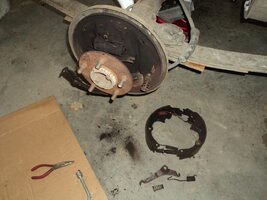
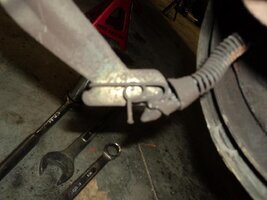
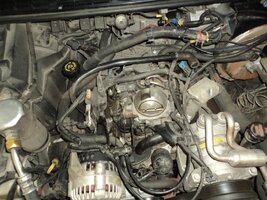
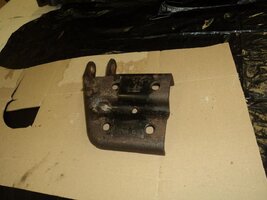
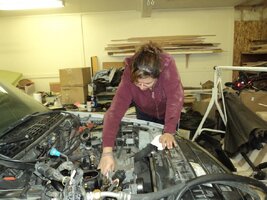
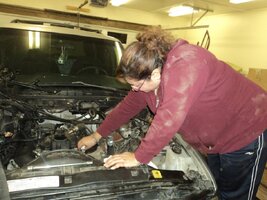
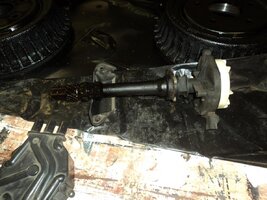
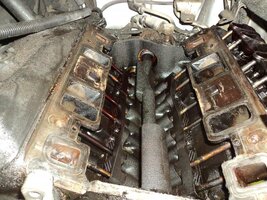
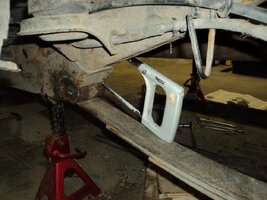
. I also bought a torch set for the most stubborn bolts. Another possible solution would be to use an angle grinder to cut it off.
 

Off Road Bella

Original poster
Member
Jan 4, 2012
76
well the saw didnt work, either did the hack saw either, dulled the blades, and took way too long. had to get a grinder and it was done very quickly.
 

Off Road Bella

Original poster
Member
Jan 4, 2012
76
My blazer is final done and on the road..... so excited this is happening........ I will have to get pictures and post them.....
:thumbsup:
 

Short Bus

Member
Dec 2, 2011
1,906
Off Road Bella said:
My blazer is final done and on the road..... so excited this is happening........ I will have to get pictures and post them.....
:thumbsup:

PICS.jpg
 

woody79

Member
Dec 3, 2011
351
Off Road Bella said:
My blazer is final done and on the road..... so excited this is happening........ I will have to get pictures and post them.....
:thumbsup:


Well done!
 

Off Road Bella

Original poster
Member
Jan 4, 2012
76
I am so upset I had more before photos of the blazer repairs on my cellphone, then at a family reunion, I had my phone in my pocket and I was thrown into the pool and I lost all my photos, that is so nuts, sure learnt my lesson, well the upside now is I have a new phone and I have taken the after photos. I am so excited that my blazer is back on the road :smile:View attachment 22356
looks so good.
 

Attachments

  • 1blazer.JPG
    1blazer.JPG
    33.6 KB · Views: 28
  • blazer 3.JPG
    blazer 3.JPG
    41 KB · Views: 28
  • blazer2.JPG
    blazer2.JPG
    39.4 KB · Views: 29

Forum Statistics

Threads
23,271
Posts
637,476
Members
18,472
Latest member
MissCrutcher

Members Online