Oh those sexy front curves

Shdwdrgn

Original poster
Member
Dec 4, 2011
568
Here we go... picture-heavy update, but there's a lot to show today! To begin with, I mentioned the receiver was rubbing on the frame cross-pipe. I made use of a 2" solid rod, a stack of boards, and a floor jack, and by bouncing on the front of the truck, I managed to get enough force to bend the bumper around the receiver and get about 1/4" of clearance. By the time I got the spacer plates welded in, I still had over 1/8" of clearance, so now the bumper slides on and off the truck smooth as you could want!

The underside bevels have all been formed and welded in place. Those outside corners were the worst to form, because not only did I have to put a curve in them, but then I had to mount them in the vice and give each piece a 45-degree twist by hand. My back is feeling it, but I got both pieces to line up perfectly with everything else before they were welded into place.
9076-img-7180.jpg


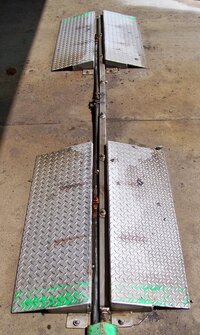
Here is the recess for the skid plate (the bevel on the far side still needs to be cut down level with the rest of the plate). Once I start making that plate, I'll drill holes across for the bolts to go through. I think this steel is thick enough that I'm going to use counter-sunk screws so there's nothing on the front profile that can snag or drag.
9077-recess-skid-plate.jpg


After using it a few times, I wasn't too happy with having the hitch-pin handle back underneath the bumper, and even without grease, it slides without hardly any effort. So after much careful calculation, I drilled a slot through the underside bevel and tapped a 5/16 hole in the end of the 5/8 hitch-pin bar. What you see here is with the pin pulled all the way out. When its pushed in place to lock a hitch, there will be less than 1" of the bar still showing. I'm going to drill a hole in the end of the bar and weld in a steel ring, which will be used to move the bar back and forth. While it is something that could get snagged, this setup should make the hitch-pin very easy to use, and if this piece does get mangled, I can just unscrew it and replace it with another 5/16 rod.
9078-hitch-pin-arm.jpg


Since I still need to pick up a new grinding disc, I haven't cleaned up the welds yet. But here's the first view of the nearly-completed bumper in place...
9079-bottom-bevels-finally-place.jpg


One thing I immediately noticed after I had the bumper sitting on the truck is the wavy profile of the bottom edge of that bevel. However it doesn't take much to straighten it up. In the following shot, I drew an angle back towards the wheel, taking off about 3/4" at the back end, but really making a big difference in how the final profile will look. And the final clearance at the back end still leaves over half the front of the tire exposed. I like it!!! (And yes, the angle of the back end of the bevel piece will also be cut tomorrow to match the top piece of the bumper.)
9080-bevel-still-needs-trimmed-up.jpg


Looking up underneath, most of the step piece in the plastic wheel-well that was used to mount the plastic to the original bumper is still inside the new bumper. So I plan on just running a bar across the inside, and using something like the original plastic push-pins to hold the wheel-well to the new bumper. By the time I finish up tomorrow, all of the structure of the bumper will be complete.
 

Shdwdrgn

Original poster
Member
Dec 4, 2011
568
:celebrate: Today it is officially a bumper! :bonk:

I finished grinding the welds out today, then added a couple brackets to hold the wheel-well plastic liner. I picked up a couple of the plastic pop-rivets at Ace, and just snapped the liner to the new brackets similar to the original bumper. I actually spent a bit of time working out how to cut the wheel-well plastic to the new height without taking any chances of getting my tires, and finally just used some manual snips and a hacksaw. There was a lot of grinding done to clean up the bottom profile, then polished the entire bottom edge nice and smooth with a sanding disk.

So here's a shot of the inside of the bumper. The brackets that the wheel-well plastic pin to are just a couple pieces of 1" x 1/8" flat bar.
9091-back-side-detail.jpg


From the side, to compare with yesterday's pics:
9095-img-7195.jpg


And a couple front shots...
9093-wheel-well-plastic-trimmed-up.jpg


9094-img-7194.jpg


I still want to run a narrow trim strip over the top edge, where it runs underneath the fender, just to clean up the view of the pieces there. Monday I'll get it pulled and finish up anything I think of over the weekend. I'm waiting for a call-back from a shop that does sandblasting to see what kind of price I'm looking at to get this cleaned up, but I hope to have it all painted by the end of next week...

[EDIT] Oh yeah, I forgot to post... final weight: 109.8 pounds.
 

Shdwdrgn

Original poster
Member
Dec 4, 2011
568
Boog2006 said:
That looks great! So how much do you want for it? :smile:

How about $2,000? Come on, it's a bargain!!! :biggrin:

So in looking over the old bumper cover, I was reminded again of the air vent holes in the front of that, and I wonder if this is something that is needed with the higher profile of the new bumper (keeping in mind that a skid plate will be added soon)? I have a 2" and a 1-1/4" hole-saw, so what I was thinking was using one of those to shape out a 6" long slot on either side of the license plate, then cover them with a heavy mesh like I want to use for the fog lights. Can anyone make a recommendation regarding this?
 

HARDTRAILZ

Moderator
Nov 18, 2011
49,665
I do fine without extra holes.
 

Sparky

Member
Dec 4, 2011
12,927
I think BartonMD's skid plates have some holes for airflow to the lower portion of the radiator, but the bumpers don't.
 

Shdwdrgn

Original poster
Member
Dec 4, 2011
568
Yeah but his setup also has a flat front plate where the air can flow in while driving. Mine is pretty much going to run at a angle from the underside of the bumper straight back to the oil pan. I'm also wondering if anything else could use the extra cooling behind the bumper? I don't have anything to plug in and monitor temps, so no way to tell if there isn't enough airflow after the skid plate is added.
 

Sparky

Member
Dec 4, 2011
12,927
The factory power steering cooler is back there on the driver side. Mine has been bypassed since long before I got the truck and it has been fine (original got a hole in it, rusted or something it looks like), but if I was to do any sort of offroading I'd be putting a new cooler in place.
 

Shdwdrgn

Original poster
Member
Dec 4, 2011
568
I finished up the welding today. First, a couple of braces between the top of the bumper and the upper frame mount. These should provide extra strength against torque if I mount a winch up there. Also a good shot showing why I need to get the thing sandblasted to remove the welding residue...
9143-braces-added-winch.jpg


I added a lip around the top and back edges to really give it a finished look. This is just some 3/4 x 1/8 flat bar. It closes up the gap at the top where the points come together, and gives a little overlap with the wheel-well plastic in back.
9144-lip-around-top-back-edges.jpg


And here's what it looks like from the top side. Note that until today, the V at the front has been open and very obvious.
9145-img-7203.jpg


When I was getting started on the edge pieces, I ran out of MIG wire. So this means I have about 10 pounds of wire in the bumper. Yeesh! When I went to pick up a new roll, I was ticked that they did not have the .030" wire that I was looking for, so I ended up grabbing a 1# roll to finish off. After getting the new wire fed into the welder, I happened to notice that the old spool said it was .035". :redface: So all the issues I was having with the wire feed at the beginning of this project were probably due to using a .030 tip with .035 wire.

In other news, I drew out the pattern for the side panels of my new push bar today. I started with drawing around the edge of my old waag brush-guard, then modified it to fit around the new bumper. I never got a measurement for the spacing between the waag and the hood, so I guessed at about 1.5 inches. which looks about right. The new frame wraps around the bottom, sitting about 1" lower than the bottom side of the bumper, and sits flush to the front of the bumper. I plan on mounting the entire piece with four 3/8" bolts, working on the principle that when pushing forward, all the force will be on the bumper itself, but if I get hit across the front by a speeding tree, the bolts will tear away before doing any significant damage to either the bumper or frame.

Since I already have the materials on hand, I will probably get started on the pushbar this week. One thing that just came to mind is I'd like to get the mounting holes drilled for both the pushbar and skid plate, so I can weld a nut on the back side of each.
 

Regulator

Member
Nov 20, 2011
2,496
I like the bumper, the time and work that you have put into it really shows. The one thing I don't understand though is why you set the receiver so far back and had to add all that extra crap to operate it? I am not a fan of the black ball on the front or the sliding ball that requires a handle to be screwed in. I could understand of you were trying to keep a smooth profile, but with the D rings and the future addition of a push bar, that is certainly not the case.
 

Shdwdrgn

Original poster
Member
Dec 4, 2011
568
Regulator said:
I like the bumper, the time and work that you have put into it really shows. The one thing I don't understand though is why you set the receiver so far back and had to add all that extra crap to operate it? I am not a fan of the black ball on the front or the sliding ball that requires a handle to be screwed in. I could understand of you were trying to keep a smooth profile, but with the D rings and the future addition of a push bar, that is certainly not the case.

The original reason for mounting the receiver flush was because I didn't think there was going to be room for both the receiver and the license plate... and I can't stand the thought of mounting the plate off to the side. My plan was to put the plate on a tray that could be raised up when I needed to use the receiver. As it turned out, the receiver had to be mounted a bit lower than I expected due to framework in the way, so there ended up being just enough room for both, which certainly made things less complicated. It never even occurred to me that I wouldn't need to mount the receiver flush due to the changes in layout.

Honestly I really do like the flush look, and yes now that you mention it, I could have brought the receiver out since I always planned on building a new pushbar anyway... but it is what it is, and I'm not going to cut it back out and reposition the whole thing now. Realistically, I still need to come up with a better idea for the pin. The ring idea is not working very well, and it just throws off my sense of balance (much like an offset license plate), so I'm trying to work out a new idea for putting the lever back underneath the bumper, and out of harm's way from flying pedestrians.
 

Sparky

Member
Dec 4, 2011
12,927
Shdwdrgn said:
The original reason for mounting the receiver flush was because I didn't think there was going to be room for both the receiver and the license plate... and I can't stand the thought of mounting the plate off to the side. My plan was to put the plate on a tray that could be raised up when I needed to use the receiver. As it turned out, the receiver had to be mounted a bit lower than I expected due to framework in the way, so there ended up being just enough room for both, which certainly made things less complicated. It never even occurred to me that I wouldn't need to mount the receiver flush due to the changes in layout.

Honestly I really do like the flush look, and yes now that you mention it, I could have brought the receiver out since I always planned on building a new pushbar anyway... but it is what it is, and I'm not going to cut it back out and reposition the whole thing now. Realistically, I still need to come up with a better idea for the pin. The ring idea is not working very well, and it just throws off my sense of balance (much like an offset license plate), so I'm trying to work out a new idea for putting the lever back underneath the bumper, and out of harm's way from flying pedestrians.

I still say spring-loaded pin with an L channel :biggrin:
 

Shdwdrgn

Original poster
Member
Dec 4, 2011
568
Sparky said:
I still say spring-loaded pin with an L channel :biggrin:

You lost me... care to explain this idea?
 

Sparky

Member
Dec 4, 2011
12,927
I think I mentioned it a few pages back. But basically the pin has a lever that slides in a channel that has an L in it. When the pin is engaged in the receiver, the handle can slide into the short part of the L (the notch) to keep it from sliding back and releasing. The spring would hold it in the notch to keep it locked. You'd want a strong enough spring to hold it but not so strong as to make it a pain to use. The lever could but up under/behind the bumper so you don't see it but easy to reach and operate. You could put a second notch at the released position to keep the receiver open while inserting a hitch or whatever, so the spring doesn't yank the pin back to the locked position.
 

Shdwdrgn

Original poster
Member
Dec 4, 2011
568
Ah yes, I remember now... Except for the L-slot, that's pretty much what I'm going for this time. There will be a handle up underneath that simple slides back and forth, the big trick is putting the handle in a position that makes it easy to operate. I'm going to stick with my black-ball latch because the operation is simple and reliable.

I'll probably get back on this next week some time, but for the moment, I'm diving head-first into the new pushbar. Got the side plates cut out today, just need to grind them smooth. Tomorrow I'm working on the pipes and plates to span across the pushbar. This part is pretty simple compared to the rest of the bumper, so if acquiring the rest of the pieces goes smooth, I might possibly have the thing bolted to the bumper by the weekend.
 

Shdwdrgn

Original poster
Member
Dec 4, 2011
568
The new pushbar is underway. I decided instead of chasing all over the area trying to find someone who could bend a decent thickness of pipe, I was just going to shape the pipe myself. I probably spent less time this way, and I certainly spent a lot less money. Basically I cut the pipe at a 12.5 degree angle, then rotated each piece 180 degrees, giving a final angle of around 25 degrees. The bottom pipe is obviously just a straight piece. These pipes are schedule-40, so they are much thicker than the pipe used in my original Waag.

The center shelf was built with 3/16" steel. I used a 1" and a 4" piece to create a piece of angle-iron. The side panels are also cut from 3/16" plate, and I finished grinding and polishing the edges after I took the photo.

The only thing missing is the strip of 1.25" flat bar that will go around the front side and hold the rubber strips. Tomorrow I hope to get everything welded together, and Friday I can finish up the mounting points.

9183-crossmembers-cut-shaped.jpg
 

Bartonmd

Member
Nov 20, 2011
545
So, you know I've got a bender, right? I can do 1.25" and 1.75" tube and mail you a piece for much cheaper than you think.

Mike
 

Shdwdrgn

Original poster
Member
Dec 4, 2011
568
Bartonmd said:
So, you know I've got a bender, right? I can do 1.25" and 1.75" tube and mail you a piece for much cheaper than you think.

Ha! That figures. Oh well, I'm impatient. I want it *now*. Like I said, the time I put into cutting and welding the pieces was less effort than trying to find someone who could do the bends.

The one thing I am dreading right now is cutting off the ends of that bent piece so it fits between the side panels. Too many compound-angles. Best I can figure is to just mark it by eyeball and cut it by hand with the angle grinder. Fortunately in this case 'close enough' works because the welds can hide any gaps.
 

Bartonmd

Member
Nov 20, 2011
545
You haven't seen any of the tube brush guards or rock sliders I've done? If you asked and paid me this morning, I could have done it tonight and shipped it to you tomorrow, and you'd have it Saturday for ~$60 shipped. No big deal, though.


I usually do compound angles with a sawzall in a vice. I mark the one angle flat, then mark the front of the tube with the angle to hold the blade.

Mike
 

Shdwdrgn

Original poster
Member
Dec 4, 2011
568
Hmm sawzall... What an interesting concept. :rotfl: I may have to pull mine out and give it a shot for this one...
 

Shdwdrgn

Original poster
Member
Dec 4, 2011
568
I hate days like this. I spent all morning and half the afternoon working on the mounting points, and have very little to show for the effort.

I decided the easiest way to mount this frame up to the bumper would be using some 3/4" round stock, drill out a 7/16" hole (to allow for slop), and use 3/8" allen-head bolts to keep it neat. There will be six mounting points, three on each side panel. I managed to screw up two of the 3/4" standoffs as I was making them, but finally got six pieces made up. I laid out their positions and included a 1/4" stand-off so the pushbar frame doesn't sit right against the bumper, then cranked up the juice to get good penetration on my welds.

The fun part was figuring out how I was going to make the crease in the sides to give them the right angle to follow the headline profile. I have a large block of 2" steel that I put down on the floor, then put a couple boards in front of the block to make a short step. I laid one of the side panels on the 2" block, with the position for the crease right along the edge, then drive a tire up on top of everything. The weight of the truck held the side panel in place off the ground, and I was able to hammer the edges to get my bends made. Once the crease was there, a little hammer work finished off the job getting both sides even and lined up with the headlights. Who needs a hydraulic press? :biggrin:

9228-img-7220.jpg


So now I have half of the tedious work done. The next step is getting the bottom pipe and the shelf welded across the side panels, then I can pull the bumper and drill the mounting holes. I'll get some nuts welded to the inside of the bumper, so mounting the pushbar will just be a matter of putting in six bolts. Then I'm ready to get the top bar and the strips for the rubber welded in place, and I'm done.

While the bumper is off, I'm also going to go ahead and get holes drilled and nuts welded in for the skid plate. I have a lead on someone who can sandblast the bumper and shoot it with primer, so once all these mounting nuts are welded in, I'll be ready to get a coat of paint on this puppy.
 

Sparky

Member
Dec 4, 2011
12,927
Just curious, why are you rebuilding the guard instead of just welding your current one to your bumper?
 

Shdwdrgn

Original poster
Member
Dec 4, 2011
568
Sparky said:
Just curious, why are you rebuilding the guard instead of just welding your current one to your bumper?

Because the original one got bent up pretty badly when it uprooted a tree. I managed to pull it back reasonably straight again, and I might be able to hammer it back flat if I tried, but for the same amount of work I can build a new one that is stronger, suitable for mounting a winch, and actually cut to fit the profile of the new bumper.

Plus I just like making things. Makes it easier to fix them later if they break.
 

Sparky

Member
Dec 4, 2011
12,927
Gotcha, didn't remember that.
 

C-ya

Member
Aug 24, 2012
1,098
Sparky said:
Oh so that's why there is such a huge gap between the factory fender and bumper. I never even thought of that.

I have wondered this, too. I have seen some TB/Envoys that have a gap like mine (3/4" or better) and some that have basically no gap. I've even seen the same year have it both ways. Case in point was two 2007's on the lot when I bought mine. One had a large gap and one had a nonexistent gap.
 

Shdwdrgn

Original poster
Member
Dec 4, 2011
568
Well I didn't get many pictures of the progress because I had a craptastic day. During the process of welding the nuts to the back side of the bumper, I had one spot where the weld splattered on the bolt, and caused it to chew out the threads when I removed the bolt. I ground out the nut, welded a new one in, and had the same @^$% thing happen again. Got that one ground out and ready to weld in yet another nut, and I ran out of MIG wire. The whole thing put me in a horrible mood this afternoon, but fortunately the rest of the day went much better, and I almost finished the new pushbar.

The only other 'progress' shot I managed to get. Oh yeah, the first time I put these pieces together, I forgot to make sure the side plates were lined up to each other. Fortunately I just had a couple tacks on each side, so it was easy to pop one loose and weld it back up straight. (Yes, it IS straight in the picture... the floor is crooked.) After getting this far and laying it on the bumper to mark my mounting holes, I realized the bottom bar was covering the bottom of the receiver. I ended up fixing the problem by adding another 1/2" of spare to the bottom mounts, which pulled the whole thing down far enough to be out of the way, and still had enough room for the front mounting bolts to clear the cross pieces on the back side of the bumper.
9235-first-pipe-place.jpg


So I completely forgot about pictures until I got the whole thing mounted up on the truck. It took a little time to figure out how to get the shelf at exactly the right location, then it occurred to me... The bumper was sitting on the sawhorses already, so I flipped it upside-down, bolted the pushbar to the bumper, and laid the shelf right across the sawhorses... Perfectly level with the top of the bumper! I plan on mounting a winch across this shelf and the bumper at some point.
9236-first-looks.jpg


I tried to get a good profile picture to show the angle of the top bar, but it didn't turn out quite right. The bar is actually sitting at nearly a 45-degree angle, which looks good, but it sits higher than my original Waag. I can just see the top of this bar over the hood, which cuts slightly into my view for off-roading. On the other hand, I finally have a reference as to where exactly the front of the truck is at now, which should help when pulling up to other cars in parking lots. In this shot you can also see the stack of washers I used as a spacer for the bottom mounting bolts. This makes the bottom of the pushbar hang a little over an inch lower than the bottom of the bumper, but I think it will work out OK.
9237-angle-top-bar-little-high.jpg


So when the welding shop open up Monday morning, I'll grab some thin steel to weld to the front of each side panel, then I can slide on the rubber strips and call this piece "finished". I also managed (after all the previous headaches) to get the holes drilled and nuts welded on to the bottom for mounting a skid plate, so the bumper itself is also finished at this point. Next week it all gets sandblasted and painted.
 

Bartonmd

Member
Nov 20, 2011
545
I really hate that I'm always MMQBing you, but why didn't you just run a tap through the nut? That's what I typically do. Weld the nuts on, let them cool, run a tap through them, then put it together.

Mike
 

Shdwdrgn

Original poster
Member
Dec 4, 2011
568
Bartonmd said:
I really hate that I'm always MMQBing you, but why didn't you just run a tap through the nut? That's what I typically do. Weld the nuts on, let them cool, run a tap through them, then put it together.

Mike

Because of all the curves in the bumper, the nuts generally did not sit flat to the metal, so I put the bolt through to hold the nut at the correct angle. After the nuts were tacked in place, I'd take out the bolt and finish welding the nut, and when they were all finished I took the pushbar back off and ran the tap through to finish cleaning up the threads. On the flat lip where the skid plate will mount, I got fancy and ran a tap through both the bumper steel and the nut, creating a greater depth of threads.

What really frustrated me about the one I re-did was that after grinding off the original nut, I actually left myself a nice flat surface to weld the second nut to, and yet I still got splatter back underneath the nut onto the bolt. *sigh* It's over now, I finally got everything in place. Yeah I made some mistakes along the way, but I've never done anything remotely like this before, nor even watched anyone else weld together any structures, and I was able to cover up the mistakes I made. If I were to do it all over again (fat chance!) I would be able to build it without all the screw-ups and get it done with less time and frustrations.
 

Shdwdrgn

Original poster
Member
Dec 4, 2011
568
Ugh, I really screwed this up. With all the work I did trying to get the mounting bolts and the nuts behind them in place, I forgot to take into account that with the rubber strips across the front, they would block my access to the mounting bolts. I *can* get them in, using a box wrench and 1/4 turns to slowly work in each bolt, but that was miserable, and I'd rather be able to just yank off the pushbar quickly if needed.

The best plan I can think of is to cut the stand-offs from the back side, and tip them in so the bolts will sit at an angle... which means grinding out the nuts from the back side and re-doing them from scratch. Actually I saw a roll of mild steel wire for the MIG the other day, maybe I'll just get some of that, and completely fill in each nut, then re-drill and re-tap a new hole at the proper angle. I think that will probably be a lot less work, considering I have very little access in the back of the bumper to do anything with those nuts.

So, one last picture with the steel work finished. Once I get these mounting bolts figured out, I'll be ready to get everything sandblasted.
9346-added-strips-rubber-covers.jpg
 

Sparky

Member
Dec 4, 2011
12,927
Is the rubber necessary?
 

Shdwdrgn

Original poster
Member
Dec 4, 2011
568
Sparky said:
Is the rubber necessary?

It helps when I'm pushing other vehicles, or don't want to scuff something up. At this point, the mounting bolts were already a tight fit anyway, so this will solve the problem.
 

Shdwdrgn

Original poster
Member
Dec 4, 2011
568
Well I'm happy to say that the wire I have been using is in fact a mild steel. I got the mounting points cut and angled this morning without much trouble, then filled in the bolt holes on the bumper with the MIG. Drilling and tapping went fairly well, except for breaking my long 5/16" drill bit on the last hole, so now I have much easier access to the front mounting bolts and can run them in and out with power tools. Now I just have to rebuild the mounting bolts on the underside. Because of the changes, the bottom bolts no longer line up with their respective holes, so I'll give them the same treatment tomorrow. The nice thing about re-doing the holes this way is that instead of just having threads from a single nut holding the pushbar on, I now have threads all the way through the bumper steel, giving nearly 1/2" of threads for the bolts to bite in to.
 

Shdwdrgn

Original poster
Member
Dec 4, 2011
568
I finally got the bumper and pushbar sandblasted today... just in time too, today was the last nice day we'll have for awhile, and there's a possibility of SNOW over the weekend!

I was really surprised at the final results from sandblasting the steel. I've never seen what it looks like, and was expecting more of a polished finish. Instead it came out looking like someone had powder-coated the whole thing with aluminum dust. Crazy.
9653-sandblasted-last.jpg


The guy did a great job of getting all the crevices cleaned out, and the pieces were easy to hit with primer once I got them home. I did a coat of the thicker brown rustoleum on the bumper to help fill in some of the smaller pits, and hit the pushbar with the regular primer.
9654-img-7497.jpg


If it gets warm enough tomorrow, I'll do a bit of block sanding on the bumper and hit it with another light coat of primer before I mount it back up to the truck. It will be at least Sunday before the weather gives me another chance to work on the finish, which should give the primer plenty of time to set up. The pushbar should be easy to finish - its just getting a coat of gloss black and it will be done. For the bumper, I found this undercoating that is supposed to be rubberized, but its in a spray can. I want to use this to coat the back side of the bumper, where all the road grime will collect over the years. Hopefully it does the trick.
 

HARDTRAILZ

Moderator
Nov 18, 2011
49,665
Shdwdrgn said:
For the bumper, I found this undercoating that is supposed to be rubberized, but its in a spray can. I want to use this to coat the back side of the bumper, where all the road grime will collect over the years. Hopefully it does the trick.

That rubberized stuff is nasty and seems to hold grime. Why not a nice coat of paint that will spray off easily?
 

Shdwdrgn

Original poster
Member
Dec 4, 2011
568
HARDTRAILZ said:
That rubberized stuff is nasty and seems to hold grime. Why not a nice coat of paint that will spray off easily?

Who sprays out the inside of their bumper? I don't even know anyone who hits the underside of their vehicle at the car wash, other than the wheel-wells.
 

HARDTRAILZ

Moderator
Nov 18, 2011
49,665
Shdwdrgn said:
Who sprays out the inside of their bumper? I don't even know anyone who hits the underside of their vehicle at the car wash, other than the wheel-wells.

My bumper is open to the wheelwell so it gets sprayed out. Bumpers and skids left with too much mud in them tend to gather worms. Great if you run out of fishing bait, but something I try to spray out on a fairly regular basis.
 

Shdwdrgn

Original poster
Member
Dec 4, 2011
568
The weather went to crap this past week, so this has been the first nice day we've had since the day I got the bumper sandblasted. I had my supplies ready to go, and once it warmed up enough today, I started sanding down the red primer and filling in spots with bondo. There's a million pinholes along the seams from welding, so anything that didn't get filled by the primer was covered with bondo. I also worked the front corners where I had to cut and weld to make the curves form properly... that area was a bit of a mess, but it still only took a skim of bondo to smooth it all out. A bit of work with the sanding block and everything came out nice.

Apparently the red primer take forever to completely dry. It's been 5 days, and I used a foam sanding block to go over everything before adding another coat of primer, but as it dried I was getting cracking. To me, this has always meant the undercoat wasn't completely dry. The temperature was up into the lower 70's by the time I sprayed the primer, and I was working in the sun, so temperature shouldn't have been a problem. I dunno, but I'm guessing I'll have to let the whole thing sit for a couple weeks before I try doing a finishing coat of primer. I still have to finish sanding and using bondo to fill the pinholes on the bottom edge, and around the fog lights, so there will be plenty of time to touch up any spots in the finish. The only real concern is when I'll have warm enough days to actually spray the primer.

I covered up the red, so at least its not an eye-sore driving it around now. :biggrin: If the weather doesn't allow for any more work, I have no problems driving it like this through the Winter. I also used some of that rubberized spraypaint to coat the tow shackels. I was really happy how they turned out.
9757-img-7505.jpg


This side area is where some of the roughest spots were at. The final results came out nice and smooth. It's been quite a number of years since I've had to bondo anything, but it came out good enough that I don't feel the need to continue sanding and re-applying more layers of bondo. Of course the real test will be when the polish goes on!
9758-img-7508.jpg


I also got a first coat of black on the pushbar today. Tomorrow is going to be cold again, but I should be able to get a final coat on it Wednesday and get it bolted back up. A friend and I are going to do some light off-roading Thursday... last chance before Summer is completely gone.
 

Shdwdrgn

Original poster
Member
Dec 4, 2011
568
bigytwotone said:
not to change the subject but yo have the exact same tires i have for the summer

Only for the Summer? What do you run in the Winter? I thought these tires had pretty good bite in the snow last year.
 

Forum Statistics

Threads
23,273
Posts
637,489
Members
18,472
Latest member
MissCrutcher