- Dec 20, 2011
- 434
Difficulty: Medium (not really hard, but it does take a while)
Estimated Time: 6 hours
Part Numbers: N/a
Cost: N/a
Equipment needed: jack stands for both sides of front end
Tools Needed:
-good assortment of sockets and extensions
-13/16 deep and regular sockets for gear unbolting
Note: I had to split this into two postings as I was over the 10,000 character limit.
Also this is probably good for most trailblazer steering gears and not just mine?
How to change your power steering gear (aka rack and pinion ). I'm not posting this as an expert, just someone who has gone through this and wants to help others.
It's very easy to tell when the gear has gone bad. The tell-tale sign is power steering fluid leaking out of one of your rubber boots on either the driver or passenger sides, right from the boot area that covers the inner tie rods. The seals in the rack and pinion go bad and start to leak. The worse it gets the more it will leak out. The boot itself may or may not be torn, but just replacing the boot is ignoring the problem that really needs to be fixed: a new rack and pinion steering gear replacement. It is especially noticable when you jack up one side, like maybe you are rotating tires like I was, and can see the power steering fluid run out like it did to me. Also the gear itself will have fluid all over it. And finally, and most obvious, you will run low, or out!
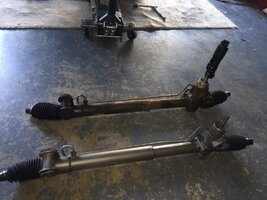
 , of power steering fluid. Don't ask me how I know. From a mechanical description, the power steering gear connects to the inner tie rods, which connect to the outer tie rods. Below see some shots of my bad gear:
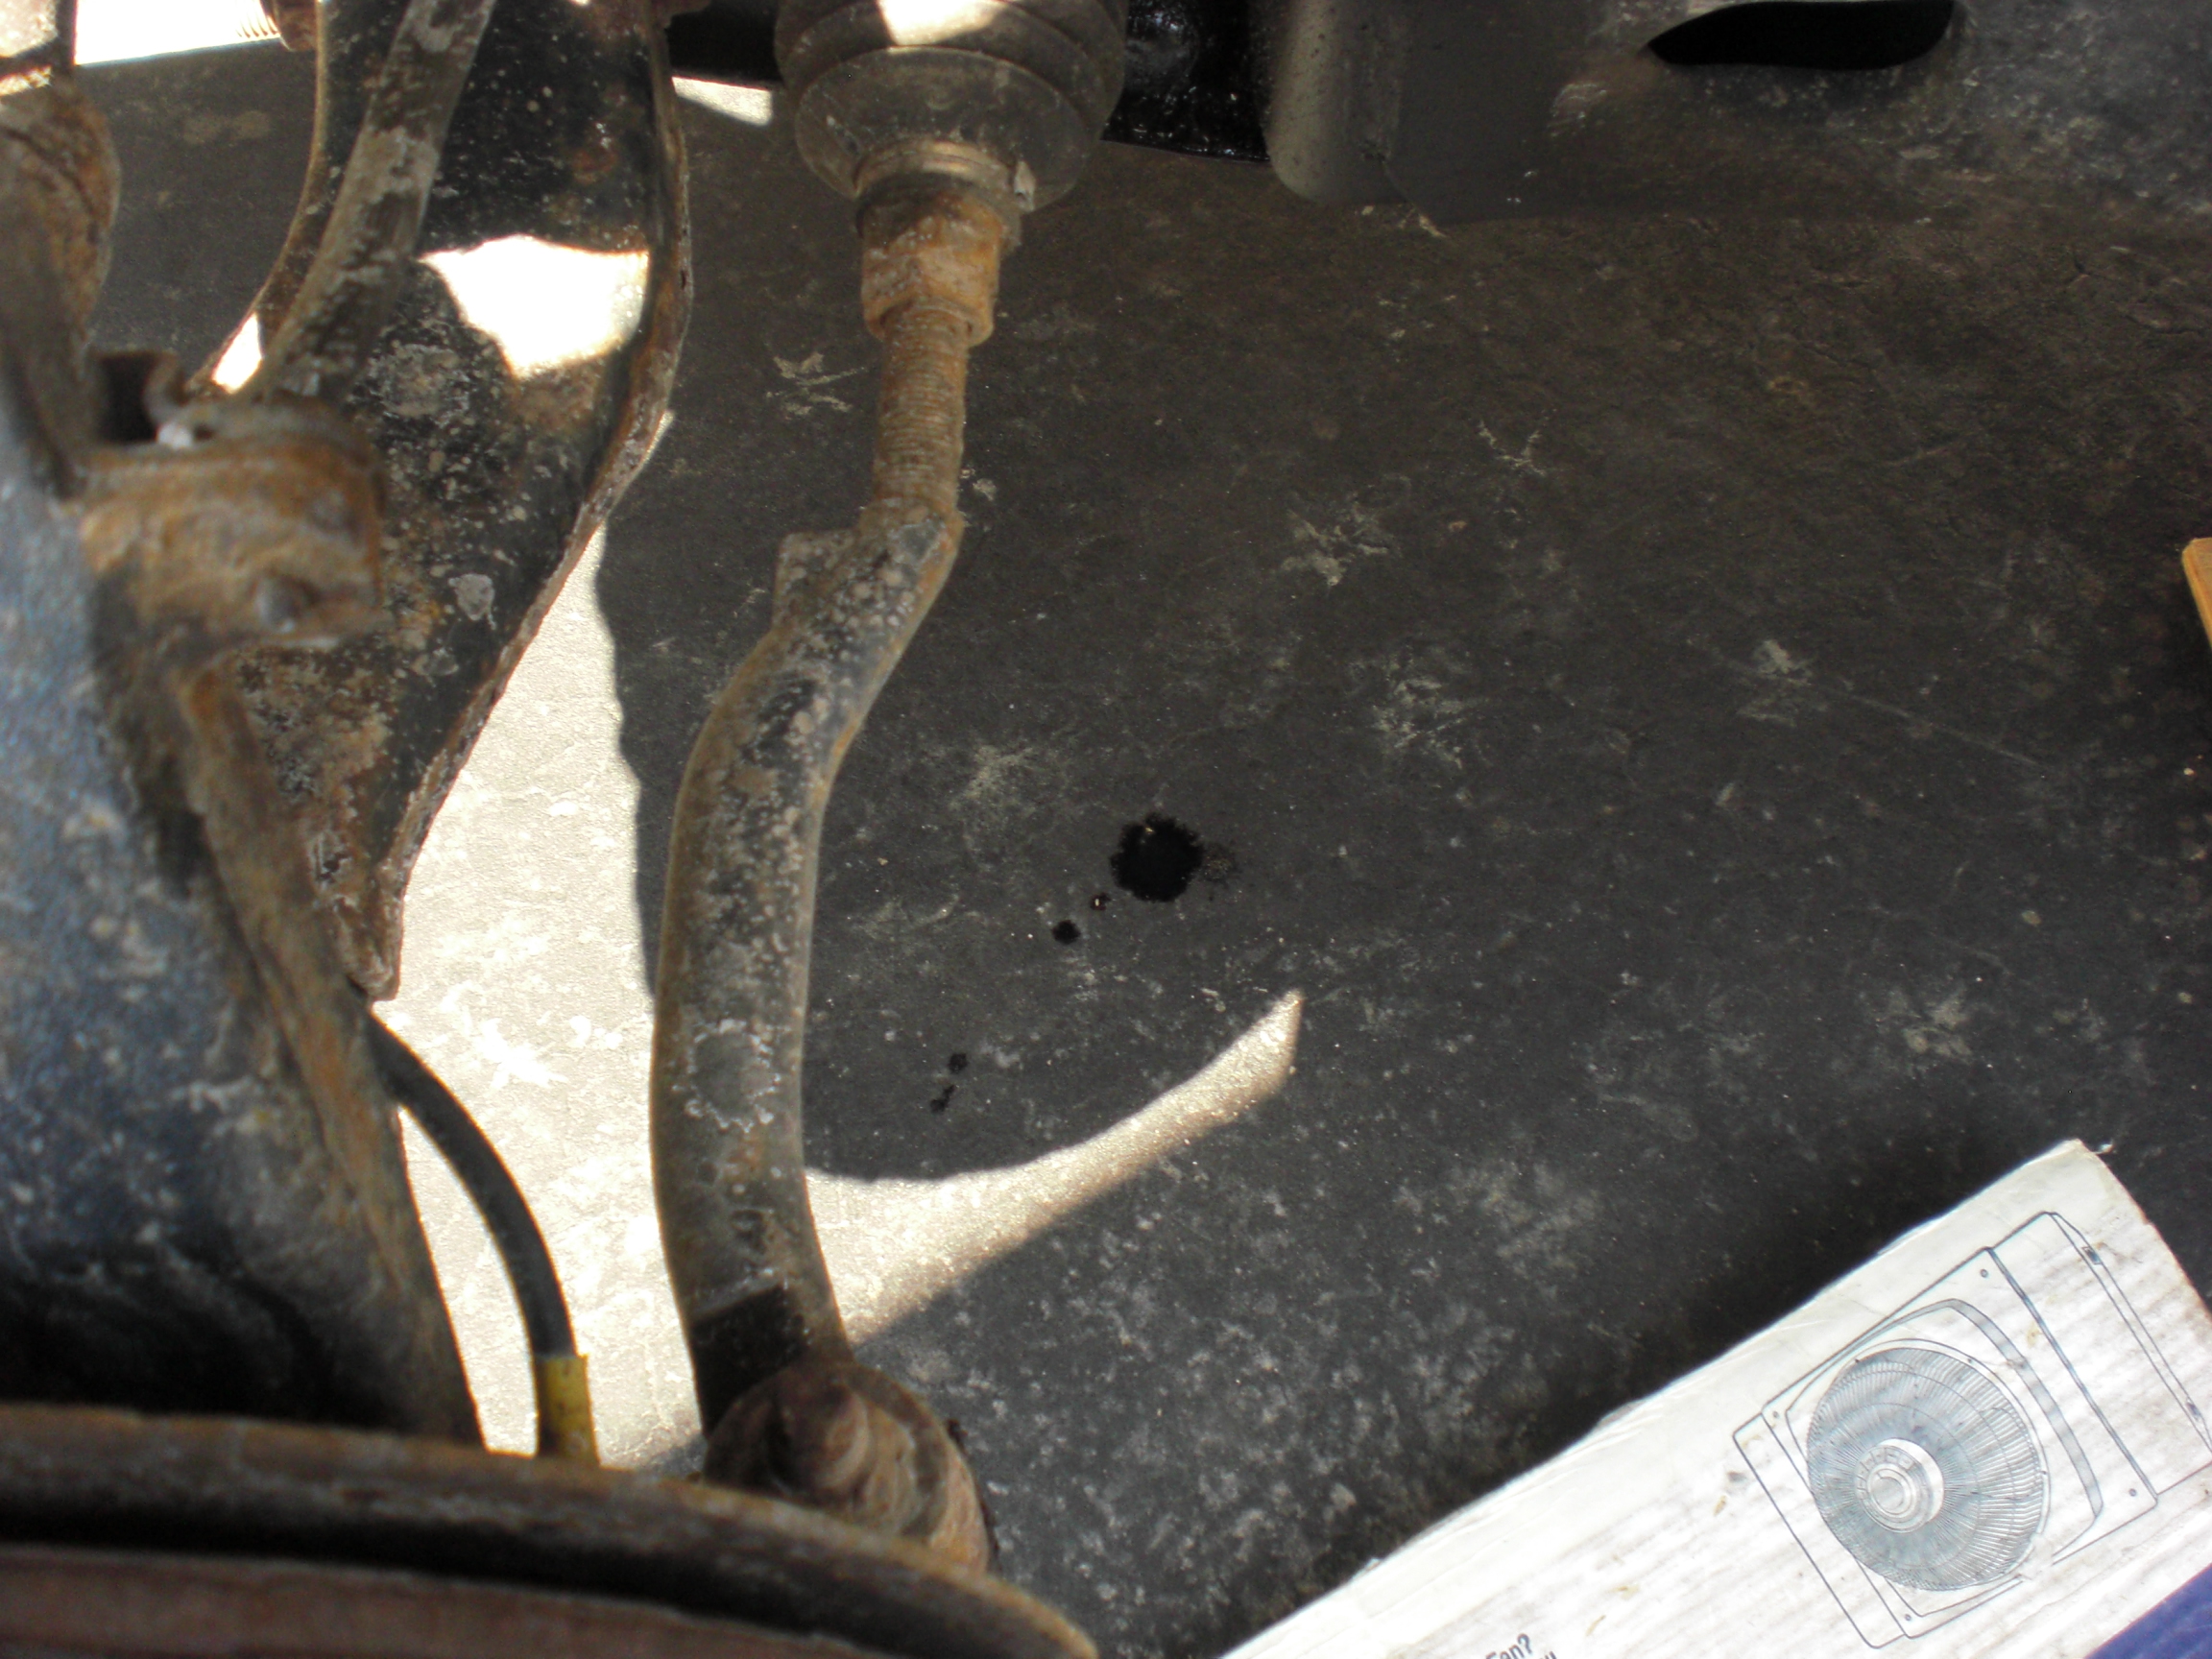
See the puddle starting right below the gear/inner tie rod boot? It's small, it just started leaking but it will get bigger!
Here is another shot of the gear with fluid all over the place:
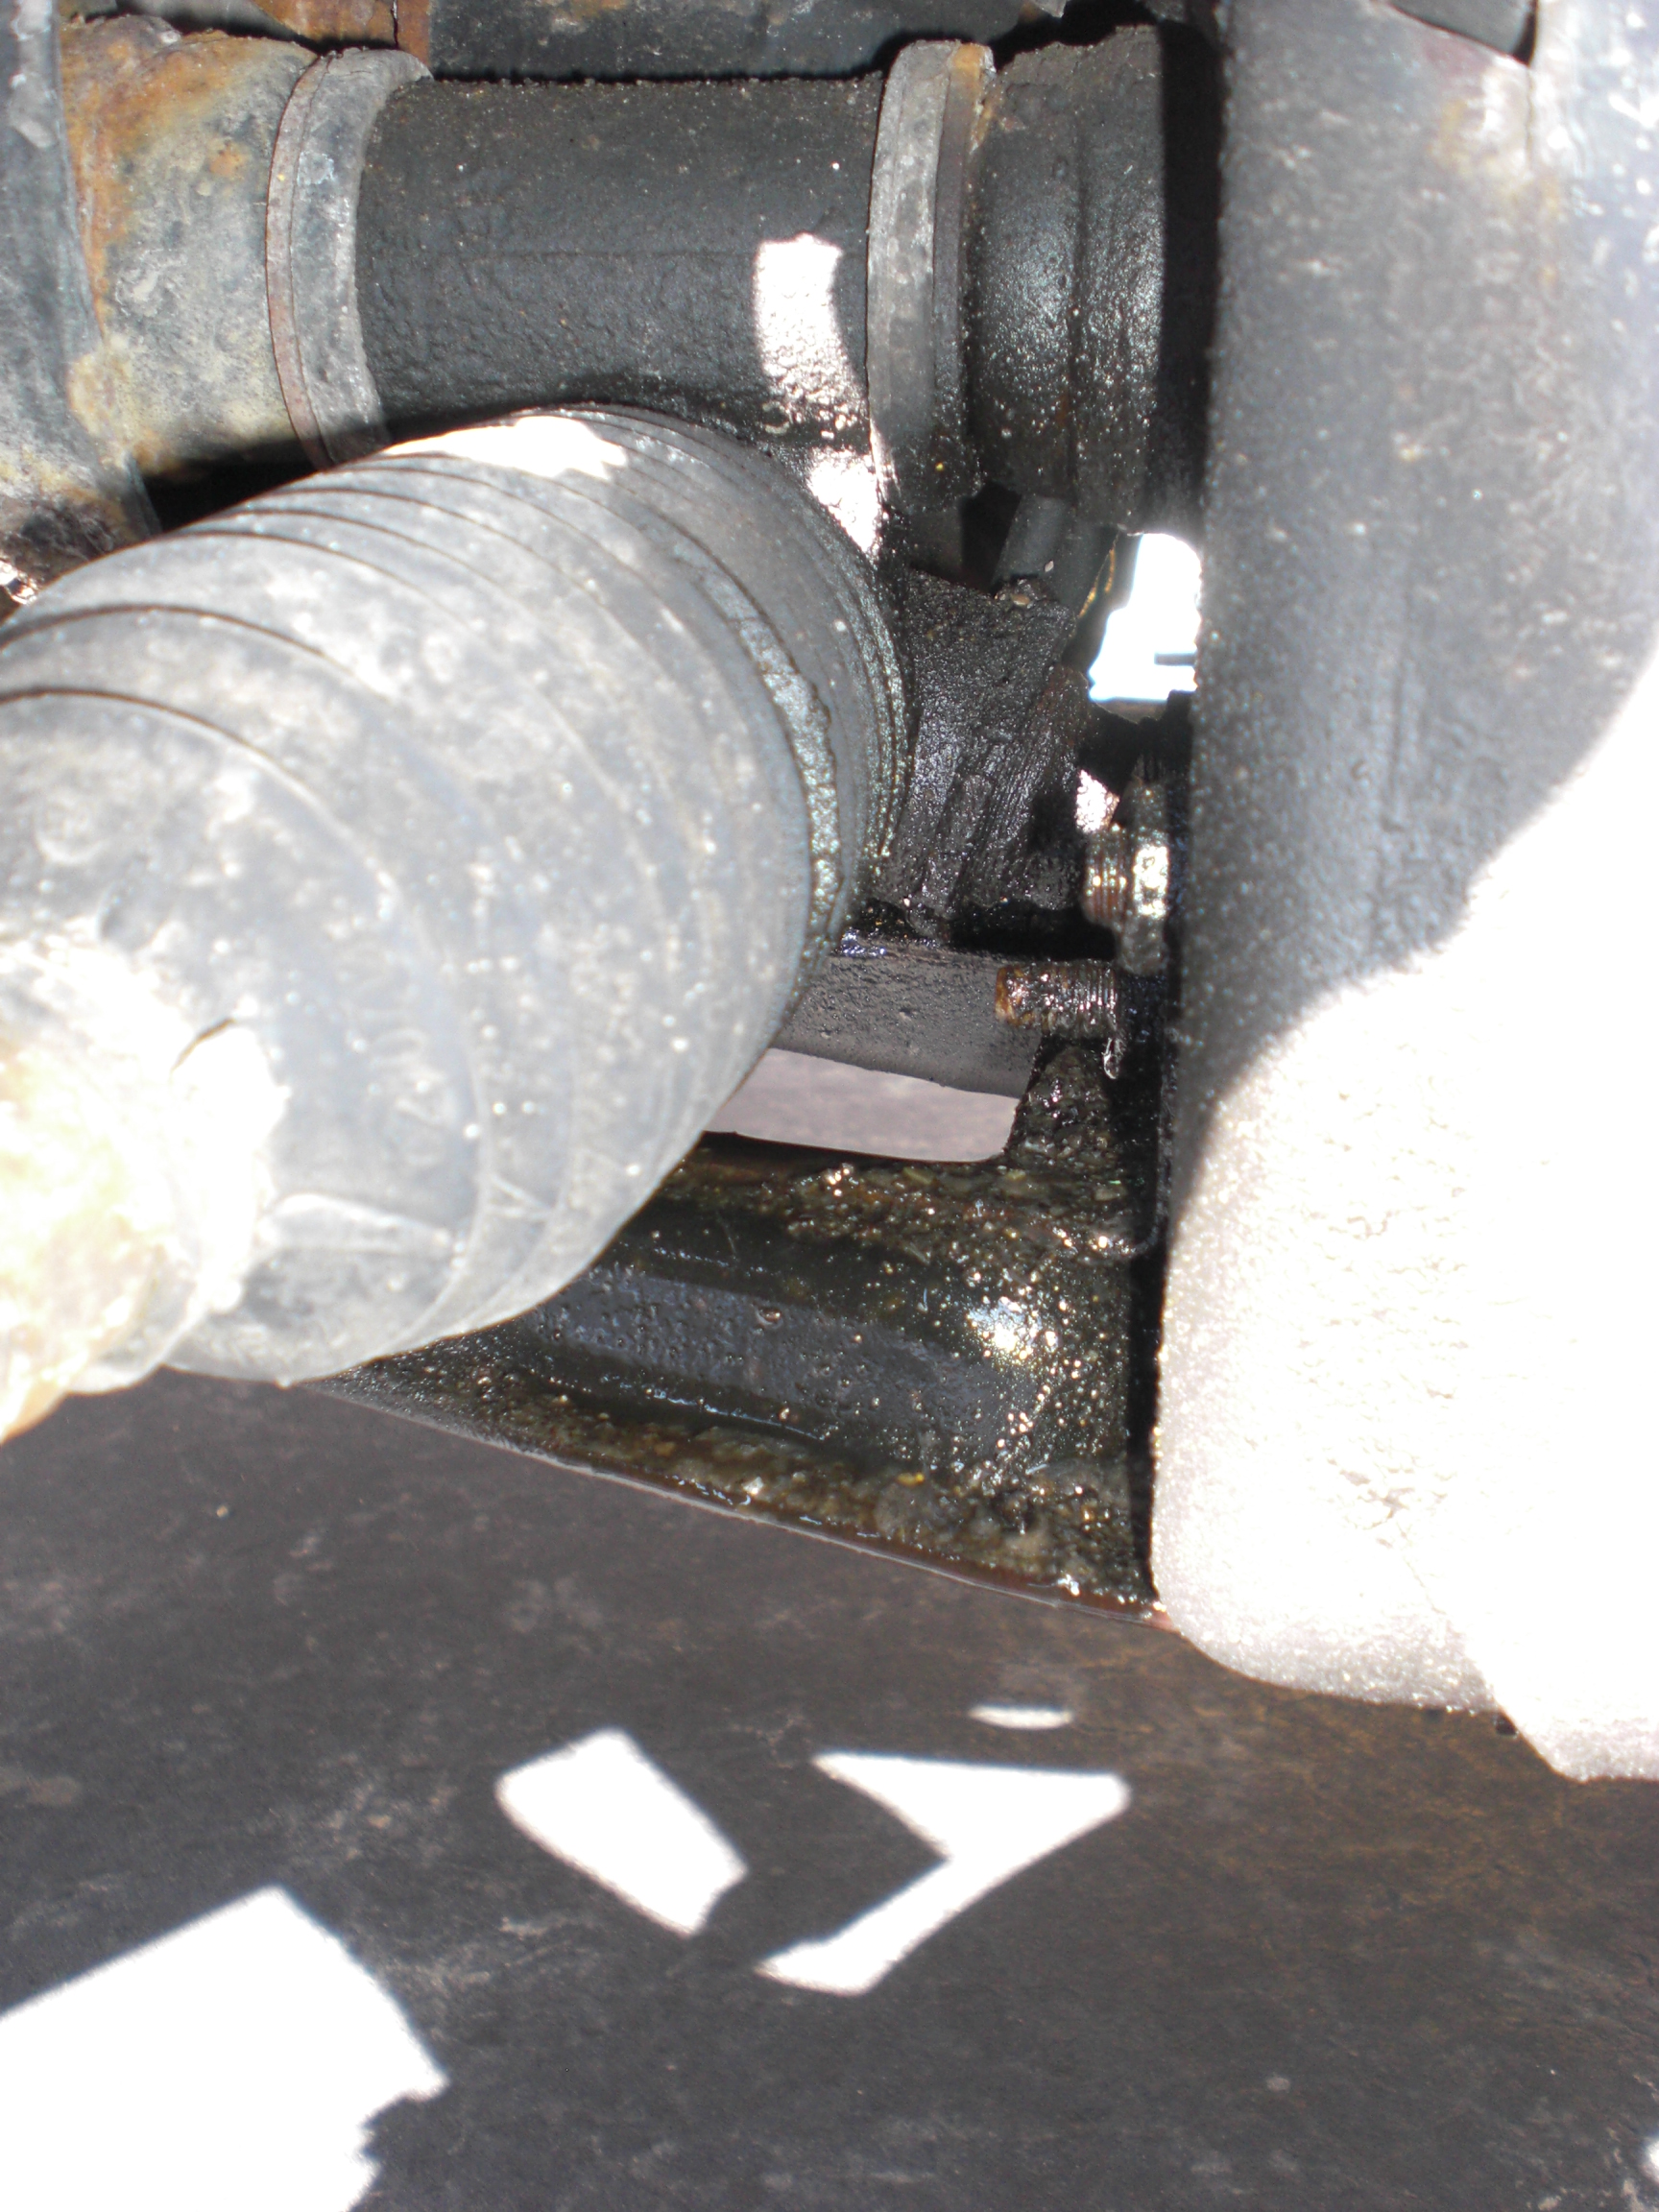
This is the second time that I am changing my steering gear. The first time was in September, 2010. At that time I also changed high pressure lines, low pressure lines, my steering pump (I eventually ran out of fluid and killed the pump), along with the steering gear. I contemplated getting one from the bone yard, but decided to get a new reman one (you can only get remans) from Napa, a Cardone steering gear. I wanted to change it once and be done with it for the rest of the vehicles life. Wrong! 30,000 miles later I'm leaking again! The good news was that there is a lifetime warranty on the steering gear, and Napa gave me another with no questions at all. Still a PIA to have to do this again.
So, if you are changing out your steering gear, I would give serious thought about changing out your high pressure line as well, and maybe the low too as well. The problem is that changing out the high pressure line adds a lot of work, there is a fair amount of stuff to remove to get at it. I swear when they built these cars the first thing that was put on the line was the vehicle frame, followed by the high pressure line and then everything else. Felt that way anyway. Changing out the gear for me is about a 6-8 hour project, eating lunch and taking pictures etc. I think allwin lists it as close to a 3 hour job. This job isn't really all that hard, but it takes a while. There are a fair number of bolts that need to come out, and of course put back in. You will need a decent assortment of extensions for your sockets. One thing to note is that the steering gear that I installed came with new inner tie rods already installed on it.
I would also think about putting on new outer tie rods. You have to take them off to get at the gear, and when you are done you will need an alignment anyway. See the dollars floating away? I'm not saying you should, but think about it.
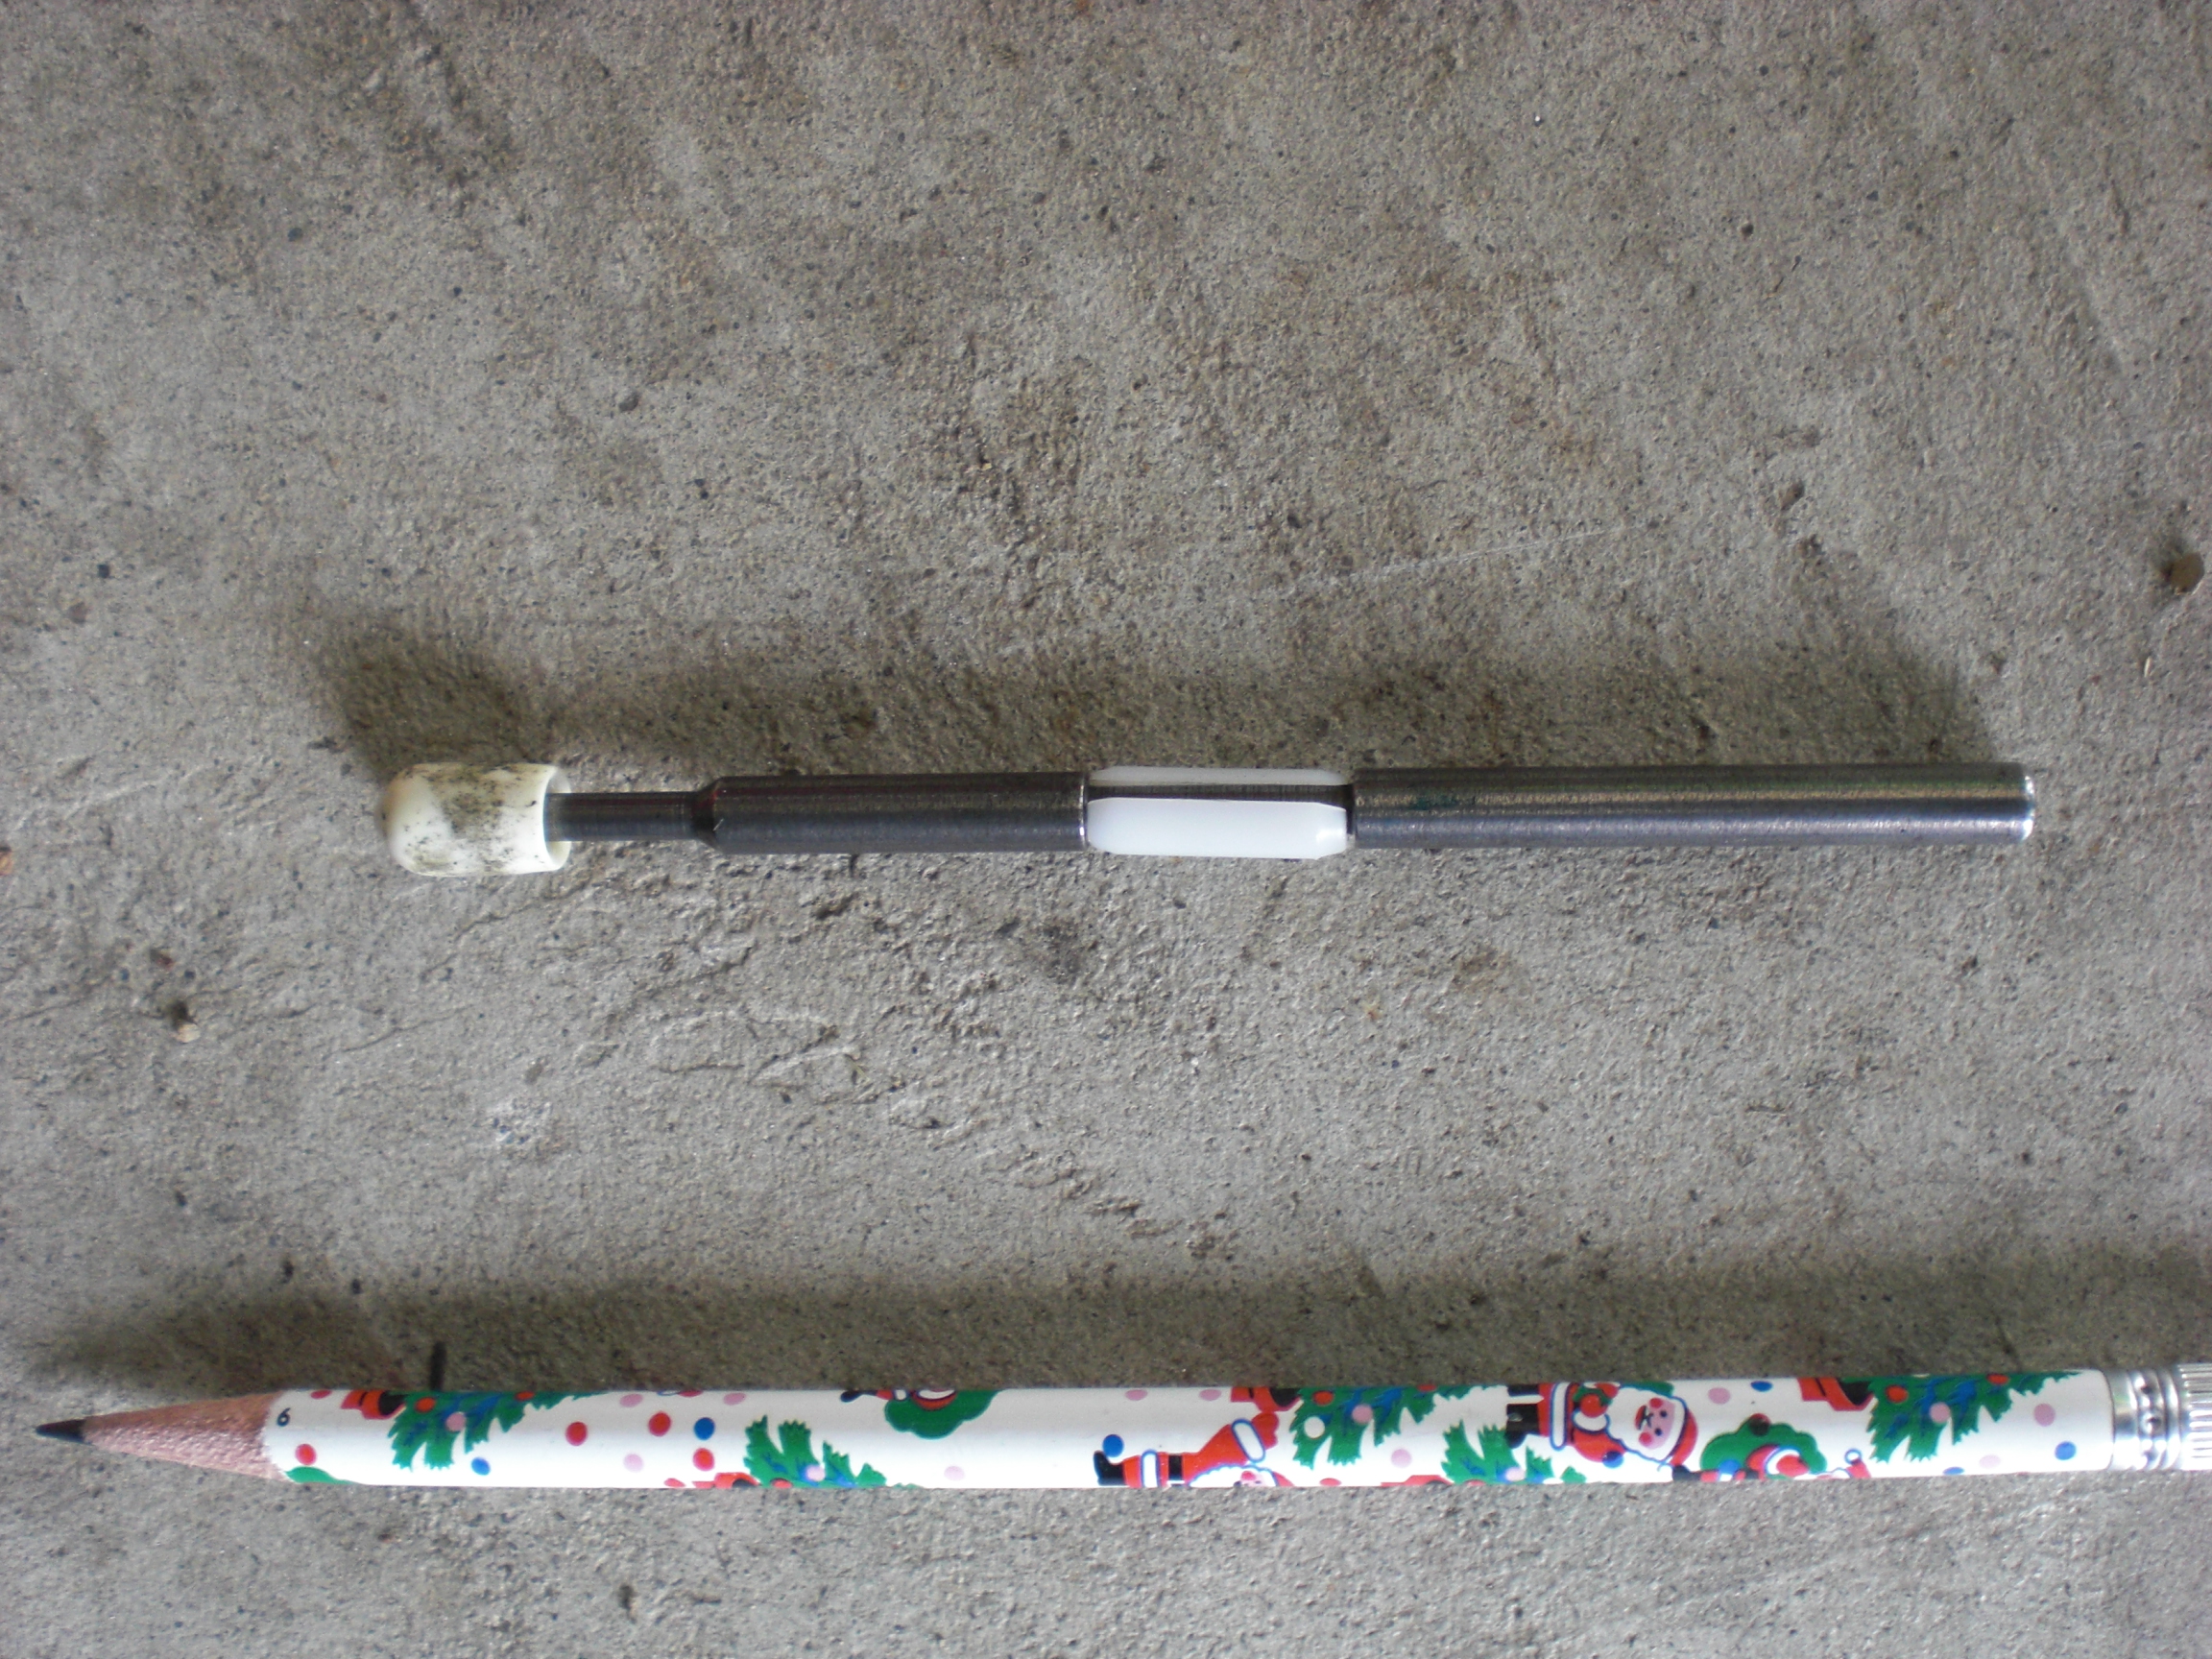
Now during this job, one thing you need to be aware of is that once you have disconnected the steering intermediate shaft you cannot turn the steering wheel. Alignment can be thrown off, and even worse you can break the coil assembly inside the air bag component. (you can actually turn it somewhat, but I think the coil breaks at 2 1/2 turns or 3 ?) GM makes a special tool for this, part number J42640. I bought it myself online, I think it was like $10. If you don't buy the tool you will have to secure the steering wheel with straps, bungee, etc something to keep it pointed straight. Here is a shot of the tool, next to a santa claus pencil for scale:
Here are a couple of shots with the tool installed, the first time I used this I thought it was a little confusing on how it fit and where:
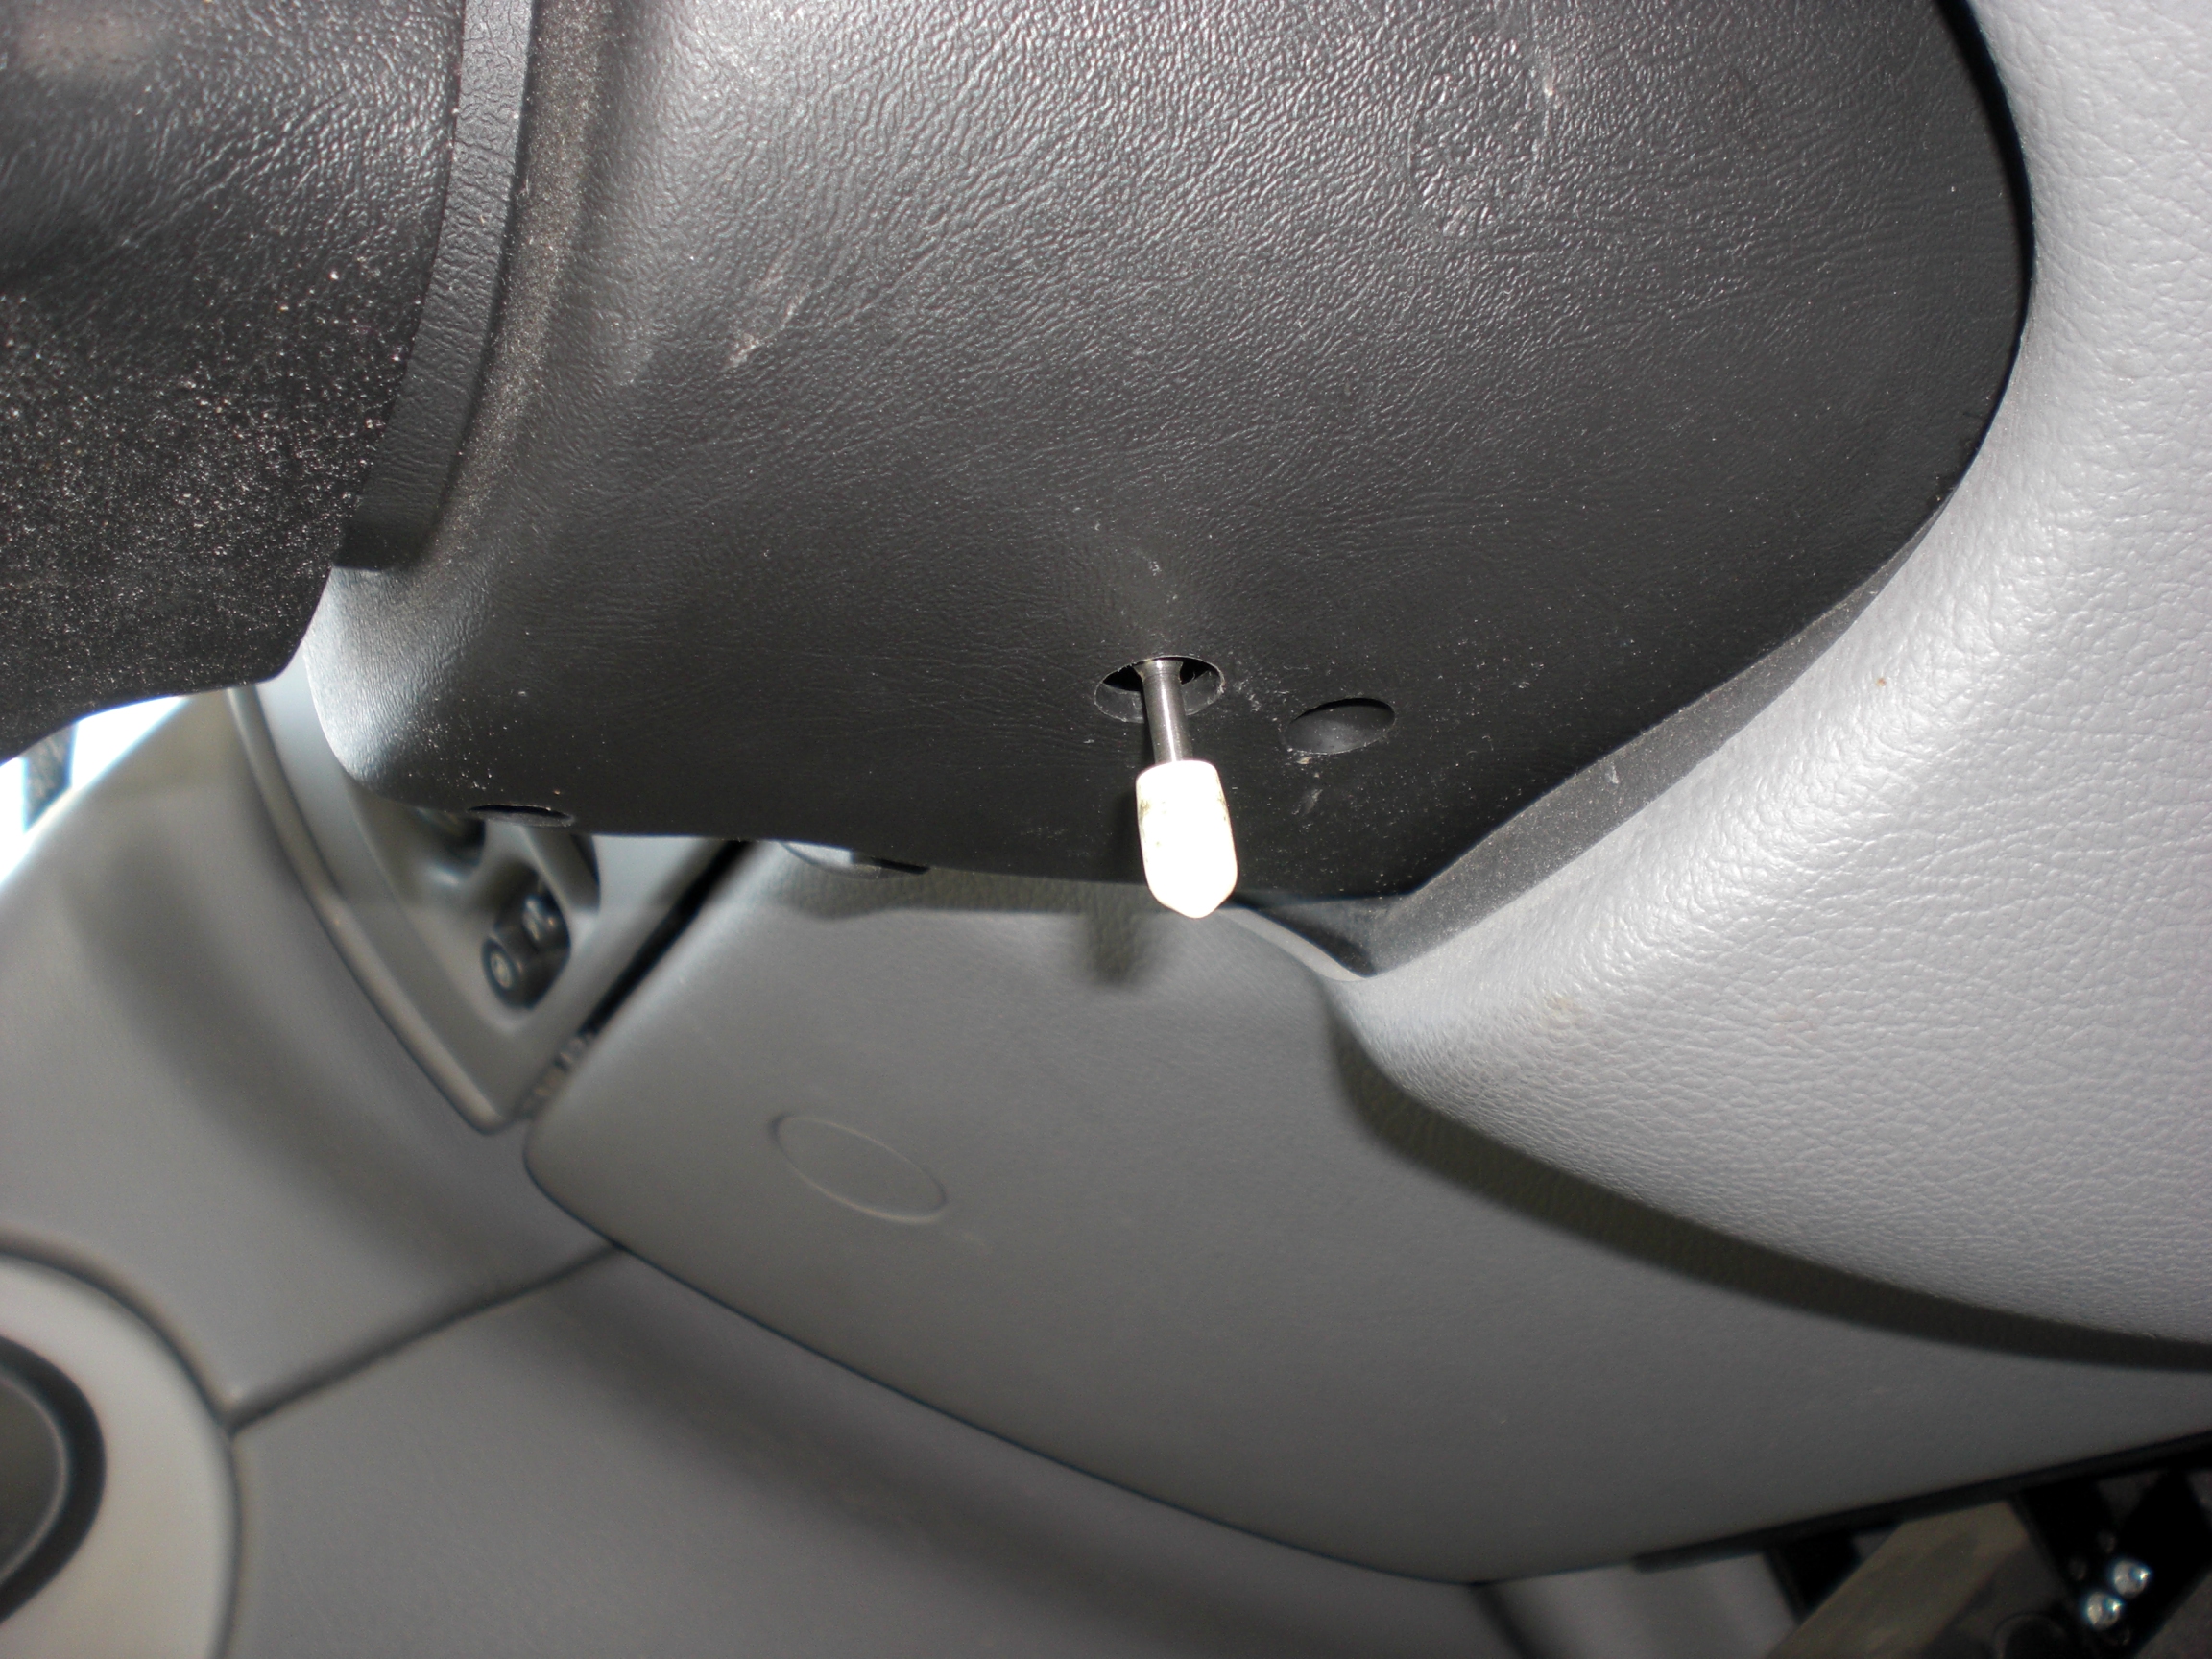
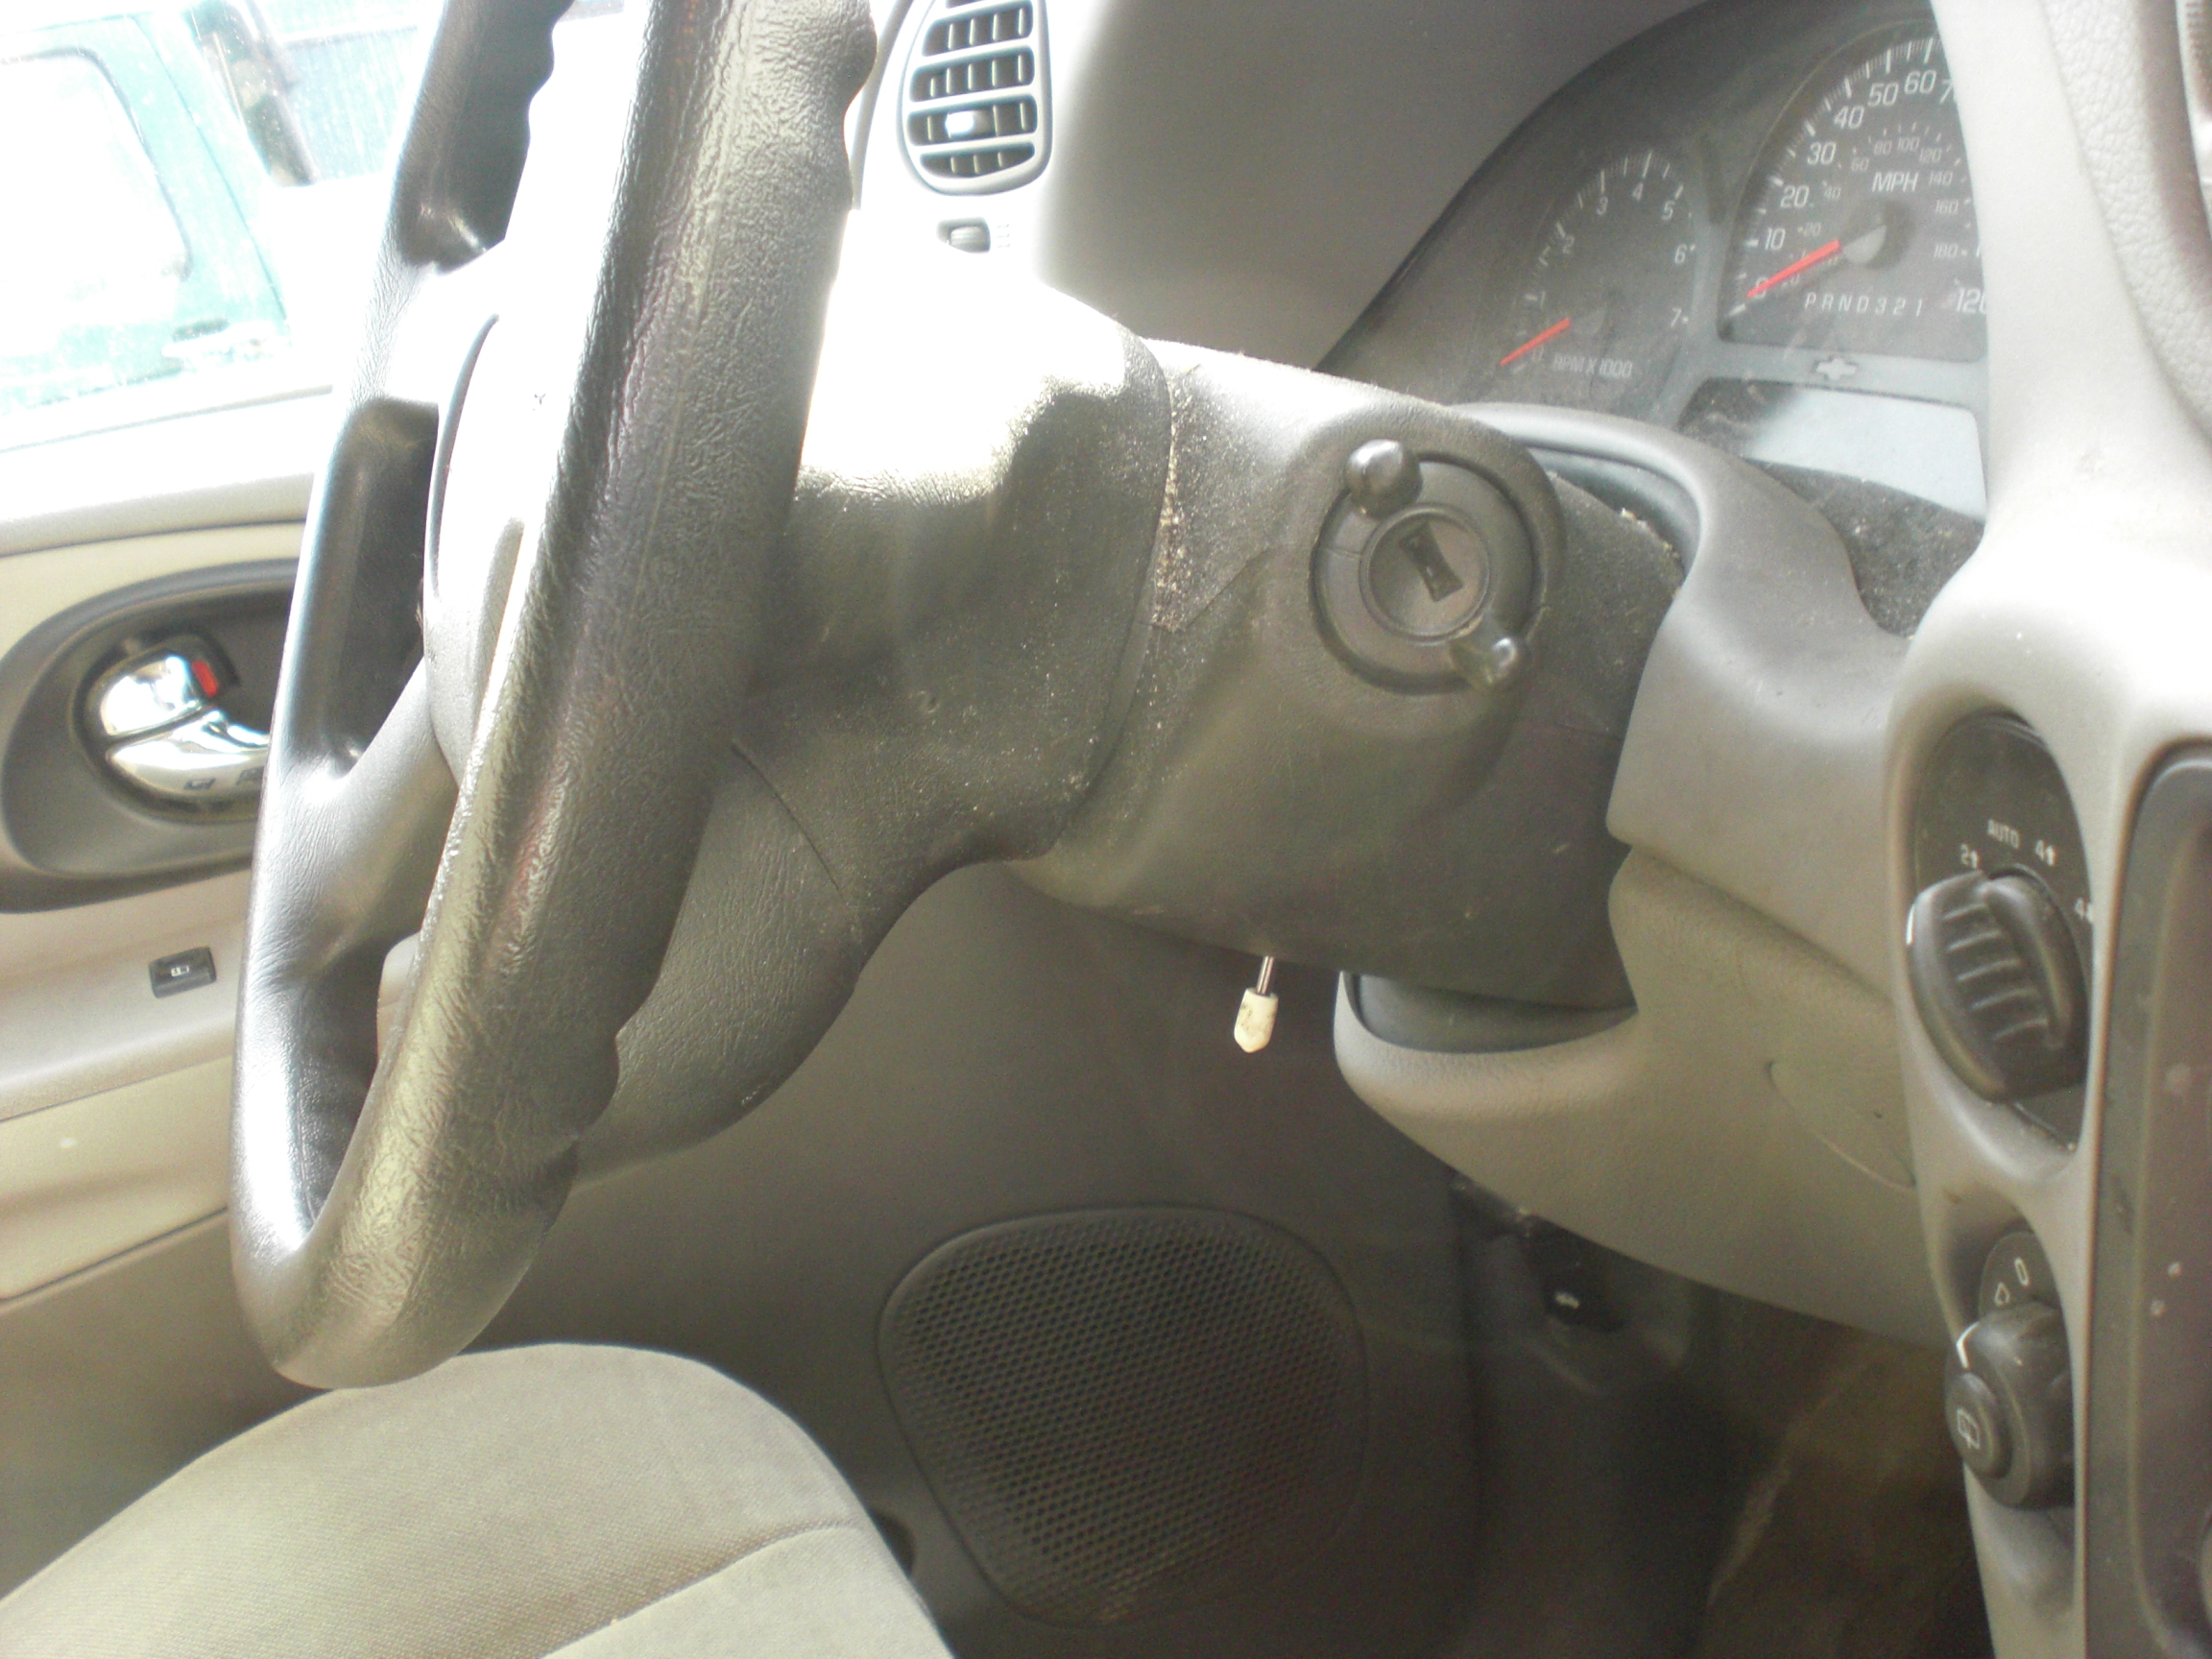
Basically, jack the vehicle up with jack stands on both sides of front. Turn the steering wheel so the wheels are straight. Turn the ignition switch and remove the key. The service manual says turn the switch to the lock position, but these vehicles do NOT lock the steering wheel when you pull the key out. At least mine doesn't. Then the tool goes in to keep the steeering wheel from turning. (or alternate plan).
So next step is to get the tires off:
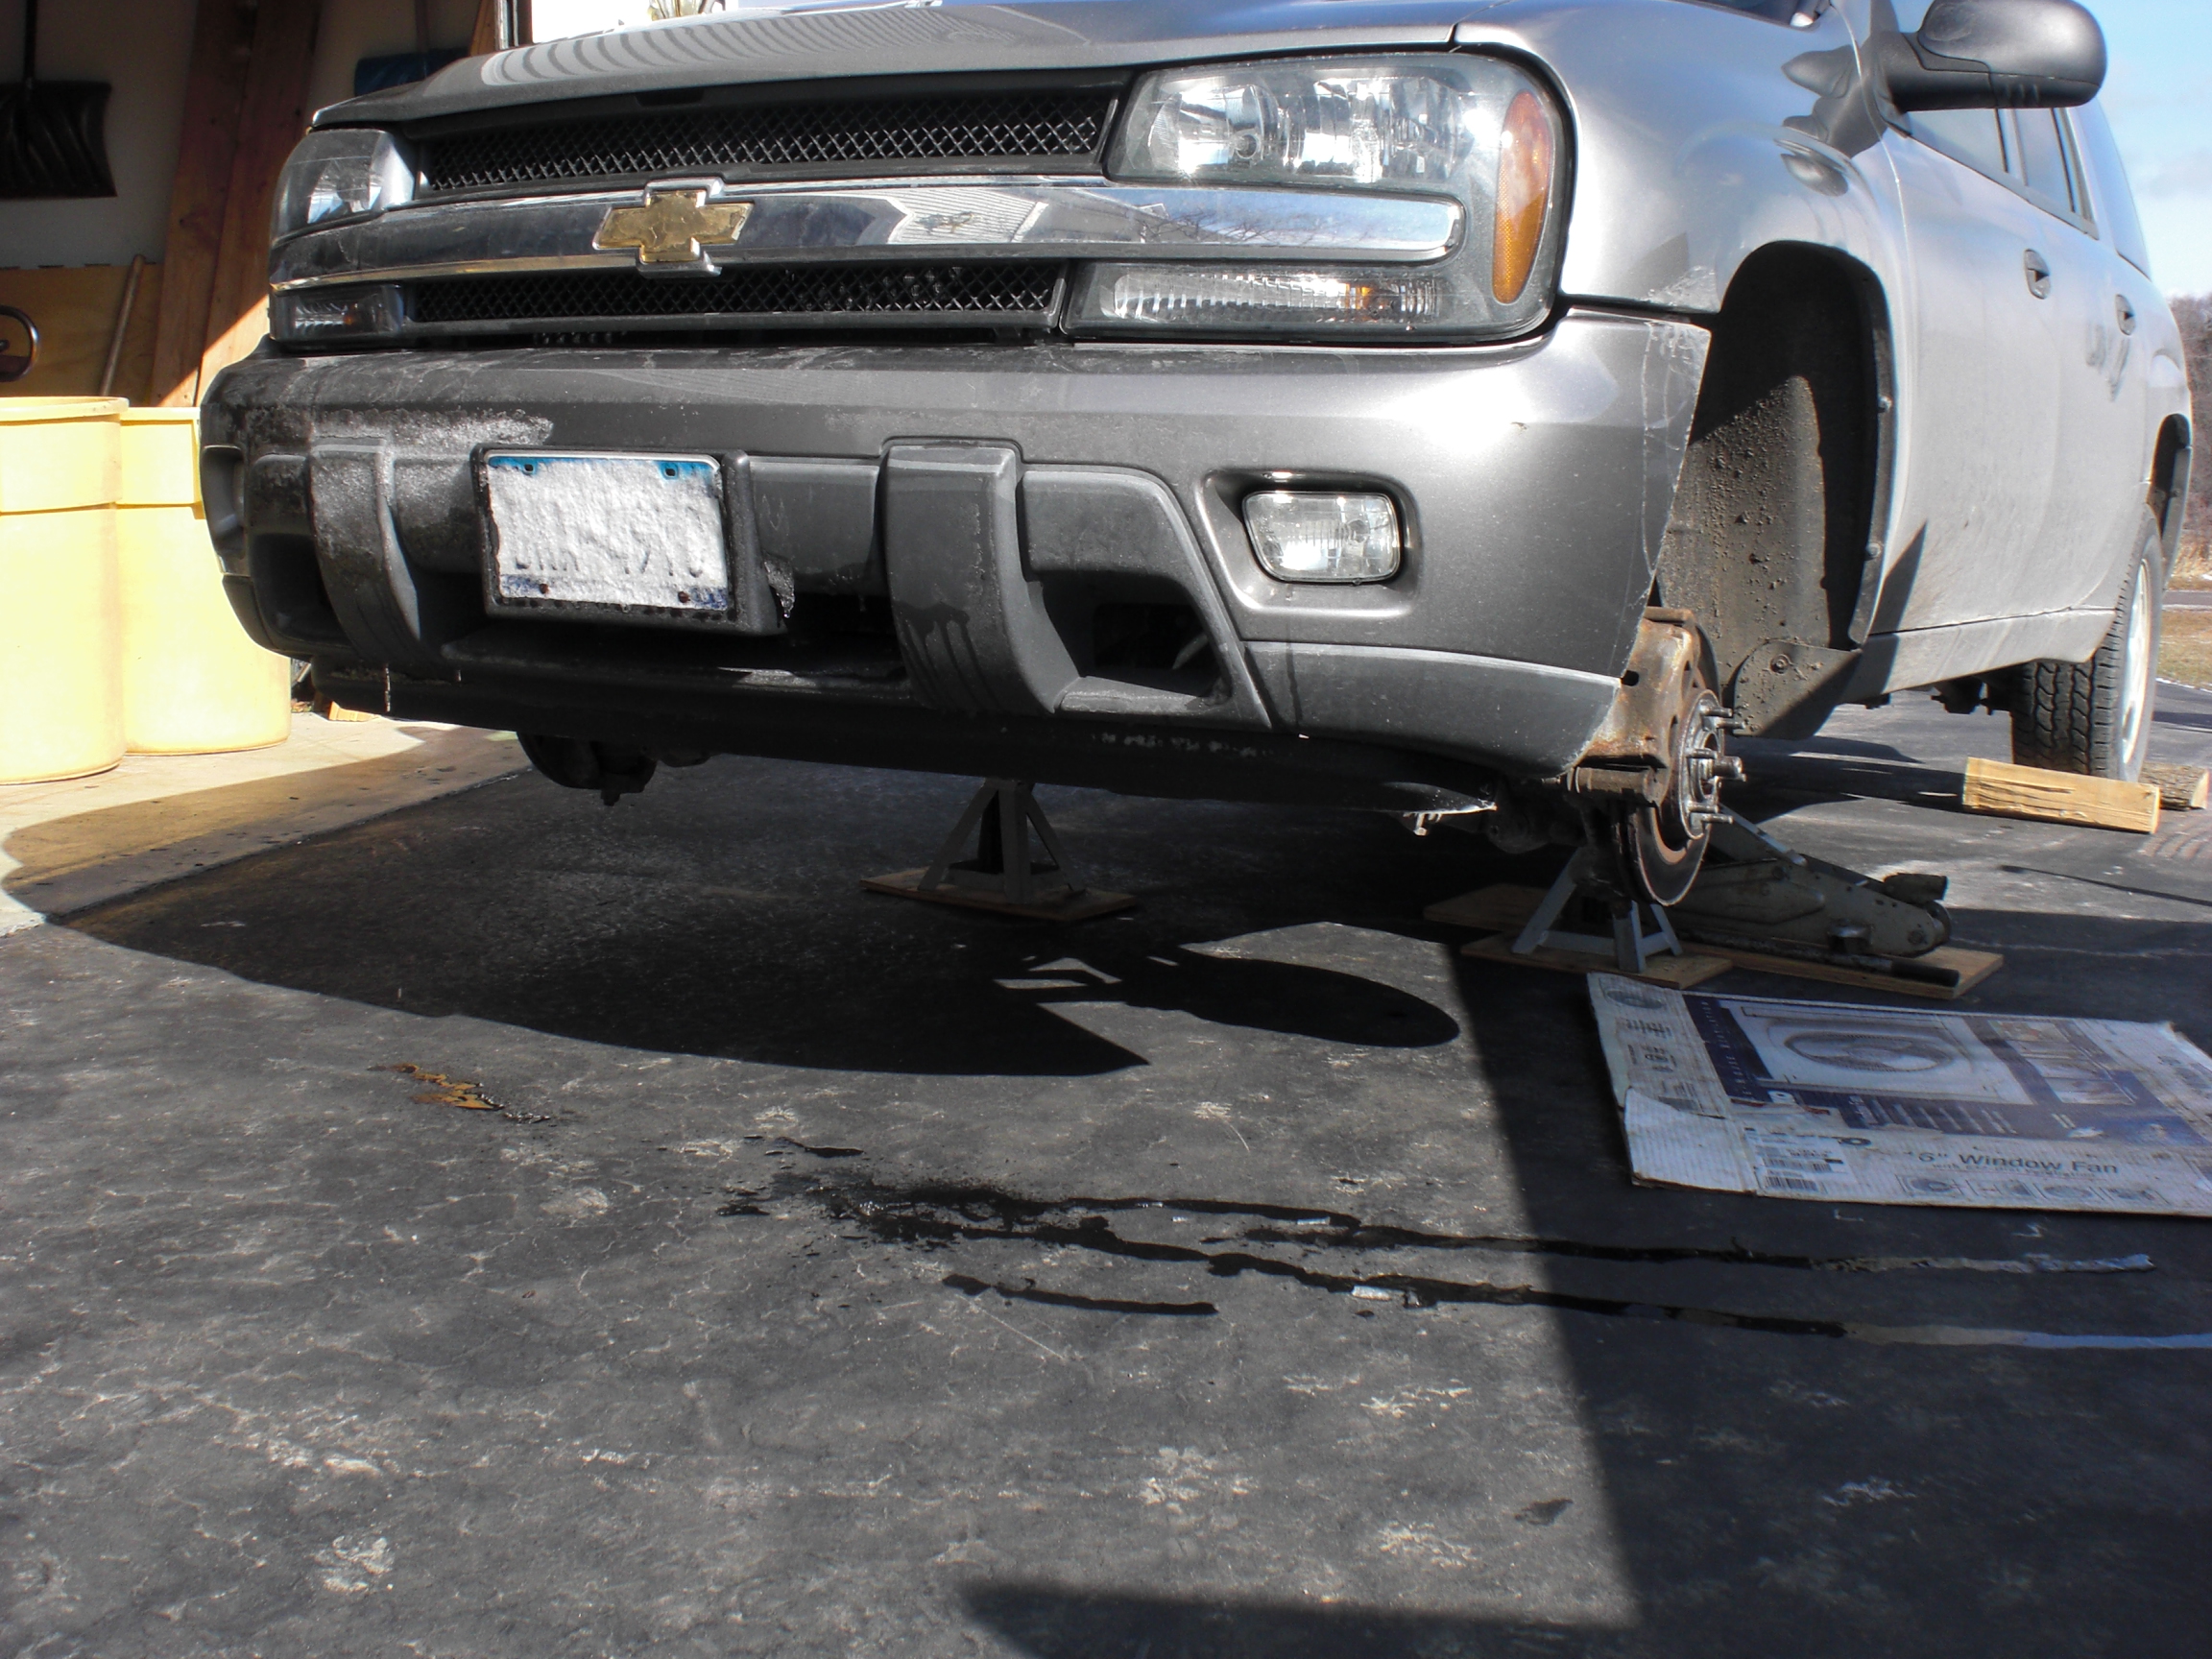
See the snow covering the license plate? The fluid you see on the driveway is just melted snow, it warmed up that day nicely. It wasn't because I drank too much coffee. Personally once the vehicle is up I really push on it to make sure that it is steady before going under it. The car jack is just there for additional support, I'm not using it to hold up the vehicle.
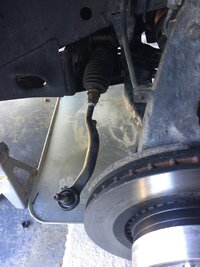
Next, the outer tie rod comes off, here is my outer tie rod. First remove the nut on top:
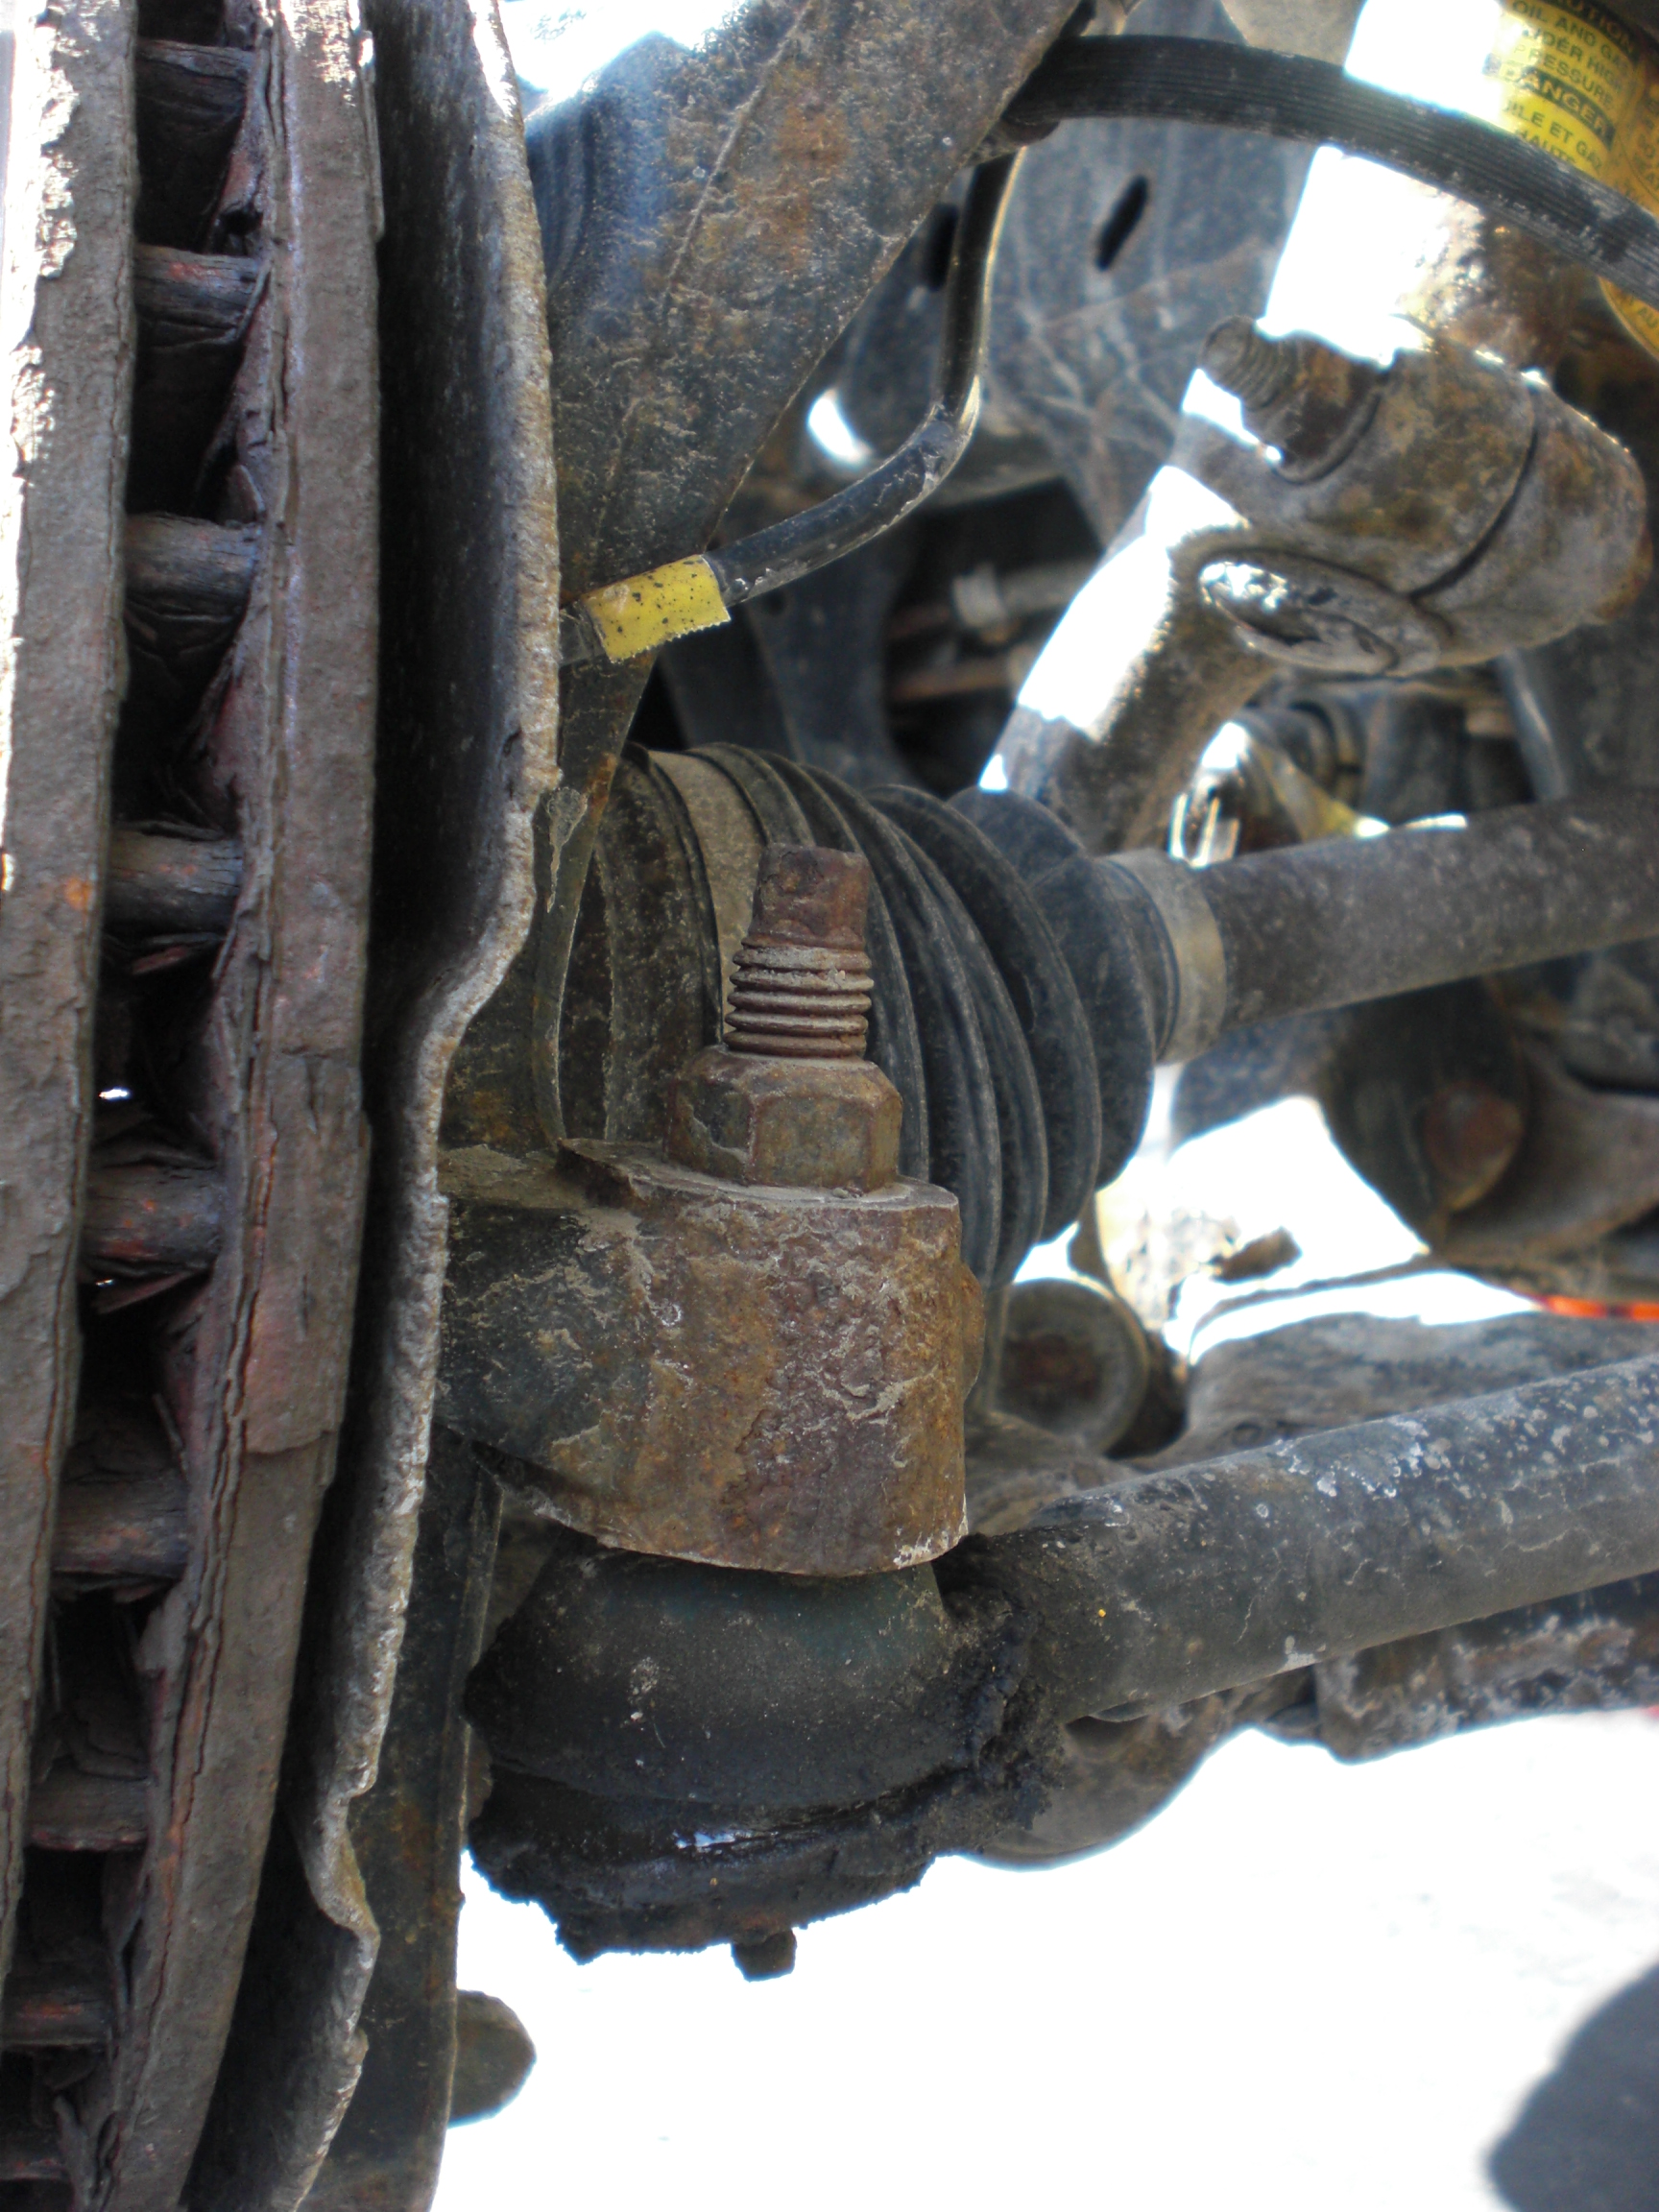
I used some penetrating oil around that nut because it was rusty. According to my notes I used a deep well 13/16 socket for that nut. Next I put on a gear puller? (not sure of name) to put some pressure and pop the tie rod loose. Here is a shot below:
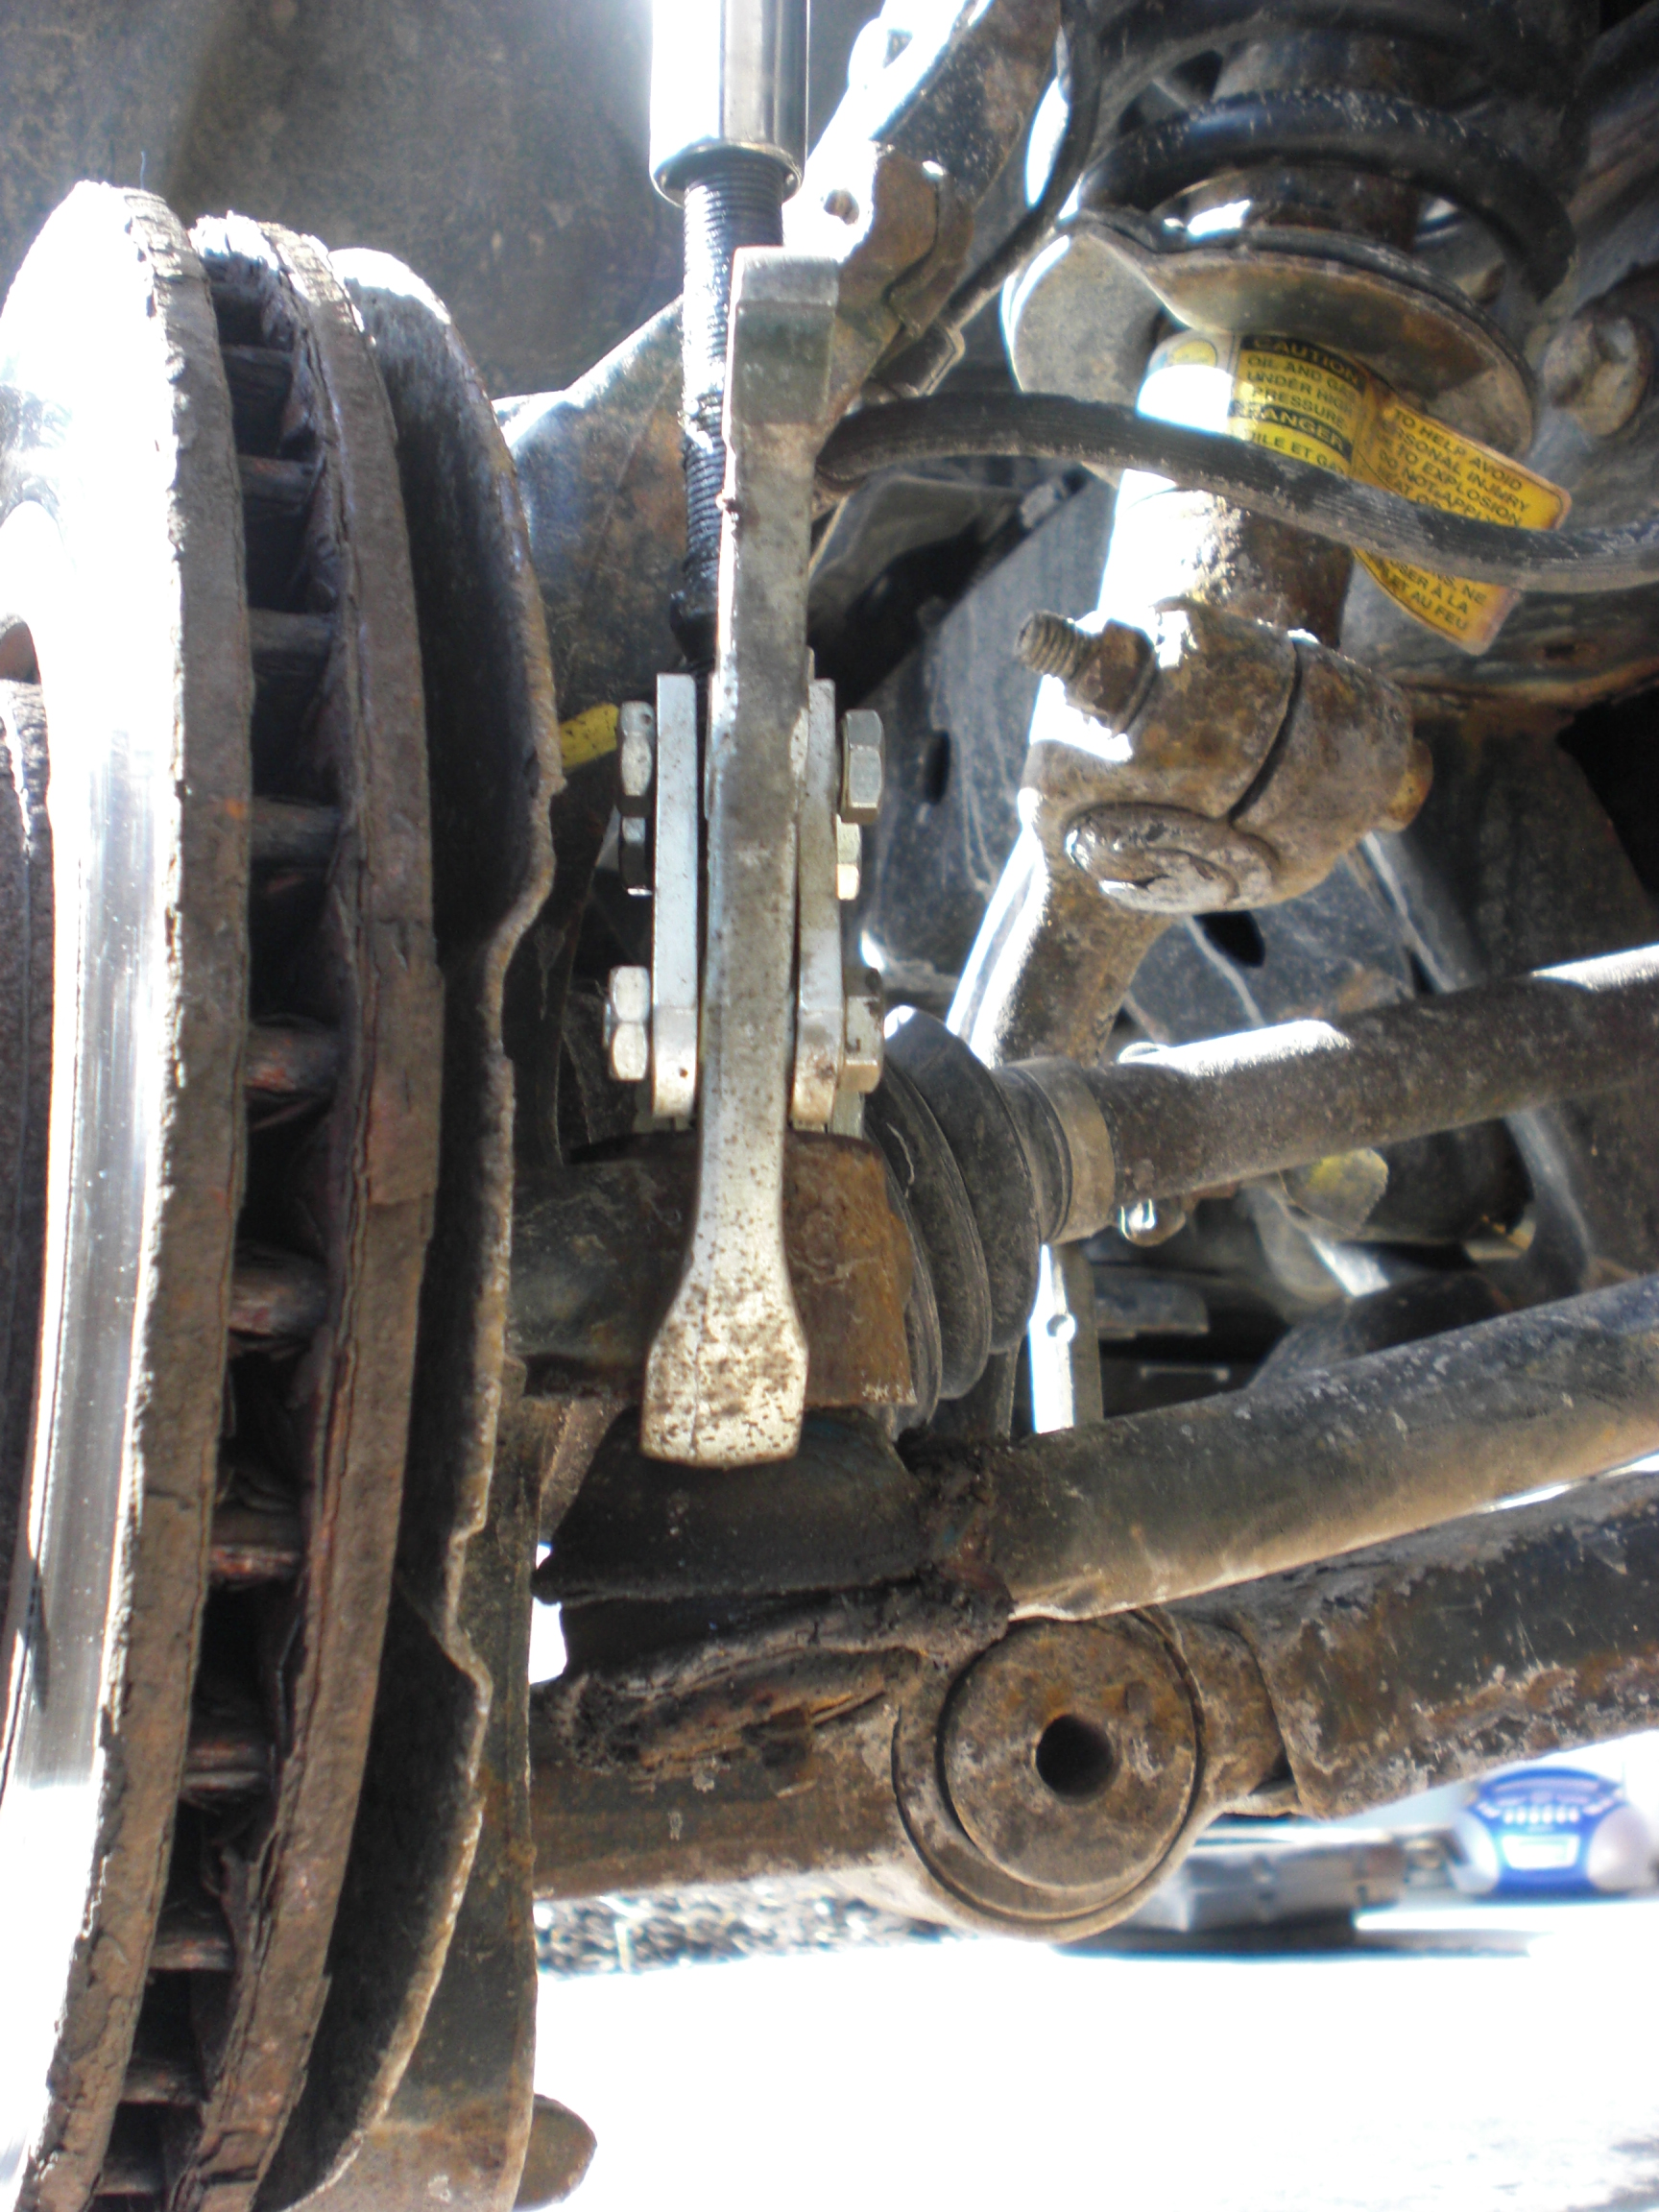
For one side, I just made it tight, and then lightly tapped with a hammer and it fell right out. (you are pushing the bolt down and out ). The other side fell right out once I started tightening things up with the puller.
Next, I measured the jam nut distance with my micrometer measure tool, see below:
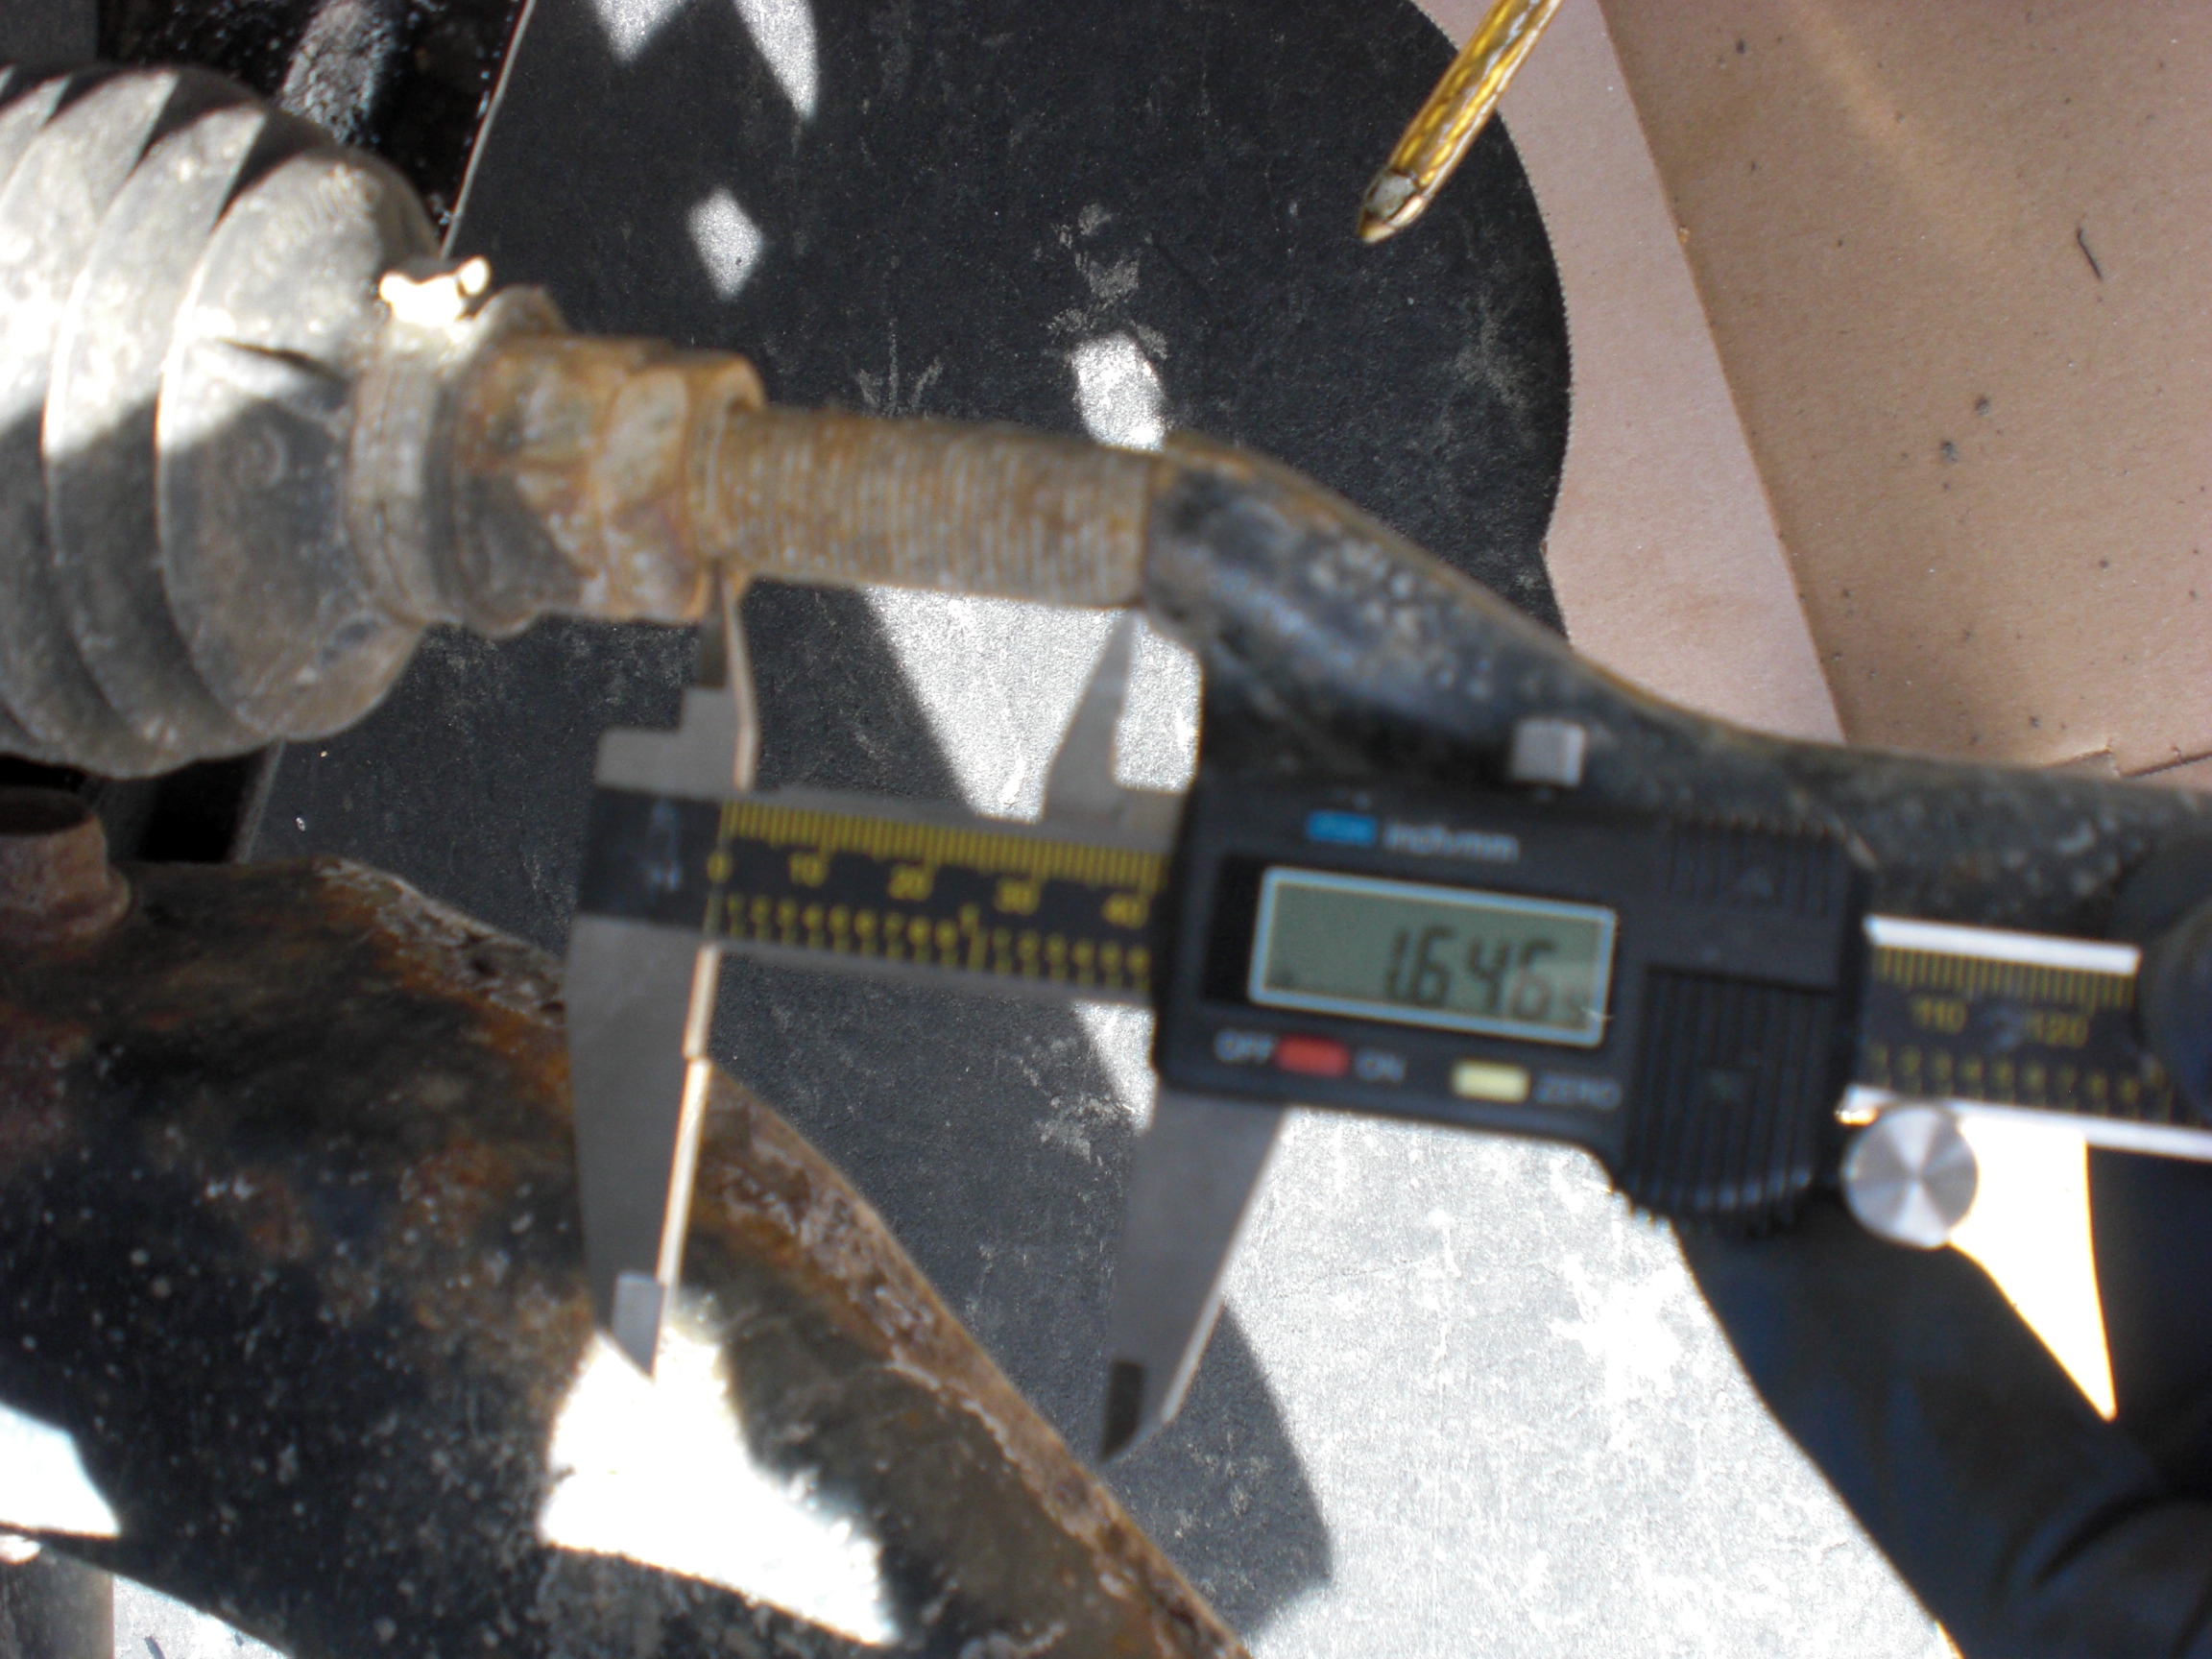
Even though you are getting it aligned, it's still nice to be close. Especially if you need to drive it a few days before the alignment. (both sides get measured)
Next, loosen the jam nut. I used a 1 and 1/16 wrench along with a crescent wrench:
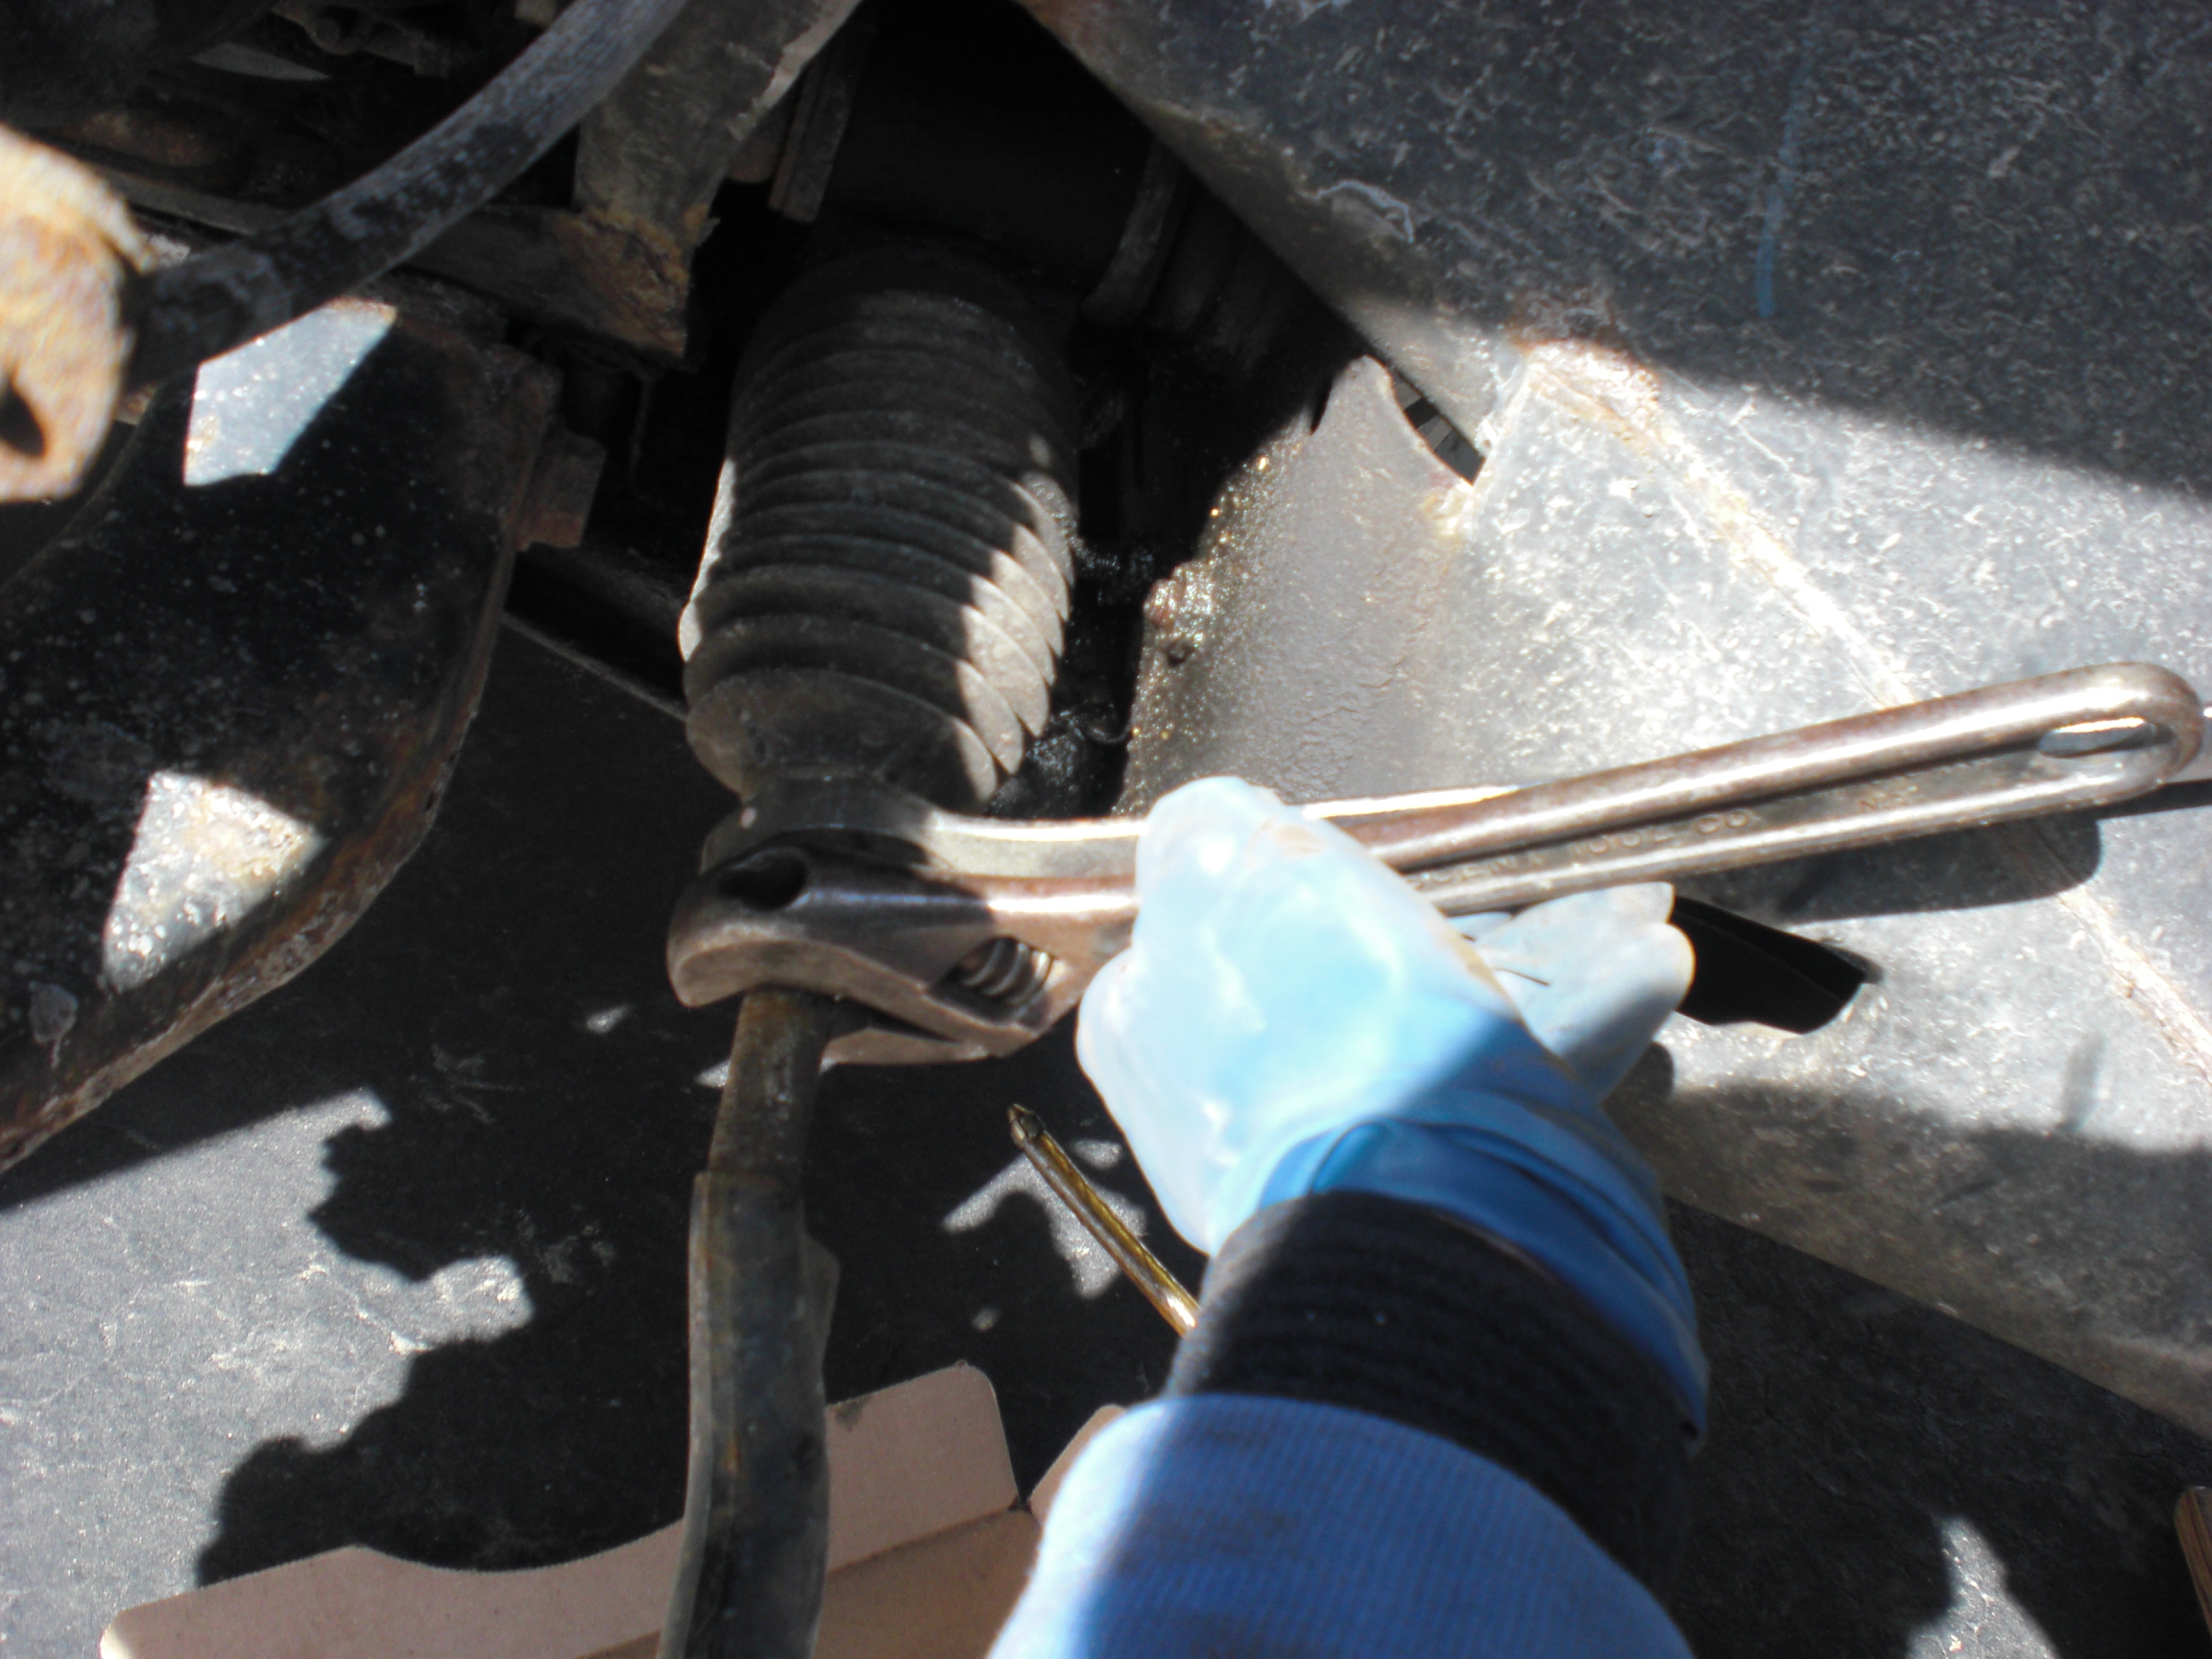
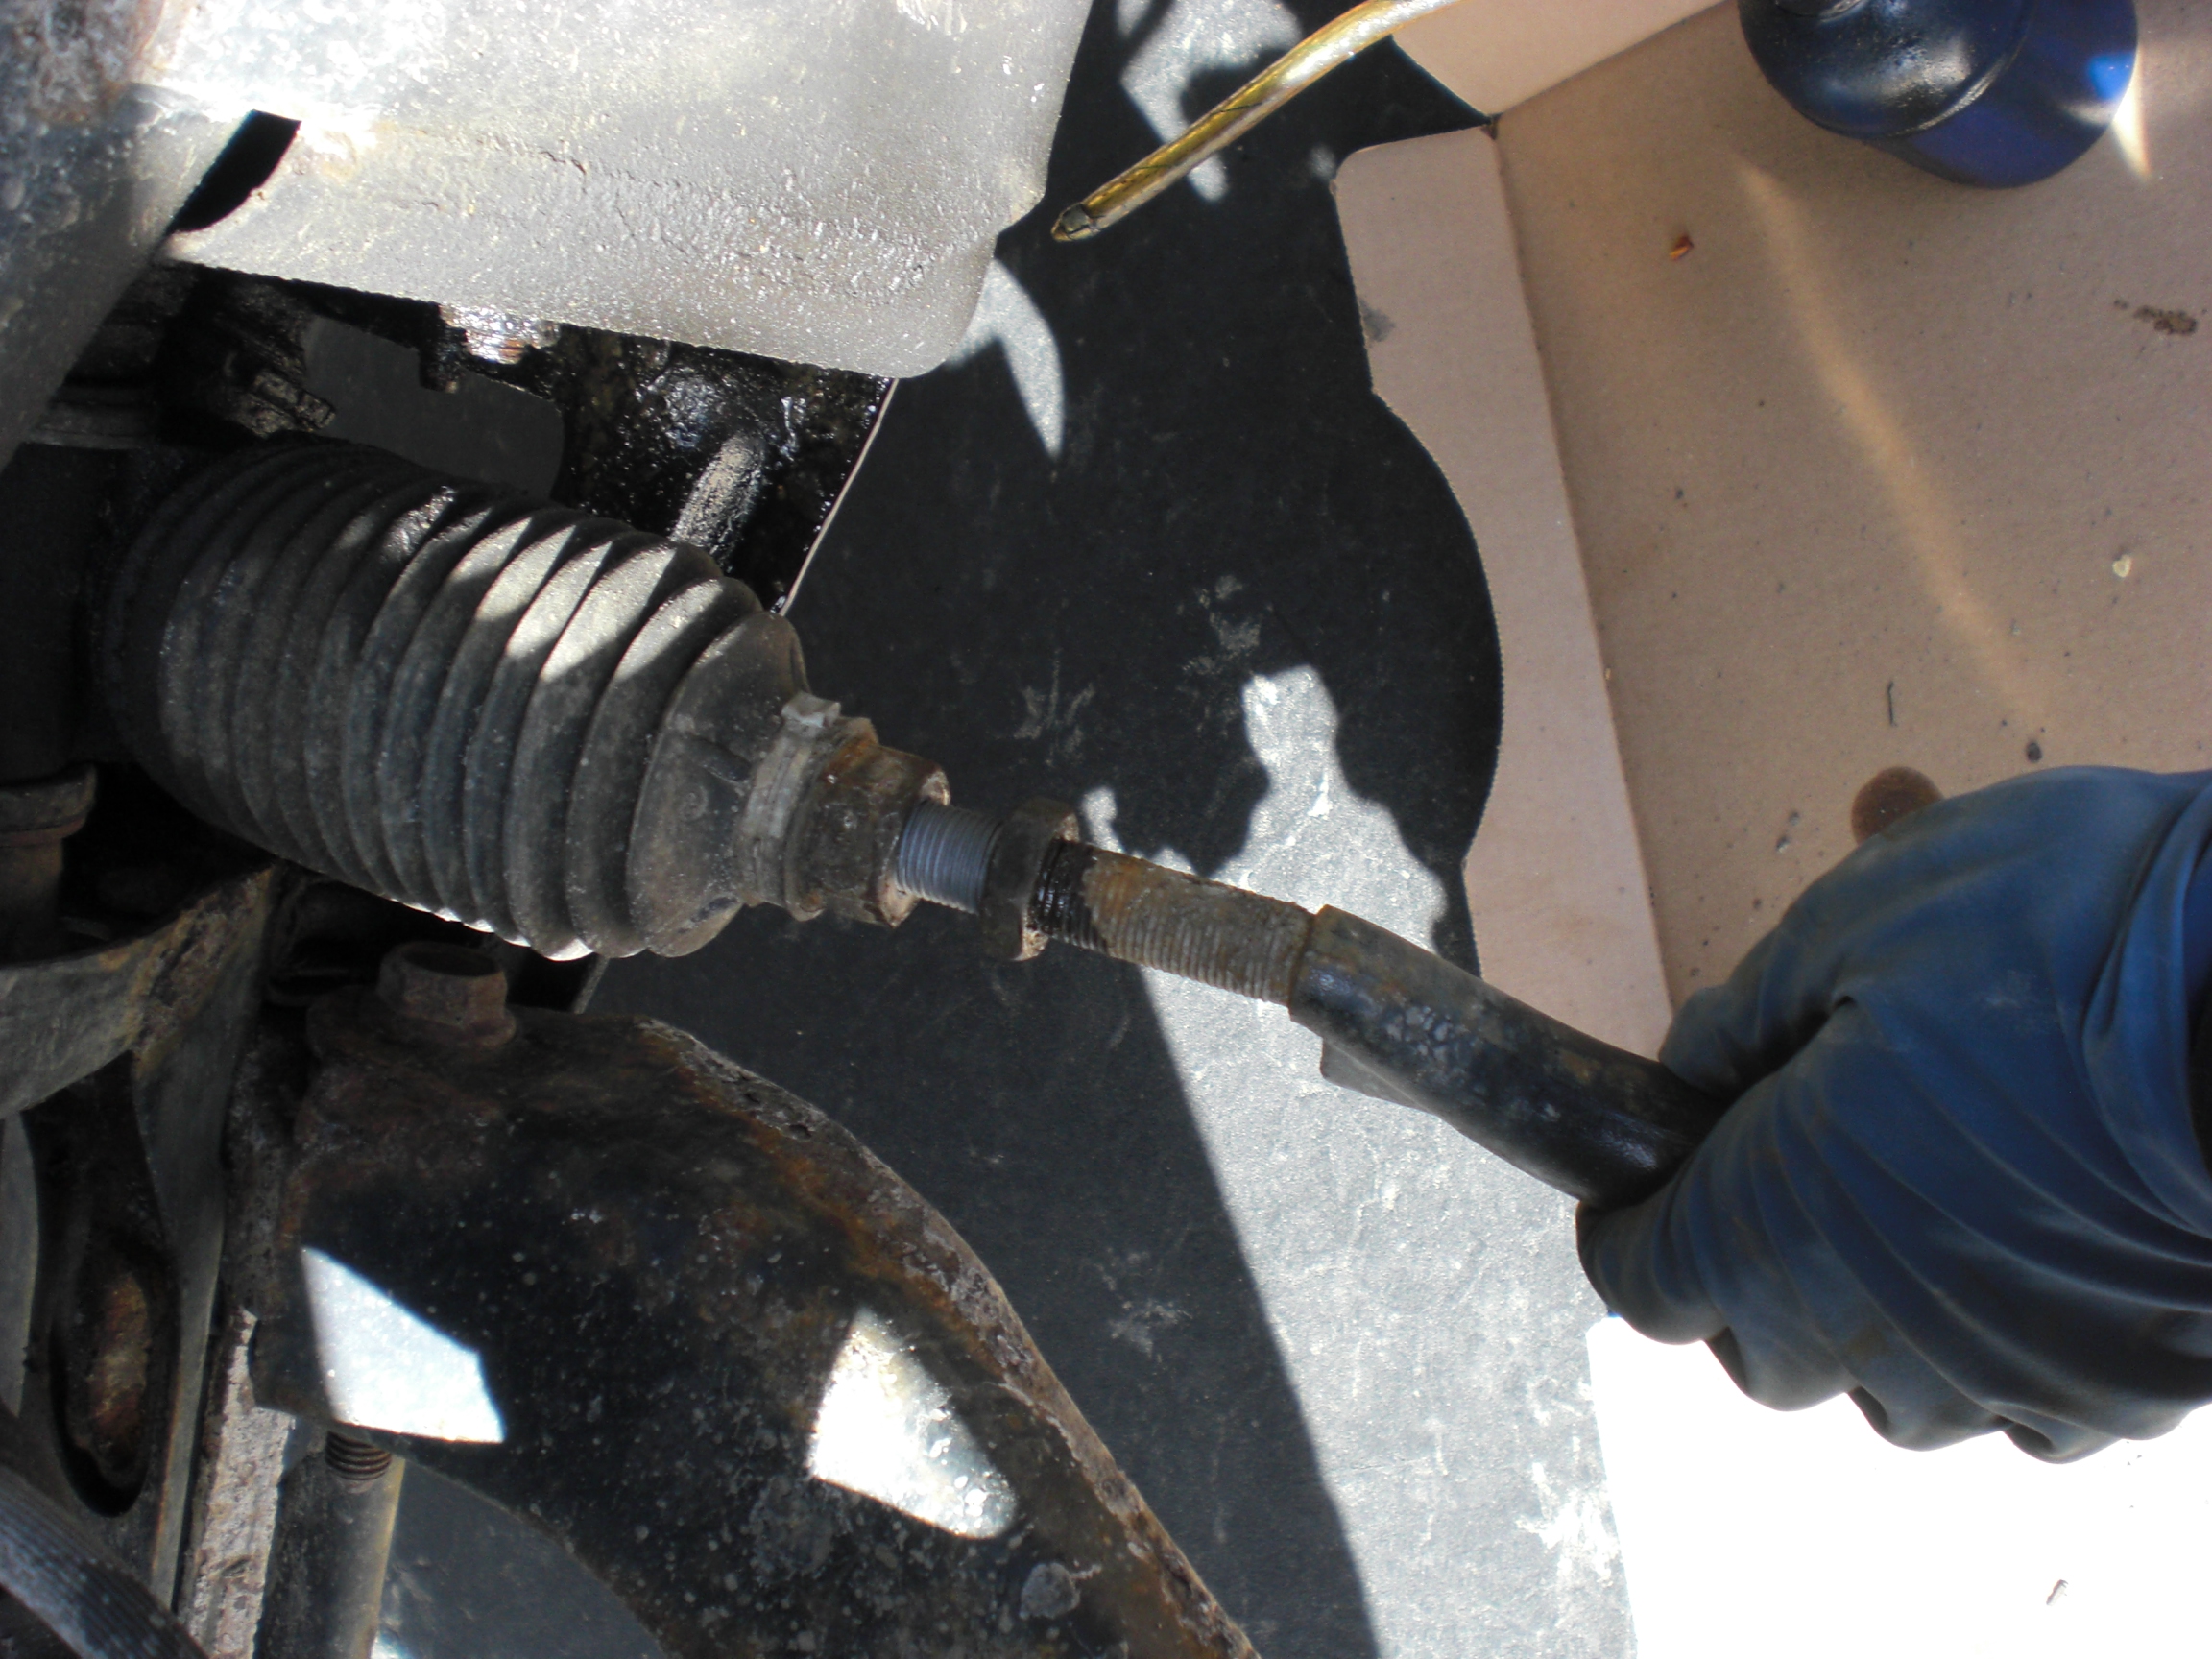
I had to hold both wrenches with one hand and take a picture with the other, this taking pictures thing gets in the way sometimes. Then the outer tie rod gets unscrewed and set aside. Remember to keep track of which side you take these off of. Below is an action shot:
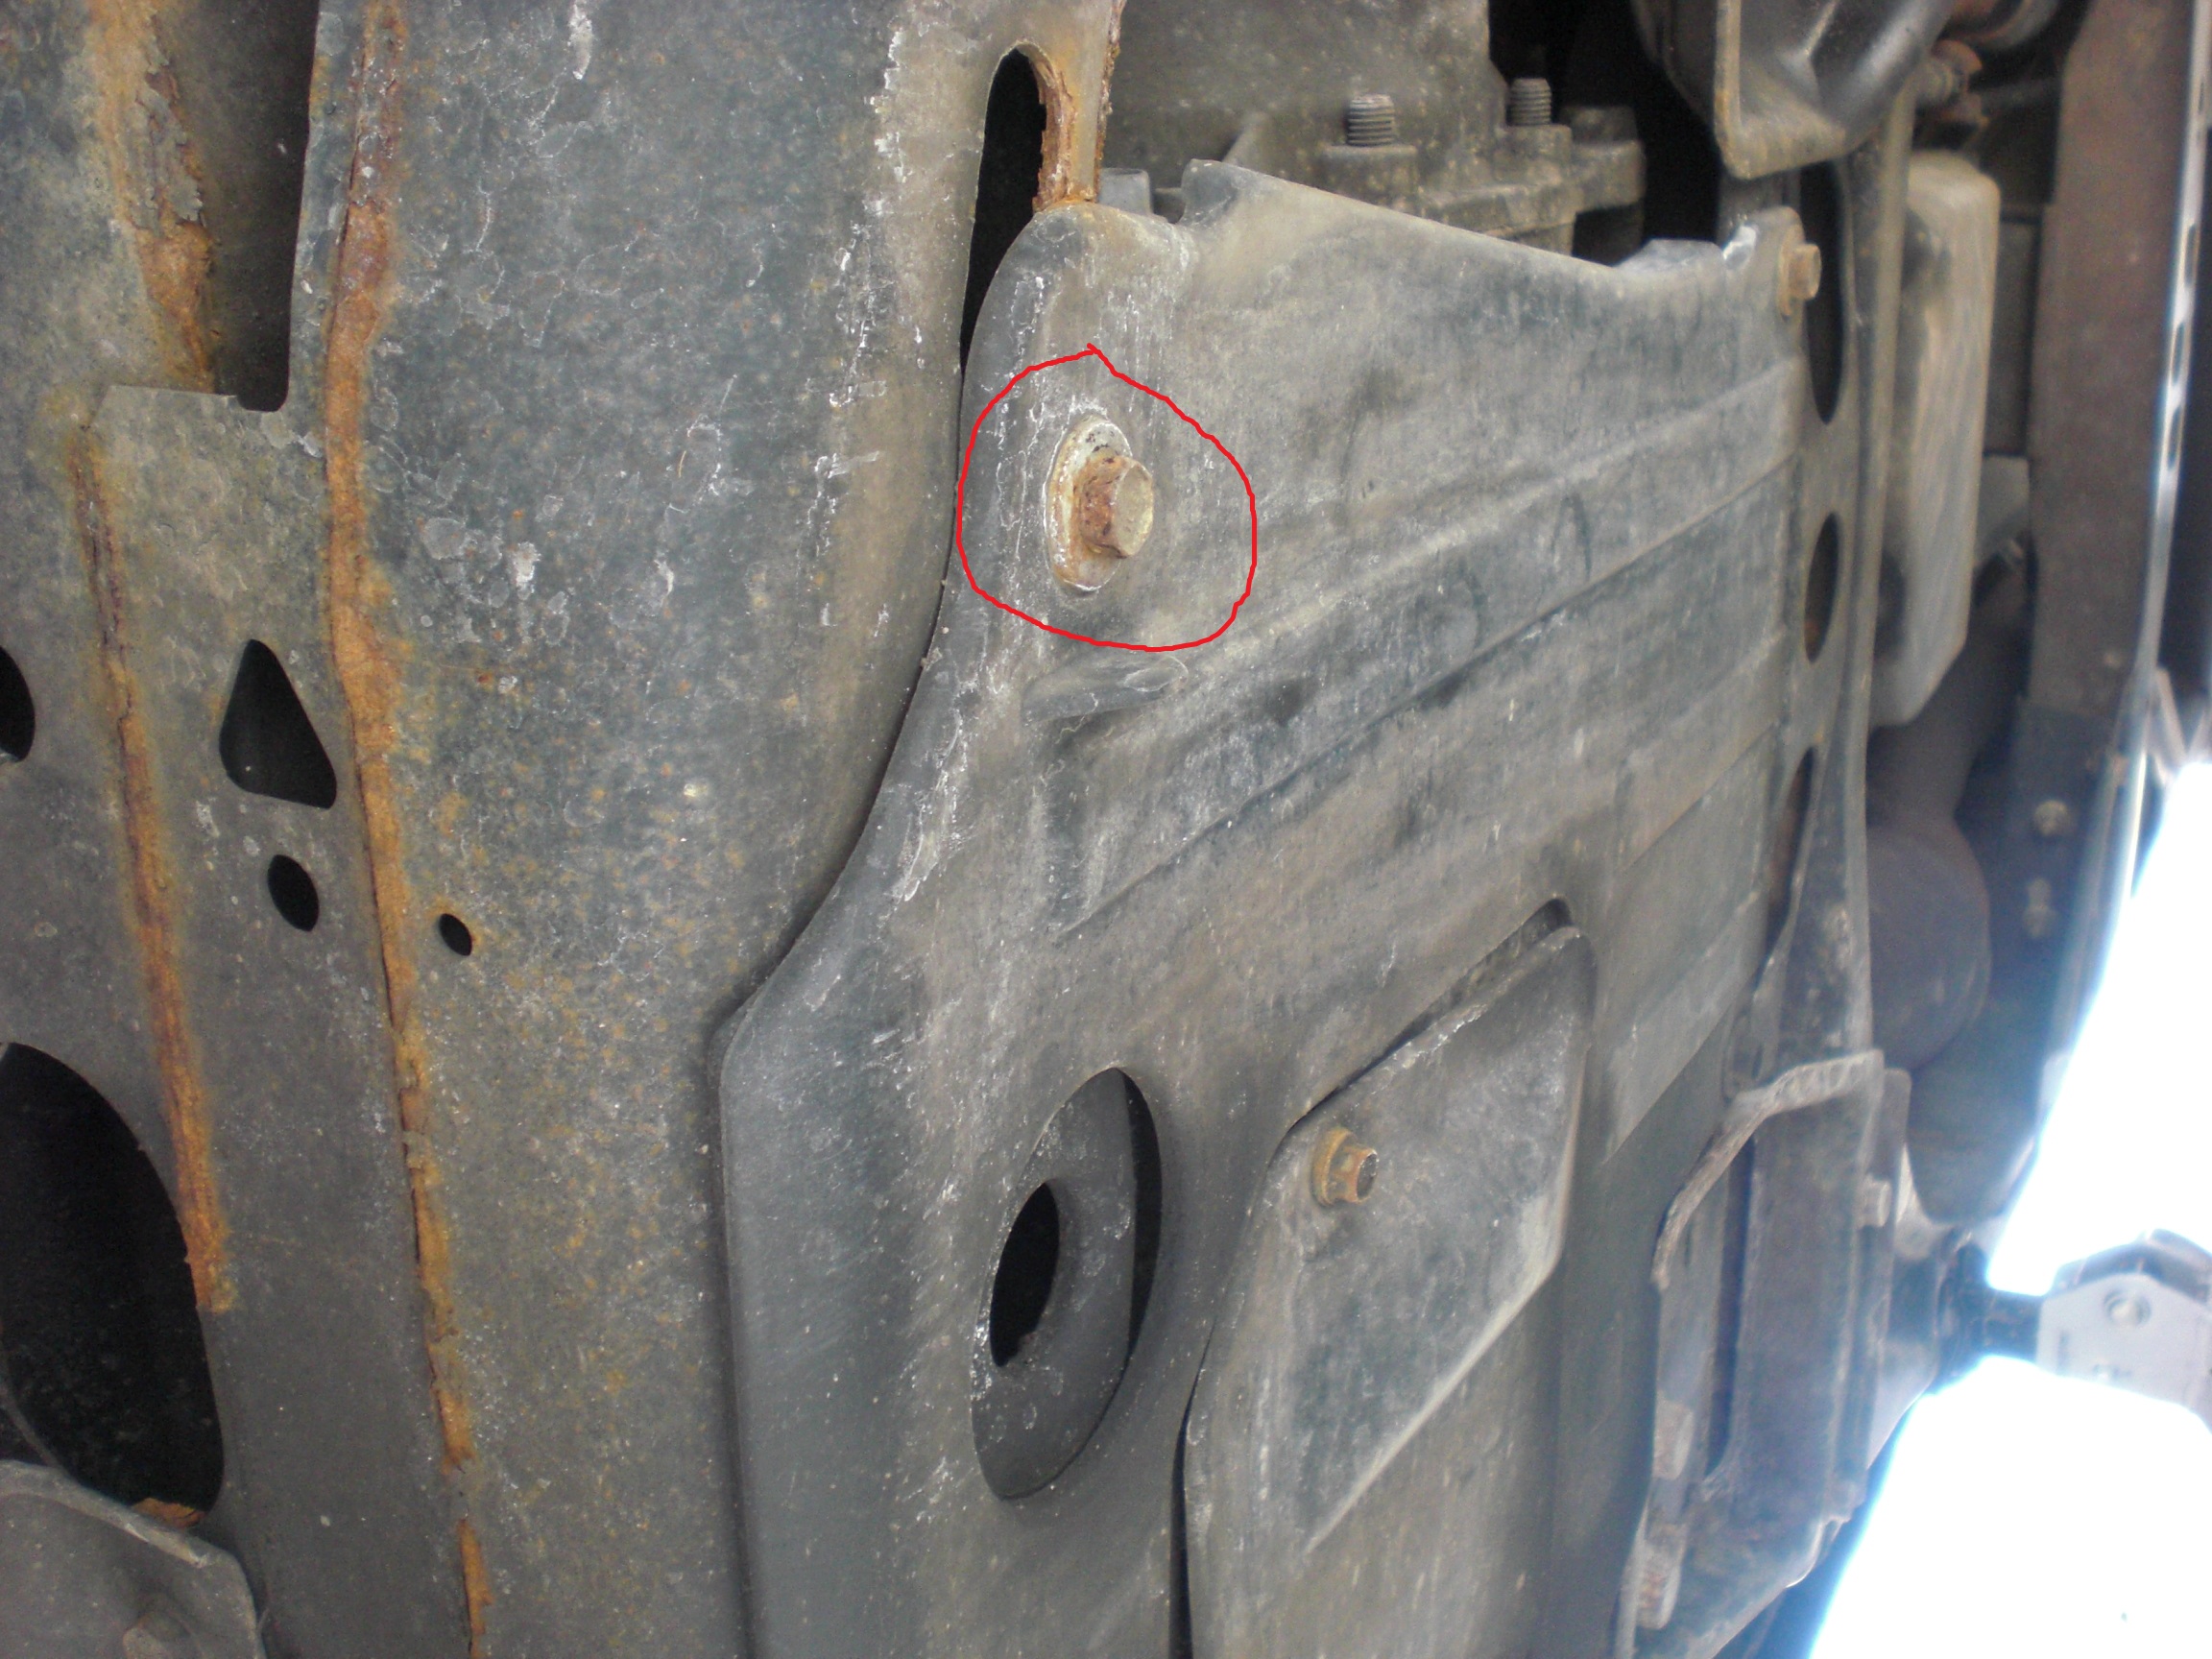
Next step, remove the engine shield. The bolts for that thing are 13 MM:
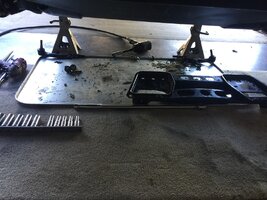
Next remove the steering gear crossmember, it's the metal plate right below the steering gear:
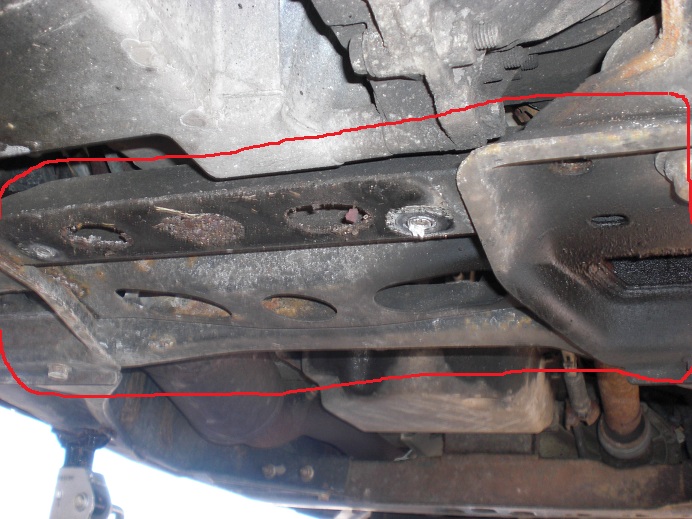
There are 12 bolts total to come off. 10 are on the bottom, 5 on each side. These may take a while depending on how rusty you are. Keep track of which bolts go in which hole, some are different. Here is a shot of 5 on one side that need to come off:
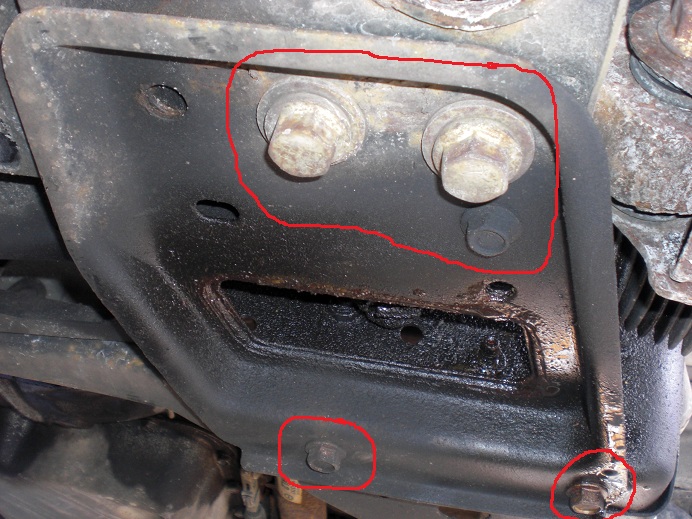
Once you get these 10 off, if you are scratching your head why the crossmember doesn't fall off, there are 2 more bolts on the side. Here is a shot of my socket on one:
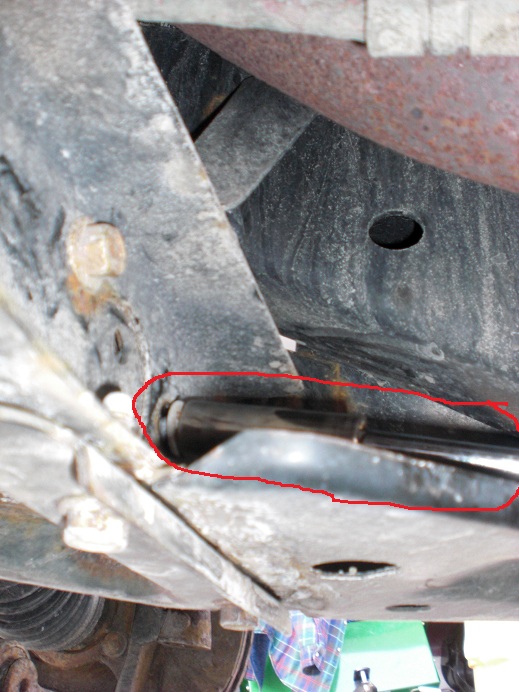
It's heavier than you expect.
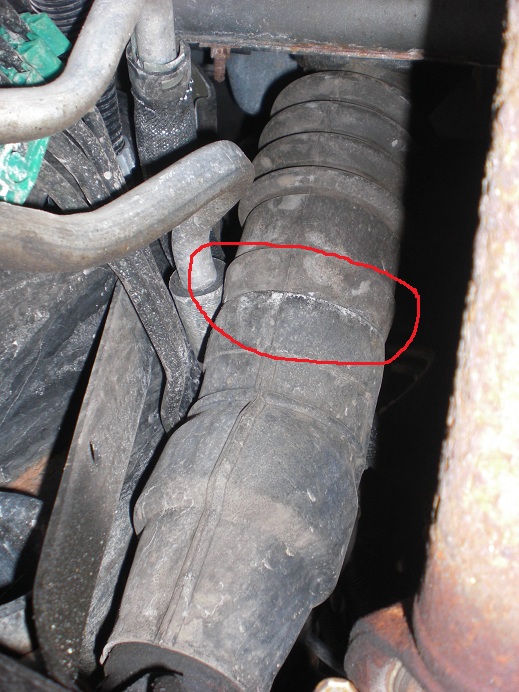
Next you get to disconnect the intermediate steering shaft. Your steering wheel is secured and not able to be turned, right? First there are 2 seperate boots covering the shaft. You need to disconnect the upper boot. Here is a shot of the boots still together, I have circled where they join. Basically you just grab the upper boot and push up:
Here is me holding them apart. See the pinch bolt holding the upper intermediate shaft to the lower intermediate shaft? Guess what your next step is.
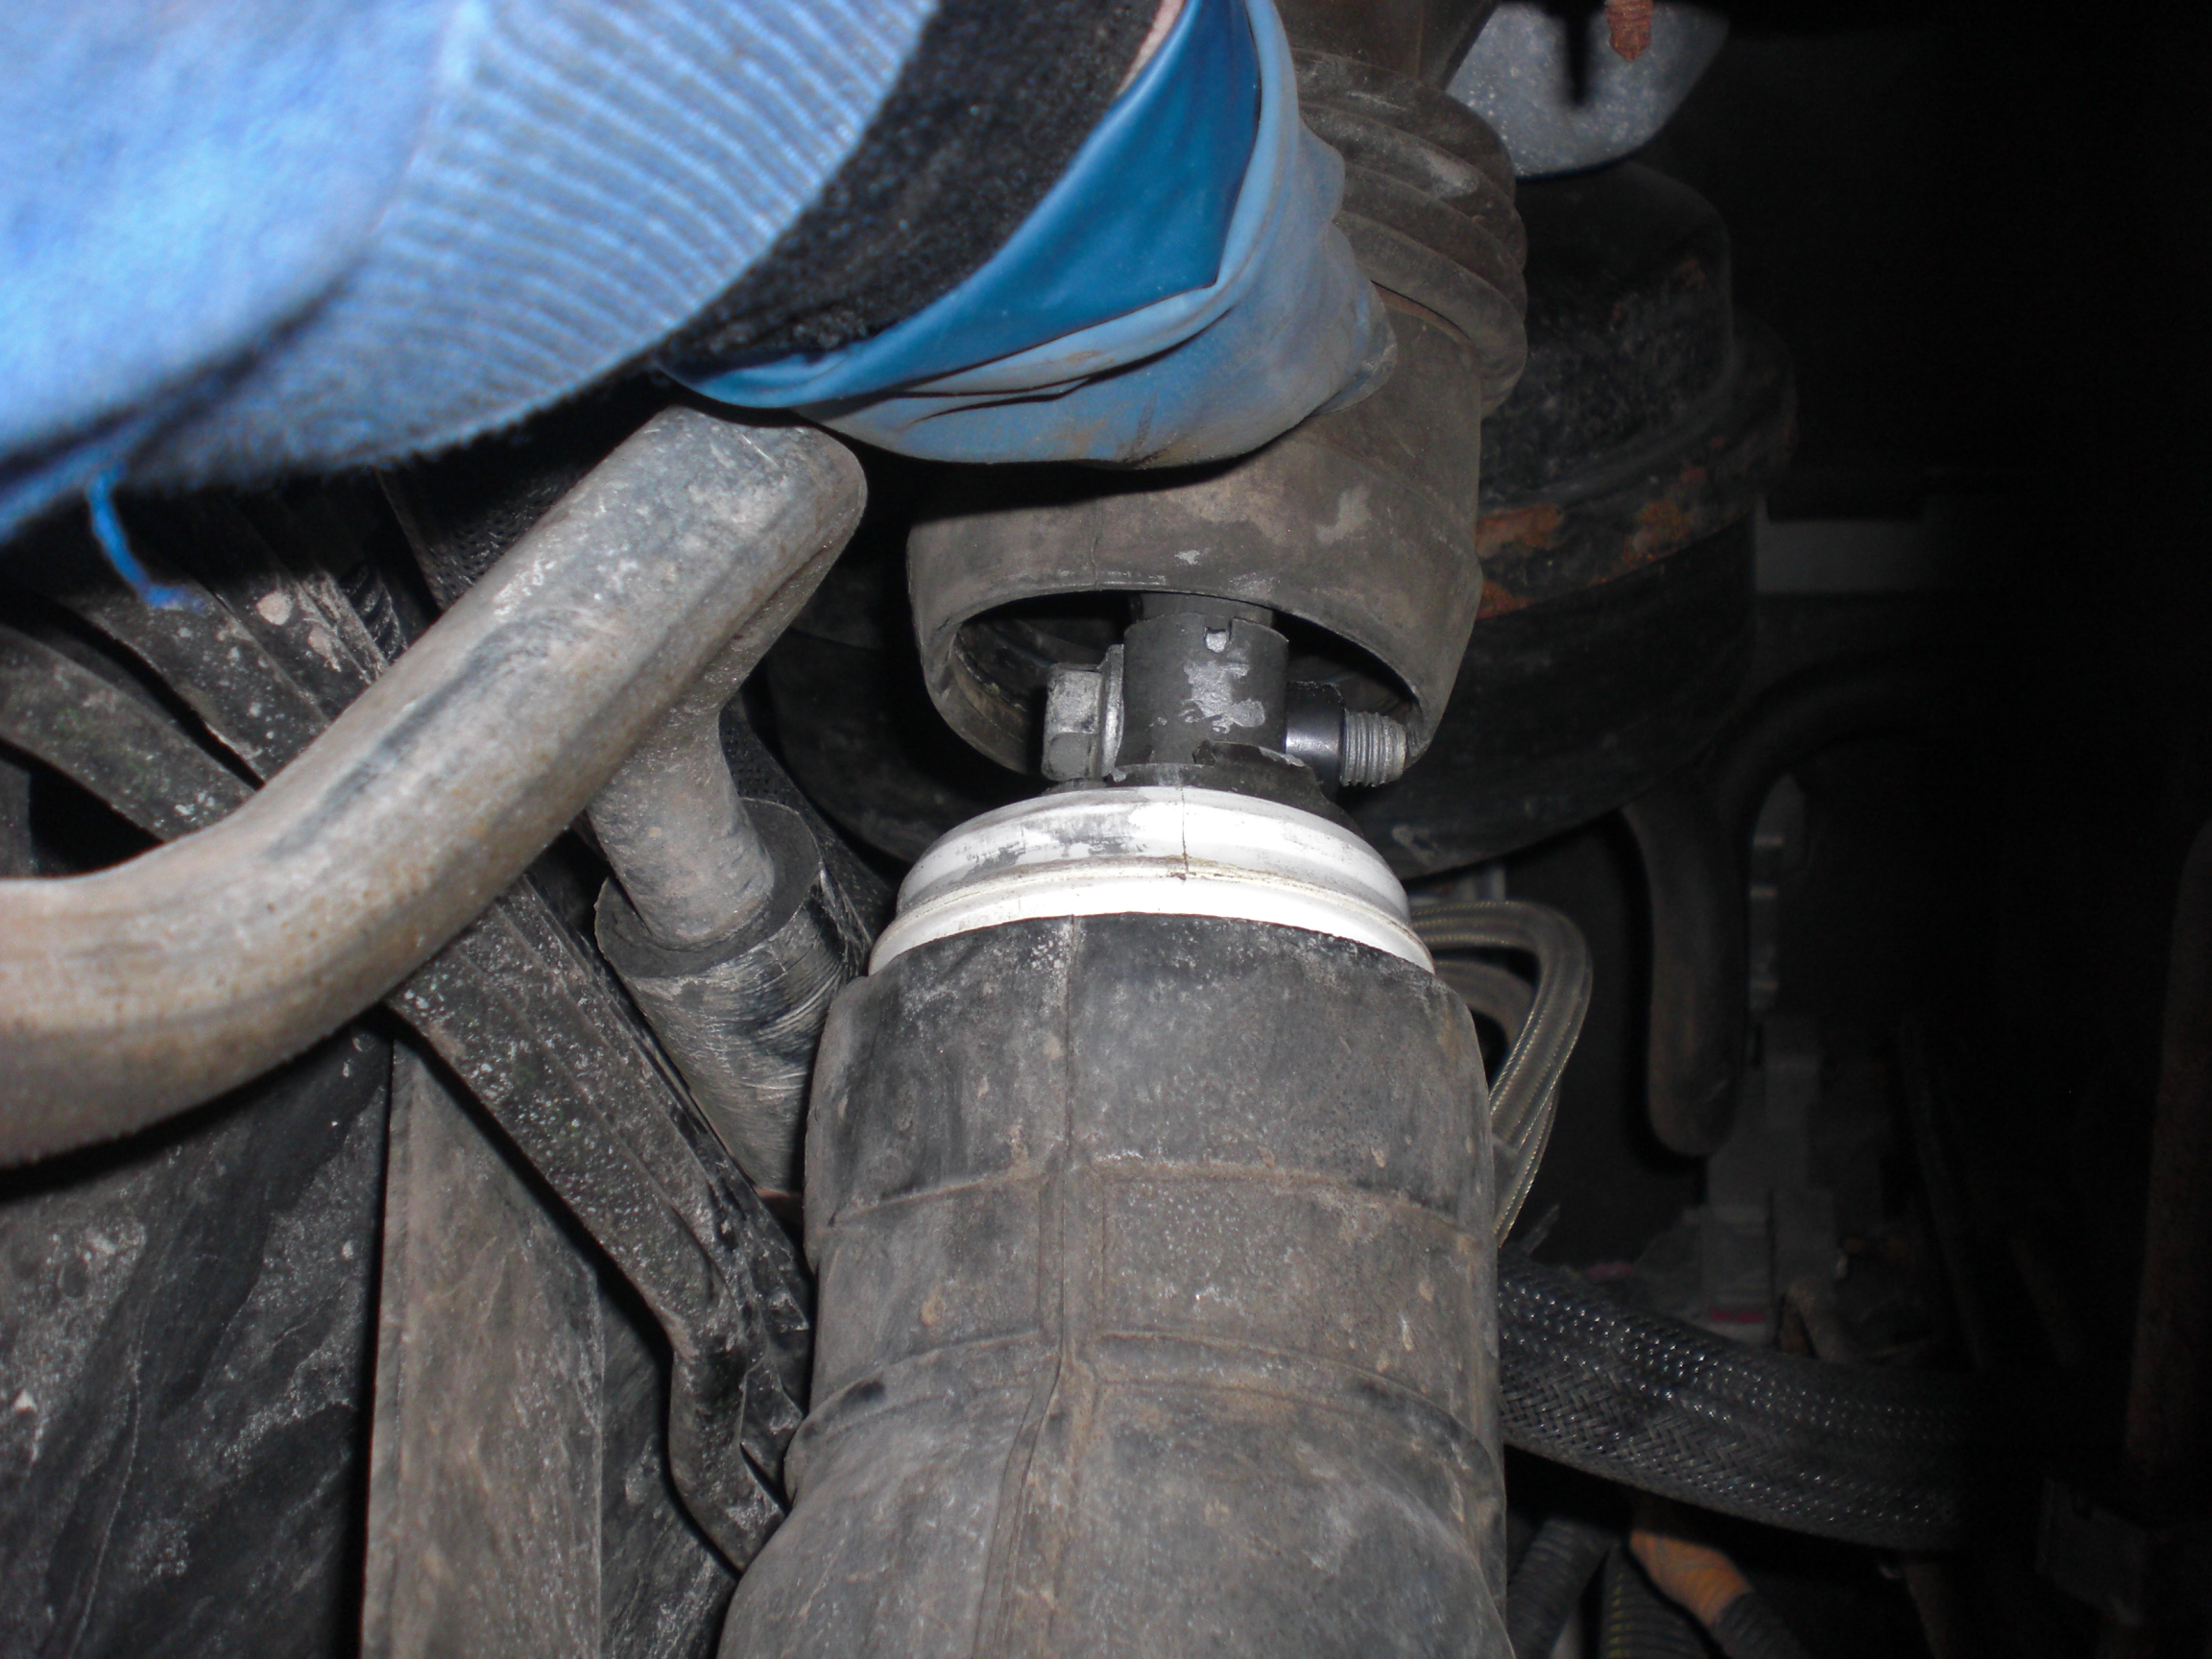
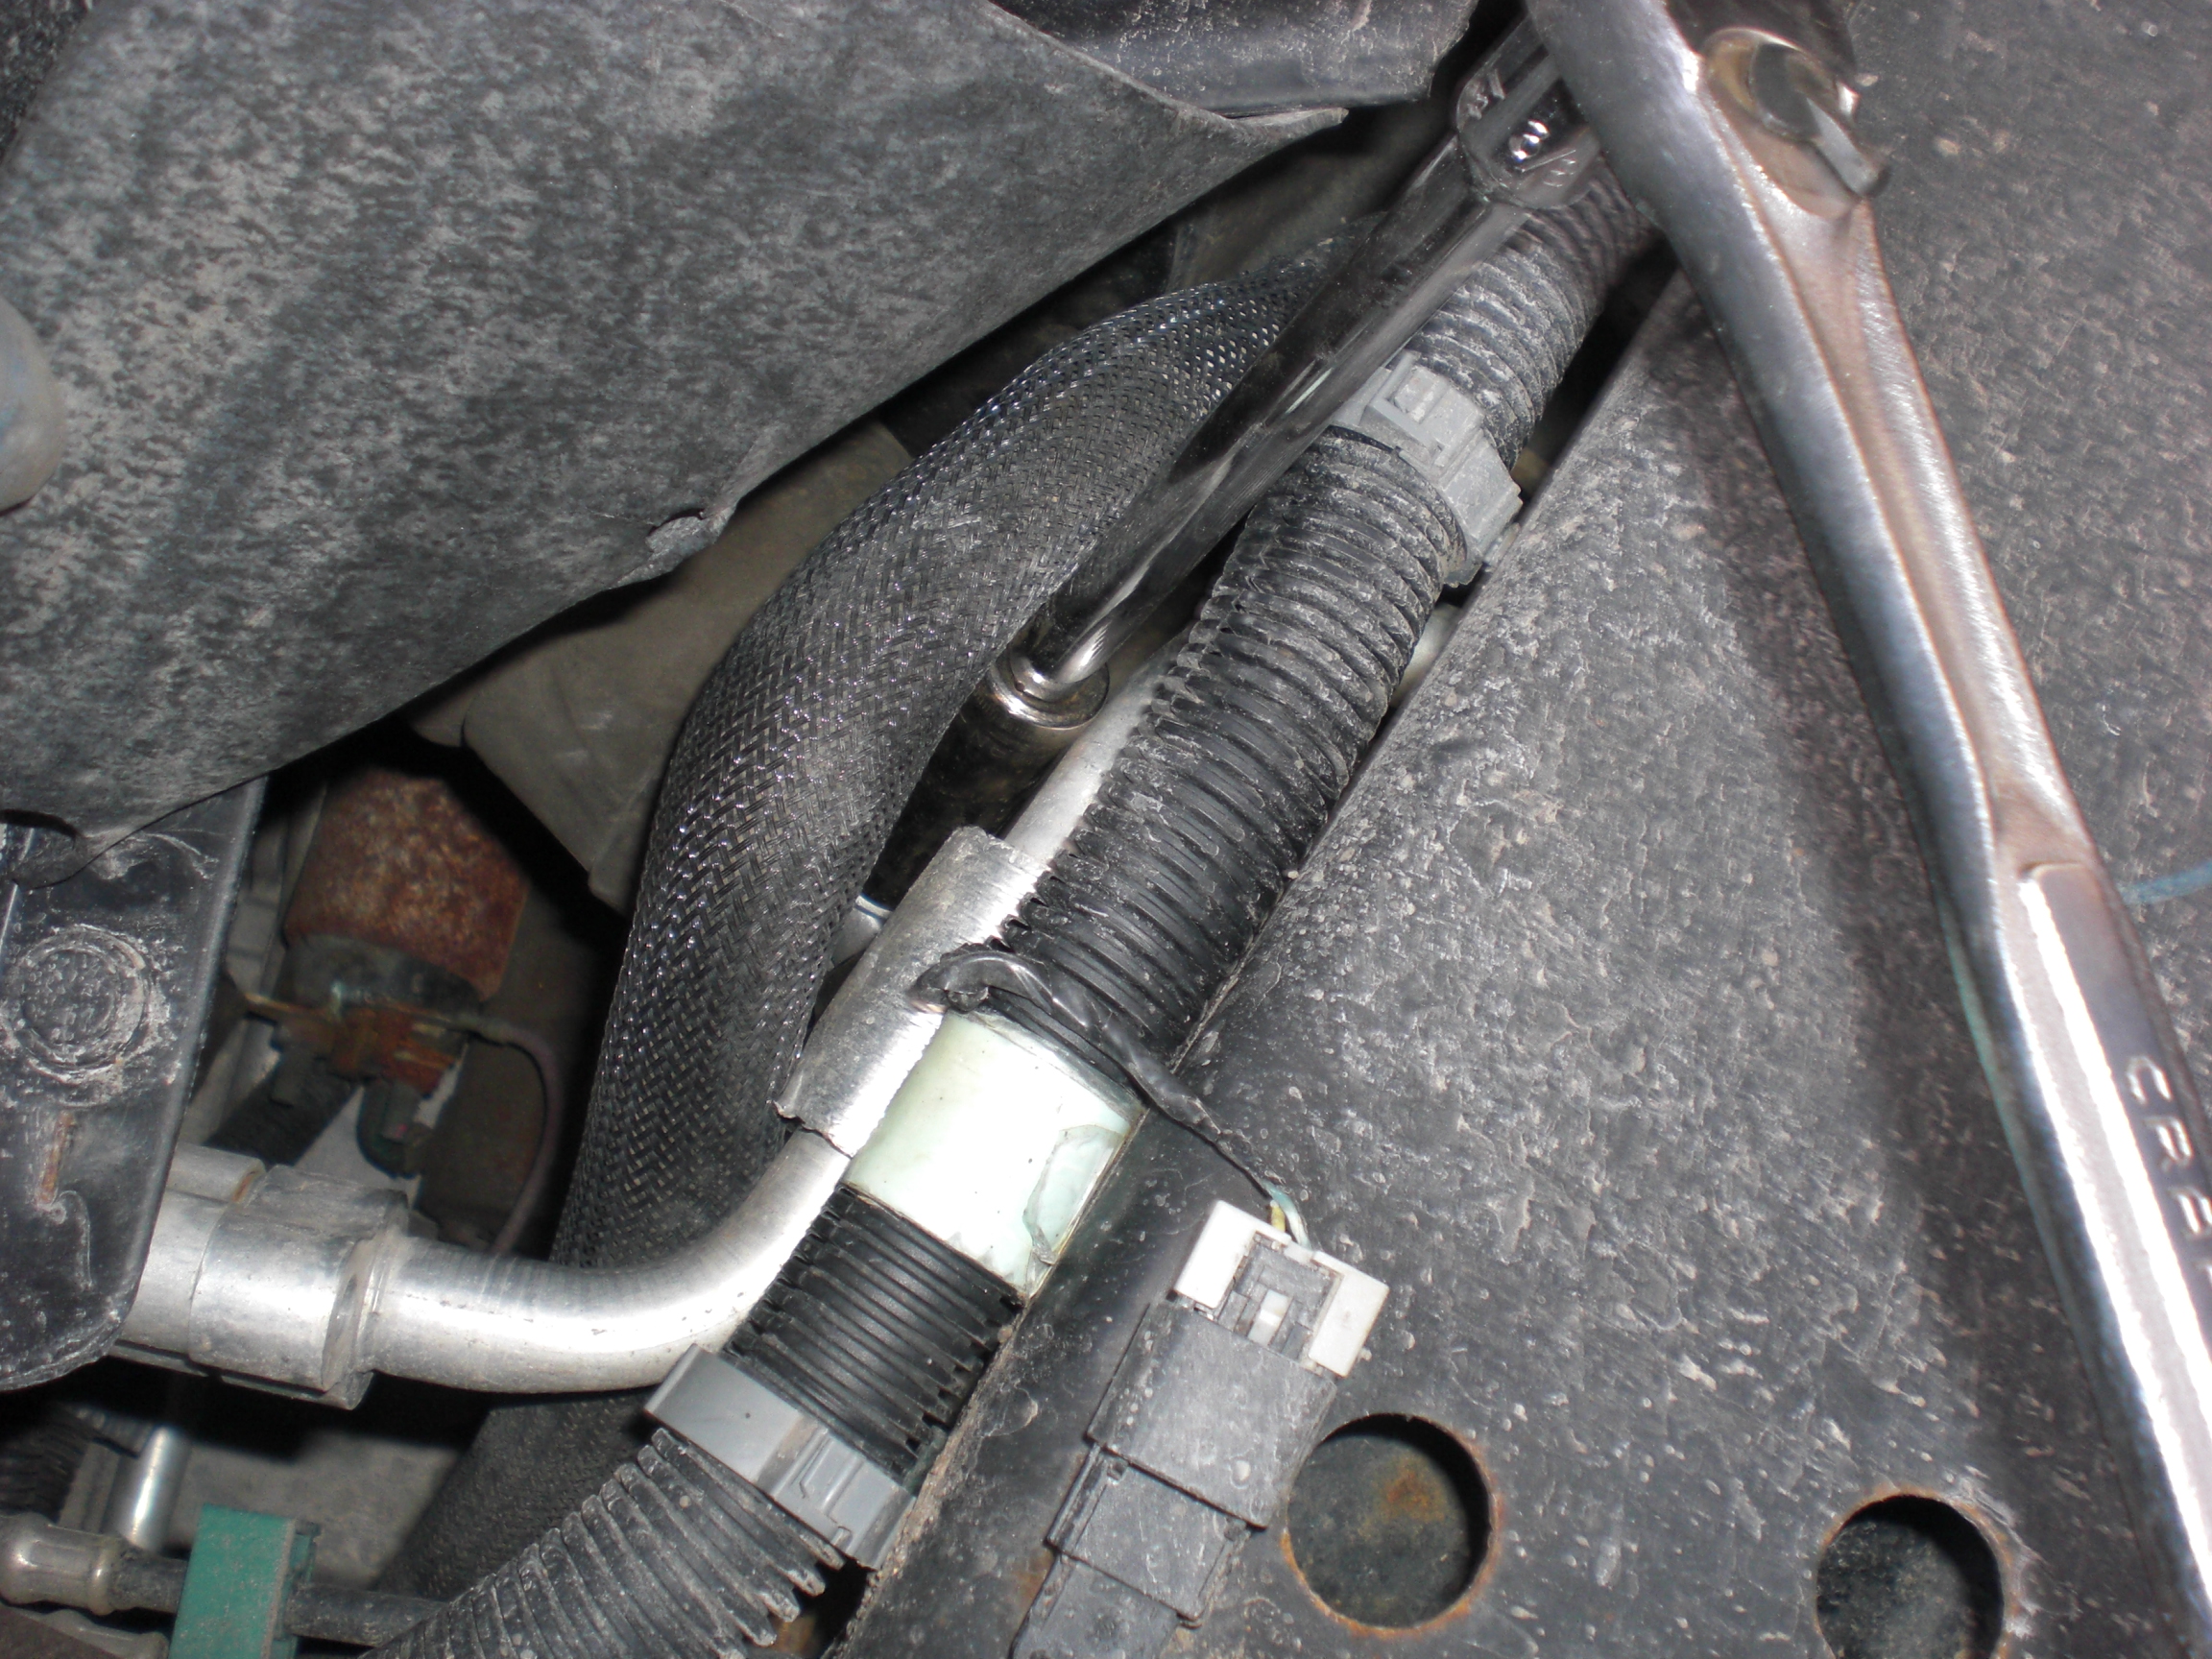
Correct! Remove the pinch bolt. 15 MM. I got to it from the outside like below:
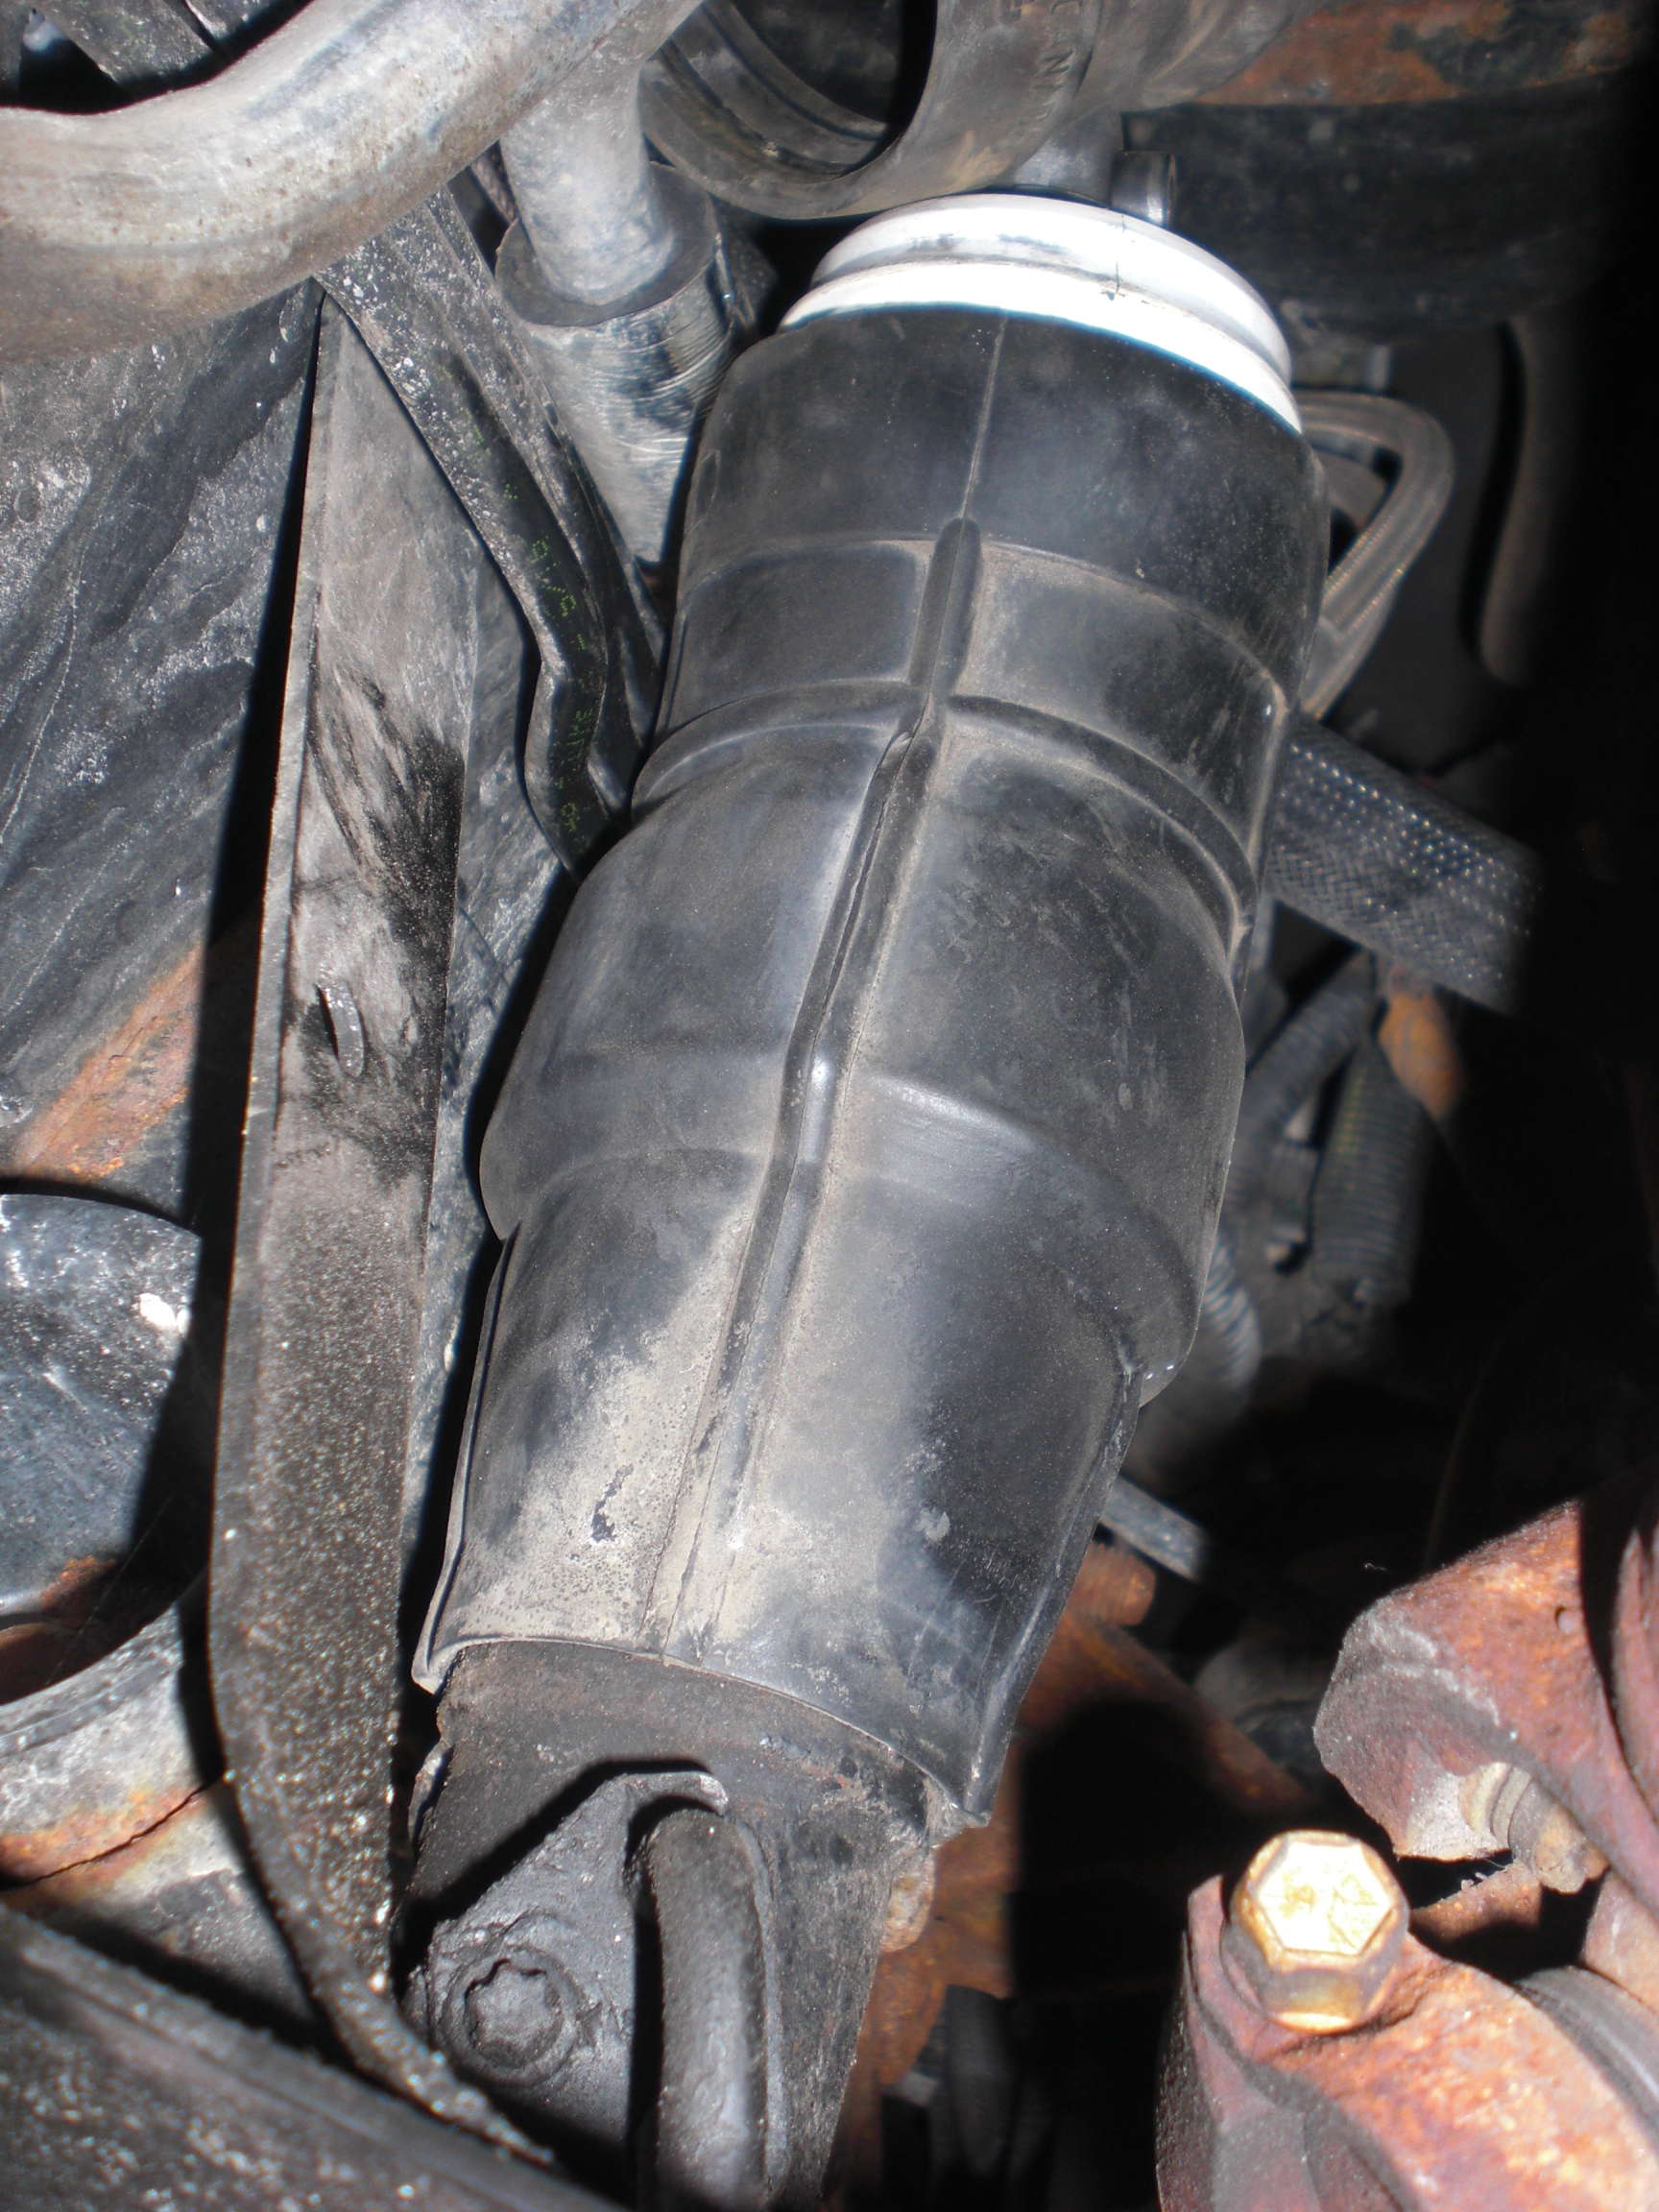
Then seperate the shafts, because you are coming to what was for me the hardest part of this job. Pushing the lower boot up and off. Here is the boot before it comes off:
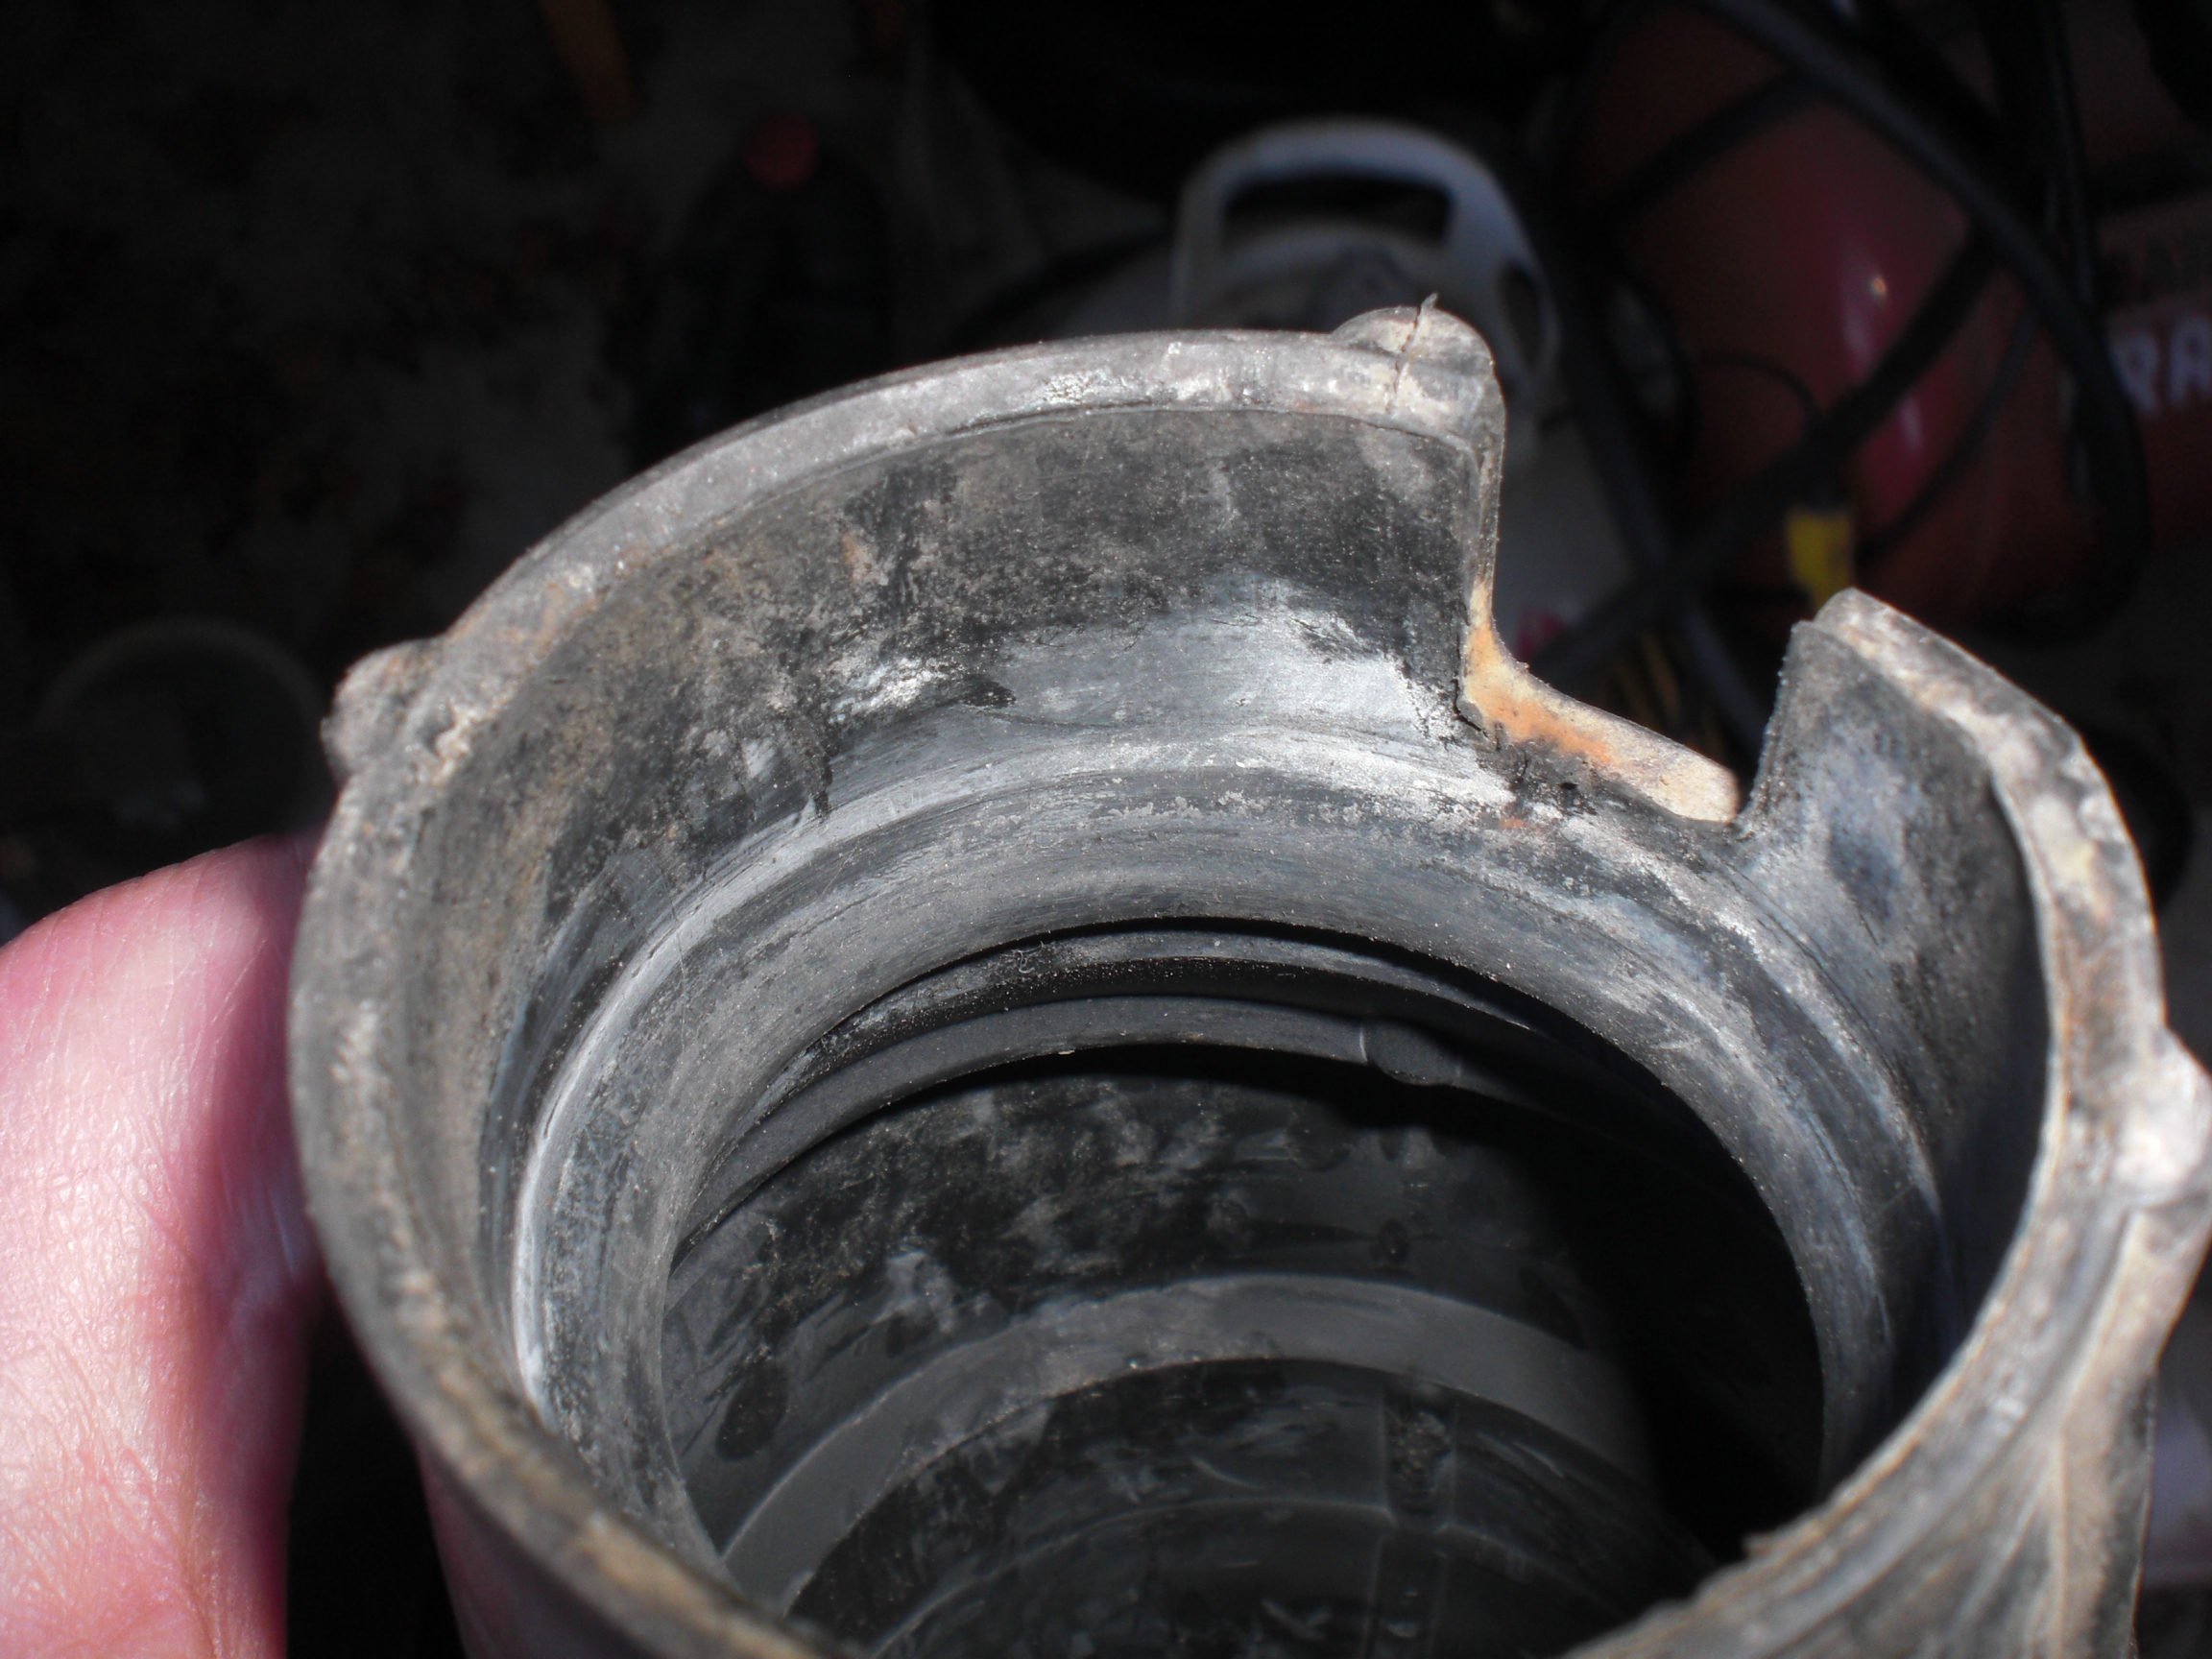
You have to grab the bottom and push it up and off. Mine was stuck on there really good. It was tough to get leverage, there is a notch preventing you from turning it a lot, and there is a lip inside holding it on, see those below:
Hopefully you will have better luck than me on this part!
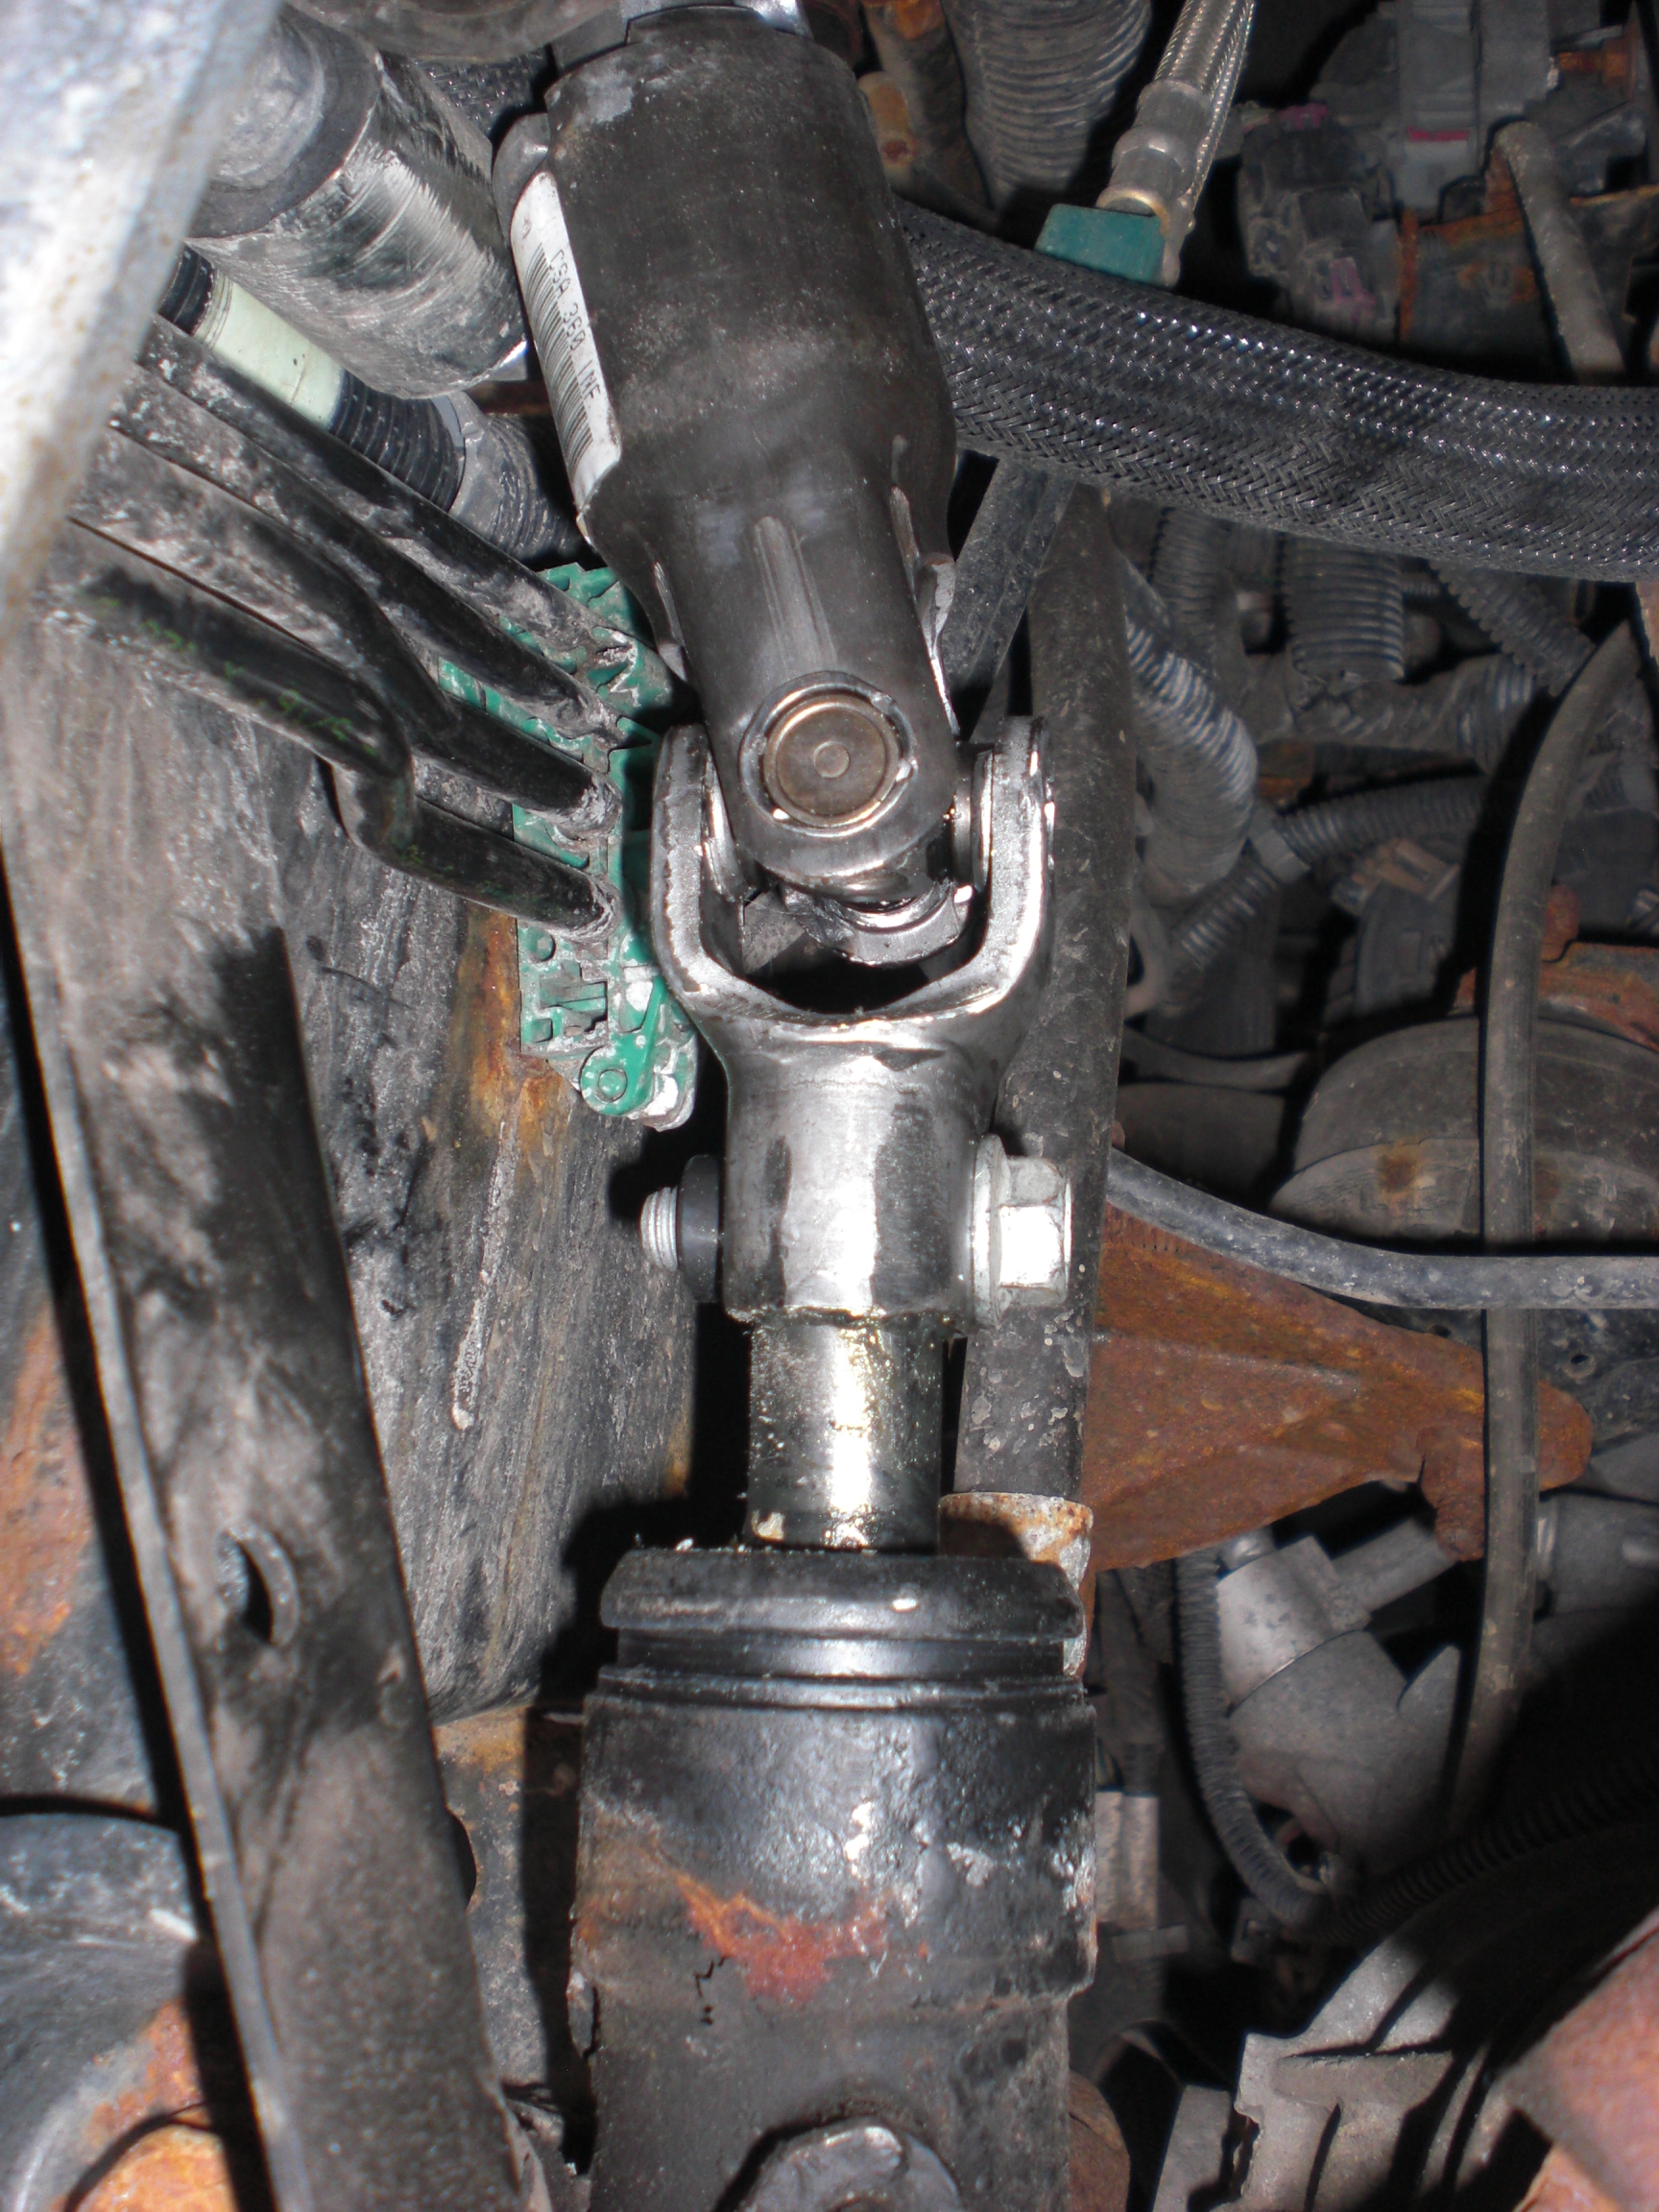
When you get the boot off, you are left with the lower intermediate shaft accessible:
part 2 is next post
Estimated Time: 6 hours
Part Numbers: N/a
Cost: N/a
Equipment needed: jack stands for both sides of front end
Tools Needed:
-good assortment of sockets and extensions
-13/16 deep and regular sockets for gear unbolting
Note: I had to split this into two postings as I was over the 10,000 character limit.
Also this is probably good for most trailblazer steering gears and not just mine?
How to change your power steering gear (aka rack and pinion ). I'm not posting this as an expert, just someone who has gone through this and wants to help others.
It's very easy to tell when the gear has gone bad. The tell-tale sign is power steering fluid leaking out of one of your rubber boots on either the driver or passenger sides, right from the boot area that covers the inner tie rods. The seals in the rack and pinion go bad and start to leak. The worse it gets the more it will leak out. The boot itself may or may not be torn, but just replacing the boot is ignoring the problem that really needs to be fixed: a new rack and pinion steering gear replacement. It is especially noticable when you jack up one side, like maybe you are rotating tires like I was, and can see the power steering fluid run out like it did to me.
 Also the gear itself will have fluid all over it. And finally, and most obvious, you will run low, or out!
 , of power steering fluid. Don't ask me how I know. From a mechanical description, the power steering gear connects to the inner tie rods, which connect to the outer tie rods. Below see some shots of my bad gear:
See the puddle starting right below the gear/inner tie rod boot? It's small, it just started leaking but it will get bigger!
Here is another shot of the gear with fluid all over the place:
This is the second time that I am changing my steering gear. The first time was in September, 2010. At that time I also changed high pressure lines, low pressure lines, my steering pump (I eventually ran out of fluid and killed the pump), along with the steering gear. I contemplated getting one from the bone yard, but decided to get a new reman one (you can only get remans) from Napa, a Cardone steering gear. I wanted to change it once and be done with it for the rest of the vehicles life. Wrong! 30,000 miles later I'm leaking again! The good news was that there is a lifetime warranty on the steering gear, and Napa gave me another with no questions at all. Still a PIA to have to do this again.
So, if you are changing out your steering gear, I would give serious thought about changing out your high pressure line as well, and maybe the low too as well. The problem is that changing out the high pressure line adds a lot of work, there is a fair amount of stuff to remove to get at it. I swear when they built these cars the first thing that was put on the line was the vehicle frame, followed by the high pressure line and then everything else. Felt that way anyway. Changing out the gear for me is about a 6-8 hour project, eating lunch and taking pictures etc. I think allwin lists it as close to a 3 hour job. This job isn't really all that hard, but it takes a while. There are a fair number of bolts that need to come out, and of course put back in. You will need a decent assortment of extensions for your sockets. One thing to note is that the steering gear that I installed came with new inner tie rods already installed on it.
I would also think about putting on new outer tie rods. You have to take them off to get at the gear, and when you are done you will need an alignment anyway. See the dollars floating away? I'm not saying you should, but think about it.
Now during this job, one thing you need to be aware of is that once you have disconnected the steering intermediate shaft you cannot turn the steering wheel. Alignment can be thrown off, and even worse you can break the coil assembly inside the air bag component. (you can actually turn it somewhat, but I think the coil breaks at 2 1/2 turns or 3 ?) GM makes a special tool for this, part number J42640. I bought it myself online, I think it was like $10. If you don't buy the tool you will have to secure the steering wheel with straps, bungee, etc something to keep it pointed straight. Here is a shot of the tool, next to a santa claus pencil for scale:
Here are a couple of shots with the tool installed, the first time I used this I thought it was a little confusing on how it fit and where:
Basically, jack the vehicle up with jack stands on both sides of front. Turn the steering wheel so the wheels are straight. Turn the ignition switch and remove the key. The service manual says turn the switch to the lock position, but these vehicles do NOT lock the steering wheel when you pull the key out. At least mine doesn't. Then the tool goes in to keep the steeering wheel from turning. (or alternate plan).
So next step is to get the tires off:
See the snow covering the license plate? The fluid you see on the driveway is just melted snow, it warmed up that day nicely. It wasn't because I drank too much coffee. Personally once the vehicle is up I really push on it to make sure that it is steady before going under it. The car jack is just there for additional support, I'm not using it to hold up the vehicle.
Next, the outer tie rod comes off, here is my outer tie rod. First remove the nut on top:
I used some penetrating oil around that nut because it was rusty. According to my notes I used a deep well 13/16 socket for that nut. Next I put on a gear puller? (not sure of name) to put some pressure and pop the tie rod loose. Here is a shot below:
For one side, I just made it tight, and then lightly tapped with a hammer and it fell right out. (you are pushing the bolt down and out ). The other side fell right out once I started tightening things up with the puller.
Next, I measured the jam nut distance with my micrometer measure tool, see below:
Even though you are getting it aligned, it's still nice to be close. Especially if you need to drive it a few days before the alignment. (both sides get measured)
Next, loosen the jam nut. I used a 1 and 1/16 wrench along with a crescent wrench:
I had to hold both wrenches with one hand and take a picture with the other, this taking pictures thing gets in the way sometimes. Then the outer tie rod gets unscrewed and set aside. Remember to keep track of which side you take these off of. Below is an action shot:
Next step, remove the engine shield. The bolts for that thing are 13 MM:
Next remove the steering gear crossmember, it's the metal plate right below the steering gear:
There are 12 bolts total to come off. 10 are on the bottom, 5 on each side. These may take a while depending on how rusty you are. Keep track of which bolts go in which hole, some are different. Here is a shot of 5 on one side that need to come off:
Once you get these 10 off, if you are scratching your head why the crossmember doesn't fall off, there are 2 more bolts on the side. Here is a shot of my socket on one:
It's heavier than you expect.
Next you get to disconnect the intermediate steering shaft. Your steering wheel is secured and not able to be turned, right? First there are 2 seperate boots covering the shaft. You need to disconnect the upper boot. Here is a shot of the boots still together, I have circled where they join. Basically you just grab the upper boot and push up:
Here is me holding them apart. See the pinch bolt holding the upper intermediate shaft to the lower intermediate shaft? Guess what your next step is.
Correct! Remove the pinch bolt. 15 MM. I got to it from the outside like below:
Then seperate the shafts, because you are coming to what was for me the hardest part of this job. Pushing the lower boot up and off. Here is the boot before it comes off:
You have to grab the bottom and push it up and off. Mine was stuck on there really good. It was tough to get leverage, there is a notch preventing you from turning it a lot, and there is a lip inside holding it on, see those below:
Hopefully you will have better luck than me on this part!
When you get the boot off, you are left with the lower intermediate shaft accessible:
part 2 is next post


 Thank you for the time and effort with the pics and explanations. Before I get new tires I think I'm going to tackle this. Mine isn't leaking really yet but it's also 13 years old and I get some odd noises sometimes when turning. New rack, hoses would give me piece of mind.