"Hoping... For Loping..."

mrrsm

Original poster
Lifetime VIP Donor
Supporting Donor
Member
Oct 22, 2015
8,197
Tampa Bay Area
Almost as soon as I got my recently acquired 2000 Chevrolet Silverado parked out there in my driveway… I took the first opportunity to look over the engine compartment for the possibility of having more space to work around I than I was used to seeing with the 2002 TB. Then I had to do my homework and find out more about the history and layout of the 4.6L, 5.3L, 6.0L LS1 Engines… so I ‘Hit the Books’ using the two new shop manuals I have from Chilton and Haynes covering the 1999-2006 Full Size GM Pick Ups and then I watched quite a few Youtube Videos from “The Sloppy Mechanic” series and many others on the Camshaft and Valve Springs R&Rs and Tear-Downs of numerous Old LS Motors. I honestly had no idea how spacious and accessible the two Exhaust Manifolds and Engine Heads on the 5.3L Engine under the hoods of these larger trucks really are!

And now the idea of being able to change out a Camshaft without having to R&R the Intake Manifold or disturb the Heads is making me crazy to want to make some immediate upgrades with say… A Low-Lift, Low LSA (112? 114?) Camshaft/Valve Springs and some Shorty S/S Header Upgrades that will give my motor a “Slight Lope at Idle” and neither require any immediate Tuning Changes to the PCM to run in general… nor having to inSTALL a 2800-3000 RPM Higher Stall Torque Converter to keep it from crapping out when the Traffic Lights Turn Green. All I want to do is to drive this nice looking, Indigo Blue Pick Up Truck with a V8 motor around the CID size of “The Ol’ Chevy 327” ...making a Nice Lope at Idle, with a little Performance Bump up front so I can go to and from Walgreen’s… or perhaps to Walmart and back… and occasionally to the Gas Station and just enjoy myself for a change by simply getting to drive something that I really, really like.

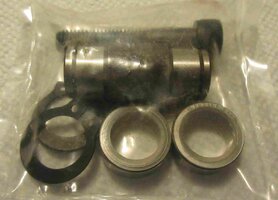
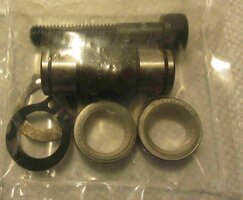
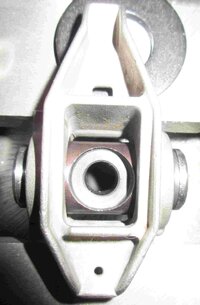
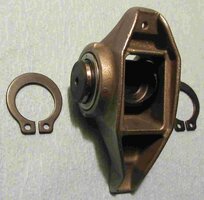
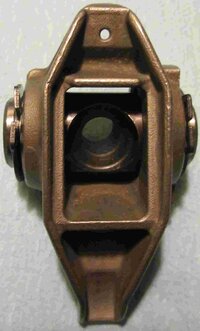
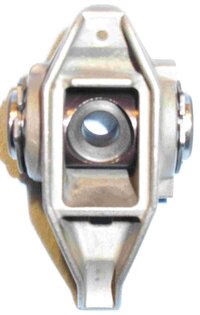
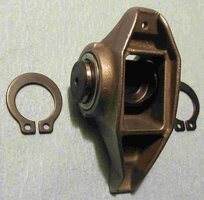
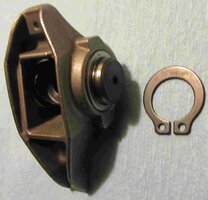
Never having had a GM LS V8 Engine with a Valve Train and Rocker Arm Assembly that are both accessible and serviceable with equal ease… I determined that they also lend themselves to being greatly upgraded with a simple, $100 Trunnion and Caged Needle Bearing Kit to improve what is probably the only serious Achilles Heel laying in wait up inside the Top End of these Engines. Each one of these OEM Rocker Arms contains 33 Unrestrained Needle bearings that can wreak havoc if allowed to come apart at any RPM and become distributed throughout the interior of these engines. But… Anybody with a “Bean” and a Bench Vise or a Small Arbor Press from HF and armed with some Common Sense can completely eliminate this very real threat in very short order and forever with a Kit that will ensure smooth Rocker Arm Action ...all the way up to 1,000 Horse Power:

… This is What the Kit Looks Like:
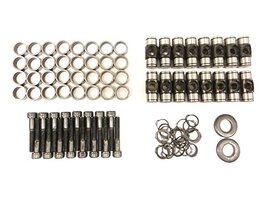
51WG3IdP3WL.jpg


… This is Where to get it:

https://www.amazon.com/dp/B075X5PQHN/?tag=gmtnation-20

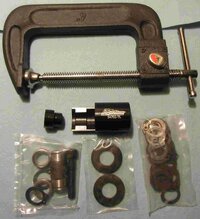
… This is a Comparison with the OEM Version on How to Rebuild them with an AMK covering the CompCam Kit from Summit:


As for the Camshaft and requisite Valve Spring Upgrade… Melling has come out with Two Cam and Valve Spring Kits that will not only provide a substantial bump in HP with a nice Lope at Idle… These do NOT require getting the PCM Tuned… Nor having to upgrade or replace the Torque Converter… although getting the Tune for the wider Air to Fuel Ratios and changing the Transmission Shift issues at the adjusted RPM levels would make sense. But if I do make these Mechanical Changes and I manage to ‘Get My Lope On...” and it drives me around the block and the neighborhood in good stead… I’ll be fine with that, too. Here is “George from Melling...” introducing these two Mild Performance Camshaft Kits (CS-MTC-7 and CS-MTC-8):


… And this is What the MTC-8 Camshaft Sounds Like… Loping at Idle in 2006 Sierra with a 4.8L LS Engine:


...Same Truck… Different viewing and listening angle:


Last but not least are… The Shorty Headers:

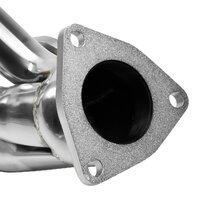
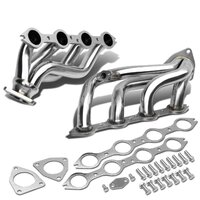
I keep seeing the Stainless Steel versions that run between $100-$200 on Amazon and eBay with varying looks and quality and some sketchy incompletion of the TIG Welding on many. When I can find one that has Quality S/S with Thick Head Flanges and completely circumferential Welds around the Primary Tubes… THAT will be the one I buy. But… I’m not interested in paying $450.00 for these Pipes… so only a Happy Compromise in the Price Range vs. Quality will make it happen.
 

Mooseman

Moderator
Dec 4, 2011
26,016
Ottawa, ON
I dunno if the self destruction of those rocker bearings is blown out of proportions because only people that have had problems with them, mostly those that modify their engines, talk about it, which would make it sound like they are failure prone. We don't hear from those that have run their vehicles for +200k miles without a single issue with them. However, thanks for pointing me to those on Amazon. I can get them from Amazon.ca at a comparable cost delivered to my door. This will be useful for my L77 '11 Caprice PPV that I do plan on camming.

I have heard that Comp. Cams' version is garbage if you happen to come across it. And I'd also be weary of those that use bronze bushings as they will wear down over time. I like the idea of captured bearings. I can't seem to find a lot of reviews on them though.
 

mrrsm

Original poster
Lifetime VIP Donor
Supporting Donor
Member
Oct 22, 2015
8,197
Tampa Bay Area
You're Welcome, @Mooseman... Anytime... Ordinarily, I wouldn't pull a hair with worrying about the Needle Bearings coming loose in those OEM Roller Rocker Trunnions... but they do look to have a weakness. Being as superstitious as I am about Engine Mods and knowing that I could've easily performed this R&R at the same time I'm replacing those Old LS1-LM7 Valve Springs with the New "LS6 OEM Style" Quality Valve Springs that comes with the Melling CS-MTC-8 Performance Camshaft Kit... I'd be kicking myself in (6) Months for not doing so when I had the chance if anything were to 'head' sideways in the Top End. I realize that my (18) Year Old Truck does have "Youthful Mileage" at only 72,654 Miles... but why Tempt The Fates? Besides that... Right Now...The Price is Right.

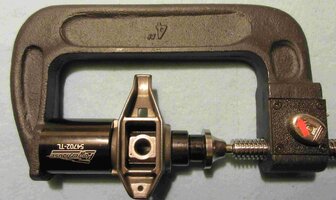
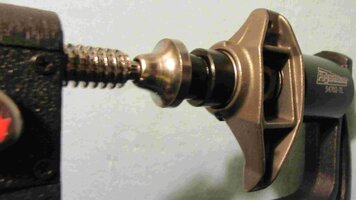
Just as an added FYI... Both Summit and Powerhouse Tools do sell Specialty Trunnion R&R Tool Kits that run between $36 and $50 ... and if it means making this transition much easier and whole lot more orderly with so many parts and pieces to pay attention to during these R&R procedures, it just might be worth the $$$. Have a look at how Cool this Powerhouse Tools LS Rocker Arm Trunnion Tool 54702-TL works:

 
Last edited:
  • Like
Reactions: Alfa-Norway

m.mcmillen

Member
Apr 29, 2016
556
Wisconsin
I'm not saying that they never cause problems but, I have 20 vehicles with a 6.0 engine and I've never had a single problem with a rocker arm. The mileage on these engines range from 60,000 miles to 250,000 miles. Most have 150,000+

The higher mileage ones have been starting to throw a random misfire code. I found that if check the misfire counters and then change the valve springs on the higher numbered ones and then do a cam/crank relearn, the problem goes away. If I was doing the work for someone I would change all of the springs but, it is fleet work and the higher mileage vehicles probably won't be around much longer.

Enjoy your truck!
 
  • Like
Reactions: Mooseman and mrrsm

littleblazer

Member
Jul 6, 2014
9,267
I'm not saying that they never cause problems but, I have 20 vehicles with a 6.0 engine and I've never had a single problem with a rocker arm. The mileage on these engines range from 60,000 miles to 250,000 miles. Most have 150,000+

The higher mileage ones have been starting to throw a random misfire code. I found that if check the misfire counters and then change the valve springs on the higher numbered ones and then do a cam/crank relearn, the problem goes away. If I was doing the work for someone I would change all of the springs but, it is fleet work and the higher mileage vehicles probably won't be around much longer.

Enjoy your truck!
The 2500HD has been treated as an on off switch for the last 210k. No problems to report yet. I do understand the worry though.
 

mrrsm

Original poster
Lifetime VIP Donor
Supporting Donor
Member
Oct 22, 2015
8,197
Tampa Bay Area
Of course... There doesn't seem to be very much in the way of empirical evidence to support my desire to just apply this repair... but my roots as a Military Mechanic and SAR Crewman go way back to 1970-1974 while being an Aviation Machinist's Mate in the USCG. On one scary occasion... I was having to write up a "UR" (Unsatisfactory Report) while inspecting the Five Blade Tail Rotor of one of our four Sikorsky HH3F Helicopters. While performing some 25-50 Hour Scheduled Maintenance on the Tail Rotor Spindle Turnbuckle Bearings-To- inserts measurements of this Bird... and even though it was Safety Wired in place... I was able to pull it completely free from its socket of one of the Blades. So I learned very early on with experiences like this ...to always Look Deeper and thereby... NOT suffer from any Failures of Imagination.

Consider it this way... At an idle of just 600 RPM... each Roller-Rocker in the LS Engine is actuating up and down at a rate of 5 Times Per Second. But at 6,000 RPM ... that translates to being 50 Times Per Second for each of the (16) Roller- Rockers with Grand Total of (1,056) Un-Captured Needle Bearings nested inside of all (16) Roller-Rockers...with a Known History of Failure in GM's OEM Trunnion Design. So if doing this Trunnion R&R completely eliminates this problem.. .AND ... perhaps even gives more rotational stability to the Valve Train via Smoothly Turning Roller-Rocker Arms... Then I'm good with that idea.

Oh... and about that 'Dearth of Evidence' on this subject... Check out what happened to THIS young man... who mentioned very early on his Multi-Part 500 HP "Budget" LS Engine Building Series... "I was thinking about replacing the Rocker Arm Trunnions using an Upgrade Kit... but right now I'm spending the Money on other parts...":.. Watch what happened to HIM. In the First Film...Speed Dial to 7:10 for the, "THIS CAN'T BE HAPPENING...!" In the Second Film... around 4:20 for the, "OH YES... IT CAN HAPPEN"...and in the Third Film it shows from their struggles and the amount of time they had to spend on the Trunnion Kit Upgrade as to WHY Using THE REAL Trunnion Tool is a Very Good Idea for doing this R&R:


Last edited:

mrrsm

Original poster
Lifetime VIP Donor
Supporting Donor
Member
Oct 22, 2015
8,197
Tampa Bay Area
I've finally decided to “Stop Moping… or Hoping for Loping”...and begin acquiring what I will need to actually accomplish this project before it comes time for me to Take A Dirt Nap. I think I've found a Better Deal on the LS Engine Full Trunnion Bearing Upgrade Kit than the one mentioned previously in this link below:

https://www.amazon.com/dp/B075X5PQHN/?tag=gmtnation-20

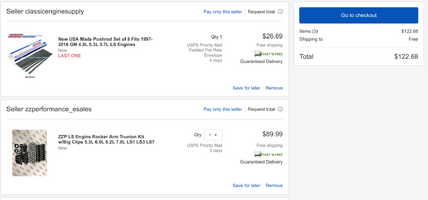
I checked around on eBay and found a Vendor that has sold almost 800 of these Trunnion Upgrade Kits for around $90.00 with Free S&H. I also I note that this Kit from "ZZPerformance" has the New, Larger Spring Steel Retaining Clips Upgrade that should prove sturdier and more to the liking of their Customers. I just became one of them… and while ordering the Kit… I also purchased the last available low cost LS Engine Push Rod Kit made by Elgin from "classicenginesupply" as well.

This what I picked up instead… from eBay:
RRTRUNNIONKITPLUSPUSHRODS.png


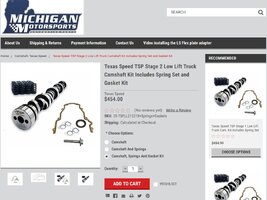
#1 on the Runway next will probably be looking closely at the Texas Speed Stage 2 Low Lift 212/218, .550"/.550" 112 LSA Camshaft Kit that will … L^^o^^^p^^e along... Just Enough … without demanding any change to a Higher Stall Torque Converter and have a set up that will be interesting to drive and listen to… and still have the Motor behave itself on the Street.

TEXASPEEDTSPCAMVIAMMS.jpg

https://www.michiganmotorsports.com...shaft-kit-includes-spring-set-and-gasket-kit/

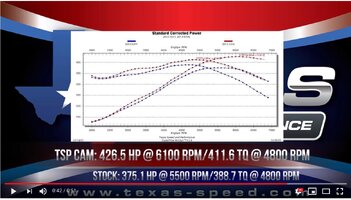
This is how the Cam performs on the Dyno (Modified Intake and Headers NOT installed on my LS):

TEXASPEEDTSPCAM.jpg


And THIS is how it sounds when at Idle inside of the smaller 4.8L Engine:

 
Last edited:

Reprise

Lifetime VIP Donor
Supporting Donor
Member
Jul 22, 2015
2,724
Missed the start of this thread...but since it looks like we're going to have similar projects, I'll chime in from my end...

I'm going to swap out the bumpstick in my 6.0L, with a tow cam. But I'm going to freshen up a few other things along the way, as I've got over 3x the mileage on your 'cream puff' (at 72K, that motor qualifies!)

I'll keep things on the 'brief' side (for me), as I'm going to be running my own thread. No, we won't be in a race to see who gets done first - I'm busy with other stuff the next 2-3 weeks. But I did get my trailer back from the dealer & back in storage - so I can finally start my 'summer project' and have it ready for the fall. And before I start any of that, I need to drain the oil and have it analyzed (see my earlier post on how I found the oil plug a couple months ago) - I'm not going to sink $$$$ into a motor that is showing excess wear on the bottom end.

I'm going to do cam / lifters / springs, and since that means pulling the heads, I found a set of 317s (stock 6.0 head) that had been rebuilt w/ a 3-angle valve job, for $280. Explored swapping to 243s, 799s, or even 706s, but after speaking to a couple of people, decided to stick with the stockers. That'll keep compression low, allow me to not worry about octane requirements, and, should I decide I want...er...'need' more...lol...I'll be in a good spot for boost. Stock height head gaskets, too.

Originally, I was going to also go with a TSP cam - 212/218, .550 lift, 114 LSA. I've since decided to go with a Comp 'XFI Xtreme Truck' model (206/212 @ 50 .513..520 lift 115 lsa with +4 advance). Springs will be the GM LS6 'blues', just like you're doing. Those are good to .550

Before I order the cam, however, I'm going to remove the old one. Why? Because I have a sneaking suspicion that it may have been 'upgraded', already. Just a hunch, based on the difference in 'feel' between my old Sierra and this one.

When I contacted TSP, they advised that a tune was going to be required - so don't be surprised if you have to go the same route.

I can reuse stock pushrods, but will get a set of CrMo in stock 7.400 I may also get the pushrod length checker, just for peace of mind. I haven't yet decided on lifters - I'll either go with the GM LS6 versions, or Comp's version of the same thing. I'll also put new lifter trays in.

The nice thing about the LS valvetrain is that lash is 'automatic' - a far cry from when I did a head swap in my SBC-equipped '75 Camaro, many many years ago.

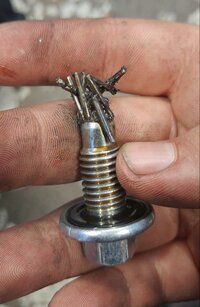
Yes, I'm going to install a trunnion kit - as @Mounce 's photo shows, the bearings can be an issue even in a stock motor. Brian Tooley Racing has a nice video on YT on how to replace them, and it turns out his pricing is pretty aggressive, too - so I may go with his offering.

Bolts will be ARP - yeah, they're a little pricey, compared to the OEM, but I expect to be able to avoid 'torque + degree' tightening on both the head & crank bolts. They're also reusable, should I ever need to go in again.

Since you're not replacing lifters, be careful when removing the cam - make sure you spin that thing around a few rotations to seat the lifters in the trays before putting your retainers in. The last thing you want to hear is the 'clink' of one of them dropping down into the windage tray.

As I'll be removing the timing set, I'll replace with an LS2 chain, and depending on any observed wear, the gearset. You don't 'have' to remove the oil pump, but it sure makes it easier to do so. I'll put in a Melling HP/HV model. Since I'm that far, there's a good chance I'll pull the oil pan and replace the gasket on that, as well. Same for the oil cooler gasket, since they're so prone to leakage.

As for headers...I've been considering the 'shorty' ones, too - but supposedly, they don't improve things that much over the stock manifolds. Found out a few weeks ago that due to GVWR of my truck, that it's exempt from emissions testing. That opens up a lot of other possibilities for me (although I still want to use cats). For now, I'm going to keep things 'as-is' WRT exhaust, and re-evaluate once I get everything done.

And to top everything off, I'll finally get to install the TBSS intake that I originally got for the Envoy. I have the throttle body for it, as well, but may run the stock one, with an adapter.
 
  • Like
Reactions: mrrsm

littleblazer

Member
Jul 6, 2014
9,267
Missed the start of this thread...but since it looks like we're going to have similar projects, I'll chime in from my end...

I'm going to swap out the bumpstick in my 6.0L, with a tow cam. But I'm going to freshen up a few other things along the way, as I've got over 3x the mileage on your 'cream puff' (at 72K, that motor qualifies!)

I'll keep things on the 'brief' side (for me), as I'm going to be running my own thread. No, we won't be in a race to see who gets done first - I'm busy with other stuff the next 2-3 weeks. But I did get my trailer back from the dealer & back in storage - so I can finally start my 'summer project' and have it ready for the fall. And before I start any of that, I need to drain the oil and have it analyzed (see my earlier post on how I found the oil plug a couple months ago) - I'm not going to sink $$$$ into a motor that is showing excess wear on the bottom end.

I'm going to do cam / lifters / springs, and since that means pulling the heads, I found a set of 317s (stock 6.0 head) that had been rebuilt w/ a 3-angle valve job, for $280. Explored swapping to 243s, 799s, or even 706s, but after speaking to a couple of people, decided to stick with the stockers. That'll keep compression low, allow me to not worry about octane requirements, and, should I decide I want...er...'need' more...lol...I'll be in a good spot for boost. Stock height head gaskets, too.

Originally, I was going to also go with a TSP cam - 212/218, .550 lift, 114 LSA. I've since decided to go with a Comp 'XFI Xtreme Truck' model (206/212 @ 50 .513..520 lift 115 lsa with +4 advance). Springs will be the GM LS6 'blues', just like you're doing. Those are good to .550

Before I order the cam, however, I'm going to remove the old one. Why? Because I have a sneaking suspicion that it may have been 'upgraded', already. Just a hunch, based on the difference in 'feel' between my old Sierra and this one.

When I contacted TSP, they advised that a tune was going to be required - so don't be surprised if you have to go the same route.

I can reuse stock pushrods, but will get a set of CrMo in stock 7.400 I may also get the pushrod length checker, just for peace of mind. I haven't yet decided on lifters - I'll either go with the GM LS6 versions, or Comp's version of the same thing. I'll also put new lifter trays in.

The nice thing about the LS valvetrain is that lash is 'automatic' - a far cry from when I did a head swap in my SBC-equipped '75 Camaro, many many years ago.

Yes, I'm going to install a trunnion kit - as @Mounce 's photo shows, the bearings can be an issue even in a stock motor. Brian Tooley Racing has a nice video on YT on how to replace them, and it turns out his pricing is pretty aggressive, too - so I may go with his offering.

Bolts will be ARP - yeah, they're a little pricey, compared to the OEM, but I expect to be able to avoid 'torque + degree' tightening on both the head & crank bolts. They're also reusable, should I ever need to go in again.

Since you're not replacing lifters, be careful when removing the cam - make sure you spin that thing around a few rotations to seat the lifters in the trays before putting your retainers in. The last thing you want to hear is the 'clink' of one of them dropping down into the windage tray.

As I'll be removing the timing set, I'll replace with an LS2 chain, and depending on any observed wear, the gearset. You don't 'have' to remove the oil pump, but it sure makes it easier to do so. I'll put in a Melling HP/HV model. Since I'm that far, there's a good chance I'll pull the oil pan and replace the gasket on that, as well. Same for the oil cooler gasket, since they're so prone to leakage.

As for headers...I've been considering the 'shorty' ones, too - but supposedly, they don't improve things that much over the stock manifolds. Found out a few weeks ago that due to GVWR of my truck, that it's exempt from emissions testing. That opens up a lot of other possibilities for me (although I still want to use cats). For now, I'm going to keep things 'as-is' WRT exhaust, and re-evaluate once I get everything done.

And to top everything off, I'll finally get to install the TBSS intake that I originally got for the Envoy. I have the throttle body for it, as well, but may run the stock one, with an adapter.
I was going to say to get something a little better than the beehives, then noticed the cam you were planning on running... They don't like the 224/230 in the red truck much above 5800 but with a mild cam are more than enough. :cool:
 
  • Like
Reactions: mrrsm

Reprise

Lifetime VIP Donor
Supporting Donor
Member
Jul 22, 2015
2,724
I was going to say to get something a little better than the beehives, then noticed the cam you were planning on running... They don't like the 224/230 in the red truck much above 5800 but with a mild cam are more than enough. :cool:
Yep - it's a 'low lift'. Emphasis on the grunt, not on the HP :smile:
 

littleblazer

Member
Jul 6, 2014
9,267
Yep - it's a 'low lift'. Emphasis on the grunt, not on the HP :smile:
Oh its got grunt... That's why the 4l80e grenaded yesterday. :laugh: You did it right, heads and intake dictated the correct cam to use, that should be matched up very well imo.
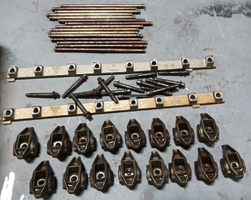
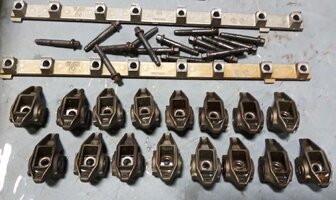
Edit: I always wondered why it cranked as slow as it does... as it turns out, cranking compression on the thing is like 185 psi. It's pretty wild actually.
 

Reprise

Lifetime VIP Donor
Supporting Donor
Member
Jul 22, 2015
2,724
Hmm...that's funny - mine fires right up almost instantly, once I put the new battery in. The old 6.0 I had would crank for a second or so (w/ new battery as well).

I know I've got good compression/ power (just not 'how' much).

Sorry to @MRRSM for hijacking his thead)
 

mrrsm

Original poster
Lifetime VIP Donor
Supporting Donor
Member
Oct 22, 2015
8,197
Tampa Bay Area
Hi-Jack away, Brother... TMCK... (To My Certain Knowledge) You're the only other presently posting Member who can Take The Heat Off of ME for being so Damned 'Long in The Tooth' when trying to write in as much relevant 'On Topic Detail' as possible. Besides my closely watching Videos of On Topic Stuff... the only other way I can improve my understanding is to Read As Much As I Can of The Thread from our GMTN... as I do like learning so very much while appreciating what they do as well. My fervent hope is that since you actually USE your Truck for its intended purposes... that you will Beat me to the Project Finish Line...by at LEAST 10 Trailer Lengths. :>)

About the need to use a Push-Rod Length Tool: The only reason you would need to do that is if the Base Circle on your New Camshaft turns out to be different from the OEM 'Stock-As-A-Clock' version. Otherwise, the Stock Length Chrome-Moly Steel Push-Rods should be able to handle all that "Push and Squeeze" just fine.

You are right about my truck as being that Rare Bird that was "Gently Handled" over the past (19) Years. The proof comes from what I just noticed as a Transmission Service Sticker on the Left Front under-hood area yesterday that read:

30,642 Miles.... Changed Transmission Fluid & Filter 05/2006.

I had to think about that for a minute... By that First (6) Year Metric... On average... the Previous Owner drove the vehicle less than (14) Miles Per Day. But even more astonishing is that for the balance of the (12) years that he covered an additional 42,225 Miles right up until I bought it just over a year ago... his Daily Driving Mileage only amounted to being around (9.6) Miles Per Day. Hell... I just about put that much mileage on my Cane walking to and from the mail-Box each afternoon!

So all of that information would strongly indicate why the Truck drives so nice and strong... and also why making any performance changes to my "Y2K Silverado" (AKA Double Aught...00) makes very good sense. Presently, the truck is NOT a DD... and represents more of a Sweet Mechanical Plaything for an Old Man whose pulse still quickens at the sound of even a Slightly Radical Cam inside of ANY Chevrolet Engine. This work is strictly meant to pique my need for some 'Vanity Performance' and I just want that to feel that same rumbling, staccato sensation happening under the hood of My Truck and in the seat of my pants as I Step On The Gas.

One other consideration for those considering installing the High Lift Cams at or above .550 is that the Stronger Dual Springs undergo MUCH more stress and actually demand full replacement at between 10-15,000 Miles. Otherwise... you can look for them to work harden early and begin fracturing.


As for any required Tune... I may as well pick up another PCM if I can locate one and work out the Cam Card Profile and RPO Data for a "Tune Sheet" and figure out who can best "Put The Music to the Motor" with a New Tune if necessary. I'll be honest with everybody... If I had to Pull the Transmission to Swap in a Higher Stall Torque Converter... I would Shine this Project On... and let the whole notion pass me by. FWIW... Staying in the "Low Lift" arena for any DD Performance Camshaft and Valve Spring Upgrade in our Trucks might make a whole lot of sense to more owners if they completely realize all of the "unintended consequences" that come right along of doing this kind of upgrade work...in the Extreme.
 
Last edited:

Mooseman

Moderator
Dec 4, 2011
26,016
Ottawa, ON
You're the only other presently posting Member who can Take The Heat Off of ME for being so 'long in the tooth' when trying to write in as much 'On Topic Detail' as possible.

You're both replying to each other??? We're gonna have to increase server storage space! :laugh:
 

Reprise

Lifetime VIP Donor
Supporting Donor
Member
Jul 22, 2015
2,724
You're both replying to each other??? We're gonna have to increase server storage space! :laugh:

Hey! I resemble that remark! :laugh:

Chalk it up to both of us being intellectually curious, I suppose.

At least I kept my pics off the server this afternoon - which reminds me...I need to xfr, resize and upload them. 'Cos my '03 and the OP's '05 from the other thread are two different animals.
 
  • Like
Reactions: mrrsm

mrrsm

Original poster
Lifetime VIP Donor
Supporting Donor
Member
Oct 22, 2015
8,197
Tampa Bay Area
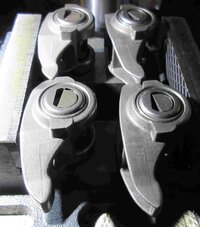
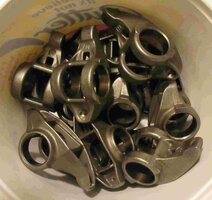
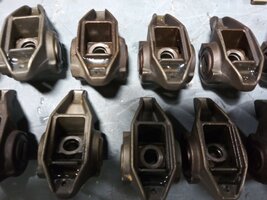
Okay... while awaiting the arrival of the GM 5.3L Trunnion Upgrade Kit... I was pondering the fact that in the absence of having (16) GM OEM Roller Rocker Arms... that would mean that I'd have to wait until I pulled them off of both of my LM7 Engine Heads and have everything opened up and undone while going through the process of taking each (8) Roller Rocker Set Bank completely apart... then cleaning all (16) RRs individually down to Bare Metal and THEN installing the New Bearings and Trunnions, etc.

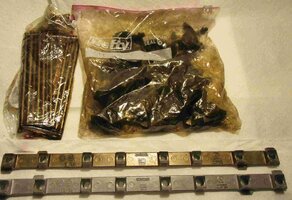
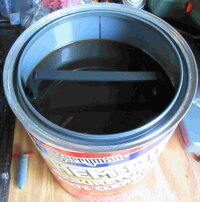
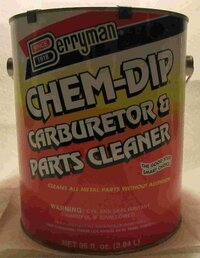
So instead... I decided to "Plow The Field" ahead of time over at eBay looking for an appropriate Used Set of GM 5.3L RR's since "You Can't Make Bricks ...Without Straw..." and I found just a few sets still available that were reasonably priced at around $65.00 with Free S&H. I pulled the trigger on the cleanest and most complete set I could locate that included the Racks and the Push-Rods as well. When these get here... I can let them take a nice, leisurely Deep Soak in a Fresh Bucket of Berryman's Carb Cleaner after disassembly of the' Rocker Racks' and then re-assemble them, piece by piece, whenever I feel like it as I continue acquiring the requisite necessary components for this Project.

I'm still debating whether or not to order the Trunnion Kit Rebuild Tool I mentioned quite a few posts back along with the showing the Videos from either CompCam or from Summit Racing as to how that tool works. I'd actually rather use something like THAT instead of having to play around while using Sketchy Fitting Sockets along with one of my New Drill Press Vises to "Put The Squeeze" on the Old GM Trunnion Caps to press them out and get rid of all that Old Hardware. Likewise... When I'm ready... I can install the New Ones correctly inside of each Roller Rocker.,, and STILL be driving my "Y2K Silverado". These images show what's coming from eBay:

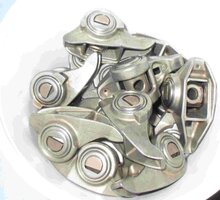
OLDROLLEROCKERS1.pngOLDROLLEROCKERS2.jpgOLDROLLEROCKERS3.jpg

@reprise… You will definitely need to consider getting this CompCam ‘Fast Flash Tuner” Part #170327 to be able to make necessary performance adjustments designed specifically for the GM Later Model V-8s. This PDF explains all of what it can do...and while I’m thinking about it… THIS featured Flasher might turn my head towards getting a CompCam Camshaft Kit… IF … They sell one that does NOT require installing a Performance Torque Converter as well. Otherwise … I’ll still be taking my chances with the TSP 212/218 Flavor Cam Kit.

You might want to Download and Keep this On Topic Document... and I'd like to call special attention of this Read to @Blckshdw ...as he had a Thread a few years back that discussed adjusting the PCM for Tire Size Increases that "Skewed & Screwed" the behavior of the Speedometer. THIS thing looks like it can address those issues over a very wide range of Tire Heights ...and it does it in 1/4" Increments!:

http://www.compcams.com/Technical/Instructions/Files/170327.pdf

Food For Thought...

This Later Model CompCam Fast-Flash Part # 170382 GM PCM Flasher is available from Colorado Speed at a Substantially Reduced Price:

https://www.coloradospeed.com/pcm-tuning-c-2902_1916_2217/fast-flash-power-programmer-p-3714.html

...and another for even a bit less:


..and this one is being offered from an eBay Vendor in “The Land Down Under” for substantially less Money in U.S. Dollars as well... But I cannot swear that it will perform as advertised in the PDF like the Model # 170327 shown therein. THIS flavor is about $100.00 Cheaper… But Australia is one Helluva Ways Off if you need to make any Returns… :>)

http://rover.ebay.com/rover/1/711-5...0001&campid=5338077216&icep_item=252274363888
 
Last edited:

mrrsm

Original poster
Lifetime VIP Donor
Supporting Donor
Member
Oct 22, 2015
8,197
Tampa Bay Area
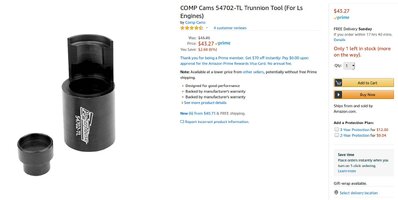
As per the Comp-Cam Video in Post #3... I pulled the trigger at Amazon tonight and purchased the Powerhouse Model # 5407-TLLS Trunnion R&R Tool... On Sale for $43.30 (Saved a Few Bucks...):


COMPCAMLS5407TLTRUNNIONTOOL.jpg


MUCH better than using the complicated methods used in Post #6 ...3rd Video. :>)


...and for anyone who wants a very comprehensive look at how a wide variety of CompCam Camshafts vs. Exhaust vs. Cubic Inch Displacement ( or Liters-litres ... if you prefer) compare... this Link is very edifying:
 
Last edited:
  • Like
Reactions: C-ya

mrrsm

Original poster
Lifetime VIP Donor
Supporting Donor
Member
Oct 22, 2015
8,197
Tampa Bay Area
I thought it would make sense to “Glom” together all of the following information, since the ENTIRE process of Increasing Overall Performance really is a Nose to Tail proposition; eventually requiring that ALL of these areas be addressed:

THIS is My Favorite Cammed Y2K Silverado Flick:


And Three Other Nicely Cammed Silverados:


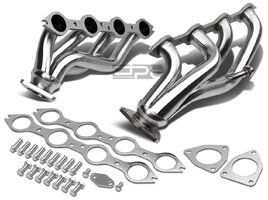
$150.00 OBO DPT Shorty Exhaust Manifold Header Stainless (Supposedly) Fits the 99-05 Chevy GMC Silverado Sierra:

http://rover.ebay.com/rover/1/711-5...0001&campid=5338077216&icep_item=110918041506

DPTSTAINLESSHEADERSWITHEGR53L.jpg

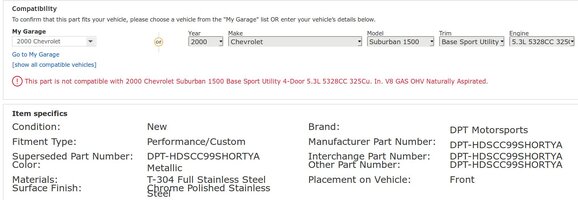
However… In Spite of having the Required EGR Port… AND Meeting THESE parameters… when checking the Year-Make-Model… eBay Red Texts the Comment… and so it raises the Most Important Question:

WILL THESE HEADERS BOLT ON MY Y2K SILVERADO 5.3L ENGINE... AND WORK PROPERLY?

REDTEXTINCOMPATIBILITYWITHY2KSILVERADO.jpg


Video of Full Size Truck 6.0l Version of Similar Shorty Headers being Installed:


Best Videos for the R&R of New Camshaft Swap and the R&R of New Valve Springs:

https://www.youtube.com/watch?v=WMpO258Fw5s
https://www.youtube.com/watch?v=odpNeFYKcvc

Best Image of the Procedures (Option B) for Finding TDC on TWO Cylinders at a Time to perform the Safest 4.8L,5.3L, 6.0L Valve Springs R&R:

HOW2SETDC4VALVESPRINGREPLACEMENTBEST.jpg

Elgin PR-614S Stock Push Rods can be found via THIS Catalog:

http://www.elginind.com/wp-content/uploads/2018/12/Elgin-2018-LSEngine-8pg-Brochure.pdf

Here is a Silverado with the Stock 5.3L Engine, Stock Cats, Stock Resonator AND a Flowmaster 44 - 1 into 2 - Dual Tail Exhaust:

https://www.youtube.com/watch?v=fobTpzrf-Sg

But… arguably, The BEST Muffler I think will turn out to be the BORLA S/S XR-1. I think it would make a REAL Compliment after having this Guy's Silverado Cammed because it just Sounds So Damned GOOD Already!. Check out how EZ the Thing installs... and How Nice and Deep it Rumbles... without the added problem of making his Neighbors MAD.

https://www.youtube.com/watch?v=m3Uikzxf6Lw
 

Mounce

Member
Mar 29, 2014
13,667
Tuscaloosa, AL
Personally I'm a fan of the cheapo muffler delete route like I've done on my truck. Sounds basically the same to me... Very similar to the last video anyways, also the only one I watched since you rated it highest lol. Close enough anyways for being the cheapest exhaust mod possible. (stock 03 LM7 with muffler delete only)

Pardon the lame videos, I'm here for sound only.


mrrsm

Original poster
Lifetime VIP Donor
Supporting Donor
Member
Oct 22, 2015
8,197
Tampa Bay Area
LOL ... I think you're right... Thanks for all the Vidz and Soundz. If I did the Muffler, Resonator Delete as you suggest... I could just drop in the Borla XR-1 Stainless Muffler and satisfy all the performance demands (including those of the Local Cops and 'Sound Abatement Nazis' as well...)

I think I just found the One and Only CORRECT (inexpensive, too) S/S Shortie Header Set that WILL Work on the Y2K Truck:


SHORTYSTAINLESS2.jpgSHORTYSTAINLESS3.jpgSHORTYSTAINLESS4.jpgSHORTYSTAINLESS6.jpgSHORTYSTAINLESS1.jpgSHORTYSTAINLESS5.jpg
 

Mounce

Member
Mar 29, 2014
13,667
Tuscaloosa, AL
Very well could drop in the muff. Was just showing you a cheaper alternative with basically the same straight through sound. But I can understand needing at least some kind of can under there to make the officials happy.

I'm assuming you'll go cat-less y-pipe? I'll be interested to see how that sounds if so. Seems like these trucks only go so loud with the factory cats but once removed or gutted they get super raspy. (at least that's what I recall from my research over a year ago and on factory cam etc trucks)
 
  • Like
Reactions: mrrsm

mrrsm

Original poster
Lifetime VIP Donor
Supporting Donor
Member
Oct 22, 2015
8,197
Tampa Bay Area
Can't go CATLess... even though presently... There are No Annual Smog Inspections in Florida... But now that I've mentioned that status out loud... The Mopes up in Tallahassee will probably Burn the Midnight Oil to change things Back to the Old Ways.... DAMN!

The actual concerns have to do with avoiding incurring family health problems... so trying to tolerate those untreated, highly noxious fumes unnecessarily is simply out of question.

If you are fortunate enough to live well into your 70s ...and beyond... you will remember discussing this subject and appreciate following an abundance of caution. Nonetheless... everything else covered so far, performance wise for upgrades, is still up for grabs. Time and Money will dictate what and how much of it can be accomplished.
 
Last edited:

littleblazer

Member
Jul 6, 2014
9,267
The "mufflers" on the red truck get old after a while. (Race bullets dumped down after the cats through dual 2-3/4 pipe from the manifolds...) Something about being able to hear the truck from a mile away inside the house with the windows closed does wear on you after a while. It's still amazing but it's also nice to have a conversation with a customer without having to shut the truck off. :rotfl:
 
  • Like
Reactions: Redbeard and mrrsm

mrrsm

Original poster
Lifetime VIP Donor
Supporting Donor
Member
Oct 22, 2015
8,197
Tampa Bay Area
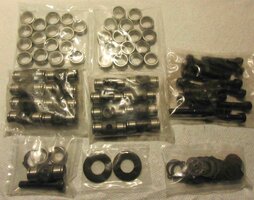
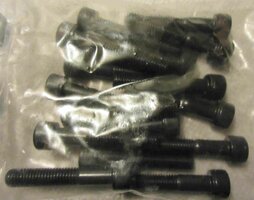
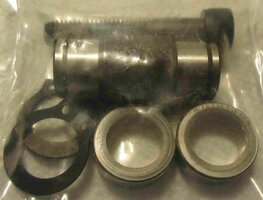
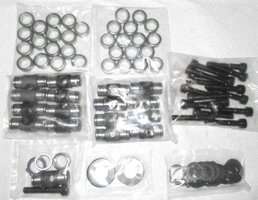
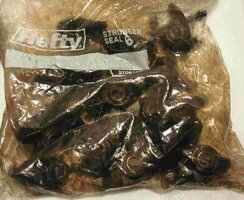
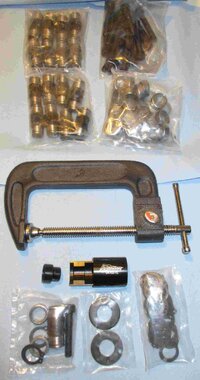
Okay... Yesterday afternoon... The Trunnion Upgrade Kit arrived with VERY FAST FREE S&H... and the Shipped Parts Tally is COMPLETE and as Follows:

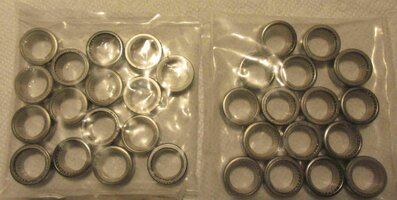
(16) Fully Encased "Trapped" Needle Style Roller-Bearings.
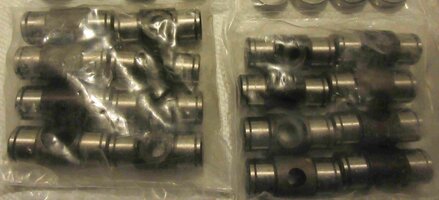
(16) Roller Bearing "Full Barrel" Trunnion Axles with Proper Center Rack Mount OEM Design.
(16) 'Grade 8' Blued Steel, Hex-Wrench Style Roller-Rocker Arm Bolts.
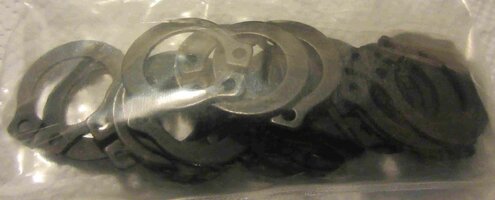
(16) HUGE (FAT) Blued Spring-Steel Retainer Trunnion Locking Rings.
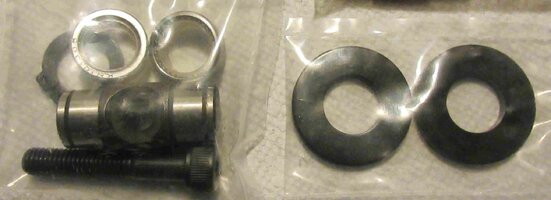
(2) Two LARGE Assembly Washers for use during "General Assembly".


Plus.... Wait For It....

One Complete Set of Everything Mentioned Above as a Back-Up--> FREE in the Kit.

Now I'm just waiting for the Set of (16) Old Roller Rockers from my eBay purchase AND The CompCam Roller-Rocker Arm Trunnion Rebuild Tool via Amazon to arrive, so I can clean them all up in a "Berryman's B-12 Bath"... Dry them off and after wiping them all down, while I'm perfectly at my leisure... I'll assemble all of this inexpensive "Peace of Mind" using everything listed above... plus a Small Carpenter's Vise ...while I'm sitting on my couch watching TV. :>)

Bit By Bit... We'll 'Get 'er Dunn...'

By the Way... All of this Stuff collected together is Well-Made and suprisingly HEAVY as Hell! Here is what this Gear looks like while still inside of the "Protective, Oily Plastic Bags":

ROLLERROCKERUPGRADES1.jpegROLLERROCKERUPGRADES2.jpegROLLERROCKERUPGRADES4.jpegROLLERROCKERUPGRADES5.jpegROLLERROCKERUPGRADES6.jpegROLLERROCKERUPGRADES7.jpegROLLERROCKERUPGRADES8.jpegROLLERROCKERUPGRADES9.jpegROLLERROCKERUPGRADES3.jpegROLLERROCKERUPGRADES10.jpeg
 
Last edited:

Mooseman

Moderator
Dec 4, 2011
26,016
Ottawa, ON
One Complete Set of Everything Mentioned Above as a Back-Up--> FREE in the Kit.

What??? That doesn't make any sense. You think it might be a packing error instead?
 

mrrsm

Original poster
Lifetime VIP Donor
Supporting Donor
Member
Oct 22, 2015
8,197
Tampa Bay Area
Nope... The other Items were all discreetly packed within their own groups... that Last Kit contained One of Each Item (except for the Two Assembly Washers) ...and this 'One of Each Lot' arrived sealed up inside One, Smaller Plastic Bag. So apparently... they intended upon including one additiona item of everything that would be critical for completion of the R&R and I suspect ,just in case of ANY Loss or Damage by the Customer(s) to any one of these Items during assembly. In any case... It seems like a generous as well as a practical consideration from a business perspective... Don't You Think?
 

Mooseman

Moderator
Dec 4, 2011
26,016
Ottawa, ON
Oh so it's basically parts for ONE rocker rather than 16. Is there a country of origin? Ebay listing doesn't say.
 

mrrsm

Original poster
Lifetime VIP Donor
Supporting Donor
Member
Oct 22, 2015
8,197
Tampa Bay Area
Yes... One Complete Set of Parts for One Roller Rocker Arm. Regardless of their point of origin... there seem to be ample artifacts indicating quality and care in Manufacture as these Roller Bearing Needle casements are stamped with some complex name/number on the edges and they all appear to be made of either Stainless or Nickel Chromium Steel. Each is fitted with a clear plastic oil retainer to protect the needle bearings within prior to installation. Also... all of the Trunnions are very finely finished and painted and bear no manufacturing defects, cracks or unsmooth edges of their margins, either.

It seems entirely possible that these could have an overseas origin... but there also appears to have been 800 satisfied eBay Customers (plus my order) which would indicate at least a high average in Customer Satisfaction. This is like anything else... when trying to make a comparison to things manufactured in Canada or the USA... most of the time things will be of much better quality if made here. But my main reasons for doing this have been completely satisfied ...merely due to this product's improved design over the Stock GM OEM Components that have been problematic enough to fail... and God Knows that they were either made in Mexico...or Made in China... however infrequently the case for failure may be. Having those Damned Fine Needle Polished Steel Bearings completely encased and trapped inside of THESE Trunnion Sets gives me more Peace of Mind about using them instead.

Also... based upon prior Customer feed back... the ZZPerformance Company decided on their own to respond to requests for Product Improvement by INCREASING THE SIZE OF THE BLUE SPRING STEEL Retention Clips that hold the Trunnion Barrels in stasis on either side of the Roller Rocker Arms. Judging by comparison with those similar but smaller Spring Steel Clips made by the Stateside Michigan Company from the other eBay offer for this similar Trunnion Kit... I really much prefer this version as a serious upgrade.

So far... All of the high water Marks have been met by what they sell... and I cannot wait to continue with assembling all of this stuff into and onto the GM OEM Roller Rocker Arms and show some more images of what these look like when their builds are completed. I will be using Permatex "Ultra-Slick" Engine Assembly Lube to pre-lube the Needle Bearings and the Trunnion Barrels to give them there Baptism in Lubricant prior to installing these all on the LM7 Engine Heads and cranking over the engine after the Performance Camshaft installation is complete.
 
  • Like
Reactions: Mooseman

mrrsm

Original poster
Lifetime VIP Donor
Supporting Donor
Member
Oct 22, 2015
8,197
Tampa Bay Area
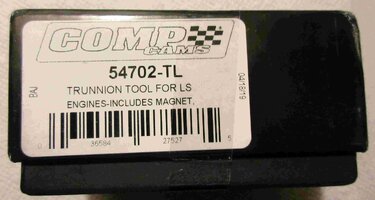
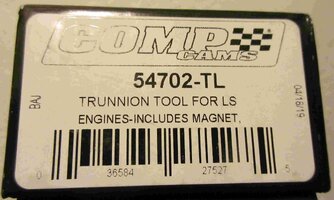
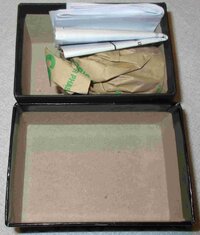
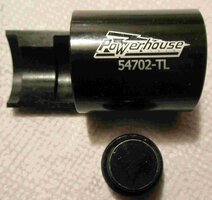
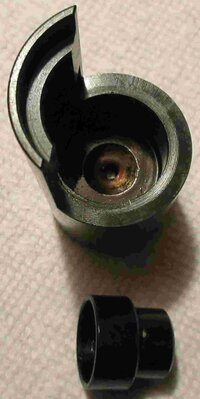
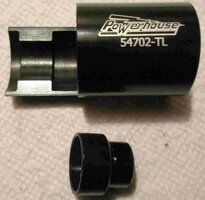
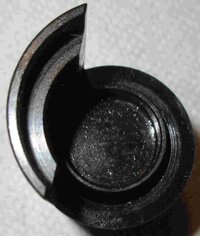
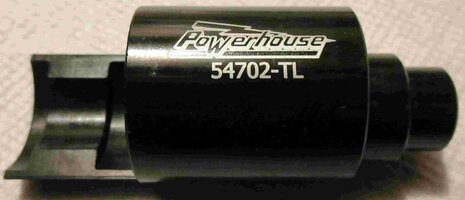
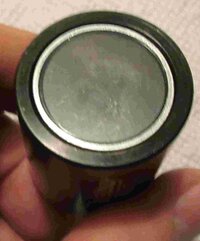
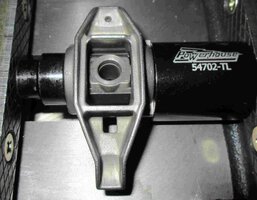
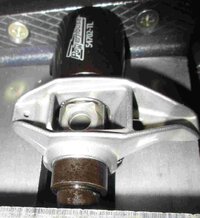
Okay... The CompCam Trunnion Tool for LS Part# 54702-TL Made by Powerhouse Products arrived in short order today... and I just took a few "Beef Cake" Shots of this Very Well Made Tool Kit and likewise, scanned its Very Well Covered, 'Fool Proof ...if You RTFM' Paper Documentation (...which is NOT available as a .PDF Download File on "The Internets") in order to memorialize this product here at GMTN for anyone who wants to Simplify, Standardize ...and Perfect this Trunnion Re-Build Procedure for their own LS Builds using this Kool Kit from KompKam... :>)

COMPCAMTRUNNIONTOOL1.jpegCOMPCAMTRUNNIONTOOL2.jpegCOMPCAMTRUNNIONTOOL3.jpegCOMPCAMTRUNNIONTOOL4.jpegCOMPCAMTRUNNIONTOOL5.jpegCOMPCAMTRUNNIONTOOL6.jpegCOMPCAMTRUNNIONTOOL7.jpegCOMPCAMTRUNNIONTOOL8.jpegCOMPCAMTRUNNIONTOOL9.jpegCOMPCAMTRUNNIONTOOL10.jpeg

Sorry about having Four Separate PDF Files... but I was unable to load these as a single, 4 Page PDF Document because it was TOO LARGE. But... For Linux Mint (Debian Based) and UBUNTU Users, to MERGE all of these into One PDF... Follow These Instructions that employ the PDFUNITE feature of the Linux Poppler-Utils APP:

Open a Terminal and Copy-Paste these separately:
sudo apt-get install poppler-utils
Press <Enter>
Key in Your Password:

********
Press <Enter>
...To Get a List of the Files and Folders... Key i
n:
ls
Press <Enter>
Now...to Change to the Directory with these files... Key in:

cd NAME OF DIRECTORY WITH THE ATTACHED PDFS
Press <Enter>
...then Copy-Paste this entire line:

pdfunite COMPCAMTRUNNIONTOOL1.pdf COMPCAMTRUNNIONTOOL2.pdf COMPCAMTRUNNIONTOOL3.pdf COMPCAMTRUNNIONTOOL4.pdf COMPCAMTRUNNIONTOOLALL.pdf
Press <Enter>
Now you have all (4) Separate Pages combined as:

COMPCAMTRUNNIONTOOLALL.pdf

Done!
 

Attachments

  • COMPCAMTRUNNIONTOOL1.pdf
    994.2 KB · Views: 6
  • COMPCAMTRUNNIONTOOL2.pdf
    1 MB · Views: 3
  • COMPCAMTRUNNIONTOOL3.pdf
    980.6 KB · Views: 3
  • COMPCAMTRUNNIONTOOL4.pdf
    935.1 KB · Views: 1
Last edited:

mrrsm

Original poster
Lifetime VIP Donor
Supporting Donor
Member
Oct 22, 2015
8,197
Tampa Bay Area
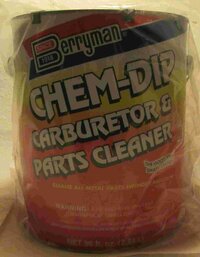
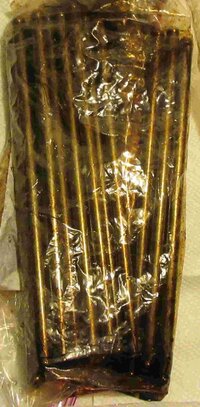
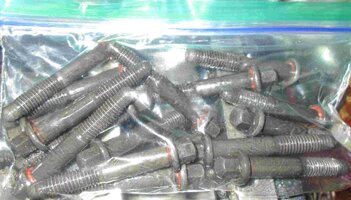
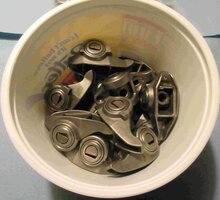
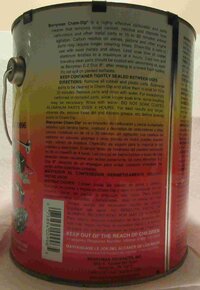
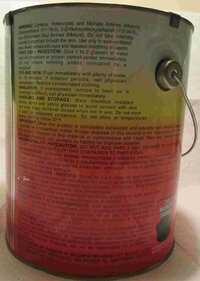
Okay... All of the "Old LS Trunnions & Push Rods" Gear arrived this afternoon, so I dug out a Brand New Container of Berryman Chem-Dip and after snapping the images attached below... I dropped all of the Trunnions and OEM Fasteners down inside of the in-dwelling Plastic Basket. They will have a "Nice Leisurely Soaking" for around 48 Hours, as these all look like they are the Fossilized Coprolites of a Stegosaurus... Dangerously Dirty ...and definitely in need of a Good, Long Chemical Wash.

Friday Morning on May 24th, 2019, I'll lift out the Basket and then search around down inside the Dark Depths of the Noxious Chem-Dip Bucket with a Strong Telescoping Neodymium Magnet for the complete collection of all these Roller Rocker Components.

Afterwards, they'll all need a secondary washing down with Hot Water and then Dried via a Heat Gun to keep them all from Rusting Up. I'll Set Up a Small, Sanitary Work Space and Follow the Instructions in the CompCam Video for the Use of the Specialty Trunnion Tool and Use the PDFs as the 'R&R Trunnion Build Bible'. Of course... I'll memorialize everything in Digital Images and Post the End Results here.

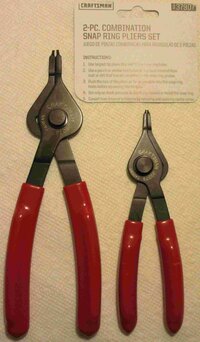
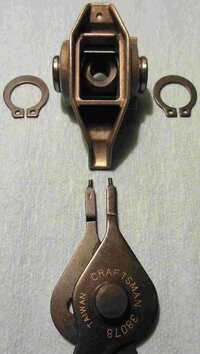
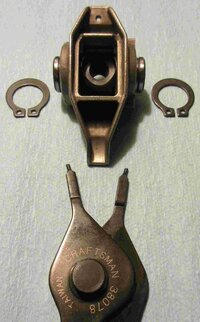
I decided to get a Craftsman Model 37907 Dual Cir-clip Pliers Set that can handle Inside and Outside Cir-clip and Spring Steel Locking Rings, even though I'm pretty sure I have an Old Set out in the Garage somewhere. These have been rated pretty high for what they are meant to do via Amazon Customers who made the mistake of buying the CHEAP Versions and suffered when they bent and gave way during various Cir-clip R&Rs.

There is NOTHING worse than having to Buy and Use a Specialty Tool that simply Does NOT Work. You can imagine from prior experiences of having to also spend way too much time either failing to get the Cir-clips installed properly... or having them spring loose and fly all around into hidden and unrecoverable locations, just when you're finishing up the Trunnion Assembly as the Last Thing to do B4 they're ready for Installation back on the Engine Heads. This the Link to the Amazon Offer on this Craftsman Dual Cir-clip Pliers Set:


CHEMDIPTRUNNIONS1.jpegCHEMDIPTRUNNIONS2.jpegCHEMDIPTRUNNIONS4.jpegCHEMDIPTRUNNIONS5.jpegCHEMDIPTRUNNIONS6.jpegCHEMDIPTRUNNIONS7.jpegCHEMDIPTRUNNIONS8.jpegCHEMDIPTRUNNIONS10.jpegCHEMDIPTRUNNIONS11.jpegCHEMDIPTRUNNIONS12.jpegCHEMDIPTRUNNIONS14.jpegCHEMDIPTRUNNIONS15.jpegCHEMDIPTRUNNIONS3.jpegCHEMDIPTRUNNIONS9.jpegCRAFTSMANCIRCLIPLIERS1.jpegCRAFTSMANCIRCLIPLIERS2.jpeg
 
Last edited:

mrrsm

Original poster
Lifetime VIP Donor
Supporting Donor
Member
Oct 22, 2015
8,197
Tampa Bay Area
Okay… This is IMPORTANT because these Issues are NOT covered within the Instructional PDFs:

Here is a Cautionary Run Down of the Processes for Cleaning, Prepping and Final Assembly of the ZZPerformance Roller Rocker Trunnion Upgrade Kit Installation Procedures:

(1) “Dunk’em In Gunk'em” or in this case… Drop them into the Berryman ChemDip for 48 Hours.

(2) Get a wide mouth Plastic Peanut Butter Jar & fill it ½ way up with VERY HOT Tap Water.

(3) Pull out 4 Roller Rockers at a time and drop them into the Plastic Jar and Cap it TIGHTLY.

(4) Gently Shake the Plastic Container to dissolve the ChemDip Residue from these motions.

(5) Drain the Container in the Sink and use Blue Scott Shop Towels to Tap the Roller Rockers against the Towel and Dry them off completely. Do this several times and they will “Come Clean”.

(6) Set up the 4” Vise to accept the Trunnion Tool and Mount the Magnetic Base onto the Rigid Side.

(7) Set the Trunnion into the Matching Concave Slots inside of the Tool and guide the wide end of the Push Pin over the outer edges of the Outer Bearing Housing.

(8) This will take a bit of juggling to adjust everything in alignment as you Slowly Snug the Vise Arm inwards.

(9) Once the components inside the Vise are aligned, Use a Box End Wrench as a Lever to slowly turn the Vise Handle and squeeze down on the components in between.

(10) This sensation should feel like you are “Arm Wrestling ...and Winning”… but if the inward motion suddenly STOPS… YOU SHOULD STOP, TOO!

(11) If this happens...Unwind the Vise and Re-Align everything again; ensuring that the Roller Rocker Housing is Definitely sitting correctly inside of the Concave Trunnion Tool Base.

(12) Tighten for around 3-4 Complete Turns of the Vise Handle until the ENTIRE Bearing assembly suddenly lets go with a slight “Pop!”…. And STOP TURNING!

(14) SLIGHTLY Unwind the Vise handle and lift up everything while cupping your fingers around all of the loose components.

(15) LIFT EVERYTHING UP and TO THE RIGHT AND UPWARDS… or the Loose Bearing Housing, Inner Race & Tiny Needle Bearings will Tumble OUT all over Hell and Gone!

(16) Hold everything in your hands until you can position them over a wide mouth Plastic Bucket.

(17) Then… Release everything by Tilting the items towards the Left and Downwards as the Needle Bearing Cases come apart and the Needle Bearings and Inner Race fall out loosely into the Bucket.

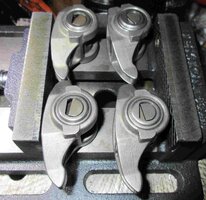
(18) Follow (1) through (17) And ... Wash… Rinse …Repeat (15) More times to obtain (16) Empty, Cleaned Up Roller Rocker Arm “Cages”.

(19) From Here on Out... Follow the Trunnion Bearing INSTALL Instructions covered in the above PDFs for the careful re-construction of the Completely Re-Built Roller Rockers. The attached images should also be very helpful.

(20) Remember... When using the Spring Clip Pliers for SPREADING the two ends wider… Keep the Tool AND the Spring Clip right over the ends of the Trunnion Bearing Barrels and MAKE SURE THE TOOL LOCKING SCREW IS SNUGGED UP TIGHT or it will become skewed and twist the Spring Clip out of Alignment.

(21) Double Check that the Blued Steel Spring Clips can Spin Freely and Independently inside BOTH Ends of the Trunnion Bearing Barrels Grooves as it is VERY Easy to MISS THE GROOVE ENTIRELY. If the Snap Ring will NOT Rotate… Re-apply the Spring Clip Pliers and DO IT ALL OVER AGAIN ...UNTIL YOU GET IT RIGHT!

TRUNNIONOVERHAUL1.jpegTRUNNIONOVERHAUL2.jpegTRUNNIONOVERHAUL5.jpegTRUNNIONOVERHAUL6.jpegTRUNNIONOVERHAUL8.jpegTRUNNIONOVERHAUL9.jpegTRUNNIONOVERHAUL10.jpegTRUNNIONOVERHAUL12.jpegTRUNNIONOVERHAUL14.jpegTRUNNIONOVERHAUL17.jpegTRUNNIONOVERHAUL18.jpegTRUNNIONOVERHAUL20.jpegTRUNNIONOVERHAUL22.jpegTRUNNIONOVERHAUL23.jpegTRUNNIONOVERHAUL24.jpegTRUNNIONOVERHAUL25.jpegTRUNNIONOVERHAUL7.jpegTRUNNIONOVERHAUL11.jpegTRUNNIONOVERHAUL20.jpegTRUNNIONOVERHAUL21.jpeg

More to Follow...
 

mrrsm

Original poster
Lifetime VIP Donor
Supporting Donor
Member
Oct 22, 2015
8,197
Tampa Bay Area
I have a few more suggestions that will make this Task a Whole Lot Easier for You:

(1) Don't lay out ALL of you Parts and Pieces around your Work area. Keep them separated as 'like Items' bagged up in a discreet Zip-Lok Baggie and ONLY remove the Six (6) Components you require for Building ONE, Single, Updated Roller Rocker at a time: (1) Rocker Arm Housing, (1) Roller Rocker Barrel Axle (2) Caged Roller Needle Bearings (2) Blued Spring Steel Cir-clip Locking Rings.

(2) If possible ...have an adjustable Flex Light and Vise arranged like the Sears-Craftsman Drill Press I used to perform all of the work upon. You will want to adjust the light source to get the Best Views of the Roller Bearing Casements to ensure that as you gradually squeeze them into the Roller Rocker Housings... you can Avoid either Tightening the Vise TOO Much...or NOT Enough to ensure that the Label Side of the Bearing Casements are FLAT & EVEN with the outer edges of each Roller Rocker Armature housing.

(3) When using the Plug Tool to mount and install the First Caged Needle Roller Bearing ... you should not have any trouble achieving the goal of it locating itself FLAT & EVEN between the two surfaces. HOWEVER... When it comes time to Insert the Barrel and slide the opposite side Bearing Casement with the Label Facing Outwards and then applying the Alignment of the Protective Blued Steel Washer... you will NOT be able to get the Second Caged Needle Roller Bearing to penetrate down inside enough to be FLAT & EVEN with the outer surface of the Roller Rocker Armature... So you MUST avoid over-tightening everything at that point inside the Vise!

(4) The Solution then is to Loosen the Vise... and REVERSE THE POSITION OF THE FLAT WASHER. Then repeat the alignment and Vise Tightening Procedures shown in the PDFs and THEN the Opposite side of The Washer will allow the Roller Bearing Casement to finally move deep enough into the Roller Rocker Armature to become FLAT&EVEN.

(5) Once all (16) of these Roller Rocker Assemblies have been built... Place them inside of a Large Zip-Lok Baggie and Liberally DOUSE AND SPRAY THEM DOWN WITH EITHER KROIL OR WD-40. Otherwise... any residual Oils, Salts and Sweat from your Hands &Fingers will quickly cause the Steel Components to Rust Up. I also recommend using CRC Freeze-off for this task in order to wash away any post-manufacture Dirt, Detritus and Metal Particles left behind.

(6) Then ... Swap these treated (16) Roller Rocker Assemblies s into another Clean Zip-LOk for safe storage until needed. Next...Tilt the First Large Spray Treatment Baggie sideways to allow the castoff Lubricant to collect inside the bottom of the Baggie. Then shine a Bright Flashlight through to view whether any of these contaminants were actually washed off all of the (16) Newly Assembled Roller-Rockers. What you can see down in there is the Crap that will NOT be getting inside of your engine!

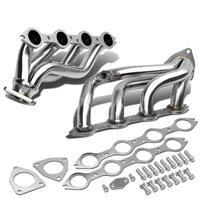
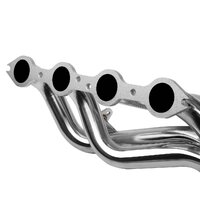
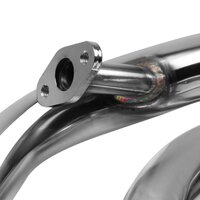
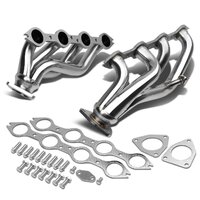
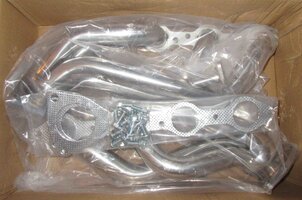
Early this morning after thinking a bit... I finally decided to jump sideways, task-wise and Order the Y2K Silverado Stainless Steel Short Headers via Amazon as these were fairly inexpensive and just about as Difficult to single out from a bewildering array of similar type and style of Header Set as it is to try and 'Separate Fly Sh*T... From Pepper'. I may wait until after the work on whatever Performance Camshaft Kit I decide upon getting is completed before installing these Headers. At the very least ... I'll have them here on hand when the time comes to install them:

SILVERADOHEADERS1.jpgY2KSILVERADOHEADERS3.jpgY2KSILVERADOHEADERS4.jpgY2KSILVERADOHEADERS5.jpgY2KSILVERADOHEADERS6.jpgY2KSILVERADOHEADERS2.jpgY2KSILVERADOHEADERS1.jpg

I note here that I've been planning for quite a while now on Performing a Complete A/C System Swap. Last Year... I ordered and received the Delphi A/C Compressor, the ACDelco Condenser Coil , the ACDelco Accumulator and the Orifice Tube & PAG Oil. So I figure that might as well perform ALL of this work at the Same Time... before it gets impossibly "Florida Hot" this summer to drive around on "Hot Dark Gray" Leather Seats. With the removal of the Front Grill, the Radiator, the A/C Condenser Coil and the Plastic Fender Well Liners... that should give me an uncommon amount of open access for ALL Three of these Projects.

Doing it this way exposes additional access area to the R&R of the A/C Compressor, the Water Pump, the Front Timing Cover, the Harmonic Balancer and allows more space to R&R the New Performance Camshaft for the Stock OEM LM7 Camshaft. Most of all and the greatest concern to me is that doing these jobs in this manner means NOT have to Break My Back leaning over Fender Wells, etc, to get any or of this work done right! Now THIS Sounds like a PLAN to ME! :>)


Here are some images of this Stainless Steel Header Set that is actually not too expensive and also serves my need for a little more 'Performance & Bling' to compliment "The Y2K Lope" Exhaust System:

More to Follow...
 

mrrsm

Original poster
Lifetime VIP Donor
Supporting Donor
Member
Oct 22, 2015
8,197
Tampa Bay Area
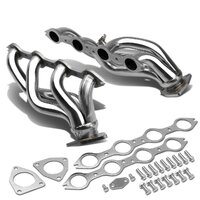
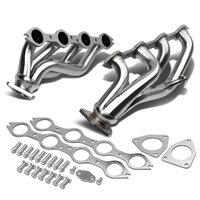
I'm trying to keep my momentum going on these Three Cross-Pollinated Projects and with that in mind.. I indulged RockAuto to Purchase the Following Necessities for the pending S/S Header Installation ...and I got a VERY Good Deal on Item Number (3) on this list below while paying only $3.62 for the Felpro Header Bolt Kit:

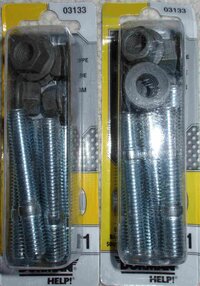
(1) Dorman "HELP!" Exhaust Manifold Lower Flange Bolt Kit(s) Part # 03133 (...a pair of 'em ..JIK)
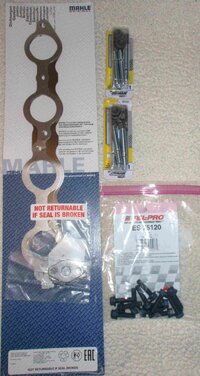
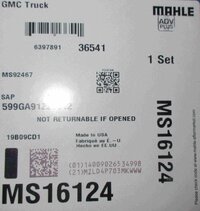
(2) Mahle LS Exhaust Header-Manifold MLS Gasket Part # MS16124
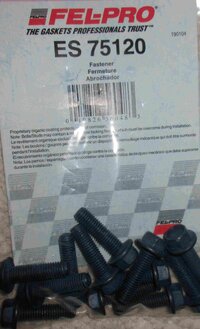
(3) Felpro LS Exhaust Header 10.9 Hardness M8X1.25X30MM Flanged Bolts Part # ES-75120

DORMANEMBOLTS03133.jpegFELPROHEADERBOLTSES75120.jpegMAHLEMLSGASKET1.jpegMAHLEMLSGASKET2.jpeg


But ... Before the New Headers can go ON... The Old GM OEM Cast Iron Exhaust Manifolds and EGR Pipes must come OFF. And because I'm a Superstitious Old Fool... I don't want to remove the two Front Plastic Wheel Well Liners and begin Right Off the Bat by getting myself into a Whole Lot Of Trouble by ACCIDENTALLY BREAKING OFF ANY of those (12) Exhaust Manifold Bolts.

So, if any of You Good, GM V-8 Owning Members out their in GMTNATIONLAND have any Definite Suggestions from your prior successful Hands-On Experiences with Header Pipe Installations... I'd very much appreciate a 'Heads Up' from all of you...Before I start this portion of "The Project Triad" by Accidentally Snapping Off those GDPITA OEM Fasteners from both sides of the LM7 Aluminum Engine Heads.

In the meanwhile... I'll be Thoroughly Spritzing Down those Old Manifold Fasteners and adjacent areas with the ever redoubtable CRC "Freeze-Off" which has provided me on many an occasion in the past with Very EZ Nut & Bolt Removals.

So what I'm really looking for here is whether or not this LS 5.3L V-8 Set Up inside of the 2000 Chevrolet Silverado presents with any very unusual problems, Such as ...Will the MAHLE MLS Gasket work as well on S/S Headers as they would on Stock Exhaust Manifolds using Standard Sandwiched Insulator Style Gaskets? This is the kinds of thing I need to know about ahead of time. ;>)
 
Last edited:

Mooseman

Moderator
Dec 4, 2011
26,016
Ottawa, ON
The very rusty manifold bolts on my Saab came out relatively easy dry without breaking when I did my DOD delete. The studs though were another story where they all had to be taken out with help with heat from my oxy torches. I'm in the rust capital of course so YMMV for the better in sunny FL. I also had no issues with the head bolts.

From my research into header gaskets, most, if not all, enthusiasts recommend the MLS gaskets as the actual header gaskets for them are junk and leak. That's my plan and the parts are waiting for install in my Caprice.
 
  • Like
Reactions: mrrsm

mrrsm

Original poster
Lifetime VIP Donor
Supporting Donor
Member
Oct 22, 2015
8,197
Tampa Bay Area
I take some confidence from your experience... I have actually had more luck than I deserved with getting the Triple Studs & Fasteners loose from underneath using that CRC Freeze-Off and a "10 Second Shock Spray". On one occasion... I was actually able to spin the 15MM Nuts off ...with my Bare Fingers.

I hope my luck holds out for this job. As you can see... I purchased ...not One...but TWO sets of the Dorman "HELP!" Six Studs/Nuts Set R&R items... just to be on the safe side in case I Bugger Up any of them during the Header Installation. Thanks for your input.
 
Last edited:

mrrsm

Original poster
Lifetime VIP Donor
Supporting Donor
Member
Oct 22, 2015
8,197
Tampa Bay Area
I know that I am bouncing around from once end of this truck to the other concerning all of these correlated subjects… but I’m trying to get the Biggest Bang for My Buck and accomplish all of these sub-systems installations without going broke. Following on with listening many times to the videos posted by @Mounce… I dug in my heels and did some more researching on CAT-Back Exhausts for the GMT800 Pick Trucks and to Cover the Bases of Performance Issues, Installation Issues and Pricing Issues. I started with viewing an assortment of Youtube Videos on the Topic of Stainless Steel CAT-Back Exhausts and found more than a few for the Chevrolet Trucks… and as it turns out, they are all just so Damned Ridiculously Expensive as well.

This Exhaust Muffler System Video displaying the "Before Sounds" are EXACTLY how the Stock OEM Exhaust System sounds on my Y2K Truck. The After-Install Magna-Flow Muffler sounds EXACTLY as what I’d like mine to sound like if possible ...only MUCH Better after I swap in the Performance Camshaft Kit. But the only problems are: They Do NOT make this set up for my 2-Door, Long Bed Chevrolet 1500… AND...on the LOW COST side, they STILL run at around $600 to $800 covering from the Out Pipe of the CAT to the the Edge of the Rear Bumper… So... FTN!:

Magna-Flow Stainless Steel CAT Back Dual Pipe System Part# MF15754 :


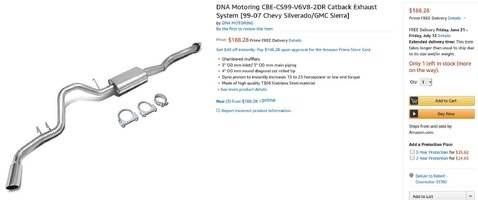
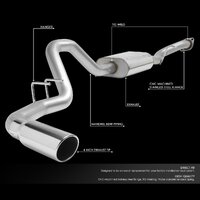
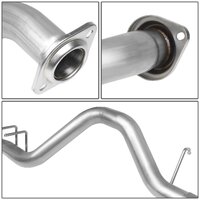
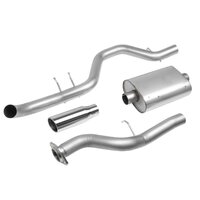
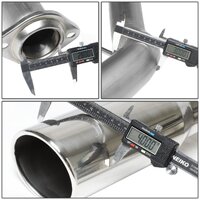
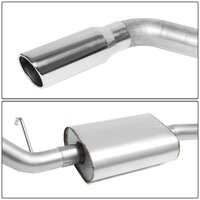
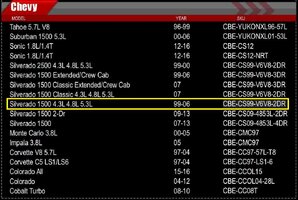
I just thought THAT Set-Up would cost me WAY TOO MUCH BREAD in my Book and I was just about ready to give up on the Idea ...when I found THIS DNA Motoring Stainless Steel CAT-BACK System Video on YouTube showing a 2000 Chevrolet Silverado LONG BED Installation of Kit Part# CBE-CS99-V6V8-2DR ...selling on Amazon for only $188.28 with FREE S&H and even though the Kit will take from1 to 2 Months to Arrive (...think ‘Slow Boat from China’ here…) I could CARE Less. I have so many other things to complete between NOW and THEN that Saving over $500 in the Bargain will MORE than make up for any shipping and handling delays:

https://www.amazon.com/dp/B079VVY288/?tag=gmtnation-20

DNAMOTORINGCATBACKEXHAUST.jpgDNAMOTORINGCATBACKEXHAUST2.jpgDNAMOTORINGCATBACKEXHAUST4.jpgDNAMOTORINGCATBACKEXHAUST5.jpgDNAMOTORINGCATBACKEXHAUST6.jpgDNAMOTORINGCATBACKEXHAUST3.jpg

Here is the DNA CAT-Back Installation Video

Here is the DNA Company Products PDF Catalog...and DAMMIT!... I was hoping there would be something in here to Help Out @WeaponX and @gmcman with THEIR CAT-Back Exhaust Woes:

http://dnamotoring.com/web/wp-content/uploads/2018/09/CAT-BACK.pdf

Here is a Screen Print of the available DNA CAT-Back Systems for Chevrolet Vehicles showing the System I just picked out and ordered for the Y2K Truck highlighted in Yellow:

DNACATBACKEXHAUSTLSITINGS4CHEVROLET.jpg
 
Last edited:

mrrsm

Original poster
Lifetime VIP Donor
Supporting Donor
Member
Oct 22, 2015
8,197
Tampa Bay Area
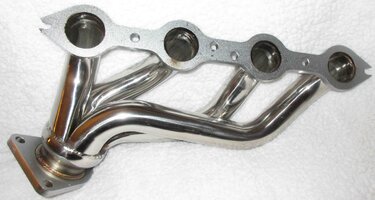
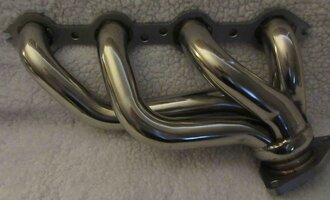
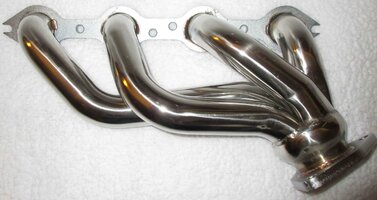
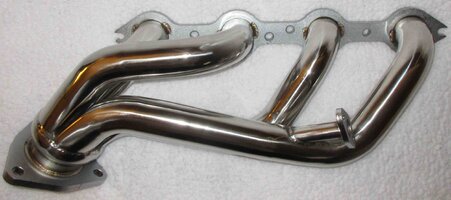
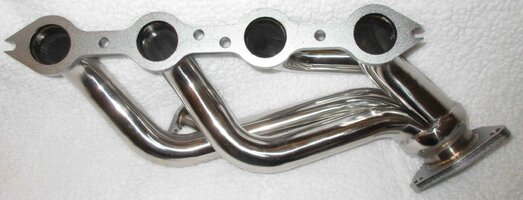
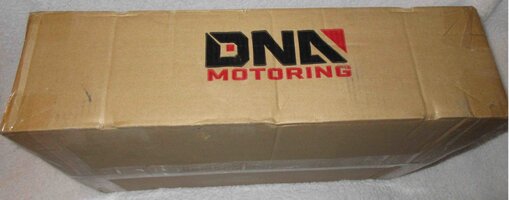
Okay… It took less than a Full Week from when I placed the order last Sunday morning for my DNA Model # HDS-CC99-SHORTY Stainless Steel Shorty Headers to arrive on Saturday, June 1st, 2091 in a surprisingly small and parsimoniously packed rectangular box that was so much lighter than I expected it to be. This of course is due to the Lack of All That Heavy Cast Iron we’re all so very familiar with having to Man-Handle and hike around inside of and underneath the Engine Bays of our GM/GMC Trucks and SUVs. I conducted a careful Un-Boxing and I’m happy to report that there wasn’t so much as a SCRATCH or the TINIEST DENT ...anywhere on their exterior, shiny Stainless Steel sub-pipe Surfaces.

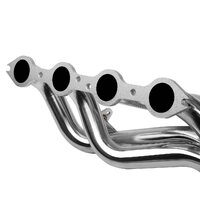
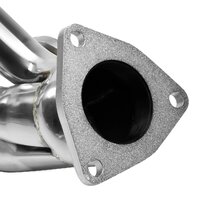
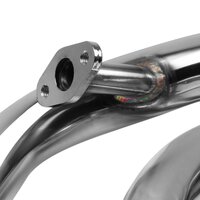
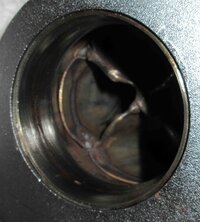
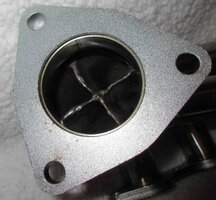
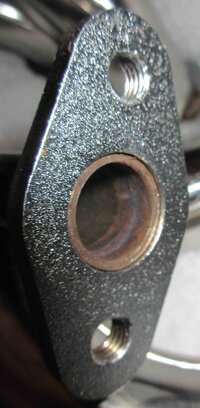
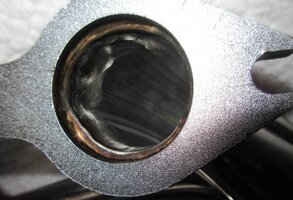
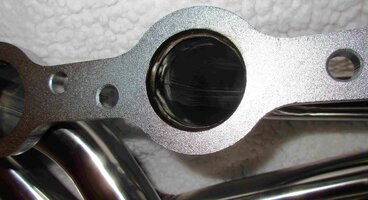
The Exterior Mandrel Jig ‘Hold-Down Welds” that can be seen when looking from the outside of the Headers towards the Engine Block; which I’ll admit that at first blush when seen in the On-Line Images, had me a bit concerned and gave the wrong impression of being Only Partially Complete. But when looking Straight Down each Pipe from the inside of the facing Flange Line at the circumferences and mate-ups between the individual Tubes and the 3/8” Thick, Textured S/S Flange Surface… You can see 360 Degrees of Quality TIG Welding inside that was later finished and ground clean after obvious examination at the DNA Fabrication site for the completeness of all Welds. They also ensured that these weld lines had enough smoothness of their circumferences to aid the (8) Escaping Exhaust Mini-Streams with wending their weary ways out of each Engine Head Exhaust Port.

I’ve got to say that for the Money… the Quality, the Fit and the Finish of these Stainless Headers are all much better than I anticipated finding after peeling the Clear Cellophane Tape off of the Tidy Cardboard Box and Packing and hoping against hope that these would turn out to be more than just “An Okay Choice”. So far... I’m quite pleased with what I can see of this Set of Pipes, to say the least. I took some close-up images of these S/S “Tubes” and I’m actually very grateful to realize how much Lighter T-304 Stainless Steel really is; considering that I need to place the least amount of strain possible on my lower back as required when I endeavor very soon to install these Headers on both sides of my 5.3L Engine:

Another issue that begs for consideration is for the suspension holding up “The Tail End” of the DNA CAT-Back Stainless Steel Exhaust occupying the space from the OTHER side of the CAT and this involves the probable need to replace All Four (19) year Old & Worn Rubber Exhaust Hangers. From what I can tell after shopping these “Genuine GM Rubber Baby Buggy Bumpers” Part#is that NOBODY has these Damned Things for CHEAP. So I’m adding the Four of them AND the requisite Rubber Hanger Removal Tool to the list of ancillary “I-ALSO-Need-To-Get-THESE-Parts-And-Tools” as necessary items for hanging the other end of the DNA Stainless CAT-Back Exhaust System during this Installation as correctly as possible.

Besides the ones I was able to upload to GMTN ...This Link takes you to all of the 23 “Glamour Shots” I took that REALLY do Justice to what these Headers look like (Prior to Installation):

https://www.flickr.com/photos/126111508@N07/albums/72157708876919988

DNAY2KTRUCKHEADERS6.jpgDNAY2KTRUCKHEADERS7.jpgDNAY2KTRUCKHEADERS8.jpgDNAY2KTRUCKHEADERS9.jpgDNAY2KTRUCKHEADERS11.jpgDNAY2KTRUCKHEADERS12.jpgDNAY2KTRUCKHEADERS14.jpgDNAY2KTRUCKHEADERS16.jpgDNAY2KTRUCKHEADERS22.jpgDNAY2KTRUCKHEADERS23.jpgDNAY2KTRUCKHEADERS24.jpgDNAY2KTRUCKHEADERS20.jpgDNAY2KTRUCKHEADERS17.jpeg
 
Last edited:

mrrsm

Original poster
Lifetime VIP Donor
Supporting Donor
Member
Oct 22, 2015
8,197
Tampa Bay Area
If you’re considering performing this Header Installation WITHOUT the Benefit of having a Shop Lift to raise and lower the GMT800 Series Trucks… THIS Video shows how to work comfortably at Ground Level by First Removing Plastic AND the Inner Metal Fender Wells of the Truck to provide uncommonly good lateral access to BOTH Exhaust Manifolds when working on them through the Wheel Wells. This will prove to be a much better approach than having to drape yourself over the Tall Upper Fenders and then working head down in extremely awkward positions when having to Remove Broken Studs from Aluminum Engine Heads and manipulate the Exhaust Manifolds OUT and the New Headers IN.

This is especially true if your intention is to be “Sticking...With Stock” Heavy Cast Iron Exhaust Manifolds. This Video covers all of the Planning, the Parts Required and the Tools that will be necessary to use and he takes us through his critical actions in Good “Step By Steps” that will work equally well for the 5.3L and 6L Engines Exhaust Manifold R&R in Full Size GM and GMC Pick Up Trucks. The VOP (Video Original Poster focuses much of what follows involving “How to use Torch Heat to Remove Rusted and Frozen Exhaust Manifold Fasteners”. His use of a “Stud Extractor Socket” turns out to One Cool Tool.


After @Mooseman ‘s comments about his relatively easy removal of the Exhaust Manifolds Bolts on his Saab… I still thought I’d keep looking around for more Good Videos that cover all of the important aspects of actually trying to Remove any Broken Exhaust Manifold Bolts I encounter using a variety of techniques. The VOP (Video Original Poster) in these next two viewings is a very well trained and highly experienced Professional Welder who really knows his stuff about working with a variety of dissimilar Metals. He demonstrates his techniques on “How to MIG Weld Nuts over Broken Off EM Bolts” with very high confidence during Bolt Extractions that his actions will succeed with the least amount of trouble and strife ...By Going Very Slowly and Cautiously when working the Fasteners loose:


For those of you with the Chevrolet Silverado 2500 Truck series… The same VOP demonstrates how he installs his Speed Engineering Headers that look very similar to the DNA Flavor I purchased:


mrrsm

Original poster
Lifetime VIP Donor
Supporting Donor
Member
Oct 22, 2015
8,197
Tampa Bay Area
Well Gents... I finally made my choice of LS1 Performance Camshaft Kits and just pulled the trigger... So There Is NO Going Back... Now:

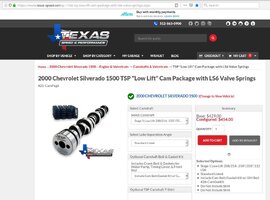
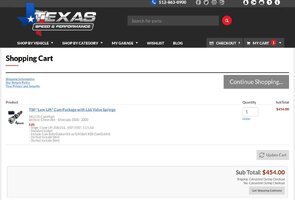
Texas Speed and Performance "Low Lift" Camshaft Kit:
212/218
112 LSA
.550"/.550"
(16) LS6 Valve Springs (Blue Beehive)
(1) OEM Front Timing Cover Gasket
(2) OEM Water Pump Gaskets
(1) OEM TTY Replacement Crankshaft Bolt

TSPCAMSHAFTKITORDER1.jpgTSPCAMSHAFTKITORDER2.jpgTSPORDERCONFIRMED.jpg


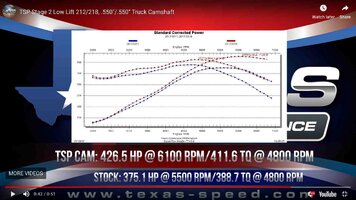
And as a Reminder of just how much additional "Punch-N-Judy" this New Bump-Stick can add to your need for More Horsepower and More Torque... Here are the Results of the TSP DYNO Test. Hmmmmm... NOT TOO SHABBY...:

TSPPERFORMANCECAMDYNO.jpg

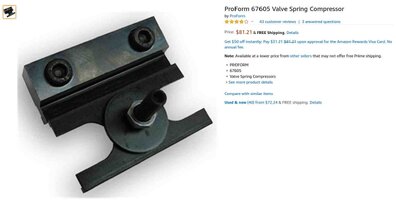
...and of course... I'll need to get one of THESE along with a slender Telescoping Magnet and a Pick to R&R the Stock GM Keepers. This Tool allows for the R&R of the Valve Springs in Pairs per Cylinder after confirming that each Piston is located Dead On TDC ...so as not to accidentally...

"Droppa-Valve":

PROFORM67605VALVESPRINGTOOL.jpg

There ARE Cheaper Versions of this tool design out there... But with my recent use of other tools from ProForm that just reeked of High Quality, I figure... Why take any chances on a Failure when so much is at stake? This Video works well as emphasis on what must take place very carefully when "ProForm-ing" this LS6-4-LS1 Valve Spring Swap:


This Next CompCam Video shows other ways and other tools to use to get this work done. The R&R of the Old Valve Guide Seals is relatively inexpensive and, as it happens... necessary. The Use of Compressed Air to Force the Valves tightly up against their Combustion Chamber Valve Seats CAN prevent the Valves from Dropping Down inside of the Cylinders.

But... Uhhh... I personally DO NOT favor this method having seen first hand what can happen if there is any the Loss of Air Pressure in a Failed Air Hose Fitting. I still cannot get the memory of that Mechanic's Screams out of my head for THAT FUBAR! Engine Head Removal of at LEAST One Bank will be the ONLY way to get out of Mechanical Purgatory if this happens. Check out THIS Dude... Ya' Think He's "Nervous in the Service" while using the Pneumatic Valve Spring R&R Method? Oh Yeah... Just listen to what his reaction is when his Compressor Kicks In:


With the Pistons in Each Cylinder confirmed as being 'chuffed up' at TDC, the Valves can only drop down so far and can easily be slid upwards and right back against the Valve Seats. You'll want to Work as FAST as Possible... without slinging the parts around and dropping the Hard-2-Handle Tiny Keepers. Slow is Smooth ...Smooth is FAST... So Just DON'T LINGER or DAWDLE while performing the R&R of these Damned Valve Springs!

 
Last edited:

Forum Statistics

Threads
23,678
Posts
641,889
Members
19,123
Latest member
Javliriano

Members Online