Help to identify top end noise

gmcman

Original poster
Member
Dec 12, 2011
4,656
Yeah....I'm kinda thinking it will roll on for awhile but I guess my question is.....how bad is the cylinder scoring? Hard to say if its minimal or excessive...but safe bet is if an aluminum piston is scoring an iron sleeve...the skirts should have some decent wear...but not sure.

One thing that may offer a glimmer of hope is I'm only hearing one knock and not 6...or for the most part...not a symphony of a racket.

Was this the case with McMillan? I can see how this points to a rocking piston...especially after his motor showed little wear on the bearings and excessive skirt wear.

Needless to say I really want the issue to be a rod bearing. Again, the fact the noise doesn't start until about 3 min breathes hope, but it suppresses slightly when hot.

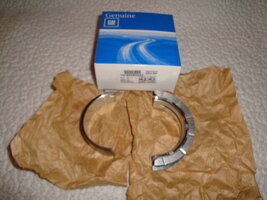
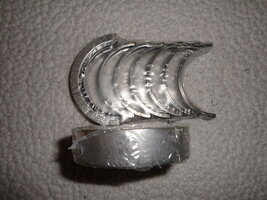
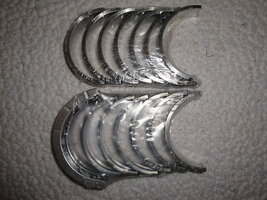
I think I'm going to at least pull the oil pan and take a look. I do have a set of rod bearings just in case. I don't want to sacrifice an entire weekend for this, but at least we will know for sure.
 
Last edited:

mrrsm

Lifetime VIP Donor
Supporting Donor
Member
Oct 22, 2015
7,697
Tampa Bay Area
I hope you realize that "Just Pulling the Oil Pan..." on these Platforms is never a 'Trivial Pursuit", Brother... you have to do a WHOLE lot more activities than you might imagine. Just visit GMT Nation Member Kevin Nadeau's (5) Part Youtube Series on this matter ...and you'll get a Bird's Eye View of what "Mechanical Troubles" really look like:


Of ALL the Engine Swap and Engine Re-Build Threads... my own Two Tomes on this subject included... I like @mc.millen 's Thread the BEST. Drop in on this link and take your time reading what he did to achieve sterling success with his Engine Overhaul Project:


gmcman

Original poster
Member
Dec 12, 2011
4,656
Thank you for the links, much appreciated. Yes...extremely involved process whichever avenue I choose. I like the fact McMillan was able to just hone the bore and use standard pistons.

Not sure how I'm going to go about this.....I surely don't want to pull the pan just for a look. Also sounds like the chances are I would unnecessarily replace the rod bearings but it would be tough choice once the pan is off, to not replace them.

I will sleep on it for awhile, and monitor the noises closely.

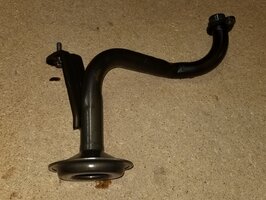
For sake of discussion.....are all the rod bearings accessible with just the pan off? I assume I need to remove the pickup tube and would the tube be removable with just the pan off? Looks cramped but doable.
 

gmcman

Original poster
Member
Dec 12, 2011
4,656
I pieced together a video, it's a bit lengthy but I tried to capture as many angles as I could in hopes to answer any questions....so bear with me.

The first 2 min are a cold start, then I jumped ahead in short segments.

The first clip I have of under the vehicle, the knock sounds more pronounced than it actually is...but still defined. I believe the mic was cancelling some of the fan noise and exhaust noise and left a sharper than actual metallic knock. The 2nd underneath clip at the end is more realistic.

Hopefully @m.mcmillen can possibly say if this was what his motor sounded like or if this may be a rod in it's early stages of going bad.

If you're standing in front of the vehicle with the hood closed, it's hard to tell it has a knock when warmed up... just slightly audible.

 
  • Like
Reactions: mrrsm

m.mcmillen

Member
Apr 29, 2016
554
Wisconsin
The sounds in your video sound pretty similar to the sound that I had. If you do have a bad rod bearing, changing the bearing at this point will not likely do you much good. The crankshaft journal will probably be beat up a bit from banging around in there (that would be the noise if it is a bad bearing). The new bearings would not last if this is the case.


To be quite honest, if I had to do it again, I would buy a good used engine out of a salvage yard. LKQ has been my yard of choice lately for engines. I didn't know when I started my project that LKQ engines come with a 30 day warranty and you can even pay a little more to get a warranty that covers parts and labor. They also have a pretty extensive network of salvage yards so if they don't have anything there they can get it and can even search around for an exceptionally low mileage engine.
 

Mooseman

Moderator
Dec 4, 2011
25,321
Ottawa, ON
My '02 did noises like that from the day I started the swapped engine (original had a spun bearing). It lasted 7 years and 100k+ KM before the tranny went. Personally, I would drive it till it self destructs unless you absolutely need 100% reliability (i.e. travelling away from home). More than likely, it would get increasingly louder as it gets worse and would allow you to get home. When I bought mine with the spun bearing, I drove it home screaming like a stuck pig but got it home.
 

gmcman

Original poster
Member
Dec 12, 2011
4,656
Thanks guys....Moose...seems these motors will get you where you need to be regardless of circumstances..:thumbsup:

Mac...I agree a swap would be the easiest but only downside is not knowing what's in the box...but still a quick way to get back on the road. That option is still open depending on the outcome.

What really bugs me is I bought this brand new knowing that a straight-6 in front of a 4L60E...within a body on frame would go the distance..and had my attention from the start.

That along with taking great care of the drivetrain...if the oil catch can that I added could have caused this...that's tough to swallow. Not the cans fault, but the clogged screen that blocked up my PVC system could be the root cause. Since many of the noises started and a few came back once it was plugged up.

Now that its cleared, the motor is much quieter so I have to find out what the deal is. Slight Marvel Comic analogy from Tony Stark is I won't be able to rest until I know the reason.

I agree that this is likely just mileage taking its toll but I need to see what the deal is. Could be carbon build up in the ring pack for awhile or just normal wear.

I have access to a second vehicle so I'm going to first get a camera in the drain hole then likely remove the pan. This way I can take my time and won't be pressed to finish in one day or weekend.

I have to replace my splined disconnect and the seal between the front diff and the oil pan anyway....as well as likely the steering gear.


I'll keep this thread updated and we will at least know the reason and if the motor can go for awhile longer.
 

mrrsm

Lifetime VIP Donor
Supporting Donor
Member
Oct 22, 2015
7,697
Tampa Bay Area
If and When you decide to perform this Engine Swap... this is a list of "The Top Ten MOST Important Things to Do... While the Engine is still On the Engine Stand:

(1) Examine the Flex-Plate for any signs of Cracking and note that Bad Motor Mounts in the Donor Vehicle will have played a part in this event. Serious Cracks can indicate an improperly installed Harmonic Balancer...and/or a Failing Thrust Bearing indicating too much end play of the Crankshaft. Install New ACDelco OEM Motor Mounts B4 Dropping in the Donor Motor

(2) Pull off the Front Cover and Oil Pan and examine the condition of the Timing Chain, How Far the Timing Chain Tensioner has Expanded towards the Chain Guide...and the Conditions of ALL Timing Chain Guides. The Complete Timing Set Cloyes Kit for this is NOT that expensive...and as an advance "Repair Strike" ...it will allow you to revitalize an area inside of the Donor Motor that is often stressed the most and is one of the hardest to perform repairs on, once the Engine is Mounted inside the SUV. Give the Engine a whole new lease on life if you discover how close the Timing Chain Set is to Break Down Failure.

(3) Unbolt and examine the condition of the Oil Pump and Oil Pressure Relief Valve as the Older the valve gets... as it is more likely to cant slightly and stick inside the Pump Bore wide open and ruin Oil Pressure. The Full GM OEM Front Cover and Gerotor Oil Pump is only around $130.00. Again... its is the very Heart of the Engine... and replacing it when it is easy to access if needed will avoid any future "Heart-Break".

(4) Pull the Oil Pump Pick-Up Tube and submerge it in a bath of Berryman's Carb Cleaner to remove all of the Old Black, Mung and Debris from the Screen and insides of the Tube. Replace the Oil Pump "O" Ring with whichever one matches either of the two designs (Old Style uses an "O" Ring over the end of the Oil Pick Up Tube and the New Style uses a Flange with a mated Orange Rubber Grommet-Seal Combo) on the Lower Front Cover Case Manifold Bolt Up Flange.

(5) Replace ALL Valve Cover "O" Ring Style Grommet Seals.

(6) Unbolt the Intake Manifold and after cleaning out all of the "Oily Goo" it has ingested from the PCV Tube in the Resonator packed inside the three Oval shaped Intake Port Openings in the Engine Head... replace those "O" Ring Style Grommet Seals as well.

(7) While the Valve Cover is off... look over the Valve Train and examine all of the Camshaft Lobes for any Galling or damage as well as any Broken Valve Springs or Loose Roller Cam Followers (Rocker Arms).

(8) You'll have to thoroughly clean off the surfaces and grooves in the Gerotor Pump-Timing Cover Combo AND the Oil Pan and either use the OEM ACDelco RTV or the 700 Degree HT Gray RTV from Permatex to lay a (3) mm Bead of the Stuff around the proper perimeter and groove locations of these components...NOT on the Engine Block Flanges. This job is a DREAM to perform with an engine on the Stand instead of waiting to do so with the Engine back in the SUV.

(9) As much as possible... AVOID PULLING THE ENGINE HEAD on the Donor Engine.

(10) Follow Kevin Nadeau's Youtube Videos to observe much of what his actions and most importantly... his DIFFICULTIES were about the partial Tear Down and repairs he performed with the Engine still in the SUV. Observe also the major Engine Repair posts on GMTN and use the GM OEM Digital Manual offered for your particular vehicle by @Mooseman in his Sig-Line for the best information on procedures and Torque Patterns, Etc.
 
Last edited:
  • Like
Reactions: gmcman

gmcman

Original poster
Member
Dec 12, 2011
4,656
Thanks for the detailed post..:thumbsup:

Man....I hope it doesn't come to that but this is no spring chicken..lol.

I meant to add in my last post about the rod bearings...I agree that new bearings may not last if the journal is damaged, and there's a high probability the journal has been slightly beat down a little but I won't know until I get in there.

I did an oil pressure test today after it had been sitting for 10 hours. Pressure looks good but one thing I did notice was the oil coming from the filter had a light silver film when looking into the cup I collected it with....this was after about 150 miles on the RedLine 5W-30.

This could mean 1 or 2 things....I have a bearing issue along with severely scuffed pistons...but points a little more to a bearing...again, likely along with worn pistons but hopefully the more predominant noise is a bearing that I can fix...fingers crossed.

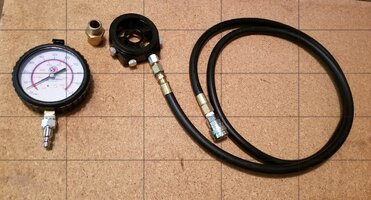
Here's the oil test and components used. Matco Oil and trans pressure test kit, Glow-Shift oil pressure adapter.

Screenshot_20190507-174824_Photo Editor.jpg

 
  • Like
Reactions: mrrsm

mrrsm

Lifetime VIP Donor
Supporting Donor
Member
Oct 22, 2015
7,697
Tampa Bay Area
Small h/j...

Call me crazy... But over the last few months... I've noticed a decided up-tick in the trend towards the Membership at GMT Nation increasing. If I were a betting man... I would suspect that as more and more of the running 2002-2009 Trailblazers and Envoys approach a threshold of 200,000 Miles on their Odometers... The Owners will seek refuge in "The Port of GMTN". Other than the reliable and friendly advice they can enjoy here for the average, every-day repairs... there really are only two long term solution paths or action options they can follow:

(1) Trade in the Trailblazer/Envoy for a Later Model, Low Mileage SUV while theirs are still running.
(2) Look towards either having a Complete Engine Overhaul, a Low Mileage Donor Motor Swap or a Re-Manufactured Crate Engine Drop-In to solve the problem.

If one calculates the cost of the New or Lightly Used Vehicles along with REALLY examining their long-term TCOP (Total Cost Of Purchase) with the exception of the Owners having TBs & Envoys suffering from serious Body Rust-Cancer, etc., the Options listed in (2) may seem to be a very good choice to make.
 

m.mcmillen

Member
Apr 29, 2016
554
Wisconsin
I personally wouldn't tear apart a donor engine unless it was high miles. I'd say if it was under 150,000 miles to run it. At the most I would change the intake and exhaust manifold gaskets, the front and rear main seals and examine the flex plate. Maybe do the valve cover gasket too.
 
  • Like
Reactions: mrrsm

gmcman

Original poster
Member
Dec 12, 2011
4,656
I guess as far as helping members prolong their engines...I cannot stress enough to perform regular oil changes with high quality syntheric oil...preferably oil with low NOACK numbers and that perform exceptionally with the wear tests.

The mystery knocking noise I'm hearing just started to show itself within the last month. I've been through a myriad of noises with the restricted PCV system, but this one is different.

I listened to the motor yesterday morning and waited for the entire warmup. I could hear the piston slap as the pistons warmed up and then the knock started after about 2 min and began very slowly getting louder and louder then settled into a steady rhythm...but kept that cam speed pace.

I'm really hoping I can cure that with new bearings...bit I'm also expecting to see more damage once inside....plan for the worst...hope for the best.
 

gmcman

Original poster
Member
Dec 12, 2011
4,656
Going over the engine rebuild thread, I just wanted to confirm the rod bolt torque for the 2002 4.2L is 18 ft.lbs plus 110 deg correct?

Looks like I need to buy another tool now....dont have a torque angle gauge.
 

mrrsm

Lifetime VIP Donor
Supporting Donor
Member
Oct 22, 2015
7,697
Tampa Bay Area
You still have yet to clarify whether or not you intend to attempt performing this repair ...with the Engine inside of the Vehicle. I can think of more than a few good reasons not to consider following this approach:

(1) The Crankshaft Main Cap Screws are NOT individual to each Main Cap.... they go completely THROUGH the Engine Bottom End Cradle. Even of you manage to perform an R&R of each Con-Rod Bearing Set... working in such close quarters will be extremely difficult ...and 'unsanitary' when having to do the work around all of the filthy obstructions down there.

(2) Partly because this engine design is a "Straight Six" and for Reason (1)... Once those Main Cap Screws are removed...The Entire, Considerable Weight of the Rotating Assembly ---Crankshaft, Con-Rods, Pistons & Rings... will all FALL completely out of the Bottom of the Motor.

(3) You WILL invariably Break Off one or more Crankshaft Main Cradle Bolts... and so trying to affect Broken Bolt TTY Extractions while difficult enough when you are standing on your feet...will be much more difficult to do while laying on your back with Hot, Razor-Sharp Drill Sprue cascading down into your Face. Eyes and Mouth while Drilling out the Bolt Shanks.

(4) As mentioned several times by @mc.millen ... The likelihood that there is substantial damage to some of the errant Con-Rod or Main Bearing Journals means that to apply New Bearings therein would send you on a Fools Errand.

(5) This particular Engine can NOT be approached in an Ad Hoc manner for internal repairs. It will require much planning and the acquisition of the Right Parts and Tools and Sealants to do this job properly.

(6) Since your Vehicle is a 4X4... it follows that removing the Lower 4 Wheel Drive Trans-Axle and Drive Shaft assemblies are inevitable.

(7) You have already established that the Top End Piston to Cylinder Wall Damage is considerable enough to warrant pulling the Engine. So to go through all of these extravagant Bottom End R&R Exploratory efforts and not address ALL of the issues when they can all be performed so much easier in One Go after Pulling the Motor is mechanically counterintuitive,

(8) If it comes down to cases... and you have to Pull The Motor... the Manual Labor involved between these two efforts will almost be "A Wash"... and therefore... NOT opening up the engine to the Elements until after you have the Motor out and mounted on an Engine Stand will prove a wiser move. The repair efforts that you apply afterwards can be done Faster and More Meticulously and most importantly ...with Greater Ease afterwards.

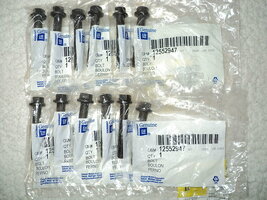
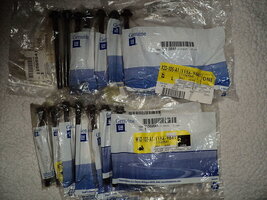
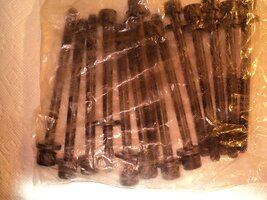
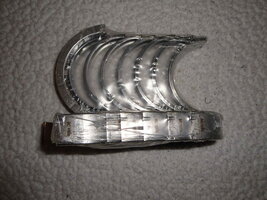
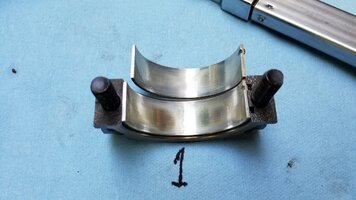
Here are the primary GM OEM Main and Connecting Rod Bearings and Fasteners, etc., you will need to obtain via a GM Dealership Outlet (gmpartsdirect.com) if you intend on doing the job completely and correctly:

29528236918_7839e6acea_z.jpg29528237178_39d1e4938b_z.jpg42494504485_7b6a6cf6bf_z.jpg41590373400_593987b480_z.jpg43350762402_cc41fc9c67_z.jpg41590372800_99525de5d1_z.jpg43350761882_55cab82b8a_z.jpg41590372390_42347c6d53_z.jpg43350761562_e4429f524a_z.jpg42494500295_546a28c8ee_z.jpg43350761372_6c71d93594_z.jpg43350759052_595f9bda19_z.jpg43350758862_c39ac9d63a_z.jpg41590373190_c73e0c9157_z.jpg
 
Last edited:

gmcman

Original poster
Member
Dec 12, 2011
4,656
If you're going to attempt this, you need to buy new rod bearing bolts as well. You cannot reuse them.

Ok, thanks. I wasn't aware the bolts couldn't be reused.

You still have yet to clarify whether or not you intend to attempt performing this repair ...with the Engine inside of the Vehicle

Yes, I'm going to remove the pan and take a look. I'm down to the oil pan and will likely get to it on Monday since Mother's day will consume the rest of the weekend.

My intentions are to see what's going on inside. I'm not planning on disturbing the main bearings unless I see something obvious but it's hard to see much there anyway unless there is severe thrust movement.


As mentioned several times by @mc.millen ... The likelihood that there is substantial damage to some of the errant Con-Rod or Main Bearing Journals means that to apply New Bearings therein would send you on a Fools Errand.


I agree.

My previous repair of rod bearings on another vehicle turned out favorable and that was caught very early on before the rod became noisy all the time.

This noise mimics the very early stages of a worn rod bearing which is why I stopped driving it. The only thing that's going to happen if I kept running the motor would be further damage.

I honestly don't know if I have a worn bearing but to me it's worth about 5-6 hours to R&R components just to get the pan on and off. I have to replace the splined disconnect, the front diff to oil pan seal, as well as the steering rack...lol....so they need to come off anyway.

So the plan is to look inside, if the pistons look somewhat usable, I will pull the rod caps and take some measurements as well as inspect the surface.

If I luck out I will just replace the rod bearings and see what happens. So far when the motor is warm, I only have what seems like a single knock and possibly from Cyl #4.

I have the GM bearings, sealant, pickup tube seal...but no bolts....thanks for the tip on that.
 
Last edited:

gmcman

Original poster
Member
Dec 12, 2011
4,656
If you're going to attempt this, you need to buy new rod bearing bolts as well. You cannot reuse them.

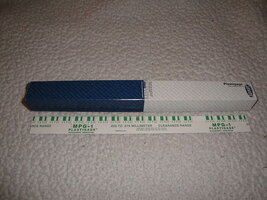
Forgot to ask, could the old bolts be used for checking the clearance with Plastigage?

If I end up going with new bearings anyway, I can see just torquing them down with new bolts if the journal checks out....but if possible would be good to know the existing clearances.
 

mrrsm

Lifetime VIP Donor
Supporting Donor
Member
Oct 22, 2015
7,697
Tampa Bay Area
Re-Using any TTY Bolts under any re-stretch can be a Crap-Shoot... So purchasing Two More Con-Rod Bolts to use exclusively for the Plasti-Gage Procedures and simply remain below the Final TTY Stretch ordinarily expected should allow you to stay well below the Yield Factor and still get reliable Babbitt Bearing Clearance dimensions.
 

gmcman

Original poster
Member
Dec 12, 2011
4,656
That's actually a good idea, I agree 18 ft. lbs should be plenty to use the plastigage.
 

gmcman

Original poster
Member
Dec 12, 2011
4,656
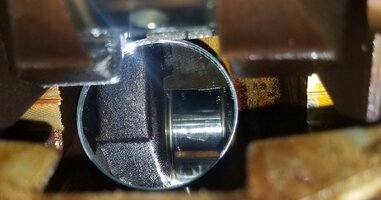
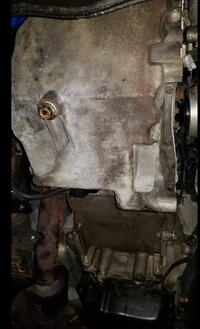
I removed the pan and after a quick look around, the cylinder walls look pretty good, only a slight hint of scuffing on a few of them. I'll poke around more tomorrow when I have more time.

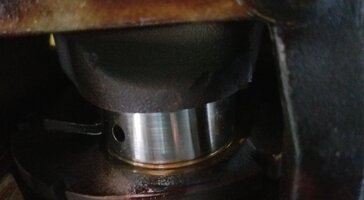
I went to Cyl #4 as that is the one I'm suspecting. The journal looks good, will get a mic on it tomorrow.

The worn bearing material possibly explains the silver film in the oil.

Screenshot_20190513-171708_Gallery.jpg

I sprayed the journal with WD-40 so it can sit overnight, that's the drips you see in the inspection mirror.

Screenshot_20190513-171612_Gallery.jpg

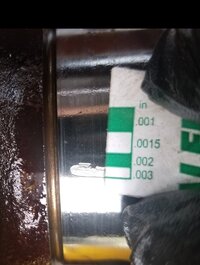
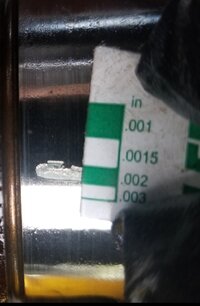
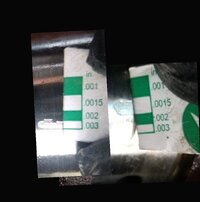
I checked the clearance with plastigage before I sprayed it with oil, looks like it's at or very close to .003, possibly slightly under...max clearance being .0025.

Screenshot_20190513-171413_Gallery.jpg


Screenshot_20190513-171354_Gallery.jpg
 

mrrsm

Lifetime VIP Donor
Supporting Donor
Member
Oct 22, 2015
7,697
Tampa Bay Area
This link may be worth a "Book Mark" as it covers ALL of the Engine Internal Specs and Tolerances:


Unless you are absolutely certain of your find...or are you considering doing ALL of the Con-Rod Bearings...? Perhaps it would be worth your while to just pull the Con-Rod Caps to the Left and to the Right of the #4 Cylinder.
 
Last edited:
  • Like
Reactions: gmcman

gmcman

Original poster
Member
Dec 12, 2011
4,656
Awesome....thanks for the link.

are you considering doing ALL of the Con-Rod Bearings

Absolutely.

I had to get cleaned up and get to work, but wanted to pull #4 first to confirm at least one suspicion.

All rod bearing will be replaced with OE parts from the dealer.

Tomorrow I will take a look at all the rod bearings and journals, and get a mic on the journals...hopefully in two spots at least.

If at any point I had to remove the oil pan after 150K miles, I was going to replace the rod bearings regardless if they needed it or not. Of course now....I'm definitely going to...:cool:
 
  • Like
Reactions: mrrsm

mrrsm

Lifetime VIP Donor
Supporting Donor
Member
Oct 22, 2015
7,697
Tampa Bay Area
You've probably already thought of everything that follows on... and I'm getting a bit ahead of the work you will encounter while replacing all of the Con-Rod Bearings... But I'd like to suggest that you take the opportunity to Spray down the Oil Pump Pick Up Tube Screen with Berryman's B-12 Solvent ...WITHOUT inducing Too Much up inside of the Long Tube leading towards the Gerotor Oil Pump Manifold...lest that stuff either soften or dissolve the "O" Rings or Flange-Style Seal therein.

Please...GMTN can always use Rare Repair Imagery for future viewing by other Members and Visitors...and will more or less guarantee that your name will become synonymous with performing this Difficult... but Doable task. So... The More Imagery for GMTN... The Merrier!


Doing so will eliminate the need to actually have to remove the Front Cover to completely unbolt, remove and dunk the OPPUT ...and so provide the chance to make a thorough, localized removal of all the built up Detritus and Gas Gum Varnish that can impede the easy suction of Oil in the Crankcase. Please.... Wear and Full Acrylic Face Mask and thick Nitrile Gloves to prevent this very powerful stuff from damaging (4) of your (5) Senses as you are working down their on your back.. allowing this strong spray to do its job on the Gunk... and not on You.

I have found that using a Small, Black Rectangular Plastic Concrete Mixing Pan (Lowes and Home Dept carry these) is the best way to effectively be able to 'Go to Town... While Spraying Things Down..." on all of the Lower End components and Engine Casement Walls and dissolve years of built-up Blow-By Varnish and then be able to capture damned near every drop of the stuff afterwards. When finished... Slide that container out of any closed garage as the noxious fumes can soon become overwhelming.

Avoid prematurely spraying all around the Lower Crank Case and Rotating Crankshaft Throws and Journals ...unless you use Permatex Ultra-Slick Engine Assembly Lube during the Babbitt Bearing R&R....which I HIGHLY recommend using over 5W-30 Motor Oil or anything else on "Bone Dry" Journals and Bearings prior to First Engine Start-Up. Avoid getting any Ultra-Slick Engine Assembly Lube on the BACK sides of the Con-Rod Bearings... a Little of this Amazing, 'Purple Jesus Slick-Sticky Goo' goes a Long Way.

Not spraying down the Crankshaft and Rods too soon until after all of the R&R work is done and then following up by spraying the Berryman's B-12 off using Brake Cleaner will avoid inviting excessive Rust Up of the freshly exposed Cast Iron and Steel components. Wait until the last minute, if the Bottom End will be left open to the elements for any length of time.

Using the Brake Cleaner Spray will eliminate the need to perform Two Oil and Oil Filter Changes ...back to back... lest the lubricity killing effects of the Berryman's get circulated around and through the engine after mixing in with Mobil1 5W-30 Motor Oil and risk Dissolving the Filter Paper in the Oil Filter and cause any problems.

You may also have to wipe down the inside edges leading to the Lower Engine Aluminum Casement Flange nice and dry and spray those areas well to get ready to apply the Permatex Gray 700 Degree HT RTV as a Single, (3mm) Wide Bead upon the Crankcase Oil Pan Flanges and Grooves and Bolting it up there within (10-15) Minutes.
 
Last edited:

gmcman

Original poster
Member
Dec 12, 2011
4,656
Awesome...thank you again for the tips. :thumbsup:

Coincidentally, I removed the oil pick up tube today and was thinking about what to soak it in..maybe Kerosene or the B12. Seems the B12 has a good following so I will pick some up.

I guess the 02 is different? The tube was held in place by two 10MM bolts, one was right near where the tube enters the front cover, and one on the main cap bracing.

I was going to get one for whenever the day came I had to pull the pan, but they were discontinued a few years ago.

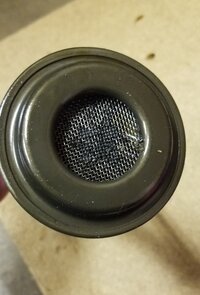
There isn't much visible crud in the screen, maybe a few pieces but I will surely soak it and get it cleaned out....who knows what's trapped in the mesh.
 
Last edited:
  • Like
Reactions: mrrsm

gmcman

Original poster
Member
Dec 12, 2011
4,656
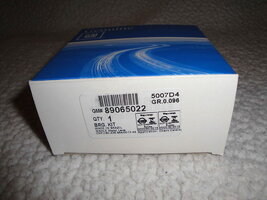
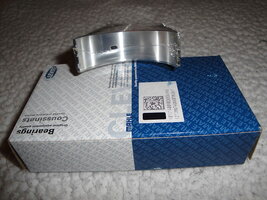
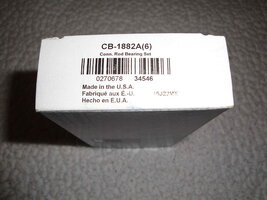
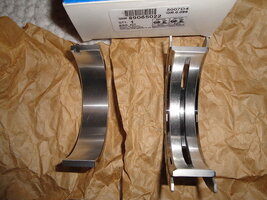
Just curious, the dealer gave me these rod bearings....GM 89017791.

Parts lookup shows the 2002 as GM89065022.

I'm assuming the latter is an updated part number, dealer isn't open yet so just wondering if anyone has come across these numbers before.


Edited to add, the other number, 89065022...was a main bearing...my mistake.
 
Last edited:

Mooseman

Moderator
Dec 4, 2011
25,321
Ottawa, ON
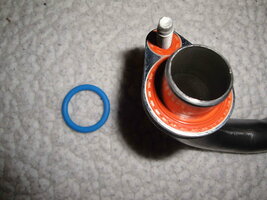
For the pickup, there was a change after 02 where they went to a flat gasket rather than the o-ring or it was updated due to an oiling issue. Not sure if the bolts had changed though. This pic shows both versions.

1524400.png

When I did my timing chain, I stayed with the same type but used a new o-ring. Otherwise it would have required the replacement of the oil pump/timing cover and pickup.
 
  • Like
Reactions: mrrsm and gmcman

gmcman

Original poster
Member
Dec 12, 2011
4,656
Thanks @Mooseman.


Time was short today but I was able to plastigage #4 and get a camera up inside.

Looks better but still have a lot more to check. Before and after clearance pic of old bearings and new.


Screenshot_20190515-182049_Cut Paste Photos.jpg


Here's a better look at cyl #2, this is the cyl that I tried to get a 90 deg mirror pic from the inspection camera.

Going back to an earlier post, the 90 deg pic wasn't at the top of the bore, but was near the top of the piston at BDC. Still doesn't dismiss there's wear on the thrust side of the bore but just a better view overall. This cyl appears to be the worst with the thrust side wear.


Quick peek at the thrust side of Cyl #5 since it was also at TDC.

 
Last edited:

gmcman

Original poster
Member
Dec 12, 2011
4,656
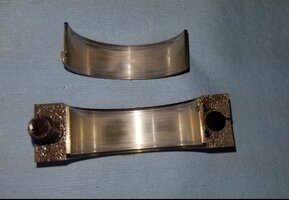
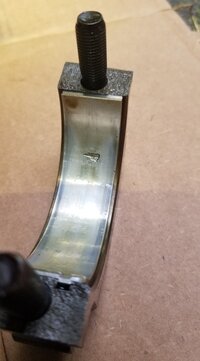
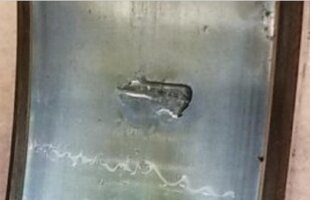
This is #5, something got a hold of the bearing. Miraculously the journal is at least smooth all the way around with no marks.

I suspect a piece of carbon maybe?

Screenshot_20190516-192907_Gallery.jpg

20190516_191915.jpg

Screenshot_20190516-192932_Gallery.jpg
 

mrrsm

Lifetime VIP Donor
Supporting Donor
Member
Oct 22, 2015
7,697
Tampa Bay Area
No... That is NOT an artifact left in the Babbitt Material by a Piece of Carbon... It is a relic of the damage caused when the Pounding Downward Force of Combustion drives the Loose Con -Rod against the Hard Nodular Iron Journal... and literally flattens and peens hard enough to cause the Thin Babbitt coating on the Inner Bearing Surface... to begin to separate from the Steel Shell underneath.

BABBITTIMPACTDAMAGE.jpg


If you have NOT found any actual damage to the Journal... you will have dodged a HUGE Howitzer Round... if the associated Crankshaft Journal bears no similar distortion after being hit in that same general area over Millions of Rotational Cycles.

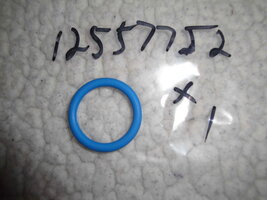
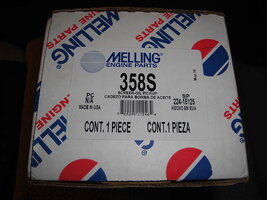
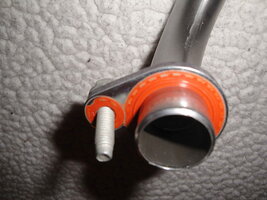
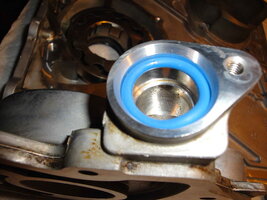
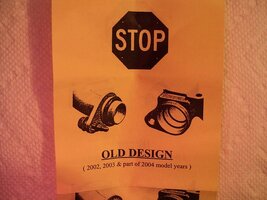
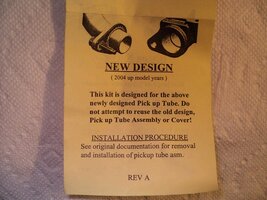
Here are some images that have the information you require about obtaining a replacement "Blue" Viton "O"Ring and a comparison shot of the differences between the Older versus the Newer Sealing designs. Please note that both of the Seals are meant to guarantee that a Vacuum can be maintained from the bottom of the Oil Pick Up Tube all the way up inside of the "Gerotor" style Oil Pump.

Think of how frustrating it is to find a crack or a slit in the side of your McDonald's Diet Coke Straw when, regardless of how hard you try to get a sip of the beverage... nothing comes through the Straw. When that similar event happens to an Atlas Engine at any RPM... its "Bye-Bye Motor".

These pumps sport completely different designs at the OPPT Manifolds, with the later version allowing the OPPT to reach deeper up inside of the manifold and making for a more stable sleeving that obviates any twisting of the pipe. The reason they went to the modified Orange Rubber on Metal Seal Design had to do with some Early Atlas Engine Failures due to Oil Pump Cavitation from the "O"Rings beings improperly installed during GM OEM Assembly that cause them to get Nicked or Cut... thereby inviting Vacuum Leaks resulting in consequences of Catastrophic Engine Failure.

Once again... These images come from my ready source for information and imagery on the GM Atlas 4.2L Engine Overhaul Parts and Components via my "Flickr -Bucket Account. You should drop in here and Bookmark this Link for future inquiries... it can be a real time saver...and you can rely upon the accuracy of the data there because when possible... I always try to include the OEM Packaging and Box Ends to provide the EXACT OEM Part Numbers. Hope these help:


42681914204_08d9ca7d8e_z.jpg43350752342_de8cf5f26a_z.jpg
 
Last edited:

gmcman

Original poster
Member
Dec 12, 2011
4,656
Thank you again for the wealth of info. :thumbsup:

I looked at the seal...along with the awesome supply of fresh atlas parts...:cool: I'm going to pick up the rod bolts and oil pickup tube seal tomorrow..not sure which one it will be, I assume the blue one, along with the rear most pair of trans cooler lines. Going to capitalize on having some room to change the lines out...found a very slight leak inside the thermal protection tube on the line.

I was thinking initially something came through the oil passage then cracked a piece of the babbitt, mainly because the missing piece is on the cap portion of the bearing.

I can see how it's likely related to the pounding as that bearing looks more worn. Luckily there's not a mark on that journal other than the wear marks in the pic.

The broken straw analogy is spot on... :smile:
 
Last edited:
  • Like
Reactions: MaYHeM2.0 and mrrsm

mrrsm

Lifetime VIP Donor
Supporting Donor
Member
Oct 22, 2015
7,697
Tampa Bay Area
As first mentioned and stressed by @Mooseman in Post #67... You MUST use the Original "Blue" "O" Ring Style...as these two variations can NOT be Mixed and Matched... without having to also Upgrade the Timing Cover Gerotor Oil Pump Combo as well... and that Combo runs about $140.00 from gmpartsdirect.com. Melling sells the later model Pick Up Tube with the L-O-N-G-E-R Insert pipe and wider mating stop flange (See Attached Images). The updated Timing Cover and Gerotor Oil Pump make up the matched set:

43350751212_226f71f291_z.jpg42681914194_3fd6b6dc60_z.jpg43350779592_1324cba187_z.jpg43350770632_56bd86ecbc_z.jpg42494505745_234ac7eabe_z.jpg

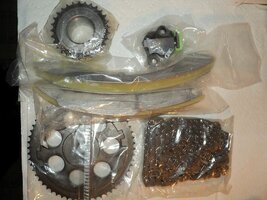
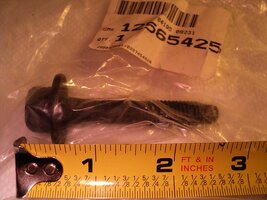
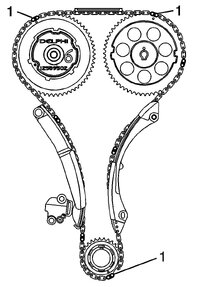
If you intend upon performing an R&R of THAT item ...then you might as well give serious consideration to getting a Cloyes Timing Chain Kit that includes The New Timing Chain, New Timing Chain Tensioner and New Timing Chain Guides. If you get the Complete Kit... it should also include the Intake and Crankshaft Sprockets as well. You will need also to purchase a New Intake Sprocket TTY Bolt... as the Old One should not be re-used:

42494504245_d5ce48d9a5_z.jpg42494506445_a00187bdfb_z.jpgGM42LATLASTIMINGSETUP.jpg

This job is SOooooo Much Easier to do when the Crankcase-Oil Pan is so conveniently removed... and with the hope that the Con-Rod Bearings R&R solves the Internal Engine Noise Problem... Short of Pulling the Engine... You will NEVER have a Better Opportunity of doing this Timing Chain Kit Update Work... than NOW. Performing THAT work will definitely quiet things down in the Front Engine Area and give a whole new lease on life to this Atlas Engine. Don't forget to obtain more Permatex Gray HT 700 Degree RTV for this R&R to seal the Timing Cover Flanges ... just like on the Oil Pan.
 
Last edited:

gmcman

Original poster
Member
Dec 12, 2011
4,656
Yeah, I hear ya on replacing the front cover and the internals since I'm 70% of the way there.

If I had low oil pressure absolutely, I will have to run with it right now and get the bottom end taken care of.

Man.....it's a tough call., at least from a tensioner, front seal, oil pump perspective.

Trans cooler lines put me back this weekend, but moving forward now. I did start on the bearings today, plan to finish that all up.

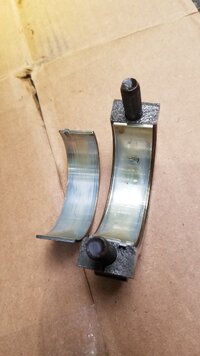
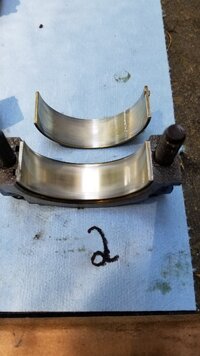
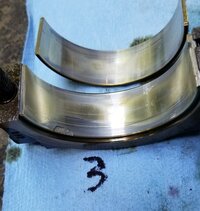
#1, & #2 look good, #3 also looks good but I found another chip out of the bearing for #3 on the cap end.

20190519_111843.jpg

20190519_133306.jpg

Screenshot_20190519-141851_Gallery.jpg

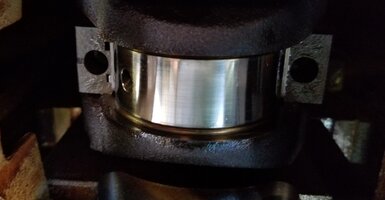
Luckily the journal shows no sign of any damage....I checked the whole journal.

Screenshot_20190519-142805_Gallery.jpg
 
Last edited:
  • Like
Reactions: mrrsm and Mounce

gmcman

Original poster
Member
Dec 12, 2011
4,656
Little peek up the oil hole....:blinkhuh:....:biggrin:

Ready to set the oil pan in place....hope for the best.


gmcman

Original poster
Member
Dec 12, 2011
4,656
Done for the day, have to get trans cooler lines installed tomorrow, then the steering rack in place to attach high pressure lines so I can start the motor.

I debated the front timing cover for awhile today there @MRRSM ...it's solid logical advice and I'm going to reluctantly pass for now. One reason is I want to see if there is a new lease on life now for the motor before I tear into it any more.

The front end seems pretty quiet now with the idler pulley swapped out, least it seemed quiet...lol....will have to see what happens tomorrow, or Tuesday when I finally get the motor running.

This is quite a welcome site, never thought I would be so happy to see an oil pan bolted to a block.

Screenshot_20190519-205045_Gallery.jpg
 

mrrsm

Lifetime VIP Donor
Supporting Donor
Member
Oct 22, 2015
7,697
Tampa Bay Area
Hopefully... the fine distribution of the energy of the Rotating Assembly at the Crankshaft Main Bearings will prove out to be sound... even with the obvious need for the replacement of the Con-Rod Bearings. And so... the only engine noise that will be very evident (if at all...) on Cold Start Ups will be Piston Slap that subsides within a few minutes after the Engine Warms Up. I hope you will consider this next Technical H/J as being "On Topic"....

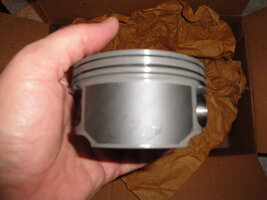
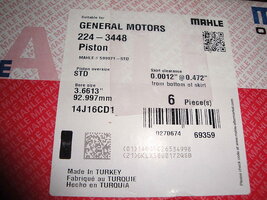
These GM OEM Mahle Pistons start out in life with a fairly robust coating of the sides and Piston Skirts with Graphite Impregnation. Anyone who has ever used the Small Tubes of Key-Lock Graphite Lubricant can attest to just how slippery this stuff really is when pressing their Index Fingers and Thumbs together. That is the idea GM and Mahle Engineers came up with to improve the life span of the Pistons inside of the internally, naturally balanced In-line Six Cylinder Atlas LL8 Engines that realistically, can achieve a life span of around 500,000 operational miles under the MOST Ideal Conditions. This is what these Pistons Look Like When Brand NEW compared to the appearance of the images previously posted by @mc.millen he had removed during his GM 4.2L Engine Overhaul:
43350758312_74005e4a14_z.jpg43350756822_d065b42831_z.jpg

And that leads us to the REAL Culprits that sets the stage for these Motors suffering with having Scored Cylinder Walls and Damaged Pistons Skirts so evident in these high Mileage Motors:

(1)The First Culprit is having Carbon-Seized Compression Rings. Think about it... Ordinarily, the Freely Expanding Compression Rings not only seal in the enormous pressures created during Compression and the Combustion of the F/A Mixture... They also serve to Center the Pistons within the Cylinder Walls during their innumerable travels up and down inside of the Centrifugal - Holt Mold Manufactured Cast Iron 1.5MM Thick Cylinder Sleeves.

But with the Build Up of Carbon deposits and Un-Burned Gas Gum By-Products of incomplete combustion... eventually ...those two top Compression Rings will gradually get squeezed and stuck tightly inside of their respective Piston Grooves... and seize in tightly flush against the sides of each upper Piston.

This condition not only reduces Compression and Power during each Firing at BDC to TDC... but the condition ALSO allows the Pistons to Cant and Move about inside of the Cylinders and begin the wear and tear into BOTH the Power and Return Stoke sides of the cylinder walls of all (6) cylinders. In the end... the Graphite Coating suffers from too much Wear and Tear... and after that, the much softer Aluminum of the Pistons begins to gradually wear itself down and leave asymmetric scratches and grooves in the side of the Cast Iron Cylinder Walls.

(2) The Second Culprit is having Oil That is TOO Thick to Lubricate In Cold Climes. What is involved here was the lack if GM having the wisdom to Engineer and build in "Piston Oilers" in the Bottom End to spray Lubricant directly up to the lower Cylinder Walls and Piston Bottoms during Initial Cold Start-Ups in Winters having VERY DEEP COLD... WELL BELOW THE LINE to add to the problem by limiting Piston to Cylinder Wall Lubrication.

Piston motions in such Dry Conditions can cause them to suffer Metal To Metal Contact that is EXTREME in the short term but active enough to locally heat up and expand the Pistons wildly at (3) Times the rate of the Cast Iron Cylinders containing them. This condition REALLY grinds their bodies together when there is No Oil Present at Low Temps to prevent this irreversible contact damage.

In around (5) Months or so, Arctic Inversions will begin affecting North America and Countless Vehicles will make attempts to be Started with 5W-30 Motor Oil (or even Higher Viscocity Motor Oils) in their Crankcases... instead of having Mobil1 0W-30 as shown in this Video. By switching to the Lower Viscosity Motor Oil Seasonally... God Only Knows how much more Life could be added to the GM Atlas Engines:

 
Last edited:

gmcman

Original poster
Member
Dec 12, 2011
4,656
Definitely on topic.....no worries. Very good info and explains a lot.

I wanted to give a detailed update since the last few days but I will keep it short for now as I have another concern.

First off, motor is running, haven't driven it yet, but it's much quieter. There's no doubt the pistons are just slightly loose and likely has a little bit of slap when warm.

The bottom end is quieter, doesn't have that sharp hammer sound but there's a slight....thick, tapping sound at half crank speed.

I've run the engine for about 30 min to 1hr each day for the last 3 days. Each day it's just slightly quieter, but overall about the same....just not as loud as the first day.

So I climbed under and crawled around...I can hear it through the fender well, sounds like it's in the side of the block. You can hear it slightly near the oil pan, I can hear it more around the torque converter..but I'm thinking the bell housing is amplifying the noise.

Then up top it's more pronounced, so I took the stethoscope and listened again. Cyl 4 had a tapping noise before I changed the bearings, and had a worn rod bearing at .003.

Now Cyl 4 seems louder and when I placed the stethoscope on the coil pack bolt, I could feel the tap.....through the stethoscope. I cannot feel this on any other coil pack bolt I even touched it with my finger and sure enough, something is contacting or there is a severe knock in that cylinder....spark, carbon, not sure.

I pulled the plug, it looked slightly dark around the base, electrode looked good, but could be slightly fuel fouled so I went to get another plug.

The sound through the stethoscope is scary. I dont know if it's a wrist pin, carbon, interference with carbon...not sure.


Here's the motor now.

Again, my phone amplifies the sound, it's not as pronounced as it seems but still easily audible.


gmcman

Original poster
Member
Dec 12, 2011
4,656
Of course this could very well be such an intense rocking action of the piston that it's felt through the coil pack and coil pack bolt.

What's strange, is #2 had the most scuffs and Cyl 4 didn't have much at all..least what I could see.

I can barely hear the knock in the stethoscope on the side of the block at #4, but very predominant at the coil pack and coil pack bolt.
 

mrrsm

Lifetime VIP Donor
Supporting Donor
Member
Oct 22, 2015
7,697
Tampa Bay Area
With the finding of as much asymmetric damage to the Connecting Rod Bearings from the pounding they were taking in evidence ...there may also be involvement at the Wrist Pin to Bronze-Brass (... or perhaps even Straight, Hyper-Eutectic Aluminum) Piston Bushing Bores to account for the noise focusing itself in the Upper Cylinder Head as opposed to being "Downstairs" at the newly refreshed bearings on the Crankshaft Journals.

I was wondering whether or not you had the chance to check for this Wrist Pin Bushing play by slightly tilting the loose connecting rods from the bottom from side to side to notice any substantial lateral movement. If it was there in ANY appreciable amount... it might explain this problem as the Tolerances between the Con Rods, The Wrist Pins and Piston Bushing Bores are VERY Close.

Also there is the OTHER possibility ...as strange as this may 'sound'... but on occasion... Cracked Flex-Plates can exude sounds that can Mimic "Rod Knock" as well. If you poke around ...starting with @Capote's Epic Flex-Plate Thread, then listen to the similar videos he and other Members posted, you might be surprised to pin down the problem there.

The ONE distinction in sounds that should be mentioned here is that if you were to also hear rhythmic "tinkling" metallic sounds at idle... THAT would make the Catalytic Converter the suspect for having shattered Ceramic-Rare Earth Metals Impregnated Honeycomb Fractures. This phenomena can easily be eliminated by shutting off the vehicle and using a Dead Blow Hammer... Lightly tap the bottom of the CAT Can and listen for any re-bounding noises that sound like a handful of Metal Fasteners or some Pocket Change ...rattling around inside of a Tin Can. Replacing the CAT would be the fix for that problem.
 
Last edited:

mrrsm

Lifetime VIP Donor
Supporting Donor
Member
Oct 22, 2015
7,697
Tampa Bay Area
I forgot to offer You my sincere congratulations after being so critical of working on your engine repairs under such difficult conditions... and now You have your engine repaired and running again. So... IMHO... You've got 'Balls as Big as Church Bells...' So Bravo, Brother... Bravo!
 
Last edited:
  • Like
Reactions: gmcman
Forum Statistics

Threads
23,313
Posts
637,835
Members
18,518
Latest member
bobby2175

Members Online