4.2 Engine Rebuild

m.mcmillen

Original poster
Member
Apr 29, 2016
556
Wisconsin
So, my 2003 Trailblazer with a 4.2 has had the common piston slap ever since I've owned it. The noise would go away when the engine warmed up but the past few months it got to where the noise never really went away.

I took the valve cover off a while back and some of the lash adjusters seemed weak so I changed all of those. Everything else in the valve train was fine. That didn't help.

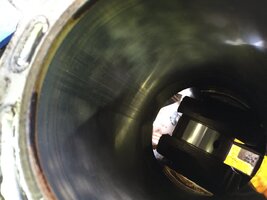
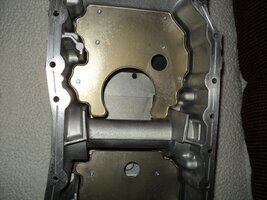
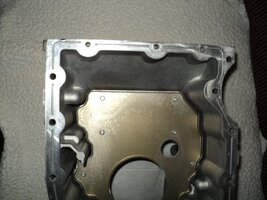
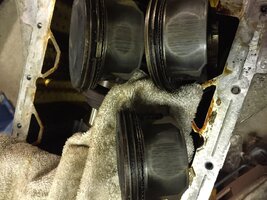
I took the engine out this week and tore it down. I found that three pistons were scuffed pretty bad but only on one side. The rings on those three were stuck so I'm thinking that the piston was tilting too much in the cylinder bore. I'm going to go get the cylinders bored and oversized pistons for it. The main and rod bearings have little to no wear on them.

I'm doing a full rebuild. I'm taking the block and the head to the machine shop Monday and hopefully have it back by the end of the week.


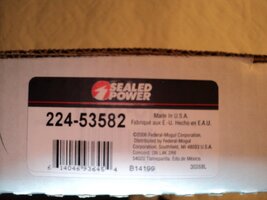
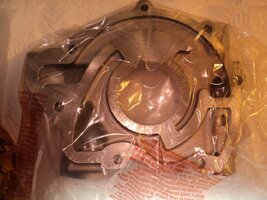
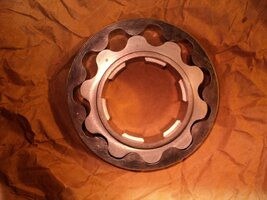
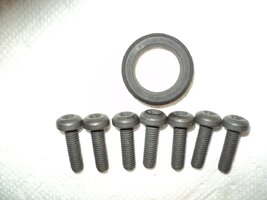
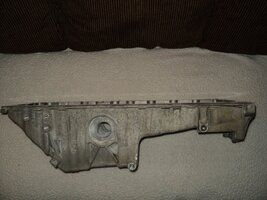
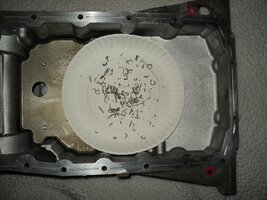
IMG_3294.JPGIMG_3296.JPG
 

mrrsm

Lifetime VIP Donor
Supporting Donor
Member
Oct 22, 2015
8,107
Tampa Bay Area
This is your Golden Opportunity to contribute some Rare Disassembly-Reassembly Images of what the Inside of the GM Atlas 4.2L Engine and the Engine Compartment look like... without the motor there to obstruct the view of things. And should you want to achieve GMT Nation "Posting Immortality" ...Please... Photo-Document and Post those images of anything and every thing you believe would be helpful to the rest of our Membership to know and use...

....and then the name: @m.mcmillen ...will become LEGEND....

PS...

The Cylinder Walls inside of this sleeved GM Atlas Engine are only 1.5 MM Thick... so Beware them Over-Boring the Block to get rid of those Deep Scars...The Old Crankshaft and Connecting Rod TTY (GM ONLY OEM PARTS) Fasteners for this engine can't be re-used and are not only numerous...but dreadfully expensive... sometimes as "Price High" as $45.00 a piece... So if it looks like this might be going sideways... in the long run... getting a Good Used Engine instead will keep you out of Bankruptcy... Just Some Food for Thought...

DSC06574.jpg
 
Last edited:
  • Like
Reactions: m.mcmillen

m.mcmillen

Original poster
Member
Apr 29, 2016
556
Wisconsin
I can get up to .50MM oversize pistons for it. I think that anything over that is too much. I talked to the machinist that is doing the work and he isn't going to take out any more than he has to. If it is over .50MM then we will look at other options. I don't trust engines out of salvage yards even with low miles.

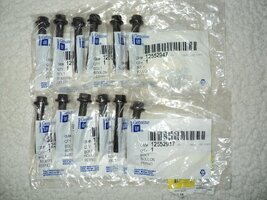
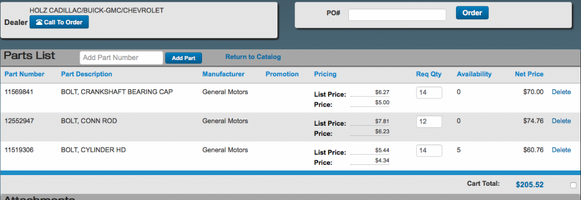
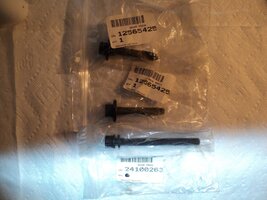
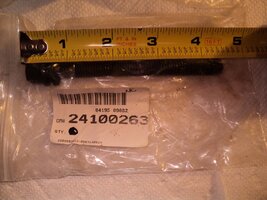
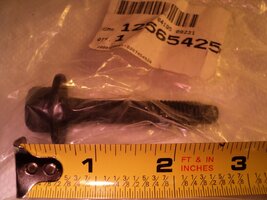
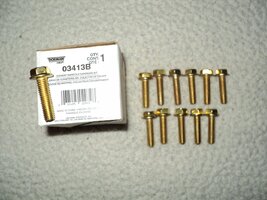
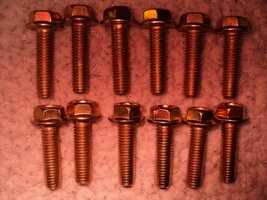
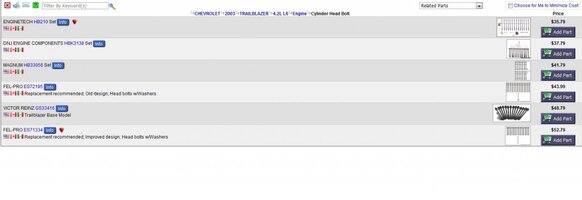
I have already ordered most every part except for pistons and rings. I bought Fel-Pro bolts. I've used them on every engine I've worked on and never had a problem with them. I'm not sure which bolt you're talking about that is $45 each but I'm only getting a price of $205 from the dealer for all of those bolts. Screen Shot 2016-09-10 at 3.17.36 PM.png

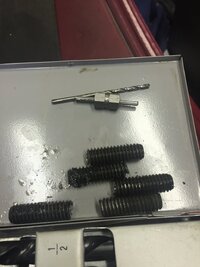
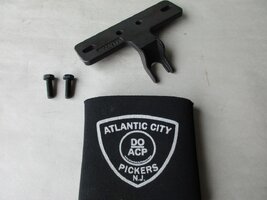
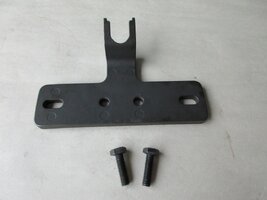
I spent a little time today removing the broken head bolts. I used a screw extractor that you drill a hole in the bolt and then drive a little stud in and then use a nut on the stud to turn it. They came out without any trouble.

broken bolts.JPG
 

mrrsm

Lifetime VIP Donor
Supporting Donor
Member
Oct 22, 2015
8,107
Tampa Bay Area
So Far...So Good... The aforementioned $45.00 Price Per Bolt was a Worst Case Example as a listing on eBay. But these were GM OEM Factory Fasteners that the "Stealerships" or the LLCs that buy out failed dealerships' stock and stores enmasse and then sell their repair parts and components at premium prices ... this is the source of this empirical information. If time permits and you can post more of your Reassembly Progress Images, they will be enormously helpful to others in the future.

This repair/rebuild is not a commonly held experience with these motors... so anything and everything that you contribute here will be memorable, useful and much appreciated by your GMT Nation Brethren. An example of this is the questions that comes to mind as to what caused those three cylinders and their pistons/rings to become so badly scored in the first place...and if possible... figuring out what can be done to prevent this from happening again.

This is a link to my GM Atlas 4.2L Engine Rebuild Photos which may also prove helpful to you for additional Accessory Parts information and their OEM Numbers as well:

http://s557.photobucket.com/user/60...NEREPAIR/TRAILBLAZERENGINEPARTS?sort=2&page=1
 
Last edited:
  • Like
Reactions: m.mcmillen

m.mcmillen

Original poster
Member
Apr 29, 2016
556
Wisconsin
I will do what I can as far as pictures and procedures. The engine is at work and I'll take some pictures of it torn down on Monday.

I have a theory about the scuffing. The first one would be that it was overheated at some point. I've only had it for two years and I haven't run it hot. I have put 30,000 miles on it and it didn't start knocking until last winter. I living in Wisconsin so it gets pretty cold. The pistons have a coating on them to help them not scuff the bores. If it was run hot then some of that could have been rubbed off. Since it is so cold here it takes longer to warm the engine up. The longer intervals with the engine running colder with the coating worn off eventually got to it.

I don't really know what else it would be. All of the rod and main bearings were fine and none of the rods were bent.
 
  • Like
Reactions: mrrsm

mrrsm

Lifetime VIP Donor
Supporting Donor
Member
Oct 22, 2015
8,107
Tampa Bay Area
I think you have nailed down the problem of the Cause and Origin of the Scuffing... EXACTLY... and for the people paying attention to your difficulty and your need to personally do this rebuild... this event serves as a Winter Warning for the parts of the world that will soon experience DEEP COLD and really shows the need to prepare the GM Trucks and SUVs well in advance of its arrival. This video from "IMSTRICKEN06" (among some of his others on GLOCK Firearms) is very well worth viewing and right on top as the means of the perfect prevention... and if you have no objection to my adding... THIS is the reason why I'm designing and building "The Franken-Oiler Machine" to be adopted as a useful tool in order to:

"...Prime Engines Left Dormant for Very Long Times ...or Those Exposed to Extremely Cold Climes..." MRRSM

...and avoid having engines lives cut short...or self-destructing upon Start-Up :


...and watch this one for the "Cold Weather Fluidity Test":


....and finally... This Video demonstrates how long and circuitous the Oil Path through the Engine is:

 
Last edited:

smokey262

Member
Sep 15, 2013
147
When I saw your parts list showed Holz I thought cheesehead right away :smile:

How bad was pulling the timing chain and head for you
 

m.mcmillen

Original poster
Member
Apr 29, 2016
556
Wisconsin
It was very easy since the engine was out. I broke five of the head bolts even though I used a brass punch and hammer to jar them before I took them out. I got them out pretty easy but most of them were on the back of the engine. It wouldn't have been very fun with the engine installed.

The timing chain was easy but the oil pan has to come off to change it. I rebuilt my front differential last year and I had to take the pan off to do that. Not a fun job.
 

07TrailyLS

Member
May 7, 2014
423
Toledo ohio
Seems like things are going well for you. Most of the people on here are scared to death to pull the head off these motors because the tty bolts will break 90 percent of the time. You didn't seem to have any issue getting them out with an easy out. So congrats man! Keep up the good work
 

m.mcmillen

Original poster
Member
Apr 29, 2016
556
Wisconsin
I think what I would try if I did it again would be to try to loosen them but not too hard. After wiggling them around (they all flexed quite a bit) I would hit them with a punch again. I did it this way with the main bearing caps and, from what I hear they are prone to break also, none of those broke and came right out.
 

07TrailyLS

Member
May 7, 2014
423
Toledo ohio
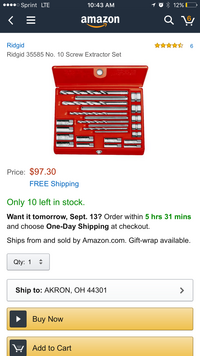
Awesome tip. Do you have the name of the bolt extractor set you used ?? Making a Christmas list for myself in Amazon right now and want to throw those in. Thanks man
 
  • Like
Reactions: Mounce

07TrailyLS

Member
May 7, 2014
423
Toledo ohio
Thanks a lot !!
 

m.mcmillen

Original poster
Member
Apr 29, 2016
556
Wisconsin
I just noticed the price on that. I'm thinking I paid something like $60 for that off the truck but that was probably 8 years ago. I think Rigid actually makes the tool for them. You might want to check with them for a better price.
 

mrrsm

Lifetime VIP Donor
Supporting Donor
Member
Oct 22, 2015
8,107
Tampa Bay Area
Unless this appears too much like a "Thread Jack"... I'd like to post some Tools-Parts-Part Numbers here that will be helpful as more Members enquire on your progress on this complex repair:
 

Attachments

  • DSC03606.jpg
    DSC03606.jpg
    143.5 KB · Views: 28
  • DSC03631.jpg
    DSC03631.jpg
    107 KB · Views: 29
  • DSC03634.jpg
    DSC03634.jpg
    112.3 KB · Views: 24
  • DSC03642.jpg
    DSC03642.jpg
    74.5 KB · Views: 22
  • DSC03644.jpg
    DSC03644.jpg
    74.9 KB · Views: 27
  • DSC03652.jpg
    DSC03652.jpg
    138.8 KB · Views: 26
  • DSC03654.jpg
    DSC03654.jpg
    108.4 KB · Views: 25
  • DSC03655.jpg
    DSC03655.jpg
    131.7 KB · Views: 27
  • DSC03664.jpg
    DSC03664.jpg
    111.8 KB · Views: 30
  • DSC03663.jpg
    DSC03663.jpg
    145.1 KB · Views: 32
  • DSC03671.jpg
    DSC03671.jpg
    109.2 KB · Views: 31
  • DSC03674.jpg
    DSC03674.jpg
    115.5 KB · Views: 27
  • DSC03685.jpg
    DSC03685.jpg
    78.2 KB · Views: 24
  • DSC03687.jpg
    DSC03687.jpg
    141.2 KB · Views: 26
  • DSC03690.jpg
    DSC03690.jpg
    117.7 KB · Views: 23
  • DSC03698.jpg
    DSC03698.jpg
    78.1 KB · Views: 21
  • DSC03700.jpg
    DSC03700.jpg
    132.1 KB · Views: 20
  • DSC03702.jpg
    DSC03702.jpg
    126.7 KB · Views: 20
  • DSC03704.jpg
    DSC03704.jpg
    115 KB · Views: 21
  • DSC03721.jpg
    DSC03721.jpg
    111.8 KB · Views: 24
  • DSC03731.jpg
    DSC03731.jpg
    157.1 KB · Views: 25
  • DSC03734.jpg
    DSC03734.jpg
    120.7 KB · Views: 27
  • DSC03752.jpg
    DSC03752.jpg
    117.6 KB · Views: 25
  • DSC03759.jpg
    DSC03759.jpg
    123.9 KB · Views: 25
  • DSC03769.jpg
    DSC03769.jpg
    121.4 KB · Views: 23

07TrailyLS

Member
May 7, 2014
423
Toledo ohio
I think this is what your referring to mcmillen.
 

Attachments

  • image.png
    image.png
    235.4 KB · Views: 60
  • Like
Reactions: m.mcmillen

Sparky

Member
Dec 4, 2011
12,927
I've never had the guts to tear deep into an engine... well, I've also had no reason to except for my old car years ago and that was well before I was anywhere close to as comfortable working on stuff as I am now.

At the same time, I like seeing rebuilds and pictures and stuff :biggrin:
 
  • Like
Reactions: m.mcmillen

mrrsm

Lifetime VIP Donor
Supporting Donor
Member
Oct 22, 2015
8,107
Tampa Bay Area
Okay... Here are some additional images of the Tools, Parts-Part Numbers. I call your attention to the Red Circles I painted on the only threaded Flange Edges as suggested by @Mooseman to be the two places necessary to re-thread in several Oil Pan Fasteners and then slowly turn them in equally until the Sealant Bond between the Oil Pan is successfully parted...without damaging either component using Pry Tools:
 

Attachments

  • DSC03753.jpg
    DSC03753.jpg
    104 KB · Views: 22
  • DSC03757.jpg
    DSC03757.jpg
    123.7 KB · Views: 24
  • DSC03758.jpg
    DSC03758.jpg
    100.1 KB · Views: 23
  • DSC03771.jpg
    DSC03771.jpg
    77.3 KB · Views: 23
  • DSC03780.jpg
    DSC03780.jpg
    118.3 KB · Views: 21
  • DSC03781.jpg
    DSC03781.jpg
    125 KB · Views: 20
  • DSC03782.jpg
    DSC03782.jpg
    112.9 KB · Views: 22
  • DSC03831.jpg
    DSC03831.jpg
    124.4 KB · Views: 27
  • DSC03833.jpg
    DSC03833.jpg
    149.3 KB · Views: 25
  • DSC03834.jpg
    DSC03834.jpg
    112.3 KB · Views: 24
  • DSC03839.jpg
    DSC03839.jpg
    133.8 KB · Views: 26
  • DSC03855.jpg
    DSC03855.jpg
    146.3 KB · Views: 32
  • DSC03888.jpg
    DSC03888.jpg
    145.3 KB · Views: 31
  • DSC04138.jpg
    DSC04138.jpg
    114 KB · Views: 30
  • DSC04824.jpg
    DSC04824.jpg
    111.1 KB · Views: 29
  • DSC04827.jpg
    DSC04827.jpg
    154.8 KB · Views: 23
Last edited:
  • Like
Reactions: m.mcmillen

m.mcmillen

Original poster
Member
Apr 29, 2016
556
Wisconsin
I dropped the block off at a local machine shop yesterday and he said that he should be able to just hone out the cylinders and take out the bad spots. I'm dropping the head off today so they can do a valve job on it.
 
  • Like
Reactions: mrrsm

mrrsm

Lifetime VIP Donor
Supporting Donor
Member
Oct 22, 2015
8,107
Tampa Bay Area
Cool Beenz...

FWIW ... If you want to draw more and more attention to the EXACT nature of your work... you might ask an Administrator or a Moderator to change the vague title you now have into being something solid and very specific to your Epic Efforts to Re-Build a GM Atlas LL8 Engine.. and then... just watch the flurry of interest and activity in your actions improve as a result.

Please Remember.... WE CANNOT SEE WHAT YOU CAN SEE WITHOUT IMAGES.... So God willing... you will take the time to memorialise your work as you go along...in time...when you yourself need to go back to double check something you want to be sure of... you will thank yourself for this effort... and Thousands of Others out here on "The Internets"...will too.

The easiest way to do this without having to micro-drop portions of your daily-weekly efforts... is to go to www.photobucket.com and set up a FREE, Publicly Accessible, 2 Gigabyte Account...and just drag and drop each daily batch of images into something called GMATLASREBUILD... or something like that... Then just drop the link to your account with each new post that has new images to view... and then everyone will be able to see what you have been up to!

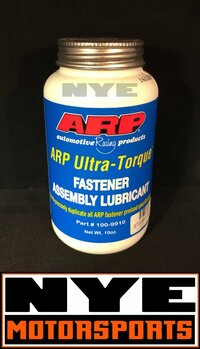
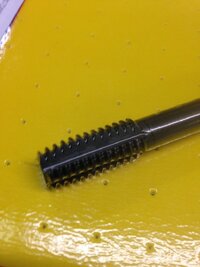
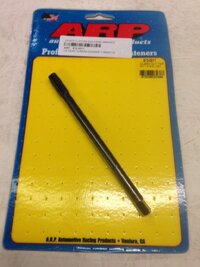
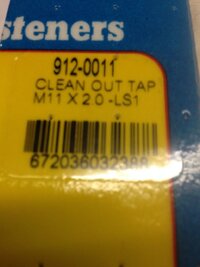
When the Engine Block Comes home and gets mounted with some 10.9 Hard M10X1.50X70MM Bolts (Might require some shorter length 50MM ones) to your Engine Stand... Before installing the Engine Head... you will have to pay special attention to cleaning out all of the 14 Large Head Bolt Holes inside the Engine Block with this exclusive (expensive, too) tool from ARP...Trust me... No Other Thread Chaser Tool Will Work...:

http://www.ebay.com/itm/ARP-912-001...ash=item3acc1bb158:g:yYAAAOSwTdJXRba5&vxp=mtr

arpboltlubricant.jpg arpboltholechaser2.jpg arpboltholechaser1.jpg arpboltholechaser3.jpg

If you fail to do this and also fail to use at least a very, very small amount of this ARP specially made low-subsidence Head Bolt Thread Lubricant... the likelihood is very high that you will wind Snapping Off some of your Brand New Head Bolts during the installation of the Engine Head:

http://www.ebay.com/itm/ARP-Ultra-T...ash=item4650d8a9c1:g:TWgAAOSwY0lXRLRy&vxp=mtr
 
Last edited:
  • Like
Reactions: m.mcmillen

m.mcmillen

Original poster
Member
Apr 29, 2016
556
Wisconsin
When I get started with posting pictures, I was thinking I would just start a different thread since this one is getting so long.

I've never heard of using a special lubricant for head bolts. I have always just used new engine oil and put a vey light coating on the bolt.

As far as the thread chaser goes, you can save yourself some $$ and make on out of one of the old head bolts. Just take an old bolt and cut grooves in it like a tap and now you have a thread chaser. I usually chase the threads then blow the hole it with air and then chase the threads again. I know that it is good when I can bottom out an unmodified head bolt by hand.

It may take me a while to get everything organized but I will get something posted. I'm pretty busy this time of year. I work for a small college and I have about 30 vehicles to keep going by myself. On top of that, I drive their bus and right now the football team is gone about every other weekend. I am taking pictures as I go. I learned that a long time ago. It is especially helpful when you know that something is going to be taken apart for a while.
 
  • Like
Reactions: mrrsm

mrrsm

Lifetime VIP Donor
Supporting Donor
Member
Oct 22, 2015
8,107
Tampa Bay Area
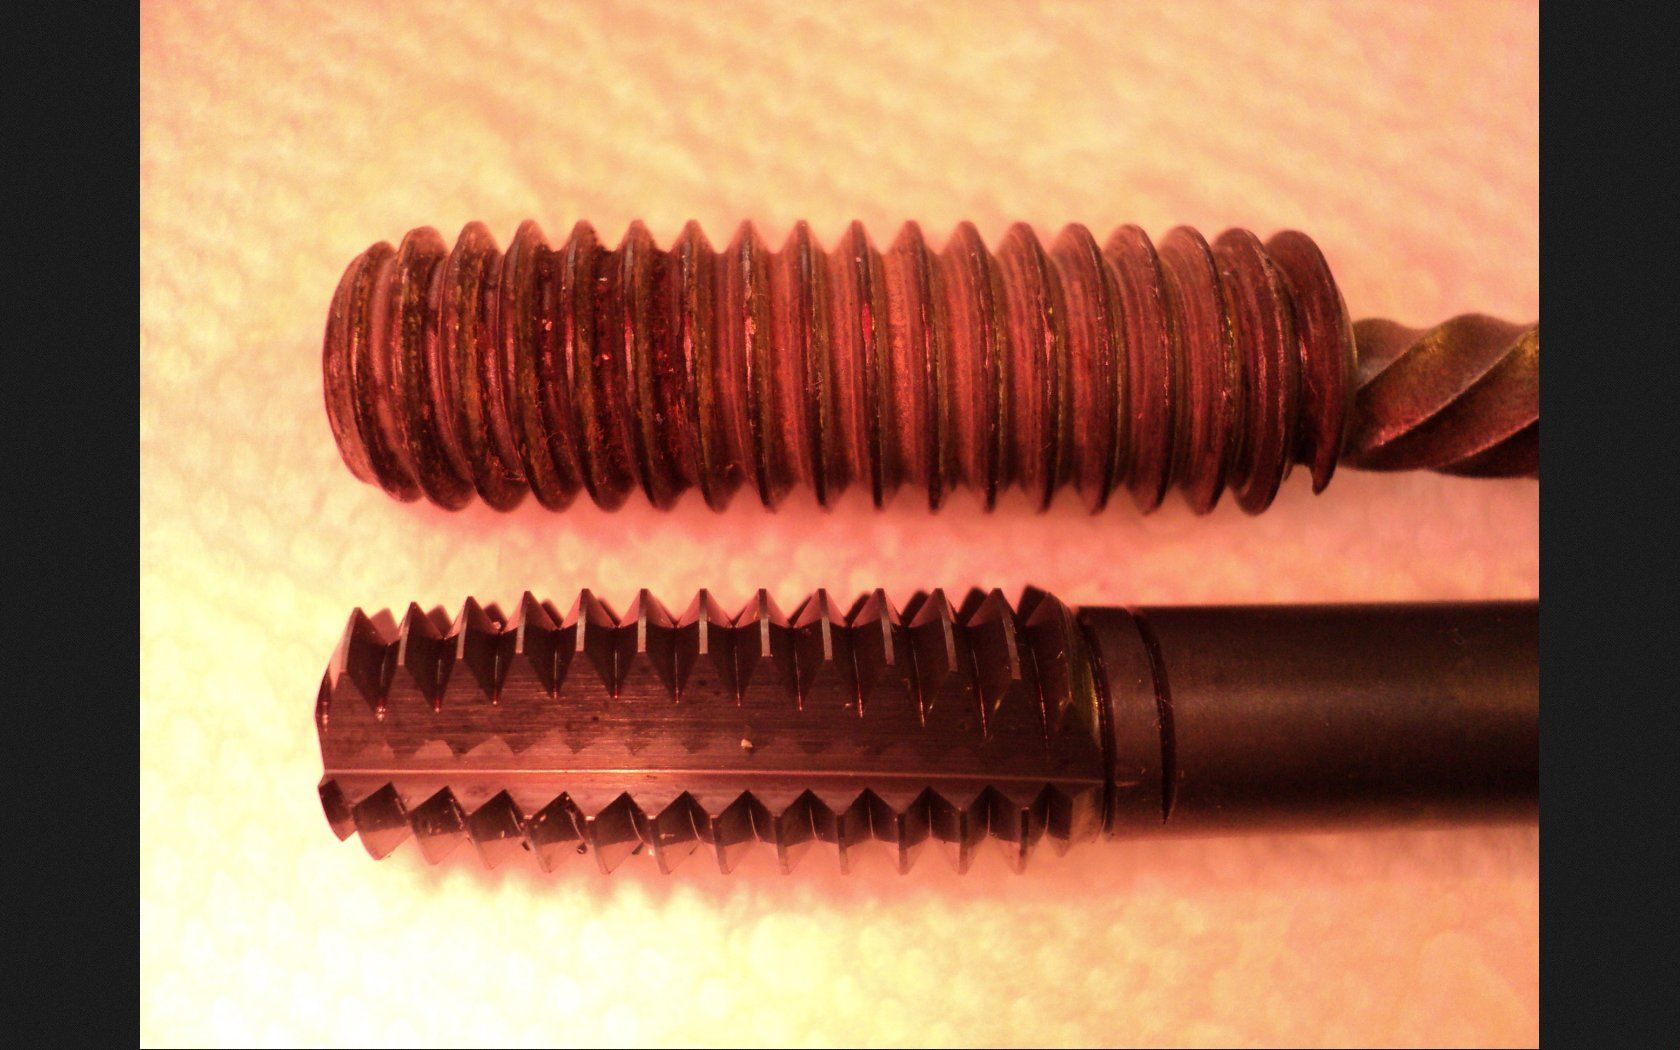
If I could... for this special case... I would very much like to discourage you from using the Modified Bolt idea... as you can clearly see in this "Side By Side" comparison between one of the Broken Bolts I extracted from my own GM Atlas 4.2L Engine vs. the ARP Bolt Hole Chasing Tool... there is simply no way a Common New Bolt will be able to get the threads cleaned up as well as they need to be to avoid having any number of the 14 Brand New Bolts subsiding or fracturings from galling and sticking inside of those deep and dirty thread-lines:

BOLTEXTRACTION20.jpg


As for beginning a Brand New Thread... I agree that if this is what you'd like to do... by all means, there will no harm in doing so...with the understanding that you have already created an interested audience based upon the fact that your "Likes Received" Numbers versus your Number of Posts are running at a ratio of greater than 1 to 1...which quite frankly, is almost an unheard of and a resounding success that seldom occurs on most forums. But... if the idea here is for you to have an uninterrupted stream of posts on a "Tabula Rasa" without any other input or guidance from others that you believe might distract or confuse what you are trying to say... Again... I will certainly respect your wishes to do it that way...and I'll leave the field that follows freely open to you as Virgin Mechanical Repair Land to navigate, cultivate and reap all of the accolades from when the time comes to Install and Start the New Rebuilt Engine for the First Time..

I just wanted to confirm with you that I have been making my postings here as the means to contribute towards a Total Stranger; whom I feel is now also my Brother in Arms for bravely attempting to do this rarely tackled Engine Rebuild. And so my comments and suggestions are meant to be benign, with the idea of trying to "yell out the presence of any "Mechanical Pot-Holes" you might encounter along the way... long before you "Break an Axle"...so to speak... Its This Damned Atlas Engine that prompts my over-abundance of Caution.

Unfortunately... we have already had another Member document a Post-Mortem of his efforts to start a recently Completely Re-built GM Atlas 4.2L LL8 Engine that ended disastrously from having seized Connecting Rod Bearings that lunched the engine... because of not having Pre-Oiled the motor before starting it for the first time. Had he been posting his work here and there along the way...we might have been able to say something or suggest something to him that would have made a profound and positive difference in the outcome.

Another good example of this will happen when you watch this Part 2 of an intrepid mechanic who places text messages on his videos to inform you that he tried to Follow the Manual and install these unusually delicate Head Bolts...WITHOUT LUBRICATION... and wound up Snapping some Off. His warning here and my own experience...and your own experience with breaking bolts... no matter how carefully the torque is applied... may prove to remain a problem in your future without the help of the ARP Special Torque Lubricant or something better than 30 Wgt Motor Oil. However...If you have had prior experiences with TTY Bolts and never suffered as others have with this re-assembly problems... I salute you:


"When The Student is Ready..... The Teacher Emerges..." Confucius
 
Last edited:
  • Like
Reactions: m.mcmillen

m.mcmillen

Original poster
Member
Apr 29, 2016
556
Wisconsin
I don't mind the comments and questions. I have a tendency to leave out information that I might think is a given. I do this especially if I have been mulling it over in my mind for several days and then I usually just skip to the conclusion and leave out everything in the middle and get funny looks from people when I try to explain something. Keep the comments coming!

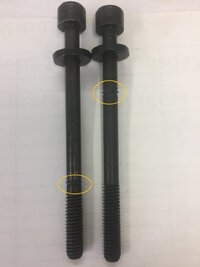
I've never experienced head bolts breaking off on anything else I've worked on. I have never worked on a 4.2 engine in this depth before either. I attached a picture of the new and old head bolts. The head bolts that I bought are an "improved design" The bolt on the left is the old one and the bolt on the right is the new one. The bolts all broke just below the spot I circled on the picture. Just my opinion here but, I think they designed the bolt to where if it broke off, that it would break above the block and one could just take some vise grips and spin them out easily. When I took the old bolts out there was no resistance in the threads. I think they break because they're so long and maybe a little bit too small in diameter.

head bolts.JPG
 
  • Like
Reactions: mrrsm

mrrsm

Lifetime VIP Donor
Supporting Donor
Member
Oct 22, 2015
8,107
Tampa Bay Area
As soon as you mentioned "Improved Design"...that is when everybody reached for their Pads and Pencils to be At The Ready... to write down the "Make, Model & Part Numbers" of such things to add to their own set of Re-Build Information..and of course... "A Picture is Worth A Thousand Words..."... ;>)

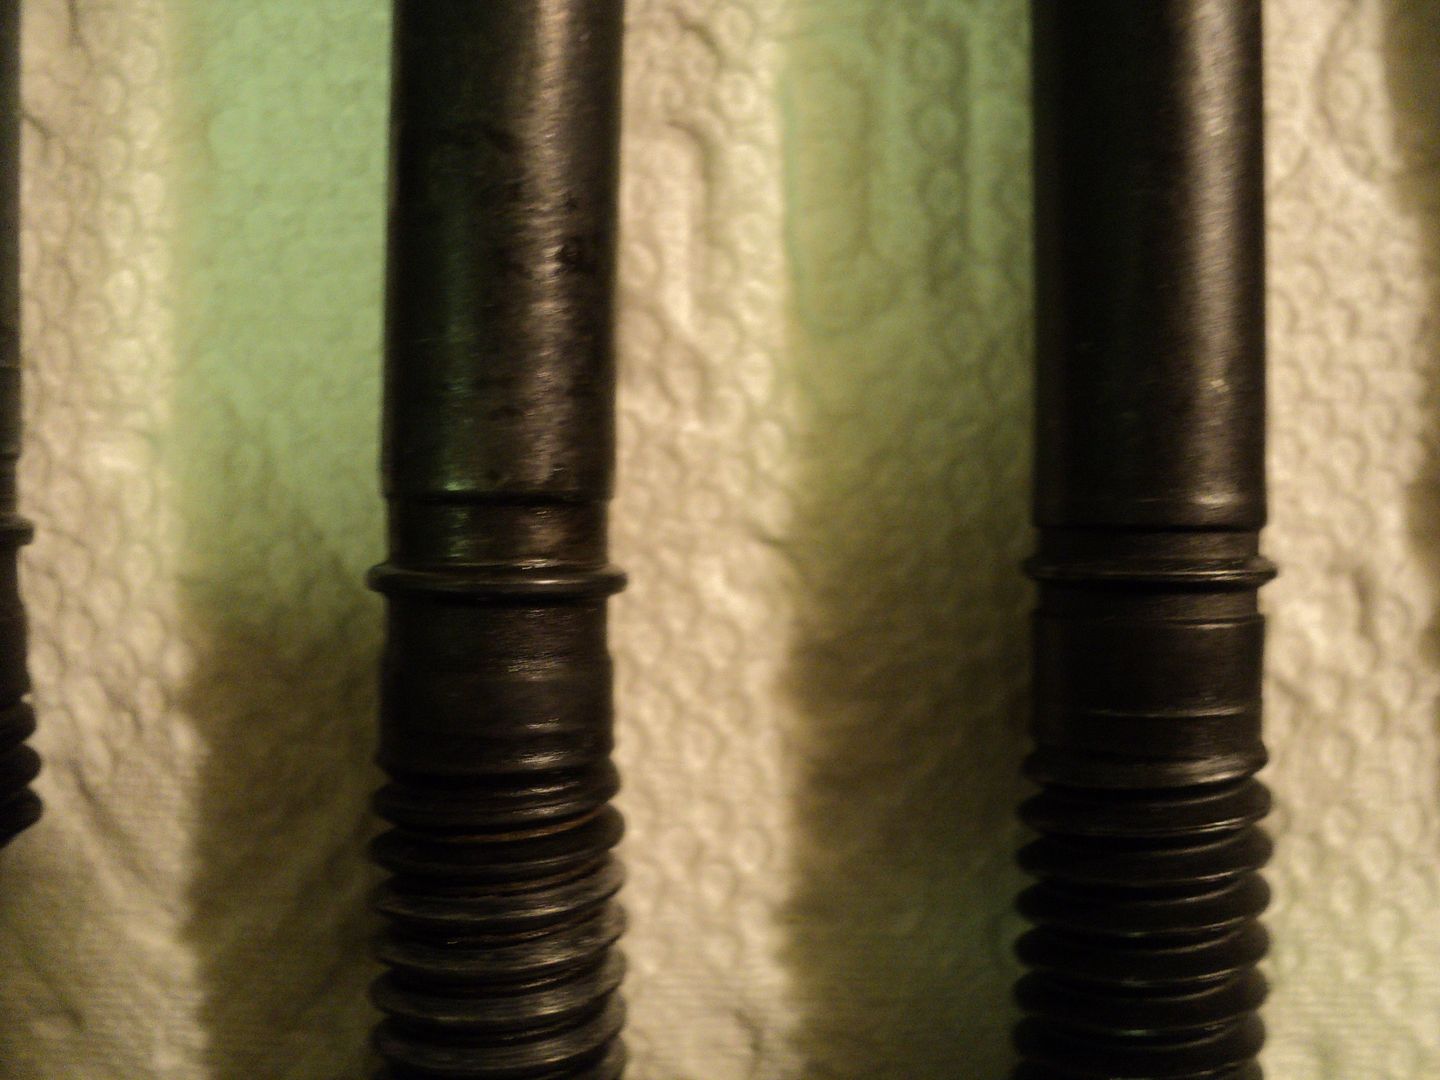
The reason these bolts break is that once torqued and tightened to a greater "Degree of Angle" to get them within an "RCH" of parting... they thin down and crystallize at an atomic level that leaves them work hardened and brittle...or "TORQUED TO YIELD" which is just another way of saying they are very close to their Failure Point as soon as they reach the TTY Torque Angle.

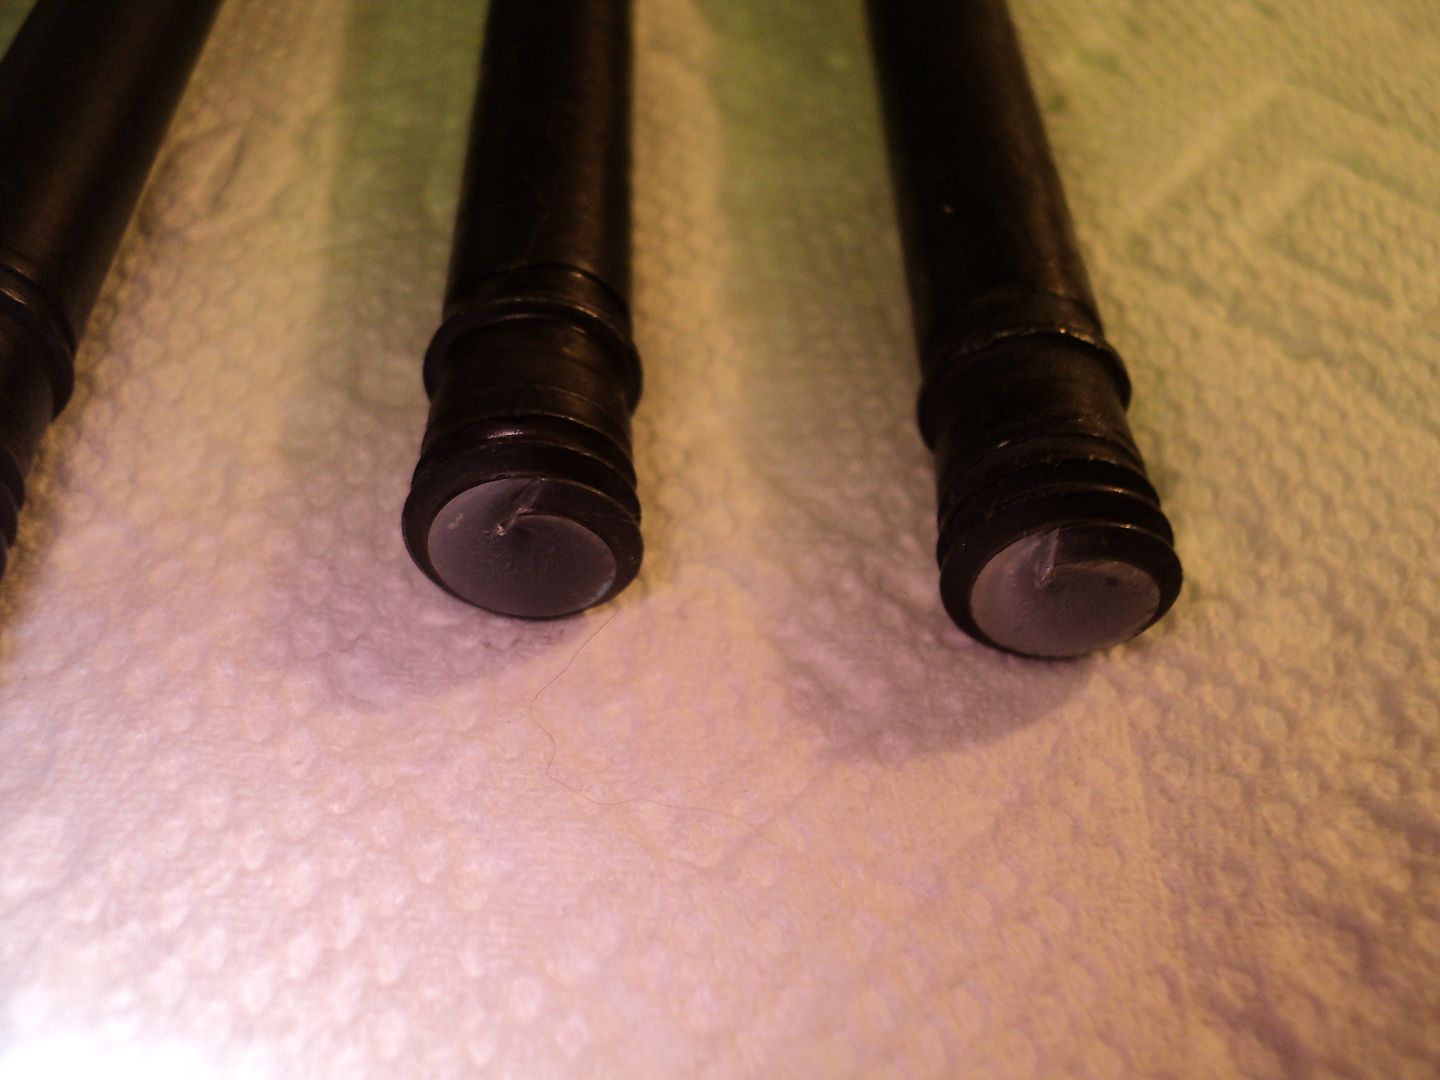
Consequently... since there is a very long distance between the H10 Hex Fitting at the Top of the Cap Screw Head where all of the Reverse Torque is being applied... and the actual threads inside the block are so very far away... near the Bottom...that the Bolt Shanks can be twisted backwards like a Coffee Twizzler Stick... and then... its:

"Bye Bye...TTY..."

Here is a close-up comparison of the area being stretched vs. a Brand New Bolt Shank:

DSC04146.jpg

DSC04142.jpg

More images and work with these here...
http://s557.photobucket.com/user/60dgrzbelow0/library/0000TRAILBLAZERENGINEREPAIR?sort=3&page=1
 
Last edited:
  • Like
Reactions: m.mcmillen

m.mcmillen

Original poster
Member
Apr 29, 2016
556
Wisconsin
That is interesting. None of my bolts (not even the broken ones) show the signs of stretching like yours do. My old ones are even the exact length as the new ones.

I learned a lesson the hard way once. I was changing some heads on an 8.2L Detroit engine and the manual didn't specify weather or not to change the bolts so I didn't. The engine ran a few weeks and then blew a head gasket. I bought new bolts and noticed something. I have a Snapon digital torque wrench that measures angle when you're done it will tell you the final torque of the bolt. The new bolts, that had never been stretched, had a much higher final torque probably about 50 ft. lbs. more.

The bolts definitely get weaker when they stretch even if they do shorten back up when the stress is taken off them. I have always replaced the head bolts on everything since that incident. That was probably one of the first heads I had ever replaced. I learned a lot during that job.
 
  • Like
Reactions: mrrsm

mrrsm

Lifetime VIP Donor
Supporting Donor
Member
Oct 22, 2015
8,107
Tampa Bay Area
The short answer to this mystery... in a word... is:

Subsidence

When the thread-lines inside the engine block have the presence of Old Oil, Lok-Tite, Silicone, Dirt...and "GOK"... (God Only Knows...) what else...lining up inside the thread spaces...initially...they will resist the pressure of the Proper Torque being applied... but in short order...all of that material will begin to slip, flatten, crush down, creep and migrate enough to loosen the thread-lines enough to relax what was once a Great and Proper Torque Procedure and translate into a Blown Head Gasket or in the case of TTY Bolts... they just Break. And in a Diesel Engine where the compression ratio is up around 18 to 1... the slightest miss in the amount of torque makes for an expensive problem if you have to go back and re-do the work,
 
Last edited:
  • Like
Reactions: m.mcmillen

m.mcmillen

Original poster
Member
Apr 29, 2016
556
Wisconsin
No doubt. That engine was really crammed in there. It was so tight in there that there was a panel under the floor mat that had to come off so I could get the push rods out through the floor board. Re-work is the worst.
 
  • Like
Reactions: mrrsm

mrrsm

Lifetime VIP Donor
Supporting Donor
Member
Oct 22, 2015
8,107
Tampa Bay Area
By the By... I'd like to get a Full Set of "The IMPROVED Flavour" (on the Right Side of your image) ...when you have time to post their source and data... TIA...

head-bolts-jpg.78362
 
Last edited:

m.mcmillen

Original poster
Member
Apr 29, 2016
556
Wisconsin
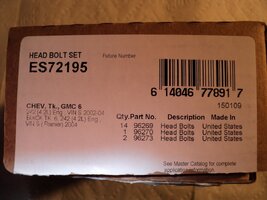
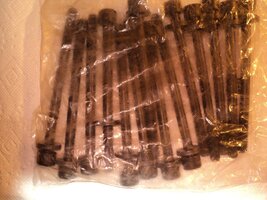
I bought them from Rock Auto but you can also buy them at any parts store that sells Fel-Pro products. I have the ES71334. The old design is ES72195.

head bolts2.jpg
 
  • Like
Reactions: mrrsm

mrrsm

Lifetime VIP Donor
Supporting Donor
Member
Oct 22, 2015
8,107
Tampa Bay Area
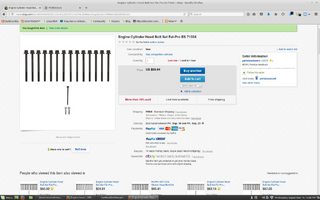
Okay... eBay... had the Best Price & Availability with Free S&H today... Thanks!
upload_2016-9-14_12-13-20.png
 
  • Like
Reactions: 07TrailyLS

07TrailyLS

Member
May 7, 2014
423
Toledo ohio
this is already turning into a very useful thread
 
  • Like
Reactions: Traz and mrrsm

mrrsm

Lifetime VIP Donor
Supporting Donor
Member
Oct 22, 2015
8,107
Tampa Bay Area
@m.mcmillen ...if you don't mind indulging this information that follows... this is only tangentially related to this present event… but it is an important idea for the Post Readers following along with the developments about your rebuild to appreciate. Someone has already explained Why having photos and videos on hand during complex or hard to diagnose RFH events (Request For HELP!) is of paramount importance.

On the subject of providing Photos and Videos that improve Everyone’s Diagnostic Abilities… @Blckshdw is fond of mentioning this memorable quote to New and Seasoned Members from time to time:

If you Don’t Have Pictures…. It Did NOT happen…!”

In the case of the below listed Member’s difficulties…

http://gmtnation.co/forums/threads/02-i6-no-start-help.10304/page-2#post-249218

...at first, @02i6Danger was unable to figure out what might cause his engine to leave what looked to him like the Metal Fragments of a Bearing inside his Intake Manifold of all places… and when it came time for the required Engine Tear Down… He was good enough to follow up on the matter and did so by Recording A Youtube Video that described the Terrible Cause and Origin of his mechanical difficulties for others to see and learn from.

As it was coined originally by @Blckshdw “Carlton’s Expression” as I like to think of it... should be principally emblazoned across the top of every new post involving any ”Request for HELP” because in an age where EVERYTHING is either being photographed or videotaped or “selfied”… there simply is NO Excuse for people NOT to bring their Multimedia Documentation right along with their Desperation to Get Their Problems Solved.

And so… Genuine Thanks go to Danger for sharing this startling and revelational piece of GM Atlas I6 Engine Cinema!


And the added thing worth mentioning after viewing this video is that it looks like Danger's Anti-Freeze is GREEN instead of being the expected DEXCOOL ORANGE... Could that have played a role in the events leading up to the engine failure? Its just an observation, mind you.. but a PERFECT illustration here that it would be impossible to consider this Diagnostic Question ...if we Don't get to see Danger's Video!
 
Last edited:

m.mcmillen

Original poster
Member
Apr 29, 2016
556
Wisconsin
Small update...I haven't stopped working on this. I'm waiting for the machine shop to finish up with my block and head. I talked to him Monday and he said to give him a week to get to it. There are not many places to go out here where I'm at. The local shop told me it would be a month before he would work on it. I went to another town about 20 miles from here. Hopefully, I will hear something next week.
 

mrrsm

Lifetime VIP Donor
Supporting Donor
Member
Oct 22, 2015
8,107
Tampa Bay Area
I meant to ask you about the complete, laborious swap-out you performed on the R&R of the Roller Rockers and Valve Lash Adjusters... Is THIS the Tool that you used...and what was your reason for doing all of them?
 

Attachments

  • KENTMOOREVALVESPRINGHOLDER1.jpg
    KENTMOOREVALVESPRINGHOLDER1.jpg
    119.2 KB · Views: 10
  • KENTMOOREVALVESPRINGHOLDER2.jpg
    KENTMOOREVALVESPRINGHOLDER2.jpg
    99.1 KB · Views: 7
  • KENTMOOREVALVESPRINGHOLDER3.jpg
    KENTMOOREVALVESPRINGHOLDER3.jpg
    98.1 KB · Views: 9
  • KENTMOORETOOLEN47945.jpg
    KENTMOORETOOLEN47945.jpg
    86.6 KB · Views: 10

m.mcmillen

Original poster
Member
Apr 29, 2016
556
Wisconsin
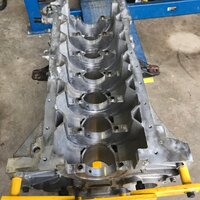
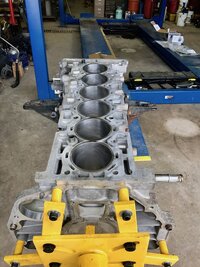
I went and picked up my engine block today. It turned out pretty nice. The shop was able to hone the cylinders and be able to keep the standard size. I did a little bit of cleaning on it this afternoon after the pictures. Hopefully tomorrow I can start putting the bottom end back together. The head should be all done tomorrow, I think.

IMG_3448.JPG

IMG_3447.jpg
 

mrrsm

Lifetime VIP Donor
Supporting Donor
Member
Oct 22, 2015
8,107
Tampa Bay Area
Remarkable... You do realize, don't you... that you have just posted what must be THE ONLY Images in existence... outside of a GM White Paper ... that shows what the "Bare Bones" of the GM Atlas 4.2L LL8 Engine actually LOOK like..Deeps Inside...Right? Who knew that the Crankshaft Cradle had all those Stainless Steel Alignment Cylinders! Keep them coming, Brother! Every single thing you show... Every Step you describe in exquisite visual detail will be added to the past, present and future Lexicon of How to Re-Build this amazing I-6 Engine.

And as much as I admire the handiwork of the Machine Shop that performed this Rescue of The Block... I would study the contents of every smidgen of Dirt and Metal extracted out of every Bolt Hole very carefully when double-cleaning and Thread-Chasing-Checking each one along the Crankshaft Grid with a Very Jaundiced Eye... as the New TTY Fasteners are also known to snap off during assembly as well as when they must get removed.

The trash I have extricated from post-machined engine blocks over the years was enough to make me think that all the work was done by "Cousin Eddy" from "The Vacation"...LOL. Nice Work... Now if I can only figure out how to stop my mouth from watering over that "Ready-To-Build" Atlas Engine Block...and all that "Blue Heavy Lifting" hardware in the background... My God... How I do ENVY YOU! :>)
 
Last edited:

m.mcmillen

Original poster
Member
Apr 29, 2016
556
Wisconsin
I gave it a good cleaning last night. I was surprised at how much junk came out of the bolt holes for the head bolts. I chased them several times and sprayed brake cleaner in there and then blew them out with air. After I did that, I chased the threads again. I didn't get anything out of the holes on the last pass so I think they're good now.

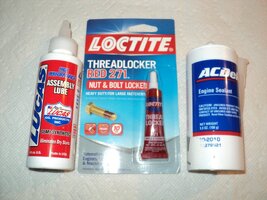
I was hoping to at least get the crankshaft installed last night after dinner. I went over and started working away and realized that I had forgotten to buy some assembly grease. I just went and picked some up so hopefully I can get going on it again today.

The lift is rated for 14,000 pounds. It is nice to be able to drive the plow truck up on there and not have to worry about taking the plow or the salter off to work on the truck.
 
  • Like
Reactions: mrrsm

Sparky

Member
Dec 4, 2011
12,927
Sure looks like they put a lot of thought into making that engine to make sure it always goes together square.

I know they use TTY stuff a lot, but I know a lot of aftermarket engine builders will use "normal" bolts like ARP studs and such. Is that an option for this? I don't really know the pros and cons of each, I just know I like reusable stuff and was really happy my Camaro had the stock TTY rocker arm bolts replaced with reusable bolts by the previous owner when I had to replace the valve springs.
 
  • Like
Reactions: mrrsm

Forum Statistics

Threads
23,580
Posts
640,807
Members
18,913
Latest member
rgaygmt

Members Online