4.2 Envoy Turbo Build

Turbodriven04

Member
Jul 22, 2012
6
ConeKilrAutoX said:
same..and I wouldnt want it to backup and have pressure causing a leak or the stick to fly out (like some ss cobalts have had happen from oil pressure)

Well, how much drain pressure are you anticipating? From my perspective the pump is one more thing to fail and cause major problems. That's just me though. I would look into using the dipstick open as a starting point and see if it could be modified to accept a larger diameter pipe and cut down on restriction from flow back. I'm not saying the pump is a bad idea it's just not the direction I will be heading when I start my build. But hey, you're a pioneer right now and I'll be following your build till completion. :thumbsup:
 

ConeKilrAutoX

Original poster
Member
Dec 8, 2011
1,179
thank you. I really like the idea of not using a pump so if at possible I want to see if maybe I can use the port the dipstick is in and compltely take out the dipstick all together. the main trouble I am having is the amount of gravity I would need to return the oil and where I can return it without back pressure from the engine. any backpressure and I am blowing turbo seals....pump was a last resort, but I agree its another thing to go wrong. hopefully by getting an STS turbo system pump it might help, knowing how many rear turbo setups they produce. I have time to think about it but I am more than happy to hear ANY ideas or suggestions because anything at this point can help!
 

jimmyjam

Member
Nov 18, 2011
1,634
if you've got a money tree, check out comp oilless turbos
 

ConeKilrAutoX

Original poster
Member
Dec 8, 2011
1,179
jimmyjam said:
if you've got a money tree, check out comp oilless turbos

ohhh I love those but my money tree has been cut down to a stump. I am paying my way through college.

Those turbos are awesome though. I saw a guy who ran 2 on an old '69 camaro ss at a car show last summer...incredible
 

limequat

Member
Dec 8, 2011
520
I vote for drilling the pan on the vehicle over a scavenge pump. Many people do this, and if you're careful you'll have no problems.

Here's a method that I haven't seen anyone try, but I think it could work pretty well:
1) Over fill your engine by 3-4 quarts.
2) Drill hole
3) Over filled oil pushes shavings right back out the hole you just made
4) Drain completely, refill

Even if you do get shavings in your pan, the pickup screen will catch most of it. Anything small enough to fit through the screen won't damage your engine. Besides aluminum from the pan is softer than almost anything you could be concerned about.
 

ConeKilrAutoX

Original poster
Member
Dec 8, 2011
1,179
i will definitely keep that in mind. that just scares me without being able to take oil pan off because id like to weld the inside and outside of the return bung. how long was your return line in the supra?
 

Sparky

Member
Dec 4, 2011
12,927
limequat said:
I vote for drilling the pan on the vehicle over a scavenge pump. Many people do this, and if you're careful you'll have no problems.

Here's a method that I haven't seen anyone try, but I think it could work pretty well:
1) Over fill your engine by 3-4 quarts.
2) Drill hole
3) Over filled oil pushes shavings right back out the hole you just made
4) Drain completely, refill

Even if you do get shavings in your pan, the pickup screen will catch most of it. Anything small enough to fit through the screen won't damage your engine. Besides aluminum from the pan is softer than almost anything you could be concerned about.

Plus anything making it through the screen should be caught by the filter.

I wouldn't want to leave a lot of stuff on the pickup screen if there happens to be a lot however.

Something else, when drilling the pan drill slowly. You'll be able to tell when you're about to break through, so then stop drilling, clean off the bit and the pan of any shavings, then finish the hole. That would keep shavings to a minimum.
 

limequat

Member
Dec 8, 2011
520
ConeKilrAutoX said:
i will definitely keep that in mind. that just scares me without being able to take oil pan off because id like to weld the inside and outside of the return bung. how long was your return line in the supra?

Probably about 14". It's a straight shot, but the turbo is mounted kinda high.
 

gmcman

Member
Dec 12, 2011
4,656
I don't think the dipstick tube would work especially with cold oil, likely too small.

The fill cap may be a bad idea also since I have tried to pour oil through a funnel too fast and it wouldn't keep up in the cam cover.

One option is to tap the cam cover in front or the side and this way you can guarantee the scavenging pump would not back up. I would also install some type of gauge that reads low pressure near the pump to monitor if the pump fails.

I think if you tap the pan you could use a vacuum and suck the shavings hoping to catch as much as you can and when you poke through, after you finish, take a pipe cleaner, make a right angle and wipe the bottom of the pan through the drain hole. May draw some shavings towards the drain.

Just a thought.
 

ConeKilrAutoX

Original poster
Member
Dec 8, 2011
1,179
gmcman said:
I don't think the dipstick tube would work especially with cold oil, likely too small.
The fill cap may be a bad idea also since I have tried to pour oil through a funnel too fast and it wouldn't keep up in the cam cover.
One option is to tap the cam cover in front or the side and this way you can guarantee the scavenging pump would not back up. I would also install some type of gauge that reads low pressure near the pump to monitor if the pump fails.
I think if you tap the pan you could use a vacuum and suck the shavings hoping to catch as much as you can and when you poke through, after you finish, take a pipe cleaner, make a right angle and wipe the bottom of the pan through the drain hole. May draw some shavings towards the drain.
Just a thought.


great info. Yes I have officially given up on the oil pump. too much failure risk both mechanically and electrically. I will tap the oil pan using all the suggestions I have received so far and I will just externally weld a bung to the pan for my return.

thanks all. :thumbsup:

would a 115v lincoln electric mig do the trick? without gas?
I have heard of Jb quick weld but I dont know about that on something so important.

also I have heard no 90 degree bends but I would need a 90 degree 10 an fitting to return the to the pan
 

limequat

Member
Dec 8, 2011
520
ConeKilrAutoX said:
great info. Yes I have officially given up on the oil pump. too much failure risk both mechanically and electrically. I will tap the oil pan using all the suggestions I have received so far and I will just externally weld a bung to the pan for my return.

thanks all. :thumbsup:

would a 115v lincoln electric mig do the trick? without gas?
I have heard of Jb quick weld but I dont know about that on something so important.

also I have heard no 90 degree bends but I would need a 90 degree 10 an fitting to return the to the pan

some of those "90 deg" A/n fittings actually have a decent radius to them.
You're not gonna have good luck welding al with a mig. I would suggest tapping the pan with 1/2" NPT then threading in a nipple. No welding. Gop some silicone on the threads and it will never leak.

- - - Updated - - -

ConeKilrAutoX said:
great info. Yes I have officially given up on the oil pump. too much failure risk both mechanically and electrically. I will tap the oil pan using all the suggestions I have received so far and I will just externally weld a bung to the pan for my return.

thanks all. :thumbsup:

would a 115v lincoln electric mig do the trick? without gas?
I have heard of Jb quick weld but I dont know about that on something so important.

also I have heard no 90 degree bends but I would need a 90 degree 10 an fitting to return the to the pan

some of those "90 deg" A/n fittings actually have a decent radius to them.
You're not gonna have good luck welding al with a mig. I would suggest tapping the pan with 1/2" NPT then threading in a nipple. No welding. Gop some silicone on the threads and it will never leak.
 

ConeKilrAutoX

Original poster
Member
Dec 8, 2011
1,179
limequat said:
some of those "90 deg" A/n fittings actually have a decent radius to them.
You're not gonna have good luck welding al with a mig. I would suggest tapping the pan with 1/2" NPT then threading in a nipple. No welding. Gop some silicone on the threads and it will never leak.

perfect thats what I like to here. no welding lol I will be doing this for sure. Thanks...your ALWAYS saving my a** haha

- - - Updated - - -

limequat said:
some of those "90 deg" A/n fittings actually have a decent radius to them.
You're not gonna have good luck welding al with a mig. I would suggest tapping the pan with 1/2" NPT then threading in a nipple. No welding. Gop some silicone on the threads and it will never leak.

perfect thats what I like to here. no welding lol I will be doing this for sure. Thanks...your ALWAYS saving my a** haha
 

limequat

Member
Dec 8, 2011
520
ConeKilrAutoX said:
perfect thats what I like to here. no welding lol I will be doing this for sure. Thanks...your ALWAYS saving my a** haha

- - - Updated - - -


perfect thats what I like to here. no welding lol I will be doing this for sure. Thanks...your ALWAYS saving my a** haha


Lol, I got plenty experience with NPT and silicone sealant when trying to adapt the supra oil pressure sensor to the 4200. Messy! But no leaks!
 

ConeKilrAutoX

Original poster
Member
Dec 8, 2011
1,179
limequat said:
ish. You might wanna check and see what's available for fittings and taps. As a general rule of thumb, your drain should be twice as big as your feed.
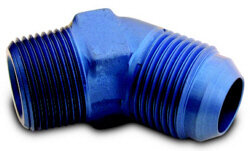
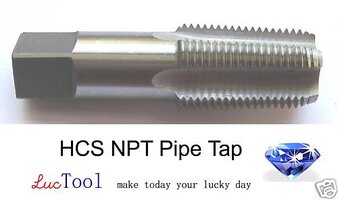
thats what I was thinking. I no on my old zx we used a 10 an I found a 10 an male to 3/4 npt male that I would screw into the tap. my drain can be 10 an because I still have a few parts left over from the zx build/demo lol


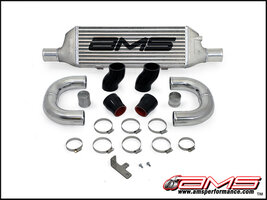
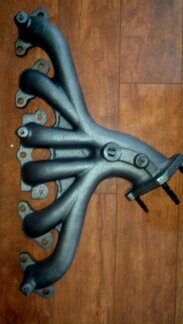
here is what I have and is this the tap I should get?
View attachment 25407
 

Attachments

  • 3,4 npt.JPG
    3,4 npt.JPG
    28.2 KB · Views: 320
  • npt tap.JPG
    npt tap.JPG
    16.4 KB · Views: 320

ConeKilrAutoX

Original poster
Member
Dec 8, 2011
1,179
well my envoy has a sad sense of humor.... yesterday after feeling happy telling people my envoy isnt like the other owners who have had cracked exhaust manifolds this morning I start driving to school and I hear the flutter of exhaust gasses under the hood... now I can no longer say that haha well played envoy....well played
 

Bartonmd

Member
Nov 20, 2011
545
limequat said:
some of those "90 deg" A/n fittings actually have a decent radius to them.
You're not gonna have good luck welding al with a mig. I would suggest tapping the pan with 1/2" NPT then threading in a nipple. No welding. Gop some silicone on the threads and it will never leak.

- - - Updated - - -


some of those "90 deg" A/n fittings actually have a decent radius to them.
You're not gonna have good luck welding al with a mig. I would suggest tapping the pan with 1/2" NPT then threading in a nipple. No welding. Gop some silicone on the threads and it will never leak.

Exactly. They don't make aluminum, self-shielded MIG wire that I know of, and if they did, without a spool gun (that his welder won't run, anyay), it won't feed down a standard MIG gun. Really a MIG welder without gas is pretty much worthless for anything on a turbo build. Not a whole lot you can do with it. With gas and .023 wire (and a better welder that can run lower current smoother than a 110V MIG can), he could do some of his intake tube work, but that's about it. An inexpensive import AC/DC TIG welder (like the $600 Longevity) and some training and a BUNCH of practice would have been a much better purchase for doing this kind of stuff.

Mike
 

scorpio1

Member
Dec 12, 2012
50
This is completely spitballing a suggestion for the return and it may not help with dropping the pan issue..... but...

When turbo-ing the L61 Ecotec Engine in the Cavaliers and sunfires, there is an issue with tapping into the Oil pan because it was pretty shallow where the best location to tap was, and people were worried about the oil pressure building back into the return. (Like you worried about.)

Long story short, the solution was to drill down through the block at an angle, just above the oil pan, and down into the pan, essentially creating a drain passage through the block into pan.

Like I said, this doesn't save the dropping the pan issue, and I don't know if its feasible on the 4.2, as I haven't had my TrailBlazer long enough to even change the oil yet, let alone get under it... But if feed angle, length or whatever is an issue for the returns location, this may be an option.

Hope that helps or inspires something for ya to think about, if not, free thread bump. :yes:

Love the build, and I'll be following along, look forward to reading more posts.
 

limequat

Member
Dec 8, 2011
520
scorpio1 said:
This is completely spitballing a suggestion for the return and it may not help with dropping the pan issue..... but...

When turbo-ing the L61 Ecotec Engine in the Cavaliers and sunfires, there is an issue with tapping into the Oil pan because it was pretty shallow where the best location to tap was, and people were worried about the oil pressure building back into the return. (Like you worried about.)

Long story short, the solution was to drill down through the block at an angle, just above the oil pan, and down into the pan, essentially creating a drain passage through the block into pan.

Like I said, this doesn't save the dropping the pan issue, and I don't know if its feasible on the 4.2, as I haven't had my TrailBlazer long enough to even change the oil yet, let alone get under it... But if feed angle, length or whatever is an issue for the returns location, this may be an option.

Hope that helps or inspires something for ya to think about, if not, free thread bump. :yes:

Love the build, and I'll be following along, look forward to reading more posts.


Good point! When I built my pan, I looked at a stock pan to see where the oil level was. I don't recall the exact measurement but it was only about 1" or 1.5" from the pan rail.

- - - Updated - - -

scorpio1 said:
This is completely spitballing a suggestion for the return and it may not help with dropping the pan issue..... but...

When turbo-ing the L61 Ecotec Engine in the Cavaliers and sunfires, there is an issue with tapping into the Oil pan because it was pretty shallow where the best location to tap was, and people were worried about the oil pressure building back into the return. (Like you worried about.)

Long story short, the solution was to drill down through the block at an angle, just above the oil pan, and down into the pan, essentially creating a drain passage through the block into pan.

Like I said, this doesn't save the dropping the pan issue, and I don't know if its feasible on the 4.2, as I haven't had my TrailBlazer long enough to even change the oil yet, let alone get under it... But if feed angle, length or whatever is an issue for the returns location, this may be an option.

Hope that helps or inspires something for ya to think about, if not, free thread bump. :yes:

Love the build, and I'll be following along, look forward to reading more posts.


Good point! When I built my pan, I looked at a stock pan to see where the oil level was. I don't recall the exact measurement but it was only about 1" or 1.5" from the pan rail.
 

ConeKilrAutoX

Original poster
Member
Dec 8, 2011
1,179
I will definitively take note of that...that is a great point I didnt even think about that thank you scorpio1. I have a while to think it over and plan luckily. I have a LOT of projects coming up before that so it should all work out and it gives me time to check out all the options such as the one you stated.

So far this is what my basic schedule outline looks like (in order) from now until May.
(I already relocated the washerfluid res and relocated the battery to inside to make room for the intercooler piping)
(I already stripped the interior and dropped a few o=pounds by losing the spare tire, the rear seating + put in the aftermarket front seats)

1. Remove A/C + install the 70.5 drive belt
2. Replace Alternator
3. Install New 06 Wiring Harness
4. Install Injectors + Injector Harness
5. Install the new 06 TB PCM and re-wire EVERYTHING accordingly for the PCM
6. Tap the Oil Pan + Install Oil Feed Line + Install new Oil Temp Sender to my oil filter adapter
7. Install New Exhaust Manifold + turbo up pipe + wastegates and wastegate dump pipes + weld back into exhaust
8. Install Turbo + attach Oil Feed/Drain Lines and Refill the Oil
9. Install Intercooler
10. Install Intercooler Piping
11. Install Boost and Oil temp gauges + vacuum lines to Wastegates / manifold / BOV / boost controller
 

scorpio1

Member
Dec 12, 2012
50
No problem bud, I figure any option is a good one to consider, and the 4.2 I6 as far as I can tell is very similar in overall design to my beloved Ecotec's, so why not throw some of that knowledge up and see if any of it can stick.
 

ConeKilrAutoX

Original poster
Member
Dec 8, 2011
1,179
Purchased more parts

I ordered the EV6 injector harness for the new 80lb 875 CC injectors from Limeswap.
View attachment 25633

I also ordered a metal air block off plate for when I remove the A.I.R. check valve solenoid (also from Limeswap :thumbsup:)
View attachment 25634

I will be purchasing the 80lb 875 CC Siemens Deka V injectors from Limeswap next week!
View attachment 25635

I also should be receiving me new Goodyear Gatorback short belt (70.5") for the engine because I will be removing the A/C compressor and lines when I remove the A.I.R. system as well.
 

Attachments

  • 100_0480thumb.jpg
    100_0480thumb.jpg
    18.4 KB · Views: 462
  • air_blockoff (1).jpg
    air_blockoff (1).jpg
    65.2 KB · Views: 23
  • 102_0346.jpg
    102_0346.jpg
    34.9 KB · Views: 463

ConeKilrAutoX

Original poster
Member
Dec 8, 2011
1,179
removed AIR system, Removed the A/C system, put the short belt on, and everything works!

short vid of new belt and engine bay without A/C

the noise heard that sounds awful is the hole in the exhaust manifold that needs replaced soon

[video=youtube;EEBlmQpH9TI]http://www.youtube.com/watch?v=EEBlmQpH9TI&feature=youtu.be[/video]
 

ConeKilrAutoX

Original poster
Member
Dec 8, 2011
1,179
sold my wheel and pedals and my playstation3 and got a lot of nice parts for the build.

View attachment 25964
View attachment 25965
View attachment 25966
View attachment 25967
ok this last one has nothing to do with the build but I am pumped to get tweeters for the front finally.

Next is intercooler piping and all the piping I need to make the up pipe to the turbo as well as the downpipe and then just the oil pan tapping supplies and I am done buying stuff after the 2 wastegates !
 

Attachments

  • AMS_Performance_Hyundai_Genesis_Front_Mount_Intercooler_Upgrade_Package_650x488.jpg
    AMS_Performance_Hyundai_Genesis_Front_Mount_Intercooler_Upgrade_Package_650x488.jpg
    97 KB · Views: 27
  • $(KGrHqZ,!g4E7P1Vu3(2BO0+CFJc7w~~60_12.JPG
    $(KGrHqZ,!g4E7P1Vu3(2BO0+CFJc7w~~60_12.JPG
    55.5 KB · Views: 415
  • $(KGrHqJ,!nwE-wqtg63KBP4D)uCY)w~~_35.JPG
    $(KGrHqJ,!nwE-wqtg63KBP4D)uCY)w~~_35.JPG
    22.5 KB · Views: 414
  • $T2eC16ZHJGoE9nuQgj4HBQGUWc3Jt!~~_35.jpg
    $T2eC16ZHJGoE9nuQgj4HBQGUWc3Jt!~~_35.jpg
    9.3 KB · Views: 413

ConeKilrAutoX

Original poster
Member
Dec 8, 2011
1,179

Attachments

  • uploadfromtaptalk1359056826575.jpg
    uploadfromtaptalk1359056826575.jpg
    49.2 KB · Views: 23
  • uploadfromtaptalk1359056847935.jpg
    uploadfromtaptalk1359056847935.jpg
    13.7 KB · Views: 386
  • uploadfromtaptalk1359056865371.jpg
    uploadfromtaptalk1359056865371.jpg
    57.2 KB · Views: 22

scorpio1

Member
Dec 12, 2012
50
Another suggestion... For your charge pipes, to help keep the charge pipes from popping apart under boost, weld a decent sized bead around the end of the pipe where your coupler slips over, that gives the clamp a place to hold onto for more support. If you knew this no biggie, just another down the road suggestion. :smile:

Nice J pipes, btw.:yes:
 

scorpio1

Member
Dec 12, 2012
50
Ah, very nice, V-bands are very nice, as many as you can use, do it!

I seriously can't wait to see how this all works out for you, been contemplating a rear mount turbo setup for mine, so I'm watching your progress closely. Keep it up bud!
 

ConeKilrAutoX

Original poster
Member
Dec 8, 2011
1,179
Thank you! I can't wait either I never thought I would have been able to do it but here I am haha...and as I am finding out the rear mount would most likely be a lot easier :rotfl:

But I believe the major parts of the build should get under way first or second week of march.

I am starting by putting in my 80lb injectors + EV6 harness, switching to the 06 TB complete engine harness, re wiring the everything to work with my new 06 tuned PCM, and then hooking up the oil catch can while the intake manifold is all disassembled.

Then it is just fabbing up my piping and hosing.

But in the mean time I am installing 2 dedicated Efans (12") and taking out the stock fan. I also want a rally control panel like I used to have (in the 300zx) on the inside so I am moving the HVAC controls to the glovebox and putting the toggle switch panel in its place with labels and toggles for halo lights, high fan, low fan, arming the nitrous, and whatever else I can think of)
 

ConeKilrAutoX

Original poster
Member
Dec 8, 2011
1,179
This is everything except my 2 TiAL 38mm wastegates and hardware, my efans, my 45 degree bends for down pipe and then my oil tapping supplies.
I am good to go when it is warm!

View attachment 26394

1. 06 TB complete engine wiring harness
2. 4" AEM Dry Flow air filter
3. Oil Catch Can + In/Return hosing
4. 2.5" GReddy universal polished aluminium intercooler piping kit
5. Maf conversion + 4" pipe for correct air flow results
6. HKS SSQV III Blow Off Valve with 2.5" intercooler pipe
7. AMS Evolution intercooler (30" x 7")
8. Glowshift BAR boost gauge and Oil Temp
9. GT45r Turbo (balanced) 4" intake and exhaust is 1.00 A/r
10. 2 x 1.5" greddy wastegate piping
11. Aftermarket Exhaust manifold that is reinforced
12. Vacuum splitter (billet machined) for my blow off valve to know when to open or close and for boost gauge reading
13. 3.25" to 3" down pipe converter
14. 3.25" downpipe
15. 06 TB PCM tuned for boost, injectors, maf and more by Limeswap.com (limequat)
16. 80lb/hr 875 CC Deka IV Long USCar injectors
17. 3" U bend from JEGS for fabricating the turbo up pipe
18. 3" J bend from JEGS for fabricating the turbo up pipe
19. 3" 90* bend from JEGS for fabricating the turbo down pipe
20. PCM Wiring I need to pin out C1
21. EV6 Injector Wiring harness
22. Intake manifold gasket
23. Oil feed line kit
24. machined 3" to T4 turbo flange plate
25. ATP Turbo studs (10mm) and 10mm Copper lock-nuts
26. Powerstop brake pads front and rear.
 

Attachments

  • Copy of 2013-02-18_19-19-50_962 - Copy.jpg
    Copy of 2013-02-18_19-19-50_962 - Copy.jpg
    72 KB · Views: 31

Forum Statistics

Threads
23,355
Posts
638,320
Members
18,563
Latest member
memoremix

Members Online