- Aug 12, 2012
- 12
The cargo area of my trailblazer was always cluttered and I was fed up with it so I decided to build some storage and organization into the cargo area myself. I did some searching and found that storage organization like this can be very expensive to buy. This whole project cost me about $150 and took about 9.5 hours over 2 evenings. Please let me know what you think.
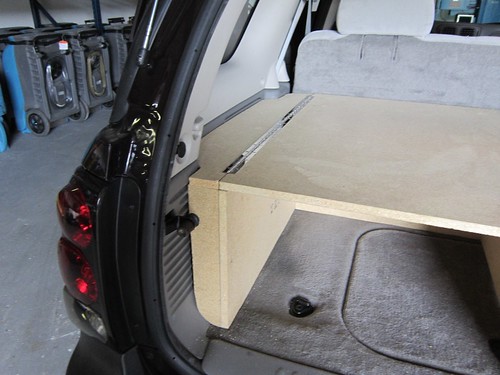
I started with the basic frame that would easily slide in and out of the back.

Unfinished with wings up by audiophobe, on Flickr
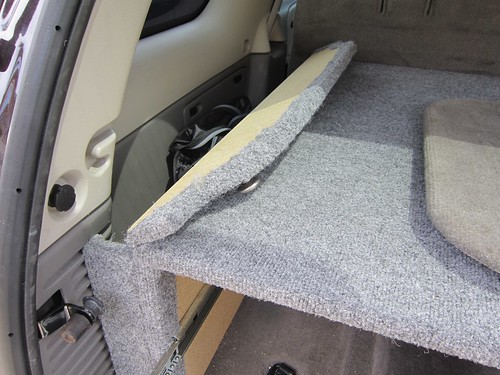
Then I added wings to the sides of the frame so that it would look nicely finished and still be easily removed when necessary.
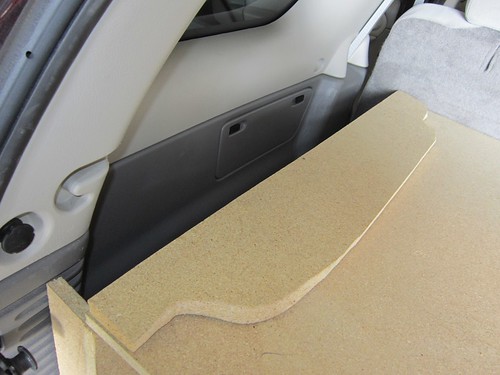
Driver side wing by audiophobe, on Flickr
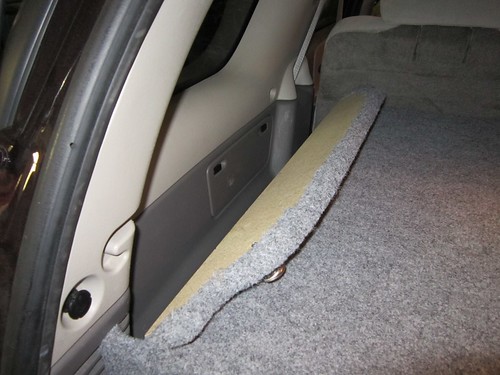
The trim pieces on the front are pressure fit in and easily removable. I added piano hinges so that I can still access the sides and use for storage.
Side trim by audiophobe, on Flickr
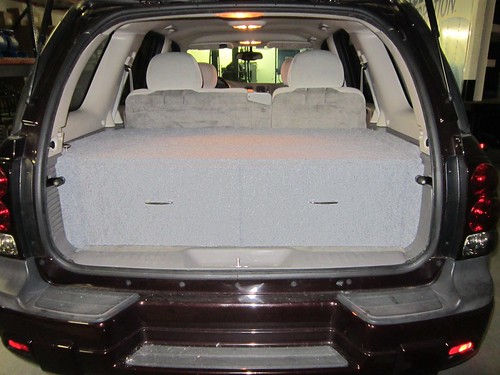
Here’s the whole unit with trim pieces installed and wings down. No drawers or carpet added yet of course.
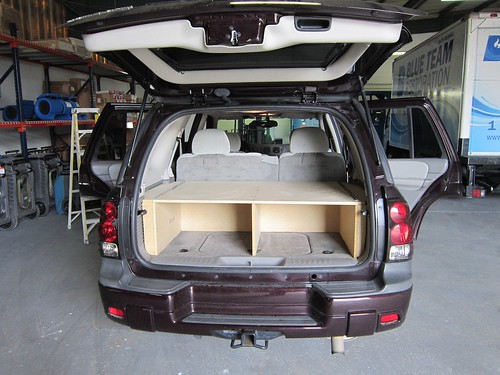
Unfinished frame by audiophobe, on Flickr
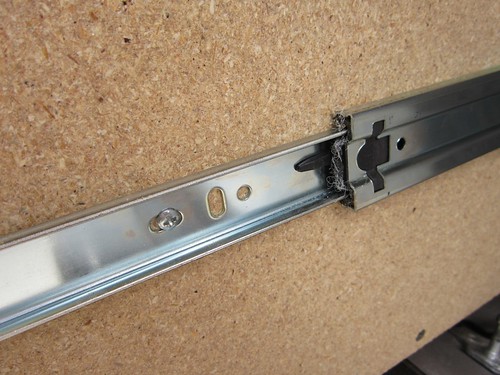
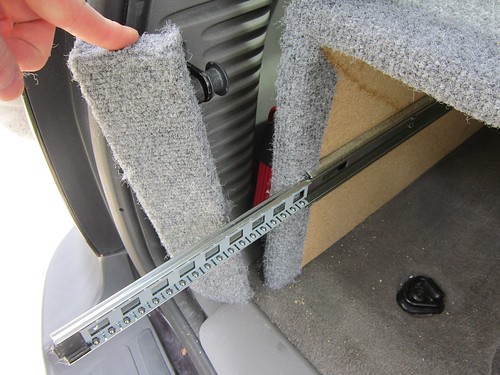
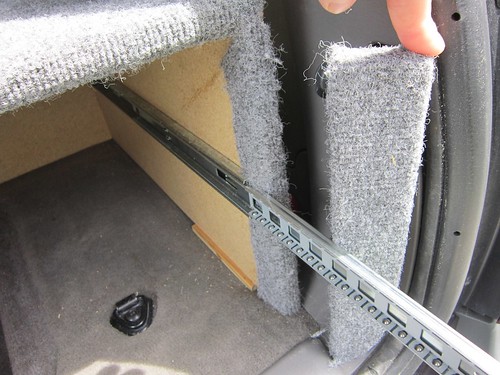
Next I installed 100 lbs. Drawer slides from Home Depot ($15)

100 pound Drawer slide by audiophobe, on Flickr
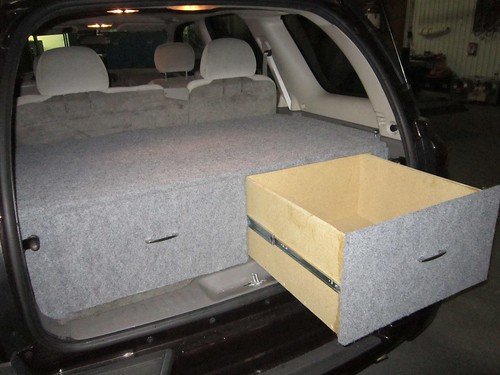
I assembled the drawers and fitted them into the openings.

One drawer sliding by audiophobe, on Flickr
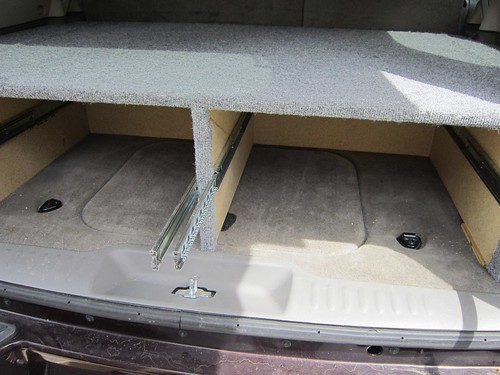
Here’s the unit assembled and ready for carpet.
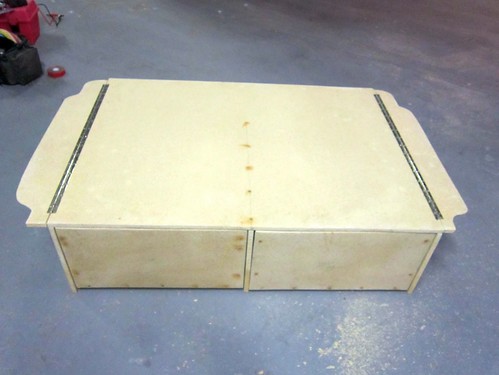
Unfinished and ready for covering. by audiophobe, on Flickr
I carpeted the top and drawer fronts with perfection grey carpet from Home Depot ($15 for a 6x5 piece) I used spray adhesive and staples to put it all together.

Covered and installed by audiophobe, on Flickr
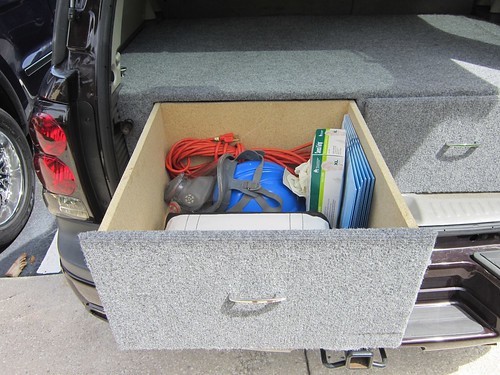
Passenger drawer ajar by audiophobe, on Flickr
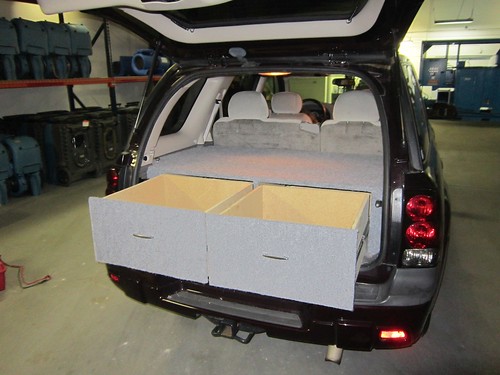
Both drawers open by audiophobe, on Flickr
Storage area behind back seat.
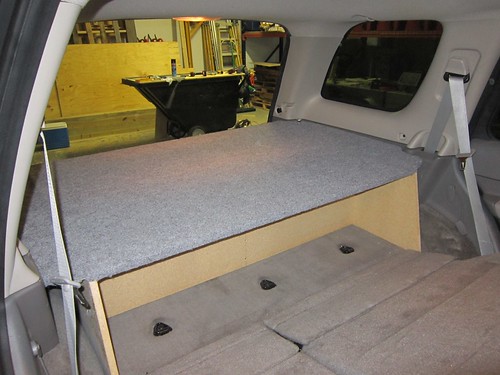
Storage area behind rear seat by audiophobe, on Flickr
I installed round drawer pull knobs on the wings for ease of access to the side compartments ($1.50 for 2)

Driver side wing knob by audiophobe, on Flickr
Driver side wing open by audiophobe, on Flickr
Passenger side wing open by audiophobe, on Flickr
I installed handles on the drawers next ($1.50 each) All trimmed out and pretty.
Installed with trim pieces in place by audiophobe, on Flickr
Incase you were wondering about how I access the storage compartment or remove the entire thing from the back of the truck here is how it’s done. I opted to leave the cover on the storage compartment so that I don’t lose it. I could easily leave it off which would mean all I have to do to access the compartment is remove a drawer. But...
I start by removing the drawers.
Drawer pulled out by audiophobe, on Flickr
Drawer slide by audiophobe, on Flickr

Drawer release tab by audiophobe, on Flickr
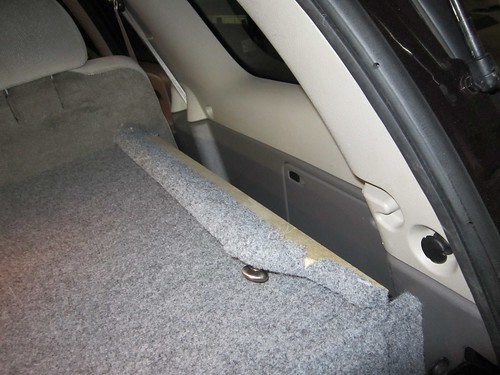
Once the drawers are out I lift the side wings.
Wing lifted by audiophobe, on Flickr
Passenger side wing open by audiophobe, on Flickr
Then I remove the front trim pieces, which I pressure fit for ease of removal.
Driver side trim removed. by audiophobe, on Flickr
Passenger side trim removed by audiophobe, on Flickr
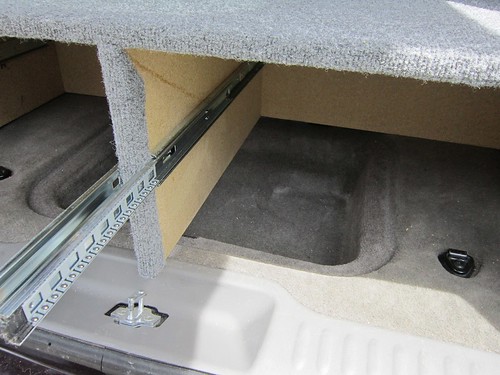
Once all of the trim pieces are out of the way I can lift the frame and pull out the cover.
Both drawers removed by audiophobe, on Flickr

Shelf lifted for access to storage compartment by audiophobe, on Flickr
Storage compartment without lid. by audiophobe, on Flickr
If I want to remove the whole thing it slides easily straight out the back. There you have it, I hope you enjoyed checking out my post.
I started with the basic frame that would easily slide in and out of the back.
Unfinished with wings up by audiophobe, on Flickr
Then I added wings to the sides of the frame so that it would look nicely finished and still be easily removed when necessary.
Driver side wing by audiophobe, on Flickr
The trim pieces on the front are pressure fit in and easily removable. I added piano hinges so that I can still access the sides and use for storage.
Side trim by audiophobe, on Flickr
Here’s the whole unit with trim pieces installed and wings down. No drawers or carpet added yet of course.
Unfinished frame by audiophobe, on Flickr
Next I installed 100 lbs. Drawer slides from Home Depot ($15)
100 pound Drawer slide by audiophobe, on Flickr
I assembled the drawers and fitted them into the openings.
One drawer sliding by audiophobe, on Flickr
Here’s the unit assembled and ready for carpet.
Unfinished and ready for covering. by audiophobe, on Flickr
I carpeted the top and drawer fronts with perfection grey carpet from Home Depot ($15 for a 6x5 piece) I used spray adhesive and staples to put it all together.
Covered and installed by audiophobe, on Flickr
Passenger drawer ajar by audiophobe, on Flickr
Both drawers open by audiophobe, on Flickr
Storage area behind back seat.
Storage area behind rear seat by audiophobe, on Flickr
I installed round drawer pull knobs on the wings for ease of access to the side compartments ($1.50 for 2)
Driver side wing knob by audiophobe, on Flickr
Driver side wing open by audiophobe, on Flickr
Passenger side wing open by audiophobe, on Flickr
I installed handles on the drawers next ($1.50 each) All trimmed out and pretty.
Installed with trim pieces in place by audiophobe, on Flickr
Incase you were wondering about how I access the storage compartment or remove the entire thing from the back of the truck here is how it’s done. I opted to leave the cover on the storage compartment so that I don’t lose it. I could easily leave it off which would mean all I have to do to access the compartment is remove a drawer. But...
I start by removing the drawers.
Drawer pulled out by audiophobe, on Flickr
Drawer slide by audiophobe, on Flickr
Drawer release tab by audiophobe, on Flickr
Once the drawers are out I lift the side wings.
Wing lifted by audiophobe, on Flickr
Passenger side wing open by audiophobe, on Flickr
Then I remove the front trim pieces, which I pressure fit for ease of removal.
Driver side trim removed. by audiophobe, on Flickr
Passenger side trim removed by audiophobe, on Flickr
Once all of the trim pieces are out of the way I can lift the frame and pull out the cover.
Both drawers removed by audiophobe, on Flickr
Shelf lifted for access to storage compartment by audiophobe, on Flickr
Storage compartment without lid. by audiophobe, on Flickr
If I want to remove the whole thing it slides easily straight out the back. There you have it, I hope you enjoyed checking out my post.
 it looks very professional, kinda like it came with the truck. Thanks for sharing!


 and nice work


