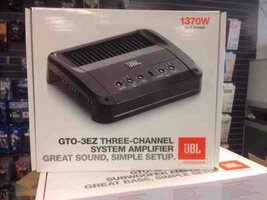
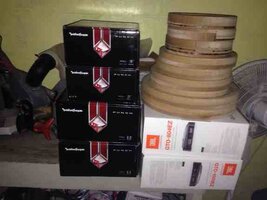
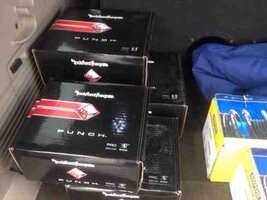
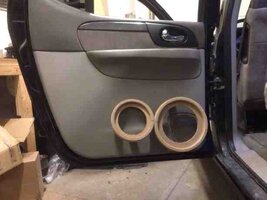
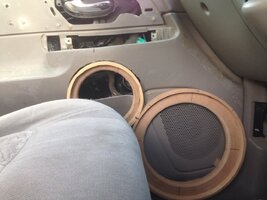
My new setup!

ghenny440

Original poster
Member
Dec 14, 2011
368
Well i made the best of thing being my subs are down( the ones in these pics are shop loner subs) and cleaned ALL WIRES up RErouted them and finally completed stage 1 of my amp rack, still havent ordered my 5th amp the 3EZ yet (coming soon though and will be in the empty spot) and i have to get my electric fans for stage 2 of the rack but let me
know what yall think
ru2ara2e.jpg

dyju5uha.jpg

6u8anatu.jpg
y7use3en.jpg

hu6uheva.jpg

u4e2e7a8.jpg

ysa6uhej.jpg

epegy6yn.jpg

As you can see in the pics after i rearranged the CAP bank the one 0awg wire wAs to short so tomorrow im gonna add a longer piece from the distribution block to the cap bank and stage one will be finished
 
  • Like
Reactions: Blckshdw

ghenny440

Original poster
Member
Dec 14, 2011
368
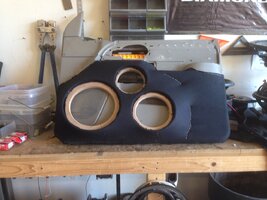
Oh and the old 18's box didnt go to waste she was cut down and pieced apart to start the amp rack... Waste not want not i guess
 

ghenny440

Original poster
Member
Dec 14, 2011
368
Finally got my last amp in oh yeah
View attachment 31833
I should be starting the door glassing the end of march, time to start saveing up for all the Rockford pro speakers! Our dealer buy is super cheap but still gonna be steap with all the speakers going in, well ill keep you guys informed, i know this is a LOOOONNNNGGG build but with 3 kids all in school, gotta go slow ya know
 

Attachments

  • ImageUploadedByTapatalk1388590859.406245.jpg
    ImageUploadedByTapatalk1388590859.406245.jpg
    15.2 KB · Views: 128

ghenny440

Original poster
Member
Dec 14, 2011
368
Well i have been saving and got the front door 6" midrange and the 8" midbass bought, and waiting on the p3 shallow 10, gotta buy the 6" midrange for the back doors, the p3shallow 8's are in to! So real soon ill be starting on the doors, gotta order the resin, im ordering the SMD Sunflash resin
View attachment 33785
View attachment 33786

[video=youtube_share;kdq4SR5HhTQ]http://youtu.be/kdq4SR5HhTQ[/video]

What ya think?
 

Attachments

  • ImageUploadedByTapatalk1396044694.849208.jpg
    ImageUploadedByTapatalk1396044694.849208.jpg
    13.9 KB · Views: 96
  • ImageUploadedByTapatalk1396044731.448657.jpg
    ImageUploadedByTapatalk1396044731.448657.jpg
    12.4 KB · Views: 96
  • Like
Reactions: Blckshdw

MAY03LT

Member
Nov 18, 2011
3,426
Delmarva
Nice. I watched the same video on meades sunflash, I can't wait to try it someday.
 

ghenny440

Original poster
Member
Dec 14, 2011
368
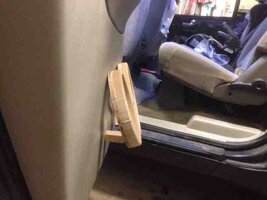
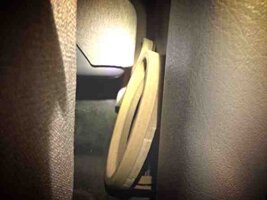
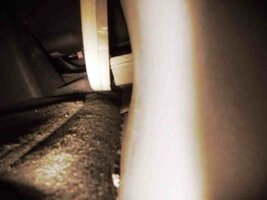
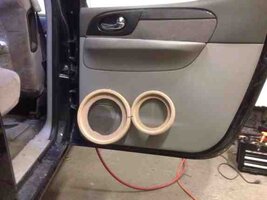
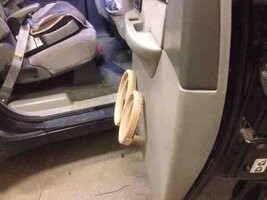
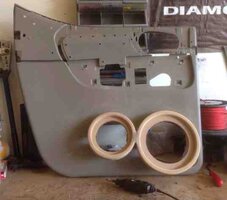
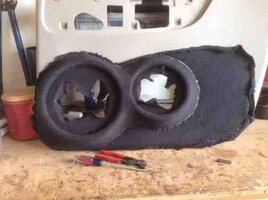
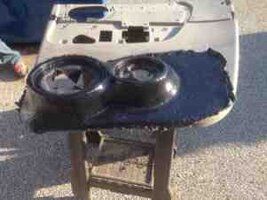
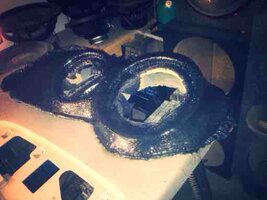
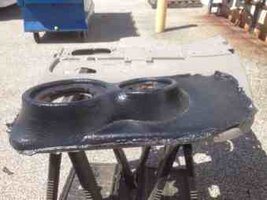
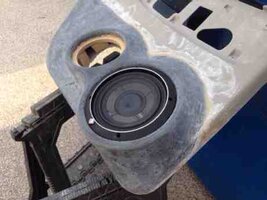
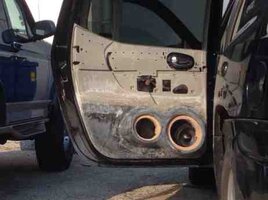
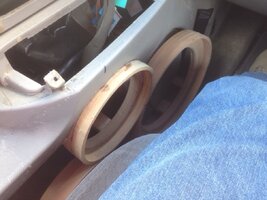
Alrighty guys... I started the door mockup today after i got off work, i just got home actually, once i took measurements and did a ton of open the door/close the door, check the distance from the seat pad and frame, after that the 2nd rear door went pretty quick, so on to the pics of the mock up/ permanent set of the rear door rings... ENJOY
View attachment 33961
View attachment 33962
View attachment 33963
View attachment 33964
View attachment 33965
View attachment 33966
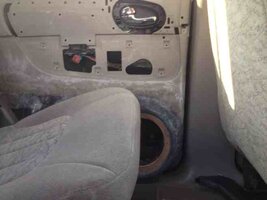
As you can see and anyone who knows the envoy xl and the trailblazer ext they have that odd raise in the panel.. Well i didnt take that into consideration in the early planning so i had to lift the smaller ring away from that hump, but all in all it should come out pretty slick i should be picking up the fleece this week and start stretching it over the panel.... Whatch ya think so far
 

Attachments

  • ImageUploadedByTapatalk1396748589.624091.jpg
    ImageUploadedByTapatalk1396748589.624091.jpg
    14.7 KB · Views: 75
  • ImageUploadedByTapatalk1396748611.889752.jpg
    ImageUploadedByTapatalk1396748611.889752.jpg
    14.4 KB · Views: 20
  • ImageUploadedByTapatalk1396748663.674268.jpg
    ImageUploadedByTapatalk1396748663.674268.jpg
    13.1 KB · Views: 77
  • ImageUploadedByTapatalk1396748707.756315.jpg
    ImageUploadedByTapatalk1396748707.756315.jpg
    17.4 KB · Views: 21
  • ImageUploadedByTapatalk1396748744.506200.jpg
    ImageUploadedByTapatalk1396748744.506200.jpg
    13.7 KB · Views: 75
  • ImageUploadedByTapatalk1396748766.306652.jpg
    ImageUploadedByTapatalk1396748766.306652.jpg
    14 KB · Views: 76
  • Like
Reactions: Blckshdw

ghenny440

Original poster
Member
Dec 14, 2011
368
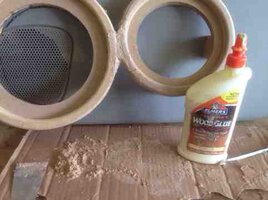
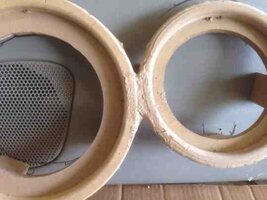
Finished up all the bracing on the back doors and filled the small crack between the rings so it wont show during the resining process
Here is a lil trick i learned for all the wood working NOOBS on here,
most would bust out some bondo and hardener for this task, no no no, why when SAW DUST IS FREE AND WOOD GLUE IS SUPER CHEAP... Simply mix the saw dust with a bit of glue til its a paste consistency, apply like you would some body filler, sand smooth with 80 grit, and your ready for fleece!
View attachment 33980
View attachment 33981
Needs a lil more filling on them before sanding but its like putting wood back in that spot, MDF is nothing more than sawdust and glue, compressed to a sheet
 

Attachments

  • ImageUploadedByTapatalk1396823736.062075.jpg
    ImageUploadedByTapatalk1396823736.062075.jpg
    12.1 KB · Views: 71
  • ImageUploadedByTapatalk1396823750.464336.jpg
    ImageUploadedByTapatalk1396823750.464336.jpg
    13 KB · Views: 71

Blckshdw

Moderator
Nov 20, 2011
10,762
Tampa Bay Area, FL
:goodpost: Granted I have ZERO wood working skills, but that's a damn good idea.
 

Sir ffeJ

Member
Dec 1, 2011
543
ghenny440 said:
Here is a lil trick i learned for all the wood working NOOBS on here,
most would bust out some bondo and hardener for this task, no no no, why when SAW DUST IS FREE AND WOOD GLUE IS SUPER CHEAP... Simply mix the saw dust with a bit of glue til its a paste consistency, apply like you would some body filler, sand smooth with 80 grit, and your ready for fleece!

A little trick I learned waaay back in wood shop :thumbsup:
Also if your working with a lathe, sawdust makes for a great finish. Smoother than a baby's bottom.
 

ghenny440

Original poster
Member
Dec 14, 2011
368
Well i finished the filling and cut out the holes for the speaker motors to pass through gonna sand them smooth tomorrow, and prepare(seal it off from the subwoofer) the midrange ring and "SHOULD" be glassing them by the weekend
peje6aja.jpg
 

ghenny440

Original poster
Member
Dec 14, 2011
368
Well got the rings all sanded and the panels FULLY disassembled and sanded smooth
View attachment 34049
Here is a video explaining what is going on and why the complete disassambly
[video=youtube_share;DkY4pf-147Y]http://youtu.be/DkY4pf-147Y[/video]
And here is a pic of the vynils
View attachment 34051
More pics coming as i go, think im gonna be laying the fleece and resining it tomorrow
 

Attachments

  • ImageUploadedByTapatalk1397001368.707476.jpg
    ImageUploadedByTapatalk1397001368.707476.jpg
    13.3 KB · Views: 81
  • ImageUploadedByTapatalk1397002439.085671.jpg
    ImageUploadedByTapatalk1397002439.085671.jpg
    11.7 KB · Views: 82
  • Like
Reactions: Blckshdw

ghenny440

Original poster
Member
Dec 14, 2011
368
Well no pics today worked late and when i went to start tacking the fleece down my dam stapler took a shit, so off to the local harbor freight tomorrow to buy a new one
 

ghenny440

Original poster
Member
Dec 14, 2011
368
Doin work son! I got to anxiouse i have to post a pic of the first door
View attachment 34077
Resin is scheduled for tomorrow!!!
 

Attachments

  • ImageUploadedByTapatalk1397156466.180993.jpg
    ImageUploadedByTapatalk1397156466.180993.jpg
    11.8 KB · Views: 64

Boricua SS

Member
Nov 20, 2011
3,080
Ohio
[video=youtube_share;qDaGc0Dysh8]http://youtu.be/qDaGc0Dysh8[/video]

:rotfl::rotfl:... startin to come together bro! Cant wait to see it done.
 

ghenny440

Original poster
Member
Dec 14, 2011
368
Me either, im pickin my moms car up in the am from her job and installing a 2 way alarm remote start with the keypad on the windshield then im gonna work on mine, gotta set it up to auto arm, she forgot to lock it the other night and somebody ransacked the car and stole 5$ in change
So i figure by the time im done with that payroll should be done, and i can go get my resin/ activator, and some spray foam to seal off the midrange compartment
 

ghenny440

Original poster
Member
Dec 14, 2011
368
Oh i guess a lil explanation is in order as to why i "ELECTED" to go so far over towards the end of the panel with the fleece, when i clearly
Stapled and formed around the speaker rings...
Reason being is that there is most likely gonna be a small window with an edge lit piece of plexi in that area displaying a rockford logo, no quite sure yet.
But if i decide by tomorrow that i dont want it there it is able to be yanked, cuz there is deffinately gonna be one in the front doors
 

ghenny440

Original poster
Member
Dec 14, 2011
368

Attachments

  • ImageUploadedByTapatalk1397259583.528877.jpg
    ImageUploadedByTapatalk1397259583.528877.jpg
    6.3 KB · Views: 50
  • ImageUploadedByTapatalk1397259607.938840.jpg
    ImageUploadedByTapatalk1397259607.938840.jpg
    12.1 KB · Views: 49
  • ImageUploadedByTapatalk1397259645.322174.jpg
    ImageUploadedByTapatalk1397259645.322174.jpg
    11.4 KB · Views: 49
  • ImageUploadedByTapatalk1397259703.707767.jpg
    ImageUploadedByTapatalk1397259703.707767.jpg
    11.8 KB · Views: 49
  • Like
Reactions: Blckshdw

Blckshdw

Moderator
Nov 20, 2011
10,762
Tampa Bay Area, FL
Just to be clear, you ARE shooting the GHenny instructional video as you're going along, so the rest of us can learn this stuff right? :deal:

Looks good BTW, you can come down and do mine next! :biggrin:
 

ghenny440

Original poster
Member
Dec 14, 2011
368
Honestly no i havent but before i sand them tomorrow after work i will do that for sure
 

ghenny440

Original poster
Member
Dec 14, 2011
368
Looks good BTW, you can come down and do mine next! :biggrin:[/QUOTE]

Ill tell you what... If you ship them up and paypal me the money for supplies/ return shipping i will MAKE you some
 

Blckshdw

Moderator
Nov 20, 2011
10,762
Tampa Bay Area, FL
ghenny440 said:
blckshdw said:
Looks good BTW, you can come down and do mine next! :biggrin:

Ill tell you what... If you ship them up and paypal me the money for supplies/ return shipping i will MAKE you some

:undecided: I may hold you to that when I have some disposable income down the road. :yes:
 

ghenny440

Original poster
Member
Dec 14, 2011
368
No problemo bro, and if you want i can make one that isnt one piece like mine are, i can do it so that it is just a "pod" that bolts on from behind the panel kinda like a Q form kick panel, do a single 6.5" component set in it.... Ill do a big right up and everything for it
 

ghenny440

Original poster
Member
Dec 14, 2011
368
Got to work today and they are hard as a rock, ill take the grinder to them tonight and lay about 2 layers of chop mat some resin and they will be ready for some smoothing
View attachment 34124
 

Attachments

  • ImageUploadedByTapatalk1397320743.006945.jpg
    ImageUploadedByTapatalk1397320743.006945.jpg
    7.7 KB · Views: 54

ghenny440

Original poster
Member
Dec 14, 2011
368

Attachments

  • ImageUploadedByTapatalk1397429797.976895.jpg
    ImageUploadedByTapatalk1397429797.976895.jpg
    9.3 KB · Views: 42
  • ImageUploadedByTapatalk1397429817.241540.jpg
    ImageUploadedByTapatalk1397429817.241540.jpg
    11.3 KB · Views: 42
  • ImageUploadedByTapatalk1397429922.641351.jpg
    ImageUploadedByTapatalk1397429922.641351.jpg
    13.4 KB · Views: 44
  • Like
Reactions: Blckshdw

Blckshdw

Moderator
Nov 20, 2011
10,762
Tampa Bay Area, FL
ghenny440 said:
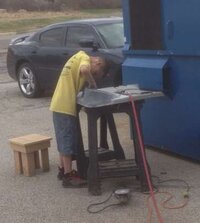
Look carlton its so easy my 11 yr old is learning, he helped ALOT on the sanding, his lil fingers worked great for sanding the inside of the rings

If it's that easy, then it should also be easy to make a how-to video, so those with less DIY skills than me can learn from you too :raspberry:
 

ghenny440

Original poster
Member
Dec 14, 2011
368
View attachment 34329
View attachment 34330
View attachment 34331
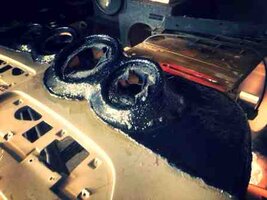
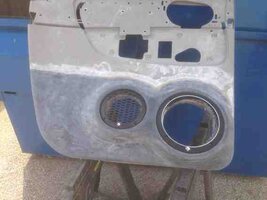
I will be doing the bondo tomorrow on this door and a lil more sanding, then grinding the other door and some chopmat reinforcement for it, then Bondo and sand it sunday, during this next part when i do the front doors i have some AWESOME tricks for QUICK working/sanding the bondo so you guys will wanna watch that video!
What ya think so far,
 

Attachments

  • ImageUploadedByTapatalk1397866173.049500.jpg
    ImageUploadedByTapatalk1397866173.049500.jpg
    13.9 KB · Views: 23
  • ImageUploadedByTapatalk1397866199.081173.jpg
    ImageUploadedByTapatalk1397866199.081173.jpg
    19.2 KB · Views: 24
  • ImageUploadedByTapatalk1397866213.598266.jpg
    ImageUploadedByTapatalk1397866213.598266.jpg
    11.2 KB · Views: 30

MAY03LT

Member
Nov 18, 2011
3,426
Delmarva
ghenny440 said:
I will be doing the bondo tomorrow on this door and a lil more sanding, then grinding the other door and some chopmat reinforcement for it, then Bondo and sand it sunday, during this next part when i do the front doors i have some AWESOME tricks for QUICK working/sanding the bondo so you guys will wanna watch that video!
What ya think so far,

I'm lovin them doors. The site is going through a transition so we lost our "likes", so I'll just say LIKE for now lol.

I'm always down to learn new tips and tricks for fabrication so post it and I'll watch it for sure.:cool:
 

ghenny440

Original poster
Member
Dec 14, 2011
368
Thanks buddy, you are gonna love this trick... And yes CARLTON the video will be ALMOST a step by step
 

Blckshdw

Moderator
Nov 20, 2011
10,762
Tampa Bay Area, FL
ghenny440 said:
Thanks buddy, you are gonna love this trick... And yes CARLTON the video will be ALMOST a step by step

lol, well I think I'll be able to fill in my own steps for the most part. All I know is, you need some LEDs in this piece!!! :lightbulb:

Can a brutha get some LED backlighting inside the speaker grilles? Somethin please!! :raspberry:
 

Blckshdw

Moderator
Nov 20, 2011
10,762
Tampa Bay Area, FL
Looks pretty good so far. I'm sure the finished product will kick ass :2thumbsup:
 

ghenny440

Original poster
Member
Dec 14, 2011
368
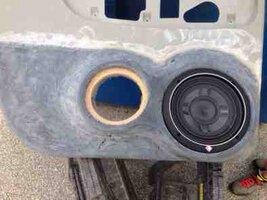
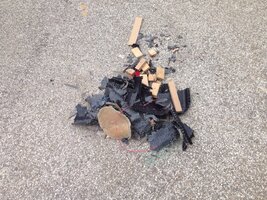
Thanks bro, i had them done already in resin and didnt check clearance between the 8" and the door, well needless to say this was not a good time when i fitted them ImageUploadedByTapatalk1399304059.296274.jpg
 
  • Like
Reactions: dmanns67

Blckshdw

Moderator
Nov 20, 2011
10,762
Tampa Bay Area, FL
So the 8" was hitting the seat when you shut the door or something?
 

Forum Statistics

Threads
23,721
Posts
642,586
Members
19,251
Latest member
Sheik480

Members Online