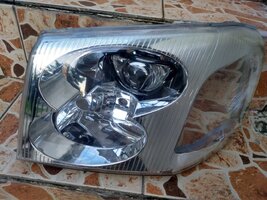
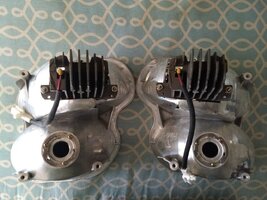
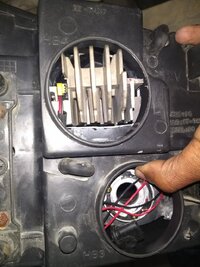
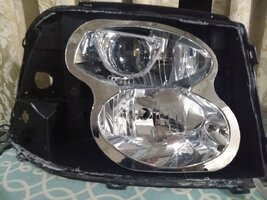
Members projector retrofits

Capote

Supporting Donor
Member
Jul 14, 2014
24,227
Atlanta, GA
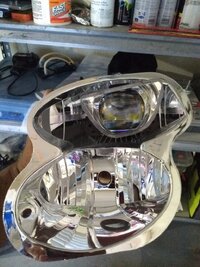
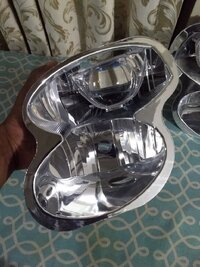
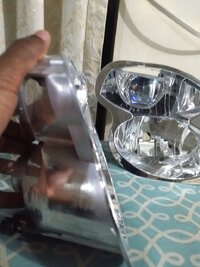
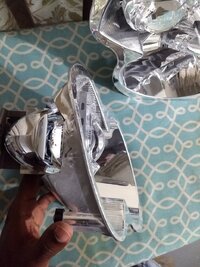
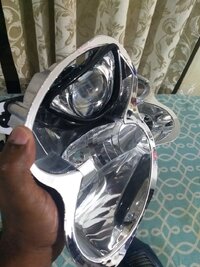
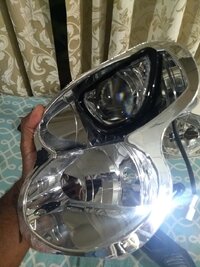
I realized that after all that work that out would've been easier that way :duh: . Maybe the other side will be better. Or should I stop before I fly too close to the sun and burn :confused:
You better stop before you ruin them...
You need DEPO headlights, something that can be baked open that doesn't have a permaseal.
 
  • Like
Reactions: 07TrailyLS

Capote

Supporting Donor
Member
Jul 14, 2014
24,227
Atlanta, GA
I guess so, will take it to a guy who does retrofits and give them one last try before stopping :2thumbsup:
As stated above many times, OEM headlights are not going to be able to be baked open.
 
  • Like
Reactions: NateDG

Capote

Supporting Donor
Member
Jul 14, 2014
24,227
Atlanta, GA
Mar 30, 2016
1,465
KSA
It'd be difficult when it comes to the inside portion where the grill crossbar attaches.

I agree! Well thanks to some motivation by @Capote :crackup: and looking at the state of my hands, I will be leaving these headlights be and wait till I get some Depo headlights or so. Also I don't think I would be able to enjoy them even if I did get the OEM headlights to open as I travel next week. So for now have put the lights and grill back on and have moved this mod to coming soon! :quiverlips:
 

07TrailyLS

Member
May 7, 2014
423
Toledo ohio
Don't get discouraged. Aftermarket heads are the way to go. Just make sure when you buy, you specifically search for DEPO brand on Amazon. There's other after markets out there that are sill permaseal. I will say that even baking them for a first timer is hard to get them open. You have to maintain heat and patience and be easy with the screwdriver. Our lights make it nearly impossible to use the pry out pliers like the pro retrofitters use. My advise would be just slow down and think about what your doing before you do it. It will lead to a much better end result. Rome wasn't built in a day brotha!
 

Capote

Supporting Donor
Member
Jul 14, 2014
24,227
Atlanta, GA
I might try to see if it's possible to even Dremel open a pair of our headlights for s***'s and giggles. I picked up some cutting wheels for mine recently. I have two spare sets anyway, might as well see if it's for sure a bust.
 

Capote

Supporting Donor
Member
Jul 14, 2014
24,227
Atlanta, GA
  • Like
Reactions: $ Khalid ! 9130
Mar 30, 2016
1,465
KSA
Don't get discouraged. Aftermarket heads are the way to go. Just make sure when you buy, you specifically search for DEPO brand on Amazon. There's other after markets out there that are sill permaseal. I will say that even baking them for a first timer is hard to get them open. You have to maintain heat and patience and be easy with the screwdriver. Our lights make it nearly impossible to use the pry out pliers like the pro retrofitters use. My advise would be just slow down and think about what your doing before you do it. It will lead to a much better end result. Rome wasn't built in a day brotha!

Not discouraged, but slowed down as i said! Will have to take it one step at a time. As always the main force is you guys :2thumbsup:
 
  • Like
Reactions: 07TrailyLS

dna59

Member
Nov 20, 2015
327
Belize
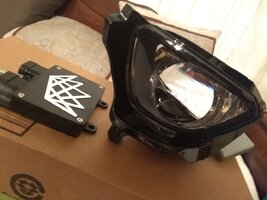
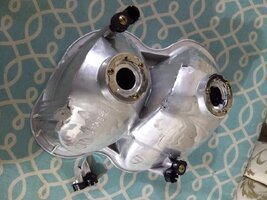
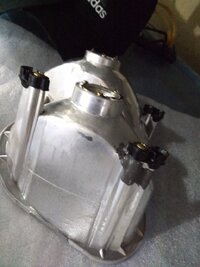
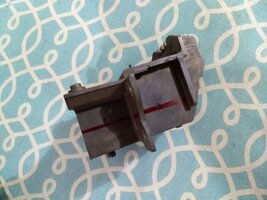
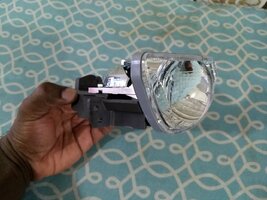
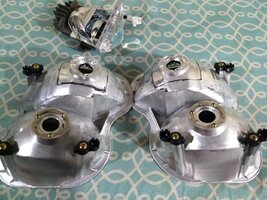
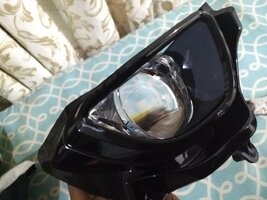
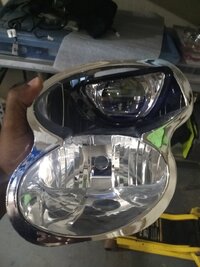
As some may know I've purchased some Corolla Koito low beam LED projectors. I'll list the components below. All of the below have already been installed while I work on the actual LED retrofit on the extra set of lights. Today I started with opening up the headlights and getting the reflectors out. So far I know I will need to trim the heatsink on the LED projectors as well as the shroud. At this point I am still uncertain if they will actually fit but I'm determined. Tomorrow I will start on trimming the heatsink and mod the projectors. Also need to fix the mounting tab on one of the reflectors since somehow it broke upon taking it out.

-DNA Motoring clear corner headlights
-Corolla Koito LED projectors
-Profile 9005 adjustable wattage HID kit
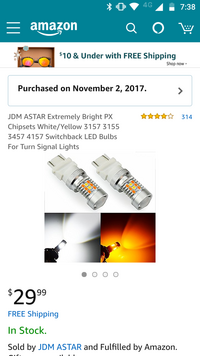
-JDM Astar LED switchback bulbs
-Kelvin orange LED cornering light
-Kelvin LED foglight bulbs
-LAFA white LED 194 bulbs
-Novita LED compatible electronic flasher
IMG_20171119_112737.jpg
 
Last edited:
  • Like
Reactions: Matt

xavierny25

Member
Mar 16, 2014
6,324
Staten Island, N.Y
-JDM Astar LED switchback bulbs

Which specific ones did you get? Are you removing the amber lens on the headlights? I'm asking this because the ones i got from jdm and by removing the lens I ended up with crazy light pattern that reflects upward in a V pattern.
 

xavierny25

Member
Mar 16, 2014
6,324
Staten Island, N.Y
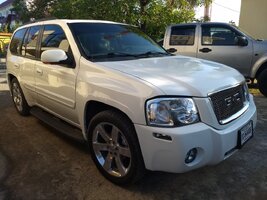
Forgot to include that I have new clear corner headlights. Linked a pic of the ones I'm using.
View attachment 82484

Those are the ones i have but they have the black base. Im not sure what head light assemblies those are but if they dont have a lens get ready for the light pattern im talking about.20160604_213510.jpg
Thats just the passenger side as I blocked the driver side switchback to take the pic.
 
Last edited:

dna59

Member
Nov 20, 2015
327
Belize
Which specific ones did you get? Are you removing the amber lens on the headlights? I'm asking this because the ones i got from jdm and by removing the lens I ended up with crazy light pattern that reflects upward in a V pattern.

Those are the ones i have but they have the black base. Im not sure what head light assemblies those are but if they done have a lens get ready for the light pattern im talking about.View attachment 82485
Thats just the passenger side as I blocked the driver side switchback to take the pic.

These ones have a lens. I like the look with the clear lens much more than just removing the lens. I don't have any issues with those bulbs and these headlights.IMG_20171126_073734.jpg
 

xavierny25

Member
Mar 16, 2014
6,324
Staten Island, N.Y
These ones have a lens. I like the look with the clear lens much more than just removing the lens. I don't have any issues with those bulbs and these headlights.View attachment 82486

Good info...:2thumbsup: I think I'll be purchasing a set of those assemblies for my next retro.... But I'm definitely going to be watching your build closely.:popcorn:
 

dna59

Member
Nov 20, 2015
327
Belize
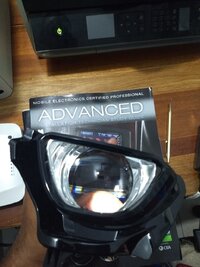
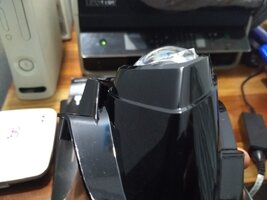
Got some stuff done. JB welded the broken reflector mount and got one projector heatsink cut down. I don't foresee any issues from the amount I cut off...I've seen much worse. Plus I don't do much night driving. Aiming to get the other cut down after work. Let's just say my gloves save my pinky a couple times.IMG_20171204_061346.jpg IMG_20171204_061937.jpg IMG_20171204_062639.jpg IMG_20171204_071108.jpg
 

dna59

Member
Nov 20, 2015
327
Belize
Height and width of the projects seem to be good now. After some rough measurements and guesstimates I might have to trim some off the rear of the projectors, but I'm hoping I don't have to or can get away with just some grinding. Tomorrow I should start cutting up the reflectors.
 
  • Like
Reactions: xavierny25

dna59

Member
Nov 20, 2015
327
Belize
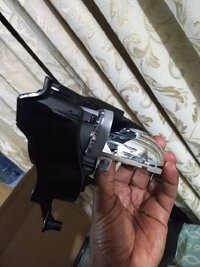
Did some cutting. This thing surely is not fitting with it bolted in the front...worse when u factor in the shroud. Even heavily modified the shroud wouldn't fit. At this point either way I'm not sure if I'll be able to use the shroud at all. Next plan of action is to look at bolting it from the back of the reflector. That would give me almost an inch more clearance in the front. I can also get away with trimming about half inch of the heatsink from the back. Maaaaaybeeeee have to start thinking about since ideas of sealing up the back as I might have to modify the rear of the housing.
IMG_20171205_060404.jpg IMG_20171205_063554.jpg IMG_20171205_063548.jpg
 

dna59

Member
Nov 20, 2015
327
Belize
...more cutting and trimming. Projector now clears the lens when inserted from the back...yes I did just say that. But I can already see that the rear of the housing will now need to be opened up to allow the rear of the heatsink through. Even with the reflector not clipped into the adjustment points it already hits the rear. Trimming the heatsink I'm the rear will yield no more usable room. Now time to ponder sealing up the rear, mounting, and shroud trimming.
IMG_20171206_173323.jpg IMG_20171206_173331.jpg IMG_20171206_173338.jpg
 

Blckshdw

Moderator
Nov 20, 2011
10,685
Tampa Bay Area, FL
But I can already see that the rear of the housing will now need to be opened up to allow the rear of the heatsink through. Even with the reflector not clipped into the adjustment points it already hits the rear.

I remember wrestling with the same issue when I retrofitted my RX350s. Good times there! lol I opted to try to make them fit inside the housing as best as possible, which I achieved, but the projectors are nearly touching the front lens :ugh: That allowed for minimal cutting on the back side.

If I had to do them again (which I might end up doing because the UV protection on the Eagle Eyes aftermarket headlights I used, is peeling off :hissyfit:) I'd try to alter the brackets to push them further back. That would also make it easier to connect the D2S ballasts to the bulbs.
 

dna59

Member
Nov 20, 2015
327
Belize
Same thing is happening to the eagle eyes I have and they are maybe like a year old. At this point Idk if the shroud will even work since it protrudes so much from the lens. Right now I'm just tackling the obstacles one at a time as I go along and trying not to reach a point where nothing will be reusable if this doesn't work out.
 

littleblazer

Member
Jul 6, 2014
9,265
My depos seem to be doing well. :coffee: Actually aside from the wiring harness taking a crap the system has been damn near flawless. Then again you're on another level from what I did too. You guys have way more patience than I do.
 

Blckshdw

Moderator
Nov 20, 2011
10,685
Tampa Bay Area, FL
the eagle eyes I have and they are maybe like a year old.

Mine were on my truck for maybe about a year as well when I started to notice the peeling. Guess I know to cross that brand off the list for the next time...

You guys have way more patience than I do.

Hey, just because my retrofits take a freakishly long time, does NOT mean I am patient! :tongue: That just means I'm good at walking away after getting frustrated, so I don't throw expensive components at a wall and lose the money I put into them
deal.gif
 

dna59

Member
Nov 20, 2015
327
Belize
Lol... What he said. I'll take a break before I begin getting frustrated. This is by far the most challenging retro I've done. Usually it's just straight forward knowing what's needed. In this case I'm just figuring it out as I go along and having to think couple steps forward so I don't screw myself later on.
 

littleblazer

Member
Jul 6, 2014
9,265
Hey, just because my retrofits take a freakishly long time, does NOT mean I am patient! :tongue: That just means I'm good at walking away after getting frustrated, so I don't throw expensive components at a wall and lose the money I put into them
deal.gif
You brought it up not me. :tongue: I actually forgot tbh. I've thrown and smashed many a tools working on projects. Your results are sweet man. I enjoy your work. :tiphat:
 
  • Like
Reactions: Blckshdw

dna59

Member
Nov 20, 2015
327
Belize
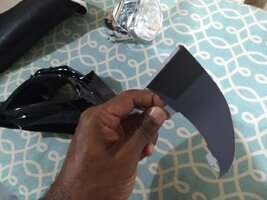
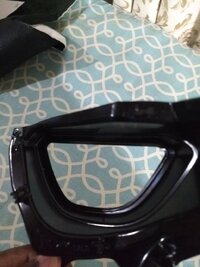
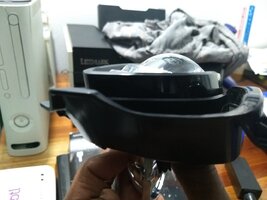
Ok ok ok...so I know I said I'd take a break buuuuuut it was calling my name. Took a look at the shield to start get some ideas about fitment. Well I realized if I removed the metal plate shield that's on it then it would allow the shroud to fit flush up against the lens on both sides as opposed to just one. This solves 90% of my problems! Now it's it start modify it to fit with the projector in the lights. I already know that pretty much 90% of the shroud won't be used.
IMG_20171207_063138.jpg IMG_20171207_063145.jpg IMG_20171207_063227.jpg IMG_20171207_063313.jpg IMG_20171207_062758.jpg IMG_20171207_062827.jpg IMG_20171207_062832.jpg
 

dna59

Member
Nov 20, 2015
327
Belize
Got the other shroud modded. It looks like maaaaaybeeeee I'll be able to get away with just grinding down some of the edges of the heatsink in the back to fit in the access hole. Which would make my like easier than having to cut of the rear of the housing and recreate one. I can't leave the back open as my environment is very dusty. Over the weekend I will try to get the projectors bolted up and then mod the heatsink as needed.
IMG_20171208_061933.jpg IMG_20171208_061820.jpg IMG_20171208_061739.jpg
 

dna59

Member
Nov 20, 2015
327
Belize
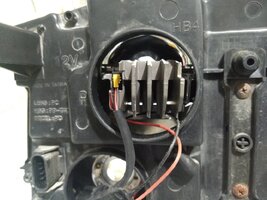
Got the heatsinks cut up some more to fit in the access hole in the back. Also got some stainless steel hardware and bolted then down. Next step is to pop the reflectors back in and see if the heatsinks actually clear it. I've just been eyeballing it with the retainers removed from the reflectors.
IMG_20171210_153409551.jpg IMG_20171210_182615159.jpg
 

Attachments

  • IMG_20171210_153409551.jpg
    IMG_20171210_153409551.jpg
    128 KB · Views: 1

Blckshdw

Moderator
Nov 20, 2011
10,685
Tampa Bay Area, FL
That looks promising. :thumbsup:

Do you have any allowance for fine tuning adjustment of the cutoff rotation?
 

dna59

Member
Nov 20, 2015
327
Belize
That looks promising. :thumbsup:

Do you have any allowance for fine tuning adjustment of the cutoff rotation?

I made sure the projectors were levelled but I'm totally expecting the driver side to need rotation as that side was where the vehicle got hit. Depending how much is needed either the reflector or projector mounting holes will get notched to allow movement. Really not looking forward to that part. Testing always gets me saying quite a few expletives.
 

Blckshdw

Moderator
Nov 20, 2011
10,685
Tampa Bay Area, FL
I feel your pain. I used threaded shaft projectors for my first retro, and thought I had them aligned properly indoors, so JB welded the backs so they couldn't rotate from vibration. Put them on the truck, and they were crooked... :mad:

With these, I was going to try to build threaded brackets with screws I could turn for adjustment, but the shape of the TB reflector bowl didn't leave enough real estate. My adjustment screws are similar to yours, but due to the engine bay being the way it is, getting a screwdriver in there just right was a huge pain. :hissyfit:

Next time, I'm buying a spare header panel, and building a proper test bench :yes:
 

dna59

Member
Nov 20, 2015
327
Belize
At this point I'm sick of cutting, grinding, testing. Got everything trimmed that was getting in the way of factory light adjustment. I need to put them on the vehicle to test but I need a day when I have tons of patience in abundance. Yea I usually use threaded shafts for the ease and convenience. These days their performance are great, but in this case a round or square projector wasn't too my liking. This is probably just the 3rd retro I've done not using threaded shafts.IMG_20171211_174212117.jpg IMG_20171211_174157529.jpg
 

dna59

Member
Nov 20, 2015
327
Belize
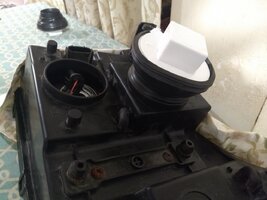
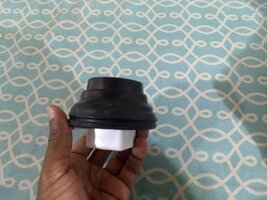
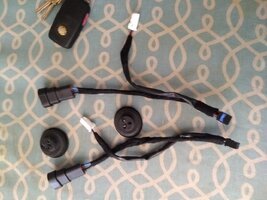
Managed to come up with a rear access hole cover.... PVC pipe end and a BMW 3 series halogen headlights seal. Might have to mod the header panel a lil but no bit deal. Also got the harness wired up to plug into the 9006 connector. The sqaure knob at the end of the cap will get cut off and I'll put one of those HID harness rubber seals with the holes for the wires
IMG_20171212_071000190.jpg IMG_20171212_071008214.jpg
 

Sparky

Member
Dec 4, 2011
12,927
Haha that's brilliant.
 
  • Like
Reactions: dna59

dna59

Member
Nov 20, 2015
327
Belize
Got the harness wired up and ready along with the rubber seal with the wire pass through. The wires from inside will come through it.IMG_20171212_125659.jpg
 

dna59

Member
Nov 20, 2015
327
Belize
...and that's why I tell people I don't throw anything away. There's always a use. Had intentions of testing tonight, but ended up at the port looking at a collapse crane boom. Plus I still haven't worked out what large flat surface I'll use to test against. That's always an issue since that's not a common thing around here.
 

Forum Statistics

Threads
23,330
Posts
638,003
Members
18,536
Latest member
Brianhvac

Members Online

No members online now.