Hi everyone,
Recently I needed to change both motor mounts on my 2007 TrailBlazer 4WD/I6, and having done some reading on this I realized this was not a straightforward process.
After collecting as much info as I could I went ahead to do the job.
With some trial and error I believe that I've found a way to do it that makes the process easier, so I'm sharing it here in hope that it would assist others who decide to tackle this work.
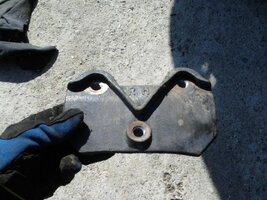
I elected to completely remove the brackets that are attached to the frame rails, through which the lower bolt of the motor mount goes.
This was much easier than I thought it would be, and it makes removal and installation of the motor mount itself straightforward.
Improvement with the new motor mounts was absolutely amazing - much smoother and quieter now!
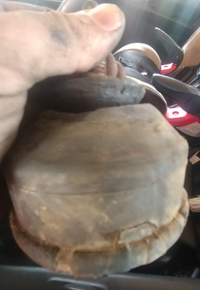
I've used genuine GM parts, having read that non-OEM mounts are not as well designed for this engine.
I also took some photos of the critical steps. It took me around 4.5 hours but much of it was trial and error. It can be done in 2.5-3 hours this way.
So here goes, I tried to make it as detailed as possible:
1. Jack up the front of the vehicle at least 5", and safely secure it
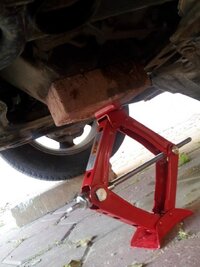
UPDATE: Looking back at what I did, it's probably better in this case to climb on top of some small ramps with the front wheels, instead of placing the truck on jack stands.
I used some blocks of concrete that I had around for that purpose (using 4WD helped climbing on top of them with the front wheels).
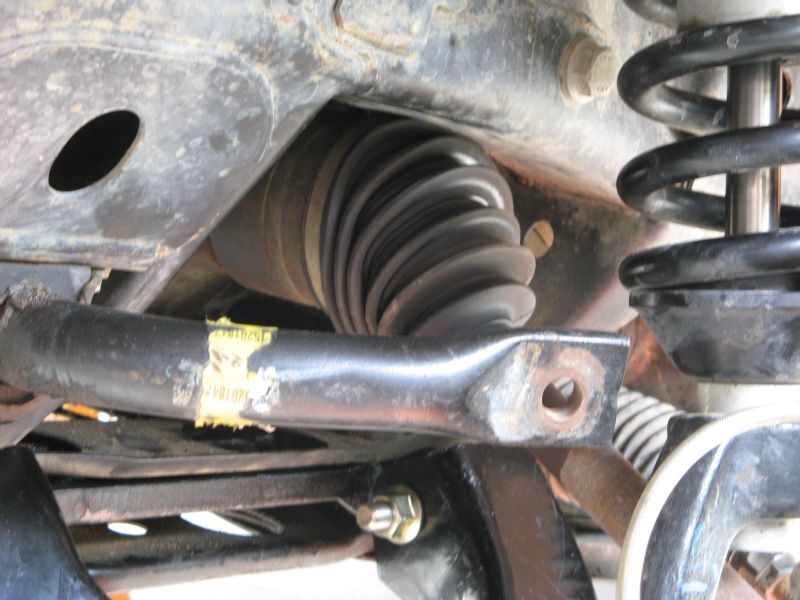
In hindsight it probably positioned the front struts in a more convenient angle, providing more clearance between them and the frame rails, helping with access to the frame rail bracket bolts.
See photos below to see exactly what I mean.
2. Remove the the plastic engine splash guard (4 x 13mm bolts)
3. Remove the 2 upper 10mm bolts holding the fan shroud in place, and pull it up slightly to provide a bit more clearance for the fan to move upwards with the engine
4. Remove the 2 bolts (10mm) and 2 nuts (10mm) that hold the ECM in place (on the driver side), and move it out of the way (no need to disconnect/unplug any wiring)
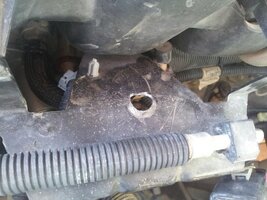
5. Drill a hole in the metal bracket below where the ECM was, exactly above the upper bolt of the driver side motor mount.
Start with a small drill bit, and gradually enlarge the hole until you can pass an extension socket through it. Make sure you have a large enough drill bit before starting this work.
This will allow easy access for loosening and removing the upper motor mount nut. See photo of how it should look like.
(I'd recommend doing this ahead of time as preparation for the motor mount job)
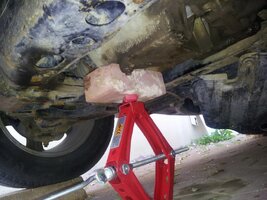
6. From below the vehicle, support the driver side of the engine oil pan with a jack, putting a block of wood between the jack and the oil pan (I used a concrete brick but wood should be safer). See photo.
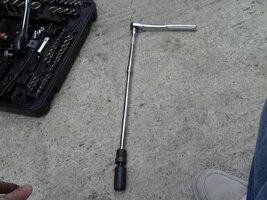
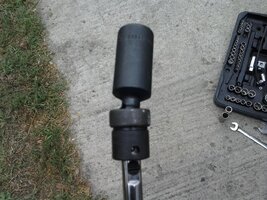
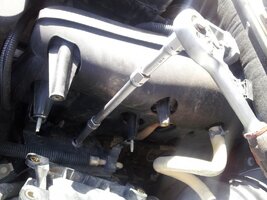
7. Remove the upper 18mm nut of the driver side motor mount using an extension socket running through the hole drilled earlier (see photo)
This requires a deep 18mm socket, a standard one will not work.
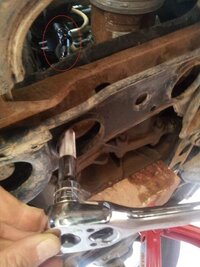
8. Remove the lower 18mm nut of the driver side motor mount, which is accessible from below.
Best way is to run the extension and swivel sockets through the hole in the frame (see photo).
9. On the passenger side, remove the air filter box cover, disconnect the air intake pipe and place it on top of engine (no need to unplug the sensor)
10. Start loosening the lower and upper 18mm nuts on the passenger side mount, but do not remove them yet. Access is much easier on the passenger side.
11. Jack the engine up until the fan almost hits the fan shroud. The more you can lift it the easier the process gets later.
However, be careful not to lift too much, as too much force applied to the fan can damage its bearing or clutch.
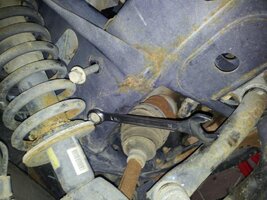
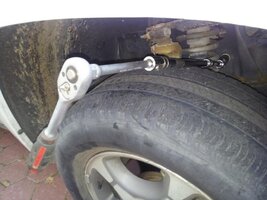
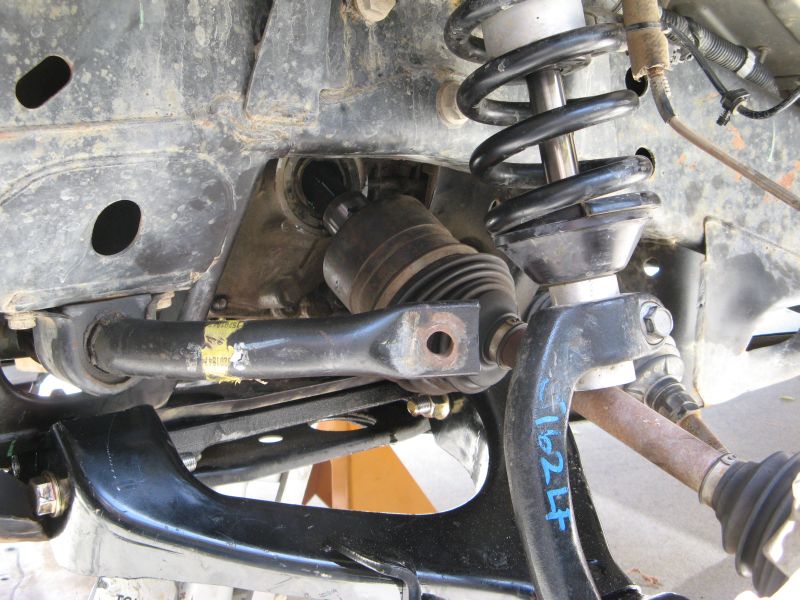
12. On the driver side, remove the frame-rail-to-motor-mount bracket. This requires fully loosening 3 x 21mm bolts that are accessible through the driver side wheel wheel.
There's absolutely NO NEED to remove the wheel or strut.
The upper 2 bolts can be accessed using extension sockets + swivel socket, and the lower bolt by using a wrench (I needed to use a hammer with the wrench to loosen it).
Initially some force is required but then these bolts rotate easily by hand. Rotate the bolts until they clear the threads.
Steering the wheel to the left or right can help with access. See photos of how this is done.
13. Both the driver side frame-rail-to-motor-mount bracket and motor mount itself should be free now.
Gently hammer the upper bolt of the mount from above and the bracket from below to get them unstuck.
The bracket has guides on top of it so it need to move upwards slightly before it can be removed. Then remove the old motor mount from the truck.
14. Place the new motor mount in its place, by installing the upper 18mm nut on it by hand (do not tighten it yet).
15. Maneuver the frame-rail-to-motor-mount bracket so the lower bolt of the motor mount goes through it, and then install the lower 18mm nut by hand, do not tighten it yet.
Maneuver the bracket to its original location, this requires sliding it from above so the guides fit exactly over where the 2 upper bolts go (I found it easier to do it from below the truck).
16. Fully tighten the 3 x 21mm bolts that hold the bracket to the frame rail.
17. Tighten the upper and lower motor mount nuts some more, but not fully so the engine can still rotate to an extent helping with the replacement of the passenger side mount.
Make sure the alignment pin on bottom of the motor mount is placed correctly into its hole in the bracket.
18. Lower the engine, then move the jack to support the passenger side of the oil pan.
19. Completely remove the upper and lower 18mm nuts on the passenger side motor mount.
20. Again jack the engine up as much as possible (supporting this time the passenger side), until the fan nearly hits the fan shroud.
21. Repeat the process of replacing the mount on the passenger side (same as driver side) - remove frame rail bracket, replace motor mount with new one, reinstall frame rail bracket.
There's a heat shield on this mount that needs to be reinstalled in the same position as it was before.
22. Lower the engine fully and remove supporting jack from under the oil pan.
23. Fully tighten both upper and lower 18mm nuts on both side motor mounts.
24. Reinstall fan shroud 2 x 10mm bolts. Be careful not to confuse them with the longer ECM bolts, as using the wrong ones could actually damage the radiator.
25. Reinstall ECM.
26. Reinstall air intake pipe and airbox.
27. Reinstall engine splash guard.
28. Lower truck to ground
29. That's it! you're done.
*** THIS PROCEDURE WORKED GREAT FOR ME. HOWEVER I DO NOT TAKE ANY RESPONSIBILITY FOR ANY RESULTS OF FOLLOWING THESE INSTRUCTIONS ***
GOOD LUCK!!! Hope you will find this helpful.



 what a difference they made, now it idles perfect even with the A/C on.