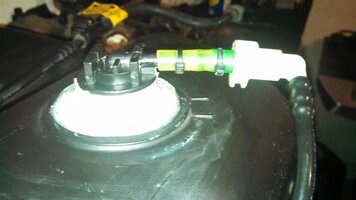
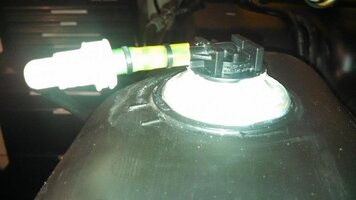
How To - Replace Broken Vent Valve in the fuel tank!! P0445

BlazingTrails

Original poster
Member
Apr 27, 2014
19,409
I have seen this come up before and have now experienced this problem myself, SO I decided to go ahead and do a write up since I had to invent a repair anyway. As far as I know I am the first person to do this, so others may have better ideas this is just what I came up with.

Some of you know that my drive shaft broke and beat the heat shield on the gas tank which broke my vent valve. (pictured Below)
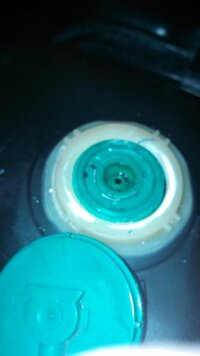
IMG_20150128_162521_0041.jpg


As you can see it was snapped right off, and there is really no way to repair it, I even tried gluing it back together with loctite 404 last week to no avail. So I started searching and to my surprise GM wants you to buy an entire new fuel tank for this little broken valve :duh: I did however find a universal vent valve made by Doorman part# 911-001.
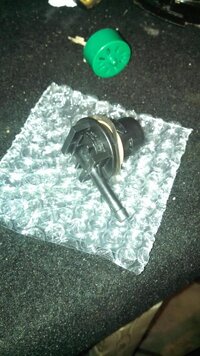
IMG_20150128_182441_7841.jpg


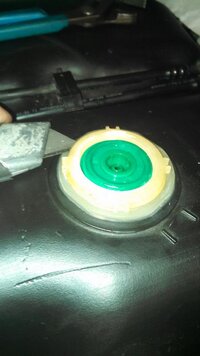
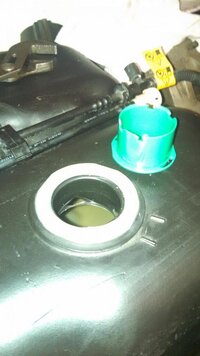
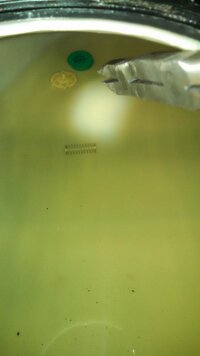
I started out by removing the old valve by cutting the ring with a razor knife, it is actually really easy to cut. I decided to pull the pump assembly out to check it since I started having problems with my truck stalling when coming to a stop. I found a LOT of little green pieces and the bottom half of the vent valve in the tank.
IMG_20150128_182414_7001.jpg
IMG_20150128_182429_2121.jpg
IMG_20150128_163841_3431.jpg
IMG_20150128_170255_6221.jpg

I took some precise measurements and determined what I would do next. I took a 7/8 drill bit and drilled a hole in the base of what USED to be the vent valve. Then I took a rasp and took the hole out to the first rib on the base, you can see it in the photo.

IMG_20150128_183259_8561.jpg

Next I took the new vent valve part # 911-001 and pressed it into the old base and it actually snapped in and was tight. You need to remove the tension ring and o-ring from the new part before inserting it.

IMG_20150128_183425_7251.jpg
IMG_20150128_183418_2871.jpg

At this point it was time to seal it all up, I had some 4000 PSI epoxy made by Super Glue that turned out to be great. Make sure the nipple is pointed in between the 2 dashes on the tank so it will line up with the hose.

IMG_20150128_184745_7631.jpg
IMG_20150128_184753_5821.jpg

After the epoxy has set cut the nipple of off the old vent valve. Then insert the cut side of the nipple into the hose leaving enough space for the locking clip on the fitting.

IMG_20150128_203316_7371.jpg

This is the finished product, it is stronger than the oem fitting and sealed back up nicely.

IMG_20150128_203324_5591.jpg
IMG_20150128_203636_3601.jpg
IMG_20150128_203644_5671.jpg

On a side note I found another shrader valve at the fuel tank to check fuel pressure, I did not know that one was there. :thumbsup:

IMG_20150128_184111_1501.jpg

So far my truck is running much better and seems to be fixed. A used tank from a local yard was $150, and the valve I got only costs $18.

I hope someone will find this helpful!

:2thumbsup:
 

Capote

Supporting Donor
Member
Jul 14, 2014
24,227
Atlanta, GA
Nice write up Brandon and awesome way of finding a solution to come up with a unique fix
 

Robbabob

Member
Dec 10, 2012
1,096
Great write up! Hope I never have to change it, but will be glad for this article if I do. What skill level would you put on this, out of 5?
 
  • Like
Reactions: Sib and Capote

BlazingTrails

Original poster
Member
Apr 27, 2014
19,409
Robbabob said:
Great write up! Hope I never have to change it, but will be glad for this article if I do. What skill level would you put on this, out of 5?
Thank you bud! I would personally give it a 3 I think this fuel tank is one of the easiest to drop and the rest is just basic drilling cutting. :yes:


BTW this is the 3rd time I have dropped my tank for various reasons.
 
  • Like
Reactions: Robbabob and Capote

Mark20

Member
Dec 6, 2011
1,630
Great write up.

This is where the Nation's community shines. I hope never to have to do this job but I've filed where the info is in the back of my mind.
 

Redbeard

Member
Jan 26, 2013
3,480
I have seen this come up before and have now experienced this problem myself, SO I decided to go ahead and do a write up since I had to invent a repair anyway. As far as I know I am the first person to do this, so others may have better ideas this is just what I came up with.

Some of you know that my drive shaft broke and beat the heat shield on the gas tank which broke my vent valve. (pictured Below)

View attachment 64285


As you can see it was snapped right off, and there is really no way to repair it, I even tried gluing it back together with loctite 404 last week to no avail. So I started searching and to my surprise GM wants you to buy an entire new fuel tank for this little broken valve :duh: I did however find a universal vent valve made by Doorman part# 911-001.

View attachment 64289


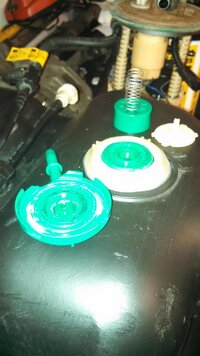
I started out by removing the old valve by cutting the ring with a razor knife, it is actually really easy to cut. I decided to pull the pump assembly out to check it since I started having problems with my truck stalling when coming to a stop. I found a LOT of little green pieces and the bottom half of the vent valve in the tank.

View attachment 64291
View attachment 64292
View attachment 64290
View attachment 64293


I took some precise measurements and determined what I would do next. I took a 7/8 drill bit and drilled a hole in the base of what USED to be the vent valve. Then I took a rasp and took the hole out to the first rib on the base, you can see it in the photo.
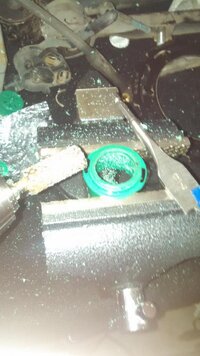
View attachment 64294

Next I took the new vent valve part # 911-001 and pressed it into the old base and it actually snapped in and was tight. You need to remove the tension ring and o-ring from the new part before inserting it.
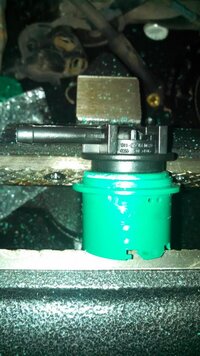
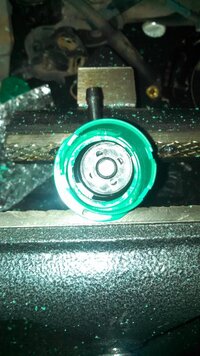
View attachment 64295
View attachment 64296


At this point it was time to seal it all up, I had some 4000 PSI epoxy made by Super Glue that turned out to be great. Make sure the nipple is pointed in between the 2 dashes on the tank so it will line up with the hose.
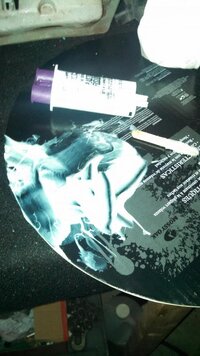
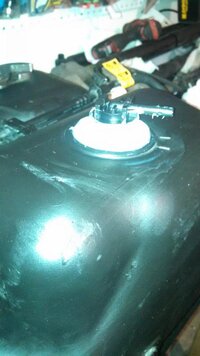
View attachment 64297
View attachment 64298


After the epoxy has set cut the nipple of off the old vent valve. Then insert the cut side of the nipple into the hose leaving enough space for the locking clip on the fitting.
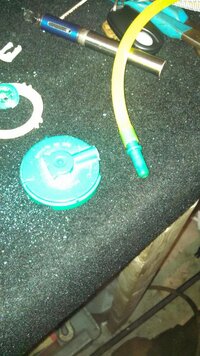
View attachment 64299

This is the finished product, it is stronger than the oem fitting and sealed back up nicely.
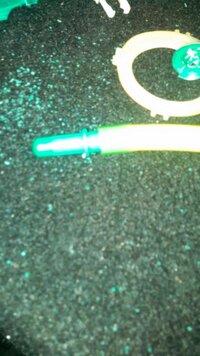
View attachment 64300
View attachment 64301
View attachment 64302


On a side note I found another shrader valve at the fuel tank to check fuel pressure, I did not know that one was there. :thumbsup:
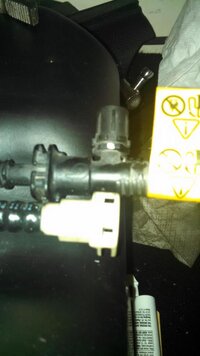
View attachment 64304

So far my truck is running much better and seems to be fixed. A used tank from a local yard was $150, and the valve I got only costs $18.

I hope someone will find this helpful!

:2thumbsup:

Hey BlazingTrails,

Great write up! Has the stalling "gone away" since you made the repair to the vent on the tank? For several years I have fought intermittent stalling while at idle, typically on warm Florida days. Never a code…I have replaced many parts, but to no avail. So when I was reading your repair and mentioned "a lot of green pieces in the bottom of the vent valve" and no more stalling I got to thinking. Could this stalling problem as simple as problems in the vent? So I ask, very politely too, do ya think the stalling had to do with the broken green pieces you found in your vent??? Your thoughts much appreciated.

redbeard
Freedom is never more than one generation away from extinction. We didn't pass it to our children in the bloodstream. It must be fought for, protected, and handed on for them to do the same, or one day we will spend our sunset years telling our children and our children's children what it was once like in the United States where men were free.
Ronald Reagan
 
Last edited by a moderator:

HARDTRAILZ

Moderator
Nov 18, 2011
49,665
Not likely to get a response from BlazingTrails. He had a falling out with the site.
 

bspurloc

Member
Dec 27, 2012
295
There is some epoxy out there that will harden with gas leaking. I forget the brand haven't used it in so long, but it used to be sold as 2 strips grey and black. I had a pin hole leak on the bottom on a gas tank once and used it to seal it up as it was still leaking out of it. lol.

Another follow up, Make sure you use an epoxy that is gasoline resistant. It has eroded the epoxy to the point that it has a tiny leak now. No Biggie, and I think the repair is still a good one. Just use the right epoxy.

Maybe something like this?

quiksteel_carded.jpg
 

Mooseman

Moderator
Dec 4, 2011
25,347
Ottawa, ON
This is a very old thread. Pretty much everybody in it has moved on.

All I can suggest is look at JB Weld. I think they came out with some new ones that might work for this. Don't use silicone as it will just dissolve in gas.
 
  • Like
Reactions: Staboogie031

Staboogie031

Member
Apr 8, 2023
2
Long Island
This is a very old thread. Pretty much everybody in it has moved on.

All I can suggest is look at JB Weld. I think they came out with some new ones that might work for this. Don't use silicone as it will just dissolve in gas.
Ok thanks, I tried to start a new thread but I’m old and lucky I got this message out lol have a great day!
 

Forum Statistics

Threads
23,332
Posts
638,005
Members
18,537
Latest member
moscoreli

Members Online

No members online now.