- Nov 20, 2011
- 2,496
Quad Beam Headlights / Multifunction Switch Alternate Wiring
The multifunction switch (high beam/directional) signals the Body Control Module (BCM) when the driver turns the high beams (highs only) on or Flash-to-Pass (High and low beams together.) This modification will reverse the signals to the BCM, so that when the high beams are turned on, you have quad beam Headlights. With this mod, Flash-to-Pass will only turn on the high beam lamps; the low beams WILL shut off.
NOTE: This modification requires an alteration to the factory wiring harness connector; improper handling of the connector could result in safety/drivability concerns. Use extreme care and judgment when performing this modification!
Estimated time: 15-30 minutes
Approximate cost: $0 unless purchasing a tool is required
Tools required: 1/4" 7mm socket, 1/4" extension, 1/4" ratchet, pocket screwdriver, terminal connector release tool
Parts and Supplies: None
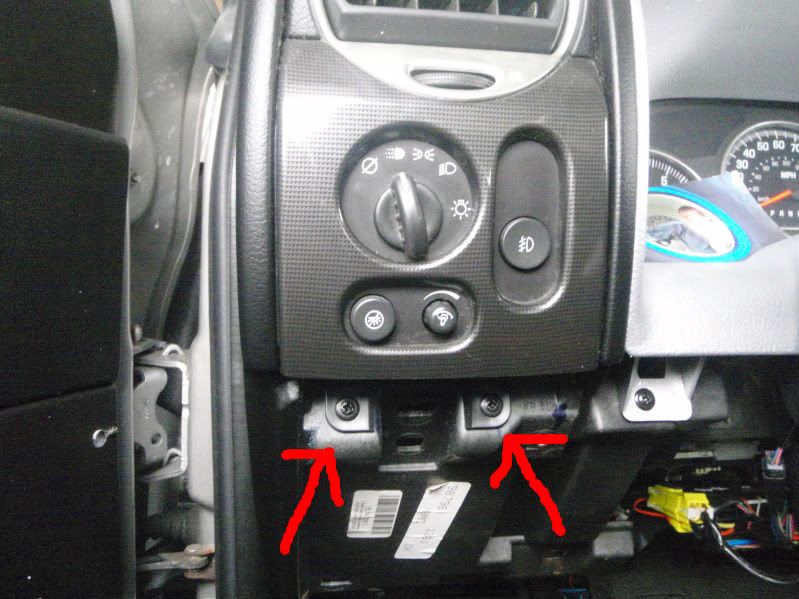
Step 1) Start by removing the lower cover under the drivers side of the dash board (2-7mm bolts - Red Arrows)
Step 2) Remove the knee bolster cover (4-7mm bolts - Blue Arrows). The knee bolster bolt covers (X2) can be removed using a pocket screw driver to pry them off.
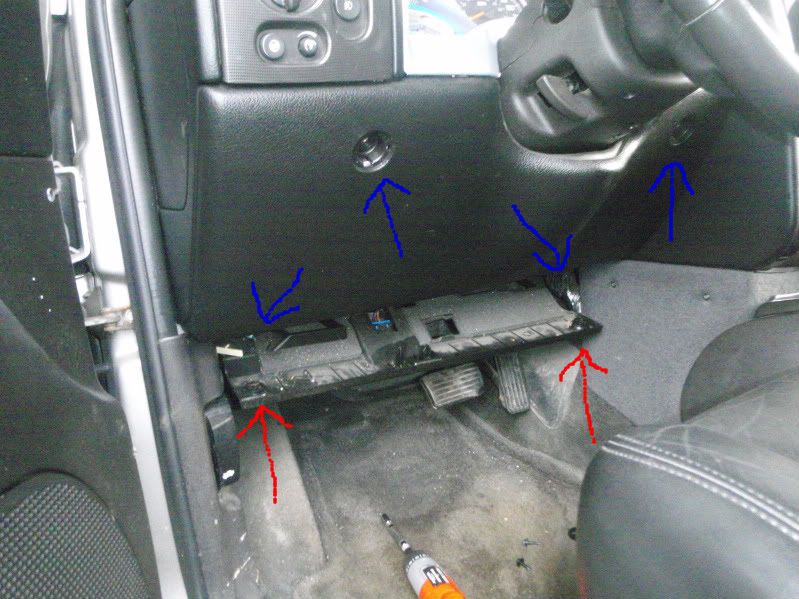
Step 3) Remove the metal knee bolster. (2-10mm bolts - Red Arrows)
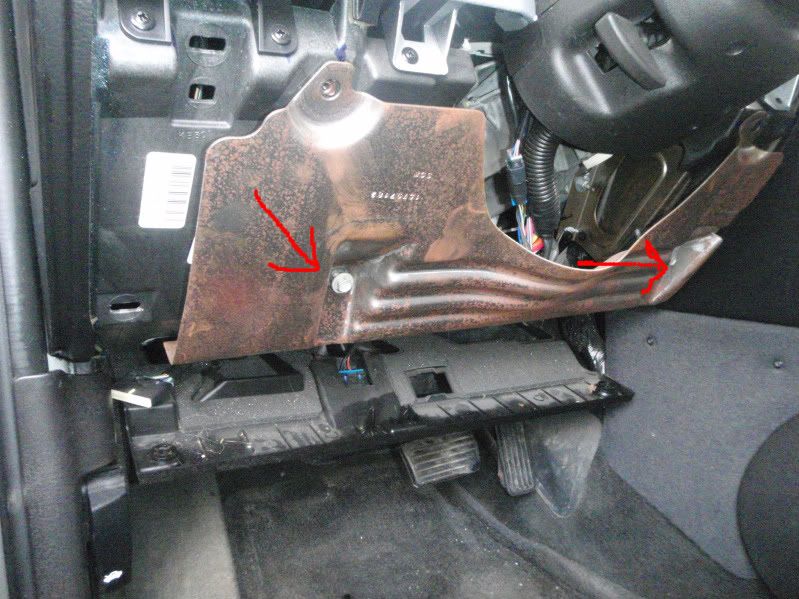
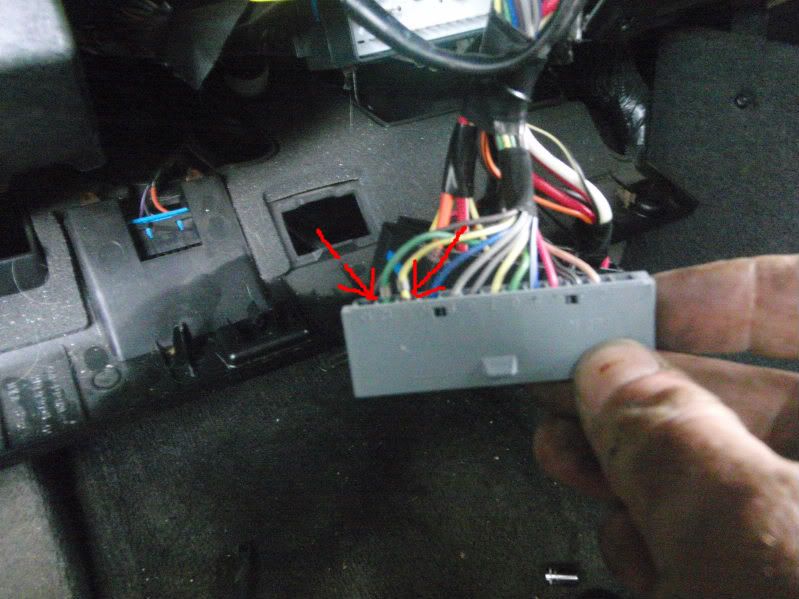
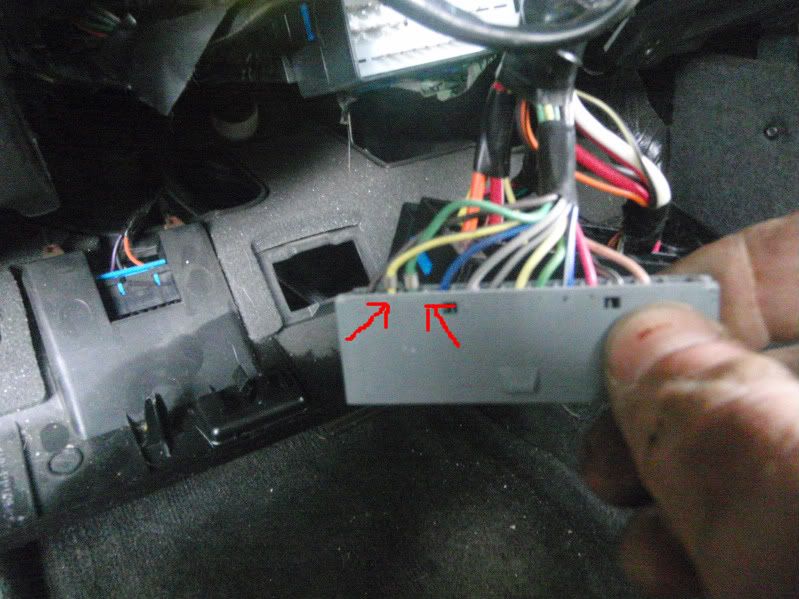
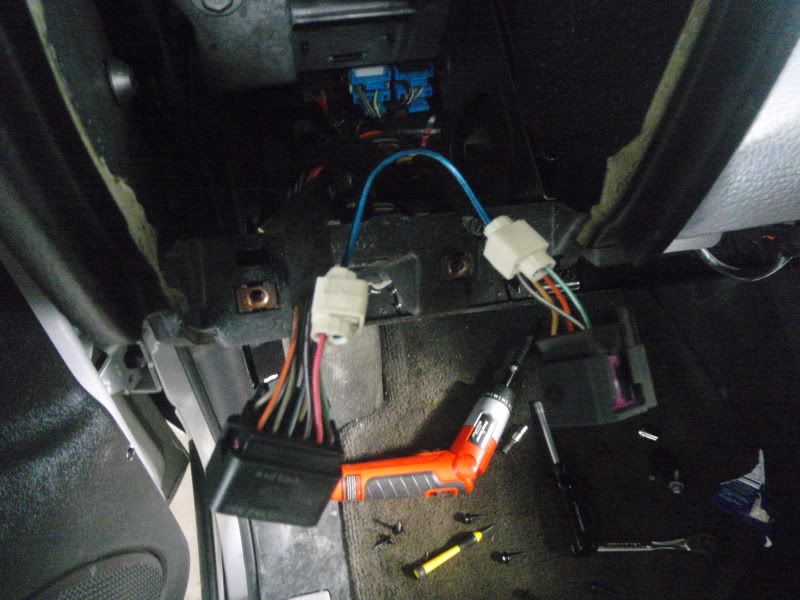
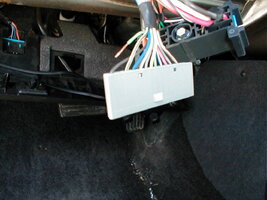
Step 4) You will see a large connector with a gold bolt in the center (Red Arrow)...Using a 7mm socket on an extension, unscrew the bolt. When the bolt is loose enough, you will be able to pull the connector apart; pull it out of the steering columns so that you can work on it.
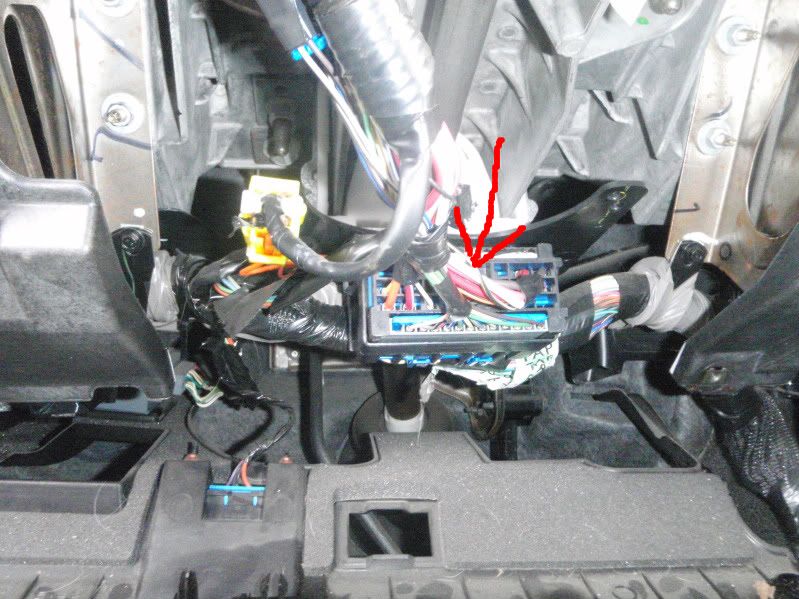
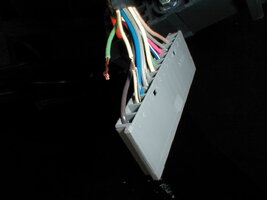
Step 5) Remove row "E" (Red Arrow) from the main body of the connector by placing a flat head screwdriver between the connector and row "E" on the terminal side of the connector. Twist the screw driver and push the wire side of row "E" so it slides away from the connector and separate.
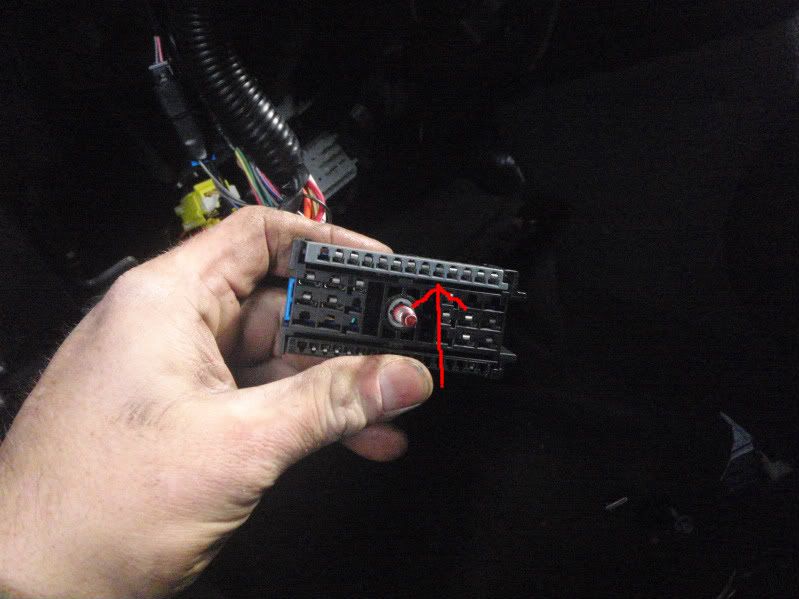
Step 6) Use the pocket screwdriver to press the blue tabs in on the side of row "E" so that the blue "comb" slides out.
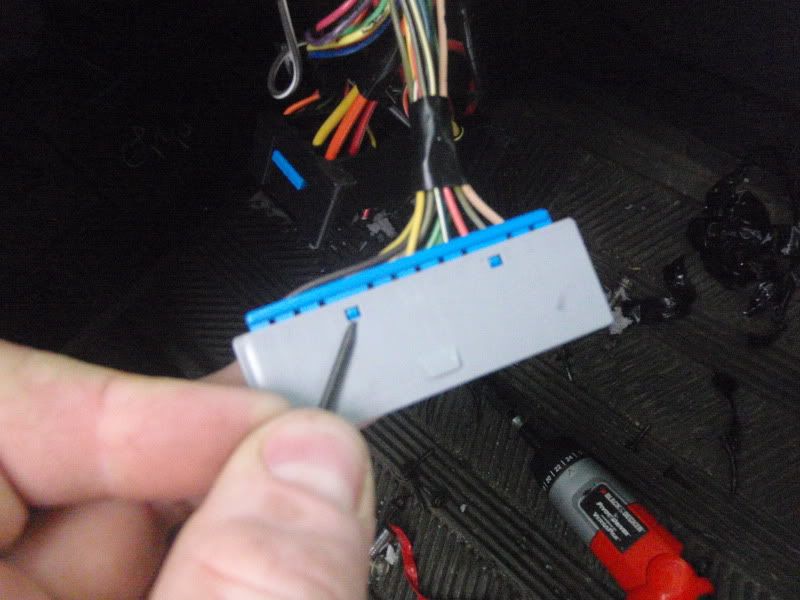
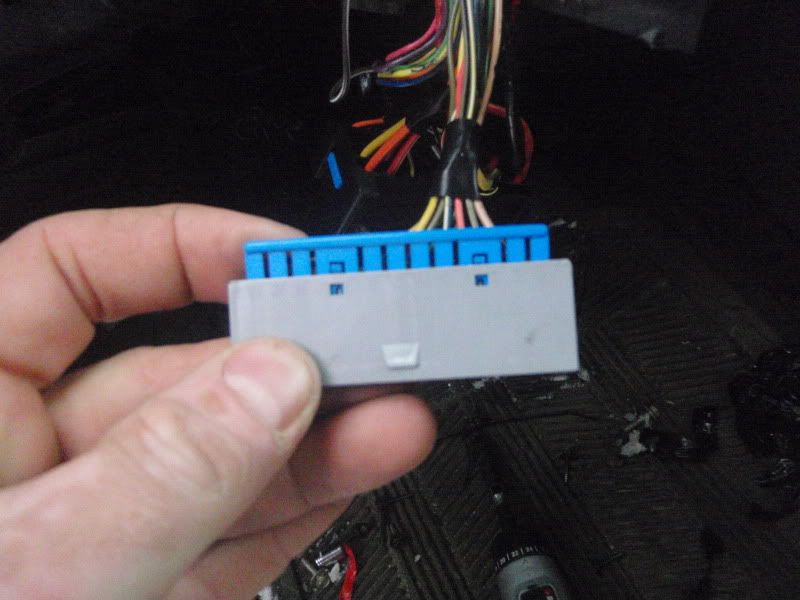
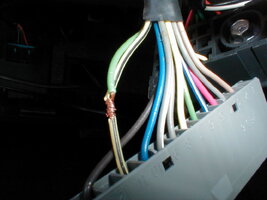
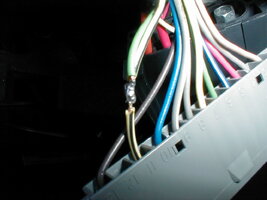
Step 7) Look for #11 & #12 on "E" (yellow/black {yellow on older models} wire & light green wire); you will switch these 2 wires using the terminal connector release tool or small eye glass screw driver. Release the terminals as shown. You may need to bend the locking tabs out a bit to make sure they lock back in place.

Step 9) Re-install the blue "comb" into "E". Re-install "E" onto the connector. Re-connect the 2 connector ends and tighten the 7mm bolt.
Step 10) Start the truck and verify modified operation.
Step 11) Install the knee bolster, knee bolster cover and the lower covers.
NOTE: NOT RESPONSIBLE FOR FAILURES CAUSED BY THIS MODIFICATION; WORK PERFORMED AT YOUR OWN RISK!
WARNING: After performing this modification, your (quad) high beam headlights will NOT shut off automatically with the headlight delay. After performing this modification, your "flash-to-pass" switch will only operate with the headlights on.
Fog Light Mod
Step 1) Remove the two phillips head screws (Red Arrows) on the headlight switch panel.
Step 2) Here is where it differs for each vehicle, but you need to get to the wire harnesses behind the switch panel. Hopefully you can figure out how to do it based on your particular model.
Step 3) You will be placing a jumper wire between the pink wire in harness A and the green w/ white stripe wire in harness B. I use wire taps, however the vehicles wiring is thin and you may have to shave some of the insulation off the wire with a razor blade for the taps to make contact.

Step 4) Test all your lights and make sure they are functioning correctly.
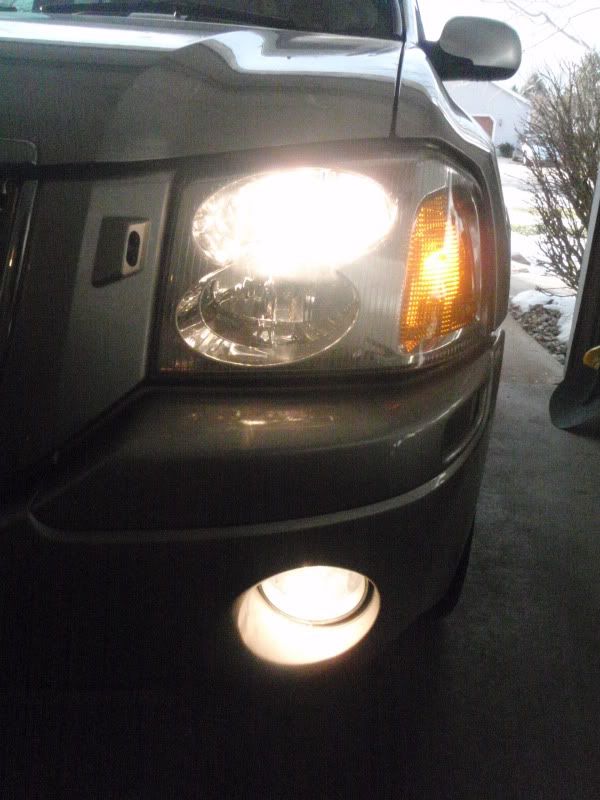
Lows with automatically on fogs.
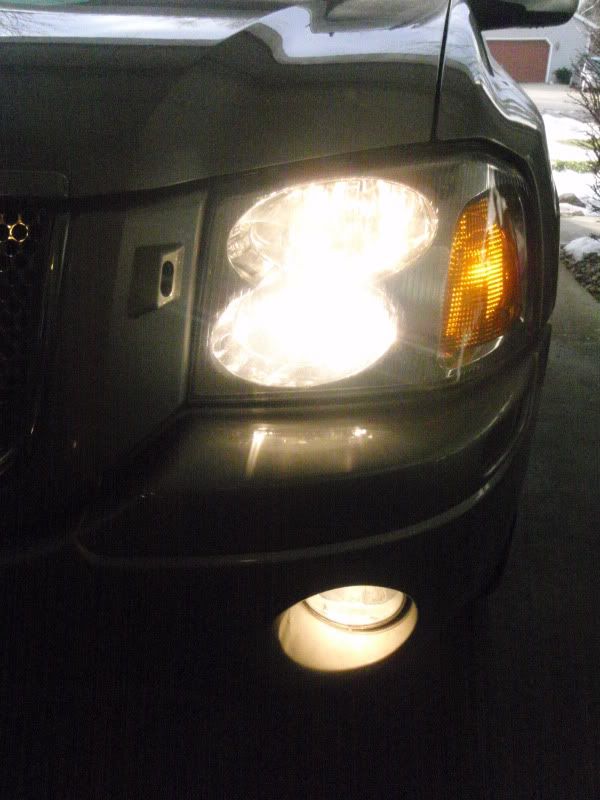
Highs, Lows, and Fogs.
Step 5) Reassemble and enjoy the extra light!
The multifunction switch (high beam/directional) signals the Body Control Module (BCM) when the driver turns the high beams (highs only) on or Flash-to-Pass (High and low beams together.) This modification will reverse the signals to the BCM, so that when the high beams are turned on, you have quad beam Headlights. With this mod, Flash-to-Pass will only turn on the high beam lamps; the low beams WILL shut off.
NOTE: This modification requires an alteration to the factory wiring harness connector; improper handling of the connector could result in safety/drivability concerns. Use extreme care and judgment when performing this modification!
Estimated time: 15-30 minutes
Approximate cost: $0 unless purchasing a tool is required
Tools required: 1/4" 7mm socket, 1/4" extension, 1/4" ratchet, pocket screwdriver, terminal connector release tool
Parts and Supplies: None
Step 1) Start by removing the lower cover under the drivers side of the dash board (2-7mm bolts - Red Arrows)
Step 2) Remove the knee bolster cover (4-7mm bolts - Blue Arrows). The knee bolster bolt covers (X2) can be removed using a pocket screw driver to pry them off.
Step 3) Remove the metal knee bolster. (2-10mm bolts - Red Arrows)
Step 4) You will see a large connector with a gold bolt in the center (Red Arrow)...Using a 7mm socket on an extension, unscrew the bolt. When the bolt is loose enough, you will be able to pull the connector apart; pull it out of the steering columns so that you can work on it.
Step 5) Remove row "E" (Red Arrow) from the main body of the connector by placing a flat head screwdriver between the connector and row "E" on the terminal side of the connector. Twist the screw driver and push the wire side of row "E" so it slides away from the connector and separate.
Step 6) Use the pocket screwdriver to press the blue tabs in on the side of row "E" so that the blue "comb" slides out.
Step 7) Look for #11 & #12 on "E" (yellow/black {yellow on older models} wire & light green wire); you will switch these 2 wires using the terminal connector release tool or small eye glass screw driver. Release the terminals as shown. You may need to bend the locking tabs out a bit to make sure they lock back in place.
Step 9) Re-install the blue "comb" into "E". Re-install "E" onto the connector. Re-connect the 2 connector ends and tighten the 7mm bolt.
Step 10) Start the truck and verify modified operation.
Step 11) Install the knee bolster, knee bolster cover and the lower covers.
NOTE: NOT RESPONSIBLE FOR FAILURES CAUSED BY THIS MODIFICATION; WORK PERFORMED AT YOUR OWN RISK!
WARNING: After performing this modification, your (quad) high beam headlights will NOT shut off automatically with the headlight delay. After performing this modification, your "flash-to-pass" switch will only operate with the headlights on.
Fog Light Mod
Step 1) Remove the two phillips head screws (Red Arrows) on the headlight switch panel.
Step 2) Here is where it differs for each vehicle, but you need to get to the wire harnesses behind the switch panel. Hopefully you can figure out how to do it based on your particular model.
Step 3) You will be placing a jumper wire between the pink wire in harness A and the green w/ white stripe wire in harness B. I use wire taps, however the vehicles wiring is thin and you may have to shave some of the insulation off the wire with a razor blade for the taps to make contact.
Step 4) Test all your lights and make sure they are functioning correctly.
Lows with automatically on fogs.
Highs, Lows, and Fogs.
Step 5) Reassemble and enjoy the extra light!

 I run it with mine, with the additional mod that Sam posted, so no matter which way I operate the high beams, the lows don't turn off. I have the DRL Killer from tblazed, so my auto lights still function.
 And yes my automatic lights work as well. Prob one of the easiest mods ive done thus far. Couldent be happier. Thanks for the write up

 But it's a minor inconvenience.


