SOLVED! How to Make A "GYMKO" Tech 2 Bench-Top Test Harness

mrrsm

Original poster
Lifetime VIP Donor
Supporting Donor
Member
Oct 22, 2015
7,639
Tampa Bay Area
I'm sorry if this Topic has been neglected by me since March 20th, 2018... but there always seem to be other more pressing projects and repairs that must supersede a project like this that, while interesting for the sake of exploring these ideas and possibilities... are not absolutely necessary in "The Grand Scheme of Things" when it comes to keeping up with the stream of fixes we always face.

Nonetheless... due in part to my investigating and finding an inexpensive repair path for another GMTN Member facing the possible need to get a Replacement BCM courtesy some very reasonable offer(s) on eBay... He declined to act on purchasing what is arguably... the ONLY Best Way to pursue owning one: WHENEVER POSSIBLE... BUY THE COMPLETE BCM UNIT...LOCK, STOCK ...AND TWO SMOKING BARRELS! After giving him "First Dibs" on obtaining this SAME unit... Once he declined... I made a fair offer of $75.00 on eBay for the system and won this item.

If you reviewed my last post from back in March... after I obtained just the upper section Module of this unit... I was concerned about how I was going to be able to attach just that small portion of the entire system to the Bench-Top Harness.... and with the acquisition of the ENTIRE UNIT... Will all of those problems disappear because my only issues henceforth will be to sort out the Connector Wiring Pin-Outs? I will need to figure that problem out and answer these additional Questions:

(1) Which Wires (Pairs) from the various Modules can be connected in isolation to the Complete BCM and what method should be used to insulate all of the Cut Wires emanating from every single Connector that will be dormant during this powered set-up?

(2) What is the Primary Voltage DC and Amperage required to feed into the Large Red Power Input Wire of the Fuse/Relay Panel... and will the Power Source of the Tech 2 Clone AC/DC 12 Volt VDC @ 1 Amp be sufficient to power up BOTH the Bench Top PCM AND the Complete Bench Top BCM System?

(3) If not ...will using the much more robust Bench Top- External Power Supply I suggested and obtained for this contingency earlier in this Project be the Better Solution for Stable Power?

What is particularly important to mention about "Getting The Whole Ball of Wax" where the BCM is concerned was canonized in a comment made recently by @Mooseman that, "... Changing out and installing a BCM is NO TRIVIAL MATTER..." ... a complicated task which includes the requirement of using a Tech 2 Scanner to re-program in the VIN and get the BCM unit to be recognized by the PCM and logged onto the GM Data-Bus.

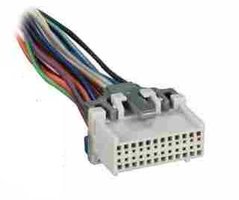
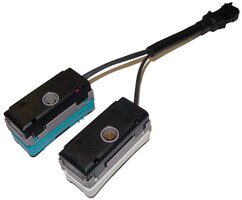
The attached images bear out the fact that THIS Full BCM System truly is"...Second Big Brain..." as @Mooseman basically described it and when held in the hand ...you can see that it is indeed... One, Big Chunk of Clunky Electronic Hardware... with numerous connectors,wire bundles and tangles of wiring.... and ALL of that Hardware that MUST be co-attached into a "Tesseract" -like Complete BCM System that includes Gold-Plated Flex Cabling, Multiple Discreet Harness Plugs and To and From Power to its very own Fuse and Relay Box ... all of which is ordinarily concealed from plain view where it hides under the Left Rear Passenger Seat. These attached images will bear out its odd Modular Complexity:

https://www.flickr.com/photos/126111508@N07/albums/72157675625128548

 
  • Like
Reactions: Redbeard

mrrsm

Original poster
Lifetime VIP Donor
Supporting Donor
Member
Oct 22, 2015
7,639
Tampa Bay Area
Once again... I'm back with what I consider to be A VERY BIG DEAL in the way of How To Make A Dedicated Bench-Top Instrument Cluster Bi-Directional Electrical Test Harness that will work with ANY Scanner that has the BI-D Capabilities. FINALLY... Somebody in the GM Instrument Cluster Repair Business has taken the time to decipher the GM 24 Pin Cluster Connector interface to the J-1850 Female OBD2 (Auto Chassis Under-Dash) Connector.

Armed with this information ...and if possible... First obtain a Junk Yard Instrument Cluster Harness Plug with a Goodly Length of the OEM Harness Wires still attached:

...AND REMEMBER... The PIN Orientation of the 24 Wire Instrument Cluster PLUG is LEFT to RIGHT ...if the Harness Wires get DIRECTLY attached to IT ...as opposed to attaching Individual Pin-Wire Connectors DIRECTLY to the Instrument Cluster 24 PIN Connector on the Board...as seen in the attached Video and has a RIGHT to LEFT Orientation and therefore... they are BACKWARDS to one another when Viewed Face On, side by side!

Then... you can wire either arrangement into the inexpensive J-1850 OBD2 Female Port and AFTER you Repair the LEDs, Mosfets and Dials on these GM Clusters... plug in either arrangement and Power Test the Lights and Dials... right there on your Bench. Yeee Haaaa!

So now... If you have your very own "GYMKO" Tech 2... So much the better for being able to run the actual Diagnostic Checks and Powered Bench Tests as though the Re-Built Cluster(s) were still mounted into the Dash Boards. I would recommend Downloading and saving this Video to obtain accurate Screen Prints of this Dude's Hand Drawn Wire Diagram of this Harness ...before his competitors find some way of getting this Video Deleted.

The Important Thing To Remember is... If you will be using this Cluster Bench Test Harness with any Tech 2 Clone... you MUST Insert the Tech 2 12 VDC 1 AMP Power Supply Plug or Cigarette Lighter Power Cord Plug ...into the Male OBD2 Tech 2 Adapter...and NOT into the Base of the Tech 2 ...otherwise, the Cluster will NOT Power Up:


Okay... To save everyone some time on this and memorialize the actual harness connection layout...

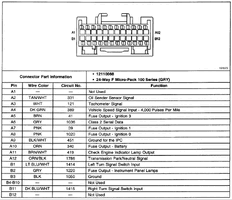
I worked out all of these 'Visual Clues" into how the GM 24 PIN Instrument Cluster communicates with the Female OBD2 Port Connector (J-1850) with the Caveat that if you will be using a USB Blue Tooth Adapter... You will need an External Power Supply producing 12 Volts DC @ 1.389 Amps to connect the Three Wire from the 24 PIN Cluster Connector B+ Connectors over to PIN 16 for the Positive 12 VDC and then arrange the A12 and B12 Pins from the IC Connector over to PIN 4 of the J-1850 for GROUND. This is NOT necessary to do when using the "GYMKO" Tech 2 Scanner:

Positive (3) Wire Bundle 24 PIN Cluster Connections:

Positive Power 12 VDC Wires
A11, B9 & B11

To… The J-1850 OBD2 Female Connections:
PIN 16 B+

Ground (2) Wire Bundle 24 PIN Cluster Connections:
A12 & B12

To... The J-1850 OBD2 Female Connections:
PIN 4

Class 2 Data Connections 24 PIN Cluster Connection:
A6

To… The J-1850 OBD2 Female Connections:
PIN 2
 
Last edited:
  • Like
Reactions: Mooseman

mrrsm

Original poster
Lifetime VIP Donor
Supporting Donor
Member
Oct 22, 2015
7,639
Tampa Bay Area
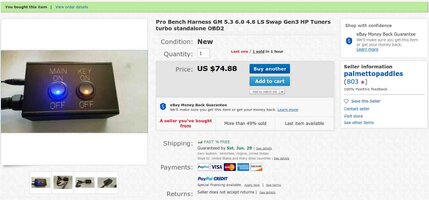
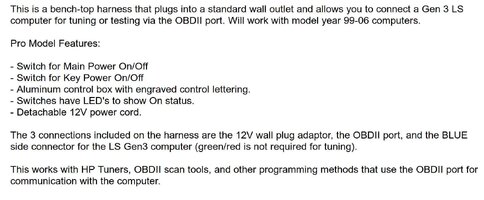
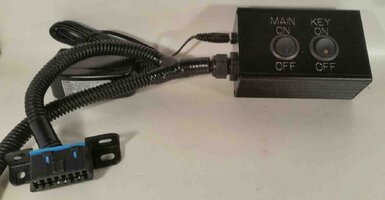
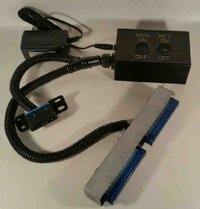
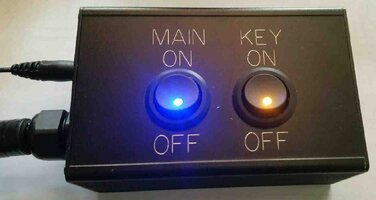
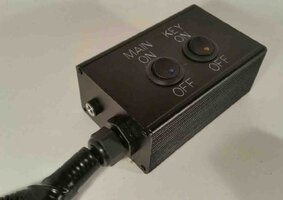
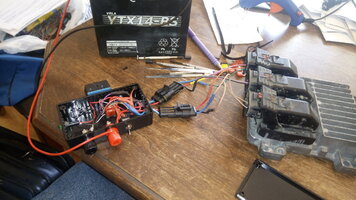
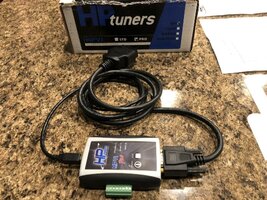
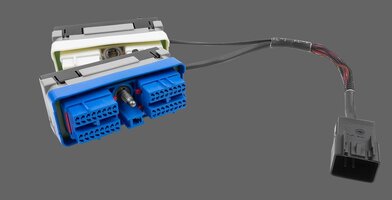
I thought I would drop this information on where to obtain a Professional Grade Bench-Top Test Harness for the GM Gen III LS ECM/PCM Units for the CABLE CONTROLLED THROTTLE BODIES Version on the PCM. What is NICE about this Set Up is that It has a Discreet Power and Key On/Off Box providing the ability to not only apply Power for the Scanner and the PCM via the OBD2 Female Connector... But, when using the "GYMKO" Tech 2 Hand Held Scanners... there is always that point during the Set Up and Use that the Tech 2 On Screen Instructions will command the User to "Turn The Ignition Key ON" and also Off as directed in order for the Scanner Software to function correctly during PCM PASS-THRU and other functions that involve SPS Re-Programming of the Modules; demanding this Power On/Off and Key On/Off Switching capability.

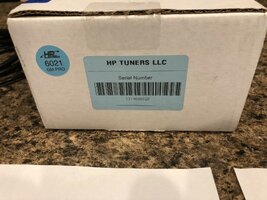
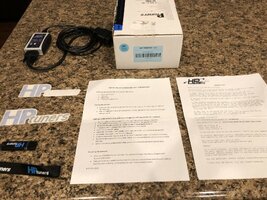
Now as much as I really do enjoy solving problems like creating "Home Made" LS and Other similar type Bench Top Harnesses involve for use with HP-Tuners... IMHO, to avoid all of these Hassles and The Aggravation entailed in the following necessary Build List to Create a Home Made LS Bench Top Test-HP Tuners Harness ...You could solve ALL of these problems at One Go by just Buying the Professional Grade Version For $75.00... as shown in the images attached below... OR...you could suffer from these Needs... (Hint ...Hint @Reprise and your pending LS Cam Upgrade):


(1) The need to Buy a Soldering Gun (Kit)
(2) The need to Buy Assorted Shrink Tubing and Harness Coverings
(3) The need to buy Automotive Quality Vari-Colored Wires
(4) The need to Buy Several 12 VDC Rocker Switches
(5) The need to Buy a Small Electrical Distribution Box
(6) The need to Buy either the Blue or Green LS OEM PCM Harness Connector
(7) The need to De-Pin almost the Entire Connector down to the Correct Wires
(8) The need to Flawlessly Re-Wire up EVERYTHING prior to Soldering
(9) The need to Painstakingly Wrap up the various sub-sets of Wire Bundles .
(10) The need for the Confidence and the Skill Set to properly DO ALL of these Things.

LSPROBENCHTESTHARNESSORDER.jpgLSPROBENCHTESTHARNESSFEATURES.jpgLSPROBENCHTESTHARNESS3.jpgLSPROBENCHTESTHARNESS1.jpgLSPROBENCHTESTHARNESS.jpgLSPROBENCHTESTHARNESS4.jpg
 

Reprise

Lifetime VIP Donor
Supporting Donor
Member
Jul 22, 2015
2,724
Hmm... Well, about 1/2 of those pre-reqs wouldn't be too much of an issue, I have them, or they're cheap enough. But if I needed something like this, I might spring for it. But I need the drive-by-wire version (I'm sure they have one, vs. your pre-2003 cable actuated)

To be honest, I expect the thing to start up first time I attempt to fire it up.

It may not run *well*...but I've been told (by Jeremy, no less) that it should run well enough to drive it to a local tuner and have them optimize it with a tune.

As far as me doing the tune myself...I could try and figure it out via hit-n-miss for what would probably be weeks or months (I'm slow & anal-retentive...lol). And I'll probably spend as much acquiring equipment / learning / buying license modules (thinking HP Tuners, etc.), vs just taking it somewhere local and dropping the $500 on a tune. So I'll probably have it done by someone who knows what they're doing.

BUT - do let us know how you find the experience, via the book you ordered, and whatever you use to tweak the Engine Mgmt program with. If it goes super smooth for you, maybe I'll try it -?
 
  • Like
Reactions: Mooseman

Mooseman

Moderator
Dec 4, 2011
25,257
Ottawa, ON
I made my own using a small project box, an old OBD connector, an LED, switch, two screw post connectors for the power and weatherpak connectors so I can use it with different modules. Just swap the connectors and voilà, multi-module capable interface. Unfortunately, I bought a bunch of 3 wire weatherpaks and I would have needed 5 wire (I later realized I would need for the high speed bus wires) so I have two of them coming out of my box, one male, one female so I can`t mix them up.

I`m at work right now but I`ll see if I took some pics of this setup.

Edit: found one. IMG_20181004_145600.jpg
 
Last edited:

mrrsm

Original poster
Lifetime VIP Donor
Supporting Donor
Member
Oct 22, 2015
7,639
Tampa Bay Area
@Mooseman... That looks like a very nice Rig. But at a minimum ... I should say that my suggestion for taking this approach deserves some consideration that prior to my deciding upon just "Pulling the eBay Buy Lever..." and getting this thing, if all of the previous efforts I invested in time, thought, energy and money made to create a Useful set of Hand Made Harness(es) can't convince people that I understand what it means to go that "Inventive Route"... then I just don't know what else would convince them that I'm not just being 'A Lazy Spendthrift' for doing so in this particular instance.

@Reprise... The more I dug into the Video Resources available on Youtube covering a very wide range of LS Motor CID Displacements and applications for everything from "Spot On" 5.3L Silverados to the LS Engine featured as a Swap-In Engine into a Porsche in the attached Video showing, the more I realized that there are only a handful of Key Areas that need specific Focus with HP-Tuners in order to keep my Y2K Truck from doing what yours will probably do as well... which is to Fall Flat on its Face as soon as it starts up... struggles to idle...and Dies.

If you watch even a handful of those online "Tuners" playing around with the HPT package... you can begin to get a feel for how it could be applied in a very general manner to make the Engine and Powertrain get through all of those Damned Driveability Issues which would just be Maddening to have to deal with ...even on very short trips around town. I want to have enjoyable performance improvement without having to wonder whether or not the LM-7 Will start, idle and run with smooth enough power and NOT give me any unwanted headaches.

But the more I've thought about leaving that control of what I've already invested into my working on and building up my Y2K Truck in the hands of other people who quite frankly, are probably no smarter thant either you and I happen to be... It Bugs the Living Hell out of me. I'm guessing that after a brief struggle with getting grounded with the HP-Tuners Basics and with some Practice with making "Slight, Incremental Changes" necessary to achieve what I want onmy Donor LS PCM ... then I'd prefer being able to do this on my own. This is One Old Dog who has never been Reluctant to ..."Learn New Tricks...".

The fact that I could not find ANY Used Legacy HP-Tuners Hardware and Wide Band Cabling lead me to the discovery that those Older Versions of HP-Tuner Box and Cables that ran around $700.00 on average and are no longer sold, available as Used nor supported by HP-Tuners. The Newer, Ubiquitous HPT Devices and Kits start at around $300.00 with "0" Credits (a Minimum of Two would probably be needed for re-working and massaging One, Decent "Tune" worthwhile enough to get licensed as a Modified LS Base Tune) The HPT Credits run around $50.00 each.

I'd like to mention that I haven't heard so much as "peep" out of any of the 'Professional Tuners' who are GMTN Members... even after mentioning their linked names on several occasions in my "Hoping for Loping" Thread. That reality has only served to forge my thinking towards doing THIS part of the Y2K Build and set up... independently... Because I absolutely abhor being held hostage to the purported arcane Knowledge and Talents of other men...and at Premium Prices, to boot.

But the truth is also that I HAVE received some very direct assistance from a NEW GMT nation Member; although he describes himself as only having "modest skills" with using HP-Tuners, he has willingly and generously offered more help to me in the last 24 Hours than I could have ever hoped for! I'm speaking of course of @2advanced . So I'll take his "Modest Skills" over 'Cold Shoulders' and 'Snubs'... any day of the week. Here are just two of the many HP-Tuners Instructional Videos that I think hold much promise that I'll be able to do this...and it drives home the point, just as Confucius once said:

"When the Student is READY... The Teacher Emerges..."

How to Tune a Base File with HP Tuners


How to use HP Tuners:


2advanced

Member
May 25, 2019
24
Central California
The fact that I could not find ANY Used Legacy HP-Tuners Hardware and Wide Band Cabling lead me to the discovery that those Older Versions of HP-Tuner Box and Cables that ran around $700.00 on average and are no longer sold, available as Used nor supported by HP-Tuners. The Newer, Ubiquitous HPT Devices and Kits start at around $300.00 with "0" Credits (a Minimum of Two would probably be needed for re-working and massaging One, Decent "Tune" worthwhile enough to get licensed as a Modified LS Base Tune) The HPT Credits run around $50.00 each.

@MRRSM You are partially correct. HPtuners did in-fact discontinue the MPVI Interface as soon as they released the MPVI2 Interface. However, the original MPVI Standard and Pro continue to be supported and are functionally almost no different than the new interface. Though rare, they can still be purchased used and will work just fine with the latest HPtuners Suite

USED MPVI PRO

Just a year or so ago, $500 got you the standard MPVI Interface with 8 Credits included (Make Specific). Like you mentioned, most GM Vehicles will require 2 credits to unlock & license. Once unlocked, it remains unlocked forever (as long as you use the same interface) and you can make an unlimited number of updates to the tune. The MPVI Pro was something like $800 IIRC and also came with 8 credits. It has the added advantage of on-board data logging (no laptop required) and Analog signal inputs (i.e. Wideband).

I personally purchased the MPVI Standard and paired it with the X-Series AEM UEGO Wideband. This particular AEM Wideband comes with an OBD-2 CAN Bus interface that acts as a OBD2 Device that HPTuners can read and log in tandem with the vehicles PCM. This was a much more cost effective solution to the Pro and "Ballenger" branded Wideband that others were using, and it worked great with my 2011 CTS-V.

AEM X-Series WB W/ OBD2

The downside to this combo however, is that it will not work with vehicles older than 2008 as the AEM WB uses the CAN Bus to communicate with HPTuners. Had I gotten the Pro, I would have been able to use the Analog inputs to log the wideband on my 2007 Trailblazer 😢 .

Forward to today and the MPVI2 and credit system is now Universal (Not Make Specific), has Bluetooth capabilities for less than $300 (no credits). The AEM Wideband continues to work with this model assuming it's a 2008+ PCM. Analog inputs for older vehicles will require their "Pro-Link" & "Pro-Feature" kit which is $250 more.
 
Last edited:
  • Like
Reactions: mrrsm

mrrsm

Original poster
Lifetime VIP Donor
Supporting Donor
Member
Oct 22, 2015
7,639
Tampa Bay Area
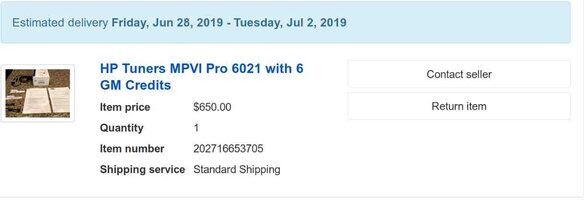
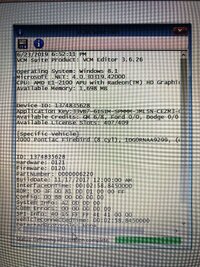
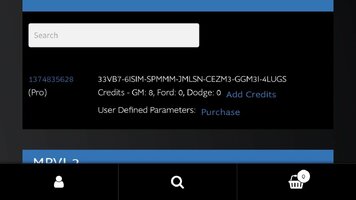
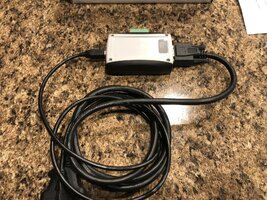
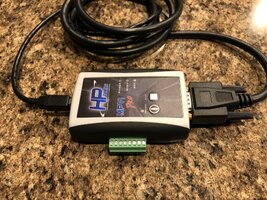
@2advanced... Brother! Thank You.... Ever so much for managing to Winkle Out THIS Original HPT Pro System on eBay for me... I just "Dropped the BUY Hammer" and purchased this Kit a few minutes ago (1:40 PM EST) Wednesday, June 26th, 2019:

HPTMVPIFULLKIT.jpgs-l1600D.jpgs-l1600C.jpgs-l1600B.jpgs-l1600A.jpgs-l16003.jpgs-l16001.jpgs-l1600.jpg

@Reprise... Thanks for those encouraging words, Man. And this is yet another perfect opportunity for me to prove the fact that I NEVER try Doing ANYTHING... BY HALVES. If I cannot get the Y2K Truck PCM adjusted properly enough to Run Well in all of its RPM and Power Bands while using THIS Gear to make things Work Right... Then I'll have Nobody to Blame... But Myself.

@2advanced... Trust me when I mention that I may have to indulge your confidence and advice as I muddle my way through the "Stoichiometric Learning Curve" and get myself grounded in the use of All This Stuff. Let Everyone here at GMT Nation know that You have NEVER Steered me Wrong!

@Mooseman... As this particular part of the Y2K Performance Upgrades is more dedicated to the application of HP-Tuners, I'll create a Separate Thread for the Tech 2 HP Tuners Sub-Forum when I finish 'getting my feet wet' and have anything useful and worthwhile to post up for the GM 5.3L Engine Owners having any interest in this matter.
 
Last edited:
  • Like
Reactions: 2advanced

mrrsm

Original poster
Lifetime VIP Donor
Supporting Donor
Member
Oct 22, 2015
7,639
Tampa Bay Area
As it concerns Post #42...

I really hate having to Cross-Post Videos… but because the VOP (Video Original Poster) was kind enough to show us How the GM IPC Cluster Connector gets Wired Up for the purposes of connecting the Cluster to a Tech 2 ON-THE-BENCH with a Hand-Made Harness ... AND… because I’ve recently had a failure with the Square, Back-Lit Message Center (Orange LED Screen) showing Black Vertical Trace Lines on the Center Left side of the IPC in my 2000 Chevrolet Silverado… I’m going to do two separate postings on this issue.

This subject may become important for the Owners of 2000-2002 Chevrolet Silverado Trucks to get informed about what the ACTUAL problem is with the Harness-Connected Orange LED Screen developing those “Blank Vertical Lines”. Fairly recently… this is another Dude who is being very generous in sharing this arcane IPC Repair information and how to drill down to what the problem REALLY is here.

He is using much more sophisticated Shop Electronic Test Equipment such as a Signal Generator to Test the Speedometer and RPM Gauges versus our use of the Home Spun Tech 2 Instrument Cluster Bench-Top Test Harness that the OTHER Generous VOP clued us in on, making it possible to finally Mark This Thread asSOLVED.jpg.

I'm sure that others with Full Size GM Pick Up Trucks and SUVs will also want to see what the 2nd VOP has done in this follow-on Video that touches on Quite a Few Diagnostic Things to Check; especially for those of us possessing the “GYMKO” Scanners and being able to run the Battery of select-able Tech 2 On-The-Bench Tests after performing this Repair to verify the outcome. Pay particular attention to the various “Test Points” on the IPC Logic Board that he touches with his DMM set on the Diode and Continuity Probe Modes for component GO-NO GO Status, connectivity and confirmation of replaced surface mounted component behavior:


Now ...if I can ONLY Get My Hands on one of those
Replacement Orange LCD Panels:
 
Last edited:
  • Like
Reactions: Redbeard

Leonf

Member
Nov 19, 2019
2
North Carolina
Hello. I started reading this thread because I was hoping that I could get a link for someone that I could buy a GM cluster harness to use for bench testing clusters out of the vehicle. Most of this stuff is way over my pay grade but if you or someone you know sells these harnesses I would love to know how to contact them. Thanks!!
 

mrrsm

Original poster
Lifetime VIP Donor
Supporting Donor
Member
Oct 22, 2015
7,639
Tampa Bay Area
Welcome to GMT Nation...

Suggestion:

Visit or Contact your local Electronic Repair (Radio Shack) Shop via Email with a message that includes a Link to this Topic. If you do this as a "Walk-In" ... bring in your Laptop-Tablet for Internet Access, then visit this Thread Link and Sign In and allow him/her to view this information. Any decent Electronics Technician can easily translate these detailed instructions and imagery into creating this Dedicated IPC Test Harness for you. The only remaining issue would be... How much will the Shop Charge for the Parts and Labor?

You can advance this possibility by first scavenging the 24 Pin IPC Harness Connector from under any GM or GMC Instrument Panel Cluster, as THAT will be one component essential to obtain from your Local Salvage Yard. If you watch this Video, The VOP (Video Original Poster) walks you through its appearance and tear down. If you can ...Chop out at least a foot long section of the Wire Bundle attached to the 24 Pin Connector:

GMIPCLUSTERCONNECTOR.jpg2013-05-17_134312_clust.gif


Also... Assuming you have a "GYMKO" Tech 2 Scanner... the same would apply towards obtaining and providing the Elec-Tech with a Brand New J-1850 OBD2 Female Under-Dash OBD2 Port-Receptical as well. That item can be found on Amazon for under $10.00 and should include the necessary Basic Colored Pig-Tail Wires as well.
 
Last edited:

mrrsm

Original poster
Lifetime VIP Donor
Supporting Donor
Member
Oct 22, 2015
7,639
Tampa Bay Area
From time to time… I like to see what if any "Pricey" new developments involving Commercial P01, P59 and P10 PCM Programming Harnesses and Equipment arise.

When I see what Bench-Force is charging just for this GM P-10 Dual Connector Harness… sans their OBD2-DLC Harness "Power-Block" Adapters, I’m glad that GMT Nation is the still place where Members can find some Home-Made Alternative "GYMKO" Solutions that work just as well ...and NOT Break The Bank:

https://bench-force.com/collections/powerblocks

https://bench-force.com/collections...ducts/engine-module-harness-02-05-gm-p10-4-2l

P10_programming_extension_harness.jpgBENCHFORCEP10HARNESS2.jpg
 

santon

Member
Jun 3, 2020
94
Israel
Once again... I'm back with what I consider to be A VERY BIG DEAL in the way of How To Make A Dedicated Bench-Top Instrument Cluster Bi-Directional Electrical Test Harness that will work with ANY Scanner that has the BI-D Capabilities. FINALLY... Somebody in the GM Instrument Cluster Repair Business has taken the time to decipher the GM 24 Pin Cluster Connector interface to the J-1850 Female OBD2 (Auto Chassis Under-Dash) Connector.

Armed with this information ...and if possible... First obtain a Junk Yard Instrument Cluster Harness Plug with a Goodly Length of the OEM Harness Wires still attached:

...AND REMEMBER... The PIN Orientation of the 24 Wire Instrument Cluster PLUG is LEFT to RIGHT ...if the Harness Wires get DIRECTLY attached to IT ...as opposed to attaching Individual Pin-Wire Connectors DIRECTLY to the Instrument Cluster 24 PIN Connector on the Board...as seen in the attached Video and has a RIGHT to LEFT Orientation and therefore... they are BACKWARDS to one another when Viewed Face On, side by side!

Then... you can wire either arrangement into the inexpensive J-1850 OBD2 Female Port and AFTER you Repair the LEDs, Mosfets and Dials on these GM Clusters... plug in either arrangement and Power Test the Lights and Dials... right there on your Bench. Yeee Haaaa!

So now... If you have your very own "GYMKO" Tech 2... So much the better for being able to run the actual Diagnostic Checks and Powered Bench Tests as though the Re-Built Cluster(s) were still mounted into the Dash Boards. I would recommend Downloading and saving this Video to obtain accurate Screen Prints of this Dude's Hand Drawn Wire Diagram of this Harness ...before his competitors find some way of getting this Video Deleted.

The Important Thing To Remember is... If you will be using this Cluster Bench Test Harness with any Tech 2 Clone... you MUST Insert the Tech 2 12 VDC 1 AMP Power Supply Plug or Cigarette Lighter Power Cord Plug ...into the Male OBD2 Tech 2 Adapter...and NOT into the Base of the Tech 2 ...otherwise, the Cluster will NOT Power Up:


Okay... To save everyone some time on this and memorialize the actual harness connection layout...

I worked out all of these 'Visual Clues" into how the GM 24 PIN Instrument Cluster communicates with the Female OBD2 Port Connector (J-1850) with the Caveat that if you will be using a USB Blue Tooth Adapter... You will need an External Power Supply producing 12 Volts DC @ 1.389 Amps to connect the Three Wire from the 24 PIN Cluster Connector B+ Connectors over to PIN 16 for the Positive 12 VDC and then arrange the A12 and B12 Pins from the IC Connector over to PIN 4 of the J-1850 for GROUND. This is NOT necessary to do when using the "GYMKO" Tech 2 Scanner:

Positive (3) Wire Bundle 24 PIN Cluster Connections:

Positive Power 12 VDC Wires
A11, B9 & B11

To… The J-1850 OBD2 Female Connections:
PIN 16 B+

Ground (2) Wire Bundle 24 PIN Cluster Connections:
A12 & B12

To... The J-1850 OBD2 Female Connections:
PIN 4

Class 2 Data Connections 24 PIN Cluster Connection:
A6

To… The J-1850 OBD2 Female Connections:
PIN 2

I found the discrepancy between this information and the instrument cluster diagram and the 24 pin connector pinout table posted earlier. For example, the A6 (Class 2 Data) labelled as DIC SW SIG on the diagram. A12 is the Transmission Park/Neutral signal on the pinout table and the ENG SPEED SIG on the digram. I am sure I am missing something here. Which information is correct for 2004 Trailblazer?
 
Last edited:

mrrsm

Original poster
Lifetime VIP Donor
Supporting Donor
Member
Oct 22, 2015
7,639
Tampa Bay Area
The purpose of this Thread is the broad base design of a working Bench Top Harness for GMT360 IPCs and P-10 PCMs. It is not intended to address any specific Year-Make-Model of any of the particular GMT360 vehicles.

Have you discovered this as a problem after actually making your own IPC Test Harness from this information... and had it fail?

In all cases of questioning what you have for your particular SUV IPC Pin-Outs, you should defer to the Wiring Diagrams from the pages on the IPC information in the GM OEM Digital Service Manuals provided by @Mooseman in his Signature Line and available for download links in any and all of his Posts and Threads.

Regarding your concerns about the accuracy of the the Hand Written Schematic ... I suggest that you contact the VOP (Video Original Poster) Jack Meyers over on YouTube and leave your Question in his Comments Section for this particular Video. As the Creator of this information, perhaps he can clarify things a bit better for you:


Barring all of this... you could also try and leave a personal message (PM) with @AlfaNorway and prod him with any questions as well. He has successfully constructed a fully functional Bench-Top Analytical IPC Machine that is far more sophisticated than what is offered here. Perhaps your answers can be found in that direction. Seek out his particular Thread for more information on the subject.

Then of course, you can always create a Brand New Thread on this Topic of your own if you have a Better Idea for its Design. If you have something in mind to make a more complete design of Harness that address your concerns in a better way, I encourage you to do so.

"Those that can't Do... Teach... and those that can't Teach... Teach GYM..." Woody Allen
 
Last edited:

mrrsm

Original poster
Lifetime VIP Donor
Supporting Donor
Member
Oct 22, 2015
7,639
Tampa Bay Area
Keeping Pace and Keeping On Topic with being able to Test GM Modules “On The Bench” in Better Ways is Very Important:

So... When it comes to being able to Test Certain Modules… THIS New Device has a Switchable Multi-Function Power AND Break-Out Box Features that opens up a Whole New Bench-Top Diagnostics Ball Game:

Sold at Amazon as a Complete Kit for $130.00:

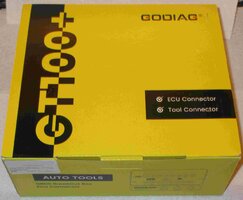
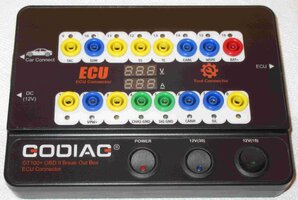
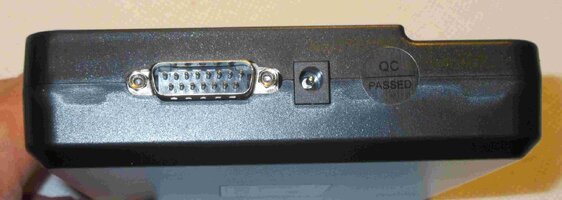
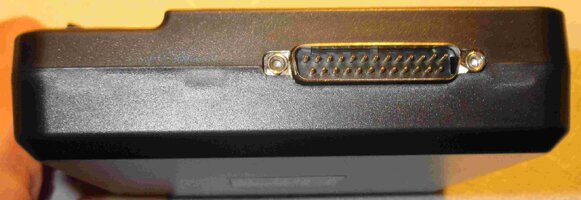
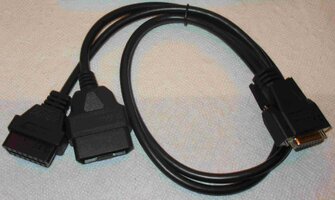
GoDiag GT-100+ OBD2 Break-Out Box for Bench-Top & In Vehicle PCM-ECM Programming:

https://www.amazon.com/dp/B096M6B2WJ/?tag=gmtnation-20

If you are a PCM Programmer of either the GM OEM Factory Calibrations, or have your eye on a Performance Tune for your LS Motor using HP-Tuners Software…

https://www.hptuners.com/

...THIS Device could come in very handy by providing a Very Stable Power Source to the PCM and an Extra DLC Port for additional Diagnostic Devices while also showing the Voltage and Amperage Draws on a Digital Read Out!.

The Unboxing and Explanation of the FULL GoDiag GT-100+ OBD2 Break-Out Box Kit:


Another End-User Unboxing with insights:


For ANY 1999-2002 GM Truck or SUV...In order to access and remove the TCCM Unit... Follow THESE Instructions FIRST:


THEN... Watch THIS Dude perform FOR REAL using his GoDiag GT-100+ Bench Top Kit vs. a BAD GM TCCM (Code C0308) out of a 2001 Chevrolet Silverado 2500HD and being able to conduct a TRUE Logic Board Sub-Component Test To Failure:


For all the Owners of GM 4X4 Vehicles with ’ Mysterious Transfer Case Issues’, How Cool is THAT!!!

In THIS Last Example... the same previous VOP (Video Original Poster) is using the GoDiag+ Unit along with his Autel Scan Tool to Test and Diagnose the Instrument Cluster from his JEEP. It follows on that these very same kinds of Tests can be done on the GM Truck & SUV Instrument Clusters by following the Factory Pin-Outs or those mentioned in previous Posts within this Thread!

 
Last edited:

mrrsm

Original poster
Lifetime VIP Donor
Supporting Donor
Member
Oct 22, 2015
7,639
Tampa Bay Area
Continuing ...

THIS is the GoDiag GT100 + OEM Manual in PDF version along with an Excellent "How To Use" Explanation Video:


Remember... It's The Principles being covered here that Matter... NOT the Year, Make or Model of any Vehicle for THESE Training Purposes:

 
Last edited:

mrrsm

Original poster
Lifetime VIP Donor
Supporting Donor
Member
Oct 22, 2015
7,639
Tampa Bay Area
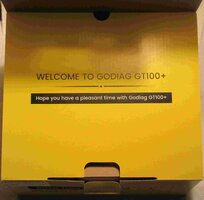
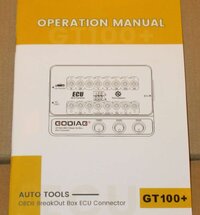
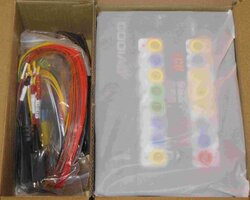
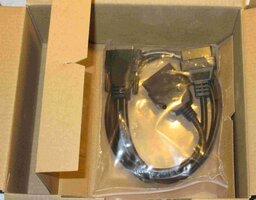
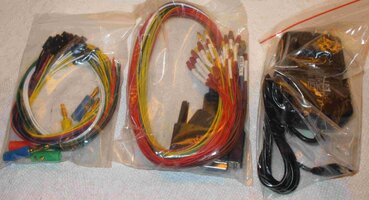
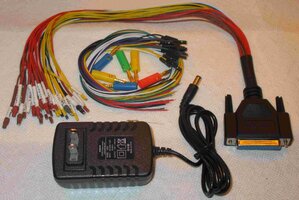
The "Yellow Boxed" GoDiag GT100+ Kit arrived this evening. THESE are the "Un-Boxing" Images:

GODIAGEAR1.jpgGODIAGEAR2.jpgGODIAGEAR3.jpgGODIAGEAR4.jpgGODIAGEAR5.jpgGODIAGEAR6.jpgGODIAGEAR7.jpgGODIAGEAR8.jpgGODIAGEAR10.jpgGODIAGEAR11.jpgGODIAGEAR12.jpgGODIAGEAR14.jpg

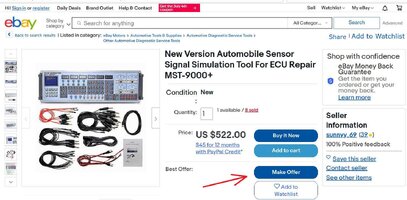
But this Video and THIS Kit... hints that this OTHER piece of Complex Diagnostic Hardware might be completely unnecessary... But it ALSO does SO Much Stuff "On The Bench" that I'm thinking about getting one of THESE Damned Bench Top Diagnostic Monster Machines...just TFAWI ...Too. 8>0

Have A Look at How It Works:


AUTOOLMST9000.jpg


Forum Statistics

Threads
23,273
Posts
637,489
Members
18,472
Latest member
MissCrutcher