You are using an out of date browser. It may not display this or other websites correctly.
You should upgrade or use an alternative browser.
You should upgrade or use an alternative browser.
Capote's Build Thread - "BatBlazer"
- Thread starter Capote
- Start date
littleblazer
Member
- Jul 6, 2014
- 9,265
OE calipers, yes. What're the Callahan and Brake motive ones that come powder coated red?littleblazer said:You still running the aluminum calipers? I think oem is aluminum.
littleblazer
Member
- Jul 6, 2014
- 9,265
Steel is better, less flex. I'd imagine after market is steel like the ext brakes. Edit: SS may be steel, not sure on ext.Capote said:OE calipers, yes. What're the Callahan and Brake motive ones that come powder coated red?
I was thinking, and don't know if it's possible, but you could clean up the metal and get it to that brushed look like those rims you posted up, that would match nice. If you go that route.
I'd have to repaint these ones, I was also thinking a polished look. Can't go wrong with that. Maybe add a bowtie somehow?littleblazer said:Steel is better, less flex. I'd imagine after market is steel like the ext brakes. Edit: SS may be steel, not sure on ext.
I was thinking, and don't know if it's possible, but you could clean up the metal and get it to that brushed look like those rims you posted up, that would match nice. If you go that route.
littleblazer
Member
- Jul 6, 2014
- 9,265
Etch it in with a dremel and accent it red?Capote said:I'd have to repaint these ones, I was also thinking a polished look. Can't go wrong with that. Maybe add a bowtie somehow?
I don't remove my calipers from the brake lines when I paint them, unbolt them, sit them on bucket and paint them that way
littleblazer
Member
- Jul 6, 2014
- 9,265
? Extension cord? I'm really confused.Capote said:I don't remove my calipers from the brake lines when I paint them, unbolt them, sit them on bucket and paint them that way
I'm saying I don't remove the caliper completely. I don't have a long enough extension cord lol. I wouldn't sit outside anyway to etch anything. Plus I would mess it up I betlittleblazer said:? Extension cord? I'm really confused.
littleblazer
Member
- Jul 6, 2014
- 9,265
Kinda what I thought. It's all straight lines. Have Brandon make a chevy die inverted and then use a dremel to to do it. Or just get decals...Capote said:I'm saying I don't remove the caliper completely. I don't have a long enough extension cord lol. I wouldn't sit outside anyway to etch anything. Plus I would mess it up I bet
Would probably go the tiny decal route, paint over it and then remove it, revealing the colorlittleblazer said:Kinda what I thought. It's all straight lines. Have Brandon make a chevy die inverted and then use a dremel to to do it. Or just get decals...
02-12 September 2015:
Sorry for the wait peeps!!
Holy crap its sucked not having WiFi, I'm at the laundrymat and will now update, woohoo
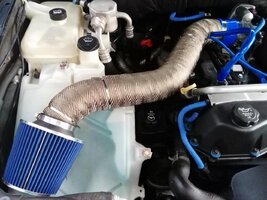
Added 2 more layers of heat wrap, making a total of 4. Intake temps run 10-15° cooler on average
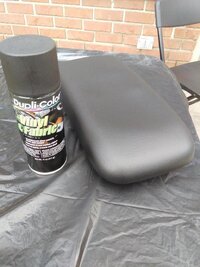
Painted console lid with Duplicolor Vinyl & fabric in prep for center console:
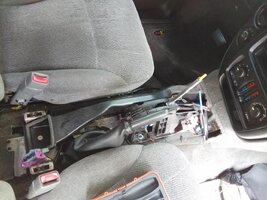
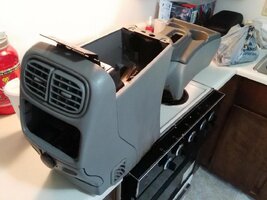
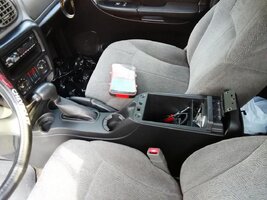
Removed center console, its sickening how previous owners let vehicles go to crap or get disgusting. Look at all the crap behind the shifter, and how gunky everything is. After I removed the center console I spent a good hour cleaning the carpet under where the console sits and all the plastic parts as well, followed by a vacumming:
A closer look:
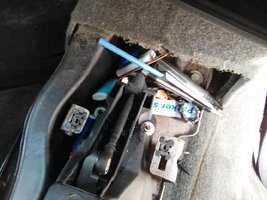
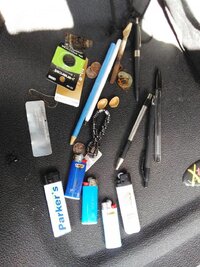
A female chain smoker who's a slob is the culprit I'm sure of it:
Center console ready for cleaning and disassembly:
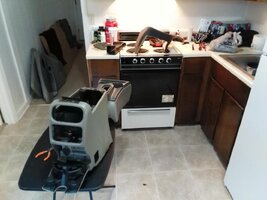
My kitchen only functions as a workshop:
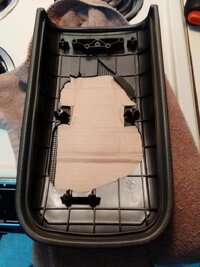
Fixed the divot in the console lid, stiff cardboard, it actually held up:
Center console, first layer of Satin Duplicolor Vinyl & Fabric:
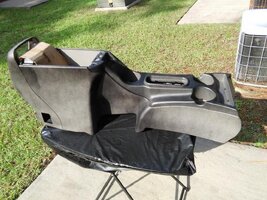
Last layer:
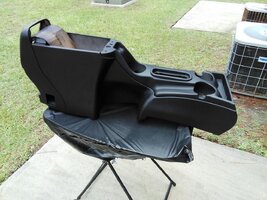
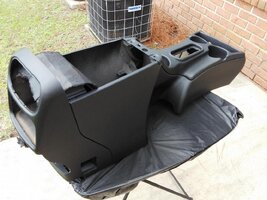
In the rig:
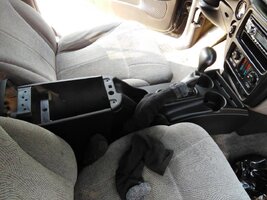
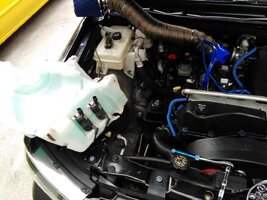
Washer tank removal:
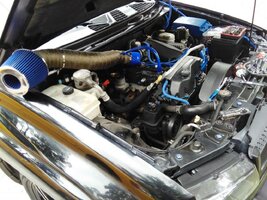
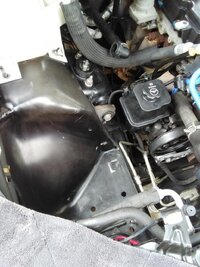
Much cleaner look under the hood and make the intake pop out more without that ugly tank:
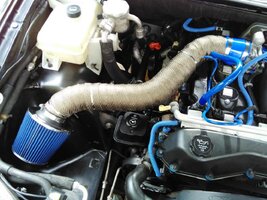
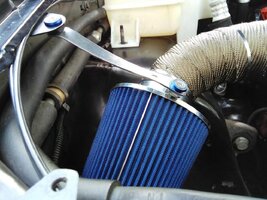
Made a custom bracket to hold up the intake and keep it from bouncing:
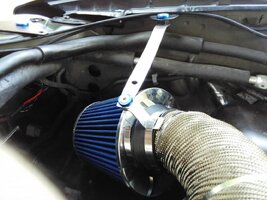
Overall look, after all the work was complete I cleaned as much as the engine bay as i could for an hour with degreaser and a toothbrush:
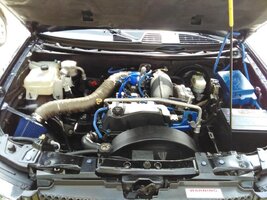
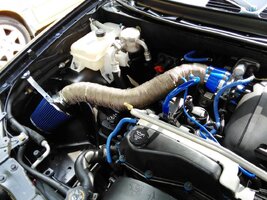
EDIT: Forgot to mention I put a new CPAS in after all this, idles a lot better now. I also added all those blue washers and chrome bolts from SickSpeed for some dress up
Sorry for the wait peeps!!
Holy crap its sucked not having WiFi, I'm at the laundrymat and will now update, woohoo
Added 2 more layers of heat wrap, making a total of 4. Intake temps run 10-15° cooler on average

Painted console lid with Duplicolor Vinyl & fabric in prep for center console:

Removed center console, its sickening how previous owners let vehicles go to crap or get disgusting. Look at all the crap behind the shifter, and how gunky everything is. After I removed the center console I spent a good hour cleaning the carpet under where the console sits and all the plastic parts as well, followed by a vacumming:

A closer look:

A female chain smoker who's a slob is the culprit I'm sure of it:

Center console ready for cleaning and disassembly:

My kitchen only functions as a workshop:

Fixed the divot in the console lid, stiff cardboard, it actually held up:

Center console, first layer of Satin Duplicolor Vinyl & Fabric:

Last layer:


In the rig:


Washer tank removal:


Much cleaner look under the hood and make the intake pop out more without that ugly tank:

Made a custom bracket to hold up the intake and keep it from bouncing:


Overall look, after all the work was complete I cleaned as much as the engine bay as i could for an hour with degreaser and a toothbrush:


EDIT: Forgot to mention I put a new CPAS in after all this, idles a lot better now. I also added all those blue washers and chrome bolts from SickSpeed for some dress up
BlazingTrails
Member
- Apr 27, 2014
- 19,409
Good Work Brother!!Capote said:A female chain smoker who's a slob is the culprit I'm sure of it:
IMG_20150904_133840.jpg
Ima need that battery for my keyless entry remote
My kitchen only functions as a workshop:
IMG_20150904_135958.jpg
It should since you are single
Thanks bud, means a lot coming from yourself [emoji4]BlazingTrails said:Good Work Brother!!
SnowBlazer
Member
Thanks buddy, put a lot of work in recently. The car show was fun, just not as big a turnout because of the rain. Mostly modern muscle and import tuners were there. I was bummed down at first since nobody was checking my TB out. But the first guy that walked up with his son was impressed with everything I did. He thought it was an SS at first until I explained not-so. Then after that I popped up my hood, put my lights and strobes on, that grabbed people's attention. Pretty much got asked if it was an SS for every person's first question that took a look at my rig, even the judges. Looking forward to getting a chance to do another one.SnowBlazer said:Man, that shit looks nice as fuck. How'd the car show go?
You could definitely use some RedLine Tuning hood struts. Get rid of the ugly prop 
Awesome work though. You have completed a ton of mods since getting home.

Awesome work though. You have completed a ton of mods since getting home.
Yes I too hate the hood prop, so old school nowadays it seems. I would love a pair of those, would further improve the look when the hood is up.dmanns67 said:You could definitely use some RedLine Tuning hood struts. Get rid of the ugly prop
Awesome work though. You have completed a ton of mods since getting home.
Thanks David I sure have. A lot more will get done after I come back after this next rotation to Germany, 3 months this time. The biggest mod after returning will be a full dip, just satin or black with glossifier to give it a semi-gloss look. I think it will vastly improve the overall appearance. Might have those guys do a batman emblem somewhere, not 100â„…
HARDTRAILZ
Moderator
- Nov 18, 2011
- 49,665
I had a TB with both and the struts sucked. two things to be in the way and did not lift as high. They definitely went with the one i sold.
Hmm I'll take that into consideration Kyle, thanks [emoji106]HARDTRAILZ said:I had a TB with both and the struts sucked. two things to be in the way and did not lift as high. They definitely went with the one i sold.
HARDTRAILZ
Moderator
- Nov 18, 2011
- 49,665
I like the prop...you can use something else to prop up the hood if it is in your way in the front of the motor really easy, but you can't move the struts when they are in your way working from either side.
Prop has never gotten in the way, even when me and Brandon changed out my lifters and cleaned everything under there. How much lower do those struts hold up the hood? Because the prop keeps it at a perfect angle, especially with my rig being so lowHARDTRAILZ said:I like the prop...you can use something else to prop up the hood if it is in your way in the front of the motor really easy, but you can't move the struts when they are in your way working from either side.
HARDTRAILZ
Moderator
- Nov 18, 2011
- 49,665
Prolly depends on exactly where you mount them really. Mine were installed when I got it. I had always wanted them until i got that truck with them and now I would not spend the money on them.
Well for now its not really a mod that I'm real antsy about doing, there's other mods on my mind. I'll probably forget about the struts anyway lol
Blckshdw
Moderator
I know when JimmyJam put those on his 02TB, he didn't like the height the hood was held at either. So he moved the struts further back so they held the hood higher up, and they were less in the way when needing side access.
Why did Redline Tuning have the mounting location for their struts in such a location as to have a bad hood angle? Lol
Blckshdw
Moderator
It was probably setup that way for some ideal amount of lift strength, vs ease of closing the hood. That's my guess. I would assume the further back they are mounted, sure the hood is higher, but there will be more upward force when you try to close the hood. Depending on height and strength, that can become a factor for some. 

Ahh that makes senseBlckshdw said:It was probably setup that way for some ideal amount of lift strength, vs ease of closing the hood. That's my guess. I would assume the further back they are mounted, sure the hood is higher, but there will be more upward force when you try to close the hood. Depending on height and strength, that can become a factor for some.
Carlton, I wanna do under hood lighting like yourself, but not the same setup. Did you use a tilt switch?
Blckshdw
Moderator
Yeah, tilt switch tied to a relay, since the current rating of the switch was lower than what the LED strip was gonna pull. A little more research and searching, and I could have found a higher rated one, or if I used less LEDs (why on earth would I do thatCapote said:Carlton, I wanna do under hood lighting like yourself, but not the same setup. Did you use a tilt switch?
 )
)I have no idea how I wanna go about it, I want it to look as clean as possible and not have the strips be so obviousBlckshdw said:Yeah, tilt switch tied to a relay, since the current rating of the switch was lower than what the LED strip was gonna pull. A little more research and searching, and I could have found a higher rated one, or if I used less LEDs (why on earth would I do that)
Blckshdw
Moderator
 So instead of on the underside of the hood, have the light down inside the engine bay... I can dig it.
 At a couple of car shows we've been to, I saw some rides done up like that. Have the strips on the sides of things, and the light reflects off other parts, so you don't see the LEDs directly. Makes it easier to hide wiring, since it can run on the underside of stuff. As long as they aren't too close to a heat source, they should be OK.
Well I do prefer the under hold way man, I just don't know how I'd hide things. Maybe some aesthetic strips of green down in the bay too, but that'd just be for looksBlckshdw said:So instead of on the underside of the hood, have the light down inside the engine bay... I can dig it.
At a couple of car shows we've been to, I saw some rides done up like that. Have the strips on the sides of things, and the light reflects off other parts, so you don't see the LEDs directly. Makes it easier to hide wiring, since it can run on the underside of stuff. As long as they aren't too close to a heat source, they should be OK.
Blckshdw
Moderator
If I had to do mine again (which I plan to at some point) I will put the strip all the way at the top, on the lip, instead of where I did a few inches down. Since the lip has that inward curve to it, the strip would be less visible and shine a little bit backwards, towards the firewall.
Where I've got mine positioned, the light shines straight down and maybe a little bit forward, but due to the viewing angle of the LEDs, you can see them clearly from a distance away when the hood is up.
Where I've got mine positioned, the light shines straight down and maybe a little bit forward, but due to the viewing angle of the LEDs, you can see them clearly from a distance away when the hood is up.
14 September 2015:
Installed Gauge Pillar to see how everything looks. Doesnt fit just right, but its still snug. Drilled it into the A-pillar. Top gauge is Trans Temp, middle is Water, that 3rd empty spot is where I'm moving the RPM gauge too. Not wired up yet, just have all the wiring organized. have to wait to hook up the Water Temp and might do the Trans Temp before I leave. Will move RPM's sometime this week.
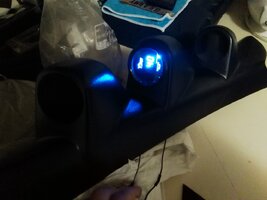
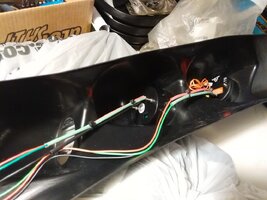
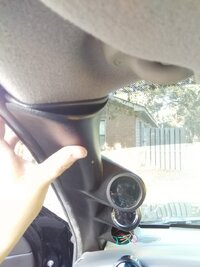
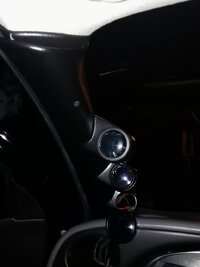
Installed Gauge Pillar to see how everything looks. Doesnt fit just right, but its still snug. Drilled it into the A-pillar. Top gauge is Trans Temp, middle is Water, that 3rd empty spot is where I'm moving the RPM gauge too. Not wired up yet, just have all the wiring organized. have to wait to hook up the Water Temp and might do the Trans Temp before I leave. Will move RPM's sometime this week.


Boricua SS
Member
Looks like the crap Lotek pod. But we have no choice since nobody else makes a pod. I bought that pod, hacked it up, fiberglassed it to my OEM A Pillar, bondo'd, sanded, primered, and painted. So now I have an OEM A pillar gauge pod. No overlay or replacement.

Gotta love gauges!

Gotta love gauges!

Oooo I like that bud. But it fits, just a gap on top. I'm satisfied lolBoricua SS said:Looks like the crap Lotek pod. But we have no choice since nobody else makes a pod. I bought that pod, hacked it up, fiberglassed it to my OEM A Pillar, bondo'd, sanded, primered, and painted. So now I have an OEM A pillar gauge pod. No overlay or replacement.

Gotta love gauges!
SnowBlazer
Member
Just spray foam insulate it!Capote said:Oooo I like that bud. But it fits, just a gap on top. I'm satisfied lol
Hell no, need a gap for the wiresSnowBlazer said:Just spray foam insulate it!
