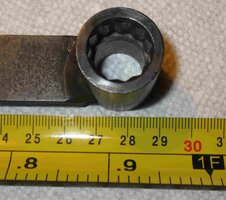
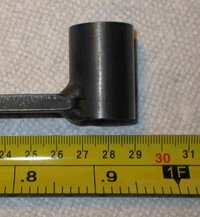
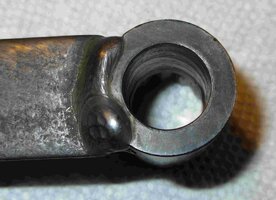
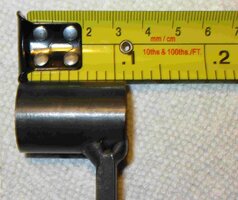
Cross-posting an old post of mine from 12/05/2015 on TrailVoy.
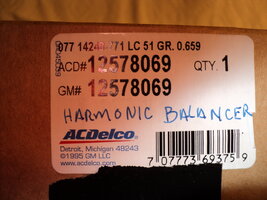
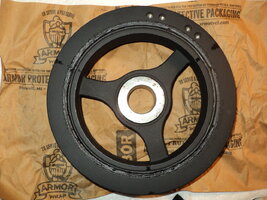
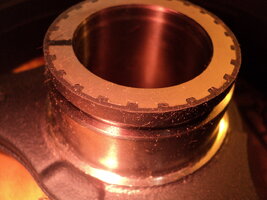
I just finished removing and re-installing the harmonic balancer on my 2007 4.2L LL8 TrailBlazer (in order to replace the oil pressure regulator in the front cover). This involved several epic struggles at various stages of the process, and I spent a lot of time searching the web for suggestions to make it easier, but I didn't really find any suggestions that were actually helpful (and didn't involve doing something risky ... like using the starter to break the bolt loose). So, I figured I should share my experiences, in the hope that it might save someone else some time, trouble, and money. Note that the 5.3L and 6.0L harmonic balancers are different (and look much easier to remove/install), so this only applies to 4.2L models.
Removing the balancer bolt:
I initially tried jamming both a screw driver and a pry bar in the flywheel, then having my wife try to loosen the bolt with a breaker bar while I held the screw driver and pry bar in place. This did not work at all - both the screw driver and pry bar started mangling the flywheel teeth under only moderate torque, and they would twist and slip off the teeth before we were anywhere close to putting enough torque on it to break the bolt loose.
So, I tried using a small (250 ft-lb) impact gun to remove the bolt. Because of the way the impact gun hammers on the bolt, there is no need to hold the flywheel; the inertia of the crankshaft and flywheel is enough to hold everything in place. However, this impact gun did nothing.
I ended up using this "700 ft-lb" impact gun (http://www.harborfreight.com/air-to...-in-professional-air-impact-wrench-68424.html) to get the bolt out, but even using that gun with my air compressor turned up to 100psi, I had to hammer on the bolt for quite a while (maybe a minute or two) before it broke loose.
I suspect it should be possible to remove this bolt with a breaker bar by using the torque converter bolt trick (described below) to hold the flywheel, but I would recommend using a big impact gun if you have one or can get one.
Removing the balancer:
The GM Service Manual says to use a special tool (J-41816) to remove the balancer. This tool costs about $140 from the official GM Tools Website (https://gmtoolsandequipment.com/en-US/Pages/ItemDetail.aspx?SKU=J-41816), so I tried to find another puller that would work.
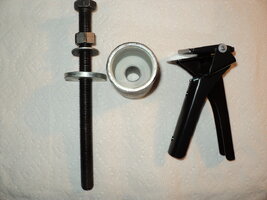
I tried using an old Olympia 05-891 4" puller that I already had (I bought it many years ago, I'm not sure where), with a socket over the crank shaft, and a piece of scrap steel over the socket (for the puller screw to push against), but the puller screw broke before the balancer moved.
So I rented all of the pullers that Advance Auto Parts had available, and purchased this puller kit (http://www.harborfreight.com/3-piece-three-jaw-puller-set-8832.html). Unfortunately, none of those pullers fit. The problem is that all of these pullers have rounded hooks on the end of the jaws, and there isn't enough space behind the balancer (in front of the front cover) for the puller hook to fit, so you simply can't hook the puller legs onto the balancer.
Luckily, each leg on my Olympia puller has one rounded hook and one flattened hook (much like the special GM puller - check Google Images for pictures of the J-41816 legs to see what I'm describing), and the flattened hook did fit behind the balancer, so I was able to use the legs from my broken Olympia puller and the frame and screw from one of the Harbor Freight pullers to attach to the balancer.
Then the swivel tip on the Harbor Freight puller screw broke before the balancer moved. I removed the swivel tip and continued tightening the puller (past the point where it started mangling the exposed tip of the puller screw, and to about the point where I was worried that something else on the puller would break), and finally the balancer started moving!
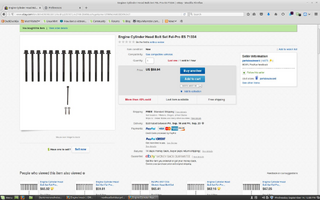
If I had to do this again, I would probably try to find the special GM puller at a reasonable price (maybe on EBay or http://www.penybonttools.com/), or I would look around for a larger generic puller that had the same flattened hooks as my Olympia puller.
Installing the balancer:
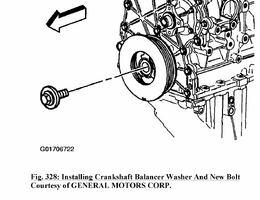
On 2004 or later models which have a shim on the balancer snout, the GM Service Manual says you should replace the shim (P/N 12578073) before re-installing the balancer.
Then the GM Service Manual says to use another special tool (EN-48034) to install the balancer. (The balancer was almost as hard to get on as it was to get off, and installing the balancer with the old balancer bolt would certainly damage the threads in the crank shaft, so it is important to use a tool for this.)
This tool costs about $55 from the official GM Tools Website (https://gmtoolsandequipment.com/en-US/Pages/ItemDetail.aspx?SKU=EN-48034). Advance Auto Parts rents a similar looking harmonic balancer installer, but it is the wrong size. I ended up finding a used EN-48034 for $20 shipped. Again, you may want to check EBay or http://www.penybonttools.com/ for another used one.
Make sure you put grease on the threads of the tool and between the nut and the washer (if you buy a new one, it should come with grease) to ensure that the nut won't be difficult to turn and won't damage the threads or washer as you use it to force the balancer onto the crankshaft. I also put a little bit of motor oil on the outside of the crankshaft and the inside of the balancer to help it slide on easier.
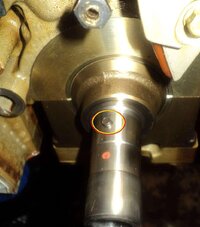
I've read forum posts from other users that suggest that the balancer will damage the snout of the crankshaft if it is not installed squarely, so be careful to align the balancer properly before you start torquing down on the installation tool. I wiggled the balancer slightly while I gradually tightened the installation tool to make sure I got the balancer square on the crankshaft before I started torquing on it.
Installing the balancer bolt:
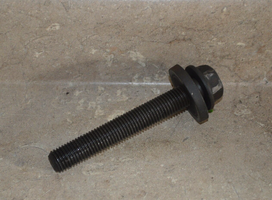
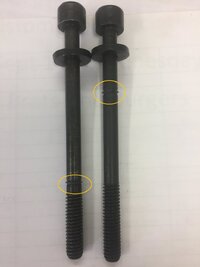
The balancer bolt stretches when it is installed (it is a "TTY" or "Torque To Yield" bolt), so you must replace it (P/N 11609792) when re-installing the balancer. The new bolt must be torqued to 110 ft-lb, then turned another half turn (180 degrees) to stretch it appropriately.
To hold the crankshaft while I torqued the bolt to 110 ft-lb, I wrapped my old drive belt around the harmonic balancer (kinda like this: http://www.tbssowners.com/forums/1256852-post7.html). Then I tried to use my "700 ft-lb" impact gun to drive it the rest of the half turn. I figured that since the impact gun took the bolt off it should be able get it back on, right? Wrong. The impact gun could only turn it about 1/6 turn (about 1/3 of the way it needed to go).
I tried turning the bolt further with a breaker bar while holding the balancer with the drive belt, but the drive belt broke before the bolt moved any further.
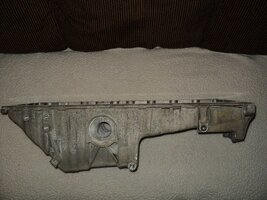
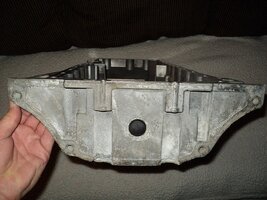
The GM Service Manual says to use special tool EN-46547 to hold the flywheel when installing/removing the harmonic balancer bolt, so I eventually broke down and bought that (for $136; I couldn't find any used ones). However, it turns out that tool doesn't actually fit the TrailBlazer! The picture in the service manual shows the oil pan having a large cut-out that mirrors the cut-out in the transmission bell housing (to create a large oval-shaped opening), but the TrailBlazer oil pan only has two circular cut-outs around the bolts in the oil pan (resulting in an odd "bone" shaped opening). This opening isn't large enough to get the GM tool in. It might be possible to use the tool when the oil pan is removed, but I had already re-installed the oil pan and didn't want to remove it again.
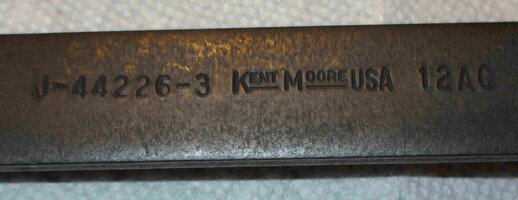
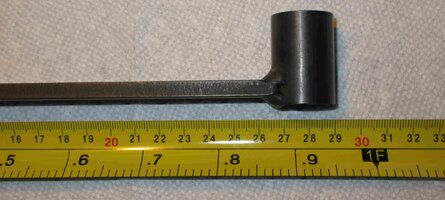
After a bunch of thinking and experimentation, I finally found a good way to hold the flywheel: In the back of the oil pan is a small plastic plug used to access the torque converter bolts when removing the transmission. I removed this plug, aligned one of the torque converter bolts with the hole, then inserted a 16mm socket over the bolt. The torque converter bolts are actually 15mm, but a 15mm socket would tilt on the bolt and twist in the access hole (and damage the the bolt and access hole) when I torqued on the balancer bolt, while a 16mm socket fit snugly in the access hole and didn't seem to twist much when I torqued on it. I also used a deep 16mm socket and wedged a piece of wood between the wrench end of the socket and the support flare on the edge of the oil pan to help keep the socket from tilting/twisting under torque.
With the flywheel locked in place, I was finally able to finish the extra half turn on the balancer bolt using a breaker bar with a cheater pipe. Based on the length of the pipe and how hard I was pulling it, I would estimate it took somewhere around 500 ft-lb of torque to get the bolt fully turned.
I'm not sure whether this means my "700 ft-lb" impact gun isn't actually putting out 700 ft-lb of torque, or whether it wasn't able to tighten the bolt any further because the bolt was being stretched for that extra half turn (so that with only instantaneous 700 ft-lb pulses, the bolt effectively acted like a spring and just bounced back to its original position and length after each pulse rather than stretching). I suspect the latter, although I don't know for sure.
Hope this helps someone.


