02 Bravada dies on Interstate....Cause?

1968Case580CK

Original poster
Member
Nov 30, 2018
29
Virginia
Greetings to all. I am posting a recent event and hope to get some opinions from the experts here:

I have owned a 2002 Olds Bravada for many years, and she now has almost 190,000 on the clock. I hooked up a trailer and drove 2.5 hours to pick up an antique Porsche 944 (poor man's Poor-shaaa), and after driving only 15 miles through some long mountain upgrades, the engine just "pooped-out", and I had to pull to the side. Engine seemed to loose all power, and almost seemed like it stalled out. When I pulled over and put her into Park, the engine was still idling, but kinda erratic (RPMs would bounce down to around 400, then surge up over 1000). I raised the hood and checked the fluids and looked underneath for some sign of leaks.....nothing wrong, all dry, and all fluids were ok (although hard to verify on a hot engine on a slight up-grade).

I started her up again, and started attacking the long grade again, with RPMs averageing 3000, but I was unable to get above 45mph before she "died" again. I had to pull over and deal with getting the entire rig towed the 2.5 hours home (not cheap).

At the time I was thinking that maybe one or two coil packs may have suddenly gone bad under the increased rpms and load (about 4500 lbs of trailer and car). Only one coil pack was replaced about 30,000 miles before, so the other 5 were long overdue. My other thought was that maybe the "catastrophic converter" was clogged and not allowing the engine to exhale the gases, and it was building up back pressure and killing the engine's power at higher RPMs. (Air filter was just changed last month.....so, not clogged with rats nest).

I put a Code Reader on her the next day, and did not get any codes saying I had misfires and no codes saying bad converter/O2 sensors. However, the "Service Engine Soon" light had been on, but that prior code was just a P0128 code (Coolant was a bit lower than normal). I had been ignoring this Coolant issue since I was putting-off replacing the thermostat, and did not think a 5-10 degree cooler temp would be an issue.

So, I just replaced all 6 of the Coil Packs and Plugs, and the engine starts up and idles the same as before. I tested the 6 old Coil Packs with a voltmeter, and they tested the same as the new coils. When I try revving the engine while in Park, the RPMs do not want to go over 3000, and its a somewhat slow rpm increase......seems to be slower than normal to rev up to 3000, as if the catastrophic converter is clogged. Using a rag near the tailpipe, the gases seem to be coming out at a good clip when the engine is gunned....but it hard to be sure.

When inspecting the Cat, it has a factory weld to the 3 foot pipe that goes up to the manifold, and a factory weld to the rear 2 foot pipe that goes to the muffler......so, I cant just remove it to inspect the guts. I believe the Cat is original, so is 180,000 miles exceeding the life of these expensive critters?

Any other suggestions as to what might be the problem with this old in-line six?
Thanks for any ideas/suggestions.

I also forgot to mention the Fuel Filter. I will admit that the fuel filter has not been replaced in probably 100,000 miles, and this is another "potential" causes for the problem.....maybe the engine just was not getting the proper volume of fuel at higher rpms? I will be replacing the fuel filter as soon as it arrives.
 

TollKeeper

Supporting Donor
Member
Dec 3, 2011
8,252
Brighton, CO
Whens the last time you replaced the fuel filter? Thats almost classic fuel filter being clogged signs.
 

Mooseman

Moderator
Dec 4, 2011
26,026
Ottawa, ON
Check fuel pressure. Could be a flaky fuel pump not supplying enough fuel.

However, the "Service Engine Soon" light had been on, but that prior code was just a P0128 code (Coolant was a bit lower than normal). I had been ignoring this Coolant issue since I was putting-off replacing the thermostat, and did not think a 5-10 degree cooler temp would be an issue.

Although a sudden loss of power is not a usual sign of a clogged cat, a bad t-stat and running at lower than normal temps can clog it. It usually doesn't cause idling issues. Try removing the O2 sensor and running it open. If it improves, then a clogged cat is possible. You could also get a backpressure test done.

Has the throttle body ever been cleaned? Worth a shot.
How to clean your throttle body
 

1968Case580CK

Original poster
Member
Nov 30, 2018
29
Virginia
Whens the last time you replaced the fuel filter? Thats almost classic fuel filter being clogged signs.
I admit that I have been a Knucklehead and have never replaced the fuel filter.....DOH! So, I hope its the fuel filter instead of the CAT..... a heck alot cheaper, for sure. I will let you know after I replace it.....might cut her open and post a pic if it is crudded-up.

Check fuel pressure. Could be a flaky fuel pump not supplying enough fuel.


Although a sudden loss of power is not a usual sign of a clogged cat, a bad t-stat and running at lower than normal temps can clog it. It usually doesn't cause idling issues. Try removing the O2 sensor and running it open. If it improves, then a clogged cat is possible. You could also get a backpressure test done.

Has the throttle body ever been cleaned? Worth a shot.
How to clean your throttle body

Thanks for the suggestions......OK, after i replace the fuel filter I will then try removing the o2 sensor and see if she revs up better.
Throttle body was "susposedly" cleaned 30k ago by a mechanic......however, I found that he failed to put a new No. 6 plug in which he billed me for, and possibly never replaced one of the coils that he billed me for. (If you want a job done right, gotta do it yourself). Thanks for the link to throttle body cleaning.....will get that done too.
 

Mooseman

Moderator
Dec 4, 2011
26,026
Ottawa, ON
And get that t-stat changed, as well as the temp sensor.
 

mrrsm

Lifetime VIP Donor
Supporting Donor
Member
Oct 22, 2015
8,202
Tampa Bay Area
Since it is very easy to perform this particular test on the GM Inline (6) Cylinder Engine... My guess is that you should Check your Compression Levels. If your Upper Cylinders are clogged with Carbon Build-Up ...with the High Mileage and Stress already experienced by your Engine over the years... Residual Gas Lacquer and Combustion By-Products and Carbon can cause the two Top Compression Rings in all Cylinders to get Glued ...deep inside of the Pistons' Ring Grooves and the results would involve Excessive Blow-By and a serious Loss of Power... and become especially obvious when towing 2.5 Tons ...Up and Down steeply inclined Hills. Check your Dipstick for a Strong Smell of Fuel in the Motor Oil as the easiest method to diagnose this problem. Ordinarily... Problems with Low Compression are subtle enough NOT to throw any Engine Codes.

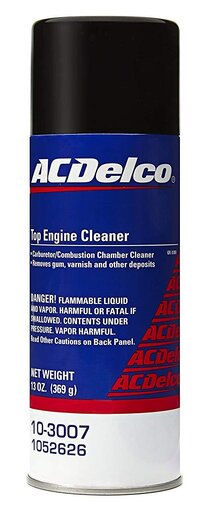
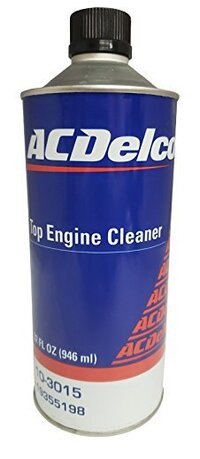
And while your COPs (Coil On Plugs) and Spark Plugs are still removed... you can attack this problem "Head" On by using Foaming ACDelco Top Engine Cleaner to douse the Internal Cylinder Head and Piston Tops for a nice long exposure to dissolve that stuff and restore your Compression and Power ...even on an Aging Engine. There are quite a few Top Engine Cleaner Threads that cover this process in greater detail here at GMTN. You WILL have to Change your Engine Oil and Oil Filter after using this TEC Method as the Engine Seals can get softened and ruined in the presence of this Strong Chemical Solvent after it bleeds down around the Rings and invades the Oil in the Crankcase. This stuff is available on Amazon:

ACDELCOTEC1.jpgACDELCOTEC.jpg
 
Last edited:

1968Case580CK

Original poster
Member
Nov 30, 2018
29
Virginia
MRSSM....Great tips. I thought about doing a compression test on the cylinders before I installed the new coils/plugs, but then thought that "if" the CAT was clogged, it could create back-pressure and screw up the compression test readings. But as soon as I am sure the Cat is OK, then I really should do the compression test. What are the "normal" readings on this straight 6......120-160lbs?

Glued top piston rings: Well, I have been using a quart of Marvel Mystery Oil with the oil changes, and try to add it to the gas on every other tank....so I am hoping that might help prevent the "glueing" affect on those top rings. Might be a worthy idea to just pour a few ounces of MMO into each cylinder and let it soak for a few days to help clean up those rings.......whats your opinion? You think the Foaming Cleaner is alot better?

During this break-down event, I did smell the oil, and there was no gas smell.....just an oil smell, and ready for the 3000 mile change.
 

mrrsm

Lifetime VIP Donor
Supporting Donor
Member
Oct 22, 2015
8,202
Tampa Bay Area
If the Upper Cylinder Head and the Piston Rings are Kleen as Kleenex and your follow on Compression Test proves the value of using MMO... I like it. But forget about using it to "dissolve" and Clean Up all of that Gas Glue from the Top Cylinders, Pistons Heads and Rings. ACDelco is THE Go To Solution for this Engine as a Master Carbon Buster.

Don't discount your High Mileage and the vagaries of the Thousands of Gallons of Suspect Gasoline that have passed through the Innards and Outers of that LL8 Engine as major contributors to the accumulation of all the Bad Stuff between the Piston Rings and Grooves. If it is NOT Bad Compression... Low Fuel Pressure... a Bad Fuel Pressure Regulator ...or CLOGGED EFIs would be #s 1,2&3 on the Repair Diagnosis Runway.

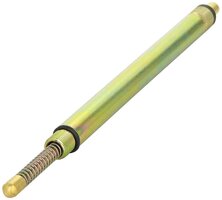
As for Which 'flavor' of the TEC is Best.... The Foaming Stuff is the Easiest to induce ...REALLY dousing the Cylinder Interiors with each one being set just B4 TDC... SO ALL FOUR VALVES ARE CLOSED. The Engine Firing Order is Prominently Stamped right on the Top of the Valve Cover. I prefer using THIS Tool... but a Long Plastic Rod would do as well... I like to avoid using Screw Drivers... Any Scratches can invite or induce Piston Head Cracks:

https://www.amazon.com/dp/B000FMSU9Q/?tag=gmtnation-20

INNOVALONGTDCTOOL.jpg

Regarding most of the questions about Compression Testing... You'll like this:

https://troubleshootmyvehicle.com/gm/3.5L/how-to-do-an-engine-compression-test-1
 
Last edited:

Chickenhawk

Member
Dec 6, 2011
783
Always go for the most common problem first. Everything points to a clogged cat.

Owners have toasted their cat by simply running even a few degrees cool over a long period of time. 5 to 10 degrees IS enough to clog your cat. If your coolant temp gauge runs even one tick to the left of center over a long period of time, even with no trouble code, it will clog a cat. Because you now have a low temp trouble code, I suspect it has been running cool for a long time.

Cat converters run on a VERY narrow mixture range. Five degrees too cool is enough for the engine to keep pumping way too much fuel. Even if its the sensor and the engine only THINKS it is running five degrees cooler, it still pumps in all extra fuel that clogs cats over time.

The other thing that clogs cats is a misfire. If the coil you replaced was bad for a while, it will also clog the cat. If the misfire was bad enough that your service engine light was flashing, the cat can clog in literally MINUTES instead of months.

Clogged cats don't set off a trouble code because the downstream sensor only measures the efficiency, it doesn't measure the volume of gas. While removing the oxygen sensor is a quick way to diagnose a clogged cat, you should also do a simple backpressure test to be certain. (Ignore the muffler shops that test cats with a heat gauge; that is not an exact diagnosis.) Backpressure should be near zero at idle and no more than 1 to 2 PSI at 2500 RPM.

As our platforms age, we will see more and more problems with bogging at high RPMs, or while pulling trailers, climbing hills or accelerating on the highway. My rule of thumb after 50 years of working on cars is simple - it is never the fuel filter (the most oversold replacement part in the world) and it is nearly always the cat if you have any of the above symptoms. Good luck and let us know.
 

1968Case580CK

Original poster
Member
Nov 30, 2018
29
Virginia
MRSSM.....
Thanks again for the detailed discussion/information. I can at least remove the O2 sensor and then do the compression tests.....that should allow a good outflow as to not affect the pressure testing. Just got the fuel filter today, so I wll let you know if it was clogged when I remove it.
 

1968Case580CK

Original poster
Member
Nov 30, 2018
29
Virginia
Chickenhawk.........Thanks for the valuable information about the harm that can be done to the Cat by running low temp coolant.....I had no idea. My old-school thinking was that running cooler is good and sure beats running 5-10 degrees on the hot side. Your assumption is correct......the check-engine light had been coming on/off for about a year, and had been on full-time for a couple weeks before the towing breakdown.

However, I monitor my MPGs constantly, and the 21mpg highway never went down based on the dash computer.....but I guess it doesnt take much "extra" rich fuel to screw up the Cat. Another note: I never use ethanol, but have been running a mid-grade non-ethanol gas (plus some Marvel M. Oil).......would that help or harm the Cat?

Backpressure......sounds like a good test, but I dont have the instruments to do it. Unless the same engine compression tester will fit into the front and rear o2 sensors at the Cat. Bottom line is that the Cat has almost 200,000 miles on it.....so maybe I just need to bite the bullet and install a new one. (However, the engine compression test needs to come first....."if" I have some low readings, it may be time to put a big "For Sale" sign on the poor Bravada).

Will keep you posted as I tear into it.
 

Mooseman

Moderator
Dec 4, 2011
26,026
Ottawa, ON
Backpressure......sounds like a good test, but I dont have the instruments to do it. Unless the same engine compression tester will fit into the front and rear o2 sensors at the Cat.

No, it's different with the low pressure reading required. I think some have adapted a vacuum/fuel pressure gauge (not for fuel injection) to work. Just need to make an adapter. If you don't have an old O2 sensor, an old flat gasket type spark plug would also work. No welder? JBWeld.


1968Case580CK

Original poster
Member
Nov 30, 2018
29
Virginia
Got some pics to ad this time:
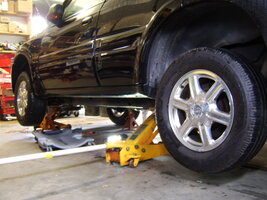
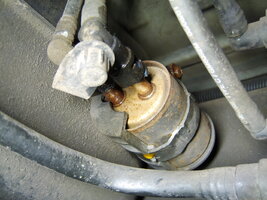
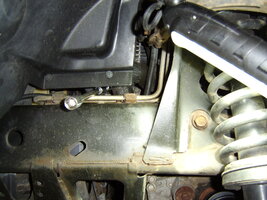
Jacked up the ole 02 Bravada and replaced the fuel filter:
Filter is on inner frame rail on drivers side....easier to just lay on the floor and use the creeper to rest the ole knoggin on:

STA76684.JPG

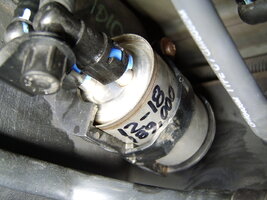
Here is the old fuel filter:

STA76662.JPG

STA76700.JPG

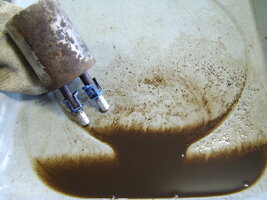
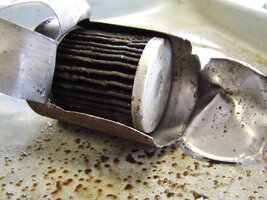
There was alot of crapola coming out the old filter:

STA76688.JPG

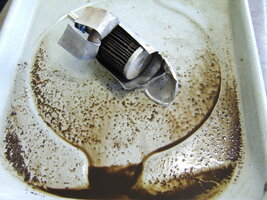
I ripped open the old filter to see how nasty it was on the inside:

STA76705.JPG


STA76707.JPG

So, whats the call here? Was this fuel filter foul enough to cause the engine to loose power and want to die-out at highway speeds turning 3000 rpm?

I just ordered one of those "foot-long" GM thermostats for the car since the code reader has been saying the engine was running cool. Once I go through the nerve-wrackking ordeal of tearing half the engine out just to get to the thermostat, I will give her a good test drive and then try to determine if the CAT is also shot/clogged up.

What happened to the good ole days when GM made vehicles we all could work on:

STA75332.JPG

2 bolts and 2 minutes later a new thermostat can be installed:
Yep, the good ole days for sure.
69 Chevy Rust Repairs 037.jpg
 

Mooseman

Moderator
Dec 4, 2011
26,026
Ottawa, ON
Nasty! Certainly a move in the right direction. What does it feel like now?
 

1968Case580CK

Original poster
Member
Nov 30, 2018
29
Virginia
Moose......Yep, real nasty filter. I did take her for a quick test run....went down the highway at 65 with no issue, and I pushed the spurs into her romp a couple times, and she seemed to gettyup like normal (no 426 Hemi here, of course). But I am still running with the low temp code warning light, and it still wants to idle down to about 500 rpm, and get a bit erratic at idle. Still thinking I might have CAT problems.
 
  • Like
Reactions: mrrsm

mrrsm

Lifetime VIP Donor
Supporting Donor
Member
Oct 22, 2015
8,202
Tampa Bay Area
Excellent Write-Up on the Fuel Filter Change and Autopsy... and ...You have an Organized Garage that you can actually SEE a Concrete Floor at the bottom. Your Jet Black ENVOY will be the ENVY of anyone who has to drive theirs around in either the Rust Belt of North America... or through brackish water and the Ocean Salt Spray on both coasts. If you add in @MAY03LT 's matching Step for Step Youtube Video as a Link to your Early Model TB/Envoy FF R&R "How To"... it would make a Perfect "Sticky" on the Topic. :>)
 

Mooseman

Moderator
Dec 4, 2011
26,026
Ottawa, ON
Who knows if it was still the original filter. Rarely does replacing the filter fix anything but such a dirty filter would cause fuel starvation.

Your Jet Black ENVOY

It's a Bravada, as per the thread title :biggrin:
 

1968Case580CK

Original poster
Member
Nov 30, 2018
29
Virginia
MRRSM......thanks for the thumbs up and your prior input. Hopefully I will soon resolve all the problems and be able to post the final outcome, and have a Bravada ready to go another 100k (crossing all fingers and toes on that one).

Organized garage? Funny....you just did not see the massive amount of dis-array from doing too many projects at the same time....but, heck.....this aint no kitchen.

Rust Belt driving......well, it has lived somewhat a sheltered life, staying away from the road salts and not falling off bridges into the ocean.....so, it may survive longer than others (if I would start doing maintenance more timely).

Not sure what you mean by "Sticky" and adding it to a Youtube video.....Im a bit oldschool, and am lucky to figure out how to upload pictures and youtube videos, but never heard of "Stickies".
 

mrrsm

Lifetime VIP Donor
Supporting Donor
Member
Oct 22, 2015
8,202
Tampa Bay Area
@Mooseman... Ouch... :hahano: ...LOL (Caught From AMBUSH...) Now THAT is NOT Your Grandpa's Oldsmobile!
In essence... a "Sticky" is an Original Thread that has Condensed and Perfected an On-Topic Repair Procedure encountered frequently (or sometimes...rarely) so well... that it deserves a Place at The Head of The Table.

Whenever you navigate from one Sub-Forum to another... whatever is Highlighted in BLUE... are the Threads that the Admins and Mods have approved for Priority Reading and help those who want to 'cut to the chase' get to their Best Solutions... sooner than later... so they get "Stuck" at the top of each Sub-Forum.

...I was just thinking about just how Gnarly that Fuel Filter looks inside... I have never seen the like before. And it prompts me to suggest that your EFI Filter Baskets are probably Jolly Chock Full of at least SOME of that Detritus and Dirt. Are you in the 'Dust Bowl' area?
 
Last edited:

1968Case580CK

Original poster
Member
Nov 30, 2018
29
Virginia
Moosman.......After seeing the muk in the fuel filter, I thought that draining the tank might be a good idea......But, these tanks dont have any drain plugs, right? I guess you have to remove the tank and just pour it out by turning it upside-down?

Mooseman.....Nope, not Gramp's Olds.......and maybe all these designs that make working on them a nightmare is why they stopped making Olds in 2004. Hey! Maybe Jay Leno will be buying this "rare" bird from me in about 50 years, and adding to his collection. Very unlikely.
 
  • Like
Reactions: mrrsm

Mooseman

Moderator
Dec 4, 2011
26,026
Ottawa, ON
Nope, no tank drain. I don't think it's worth the trouble. I think it's just the length of time that filter was there and the accumulated gunk over time.

With some help from us, it's well on its way back to health :smile:
 

1968Case580CK

Original poster
Member
Nov 30, 2018
29
Virginia
Moose.......10-4, I will keep my paws off the tank. But if GM had continued with tanks with drain plugs, it would have been a good "piece of mind" thing to do by flushing out the tank.
Slowly getting her back to health with this site's help....thanks again.
Pass the scalpel please.
 

Mooseman

Moderator
Dec 4, 2011
26,026
Ottawa, ON
You are dating yourself. I've been tinkering with cars since 1980 and I can't remember any gas tank with a drain plug. I can see why they would eliminate them to avoid fuel theft.
 

TollKeeper

Supporting Donor
Member
Dec 3, 2011
8,252
Brighton, CO
That was a nasty Fuel Filter there. May not have been all the cause of problems, but maybe a part of it.

The last time I saw a fuel tank drain plug was in my 1990 Pontiac ASC McLaren Turbo Grand Prix. It was way cool, since I was replacing the fuel pump about every 2 years or so (garage queen). Thank god for life time warranties. It was running a Corvette high flow fuel pump because of engine mods. They arent cheap!


WOW! Even the frame rail is still painted black!

FarmTruck and Azn called, they want their truck back!
 
Last edited:
  • Like
Reactions: mrrsm and Blckshdw

1968Case580CK

Original poster
Member
Nov 30, 2018
29
Virginia
Moose.......Yea, I have tinkered more on the old ones than on these computer chip-laden new breeds.....from a 27 Nash to old Studebaker Hawks and 66-68 Chargers....and alot of those had the drain plugs.......back when gas was 25 cents a gallon and alot more "honest" thieves back then.

TollKeeper......Yep, the frame rail is still in good shape, but has some surface rust in spots, so I will try to take some time to clean and repaint. Sounds like your 90 ASC McLaren was a hot number.
 
  • Like
Reactions: Mooseman

TollKeeper

Supporting Donor
Member
Dec 3, 2011
8,252
Brighton, CO
TollKeeper...... Sounds like your 90 ASC McLaren was a hot number.

It definitely had its moments. From a dig, it would only hook if I could get some heat in the tires. But being front wheel drive V6, it was somewhat hard to do on stock suspension, regular street tires.. 406 HP and 413 tq.. way to much power for FWD. Now from a roll... Yea buddy! I showed a couple C4, C5, Mustangs, Camaros, etc, my tail lights. Then the Self Powered brake system (WORST IDEA EVER) started showing signs of going out, and I got rid of it.
 

mrrsm

Lifetime VIP Donor
Supporting Donor
Member
Oct 22, 2015
8,202
Tampa Bay Area
Other than the irritating Background Music... This is arguably The BEST "How To Clean Your Fuel Tank Video"...EVER. And it comes from the People who make the BEST Fuel Pumps for our GM Products: DELPHI. This is a Universal Instructional and very informative for anyone with an Especially Contaminated Fuel Tank:


1968Case580CK

Original poster
Member
Nov 30, 2018
29
Virginia
TollKeeper......Amazing, 406HP and front wheel drive, and with failing "self-powered brakes". I am picturing Fred Flintstone in his ride with stone wheels, and using his bare feet as the "self-powered brakes". But I dont think ole Fred had 406HP.
 

1968Case580CK

Original poster
Member
Nov 30, 2018
29
Virginia
Update (with pics) on bringing the ole 02 Bravada back to life:

While waiting for the new thermostat to arrive, I started the process of removing the old one.
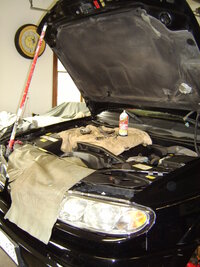
First thing I realized that the hood support arm was right in my way and it was going to be fighting me the entire process. So I found a 3 foot paint stick, and the threaded end fit snugly into a top hole, and I used some wire on the bottom to ensure I did not do a Homer Simpson and bump the stick out and have my head smashed down against the alternator......DOHHHH!

STA76725.JPG

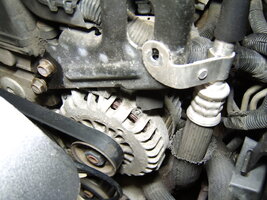
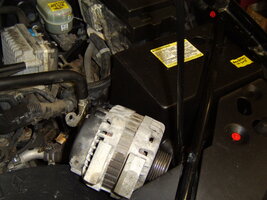
Have to remove the alternator bracket, slacken the serpinetine belt (which I noticed was wearing out, so I have a new one on order), and fight like crazy to ease the alternator out between the battery box and the fan shroud:

STA76710.JPG

I found that the lower alternator bolt was easier to remove by going through a crack above the frame......I used a pair of pivoting end extensions to allow a bit of bend to the socket: (It sure would have been helpful if GM had designed a hole in that plastic fender shroud for a straight shot to the bolt).

STA76715.JPG

By pushing sufficiently hard (fighting like crazy/grunting/groaning) on the AC line, I got lucky and managed to squeeze the alternator out without removing the battery (battery removal requires removal of that black support bar and the front 4 foot long plastic radiator shield....time/effort I did not want to deal with).

STA76722.JPG

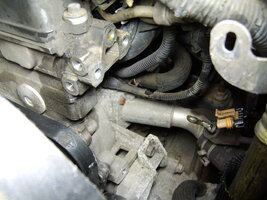
Alternator out, and now gotta drain the antifreeze and remove that foot-long thermostate that looks like an old farm well hand pump spigot end:
Searching around, I found that there are no drain petcocks on the radiator.....DOHHHHH!
So I had to just pull the hose and let the fluid just gush out, catching most of it in a big container. Sure would be nice to have a drain plug on that radiator (Ummmmm, and one wonders why GM is closing down plants and laying off workers).

STA76737.JPG

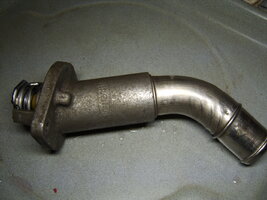
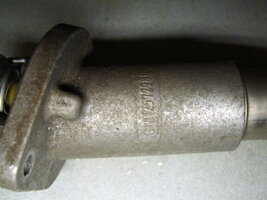
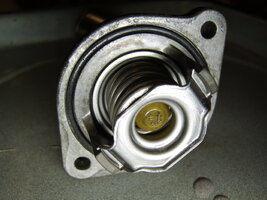
Here is the offending criminal......the reason I had the engine warning light on/off the past year or so. The code said that the engine temp was operating too low, so the thermostat must be sticking open. (My gauge was showing an operating temp of about 175 degrees, and I am told the thermostat is supposed to open around 190......so, there was a 15 degree difference.

STA76750.JPG

Yep, stuck open: (Has a GM number on it........is it possible that this is the factory thermostat?)

STA76748.JPG

STA76746.JPG

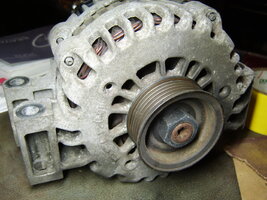
This alternator has "Delphi" stamped on the side......were these original equipment items, or does this mean that it was replaced years ago? (I have owned since 04, and have never replaced it). I might tear into this one and look at the brushes/clean the armature and see if the bearings can be lubed......got her off, so might as well investigate. Will it be easier to work on than the 1927 Nash generator I rebuilt?)

STA76754.JPG
 
  • Like
Reactions: Mooseman

Mooseman

Moderator
Dec 4, 2011
26,026
Ottawa, ON
Alternator looks original but a rebuilt could have been installed but in 2004 (2 years old), I doubt it. Same for the t-stat.
 

1968Case580CK

Original poster
Member
Nov 30, 2018
29
Virginia
Moose........And if that alternator is original and about 19 years old, you think I should bite the bullet and just put a new one in? Or just keep the old one, knowing its just a matter of time?
 

TollKeeper

Supporting Donor
Member
Dec 3, 2011
8,252
Brighton, CO
I know it's to late, but there is a drain pit caulk, it's on the passenger side, where the radiator mount drops thru the lower core support. The support is the pit caulk... At least on my envoy v8. But I can't see why they would change it
 

1968Case580CK

Original poster
Member
Nov 30, 2018
29
Virginia
TollKeeper........Drain Pet Cock......Well, I will have to crawl under tomorrow and look for it, as it appeared to have packed up and moved away when I was looking this morning. DOH!!!
 

mrrsm

Lifetime VIP Donor
Supporting Donor
Member
Oct 22, 2015
8,202
Tampa Bay Area
In support of @TollKeeper 's information on where to find the Weird Radiator Spigot Valve... here is a close look: However... in some later models.... That Spigot may NOT Be Present:

RADIATORDRAINCOCK.jpg

.... and FWIW... Contrary to the popular belief that it is NOT possible to move the Air Conditioning Low Pressure Line completely out of the way...WITHOUT HAVING TO RECOVER THE A/C R-134A REFRIGERANT...for THIS AND MANY OTHER REPAIRS... including the Engine Head Removal... these are the steps necessary to carefully perform this task:

(1) Remove the Two Fasteners @ the A/C Low Pressure Line Brackets @ Top Front of the Engine.
(2) Loosen the Steel Bracket Fastener securing the A/C Accumulator "Cup Holder" in place.
(3) Carefully lift the A/C Accumulator up and STOP as soon as the Rubber Cup clears the Bracket.
(4) VERY GENTLY... Pull the Aluminum Line towards the RF Corner & Secure it using Zip-Ties.
(5) BE VERY CAREFUL NOT TO APPLY TOO MUCH PRESSURE & BEND/KINK THE PIPE ELBOW!
(6) Use Zip-Ties to Uniformly Apply Pressure and Hold the A/C Line away from the Engine Area.
(7) Us the Same Care and Caution when reversing/replacing the A/C Low Pressure Accum/Line:

RADIATORDRAINCOCK.jpgSECURINGTHEACLOWLINE0.jpgSECURINGTHEACLOWLINE1.jpgSECURINGTHEACLOWLINE2.jpgSECURINGTHEACLOWLINE3.jpg

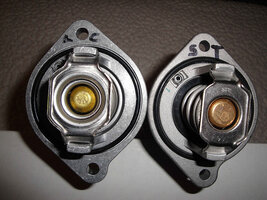
And regarding choosing another GM Quality OEM Grade Thermostat... I memorialized a 'side by side comparison' between the ACDelco vs. the Stant flavors of this unique TSTAT & Pipe Manifold Combo at this Linked "Flickr-Bucket" Album:


42681914884_370404812d_z.jpg
 
Last edited:

1968Case580CK

Original poster
Member
Nov 30, 2018
29
Virginia
MRSSM......Thats amazing that the spigot valve is supposed to be behind that wierd "welder's helmet-looking" chunk of plastic. Are you supposed to pop it off to find the spigot? I will go look at mine and see if it is there. Makes me wonder how many other people can never find this new-fangled petcock.

Therm.....are you also saying that the AC one is better, and best to pay the extra bucks for it? After reading a couple reviews that the non-AC one was not the same length or at a different bend angle, I went with the AC Delco.....if I can avoid doing this repair again for an extra year or two, it is worth it.

Moving the Air Cond. Low Pressure line out of the way......OK, I see......you are moving the entire line and tieing it down, but not opening it up at connections and losing the freon.

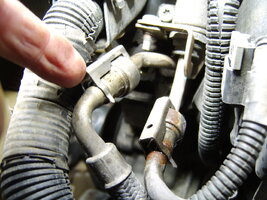
This is one of those metal clips that fell off when I was tugging on the alternator: (Can the lines seperate at these joints if the clips are removed?)

STA76741.JPG
 

mrrsm

Lifetime VIP Donor
Supporting Donor
Member
Oct 22, 2015
8,202
Tampa Bay Area
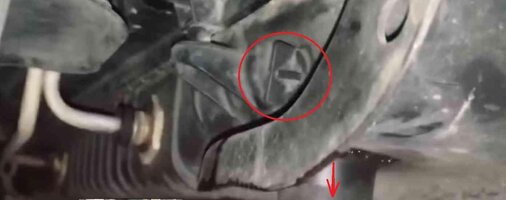
No... The Black Plastic Spigot Valve has a "Crosshairs" (+) Design that allows you to use a Pair of Pliers to unscrew ...partially... and the Radiator will empty out of the Hollow Tube I marked with a Red Arrow pointing to the Drain Pan. This works much faster if you open the Radiator Cap...AFTER you undo the thing and get the stuff flowing down and out of the Radiator... otherwise... You WILL wind up getting to "Bathe in Dexcool" whether you need to... or not.

About Moving the Entire A/C Low Side Line: YES... This method allows you to jostle it all aside ...Very Carefully...and tie it off and away from the work areas and then You'll avoid having to evacuate the A/C System to get the Extra Room needed to work.

YES.... That Stainless Steel Clamp is a BACK-UP Safety Lock that is installed Just In Case the Inner Squeeze Tabs fail ...and the Silicone "O" Ring laden Tube manages to pull itself out and spill Fuel Under Pressure all over Hell and Gone with a Red Hot Engine. These are GM's Ubiquitous Locks and you can easily find replacements all over eBay. You might consider obtaining a New Female Barbed Tube End to replace that one in your image as well... as it looks like it is either Rusting up...or Leaking a bit.
 

1968Case580CK

Original poster
Member
Nov 30, 2018
29
Virginia
MRRSM......I just checked the passenger side radiator bottom, and my 02 BraVoodoo does not have the drain plug. There is a hole where the valve should be, but I guess it was never drilled/tapped for a valve.

Stainless Steel Clamp......Fuel line....ok. I have never pulled this type apart.....Just a matter of removing the clips and then pulling?

1544017980853.png
 

mrrsm

Lifetime VIP Donor
Supporting Donor
Member
Oct 22, 2015
8,202
Tampa Bay Area
Uhhhhhh. Nope. I would NOT Do that if I were Homer. Watch THIS Video and You'll get the drift of the Proper Way to Do this with a Simple but necessary Special Tool:


Forum Statistics

Threads
23,681
Posts
641,969
Members
19,138
Latest member
wentzben

Members Online