New Member Progress thread 05 Envoy SLT

Bill05EnvoySLT

Original poster
Member
Mar 24, 2014
276
Bristol PA
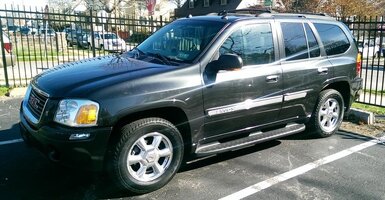
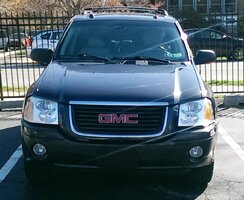
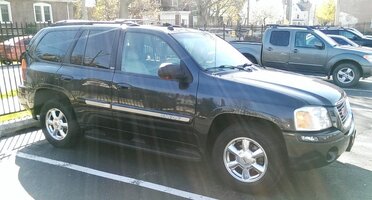
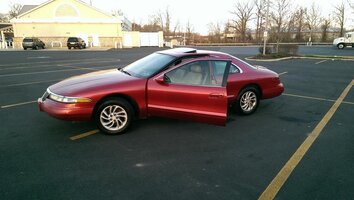
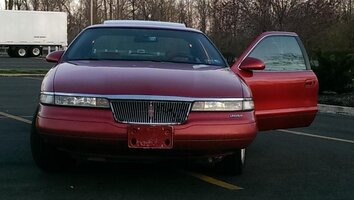
Well bought an 05 Envoy SLT 3/18/14. issues with Truck when purchased: Paid 4K and 152K on the Clock.
1. Cracked windshield (replaced 2 days later for 150.00 installed ) (dealer hooked me up with glass guy) :tongue:
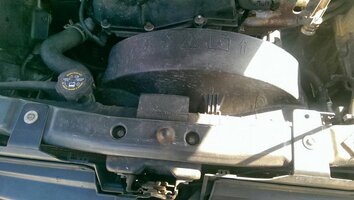
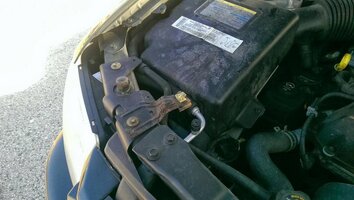
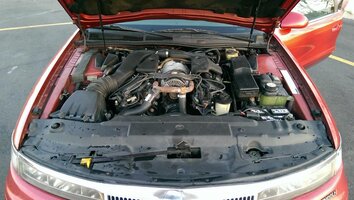
2. Check engine lights on - Codes - P0410, P0128, P0014.
3. ABS light on
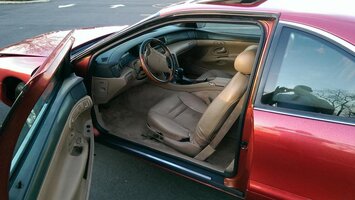
4. Memory Seats not functional
5. headlamp switch not functional
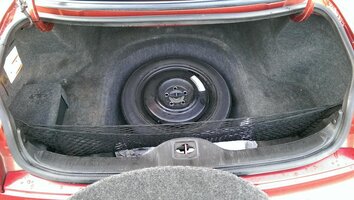
6. Missing Spare Tire
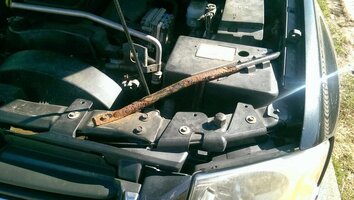
7. Missing rear Wiper blade Arm
8. Hub Bearing noise (left front tire)

Now to update this thread -
As of 3/27/14 the following has been completed.
Windshield replaced 3/21/14
Error Codes - P0410 -Air Pump Check Valve (SAIS Error) replaced 3/26/14
Error Codes P0128 - Thermostat and Thermostat Sensor replaced 3/26/14
Error Codes P0014 - VTT (CPAS) Solenoid - pulled and cleaned 3/23/14
Memory Seats - found corroded contacts in the switch - removed old solder and cleaned contacts re-soldered and tested - Fixed 3/20/14
Headlamp Switch - removed housing found two broken tabs in the box broken allowed switch to separate not making contact. closed and melted plastic back together all functions working - Fixed 3/23/14
Spare Tire - Made dealer find good spare and install -3/18/14
Rear Wiper arm - Made dealer find replacement -3/18/14 - had to remove and lubricate arm as it was so stiff it never made contact with rear window - Fixed 3/18/14


Still need to do Hub Bearing - Will also fix ABS indicator :yaay:
 
  • Like
Reactions: JamesL3

Robbabob

Member
Dec 10, 2012
1,096
Great looking progress!

Agree, changing the hub should clear the ABS... wait and see. If interested ahead of time, need a scan tool capable of ABS codes.

Also, I don't remember if we noted to Change the transfer case fluid, it's at every 50K miles.

:cool: summer is almost here... "they say"
 

Bill05EnvoySLT

Original poster
Member
Mar 24, 2014
276
Bristol PA
Robbabob said:
Great looking progress!

Agree, changing the hub should clear the ABS... wait and see. If interested ahead of time, need a scan tool capable of ABS codes.

Also, I don't remember if we noted to Change the transfer case fluid, it's at every 50K miles.

:cool: summer is almost here... "they say"

The Transfer case is separate unit on this model? My 97 explorer shares fluid (AWD version with V8) with Transmission. That would be a nice change haven't gotten under the truck completely as when i did these other repairs the temp outside was about 28*F.. a tad bit cold :smile::crazy:
 

Robbabob

Member
Dec 10, 2012
1,096
Bill05EnvoySLT said:
The Transfer case is separate unit on this model?

Correct, my friend. If I recall, Transfer Case – 2 qts AUTO TRACK II, purchase at dealer.

Just under drivers seat or floor board area. top and bottom plugs. Remove the top one first (in case the bottom comes off but the top won't). Nothing serious. I believe May03LT has a video I learned from (and about a million others that have). I linked them all for your reference.

:thumbsup:
 

fletch09

Member
Nov 20, 2011
1,982
Welcome :tiphat:
you are in the right place to help you w/ ongoing and/or future problems.
the search tool is your friend.
 

Bill05EnvoySLT

Original poster
Member
Mar 24, 2014
276
Bristol PA
Ok, update. Took for inspection, dam Evap code popped for gas cap, cap is new, so I figure a solenoid is in order, I how ever cleared the codes prior to inspection and had the sais and Evap in the not ready and truck still passed emissions. Nice, the bad, failed state. Lmao rear brakes pads bad need new before stickers go on. 30 min job when parts store opens. Then back for stickers. Lol
 

Robbabob

Member
Dec 10, 2012
1,096
Bill05EnvoySLT said:
Ok, update. Took for inspection, dam Evap code popped for gas cap, cap is new, so I figure a solenoid is in order, I how ever cleared the codes prior to inspection and had the sais and Evap in the not ready and truck still passed emissions. Nice, the bad, failed state. Lmao rear brakes pads bad need new before stickers go on. 30 min job when parts store opens. Then back for stickers. Lol

Just make sure you complete the drive cycle once the codes are cleared, their machine will fail you if the bit is not turned on.

Good luck!
 

Bill05EnvoySLT

Original poster
Member
Mar 24, 2014
276
Bristol PA
Well even though two were not set, it passed. It's the Evap and secondary air. But it's legal and stickered.
 

Bill05EnvoySLT

Original poster
Member
Mar 24, 2014
276
Bristol PA
Just an update to the daily progress of my Envoy.

Error Code popped up today for Evap system. P0455 I know the gas cap is good, so now i have to look at the valves and purge solenoid.. for the minimal 50. for both parts and a little of my time it might just be better to replace both and know that they are new.

Maybe ill tackle this when i replace the hub bearing this weekend. (hopefully also corrects my ABS light ) :smile:
Thanks
 

Bill05EnvoySLT

Original poster
Member
Mar 24, 2014
276
Bristol PA
Ok, so after a suprise bash on Saturday (cold and Windy) Sunday was beautiful. about 60*F. took the time to open the truck up and replace bad hub bearing and hopefully FIX the ABS light...

Thought after a test ride and wheel spin. the Front Drivers side Hub might of been bad, I was wrong.. :sadcry: I replaced with the new one anyway. Figured they were set for either side so no loss.
Took apart passenger side. Wow was it toast. the bearing was grinding in my hands very worn and glad i chose to replace.. also inspected ABS Sensor cable found it was hanging and cut half way through (surely the cause of the Fault).
I put the one i had removed from the drivers side and installed and made sure the sensor cable was securely mounted. re-assembled it all and then took for a test spin, the ABS light went out and didnt activate at lower speeds so all is good now.

then decided to wash the truck.

Next on list is to repair gauge cluster and replace Evap solenoid on block. I bought that yesterday too but wife wanted to hang out since it was a beautiful day out ... so ill have to try to install it sometime this week.. i just want that F'n light off permanently.

Thats my Progress this week... 4/6/14

-Bill
 
  • Like
Reactions: JamesL3

Mark20

Member
Dec 6, 2011
1,630
You're giving me confidence to tackle this when the time comes!
 

Bill05EnvoySLT

Original poster
Member
Mar 24, 2014
276
Bristol PA
Bill05EnvoySLT said:
Ok, update. Took for inspection, dam Evap code popped for gas cap, cap is new, so I figure a solenoid is in order, I how ever cleared the codes prior to inspection and had the sais and Evap in the not ready and truck still passed emissions. Nice, the bad, failed state. Lmao rear brakes pads bad need new before stickers go on. 30 min job when parts store opens. Then back for stickers. Lol

Forgot to update this, the rear brakes are done, the same day last weekend, took back and got my stickers,
Found out the system will pass emissions even if up to 3 sensors are not set and in incomplete mode, as long as all others are set and didn't pop a code for them.
Now all but the Evap has been resolved. Well tackle it when it stops raining.
 

Bill05EnvoySLT

Original poster
Member
Mar 24, 2014
276
Bristol PA
Ok New Update as of 4/8/14

Was pissed off at my job so I actually took my lunch break (30 min) and ripped off the TB and looked at the back of it as i had a (very little rough Idle) it WAS BLACKER then NIGHT!!!!

So much built up carbon on the back of the plate... it took me over 15 min just to clean it off. Well Scratch another quick maint issue off the list. its 100% clean both sides and the Vacuum port as well.

re-assembled and back in the office before my 30 min break expired.. lmao.. easy to do.
Thanks for the guides here May03LT... made it super easy to figure out.,


Thankks for letting me rant!
 
  • Like
Reactions: rocketsound

MAY03LT

Member
Nov 18, 2011
3,420
Delmarva
Bill05EnvoySLT said:
Thought after a test ride and wheel spin. the Front Drivers side Hub might of been bad, I was wrong.. :sadcry: I replaced with the new one anyway. Figured they were set for either side so no loss.

I'm in the same boat, sounds like LF but I've been burned enough times that I'm saving up to do both of them. Seems to be only GMs that have the phenomena of it-sounded-like-this-side-but-it-was-actually-the-other.

Thanks for the guides here May03LT... made it super easy to figure out.,

No prob boss. And thank you for compiling this progress thread - I enjoy reading it because this is the reality of buying a used vehicle. Over the years, I've seen plenty of people buy a higher-mileage vehicle for a low price and then b!tch and complain because it actually needs work. Especially the wannabe car flippers who believe that the car flips on tv are actually real. I'm not too far from the DAE auction house so I've seen my share of "gems" at work and at home lol.

So much built up carbon on the back of the plate... it took me over 15 min just to clean it off.

But Bill, how come the Richie Cunningham youtube technicians don't remove the throttle body? Oh that's right, 3 minute vids get more views.:rotfl:

Thankks for letting me rant!

Likewise, sorry for going off topic.:redface:
 

Bill05EnvoySLT

Original poster
Member
Mar 24, 2014
276
Bristol PA
Update 4/8/14

Ok after a Sh!tty day at the office and cleaning the throttle body at lunch the car idles better still not as smooth as glass but getting there...
Plugs may be the next order.

I decided to change the evap solenoid ( I think it is On the side of the engine - I always screw them up) got that done pretty easy on the scale of 1 to 10 being hardest.. i gave a ranking of 3 due to its location and hose connectors but all in all i finished it in less then 20 min.

so after this i choose to de-grease the motor ( it was warm not hot - had been sitting 1.5 hours) hosed it all down and let stand 10 min and cranked it up..
No issues- have to wait for evap to finish its cycle to figure out if that part was the real reason or its the evap purge at the tank to replace next...

Anyway noticed a code that didnt throw a check engine light but showed as a possible code.... P0256?
fan/idle issue? i have to research it further maybe some water got where i didnt want it to go :sadcry: but that's for another day as it hasn't thrown a code for it yet.

Im going to add my shine stuff to the engine bay to give it a cleaner protective look maybe tomorrow just to make me happy.. i know it will get dirty again soon but at least i know its there :smile:

I think i have done enough today im going in and grab a brew and chill out now.
night all
- Bill :raspberry:

OK had to Edit.... I checked into this further and found the reason it set but didnt pop the CEL... for the P0526.. while the truck was running and cold, i held the fan for a few seconds to see if there was any real drag from the clutch, apparently it detected the fan not spinning at the required low speed of 40RPM.. it showed the P0526 code but didnt throw it i guess had i stopped the fan again it would give me the CEL.. so i say problem solved. until the light pops.. :smile:
 

Bill05EnvoySLT

Original poster
Member
Mar 24, 2014
276
Bristol PA
Almost forgot *** - Dam CEL popped today for the EVAP again so its got to be the unit near the rear of the feul tank. I have it ordered and will replace when it arrives Should clear that dam P0455 code again. :crazy:


Update 4/9/14 -
Well after cleaning the engine off yesterday i was going to apply the detail spray but figured it might be best to apply to a nice and warm dry motor..
So I waited to get to work, mid afternoon and then went out and sprayed it down! Ill post a pic but it really does look nice all shiny and clean looking...

Keep in mind its All 100% Stock but it looks almost clean enough to eat off of :raspberry:

I need to detail the truck the way I like it and have to clean the front headlamp lenses, there is a haze that I have seen on almost all clear lenses... i have the 3M kit for removing Oxidation. i have used successfully in the past even with Dark yellow stains in the lense brought them back to crystal clear glass look.

So I may venture to do this tonight when I get in.. All I plan on using is the buffer pad and the plastic polish from 3M and see if that will be enough to clean them up without having to remove a thin layer of plastic with the 5000 grit paper first.

I will post pics of both in the beginning and end process. :eek:
 

HARDTRAILZ

Moderator
Nov 18, 2011
49,665
Lot of work, but its all worthwhile
 

Bill05EnvoySLT

Original poster
Member
Mar 24, 2014
276
Bristol PA
View attachment 34062
Theses are the before shots, next are the after pictures.
9evaneta.jpg
de3ydusa.jpg
 

Attachments

  • uploadfromtaptalk1397071960424.jpg
    uploadfromtaptalk1397071960424.jpg
    72.1 KB · Views: 20
  • uploadfromtaptalk1397071985531.jpg
    uploadfromtaptalk1397071985531.jpg
    88.7 KB · Views: 21
  • uploadfromtaptalk1397072035579.jpg
    uploadfromtaptalk1397072035579.jpg
    74.6 KB · Views: 21

dmanns67

Member
Apr 3, 2013
32,979
Ohio
That looks great. Did you use anything special to get everything so clean and shiny? I need to do this as well.
 

DDonnie

Member
Mar 26, 2012
2,631
Next step should be to sand and repaint the bar over your battery box. Rust spreads like a virus.
 

Bill05EnvoySLT

Original poster
Member
Mar 24, 2014
276
Bristol PA
DDonnie said:
Next step should be to sand and repaint the bar over your battery box. Rust spreads like a virus.

Actually want to replace it, the hold down for hood support as well. I also want to sand blast the bracket above the alt. Then paint it black.

The cleaning process could have been better but used auto zone De greaser , on warm engine, let sit 20 min used long handle sift bristle brush on heavy spots then flush with garden hose till clean let dry then hit with detail spray

That's it. Little elbow grease and vola. Clean to eat from and protected from water too. It beads right off of it all now.
 

HARDTRAILZ

Moderator
Nov 18, 2011
49,665
Virus...nah...cancer
 

Bill05EnvoySLT

Original poster
Member
Mar 24, 2014
276
Bristol PA
dmanns67 said:
That looks great. Did you use anything special to get everything so clean and shiny? I need to do this as well.

Nope just autozone engine degrease let sit 20 min then hose off with garden hose and use a soft bristle brush to get any really grimy parts before hosing off.. once done, let dry maybe even the next day and then hit with Gunk Engine detailed spray.

Little elbow grease make it look good..

Thats all i did
 

Bill05EnvoySLT

Original poster
Member
Mar 24, 2014
276
Bristol PA
Fire06 said:
Would you do mine

LMAO
Drive it to me and ill gladly take the time to do it :smile: might have to drink a few beers while we wait :coffee::popcorn::tequila:
you get the idea
 

Bill05EnvoySLT

Original poster
Member
Mar 24, 2014
276
Bristol PA
Ok update, I think after last night's adventure I have been working non stop, the wife's 97 explorer AWD needed the upper and lower control arms. Took me till 11 pm to finish it. So not progress on my truck but instead it was hers. Lol. Now I'm in bed bit feeling well.
 

Bill05EnvoySLT

Original poster
Member
Mar 24, 2014
276
Bristol PA
Update 4/11/14
New head light switch came in, cell phone mount came in, waiting on speakers. Mount and headlight switch installed while my daughter is at her softball practice. Lol. Just need to get the aux 3.5 mm Jack mod done. Will run a cable right to the phone. Next to do is use my3m kit on the head lights. They aren't bad but hazy and the McGuires plastic polish didn't work worth a dam. Want them clear. . Ok enough rambling today.
 

Bill05EnvoySLT

Original poster
Member
Mar 24, 2014
276
Bristol PA
Update 4-12-14
Im selling my 96 Lincoln LSC so i had to take the time to clean it up and clean out all of my junk :sadcry: I dont want to get rid of it but the wife says my toy has to go since i got the truck...

here are quite a few pics that i took of the finished cleaning.

if interested ill post the CL link too.

View attachment 34136
View attachment 34137
View attachment 34138
View attachment 34139
View attachment 34140
View attachment 34141
View attachment 34142
View attachment 34143
View attachment 34144
View attachment 34145
View attachment 34146
View attachment 34147

So all of this took me about 6 hours to clean out and get ready..

I plan on doing this to the GMT in the AM so another 6 hour run but with the addition of the Compound and wax and head light cleaning.... :raspberry::thumbsup:
Bill

P.S.
If anyone knows of or is selling a Non Lux Touchscreen Navi unit i would really appreciate either a link or a price shipped to 19007..
Thanks
:smile:
 

Attachments

  • IMAG0059.jpg
    IMAG0059.jpg
    80.9 KB · Views: 11
  • IMAG0060.jpg
    IMAG0060.jpg
    64.7 KB · Views: 12
  • IMAG0061.jpg
    IMAG0061.jpg
    93.5 KB · Views: 10
  • IMAG0062.jpg
    IMAG0062.jpg
    60.9 KB · Views: 13
  • IMAG0063.jpg
    IMAG0063.jpg
    57.6 KB · Views: 10
  • IMAG0064.jpg
    IMAG0064.jpg
    77.8 KB · Views: 10
  • IMAG0065.jpg
    IMAG0065.jpg
    100 KB · Views: 10
  • IMAG0066.jpg
    IMAG0066.jpg
    85 KB · Views: 10
  • IMAG0067.jpg
    IMAG0067.jpg
    61.3 KB · Views: 10
  • IMAG0068.jpg
    IMAG0068.jpg
    100.8 KB · Views: 10
  • IMAG0069.jpg
    IMAG0069.jpg
    78.3 KB · Views: 12
  • IMAG0070.jpg
    IMAG0070.jpg
    74.1 KB · Views: 12

Bill05EnvoySLT

Original poster
Member
Mar 24, 2014
276
Bristol PA
Update 4/13/14
The wife had different plans for me today since it was so nice out, 80℉ turned out to be a perfect day. She liked the way the Lincoln turned out so much she asked me to do her truck, 97 explorer. Ok so out side we go took over an hour getting rid of all the trash, salt and pepper packets, tissues, expired paperwork, and shit collected, then the fun begins, oh forgot to mention she has work today too. Well I'm right in the middle of washing it when she has to leave. Duh she takes my truck. So about4 his later, completely cleaned inside and out. Cherios French fries, power bars and other goodies. All cleaned up. Wonder how long she will keep it cleaned.
Maybe tomorrow I'll get to clean mine. Only time will tell. Might even have time to install purge valve near tank to get rid of the P0455 code to. Everything else is100%. Wish me luck. Again not so much progress on my GMT but progress nine the less. Day well spent.
I used to detail my cars all the time. Would take me all day. Ten engine bay to compound and hand wax to high-speed buffing. Then interior detailing. 1 car = min of 8 hours.
 

Bill05EnvoySLT

Original poster
Member
Mar 24, 2014
276
Bristol PA
Ok Update Again!!! :biggrin:

4/20/14 Happy Easter!!

The Wife had Work today unfortunatly so we Did our Easter Diner last night! Yummy ham....

Well today after the wife left for work, i pulled the truck into the driveway, put it into low gear and run it up my ramps back wheels lifted!
While under the truck, I had several things in mind. through (The_Roadie's comments in other postings here) I found out that the little bump when i stop was from a yoke that needed to be greased.So I pulled the drive shaft. I think the U-Joint on the Carrier Side may be a little dry it didnt feel smooth as glass but didnt bind so I preceded to lubricate the yoke side with grease, added a bit of grease to the carrier side just to slow down the little surface rust in the U-Joint holder. makes removing the shaft a little easier next time. anyway, the Yoke is lubricated, I also replaced the Valve for Evap next to the fuel tank as it was the last part that I had for the error code P0455, I dont have it back yet but it still hasnt set either according to Torque Pro.

Third thing done was to check both top and bottom 10MM plugs on Xfer Case, they are in pristine condition and was able to remove both without any issue. I had ordered the Autotrak II fluid (2 Quarts) it showed up Saturday so since the plugs came out so easily i emptied the Xfer unit. Well didnt think this through all that well, I then realised that the fill hole was in a very tight position not allowing me to just pour the new fluid in. so now the hunt begins for my mini pump. But Alass, could not find it. had to get the cut away top for my gear lube bottle screw that on to the quart bottle of AUTOTRAK II and fashion a hose to manually squeeze out the fluid. ( I might add, this took me the absolute longest to do about 1.5 hours of Screwing with this process) it did take every ounce of the 2 quarts thankfully as I had read that some folks had more then 4 quarts in their Transfer case.. I was concerned till I found The_Roadies post of liquid Capacity. so I know I was good with 2 quarts.

Ok fourth thing done. Head lamp lenses.. they had a bit of haze in them. I took out my trusty drill, added my 3M kit to it and went to town. I did not use the sand paper portion of the kit as it was a minor bit of Oxidation, so I used the finishing pad, (Very minor abrasive) polished it and then used 3M's plastic cleaner and buffed them to a nice clear shine. Just forgot about all of the over spray from the wet drill and wax. so this leads me to the 5th item to attend to :yes: .

5th Item tackled today... a Full wash. pulled out the auto care stuff and actually gave her a bath. had to clean engine bay again (spray all over from headlight cleaning,) scrubbed off all road grime, and then even went ther extra to scrub out the wheel wells. I plan on adding bright white LED's into the wheel wells so i can use that light as part of the perimeter lighting source when i unlock the truck at night. This will also double for evening lighting for each wheel should I need to perform night time repairs. I hope to find the wire that controls the illuminination from remote and not tie in directly to the power lead for the light directly as I dont want them on when either parking lights are on or reverse lights turn on.

So anyone knows what wire I can tie into so that I can get the lights to come on only when remote activates perimeter lighting and not when headlights or reverse lights illuminate. Ill add a direct power switch to the unit so I can manually operate the lights as well.

Well I think thats all I did yesterday and I think it was enough. getting her there slowly but surley...

Things still to do :
1. Light to LED and stepper motor swap in dash - still looking for LED equiivilant type for dash I have the Stepper motors.
2. purchase and then swap out the Factory Struts and shocks in rear. ( noticed while I was under the truck it had 1 sole Bilstein shock in the rear I guess 1 failed and rather then replace both they only put in 1 WTF? :confused: So plans are to replace both rear and fronts. Already have items picked out and found them for 52.00 each. Just have to wait now for simple paycheck where im not putting cash out hand over fist.
3. check Emergency brake - I hate the feeling when i pull it up it will pull all the way to the max position. I expected more resisitance about half way so i guess the pads or adjust ment may be out of spec. it will hold in reverse gear but in drive it will creep forward. dont like that. ( Anyone know the part numbers for the Drum shoes for the E-Brake?)
4. I plan on upgrading the brakes. Im going to swap out the factory rotors and pads for slotted and crossdrilled rotors front and back and ceramic pads. See many types out there, as Im extremely hard on brakes after proper break in process is complete i hope they have minimal fade and last a long time and provide better stopping power. i do plan on towing with my truck maybe a small boat. (anyone out there with them your thoughts and opinions?)

Thinks this is enough, I know you guys dont like reading my novels but this is also good for my Service records. :yes: :thumbsup:
 

MAY03LT

Member
Nov 18, 2011
3,420
Delmarva
3- you might get away with an adjustment. There's no adjustment slot, on each side the rotor has to be pulled to see the adjuster.

You know me, I like the novels. And my posts are how I keep track of my maintenance as well.
 
  • Like
Reactions: Bill05EnvoySLT

Bill05EnvoySLT

Original poster
Member
Mar 24, 2014
276
Bristol PA
Ok Update**** 4/22/14

I was able to finally get the Evap sensor to set and no check engine codes popped. I finally got this error Fixed!!!

No more P0455 Code for me!!!fixed for a cost of $45.00 I love being able to work on my own stuff and not have that huge Arse bill when the work is complete. :thumbsup:
 

Bill05EnvoySLT

Original poster
Member
Mar 24, 2014
276
Bristol PA
Headlights all Cleaned up 4/21/14
 

Attachments

  • left side Envoy.jpg
    left side Envoy.jpg
    129.2 KB · Views: 16
  • headlights envoy.jpg
    headlights envoy.jpg
    109.3 KB · Views: 16
  • right Side Envoy.jpg
    right Side Envoy.jpg
    100.5 KB · Views: 17

Bill05EnvoySLT

Original poster
Member
Mar 24, 2014
276
Bristol PA
Ty I'm putting together my next project now. Got the led bug now. Just have to figure out which one first
 

Forum Statistics

Threads
23,340
Posts
638,128
Members
18,548
Latest member
nadmak

Members Online