SOLVED! Sudden loss of 3rd/4th gear

zippy411

Member
Joined
May 6, 2023
Posts
31
Location
20814
2003 Suburban LT 5.3L 4x4 210xxx miles
No check engine codes
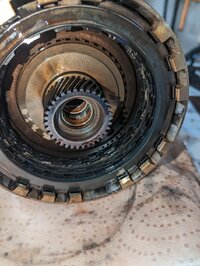
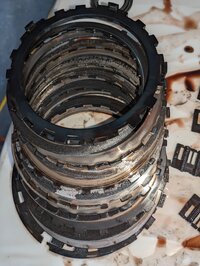
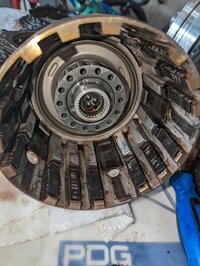
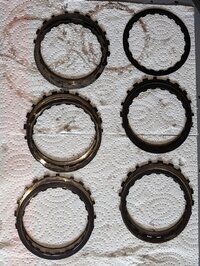
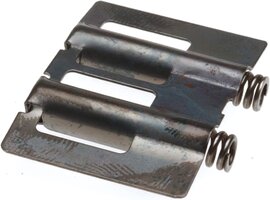
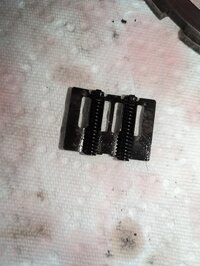
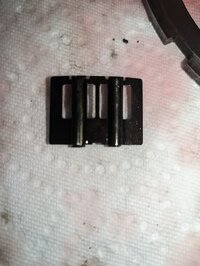
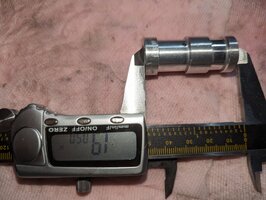
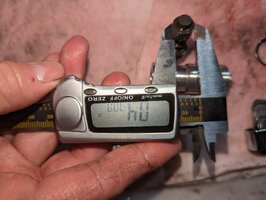
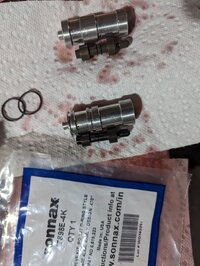
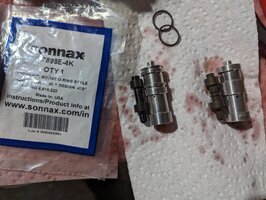
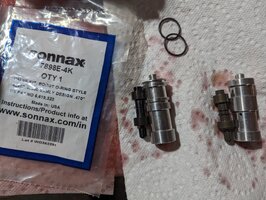
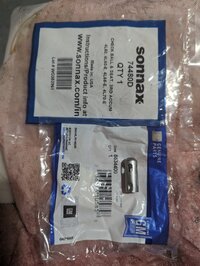
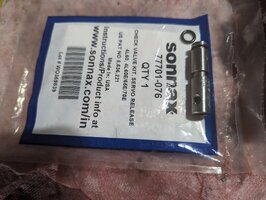
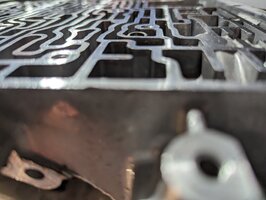
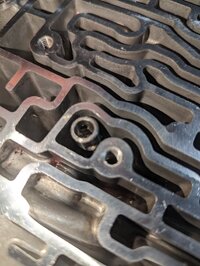
Transmission is a 3KCD
No previous issues with transmission. Never noticed any slipping gears previously. Complete fluid change out done personally ~70k miles ago with GM fluid. Fluid still looks and smells good. Gauge cluster has transmission temp gauge and It has never overheated that I've noticed. Usually never over 150, went up to 210 a couple times when towing/country driving.

I drove ~90 minutes mostly highway with no issues doing 70mph. I arrived at a location and idled for ~30 minutes and when I was leaving the location the transmission would no longer shift higher than second gear. In drive first and second gear work fine but when it feels like it is attempting to shift into third gear it feels like neutral, the engine revs high but speed does not increase. Manually shifting into first or second works fine as well but manually shifting into third results in the same neutral feel with free revving engine and no forward power. I was able to drive off highway home in second gear keeping the rpms from getting too high.

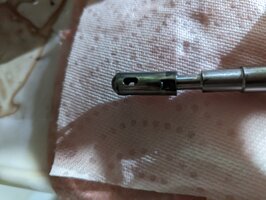
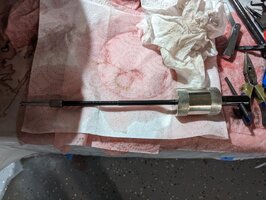
I sourced and swapped out another 3KCD from a 2003 Tahoe that was being parted out supposedly from rusted out brake lines. I swapped this transmission with mine successfully but the same free revving neutral third gear still exists. I am not sure about the likelihood of getting another transmission with my same exact issue so I'm beginning to wonder if the issue is electrical outside of the transmission. I tested all the fuses in the engine fuse block and driver's door fuse block and didn't find any blown fuses. The replacement transmission came with the transfer case as well which I left attached when I swapped it, if that makes any difference. I dropped the pan, replaced the filter, and topped off the fluid with Valvoline Maxlife as well before testing the replacement. The new transfer case got Auto-trak II.

I will be borrowing a bidirectional scanner to see if I can read live transmission data to make sure it is actually calling for third and test the solenoids.

I read that limp mode for the transmission with force it to be third gear in "drive" and "third". How would I force it to go into limp mode?

What guidance can anyone here give me on diagnostic avenues to explore?

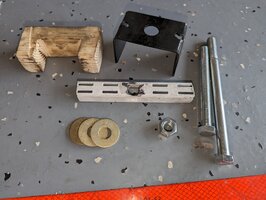
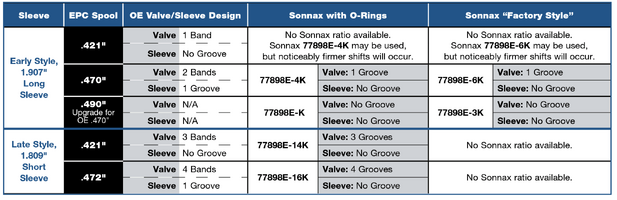
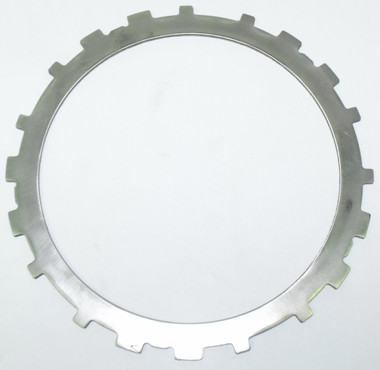
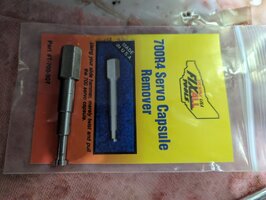
I am looking at possibly rebuilding the original transmission myself as well.
 
Last edited:
Testing with a bidirectional scanner shows the transmission calling for third but never achieving a shift. It says it is able to grab fourth but the rpms are more like it is falling back into second gear. Cycling the solenoids with the scanner provides an audible click from 1-2 solenoid, 2-3 solenoid, 3-2 downshift solenoid, and TCC control solenoid.
 
Sure sounds like she's done but still strange that both exhibited the same problem. Could just be that both had 3rd gear clutches failed. Not unheard of on these with significant mileage.
 
Coming in late here, but Moose speaks truth, as always. From the described symptoms, your 3rd clutch has given up the ghost.

The 3rd clutch is one of the weak areas of the 4L60, and it can't be fully bulletproofed (design limitation), although HD clutches are available for it and will help (Raybestos 'High Energy' and Alto 'red' frictions are the preferred solutions for most people / daily drivers). My Envoy got the High Energy when it was rebuilt a few years back; 1-2 is a little firmer when cold, but I'd rather that than the

At 210K (and who knows on the replacement), you can expect the 3rd clutch to wear out, especially in the later versions (2004-onward were the worst; GM figured out where they could save $ in material costs over the lifespan of this transmission, and the earlier ones were a bit more robust than the later ones). They're pretty good units, especially compared to their competition at the time, but the 3rd clutch and a couple of other things make them less durable than the big brother 4L80, especially when used in a HD capacity (plowing, towing heavy, etc.)

BTW, 'limp mode' is a failsafe for electronic issues -- 3rd is the only gear in the 4L60E that doesn't require electronic activation, so it became the 'limp home' gear. The 3rd clutch breaking is a physical problem, so when it goes, the trans will flare above about 25-28 mph, as it can't shift to 3rd at that point, automatically or manually. So limp mode isn't going to help you, here.
 
  • Like
Reactions: Mooseman
Thanks for the replies. I guess I will be trying my hand at rebuilding a 4l60e. I'll let you know how it goes. I've got the original one mostly apart now, I just need to make the special tool for removing the spring cages.
 
3/4 clutch pack pictures attached
 

Attachments

  • PXL_20230508_170003237.jpg
    PXL_20230508_170003237.jpg
    542.8 KB · Views: 38
  • PXL_20230508_170202924.jpg
    PXL_20230508_170202924.jpg
    620.5 KB · Views: 37
  • PXL_20230508_170837387.jpg
    PXL_20230508_170837387.jpg
    534.5 KB · Views: 37
  • PXL_20230508_225128509.jpg
    PXL_20230508_225128509.jpg
    1 MB · Views: 31
hes-dead-jim.jpg
 
  • Like
Reactions: coveman
I have to take a break while a new set of 3/4 clutch boost clip springs get delivered. The rebuild kit I got did not include them. These don't seem to have maintained the springiness(technical term) that it is supposed to have. I wonder if the lack of spring contributed to the clutch pack failure or is a result of the extreme heat from the clutch pack failure.

Here are pictures comparing mine to a new one.
 

Attachments

  • PXL_20230508_201018201.jpg
    PXL_20230508_201018201.jpg
    290.4 KB · Views: 15
  • PXL_20230508_201023601.jpg
    PXL_20230508_201023601.jpg
    357.5 KB · Views: 16
  • 71wyQH-hCiL._AC_SL1500_.jpg
    71wyQH-hCiL._AC_SL1500_.jpg
    70.2 KB · Views: 16
I am using these videos to assist with this project.

Removal

Teardown

Reassembly

Install
 
Last edited:
I've ordered and been using these parts.

Rebuild kit

Torx plus 50 bit (for bell housing bolts, zipped right out with big impact)

Valve body spacer plate (mine has damaged check ball holes)

Transmission fluid cooler line fittings x2

Sunshell

Pressure control solenoid

Torque converter clutch PWM Valve

3-2 shift solenoid

Shift solenoid valve x2

Manual valve position pressure switch

3/4 clutch boost spring x5

Transmission assembly lube

And bonus, the rear main seal I replaced when I switched transmissions the first time.
 
Last edited:
And here are the special tools from the videos that I made for compressing the spring cages. They have worked great. The black metal one was made from an old lawn mower blade I had.

I have a set of harbor freight snap ring pliers. They really weren't working due to the rounded tips. I filed the outside edges of the tips of a couple of them flat which helped tremendously with snap ring removals and installs.
 

Attachments

  • PXL_20230508_225253122.jpg
    PXL_20230508_225253122.jpg
    411.8 KB · Views: 13
Last edited:
Well it looks like I'll have to take another pause in the rebuild. I didn't realize the kit did not include a new pump boost valve so I will wait for a replacement to arrive. Based on the Sonnax chart and my measurements it looks like I would need a 77898E-4K boost valve. I measured valve length at 1.905 and EPC Spool diameter at 0.470.
 

Attachments

  • PXL_20230511_163314264.jpg
    PXL_20230511_163314264.jpg
    472.1 KB · Views: 12
  • PXL_20230511_163422821.jpg
    PXL_20230511_163422821.jpg
    406.6 KB · Views: 14
  • Screenshot_20230511-124010.png
    Screenshot_20230511-124010.png
    257.9 KB · Views: 14
  • Like
Reactions: Mooseman
I did run into an issue when rebuilding the 3/4 clutch pack. The original clutch pack contained 5 steels and 6 frictions. The replacement pack had 6 steels and 6 frictions. In the video the guy also had an extra steel that he just set aside and still got a good clearance measurement of 0.060" at the end with feeler gauges. When I set the extra one aside I ended up with a gap of way over the upper limit of .085". when adding the extra steel to the bottom of the stack the clearance is right at 0.085". the thickness of the original 5 plates was 0.1045". the thickness of the new plates are 0.0785". I cannot just reuse all the old plates due due to significant scoring being present on two of them.

The replacement pack of steels did not have a branding/label on them which now seems concerning. The replacement kit of clutches was Exedy EFK173 which has 3/4 clutches that are 0.080" thick, which I believe is the original thickness.

What would the recommended solution be?

Should I just order a different/better 3/4 clutch pack?

Edit: I ordered original thickness plates from this website. That should resolve my issue. It seems like the 0.078" plates were the medium thickness plate option for the 3/4 clutch pack and 0.060" would be the thin plate option.

 
Last edited:
This is an interesting "Side By Side" Comparison showing the differences between the GM Factory OEM Boost Valve and the Sonnax Kit Conversion:


And here is Pro Transmission Builder opining (Via Dual Camera Split Screens) on "The Aging 4L60E Transmissions" and the problem of them having a HUGE Trans-Fluid NEED to be present for the 3-4 Clutch activities:

 
  • Like
Reactions: zippy411
That is a great video that touches on several points that I don't recall seeing in the other videos I linked. Thanks for sharing! I'll definitely be checking a few things he mentioned before I put it back together.

I'll be checking for the 3/4 system leaks he mentioned.

I do have a precision straight edge from when I replaced the cylinder heads on my 4runner. I'll use that to check the drum and valve body surfaces.
 
  • Like
Reactions: mrrsm
GM pump boost valve (right with double rib piston) vs Sonnax 77898E-4K (left with single channel piston and two slots for o-rings)

The Sonnax boost valve has a smaller single upper hole compared to a slightly larger single hole on the GM. The Sonnax also only has a single slightly smaller lower hole whereas the GM has two slightly larger lower holes, one on each side. The Sonnax also has the two slots for the o-rings vs no o-rings on the GM. The fit on the Sonnax was definitely a little more snug than the GM. It still returned up smoothly with spring pressure after being pushed down then released.
 

Attachments

  • PXL_20230515_153127550.jpg
    PXL_20230515_153127550.jpg
    597.2 KB · Views: 6
  • PXL_20230515_153200484.jpg
    PXL_20230515_153200484.jpg
    617.6 KB · Views: 6
  • PXL_20230515_153134749.jpg
    PXL_20230515_153134749.jpg
    535.6 KB · Views: 6
  • Like
Reactions: mrrsm and Mooseman
I did not realize that the Sonnax 74480D, 3rd accumulator check ball with seat pill, was just a packed GM part 8634400.

I also ordered the Sonnax 77701-076, check valve kit servo release, that is a backup for the 3rd accumulator check ball.
 

Attachments

  • PXL_20230515_165734700.jpg
    PXL_20230515_165734700.jpg
    494.8 KB · Views: 5
  • PXL_20230515_165828048.jpg
    PXL_20230515_165828048.jpg
    425.8 KB · Views: 6
  • Like
Reactions: mrrsm and Mooseman
I had nicked a seal on the reverse input drum piston trying to seat it with feeler gauges so I ordered a replacement set that came with a "lip wizard". I practiced a couple time on the nicked seal to make sure I had the technique down. It made it easy to get the drum seated with the new seals.


Attachments

  • PXL_20230511_170006793.jpg
    PXL_20230511_170006793.jpg
    726.6 KB · Views: 3
  • Like
Reactions: mrrsm
I tested the 3rd accumulator check ball and it wasn't leaking into the case but I figured it was a cheap part with over 200k on it so I replaced it anyway and added the Sonnax servo check valve kit on top of it just below flush. It fit snugly without the o-ring so per the Sonnax instructions I left the o-ring out. It tested without leaks on the interior as well after install. This special tool worked perfectly for removing the old pill and then I used a 3/8" punch that was perfect size to tap the new pill into position. My 10lb slide hammer threads were way too big for this special tool but the Harbor freight 2lb slide hammer kit was the right size thread and got the pill removed easily.

Also the valve body mating surfaces were nice and flat when checked. With my precision straight edge.

Teckpak T700307 Capsule Driver
3/8" - 16 threads


Attachments

  • PXL_20230515_225034328.jpg
    PXL_20230515_225034328.jpg
    345.7 KB · Views: 7
  • PXL_20230515_222747211.jpg
    PXL_20230515_222747211.jpg
    609.9 KB · Views: 5
  • PXL_20230515_223047403.jpg
    PXL_20230515_223047403.jpg
    349.8 KB · Views: 5
  • PXL_20230515_230214801.jpg
    PXL_20230515_230214801.jpg
    480.2 KB · Views: 8
  • PXL_20230515_230232057.jpg
    PXL_20230515_230232057.jpg
    333.3 KB · Views: 9
  • PXL_20230515_230251062.jpg
    PXL_20230515_230251062.jpg
    339 KB · Views: 9
Last edited:
  • Like
Reactions: mrrsm and Mooseman
The new 0.106" 3/4 clutch steels arrived and I rebuilt the clutch pack with them. The new clearance is measuring 0.030". While not necessarily manufacturer spec that is pretty much perfect from what I'm understanding. If you think that is too tight I could switch one of the 0.106" steels with a 0.078" steel.

Testing with an air compressor showed good function of all clutch packs and pistons holding pressure.
 
  • Like
Reactions: mrrsm and Mooseman
I ordered a new Sonnax 3-2 control valve spring. You can tell from the picture how compressed the old spring had gotten.

Sonnax 77754-23 4L60E 3-2 Control Valve Spring

The kit I ordered had a new seal for the forward accumulator piston but it is a plastic piston. I really didn't want to put a 20 year old piece of plastic back in the transmission because I read these can be prone to cracking so I ordered the Sonnax aluminum replacement.

Sonnax 74927-AP Forward Accumulator Piston Aluminum

I used this kit to replace the 1-2 and 3-4 accumulator pistons.

ACDelco GM Original Equipment 24221919 Automatic Transmission 1-2 and 3-4 Accumulator Piston Kit with Pistons

The cooler line fittings I had ordered were apparently the wrong ones. Their threads were much larger. Reading into it revealed that the ones I ordered are actually for the radiator side connections. So I ordered the Dorman replacements that fit. They are installed without issue. In the picture the old one is on the left, the correct Dorman one is in the middle, and the wrong GM one is on the right.

Dorman 800-604 Transmission Line Connector With 3/8 Tube X 1/4-18 In. Thread​


Attachments

  • PXL_20230521_164455002.jpg
    PXL_20230521_164455002.jpg
    506.3 KB · Views: 5
  • PXL_20230517_200535891.jpg
    PXL_20230517_200535891.jpg
    468.1 KB · Views: 6
Last edited:
  • Like
Reactions: mrrsm
I replaced the Teflon seals as well. These are the ones that arrived in the kit.


I installed them using these resizer tools. The kit worked great. I would recommend not using the extensions that go into the expanders and just use the expansion tips by themselves. When attempting the first time I had the new seals get caught up on the lip between the two pieces so I just took out the extensions and just passed over the wide part slower to allow more expansion time. Then CAREFULLY working the compression sizers on worked perfectly to size the rings back down. I kept the sizers on for about half an hour and took them off right before reassembly.


I reassembled the valve body with new gasket plate and all new solenoids. The transmission is now completely reassembled and I should be swapping them out later this week.
 
Last edited:
  • Like
Reactions: mrrsm
For Post-Installation Diagnostic & Testing Activities:
 

Attachments

I completed swapping in my now rebuilt original transmission and it only took seven hours, half the time of my first swap!

More importantly, I have third and fourth gear back! The transmission shifts so smooth. Thank you for all your help!

If any issues do pop up over the long term I'll post an update.
 
I noticed while driving that the transmission fluid got up to temperature a lot faster that it used to. Not overheating, but just got up to 150 faster. My initial thought was that I was too aggressive packing the 3/4 clutch pack to 0.030" and it was creating friction when it shouldn't.

So to test that I drove on the highway to keep that clutch pack locked up which would eliminate that as a source of extra friction/heat.The transmission temp never rose above 150. I then drove a few miles back home manually in second gear and the temps crept up to about 180. This seemed to confirm my theory.

So last night I pulled the transmission. Took it partially apart, replaced one of the 0.106" 3/4 clutch plates with a 0.078" plate. The clutch pack clearance was 0.060" after. I then reassembled and reinstalled the transmission.

I just repeated my same driving test. First thing I noticed is that transmission temp was still at 100 where it had been already at 150 previously. The transmission got up to temp of 150 during the test but didn't rise above, even during the second gear portion.

I'm going to mark that issue as resolved. Hopefully that was my only mistake. The transmission still works great and I caught it so early that the 3/4 clutch pack was still in perfect shape.

On the plus side I've gotten really good at removing and rebuilding this transmission. It isn't intimidating at all anymore. I just wish I had a lift. I'm getting tired of laying on my back on the garage floor.
 
Last edited:
Alas, the golden age has ended. Last week the transmission seemed to have extended shift times from 1st into 2nd gear. Then it started failing to shift into 4th. Then shifting into 1st gear from a stop was delayed then engaged with a small bump. Now I'm being told that third gear can't maintain the attempted speed and transmission temps are rising from cold to 220 more rapidly than normal.

I obviously need to get into it when I get home. My first thought is that this is a general loss of line pressure issue. Caused by either a failure in the valve body or the pump. Any ideas or recommendations?
 
  • Sad
Reactions: Mooseman
Well I got the transmission out and broken down mostly. Lots of the forbidden glitter in the drained fluid. There is debris EVERYWHERE, I'm surprised it could move at all and wasn't making any abnormal noises. I haven't found anything that catastrophically failed yet but I still need to go through and take a detailed look at all the bushings and sprags. The pump screen was pretty clogged. My working theory is that the torque converter failed (which I don't think I can check due to its enclosed nature) and dumped debris into the pump, clogging the filter enough to restrict fluid, lowering line pressure, results in cascading failures. The 3/4 clutches are destroyed again but I think that is a symptom this time, not the cause. This is probably due to me being cheap/dumb and reusing the old torque converter last time I rebuilt it.
 

Attachments

  • 9870.jpg
    9870.jpg
    325.2 KB · Views: 14
  • 9871.jpg
    9871.jpg
    511.1 KB · Views: 11
  • 9872.jpg
    9872.jpg
    467.2 KB · Views: 11
  • 9873.jpg
    9873.jpg
    491.3 KB · Views: 12
  • 9874.jpg
    9874.jpg
    488.9 KB · Views: 9
  • 9876.jpg
    9876.jpg
    251.8 KB · Views: 13
  • 9877.jpg
    9877.jpg
    216.5 KB · Views: 12
Last edited:
  • Sad
Reactions: Mooseman
Transmission is rebuilt with firmer shifts in 1-2 and 2-3 due to upgrades. I will likely be towing a camper with it in the near future so I upgraded parts for more holding power. The valve body is upgraded by Sonnax to engage the overrun clutches in all three gears when in D3. If performing upgrades make sure you read the part instructions carefully to prepare for modifications that need done like enlarging holes or grinding down a servo pin to allow appropriate length of travel.

I've consider another possible scenario for failure. The last rebuild the kit arrived with no name clutches and steels. It may be possible that the cheap clutches failed, the pump line pressure booster clamped hard enough on the 3/4 pack to strip metal (there was noticeable thinner steels with bare/super thin clutch metals remaining). and then the metal fragments eventually built up in the filters as pictured enough to reduce pressure. The 3/4 check-ball was also puking fluid, I assume from debris blocking its seal. The pump had noticeable scoring in the vane area on both sides. The sunshell had slightly bowed outer arms. (not sure what would have caused this. The sunshell also had deep scrapes where the bowed out arms had scraped possibly the case or debris moving between it and the case.

Either way it is rebuilt now. Due to all the debris in the transmission I removed, I rebuilt the marketplace one that ended up having the same issue as before the first rebuild. Here are the parts used in the rebuild; + a new deep pan filter.

The Transmission Bench 4l60-E videos are Highly Recommended!

Welcome to the GM 4L60E classrooms​


Sonnax Heavy-Duty Remanufactured Valve Bodies GM053-HD​


GM 4L60E Transmission Rebuild Kit w/Alto High Energy Green Clutches (1997-2003)

700R4 4L60E 4L65E Performance Piston Set Hi-Per Blue® 74960K 1994-Up

Sonnax 4L60E 4L65E 4L70E Transmission Pinless Accumulator Piston Kit

Sonnax 77701-076 Transmission Servo Release Check Valve 4L60E 4L65E 4L70E

Sonnax 77763-01 Transmission Boost Spring, 3-4 Clutch (10 Per Bag) 4L60E 4L65E

TH700R4 4L60E Transmission Thrust Bearing Kit 5pc Set 1982-03 Sonnax SBK-G12

Sonnax Extra Wide Intermediate Band 77700-01K Fit 4L60, 4L60-E, 4L65-E, 4L70-E
 
Last edited:
  • Like
Reactions: Mooseman
I ordered a torque converter from Precision of New Hampton, I read that they are one of the best rebuilders of them. They wouldn't let me order directly through them so I ordered through one of their distributors.

Torque Converter Precision of New Hampton

4L60E 4L60 4L65E 4L70E 4th Gear Super Hold Dual Servo Kit SONNAX 77767K 1982-up

4L60E 4L65E 4L70E 4L60 Sonnax 2nd Gear Super Hold Servo Kit 77911-03K

Borg Warner 28571AM Transmission Sprag, Low/ Reverse (Wide) 4L60E TH700-R4

Borg Warner 29236AM Transmission Sprag, Forward Clutch (Metal Cage) 4L60E

. 700r4 4L60e REVERSE INPUT steel plates .078" with Turbulator Holes (4) (needed different thickness & turbulator holes for less drag, more mpg)

. 4L60E STEEL Plates LOW REVERSE with Turbolator Holes for Lube (5 pack) (turbulator holes for less drag, more mpg)

Sonnax 77010-01 Wide Reaction Sun Gear Bushing 4L60, 4L60-E, 4L65-E, 4L70-E
 
Last edited:
  • Like
Reactions: Zaab and Mooseman
Sonnax 77805E-K Transmission Torque Converter Clutch (TCC) Apply Valve Kit

GM Genuine Parts 8634400 (08634400) 3rd Accumulator Retainer​


2x Dorman 800-604 Transmission Line Connector With 3/8 Tube X 1/4-18 In. Thread Compatible with Select Models​


GM Genuine Parts 29535617 Automatic Transmission Fluid Pan Magnet​


"THE BEAST" 700R4 4L60E 4L65E Transmission Heavy Duty Reaction Sun Gear Shell​


GM Genuine Parts 24245624 Automatic Transmission Reverse Input Clutch Housing​


4L60E TRANSMISSION BUSHING KIT W/TEFLON COATING 1994 - UP #74030E​


FEL-PRO 72770 Transfer Case Adapter Gasket for Chevrolet Silverado 1500​

 
Last edited:
  • Like
Reactions: Zaab and Mooseman

And some tools that made the job easier.


Bonbo T-0158 Universal Clutch Drum Spring Compressor Transmission Tool Heavy Duty Steel (lube the threads)​


Bonbo T-0151 Rear Clutch Spring Compressor Transmission Tool - 4L60E Low & Reverse Spring Compressor, Compatible with GM 250 250C 350 350C 700R4 4L60 4L60-E 4L65E 4L70 4L70E 4T80-E (lube the threads)​


S&G Tool Aid (91200) Bushing Splitter/Panel Cutter (phenomenal for removing bushings)

T-0220-700R4 Master Bushing Driver Set For GM 700-R4 4L60 4l60E 4L65E Transmissions Bushing Bearing Seal Installer Remover Tool Kit (13 PCS)​


WFLNHB Transmission Repair Fixture Holder Bolts to an Engine Stand Replacement for GM 200R4 TH350 TH400 700R4 4L30E 4L60E 4L65E (for mounting transmission to engine stand)​


Dial Indicator with Magnetic Base Holder Fine Adjustable Long Arm 0-1" Magnetic Dial Indicator Professional Dial Gauge 0.001" (for determining endplay and stroke measurement of corvette servo)​


MAXTOOL No.31 10pcs Identical Jobber Length Drills Dia 0.120" HSS M2 Twist Drill Bits Wire Gauge Gage Numbered Straight Shank Drills; JBN02H10R31P10 (for drilling out servo release check valve hole due to corvette servo upgrade)​


uxcell Diamond Grinding Mounted Point, 12mm 100 Coarse Grits Spherical Concave Head Bead Fine Grinding Bit for Jade Amber Stone Beeswax Glass (for smoothing tip of corvette servo pin upgrade after grinding down.)​


uxcell Diamond Grinding Mounted Point, 11mm 600 Fine Grits Spherical Concave Head Bead Coarse Grinding Bit for Jade Amber Stone Beeswax Glass (for smoothing tip of corvette servo pin upgrade after grinding down.)​

 
Last edited:
  • Like
Reactions: Zaab and Mooseman
I forgot to mention that prior to installing the rebuilt transmission I flushed the cooler and lines out with a couple bottles of this cooler flush. The first bottle came out filthy. The second bottle looked clean but I used the whole bottle anyway.

Lubegard 19001-UNV Kooler Kleen Transmission Cooler Flush with 2-in-1 Fitting, 13.25 oz.​


I just drove it over 300 miles on a trip of mixed highway, city, country driving. The transmission temps hovered around 160-170, never exceeding 175. I think the firmer shift modifications helped reduce the transmission temps for city and country driving.

It seems to work well. I think corvette servo and other upgrades does make the 1-2 and 2-3 shift firmer that I would like for a family use vehicle but I'll get used to it.
 
Last edited:
  • Like
Reactions: Mooseman

Forum Statistics

Threads
24,080
Posts
646,544
Members
20,277
Latest member
EValdez307

Members Online