Replaceing Filler Neck Pipe... Bolt "Plate" Snapped Off! HELP

AC75TB07

Original poster
Member
Aug 17, 2019
68
Canada
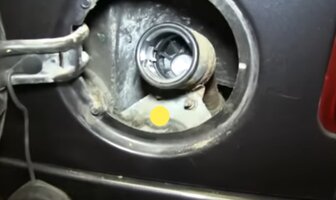
Getting around to replacing the filler neck pipe from the cap to the tank... There are two bolts that hold the cap end of the neck to the edge of the body right inside the fuel door hidden behind the rubber gasket thing that surrounds the cap... The entire piece has snapped off, leaving nothing to put the new bolts into... See pic below... (not mine, for visuals only) ... Where the yellow dot is has completely snapped off right to the very edge. Disintegrated from rust...

What the hell do I do? It was intact when I discovered the pipe was leaking, but in the time since it's just rusted off completely...Probably the weight of the nozzle when adding petrol was too much for it...

There are zero of these trucks anywhere near me so I can't just go cut the piece off or anything like that. I suppose if I had it I could JB Weld it or something, but I got no chance of finding it...
20231026_162300.jpg
 

mrrsm

Lifetime VIP Donor
Supporting Donor
Member
Oct 22, 2015
7,769
Tampa Bay Area
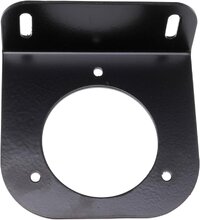
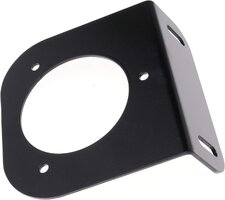
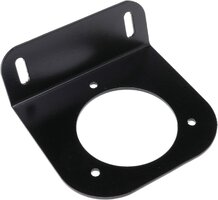
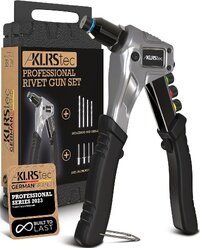
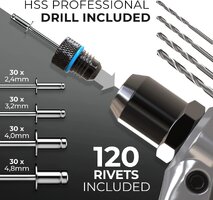
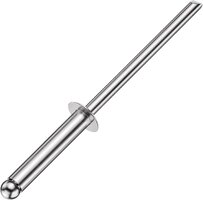
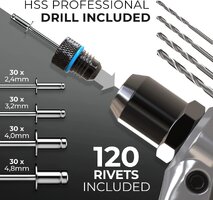
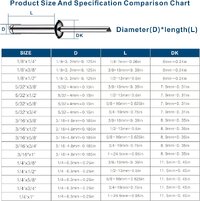
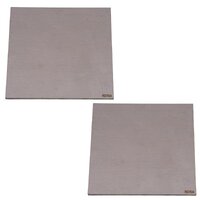
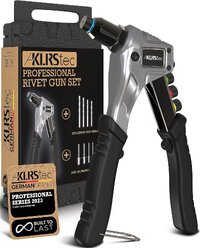
They make a Replacement Filler Neck Mount that you may be able to *finagle* into that location. Or... at the very least, give you the idea of using some Galvanized 1/8" Plate Steel and after Shaping it with a pair of Tin Snips or a Grinder to suit your situation... clean up the Burred Edges with a File or Grinder and then use an inexpensive Pop Rivet Kit with Large Stainless Steel Pop Rivets to hold that Modified Plate onto the remainder of the Existing Metal Plate still attached to the upper, Inner Fender Well. Ladling on some JB-Weld in between just before you finalize the riveting work certainly would not hurt, either.


712qOt9kiTL._AC_SL1500_.jpg71bMwWZvf0L._AC_SL1500_.jpg71-vMsQCCQL._AC_SL1500_.jpg


81zhQ4rXvaL._AC_SL1500_.jpg61X+NinFGaL._AC_SL1500_.jpg

Use Stainless Steel Rivets instead of Soft Aluminum Ones:

51wYo6EzaUL._AC_SL1500_.jpg61X+NinFGaL._AC_SL1500_.jpg71+cgRMw2FL._AC_SL1500_.jpg71Oj6ZlkuYL._AC_SL1500_.jpg71vyLUBZsEL._AC_SL1500_.jpg8123+IJ-52L._AC_SL1500_.jpg


1/8" Plate Steel:


516nxaQKgnL._SL1500_.jpg

This Video shows a GMT360 Vehicle IN VERY DIRE STRAITS with excessive Rust and Body Cancer that may prove helpful with an alternative view and approach to this particular R&R:


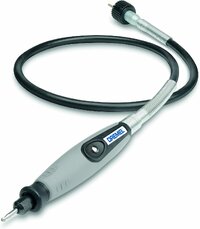
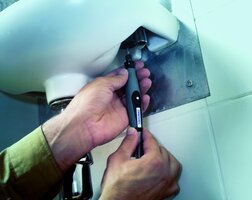
Since you will have to either work in the cramped confines of the Filler Neck Area or perhaps as shown in the above Video...up from underneath everything after removing the Spare Tire to obtain the room to move...for the sake of Safety...using a Dremel Cable Drive to drill out the New Holes to match the Pre-Drilled Holes in the New Replacement Mounting Plate... anything you can do to reduce the chance of having any Sparks and Flame Ignition is worth considering. ALWAYS Have an ABC Fire Extinguisher at hand.

THIS would be the Tool Of Choice:


71UYPTO0Z0L._AC_SL1500_.jpg81R1miWzQUL._AC_SL1500_.jpg
 

Attachments

  • 81zhQ4rXvaL._AC_SL1500_.jpg
    81zhQ4rXvaL._AC_SL1500_.jpg
    183.8 KB · Views: 0
Last edited:
  • Like
Reactions: AC75TB07

AC75TB07

Original poster
Member
Aug 17, 2019
68
Canada
I haven't had the opportunity to get up under the truck, but I guess what was there originally to bolt the neck to was welded on, not something that was screwed on and could be fixed? There's no way to replace it?

Those Amazon mounts might be able to help do something in a pinch...

Oh, and I had already watched that video, and my stupid spare tire is already removed, too. I think that was why the neck broke. The frame that held the tire got all bent up during winter cause it was so rusted and the tire went sorta sideways pushing upwards on the filler neck side. I think it put pressure on it and caused the weakened metal at the fuel door to give up the fight.
 
Last edited:

mrrsm

Lifetime VIP Donor
Supporting Donor
Member
Oct 22, 2015
7,769
Tampa Bay Area
With the idea of "Suspending" the Filler Tube roughly in the center of that hole in another creative way...consider getting a Fistful of Sturdy, Industrial Grade ZIP-Ties and then locate adjacent structures down in there and try to *fix* the position of the Filler Neck using a minimum of Three, Triangulated Support Vectors and thus... keep the Unit from Banging About inside of the Plastic Outer Cover. Using an Inexpensive Bore-Scope to "I" Ball the interior areas might help you with finding enough positions of restraint to make this work.
 
Last edited:
  • Like
Reactions: AC75TB07

AC75TB07

Original poster
Member
Aug 17, 2019
68
Canada
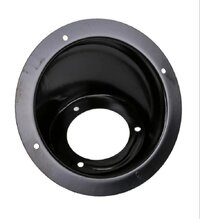
I wonder if something like these things might be worth trying to make fit? It would be easy to secure around the outer edge and easy to make a couple spots to attach the bolts on the new filler neck ... 20231028_194642.jpg
 

mrrsm

Lifetime VIP Donor
Supporting Donor
Member
Oct 22, 2015
7,769
Tampa Bay Area
That Black Cup Unit holds more possibilities that might require some Very Careful Pre-Fitment while also minding the necessity for dealing with any *Static Sparks* by the addition of a Bonding Strap getting firmly attached in between that Cup Unit and the SUV Body due to it being made of what looks to be Mild Steel.

The other consideration is to make certain that the GM OEM Gas Cap can still be easily and completely accessed for the ease of its installation and removal prior to the needed "Steel Cup" modification(s) and final placement.

Those fitting adjustments would include the necessity for finding just the right positions for drilling out Two Larger Holes for the two Stud Posts and Fasteners on the Filler Neck Down Pipe along with ensuring that a roughly centered Drain Hole is also present down inside the very bottom of that Cup to allow any fuel overflow to fully drain.out of the Filler Neck Area.

In order to maintain the coverage of the OEM Loose Plastic Shield in its original position, it might work better if that piece is installed first while arranging the "Steel Cup" through it and thereby, ensure that all of the adjacent open spaces have enough protection and coverage from Fuel Overflow and Spillage
 
Last edited:
  • Like
Reactions: AC75TB07

AC75TB07

Original poster
Member
Aug 17, 2019
68
Canada
Looking at this part for the Tahoe etc. it does list the Olds Bravada as a fit, too... Wonder if it's a mistake?... If it fits a Bravada from the 00's it should fit a Trailblazer... Does anyone with a Bravada know if they use this thing ⬇️ rather than the rubber housing?

Would be easy to drill a couple spots for the filler neck bolts if they dont quite line up...


Blckshdw

Moderator
Nov 20, 2011
10,686
Tampa Bay Area, FL
The GMT360 platform started with the 2002 models. The Bravada that part is for, is the predecessor to ours :twocents:

USB00OLS011A0802.jpg
 
  • Like
Reactions: AC75TB07 and mrrsm

mrrsm

Lifetime VIP Donor
Supporting Donor
Member
Oct 22, 2015
7,769
Tampa Bay Area
As far as GM-GMC making any "Engineering Mistakes" by adding in any additional Time Money and Expense in the Design, Tooling and Manufacture of any components or parts that should easily be common and "cross-pollinated" between Brand,Makes and Models of their Vehicles, it never makes any practical sense to do so.

For example, If they can use Common Parts like the Multec Type I and Type II Electronic Fuel Injectors for a wide range of Engines, why design a specific EFI for every single Engine Model within their extensive Car and Truck Line Series? Well... The same thing applies with the use of Fasteners and with the arrangement of the dimensions of Sub-Frame Parts and Components, etc. that will be common to them all.

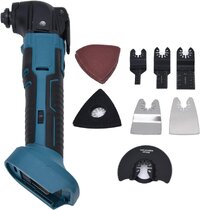
You might consider visiting the Local Salvage Yards and determining if you would be allowed to Chop Out the supporting "TIN" you require from a Wrecked Vehicle with sufficient damage to the Left Rear Quarter to make it worthwhile for the Yard to allow you to perform this Surgery using THIS Tool:


61iC+Hew27L._AC_SL1500_.jpg

Ordinarily, for the sake of Safety and Liability, Reducing Fire Hazards, Collecting Aging or Contaminated Coolant, Oil and Fuel for Disposal...the Engines, Transmissions...and ALL of the Gas Tanks and their Accoutrements ...are summarily RIPPED out of Wrecked Vehicles.

If this is likewise the case in the Yard you might Visit... then the "TIN" Parts-or Sections you need and want to scavenge should be accessible by using the above style of Oscillating, Lithium Battery Powered Saw to make very quick work of obtaining the results of such Metal Surgery. Call ahead before you show up with your "Kit" and ask permission first, lest they say, "Uhhh... HELL NO!"

Just make certain to take MORE of the Adjacent Metal Surfaces than you think you might actually need. You can always trim down whatever you take to the proper size later on and then Drill Out and Pop Rivet the entire Donor Segment into place.

You will need to possess at least a modicum of Safe Metal Working Skills to complete this job. If in doubt, then be clever enough to let someone else who really knows what they are doing engage in this repair; especially considering that the work must be done so close to an installed and partially filled Fuel Tank.

Don't forget the ABC Fire Extinguisher and to Pack some Blue "Scott" Shop Towels (or use some Blue Painter's Tape) and Tape Off the exposed Short Neck of the exposed Plastic Fuel Tank to keep out any Dirt and Flying Hot Metal (Sparking, Friction Heated) Particles and Debris.


"Well DONE...is Better... than Well SAID..." - Benjamin Franklin
 
Last edited:
  • Like
Reactions: AC75TB07

Sparky

Member
Dec 4, 2011
12,927
Ya know what I did when mine did that?

Get ready to laugh...

I supported the filler neck where it was supposed to sit by using a piece of cardboard with a hole (and slit) cut in it and stuffing it up in the body cavity so the filler neck stayed put. Then, I sprayed "great stuff" expanding foam all around it, and let it expand/dry. Then I used a long screwdriver and poked a large-ish hole through the foam at the bottom as a water drain hole, and put the rubber boot on. No one was none the wiser unless they pulled the boot or looked under the vehicle.

Hey don't judge me! It worked! :poke:

I don't know about long-term longevity, I can imagine it might lead to rusting the fuel filler neck faster by trapping any salty water up in there, BUT I only needed it to last a couple of years, and it did.
 

TJBaker57

Member
Aug 16, 2015
2,907
Colorado
Get ready to laugh...

I supported the filler neck where it was supposed to sit by using a piece of cardboard

I often make brackets etc. For stuff I work on Having a few decades of sheet metal fabrication experience helps! I once ran an HVAC sheet metal shop that was nearby a "motor mile" where all the car dealers were. Occasionally I would make up a piece or three for a dealer who needed something that was on a long backorder. I do miss having all that metalworking machinery close at hand.
 

AC75TB07

Original poster
Member
Aug 17, 2019
68
Canada
The GMT360 platform started with the 2002 models. The Bravada that part is for, is the predecessor to ours :twocents:

USB00OLS011A0802.jpg
They list it up until 2004, which is a bit weird. The Bravada in that form ended in 2001, didn't it?
 

AC75TB07

Original poster
Member
Aug 17, 2019
68
Canada
Ya know what I did when mine did that?

Get ready to laugh...

I supported the filler neck where it was supposed to sit by using a piece of cardboard with a hole (and slit) cut in it and stuffing it up in the body cavity so the filler neck stayed put. Then, I sprayed "great stuff" expanding foam all around it, and let it expand/dry. Then I used a long screwdriver and poked a large-ish hole through the foam at the bottom as a water drain hole, and put the rubber boot on. No one was none the wiser unless they pulled the boot or looked under the vehicle.

Hey don't judge me! It worked! :poke:

I don't know about long-term longevity, I can imagine it might lead to rusting the fuel filler neck faster by trapping any salty water up in there, BUT I only needed it to last a couple of years, and it did.

Actually that isn't so laughable. It just might work. I could clear out the area and spray it in from the backside of the neck from under the vehicle... I could easily keep a check on it to be sure rust wasn't forming...

*thinking... thinking... thinking...
 

mrrsm

Lifetime VIP Donor
Supporting Donor
Member
Oct 22, 2015
7,769
Tampa Bay Area
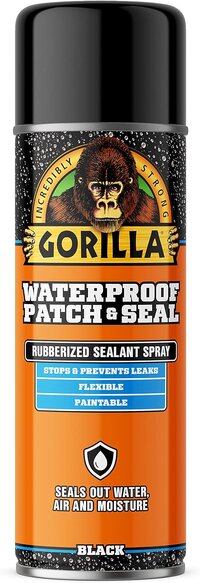
@Sparky 's idea is quite clever... and if the Pre-Shaped and Supportive Conic Cardboard were also to be Sprayed down with Several Coasts of Rubber Spray Sealant...it might make it even more durable. I was just wondering...if that Mild Steel Body Panel Metal that high up on your SUV has managed to Rust completely through... what else is down under there that might need some of the same attention, too?


81ZGIQXLZNL._AC_SL1500_.jpg
 
Last edited:
  • Like
Reactions: AC75TB07

AC75TB07

Original poster
Member
Aug 17, 2019
68
Canada
@Sparky 's idea is quite clever... and if the Pre-Shaped and Supportive Conic Cardboard were also to be Sprayed down with Several Coasts of Rubber Spray Sealant...it might make it even more durable. I was just wondering...if that Mild Steel Body panel Metal that high up on your SUV has managed to Rust completely through... what else is down under there that might need some of the same attention, too?


View attachment 110161

Definitely not rust free, but the main reason the neck bolt area failed was because I slid into a ditch a couple years ago on a slick road and the stupid spare tire frame thing jammed up sideways pushing the neck upwards. It didn't start leaking but it bent that little piece of metal that holds the bolts and I guess it didn't properly drain anymore and was always filled with road gunk.
 
  • Like
Reactions: mrrsm

Mooseman

Moderator
Dec 4, 2011
25,374
Ottawa, ON
Might want to test the effects of gasoline with the spray foam. I know that it's not good with styrofoam and even produces napalm!


Sparky

Member
Dec 4, 2011
12,927
Huh. I didn't even think about that. Oh well :explode:
 

mrrsm

Lifetime VIP Donor
Supporting Donor
Member
Oct 22, 2015
7,769
Tampa Bay Area

Attachments

  • 248657.PDF
    159.5 KB · Views: 0
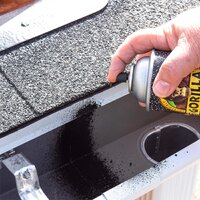
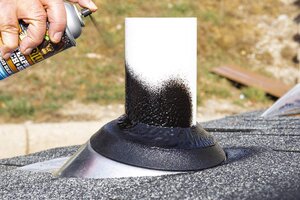
  • Gorilla-Waterproof-Patch-and-Seal-Spray-Black-v1.1-02122020.pdf
    402 KB · Views: 0

AC75TB07

Original poster
Member
Aug 17, 2019
68
Canada
Ok, thanks for all the information... I don't want to explore so I think I'll try fabricating something...

On another note, does anyone know the size of bolts that are meant to go through the little bracket that bolts to the top of the frame to hold the filler pipe on? They've further down the neck sort of around the area of the charcoal canister thing but they bolts downward from the top of the frame to hold it in place... Would they by chance be 13mm? Of course the tops of mine are all rusted to shit and I can't get a socket to fit to buy new...
 

mrrsm

Lifetime VIP Donor
Supporting Donor
Member
Oct 22, 2015
7,769
Tampa Bay Area
You should probably be thinking of using Steel Pop Rivets in those locations since attempting to try using Stainless Steel, Self - Threading Screws into a Caked-On Badly Rusted Under Structure might open up a "Whole 'Nother Can Of Worms".
 
Last edited:

AC75TB07

Original poster
Member
Aug 17, 2019
68
Canada
You should probably be thinking of using Steel Pop Rivets in those locations since attempting to try using Stainless Steel, Self - Threading Screws into a Caked-On Badly Rusted Under Structure might open up a "Whole 'Nother Can Of Worms".

They just bolt down into the frame/chassis... It's in good condition there just the old bolts gotta be pulled out first. New ones in should be fine... They go through this circled bracket...

20231101_191902.jpg
 

AC75TB07

Original poster
Member
Aug 17, 2019
68
Canada
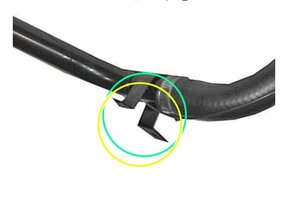
Actually after taking a glance at a few diagrams, I think it's some form of hook and pin that holds it to the frame not bolts... Gotta take a closer look...
 
  • Like
Reactions: mrrsm

Forum Statistics

Threads
23,347
Posts
638,203
Members
18,554
Latest member
evenson1

Members Online