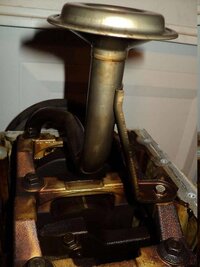
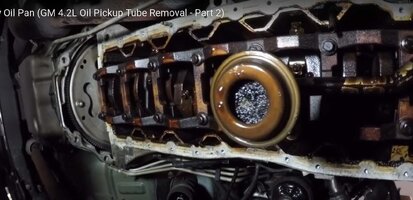
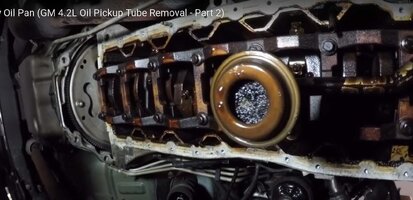
Parts cleaner to clean oil pickup tube

emedlin

Original poster
Member
Jan 25, 2012
150
I have had the fake gauge and DIC say low oil pressure on and off since 2020. My XUV w/ 4.2l has 225K miles on it. It sounds and runs fine. But, normally in summer when it is warmer after about 20-30 mniutes of driving, if you stop at a stop light it shows low oil pressure. The XUV is more of an emergency car and doesn't get driven much anymore. I put an AC Delco oil pressure switch in it back in 2020 when it first did it. It didn't change anything though. I have also ran MMO in the oil a few times. Didn't really want to tear into it and being that is isn't driven but a few 1000 miles a year I just left it. Most trips are less than 30 minutes anyway. And, it doesn't have the issue in the winter. But, I just ran across some posts on youtube about draining the oil and pouring 3qts of Gunk parts cleaner down the dip stick hole and letting it sit over night. Then drain that out the next day and flush it out with cheap oil, ATF, diesel, or kerosene. Feed back seemed good. No one said it didn't work for them. My question is what is the best way to flush out the parts cleaner? I figure just pour 5qts of cheap oil down the dip stick hole and then just immediantly drain it back out. Thoughts? Then, go back to Pennzoil Platinum High Mileage Full Synthetic and new filter. Might replace one qrt with MMO just for good measure.
I don't have an oil pressurer tester or I would test it. The parts cleaner is about the same price and maybe it will fix it for good. Should at least clean something out of it after 225K miles. If I were to get a tester, how long of a hose would I need to reach all the way to the window shield so I could see it when I drive it around. Any recommened testers that will reasch and don't go up to 140+ psi? I figure a smaller psi range would be more accurate for the psi I would be measuring.
 

Mike534x

Member
Apr 9, 2012
934
I had that same issue with my first 02 Envoy. Engine sounded great, but after driving it around after it warmed up the oil pressure gauge would drop to 0 and the "engine oil pressure" low message would pop on. I never did figure out what caused it before trading it in. Some of these trucks had issues with the o-ring on the oil pick up tube being defective, causing loss of pressure when warm.

You may be able to rent a oil pressure tester from Advanced/Auto Zone/O'Reily and return it when you're finished. All you're doing is threading it in where the oil pressure sender is, and just starting the truck up to monitor the pressure (May03LT) has a video on his YouTube channel showing how to test the oil pressure on these trucks.

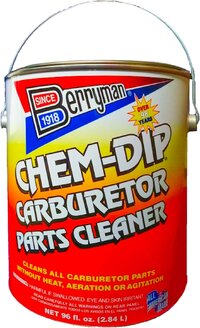
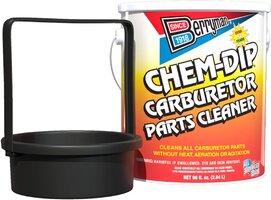
@mrrsm Has highly recommended using Berrymen B-12 Chemtool (pouring enough to fill the oil pan up to the oil pick up tube), and letting it soak for a few hours and then running the cheapest 5w-30 + filter after draining it. Then drive it for a bit and do another oil and filter change.
 
  • Like
Reactions: mrrsm and Mooseman

Mooseman

Moderator
Dec 4, 2011
25,355
Ottawa, ON
Sounds like a good plan before tearing into it because it is a b!tch of a job to get the oil pan off. However, I wouldn't put any MMO as that may have to effect of thinning the oil, thus lowering the pressure.

Getting a proper reading with a real pressure gauge would be ideal. You could just buy a cheap mechanical gauge, like these, to install and check your actual running presasures.


The second one has a wider sweep and would yield more accurate results. Having one mounted would probably tell you while driving and hot when it may have low pressure.
 
  • Like
Reactions: mrrsm

mrrsm

Lifetime VIP Donor
Supporting Donor
Member
Oct 22, 2015
7,750
Tampa Bay Area
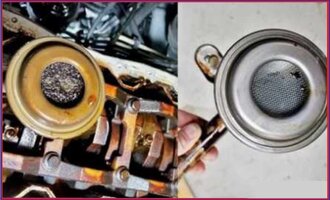
Your BFF of Passive, Non-Destructive Solvents when used according to the directions on the side of the .75 Gallon Can(s). (A Minimum of Two Cans should do the trick). But Remember this... It will be important to take @Mooseman 's original suggestion to Avoid Over-Filling the Crankcase up to a level that touches the lower portions of the Steel, Crankshaft Cradle or above that point, as going above that "Water Line" might loosen (but NOT completely dissolve away or dis-lodge) ALL of the Black Carbon *MUNG* Coffee Grounds thus loosened up that eventually can fall to the bottom into the Motor Oil and re-collect upon on the freshly cleaned up Oil Pick Up Tube and Screen and suffer a New Blockage:

49575555993_630d2b0ae3_c.jpg

This Is Important...

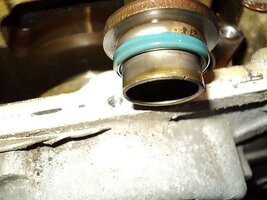
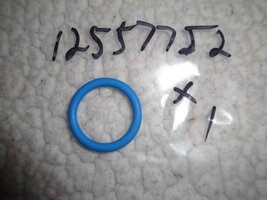
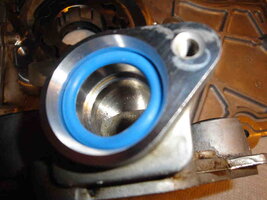
Bear in mind that in Early Model (2002-2003) Vortec 4200 LL8 Motors... Having a Carbon *MUNG* Clogged Oil Pick Up & Screen surface transfers and focuses the Gerotor Oil Pump Vacuum (Suction) Force right into the Blue "Viton" "O" Ring meant for sealing the Forward End of the Tube to the Inlet Base Manifold of the Gerotor Oil Pump designed to pull and move over 11 Gallons of Motor Oil Per Minute from the Bottom of the Crank-Case up and throughout the LL8 Engine Block Galleries at Higher RPM.

THIS problem invites Damaging or Compromising that Seal by Erosion to the point of causing Air Cavitation ...ANOTHER reason for the Loss of Gerotor Oil Pump Suction and thus... Lowers the Discharge Oil Pressure that is only Nominal between 12 PSI @ 600 RPM near Idle up to 65 PSI @ around 3,000 RPM and above ... just before the Release Valve in the Upper Gerotor Oil Pump opens to dump any excess oil right back into the Crank-Case:

49576291647_d591778c33_w.jpg49576287002_21d17a86fe_c.jpg
50109253108_898232f3c6_c.jpg

The effects of long standing Gas Gum Blow-By from entrapped Compression Rings frozen deep inside of the Lands and Grooves of the Pistons is the cause and origin of this problem after so many, many useful miles back there in your Rear View Mirror. THIS is the Stuff You Want and avoid exceeding the Soak Time to avoid leaching Silicates out of the Cast Aluminum Crankcase - Oil-Pan. As @gmcman has suggested...ASAP ...follow up with a Cheap Organic Motor Oil and Oil Filter Change and flush out the residual Berryman's Chem-Dip Liquid and avoid other potential issues of softening the Front and Rear PTFE Engine Oil Seals:

81NcN7XLCBL._AC_SL1500_.jpg71t5IPTMHnL._AC_SL1500_.jpg71CcLs2FxiL._AC_SL1500_.jpg


Related Berryman Chem-Dip Threads:


For More Gerotor Oil Pump and Front Timing Cover "Autopsy" Images:

 
Last edited:
  • Like
Reactions: gmcman

emedlin

Original poster
Member
Jan 25, 2012
150
Any reason to pick Chem-Dip over Gunk? I already have Gunk waiting for me to pick up at Advance. Also when I ran across this fix it was just one can of Gunk, but here you say two cans of Chem-Dip? Is that because of the differences between the two? I read to pour Gunk in the dip stick tube to avoid it going anywhere but the oil pan, is that correct? Where would you power Chem-Dip in at, the normal oil fill hole or dip stick tube.

Why in the post that lists the 10 steps to do this does it say use 6gts of cheap oil. Shouldn't you fill it with 7qts if you are going to run the engine?
 
Last edited:

mrrsm

Lifetime VIP Donor
Supporting Donor
Member
Oct 22, 2015
7,750
Tampa Bay Area
My selection of using the Berryman's Chemistry has been supported by personal, empirical success... and not suffering the Unintended Consequences of using anything that might make matters worse. I agree that using the GUNK Product will likewise work and my suggestion to use 2 x .75 gallons of the Chem-Dip can be explored after filling an empty lower Crankcase with just enough to submerge the Oil Tube and Pick Up Screen with enough Mass/Volume of the Solvent to work in sufficient quantity and dissolve away the Matted Mung infecting the Screen and up inside of the Tube: Ergo...

GALLONSTOLITERS.jpg

The 1.5 Gallons should be enough to fill up the Lower Crank-Case since the Total Capacity of the GM LL8 Crank-Case Oil Pan is 7 Quarts of Motor Oil. IIANM... @Mooseman 's original admonition to avoid Over-Filling the Crank-Case as I had originally suggested came when another Member did so...and subsequently performed repeated Drain Outs that showed a propensity for the Loosened Carbon Chunks to drop down inside of the Replacement Cheap Motor Oil being used to wash out any residual Chem-Dip and this resulted in those Chunks getting Vacuumed Up inside the Screen and starting the Clogged Strainer-Screen Blockage all over again.

If you scope out the additional linked Threads mentioned in my last Post....they will lead you to Kevin Newland's Epic Envoy 4.2L Crankcase R&R as a Five Part Series on YouTube in which he placed the free Oil Pick Up Tube way down inside of a Bucket of Solvent with THIS being yet another example of just how successful this odd *passive* solvent behaved. I have mentioned several times as a CAVEAT EMPTOR that performing this work should be considered as the Last Ditch Effort of recovering Nominal Oil Pressure ...before having to do the laborious job of Dropping The Suspension Components and removing the Oil Pan and of course...The Oil Pick Up Tube... WITH A MANDATORY REPLACEMENT OF THE BLUE "VITON" O-RING... while laying on your back.

Look closely into the mix of Carbon "MUNG" as Chunks and Sticky, Slimy Pieces of that stuff that had collected along the Rails of the Steel Cradle underneath Kevin's Motor over time and eventually got shaken loose and Flaked Off (probably aided by Tired and Worn Out Gel-Filled Motor Mounts) only to once again, Haunt the Innards of the Oil Pick Up Tube Screen and Drop his Oil Pressure to Dangerously Low Levels. The Before vs. After Images here tell the Tale of SUCCESS... that he might have achieved entirely WITHOUT having to perform the Actions of the Crank-Case-Oil-Pan R&R in the first place:

B4ANDAFTERCLOGGEDOILPICKUPTUBE.jpg

GMLL8CLOGGEDOILPICKUPTUBE1.jpg
 
Last edited:

emedlin

Original poster
Member
Jan 25, 2012
150
Some posts on some of Kevin Newland vidoes is what lead me to trying this. He also used Gunk parts cleaner, which is why I ordered some. I can see why you wouldn't want to free up all the chunks attached to the lower rails. It could take awhile to flush all that out if you ended up cleaning off everything at once.

So, is the pick up tube up high enough that it would take two cans? I figured it was lower and one would be enough to submerge the screen.

What about pouring it in the dip stick tube vs the main oil fill spot?
 
  • Like
Reactions: mrrsm

mrrsm

Lifetime VIP Donor
Supporting Donor
Member
Oct 22, 2015
7,750
Tampa Bay Area
Certainly... although with it having such a sticky, viscous consistency... that Narrow Dip Stick Tube might not be *** patent enough to get the *Stuff* to go in. My reasons for staying with using the 2 X .75 Gallon Cans of the *Stuff* has to do with the need to have a sufficient quantity of the Chemical to sort of slightly pressurize its own way up inside the Tube... slowly passing through the Screen while dissolving this matted mess on contact.

*** PATENTOPENING.jpg

"More is Better" in any situation where Osmosis or Diffusion of a mass of liquid solvent versus the intended solids to be dissolved are involved. I do not think any damage will happen if you pour the *Stuff* into the Motor directly through the filler neck. Look at the Carbon Clogged (Rhomboid Shaped) Oil Drain Down Passages along the Engine Block Side Walls that guide liquids down inside of the Crankcase from the Upper Engine Head in this image as another reason to flush that collection of Carbon MUNG down and out in the process.

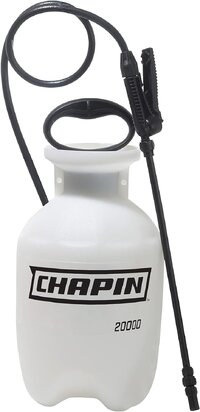
I have often thought that getting a simple Garden Pressure Sprayer filled with either Diesel Fuel or Kerosene with a Conical Rubber Stopper around the Sprayer Stem and then guided in through the Drain Plug Port and Sprayed under Pressure (10-15 PSI) from the Bottom Up inside the emptied Crank-Case after this Treatment would also flush out anything like the Carbon "MUNG" Coffee Grounds-Chunks and rid the lower block and pan of that *Stuff* at the same time would also work.


61y67kKAipL._AC_SL1500_.jpg


GMLL8CLOGGEDOILPICKUPTUBE1.jpg
 
Last edited:

mrrsm

Lifetime VIP Donor
Supporting Donor
Member
Oct 22, 2015
7,750
Tampa Bay Area
Okeedoke...:blinkhuh:
 
  • Like
Reactions: Mike534x

emedlin

Original poster
Member
Jan 25, 2012
150
When I picked up the Gunk parts cleaner the guy said it would eat plastic. Wouldn't that include the nylon timming chain rail guides if I poored in the oil fill hole? Not to mention the plastic value covers on the 04.

Chem-dip says safe for most plastics. So, maybe I should switch if I cannot pour it down the dip stick tube. Is Gunk just more harsh than Chem-dip?
 

mrrsm

Lifetime VIP Donor
Supporting Donor
Member
Oct 22, 2015
7,750
Tampa Bay Area

Attachments

  • CD-A-Int-0996-R01.pdf
    156.7 KB · Views: 0
  • CC3K.pdf
    179.3 KB · Views: 0

emedlin

Original poster
Member
Jan 25, 2012
150
I had found those documents. But, I don't know what I am looking for in them that would mean bad for plastic.
 

emedlin

Original poster
Member
Jan 25, 2012
150
Seemed pretty hard to poor down the dip stick tube, so I got some chem-dip and poored in the oil fill hole. The wait begins.

I did noticed the 4 hour limit for aluminum like you mentioned on the can. Any clue what it does? Just change the color of it or does it weaken the medal? I guess I will go out and drain it in 4 hours instead of waiting over night like I was going to do with the Gunk brand.
 

mrrsm

Lifetime VIP Donor
Supporting Donor
Member
Oct 22, 2015
7,750
Tampa Bay Area
Sure... ( I just KNOW somebody is going to HAMMER me for mentioning WAY TOO MUCH Information) But... here goes:

In a similar manner that GM-GMC and other Auto Engine Manufacturers stress to "NEVER Use Plain Tap Water in your Radiator" certain Chemicals that might get lugubriously poured all over the insides of a "Lost Foam" Engine and Head Casting made out of a strange, durable alloy of Aluminum and Silicate can cause the materials to dissolve out in solution as White Crystalline Aluminum Oxides and weaken the metal substrate.

The Chemistry of Anti-Freeze is meant to provide an ION Barrier between the Coolant and the Heated-Cooling inner Block and Head surfaces... with a particular shelf life and "Use By" Date because Coolants break down over a fairly shorter time frame than most people might expect. If the color of the Coolant changes to a Darker "flavor" ...it may have already lost its protective qualities.

In the case of these Unique Carbon-Busting Solvents with perhaps a slow-acting Chemistry they act to gradually Bond with and Break Down Carbon-Carbon and Long Chain Carbon-Hydrogen Bonds from the Cooked On MUNG all over the inner engine surfaces. This is mostly caused by Excess F/A Combustion Gas Blow-By from having Trapped Compression Rings. If the *Stuff* remains inside of the motor for too long the Solvents may wind up either Donating or Stealing Electrons along the way and if the Al-Si Surfaces start to do this...things can get ugly. So... Long Story SHORT... Limiting the "Soak Time" to Four Hours will avoid these unintended consequences.

Sidebar Fun Fact... Carbon is the usual residue when most things like Wood and Fuels combine with Oxygen and SORT of Burn...but ... since Plain Carbon can only actually burn at or above 5,000 F... It collects as "Black Soot" in everything from Smoke Stacks to Valve Seats and Piston Tops over time. IF the Carbon also is associated with other Failed Combustion Gasoline and Diesel Fuel By-Products it forms a Gooey, Sticky Adhesive Like Gas- Gum Glue that just LOVES hanging onto Inlet Screens, Piston Compression Rings-Lands & Grooves and Valve Stems as well as the insides of the Lower Crank Case. The Gunk and Berryman Products tear those Carbon Bonds to SHREDS and allow it to lose its hold upon Metal Surfaces and dissolve into a MUNG-Like Liquid. Both of those Solvent Products... are recoverable and re-usable..
 
Last edited:
  • Like
Reactions: Redbeard and Beacon

emedlin

Original poster
Member
Jan 25, 2012
150
Thanks for all the info. Not sure that tells me how Gunk's SDS shows it is bad for plastic, but Chem-dip's SDS says it is OK for plastics. I think I need to know more chemsitry for that though.:smile: Either way I switched to Chem-dip and did a 4 hour soak. Considering I don't drive it that much it may take awhile to know if it really fixed my problem. But, I have my fingers crossed.
 

mrrsm

Lifetime VIP Donor
Supporting Donor
Member
Oct 22, 2015
7,750
Tampa Bay Area
Follow up on @Mooseman 's and @TJBaker57 's suggestions for setting up an Analog Oil Pressure Gauge that will allow you an IMMEDIATE View of what your Gerotor Oil Pump is Generating for Oil Pressure as it REALLY is within just a few moments after the Crankshaft Starts Rotating. If the pressure does NOT display AT or rise ABOVE 12 PSI at Idle as the Engine RPM Rises... SHUT DOWN THE MOTOR.

If the Low Idle (600 RPM) stabilizes ... once the Engine Warms Up ...watch for uniformity as the RPM increases with Oil Pressure RISING and approaching 65 PSI around 3,000 RPM if the integrity of the Oiling System is Nominal. If this effort reveals a less than sterling improvement... the next *suspect* in the Drama is The Blue "Viton" Oil Seal "O"Ring has probably failed and the next course of action becomes more involved with the need to R&R the Crank-case - Oil-Pan. Fingers CROSSED for the Former... as a FTW Event!

Please ...Take Some STILL Shots of the Oil Pressure Gauge Read-Outs Hopefully NOMINAL...but necessary and just as important to KNOW if SUB-PAR as well and then Post them up for us all to see.
 
Last edited:

emedlin

Original poster
Member
Jan 25, 2012
150
Fingers still crossed. I did drive it some yesterday. No low oil warnings. If it shows again, I will probably just get the MADDOX oil pressure test kit from Harbor Freight and the M16 1.5 Adapter to 1/8 NPT adaptor from amazon.
 
  • Love
Reactions: mrrsm

mrrsm

Lifetime VIP Donor
Supporting Donor
Member
Oct 22, 2015
7,750
Tampa Bay Area
Don't leave the Cheap Organic "Wash-Out" Motor Oil inside the Engine Block for TOO Long. Better to perform the SAME Procedures using 7 Quarts of 5W-30 Organic Motor Oil and ANOTHER Brand New Cheap Filter to continue collecting the *MUNG* that has broken loose and is being sent through the Filtration System.

Many a Brand New Re-Built Engine has suffered when the Builders used Molybdenum- Di-Sulfide Grease on the Mains and Con-Rod Bearings... only to suffer from a Sudden Drop in Oil Pressure because the Moly-D Grease CLOGGED UP THE FAN-FOLD FILTER PAPER and FUBARed the Works. These event cascades have happened right after the Builder Stopped Monitoring the Post-Build Oil Pressure and by NOT DOING THE RIGHT THINGS. Don't wait for problems like this to surprise you while you're driving Ten Miles from Home.

The same event might rear its Ugly Head if the Gel-Like Carbon By-Products (Post Chem-Dip Treatment) manage to accomplish the same thing. After Changing the Oil and Filter as recommended for a Second Time.... Drive the Vehicle for around 300 Miles and THEN Swap the Oil and Filter for Mobil1 5W-30 FULL Synthetic and a Mobil1 or K&N Oil Filter, and then do so ...every 3,000 Miles from then on.

How to Perform an Oil Filter Autopsy:


THIS then should be your Next Port Of Call to deal with what has caused all of this aggravation in the first place:

 
Last edited:

emedlin

Original poster
Member
Jan 25, 2012
150
I ran it for 15-20 minutes with the cheap oil. Was actually a sythentic blend as it was the cheapest I could find. Then put Mobil1 extended performance high mileage in it with a new AC Delco filter PF61E. Normally use Pennzoil high mileage, but the store was out. I normally change the oil when the oil life indicator says to. I didn't reset it this time, and right now it is at about 50%. I planned to change it when it said to. Or, I see the oil pressure light warning again.

One thing about the the new filter. It was taller than the Fram filter that was on it. I forgot to look at the model, but it was an orange Fram. May have been PH3506, but not sure.
 
  • Like
Reactions: mrrsm

mrrsm

Lifetime VIP Donor
Supporting Donor
Member
Oct 22, 2015
7,750
Tampa Bay Area
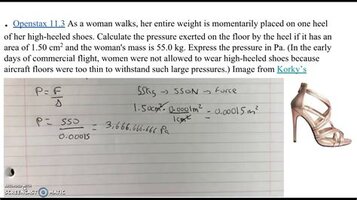
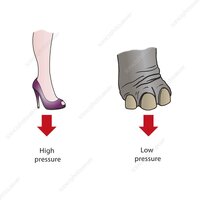
Ahhhh... The Famous Fram Oil Filter... Try to find an advocate for using anything like it here...I DARE You. The Taller Oil Filter made by Mobil1 or K&N is a Better Idea because Added Filtration Density screens out more Particulate Matter and makes for an easier Oil Flow... with less likelihood of the Oil Filter Bypass Valve opening up suddenly during periods of acceleration when the Filter gets TOO Dirty.The Best Example I can think of is the comparison of a Tiny Woman wearing High Heels versus the MUCH Larger Area of Contact allowed at the Bottom of an Elephant's Foot. See for yourself how the Principle of , "As Area Increases... Pressure Decreases" conversely, "As Area Decreases... Pressure INCREASES..."

th-3492395526.jpegC0415755-Pressure_exerted_by_stiletto_heel_and_elephant_s_foot,_illus-2310886332.jpegelephant-2405704285.jpeg

Motor Oil is Like Blood... it winds up becoming a Liquid WITH Solids (Dirt Particles become like the Red Blood Cells) suspended within. In time... Carbon also collects within in it ... and so does Un-Burned Gasoline and Gas-Gum Products that will Reduce its Lubricity and Protection Qualities.

Anyone with GMT360 Vehicles who avoids Oil Changes every 3,000 Miles on High Mileage GM-GMC Atlas 4200 Motors... is just ASKING for the Trouble that You have been going through just now. The reason for using the Cheap, Organic 5W-30 during the "Follow Up Wash-Outs" is that it tends to *sop up* and grab onto this *Chemical Junk* much more readily than by using the Synthetic Flavors do for this particular purpose.

Remember that your present application of using Chem-Dip during this clean out is very far from normal and therefore, is a different situation than what the Manual Recommendations might be for following via the "Oil Use Warning Light" Change Timeline and is therefore irrelevant. The Final Arbiter in your present situation will be What You can SEE on your New Analog Oil Pressure Gauge from one moment to the next... :>)
 

Attachments

  • th-569722428.jpeg
    th-569722428.jpeg
    58.8 KB · Views: 1
Last edited:

emedlin

Original poster
Member
Jan 25, 2012
150
My walmart only had the synthetic blend. I hadn't looked for organic oil in awhile. Pushed for time I didn't really look around at other places for it. Also figured since synthetic has been the recommended oil for awhile it may have been hard to find. Although if I had looked around at more spots I could have probably found it. Will see how it does over the next few weeks.
 
  • Like
Reactions: mrrsm

Forum Statistics

Threads
23,336
Posts
638,064
Members
18,541
Latest member
33chevyrod

Members Online