- Nov 20, 2011
- 545
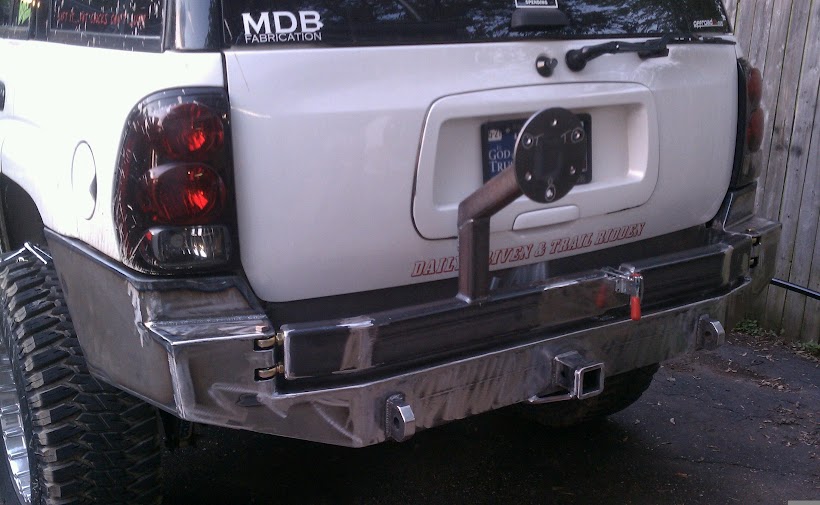
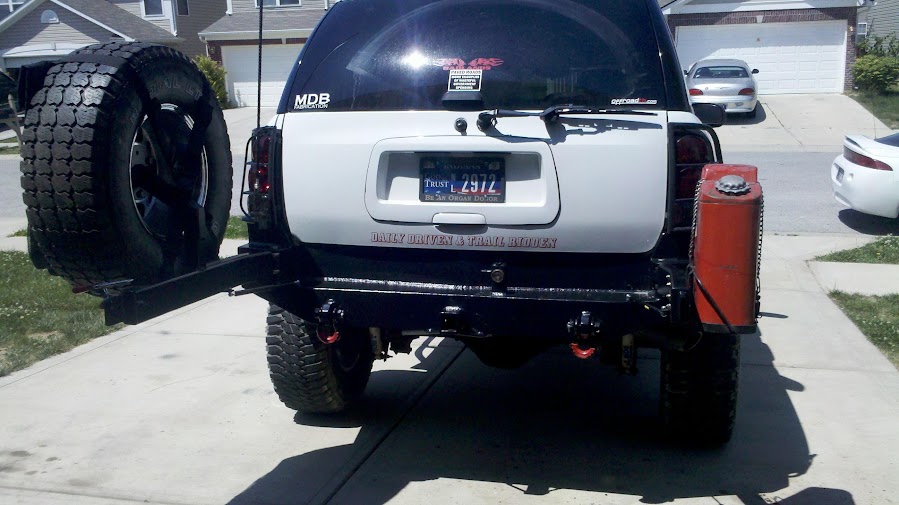
Not done yet, but here's a sneak peek...
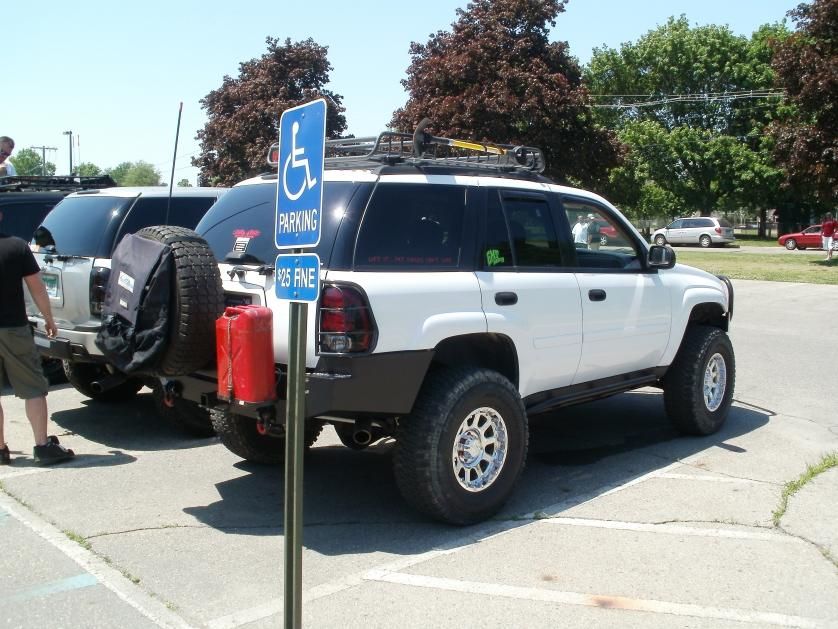
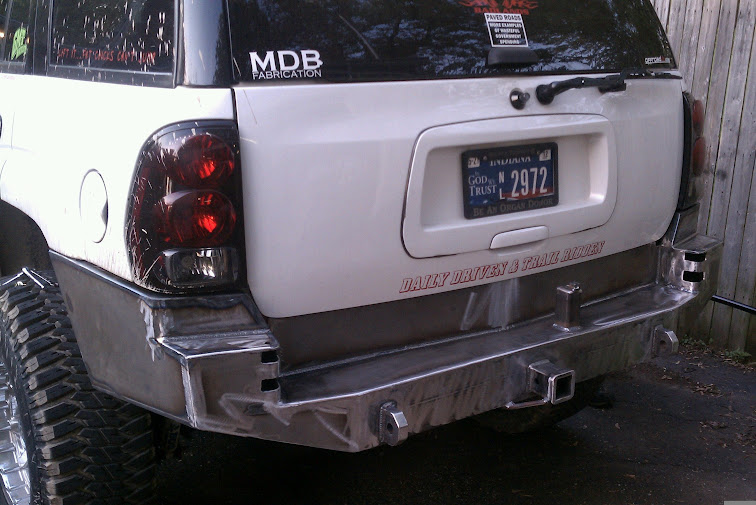
Still needs some gussets on the tire carrier, and little stuff here and there, but a teaser pic:
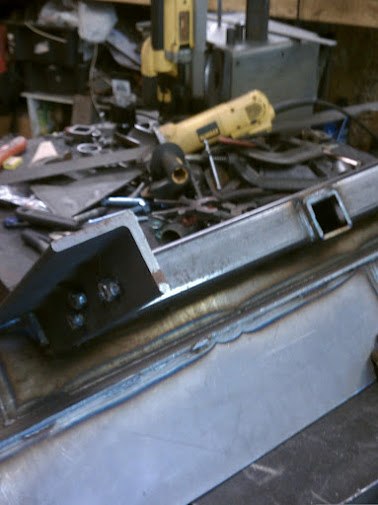
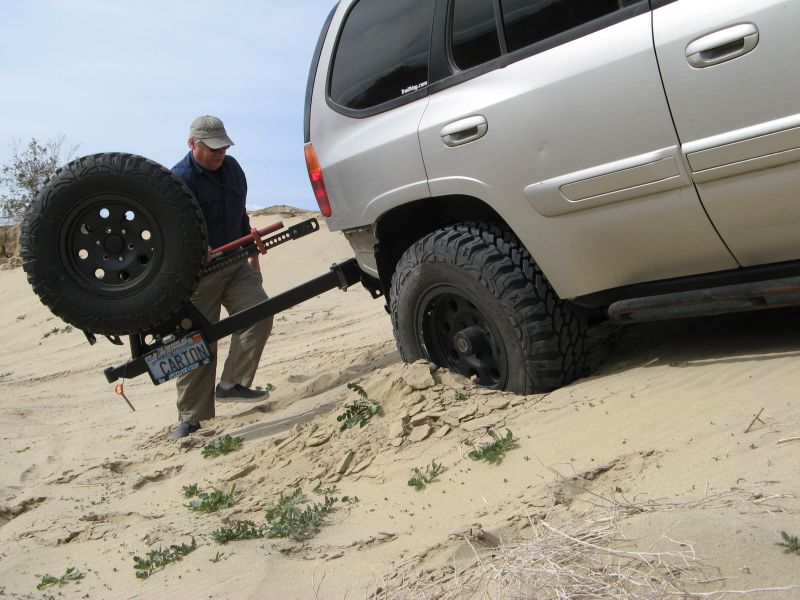
Real class 4 receiver that I wouldn't have a problem towing a car trailer or camper with, and/or using a load-distributing hitch with:
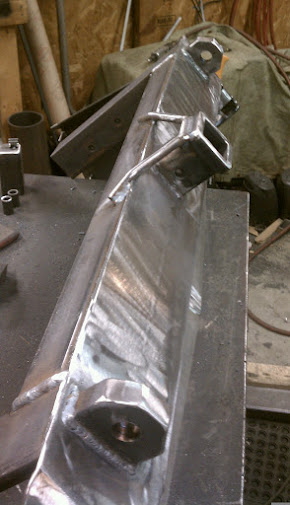
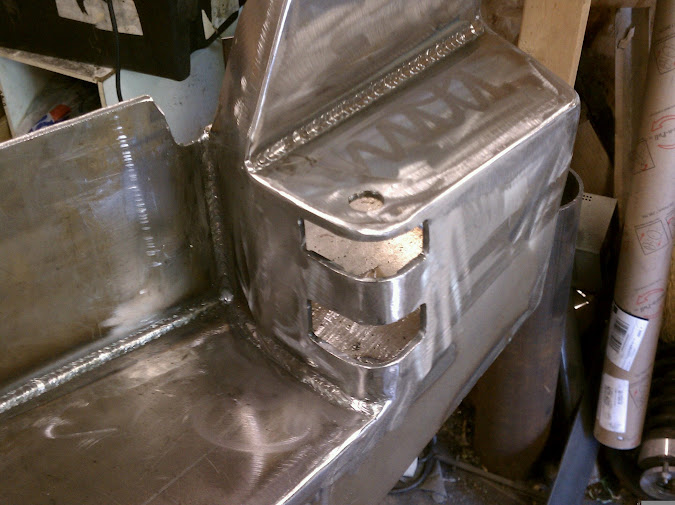
Progress on making the radii

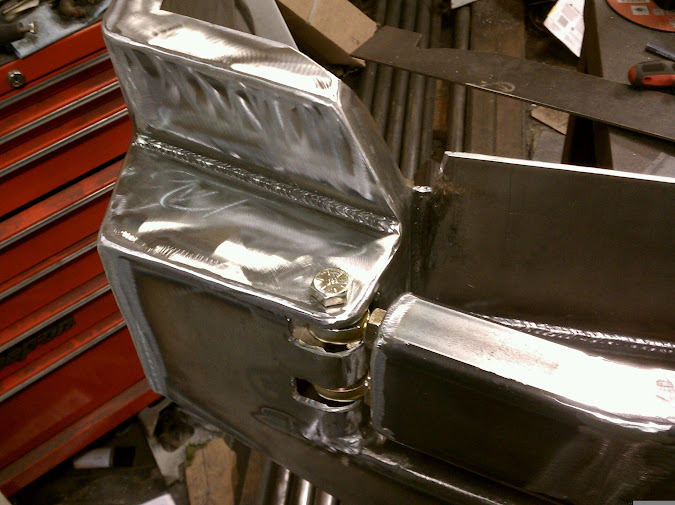
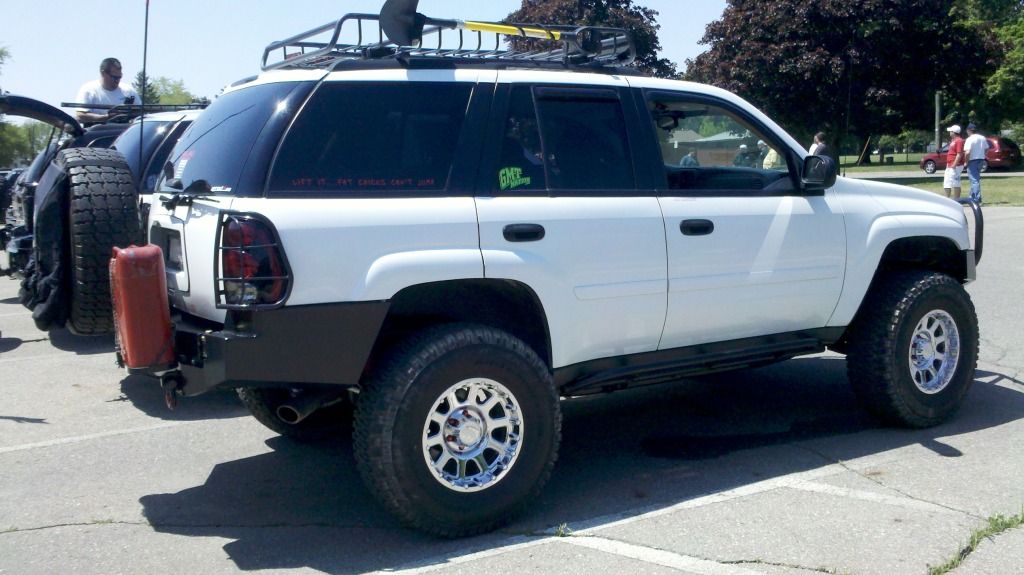
Add 1" to the center portion, and this would look good as just a standard step-bumper, without the tire carrier:
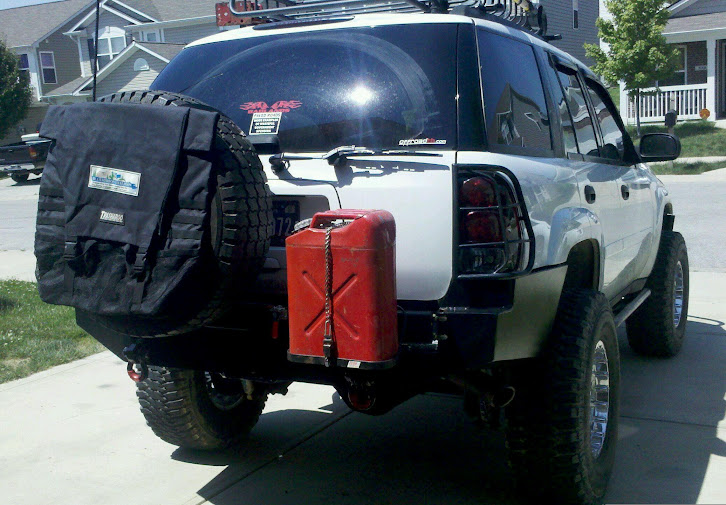
And with the 35" tire... Glass still opens with the tire in the "closed" position:

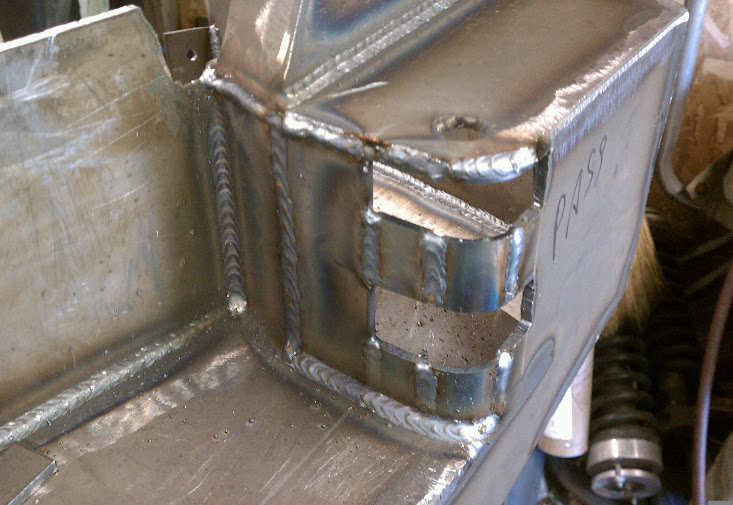
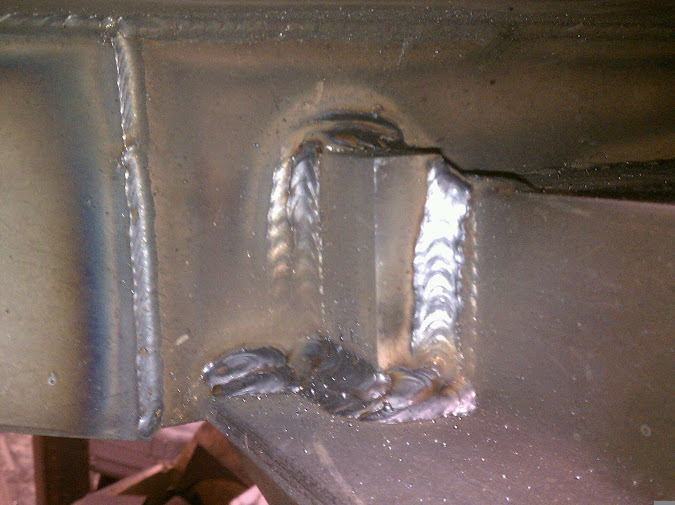
Yeah, and I don't think the shackle mounts are going anywhere... Tripple-pass welded at 210amps, all around the back side, directly to the 3x3x3/8" angle frame mounts...
Preliminarily, the pricing will be as follows:
- Standard body with single swing - $750
- 3" body lift with single swing/bearing - $850
- 3" body lift with dual swing - $1000
All the stuff that sets off this one... The details... Make it a GIANT PAIN IN THE ASS. This one -literally- had like $430 in PARTS COST (before powdercoat), let alone the literally 40 hours I have in it (total, probably 8 of that is sitting looking at it, doing the "design" on the fly), at this point in time (plus the ~25 or so that Kyle has been there helping)...
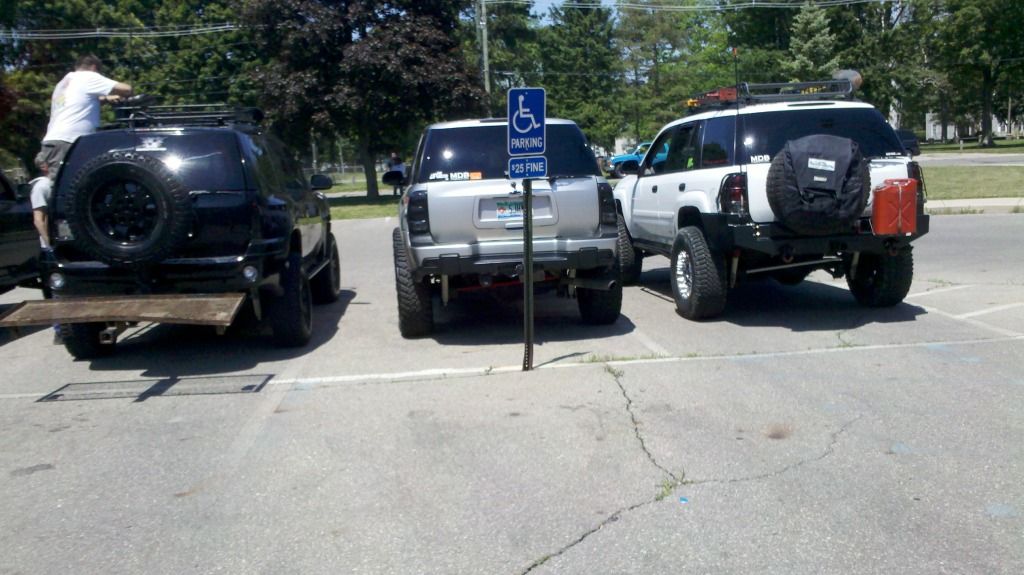
As an aside, a lot of the reason for splitting them on this one, was so he didn't have the full length of arm out there, just to get into the hatch. Kind of cuts down on being able to put stuff in if you've driven-thru a parking spot, or have parallel parked and there's somebody behind you. With the way we're mounting the jerry can holder on the other arm, without a jerry can in it, the lift gate will still open with just the tire swing open. The gas struts, which aren't on yet (tonight), are over-center when closed, so they should hold the gates closed just a little bit, then you pop them over center, and they open the gates up. Because of this, Kyle should be able to unlatch the tire side and swing it open, while the jerry can side will stay closed by itself... We'll see how well it actually works, but that's the plan. Because the tire is so large, though, and the mount offset a bit, he'll still be able to mount a 2' wide table on the tire side, similar to James'.
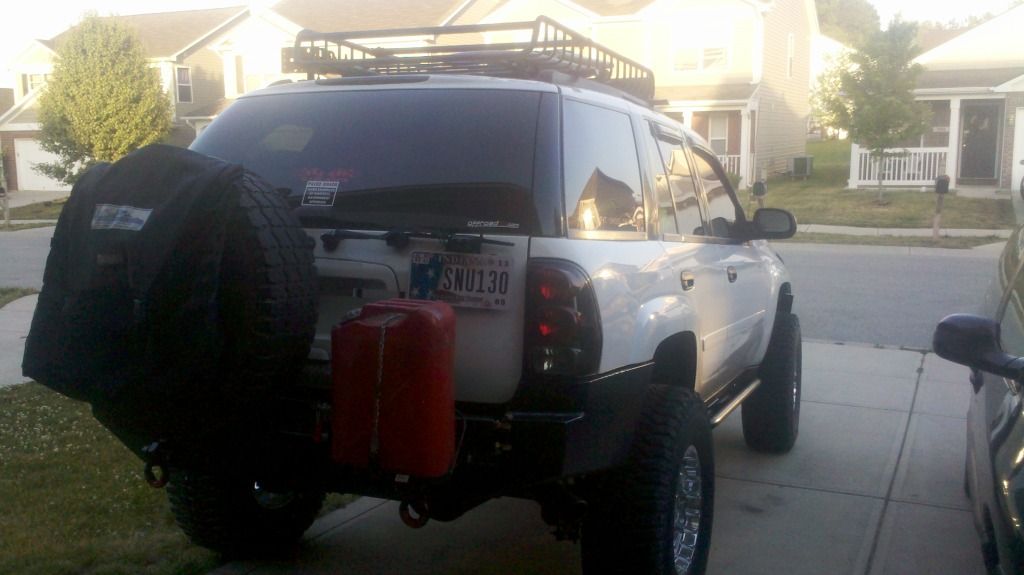
We're also putting a tab on the tire side, and a mating tab on the center latch post, so that he can put a padlock behind the arm, there, so somebody doesn't just come up and open his tire-carrier in a parking lot or garage. Also adds a little bit of security for the latch, even with a carabiner through it, since this style of latch doesn't come with a secondary safety-latch that you pull with your index finger like the straight latches can come with...
Mike
Still needs some gussets on the tire carrier, and little stuff here and there, but a teaser pic:
Real class 4 receiver that I wouldn't have a problem towing a car trailer or camper with, and/or using a load-distributing hitch with:
Progress on making the radii
Add 1" to the center portion, and this would look good as just a standard step-bumper, without the tire carrier:
And with the 35" tire... Glass still opens with the tire in the "closed" position:
Yeah, and I don't think the shackle mounts are going anywhere... Tripple-pass welded at 210amps, all around the back side, directly to the 3x3x3/8" angle frame mounts...
Preliminarily, the pricing will be as follows:
- Standard body with single swing - $750
- 3" body lift with single swing/bearing - $850
- 3" body lift with dual swing - $1000
All the stuff that sets off this one... The details... Make it a GIANT PAIN IN THE ASS. This one -literally- had like $430 in PARTS COST (before powdercoat), let alone the literally 40 hours I have in it (total, probably 8 of that is sitting looking at it, doing the "design" on the fly), at this point in time (plus the ~25 or so that Kyle has been there helping)...
As an aside, a lot of the reason for splitting them on this one, was so he didn't have the full length of arm out there, just to get into the hatch. Kind of cuts down on being able to put stuff in if you've driven-thru a parking spot, or have parallel parked and there's somebody behind you. With the way we're mounting the jerry can holder on the other arm, without a jerry can in it, the lift gate will still open with just the tire swing open. The gas struts, which aren't on yet (tonight), are over-center when closed, so they should hold the gates closed just a little bit, then you pop them over center, and they open the gates up. Because of this, Kyle should be able to unlatch the tire side and swing it open, while the jerry can side will stay closed by itself... We'll see how well it actually works, but that's the plan. Because the tire is so large, though, and the mount offset a bit, he'll still be able to mount a 2' wide table on the tire side, similar to James'.
We're also putting a tab on the tire side, and a mating tab on the center latch post, so that he can put a padlock behind the arm, there, so somebody doesn't just come up and open his tire-carrier in a parking lot or garage. Also adds a little bit of security for the latch, even with a carabiner through it, since this style of latch doesn't come with a secondary safety-latch that you pull with your index finger like the straight latches can come with...
Mike


 150%
150%