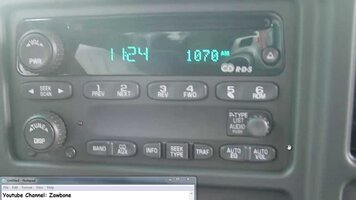
im trying to swap to leds in my 2005 colorado factory radio. i have been searching everywhere online for the polarity of the factory bulbs and cannot find them. does anyone have a link to a how to or anything that would show this? it has the exact same radio as a 2005 silverado. i have uploaded a picture of the same radio i have.
You are using an out of date browser. It may not display this or other websites correctly.
You should upgrade or use an alternative browser.
You should upgrade or use an alternative browser.
LED in factory radio
- Thread starter andrew5001
- Start date

Sierra117
Member
I realize this may be way too late for you, but it might help some others.
This stock GM/CHEV radio can also be found in vehicles such as Silverado, Sierra, Tahoe, Yukon, etc.


There are 3 bulbs that are 4mm, and 7 bulbs that are 3mm I believe. 10 altogether. It's all 12VDC and they're all in parallel.
I used 12V, 5mm LED bulbs for all 10 of them but it didn't go so smoothly where the 3mm bulbs were. Mostly because the 5mm legs were a bit too thick and wouldn't pass through the board so I just had to keep them short and solder them on the front of the board.
Using LED's for the radio is also tricky because it ends up giving you hot spots and uneven lighting across the entire faceplate. The row of buttons directly below the display ended up clearly dimmer than everything else because it's all lit by just 2 bulbs (5mm) which face the back of the black plastic faceplate cover, and there are a couple clear diffusers to spread the light across. Problem is most LEDs are fairly directional so the light doesn't spread well to begin with, whereas the stock bulbs don't have that problem and can also reflect off of the white cover on the front of the board.
The row of buttons directly below the display still lights up well enough, as much as stock if not a bit brighter, but the rest of the buttons, especially the volume and tune nobs, as well as the bottom row of buttons are far brighter. Maybe if I had matched up the LED sizes to the stock bulbs it would've turned out better perhaps. Depending on how particular you are, you may want to be prepared to have to figure out a way to brighten, dim, or diffuse some of the LED's to get even lighting across the entire faceplate. A few of the LED's are facing directly into a button all by themselves so no matter what size they are, they're going to be bright and create a hot spot.
Here's a link to a YouTube video which has a bunch of useful info in it that shows a complete teardown of this radio, along with the bulbs being replaced. It's stock bulbs being replaced with stock bulbs however. They don't install LED's, but it would give you a much better idea of what to expect.
This stock GM/CHEV radio can also be found in vehicles such as Silverado, Sierra, Tahoe, Yukon, etc.
There are 3 bulbs that are 4mm, and 7 bulbs that are 3mm I believe. 10 altogether. It's all 12VDC and they're all in parallel.
I used 12V, 5mm LED bulbs for all 10 of them but it didn't go so smoothly where the 3mm bulbs were. Mostly because the 5mm legs were a bit too thick and wouldn't pass through the board so I just had to keep them short and solder them on the front of the board.
Using LED's for the radio is also tricky because it ends up giving you hot spots and uneven lighting across the entire faceplate. The row of buttons directly below the display ended up clearly dimmer than everything else because it's all lit by just 2 bulbs (5mm) which face the back of the black plastic faceplate cover, and there are a couple clear diffusers to spread the light across. Problem is most LEDs are fairly directional so the light doesn't spread well to begin with, whereas the stock bulbs don't have that problem and can also reflect off of the white cover on the front of the board.
The row of buttons directly below the display still lights up well enough, as much as stock if not a bit brighter, but the rest of the buttons, especially the volume and tune nobs, as well as the bottom row of buttons are far brighter. Maybe if I had matched up the LED sizes to the stock bulbs it would've turned out better perhaps. Depending on how particular you are, you may want to be prepared to have to figure out a way to brighten, dim, or diffuse some of the LED's to get even lighting across the entire faceplate. A few of the LED's are facing directly into a button all by themselves so no matter what size they are, they're going to be bright and create a hot spot.
Here's a link to a YouTube video which has a bunch of useful info in it that shows a complete teardown of this radio, along with the bulbs being replaced. It's stock bulbs being replaced with stock bulbs however. They don't install LED's, but it would give you a much better idea of what to expect.
Last edited:
Sierra117
Member
Here's a picture of the radio with the blue LED's. I used blue because I ordered a stepper motor kit for the instrument cluster and it came with blue, red, and white LED's. I used the white for the gauges, so I chose blue instead of red for the radio.


As you can see, some buttons light up brighter than others and there are some hot spots. I tried to add a few layers of foam inside the volume and tune knobs to see if I could dim the light a bit, but it really didn't seem to make a difference, so no point in trying elsewhere. I'm not sure exactly how you could get LED lights to be more even without hot spots in this radio, other than maybe using 3mm bulbs like where they did stock. I'm not entirely convinced myself that simply using a 3mm bulb would be that much dimmer considering how all the bulbs are placed behind the buttons. It's much better than all the lights being burnt out though.
As you can see, some buttons light up brighter than others and there are some hot spots. I tried to add a few layers of foam inside the volume and tune knobs to see if I could dim the light a bit, but it really didn't seem to make a difference, so no point in trying elsewhere. I'm not sure exactly how you could get LED lights to be more even without hot spots in this radio, other than maybe using 3mm bulbs like where they did stock. I'm not entirely convinced myself that simply using a 3mm bulb would be that much dimmer considering how all the bulbs are placed behind the buttons. It's much better than all the lights being burnt out though.
Mooseman
Moderator
Sierra117
Member
Black permanent marker?
How much dimmer did it make the brightness? If say the LED's were a 10/10 brightness at first, would you say the marker dropped them to like a 8/10 or maybe 4/10?
Did the color stay the same? If you had the same LED's but some with black marker and some without, would you see any difference in color?
Is it difficult to get an even marker layer so the light spread is consistent? I'd assume multiple layers of marker will keep dimming the brightness wouldn't it?
How about removing the black marker from the bulb? Will it come off with some rubbing alcohol if it were too much dimming for one's liking?
Personally I find my bottom row buttons and the knobs to be a bit too bright, but the row of buttons directly below the display seem kind of dim. I'd guess once the brighter buttons were dimmed somewhat, that the presently dim buttons wouldn't seem as dim anymore though, so finding a way to brighten the dims somehow may not be necessary.
I have been wondering if I had used a white out pen on some of the black plastic faceplate for the buttons directly below the display, whether or not that would've reflected more light into the clear spreader/diffuser and made them brighter. With my instrument cluster, I ended up soldering the LED's as high as I could but facing down so they look like a 'spider' with two legs and because the board is white in those locations, it's not much dimmer overall yet spreads the light very evenly on the gauge overlay. Not enough room to do 'spider' LED's with the radio unfortunately, but maybe the white out would have helped.
Mooseman
Moderator
I didn't cover them 100% since the black marker was totally opaque. I had to experiment as to how much I covered them. I think I covered them up like 80-90% and it was a nice low light for those switches.
IIRC, it came off with WD40.How about removing the black marker from the bulb? Will it come off with some rubbing alcohol if it were too much dimming for one's liking?
Sierra117
Member
Initially:


Now:


The left pic shows the balance and uniformity better and the right pic shows the blue color better. There's only miniscule differences now.
I ended up using some packing foam I had lying around to dim the hot spots and even out the rest. Some was clear-ish white, about 1/8 inch thick, and fairly dense, while some was black, about 3/8 inch thick, and very soft and porous.
For the knobs and bottom row button hot spots, I cut out the black foam to fit into them. The knobs and buttons are all indented and hollow inside where you can stuff the foam into. I cut pretty precisely so the foam wasn't compressed very much.
Where there is 1 button that's split into 2 selections, I had to use a much smaller piece of black foam and only cover just the bulb in the center of the button, to block the hottest spot. That way the stock diffusers inside could spread the light to the outer sections of the button which gave an even glow. This all worked extremely well. I only ever needed 1 layer of black foam.
The row of buttons directly below the display got filled with the clear-ish white foam since there's only 2 bulbs for that row of 4 buttons, which have 2 sections each. This added a secondary diffusion layer to the stock diffusers, which weren't spreading the light well enough on their own. This also worked out extremely well. I only ever needed 1 layer of white foam.
I'm pleased with how it's finally turned out.
Now:
The left pic shows the balance and uniformity better and the right pic shows the blue color better. There's only miniscule differences now.
I ended up using some packing foam I had lying around to dim the hot spots and even out the rest. Some was clear-ish white, about 1/8 inch thick, and fairly dense, while some was black, about 3/8 inch thick, and very soft and porous.
For the knobs and bottom row button hot spots, I cut out the black foam to fit into them. The knobs and buttons are all indented and hollow inside where you can stuff the foam into. I cut pretty precisely so the foam wasn't compressed very much.
Where there is 1 button that's split into 2 selections, I had to use a much smaller piece of black foam and only cover just the bulb in the center of the button, to block the hottest spot. That way the stock diffusers inside could spread the light to the outer sections of the button which gave an even glow. This all worked extremely well. I only ever needed 1 layer of black foam.
The row of buttons directly below the display got filled with the clear-ish white foam since there's only 2 bulbs for that row of 4 buttons, which have 2 sections each. This added a secondary diffusion layer to the stock diffusers, which weren't spreading the light well enough on their own. This also worked out extremely well. I only ever needed 1 layer of white foam.
I'm pleased with how it's finally turned out.