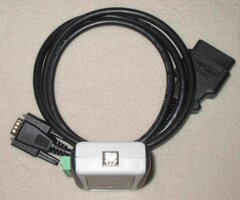
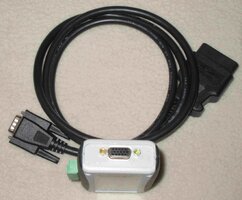
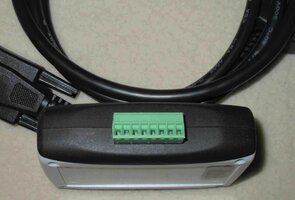
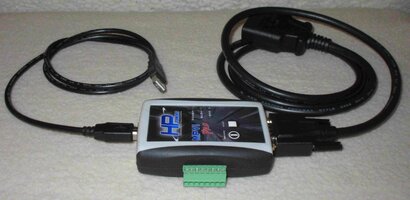
How to Use HP Tuners vs. Y2K Silverado LM7 & TSP Peformance Cam

mrrsm

Original poster
Lifetime VIP Donor
Supporting Donor
Member
Oct 22, 2015
8,198
Tampa Bay Area
To begin this HP Tuners Thread… The FIRST Place I went directly to was THIS Site:


… and Signed Up as a New Member on Friday, June 28th, 2019, Filled in My Basic Profile as “MRRSM” and after Navigating to the Main Page...Sought out and Downloaded ALL of the Introductory FAQs and Main Links to Common Q&A Issues for Beginners in order to Save Time and Help Myself to a Wide Array of EXCELLENT Information, Documents and Links to Videos:


Next Up… This GMT Nation HP Tuners Thread will be a Branch-Off from the Original “Hoping for Loping” Thread and will cover the PCM-ECM Clone, Swap (1 for 1) and HPT “Tuning” of the 2000 Chevrolet Silverado 1500 5.3L Long Bed Truck.

Major PCM-ECM Programmer and Controller Hardware/Software Involved:

(1) A Bosch Vetronix “GYMKO” Tech 2 Full Scanner Kit.

(2) A Dedicated Dell M65 Laptop with the Windows XP Professional Ver. SP3 along with TIS2000 and a USB “HWK” (Hard Ware Key) aka ‘Dongle’ Security Validation Key.

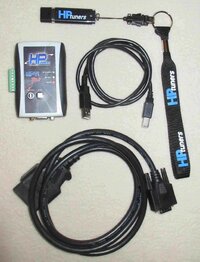
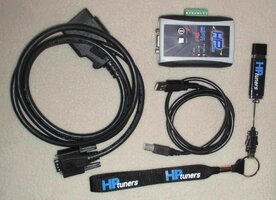
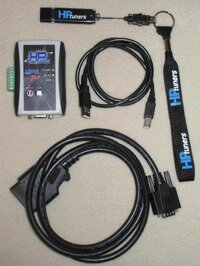
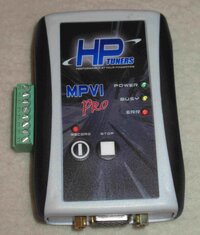
(3) A HP Tuners MVPI 1 Programmer, Cabling, Datalogger and Installation Software Kit.

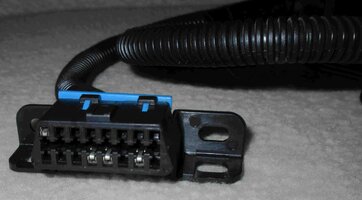
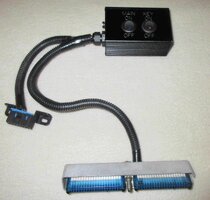
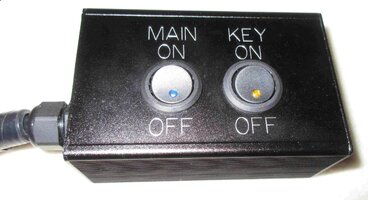
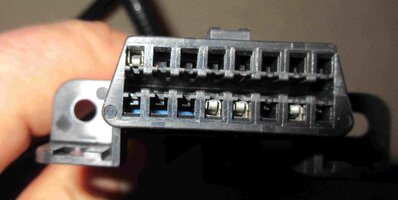
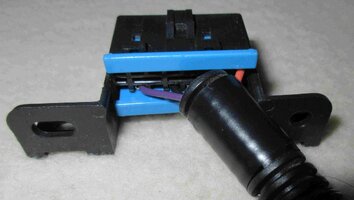
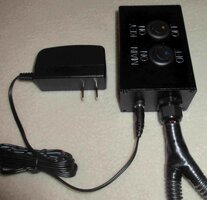
(4) A GM LS ‘Bench Top” Power and Communication “Blue” Harness (arrived Friday, June 28, 2019)

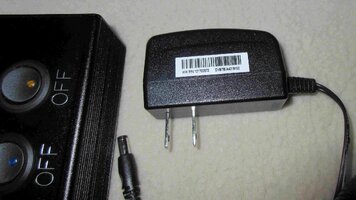
(5) An AC/DC Adjustable Power Supply.

(6) An ES5000 “Booster PAC” 1500 AMP Battery Power Supply to Power the Tech 2 & PCM through the DLC during SPS and Tech 2 use inside of the Y2K Truck.

(7) Two GM PCM-ECUs Circa 1999-2006 (One for “Bench Top” Tuning; One for the Y2K Truck.

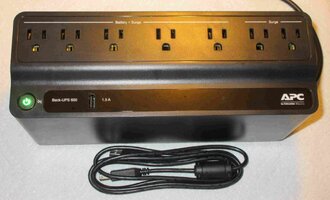
(8) UPS-750 Uninterrupted Power Supply to Guarantee Steady Power to BOTH AC/DC Power Converters due to frequent Power Fluctuations from Thunderstorm Outages down here in Florida.

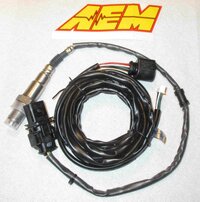
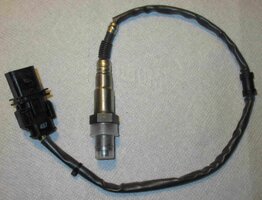
(9) Wide Band O2 Analog Sensor and Wiring (The HP Tuners MVPI-1 is equipped to Accept, Read and Store this “Fine Grain” Stoichiometric Data).

Engine Type and Internal/External Component Considerations for HPT Tuning:

(1) GM 5.3L LM-7 V8

(2) Stock Throttle Body- using Non-Electronic Cable Control

(3) DNA Stainless Steel “Shorty” Exhaust Headers

(4) Stock Dual Catalytic Converters

(5) Full 3” CAT-back Exhaust

(6) Texas Speed and Performance Low Lift Stage 2 Model # 25-LL212218112 .550”/.550” Camshaft

(7) Locating and Welding in a New Wide Band O2 Sensor Bung close to the "Y" Pipe Collector

Naturally… it is “Early in The Game” of trying to figure out the best ways to work with HP Tuners between “paired” PCM-ECMS when having one mounted inside the Y2K Truck...while the other serves as the “Tuner Platform” to Create and Manipulate all of the variations with the HPT Tunes and get the Truck to Start, Idle, Accelerate, Shift and Decelerate while trying to keep “Stoich” as close to 14.7:1 as possible and avoid running Too Lean and either Stalling out and hurting either Engine or the 4L60E Transmission along the way. And so here is where I have many questions which will need answering by searching on the HP Tuners Site First ...before I set up all of this Gear and finally get to work on things:

(Q1) Is it possible to “Clone” a GM PCM-ECU with an Identical Vehicle Identification Number and Factory Calibration that match IN EVERY RESPECT?

(A1) In a Word: Yes. The GM TIS2000 SPS Program has a feature during the PASS-THRU to Program a Replacement PCM and will pause to allow the Tech 2 SPS Programmer to Key in the Identical VIN and then load the latest Calibration(s) onto the PCM-ECM.

(Q2) Will Cloning the PCM cause problems with the Y2K Truck BCM?

(A2) No… As long as there is a proper amount of Stable Voltage DC to keep the “GYMKO” Tech 2 AND The PCM powered throughout the SPS PASS-THRU Calibration procedures, there should not be a problem. In particular… the Early GM OBD2 Based PCM-ECMS are interchangeable without being disruptive to other Body Control parameters such as with the Air Bags.

(Q3) Will Cloning a New PCM cause problems with the accuracy of the Odometer?

(A3) No. The Odometer readings are maintained within the Truck BCM. (See Anecdotal Image of an HP Tuners Thread Posting...)

UCANSWAPECMSWITHCABLETBCONTROL.jpg

(Q4) HP Tuners has Very Steep Learning Curve… What Training Resources are available?

(A4) HP Tuners has a very popular HPT Forum where Owners-Users and even Professional Tuners have many Threads and Member Resources on related topics to assist with Learning. Youtube also offers a great many very well documented Training Videos; some which are surprisingly quite particular and very close to the issues and parameters I’ll have to overcome with my Y2K Truck.

Those particular Videos will help me to Navigate and become Familiar with How Best to Use the HP Tuners Hardware, Software, “Hands on Tuning” and the Datalogging necessary for the Trial and Error Datalogs. These actions will be indispensable for knowing where to make corrections and improvements of a variety of Tunes that will change the LM7 from being a “Stock as a Clock” Motor over to a Better Running, Jumping, Leaping and … “Hopefully Loping” Performance Engine. :>)

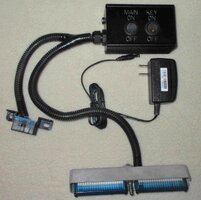
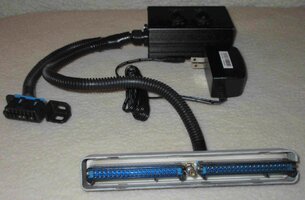
I will post the YT Links to the Most relevant Videos in due time. One very important GMT Nation Member has come forward and offered Aid and Assistance regarding How to Use HP Tuners. In More Ways than One... He is @2advanced … and I’m very grateful for his generous assistance with some additional Tunes that I can begin experimenting with very soon. Earlier this afternoon… The Professional Quality LS PCM OBD2 Power Harness via eBay arrived... with a few images attached below for display:
PROLSHARNESS1.jpgPROLSHARNESS2.jpgPROLSHARNESS3.jpgPROLSHARNESS5.jpgPROLSHARNESS6.jpgPROLSHARNESS7.jpgPROLSHARNESS8.jpgPROLSHARNESS9.jpgPROLSHARNESS12.jpgPROLSHARNESS14.jpgPROLSHARNESS15.jpgPROLSHARNESS16.jpgPROLSHARNESS4.jpgPROLSHARNESS11.jpg

More to Follow as the Rest of the HP Tuners Hardware & Software arrives...
 
Last edited:

mrrsm

Original poster
Lifetime VIP Donor
Supporting Donor
Member
Oct 22, 2015
8,198
Tampa Bay Area
Okay… Today’s HPT Thread Posting will cover Wide Band Oxygen Sensors ...and Why Tuners NEED such things for the purposes of literally “Fine Tuning”...The “Performance Tune” inside of any PCM-ECM:

In general… Most modern OBD2 Type Power Train and Electronic Control Modules require up to (4) Standard O2 Sensors to STRICTLY report whenever conditions of Perfect Stoichiometric Conditions have been reached after the the Engine Warms Up and the PCM adjusts the EFI Pulse Width Modulation to try and keep the Engine running at a “Clean Burning” 14.7:1 Air to Fuel Ratio.

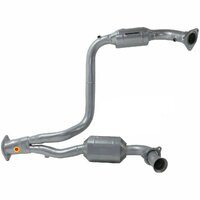
Generally, for V6 and V 8 Engines, there are Two Upstream O2 Sensors that collect Oxygen Concentration information BEFORE the Exhaust Stream(s) reached the Catalytic Converter(s) and there are Two O2 Sensors placed AFTER the CAT to confirm it efficiency for EPA Purposes. See Attached Image of an LS Stock Y-Pipe with Yellow/Red Dot to locate where the Weld On WB O2 Sensor Bung needs to be; but re-positioned at 90 Degrees from THAT location on that image, so the O2 Sensor “Innards” are positioned at a Right Angle to the Exhaust Stream and Water and Exhaust Junk cannot infiltrate and damage the Bosch WB O2 Sensor. I hate having to locate that O2 Bung so far away from the Inlet side of the Dual CATs ... but there doesn't seem to be any other way of getting "a taste" of the Blended Exhaust Streams in any other location along this "Y-Pipe":

DUALCATEXHAUST.jpg

However… Once we venture off the reservation of the GM OEM PCM-ECU Stock VE Tables, Spark Advance and Fuel Enrichment, etc., that are generally quite Conservatively laid out in the Main Tables for things like VE Tables dealing with MAF or MAP vs. RPM for example… if your F/A Ratios Lean out suddenly at WOT (Wide Open Throttle)… Very Serious damage can occur to any engine,including Damaging Piston Heads through Detonation and so forth.

On the lower end of these related issues are problems of having Very Poor Drive-ability, and excessive amounts of Fuel getting Dumped into the CATs. Also there can be problems of Poor Idling, Back-Fires and often… Complete Stall Outs as well after experiencing big changes in Air Temperature. So ALL of these issues and many more almost Guarantee that you WILL need to “Custom Tune The PCM”. WOW, Huh? Who knew these problems would occur just after making a Simple Change of the LS Engine Roller Camshaft?

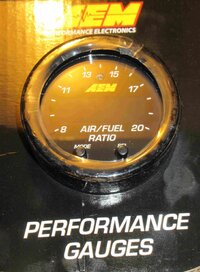
Enter the Bosch Version 4.9 O2 Sensor which extends the RANGE of Sensitivity and allow the Driver to see a Well Lit Gauge and WARN him/her that the F/A Conditions present in ALL RPM Ranges may be entering the territory of Engine Destruction. For Genuine “Tuners” however, it allows for Datalogging these discrepancies so that he/she can make necessary adjustment to reign these issues in and shoot for a perfect “Stoich” of 14.7:1 all the time. And when this is NOT possible… The “Tuner” can make adjustments to a whole range of Engine Performance Parameters that can measure either a Lean Down to F/A Ratio of say… a Dangerous 16:1 F/A Ratio at WOT

When called for, the "Tuner" has the ability to Enrich the F/A Stream and maintain a good operational balance under High Performance conditions at WOT with a F/A Ratio of say a “FAT” 13:1 when at Higher RPM and it is called for. Datalogging what the WB O2 has to report along with many other Engine Performance Sensor and Module Parametersis critical knowledge before making such changes. Afterwards… HP Tuners HW & SW to allow the “Tuner” to load various “Freshly Adjusted Tunes” into the PCM. Then those can either be Dyno’d or Re-Tested during Repeated Datalogging Test Drives and Played Back on the HP Tuners Laptop for further “Tune Tweaking”.

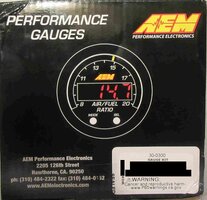
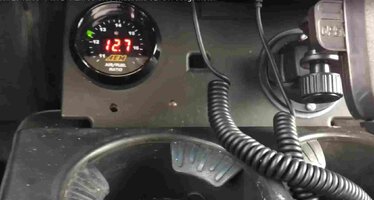
But to Start with… You first must acquire a Decent Wide Band O2 Kit like the AEM Model # 30-0300 System. Then it follows on that the WB O2 Sensor and Supporting Analog and Digital Combo Gauge Components will have to get spread out into, onto and under the Vehicle and correctly installed.

This First Video is quite Generic (and as it happens… a bit Funny and Entertaining as well because “Frenchy” here looks like he has a Very Bad Temper and gets MAD AS HELL at the Drop of a Hat! ...LOL). Even so, this Video is still comprehensive enough to provide a very good idea of what needs doing to get a Wide Band O2 System Kit pre-positioned and then properly installed inside of the Vehicle. His choice for this Video Installation was... The AEM WB O2 Sensor Kit.

I’ll cover connecting up the Power and HP Tuners External Analog Connections to the Pro MVPI-1 Unit in a later post about Datalogging with HPT. For now though… this covers pretty much just about everything the average Mechanic needs to know on this Topic:


...and here is a Video focusing on a Turbocharged Silverado “Sleeper” having the same AEM Kit Installed and Set Up:


Did the VOP just say… “Wee Wout...” ? LOL :>)
 
Last edited:

mrrsm

Original poster
Lifetime VIP Donor
Supporting Donor
Member
Oct 22, 2015
8,198
Tampa Bay Area
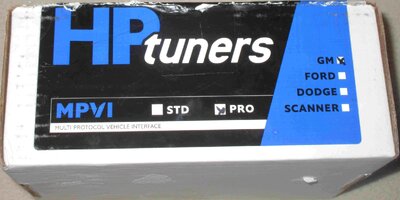
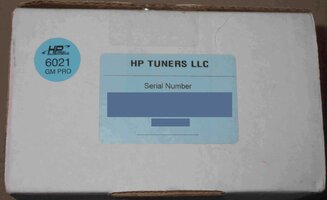
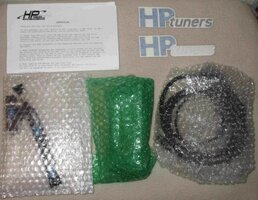
The HP Tuners Complete Product # 6021 Pro MVPI-1 Kit arrived from eBay on Tuesday, July 2nd, 2019. I posted a RFI at hptuners.com on the Questions I have about whether or not this Product Serial Port Device and the VCM Suite Hardware and Software Serial Number have to be "Re-Registered" and Transferred over to my New Account as MRRSM over at the HP Tuners Web Page. The "Un-Boxing" Images are attached below:

HPTUNERSMVPI1PRO1.jpgHPTUNERSMVPI1PRO2.jpgHPTUNERSMVPI1PRO3.jpgHPTUNERSMVPI1PRO4.jpgHPTUNERSMVPI1PRO5.jpgHPTUNERSMVPI1PRO6.jpgHPTUNERSMVPI1PRO7.jpgHPTUNERSMVPI1PRO8.jpgHPTUNERSMVPI1PRO9.jpgHPTUNERSMVPI1PRO10.jpgHPTUNERSMVPI1PRO12.jpgHPTUNERSMVPI1PRO11.jpg
 

mrrsm

Original poster
Lifetime VIP Donor
Supporting Donor
Member
Oct 22, 2015
8,198
Tampa Bay Area
Part 1 of 2 Parts...

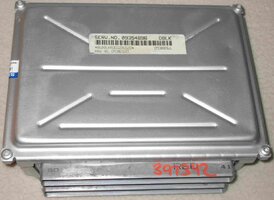
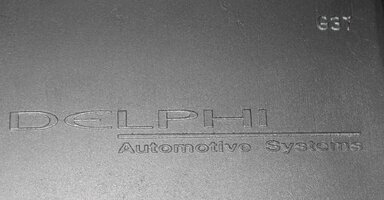
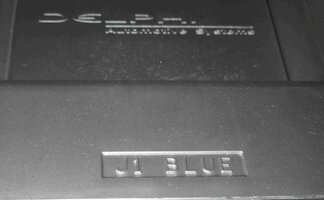
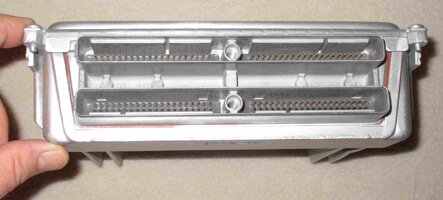
The 2000 GM “Clone” PCM-ECM Service Part # 09354896 (DBLK) AKA “Blue” Model P01 Computer arrived this Afternoon on Friday, July 5th, 2019. These are the Wire Color Specs and Pinout Definitions for this Computer:

http://harrishighperformance.com/?page_id=154

GM 09354896 LSX Wiring Pinout

Truck 1999+ 5.3L Connector C1 BLUE

Pin Wire Color Circuit No. Function

1 BLK/WHT 451 PCM Ground
2 LT GRN 1867 Crankshaft Position Sensor B+ Supply
3 PNK/BLK 1746 Injector 3 Control
4 LT GRN/BLK 1745 Injector 2 Control
5 — — Not Used
6 — — Not Used
7 — — Not Used
8 — — Not Used
9 — — Not Used
10 — — Not Used
11 LT BLU 1876 Knock Sensor Signal Rear
12 DK BLU/WHT 1869 Crankshaft Position Sensor Signal
13 ORN/BLK 463 Requested Torque Signal (NW7)
14 ORN/BLK 1061 UART Serial Data (drive by wire only)
15 DK BLU/WHT 774 UART Serial Data (drive by wire only)
16 — — Not Used
17 DK BLU 1225 Transmission Fluid Pressure Switch B
18 RED 1226 Transmission Fluid Pressure Switch C
19 PNK 439 PCM Ignition Supply
20 ORN 440 PCM Battery Supply
21 YEL/BLK 1868 Crankshaft Position Sensor Ground
22 — — Not Used
23 PPL 719 Sensor Ground EGR
24 — — Not Used
25 TAN 1671 HO2S Signal Low B2S2 (w/Case Ground O2 Sensors)
25 TAN 413 HO2S Signal Low B2S2 (w/Isolated Ground O2 Sensors)
26 TAN 1667 HO2S Signal Low B2S1 (w/Case Ground O2 Sensors)
26 TAN 413 HO2S Signal Low B2S1 (w/Isolated Ground O2 Sensors)
27 — — Not Used
28 TAN/WHT 1669 HO2S Signal Low B1S2 (w/Case Ground O2 Sensors)
28 TAN 413 HO2S Signal Low B1S2 (w/Isolated Ground O2 Sensors)
29 TAN/WHT 1653 HO2S Signal Low B1S1 (w/Case Ground O2 Sensors)
29 TAN 413 HO2S Signal Low B1S1 (w/Isolated Ground O2 Sensors)
30 LT GRN 1478 Engine Coolant Level Switch
31 — — Not Used
32 BLK/WHT 771 PRND A Input
33 PPL 420 TCC Brake Switch
34 WHT 776 PRND P Input – PCM can be programmed to accept a SINGLE WIRE park/neutral signal on this PIN, if no trans mounted range sensor is present
35 GRA 48 Clutch Switch Signal (manual trans)
36 BLK 1744 Injector 1 Control
37 YEL/BLK 846 Injector 6 Control
38 PNK/WHT 1101 Damping Lift/Drive Signal
39 — — Not Used
40 BLK/WHT 451 PCM Ground
41 BLK 407 Sensor Ground (Trans) w/Case grounded o2 Sensors
41 GRY 720 Sensor Ground (Trans, ETC) w/Isolated Ground O2 Sensors
42 — — Not Used – ADD PIN HERE FOR FAN 1 RELAY CONTROL
43 RED/BLK 877 Injector 7 Control
44 LT BLU/BLK 844 Injector 4 Control
45 GRA 474 Fuel Tank Pressure Sensor 5V Reference
46 GRA 416 TP Sensor 5V Reference
47 GRA 597 MAP Sensor 5V Reference
48 GRA 596 EGR Pintle Position Sensor 5V Reference
49-50 — — Not Used
51 DK BLU 496 Knock Sensor Signal Front
52 — — Not Used
53 BLK 470 Fuel Tank Pressure Sensor Ground
54 BLK 452 TP Sensor Ground
55 BRN 1456 EGR Pintle Position Sensor Signal
56 — — Not Used
57 ORN 440 PCM Battery Supply
58 DK GRN 1049 Serial Data to OBD2 Port
59 YEL 710 Serial Data to BCM
60 ORN/BLK 469 MAP Sensor Ground
61 PNK/BLK 632 CMP Sensor Ground
62 — — Not Used
63 GRY 720 Sensor Ground (ETC) w/case grounded o2 sensors
63 TAN 413 Sensor Ground (HO2S Low Signal) w/isolated grounded o2 sensors
64 — — Not Used
65 PPL 1670 HO2S Signal High Bank 2 Sensor 2
66 PPL 1666 HO2S Signal High Bank 2 Sensor 1
67 — — Not Used
68 PPL/WHT 1668 HO2S Signal High Bank 1 Sensor 2
69 PPL/WHT 1665 HO2S Signal High Bank 1 Sensor 1
70 BRN 1174 Low Oil Level Switch
71 — — Not Used – ADD PIN HERE FOR TOW/HAUL MODE SWITCH INPUT (programming required to make function)
72 YEL 772 PRND B Input
73 BRN/WHT 633 Camshaft Position (CMP) Sensor Signal
74 YEL 410 Engine Coolant Temperature (ECT) Sensor Signal
75 PNK 1020 PCM Ignition Supply
76 BLK/WHT 845 Injector 5 Control
77 DK BLU/WHT 878 Injector 8 Control
78 — — Not Used
79 WHT 687 3-2 Shift Solenoid Control
80 ORN/BLK 510 Fuel Level Sensor Ground

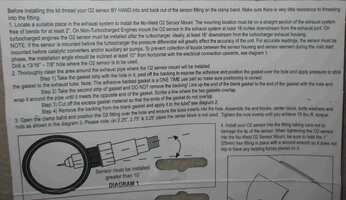
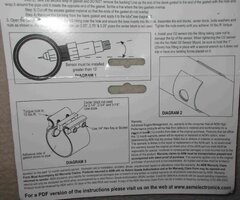
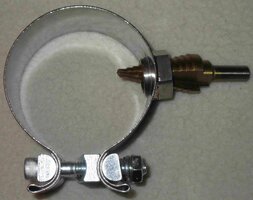
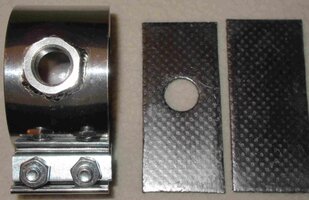
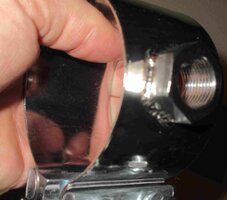
I’ve decided that in order to simplify the Wide Band O2 Sensor Installation… Rather than Lug and Hike around my MIG Welder and Support Gear and try to Weld in a Permanent Bung into the 5.3L “Y” Pipe , I’ll use and “External Stainless Steel Bung Sleeve” instead. I’ll literally have to “Choose a Side” Upstream of BOTH CATs and after establishing a Good Location between 3 & 9 O'clock Positions on one of the Two Bank Exhaust Down Pipes (probably the one on the Passenger Side).

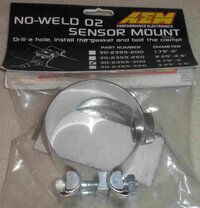
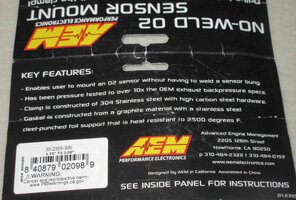
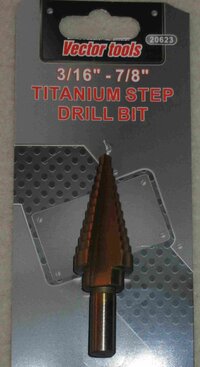
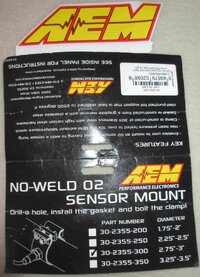
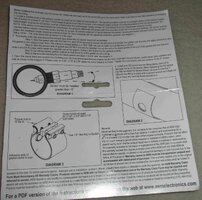
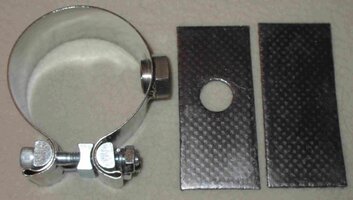
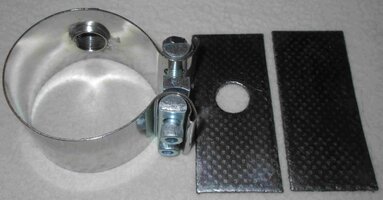
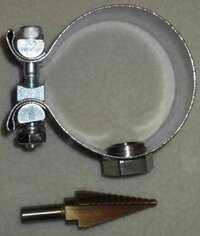
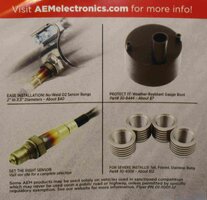
Next, I’ll use a Titanium Graduated Step Drill and Drill Out a Hole that is between 11/16” and 7/8” through the Pipe and then fit the outer Pipe with an AEM O2 S/S Band Style Bung Adapter with Graphite Impregnated Seals and simply Tighten sown the Two Fasteners to hold it in Place. I’m trying to find the Best Price on the AEM Complete Wide Band/Bosch O2 Sensor Harness Kit...and when I see the one I want…. I’ll pounce and grab the Last Expensive Component needed for this entire Hardware Acquisition. See the Attached Images for Today’s Update:

IMG_2031.jpgIMG_2035.jpgIMG_2037.jpgIMG_2039.jpgIMG_2043.jpgIMG_2048.jpgIMG_2053.jpgIMG_2057.jpgIMG_2060.jpgIMG_2061.jpgIMG_2064.jpgIMG_2066.jpgIMG_2033.jpgIMG_2036.jpgIMG_2046.jpgIMG_2051.jpgIMG_2059.jpgIMG_2062.jpgIMG_2067.jpg

Part 2 of 2 Parts Follows...
 
Last edited:
mrrsm

Original poster
Lifetime VIP Donor
Supporting Donor
Member
Oct 22, 2015
8,198
Tampa Bay Area
Part 2 of 2 Parts...

Truck 1999 5.3L Connector C2 RED

Pin Wire Color Circuit No. Function

1 BLK/WHT 451 PCM Ground
2 BRN 418 TCC Control Solenoid
3 TAN 1465 Fuel Pump Relay Control – Secondary
4 — — Not Used
5 TAN/BLK 464 Deliverd Torque Signal
6 RED/BLK 1228 Transmission Fluid Pressure Control Solenoid High
7 RED 1676 EGR Solenoid Supply
8 LT BLU/WHT 1229 Transmission Fluid Pressure Control Solenoid Low
9 DK GRN/WHT 465 Fuel Pump Relay Control
10 WHT 121 Engine Speed (Tach) Output Signal
11 DK BLU 604 A/C High Pressure Recirculation Switch
12 — — Not Used
13 LT BLU/BLK 396 Cruise Control Engage Signal
14 — — Not Used
15 BRN 25 Generator L Terminal (Alternator turn on signal)
16 GRA/BLK 1694 4 Wheel Drive Switch Signal Low (KEEP IF USING STOCK TRANSFER CASE IN A 4WD APPLACTION, WITH VSS ON OUTPUT OF TRANSFER CASE.
17 DK GRN/WHT 762 A/C Request Signal
18 — — Not Used
19 BLK/WHT 1695 4 Wheel Drive Front Axle Switch
20 LT GRN/BLK 822 Vehicle Speed Sensor (VSS) Reference Low
21 PPL/WHT 821 Vehicle Speed Sensor (VSS) Signal
22 RED/BLK 1230 Vehicle Speed Sensor (VSS) Signal (4L80E Only)
23 DK BLU/WHT 1231 Vehicle Speed Sensor (VSS) Reference Low (4L80E Only)
24 DK BLU 417 TP Sensor Signal
25 TAN 472 IAT Sensor Signal
26 PPL 2121 Ignition Control 1
27 RED 2127 Ignition Control 7
28 LT BLU/WHT 2126 Ignition Control 6
29 DK GRN/WHT 2124 Ignition Control 4
30 — — Not Used
31 YEL 492 MAF Sensor Signal
32 LT GRN 432 MAP Sensor Signal
33 DK GRN 1614 HVAC Recirculation Door Control(KEEP PIN HERE FOR FAN 2 RELAY CONTROL)
34 DK GRN/WHT 428 EVAP Canister Purge Solenoid Control
35 — — Not Used
36 BRN 436 AIR Pump Relay Control (w/NC1)
37 — — Not Used
38 — — Not Used – ADD PIN FOR PWM FUEL GAUGE SIGNAL OUTPUT (used to run factory fuel level gauge in 96-99 trucks)
39 RED 631 CMP Sensor B+ Supply
40 BLK/WHT 451 PCM Ground
41 WHT 257 EGR Solenoid Ground
42 TAN/BLK 422 TCC Enable Circuit (4L60-E only)
43 DK GRN/WHT 459 A/C Clutch Relay Control
44 — — Not Used
45 WHT 1310 EVAP Canister Vent Valve Control
46 BRN/WHT 419 Malfunction Indicator Lamp (MIL) Control
47 YEL/BLK 1223 Transmission Shift Solenoid B
48 LT GRN 1222 Transmission Shift Solenoid A
49 YEL/BLK 1827 Vehicle Speed Output Circuit 128K
50 DK GRN/WHT 817 Vehicle Speed Output Circuit 4K
51 YEL/BLK 1227 Transmission Temperature Sensor Signal
52 GRY 23 Generator Field Duty Cycle Signal
53 — — Not Used
54 PPL 1589 Fuel Level Sensor Signal
55 DK GRN 603 A/C Low Pressure Switch Signal
56 — — Not Used
57 BLK 552 IAT Sensor Ground
58 — — Not Used
59 — — Not Used
60 BRN 2129 Ignition Control Reference Low Bank 1
61 BRN/WHT 2130 Ignition Control Reference Low Bank 2
62 GRA 773 PRND C
63 PNK 1224 Transmission Fluid Pressure Switch A
64 DK GRN 890 Fuel Tank Pressure Sensor Signal
65 — — Not Used
66 PPL/WHT 2128 Ignition Control 8
67 RED/WHT 2122 Ignition Control 2
68 DK GRN 2125 Ignition Control 5
69 LT BLU 2123 Ignition Control 3
70 — — Not Used
71 — — Not Used –
72 — — Not Used
73 DK BLU 1936 Fuel Level Sensor Signal – Secondary
74 LT GRN/WHT 3213 HO2S Heater Control (w/isolated grounded sensors) (2001-02 6.0L Only)
75 — — Not Used
76 LT GRN/WHT 1749 IAC Coil B High
77 LT GRN/BLK 444 IAC Coil B Low
78 LT BLU/BLK 1748 IAC Coil A Low
79 LT BLU/WHT 1747 IAC Coil A High
80 LT GRN 3212 HO2S Heater Low Reference (w/isolated grounded sensors (2001-02 6.0L Only)

More to Follow...
 
Last edited:
mrrsm

Original poster
Lifetime VIP Donor
Supporting Donor
Member
Oct 22, 2015
8,198
Tampa Bay Area
I like using these kinds of things as 'Touch Stones" worth following along the way as it will be these kinds of Instructional methods that can keep us on track when trying to "Learn to Become a Tuner". Here is "The Tuner School" Instructor during a "Tech Tuesday Training Video" describing:

The 7 Facts About Tuning


The Major Differences between the PCM-ECMs that Govern the Gen III, IV & V Engines:


...and THE ONE ISSUE that I am Most Concerned with: Driveability:


mrrsm

Original poster
Lifetime VIP Donor
Supporting Donor
Member
Oct 22, 2015
8,198
Tampa Bay Area
With the arrival of the Donor PCM… I’m starting to plan out how I want to arrange and work through all of the necessary procedures required to fit it with the Bench Top Harness, Connect it up to the GM Tech 2 and use the Dedicated Dell Precision M65 Laptop using the TIS2000 Program to perform the Procedures necessary to Clone my Y2K Truck PCM.

But since, “All Solutions Breed New Problems...” additional Safety and Protective measures to Guard all of this Gear from incurring any Unintended Damage must first come under my consideration. And this is the point where it all gets a little bit weird, (... think "Doc Brown (BTTF) Tin-Foil Hat" sort of weird).

doc-brown.jpg

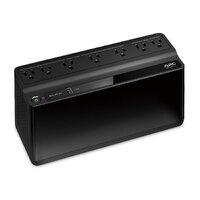
It is a given that since I’ll be working with (3) Different Computers Simultaneously, I’ll need a Reliable, Dedicated UPS Battery Back-Up Power Supply with Fresh Lead Acid Batteries:
817Z5KQfqXL._SL1500_.jpg

https://www.amazon.com/dp/B01FWAZEIU/?tag=gmtnation-20

But… I’ll also require enough Free Space to lay out all of the involved Electronic Gear and be able to arrange and make a Digital Photo Record of “The Works” when using all of these things for the “Step By Step” procedures required to take a Stock GM OEM PCM-ECM through the necessary Steps for Cloning and eventual “Tuning” procedures. It follows on that I’ll have to use my Bed as being the only space large enough to accommodate this “Work Platform”. But now another Non-Trivial problem of doing things in this way has reared its Ugly Head. What concerns me most is the EXPOSURE OF ALL THIS COMPUTER HARDWARE TO STATIC ELECTRICITY.

Now you would never imagine this to be such a serious problem down here in Sunny, Humid Florida. But in OUR house… “The Lil’ Woman” likes to keep the Temperature down to where its ‘Cold Enough to Hang Meat’. Say at right around 65 Degrees Fahrenheit. So the resultant Cold and Very Dry Air in the place makes EVERYTHING inside get quite “Sparky”.

With all of that in mind, I just can’t Risk ‘Lunching’ either The Dell Precision M65 Laptop, The “GYMKO” Tech 2 or The Donor GM Model P01 PCM-ECU from exposure to Random Static Shocks that could also ruin the SPS PASS-THRU PCM Reads/Writes and later on… the HP Tuners Programming and “Tune Transfers”.

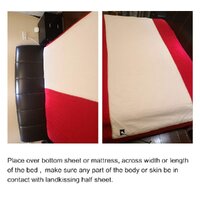
I investigated a few different angles while trying to solve this problem… and what I managed to come up with is to use a Grounded, Anti-Static Ant-EMF Cotton Sheet Embedded with Silver Wires. This item comes with an actual “Bonding Strap” that plugs into a Socket fitted into one end of the Cotton-Silver Mesh Sheet, while the other end gets plugged into any Open Grounding Prong Socket on any 3-Prong Electrical Wall Outlet or UPS Power Supply:

ANTISTATICSHEET1.jpg

This kind of Protection can prevent any chance that my casual movements and hands-on contacts with any and all of this sensitive Hard Ware might accidentally “Spark Up” and wind up ruining any of these many expensive Electronic Devices. Considering that this is such unique problem that this Sheet manages to solve, it really is a fairly inexpensive and viable solution. It is available on Amazon for around $40.00:

ANTISTATICSHEET2.jpg

https://www.amazon.com/dp/B07HP4N1B5/?tag=gmtnation-20
 

mrrsm

Original poster
Lifetime VIP Donor
Supporting Donor
Member
Oct 22, 2015
8,198
Tampa Bay Area
With the possible exception of getting “The Tuning School GM LS Platform Beginners and Intermediate Tuners Course”:

https://thetuningschool.com/collect...ated-for-use-with-your-hp-tuners-3-x-software

...the Last “Big Ticket Item” required to complete this ensemble of HP Tuners MPVI-1 Kit married up with the required AEM Wide Band Oxygen Sensor, Digital “STOICH” Gauge and Multiple Harnesses have finally arrived. Also… the BACK-ups 600 AC/DC Back Up Power Supply also got here on time. Everything else “Mechanically Necessary” has already been acquired and is well documented over in the “Hoping for Loping” Thread:


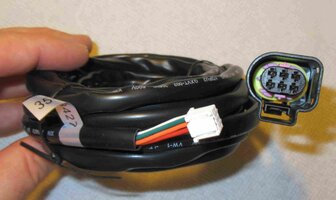
With the problems of Bad Weather and Lightning riddled Thunder Storms threatening us with almost daily power outages all summer long on the Gold Coast near the Gulf of Mexico… I have NO plans on Risking ANY of these expensive computers and associated hardware while using the TIS2000 SW on the Dell Precision M65 making SPS PASS-THRU Reds/Writes to the Y2K Truck P01 PCM-ECM. And so I’ll be plugging all of that Gear into the BACK-ups 600… just to be on the Safe Side. The attached images reflect the AEM Company Literature and Imagery previously posted of everything that is supposed to come with this Wide Band Bosch O2 Sensor and Digital Gauge Kit...were actually inside The Box:

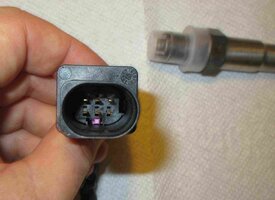
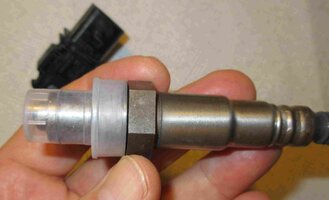
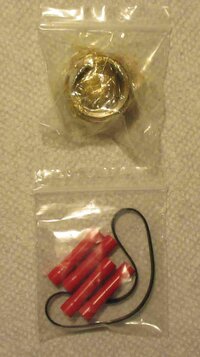
IMG_2081.jpgIMG_2085.jpgIMG_2086.jpgIMG_2087.jpgIMG_2090.jpgIMG_2094.jpgIMG_2106.jpgIMG_2111.jpgIMG_2082.jpgIMG_2088.jpgIMG_2084.jpg
 

mrrsm

Original poster
Lifetime VIP Donor
Supporting Donor
Member
Oct 22, 2015
8,198
Tampa Bay Area
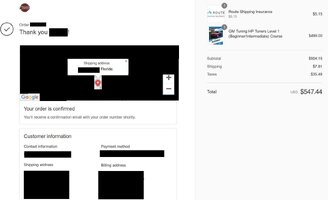
Okay… In keeping with my determination to NEVER Take Half Measures… I Dropped “The BUY Hammer” just now over at “The Tuning School” to purchase their GM LS(X) HP Tuners Beginners/Intermediate Training Course. So If I cannot Get my Y2K Truck to Start, Idle, Run and Perform WELL... after using the HP Tuners MVPI-1 Pro Hardware,Studying This HPT Software Training Data and Creating a Useful Modified Base Tune, after learning all of this information...Then I won’t deserve to call myself… A Mechanic… Let Alone deserve the Moniker of becoming a “Rookie Tuner” !

https://thetuningschool.com/collect...ated-for-use-with-your-hp-tuners-3-x-software

NOTE:

The Following Literature indicates that "The FULL Version of the HP Tuners Software is NOT Included..." However... You CAN Download the Latest, FULL Version of the HP Tuners VMI Suite for FREE from THIS Link:


This course will teach you a step-by-step tuning process for Gen III / Gen IV GM vehicles with the following vehicle modifications: bolt-ons, heads/cam and forced induction. You can tune with confidence knowing that we have developed a safe, effective and repeatable process for you to follow.”

We also include one year of technical support to guide you along the way as needed.


Summary
  • + Learn to tune using HP Tuners 4.X software specifically on Gen III & Gen IV LS vehicles (for an overview list of engine types, see below)
  • + Topics include:
    • + The basics of how to use the HP Tuners software
    • + What tables need to be changed for your tuning needs
    • + What the tables mean, how to understand them and how to adjust them properly for your vehicle modifications
    • + The correct order of tuning, such as when to adjust fuel, spark, etc.
    • + Separate guide for MAF & VE tuning (covers Virtual VE)
    • + 4 Speed Automatic Tuning Guide
  • + Learn a safe and effective repeatable process that you can use over and over again for three different vehicle modification types:
    • + Bolt-ons
    • + Heads/Cam
    • + Forced Induction
*FULL VERSION OF THE SOFTWARE NOT INCLUDED

Your Course Includes

  • + 336 page full color manual written in a process-oriented format for safe and effective tuning
  • + 60 page separate full color manual on MAF and VE Tuning & Now Virtual VE is included.
  • + Laminated checklists for quick reference on the tuning process for each vehicle modification type (bolt-ons, heads/cam, forced induction)
  • + Digital download with example tune files that guide you through the changes made for certain more complex tables
  • + One year of technical support through our Online Ticket System
Our course material is based on late model GM LS and Vortec Vehicles. This includes the:

LS1, LS6, LS2, LS3, LS7, LS9 and LSA.

Vortec V8 4.8L, 5.3L, 6.0L, 6.2L and 8.1L ranging from 1998 to 2015.


What it is NOT directly covered by the course material:

Direct injection (which is covered by our Gen V course)
4 cylinder and 6 cylinder application
Ecotech Engines
Front wheel drive LS4's
Northstar V8's

THETUNINGSCHOOLTRAININGKIT1.jpg
 
Last edited:
mrrsm

Original poster
Lifetime VIP Donor
Supporting Donor
Member
Oct 22, 2015
8,198
Tampa Bay Area
Okay… the Instructional Package from “The Tuning School” arrived earlier today...and I have been DEVOURING its contents! In One Word:

MAGNIFICENT!

The Physical Materials that will naturally get used Over and Over are made up of Discreet “Step By Step” Instructions that can be used distinctly from the Main Instruction Book. These Items have been LAMINATED IN CLEAR LEXAN PLASTIC for Lasting Durability. I was able to quickly Isolate the Uniquely Colored “Parts 1 & 2” and “Parts 1 thru 3”, etc… and gather the GEN III LS Guides from the GEN IV Guides to hone in on my Interests and Needs. These Instructions MAKE PERFECT SENSE.

I MUST make mention at the Outset...that ALL of these HP Tuners Training Tools, Methods and Documentation I purchased from "The Tuning School" are quite Proprietary and other than addressing my anecdotal experiences and successes with this Project that hopefully get derived from this Training Investment over time… Nothing of what is nested inside of any of these materials can be legally Copied, Duplicated or Shared without the Express Written Permission from “The Training School, Inc.”.

Just to clarify how Really GOOD these Training Materials are… I have a great deal of personal experience with just how difficult it is to Write Technical Training Manuals, having written many such professionally myself and created reproduce-able End User Results using perfected “Step By Step” Computer User Instructional Plans dedicated to train hundreds of Police Personnel.

Thus… I know full well all of the difficulties that are involved in trying to Break Down Each Subject and Sub-Topics into easily digestible Blocks and Segments. The results of following this painstaking process were that many people with a wide variation in their levels of interest, skill and aptitude were consistently able to easily use Complex Police Database and Information Systems.

These included may Specific Databases that I designed and programmed in dBase using Relational Databases that made their work so much easier to perform and function in very creative and effective ways. So I know full well just how difficult it is to achieve an end result for the “Ease of Use and Understanding” that all stemmed from Preparing and Building the Training Materials and Regimens well enough to allow them all to succeed as Students and Practitioners in the Use of Information.

Having perused the Full Package of “The Tuning School” Information Resources now available to me… I have absolutely no doubt whatsoever that I WILL become a Thoughtful, Careful and Competent “Tuner” on this Single GEN III Platform.

And THAT, Ladies and Gentlemen... brings me the Peace of Mind I’ve really been missing over these last few months regarding “What will happen… Once I’m no longer “Hoping for Loping”… and it comes time to Start the Modified LM7 with all of this Expensive Hardware Bolted Up… Inside and Out?” Well... I'm happy to be able to “Crack The Seal Open on The Keys to The Kingdom of HP Tuners”.

As of this moment, I know that I can breathe ever so much easier. My confidence is HIGH that My 2000 Chevrolet Silverado 1500 LM7 5.3L Engine is going to Run Royally Strong, Idle Loyally Well and “Lope” Willingly enough to meet ALL of my expectations when I get through with THIS Baby!

‘Nuff Said for the Moment on HP Tuners... Soon... I'll be Burning the Midnight Oil while Hitting These Books!
 
Last edited:
mrrsm

Original poster
Lifetime VIP Donor
Supporting Donor
Member
Oct 22, 2015
8,198
Tampa Bay Area
The “Low Buck LS Project” Turbo-Charged 2000 Chevrolet Silverado 1500 5.3L featured on YouTube and in the following narrative, while technically the ‘Very Antithesis’ what my "Spare NO Expense" approach has been, even though mine involves a much more Conservative Performance Upgrade on my Blue Y2K Long Bed Pick Up Truck, may improve your understanding well beyond what I have covered so far on the DOING of all this particular job.

And If you are following along with me here and are more than a bit curious, much of HIS work carries the idea well beyond my present TSP Camshaft and Bolt-On Upgrades. If you have an Early Model Silverado like mine, but are still seeking additional information on Turbo-Charged Mechanical set-ups, it will be worth your time to Check Out most what this Dude’s many Videos contain:
https://www.youtube.com/channel/UC5EwtYRQ4z8xuPIlysn3OXA/videos

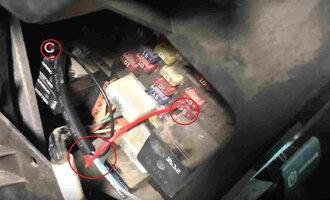
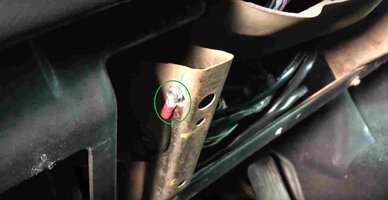
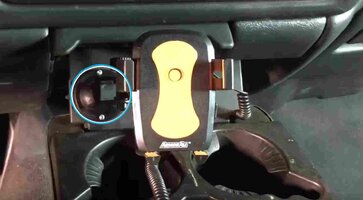
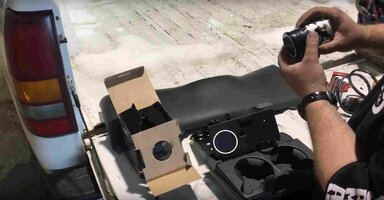
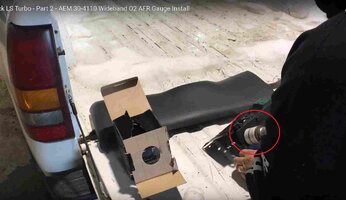
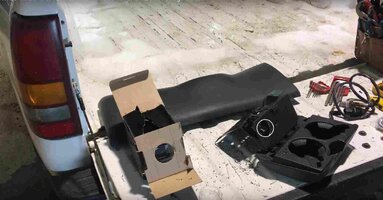
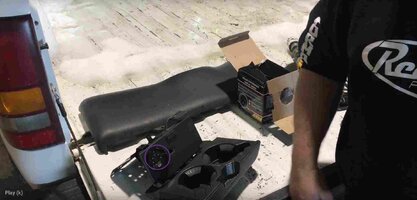
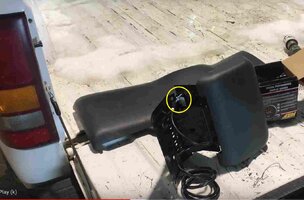
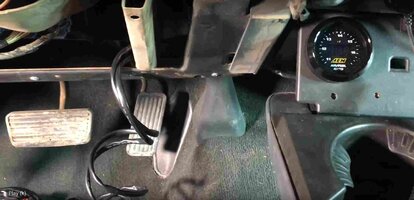
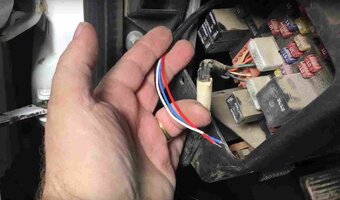
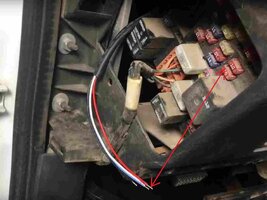
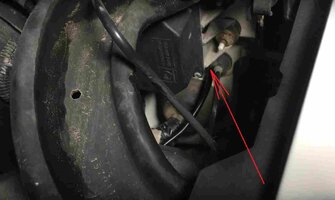
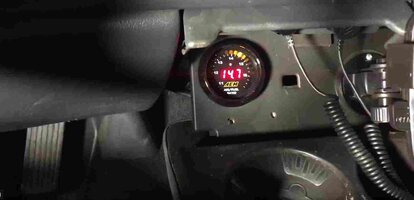
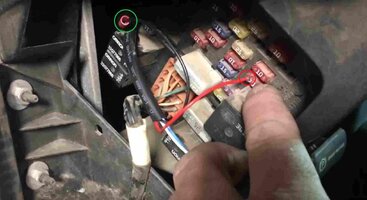
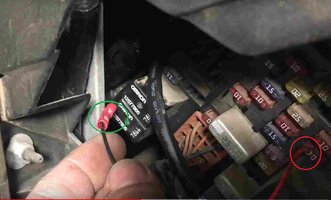
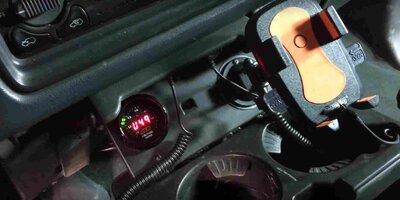
Today’s Installment, however... returns us to the Question of, “What is the Best Way to Install an AEM Wide Band Oxygen Sensor Kit in a Full Size GM Pick Up Truck?” And by this, I mean what all goes into a COMPLETE O2 Sensor Placement ( ...a VERY BIG Surprise…) Installing the AEM Digital-Analog Gauge, along with the Power and 0-5 Reference Signal Wire Hook-Ups. The VOP in this matter really shows his knowledge and skill with HP Tuners and other aspects of Computer Controlled Sensors that hold an even BIGGER surprise at solving a touchy problem.

His methodology for doing this puzzling task will dissuade even the laziest among us from being tempted to just “Throw the Sensor into the Exhaust and Toss the Gauge up on the Dashboard...”


And here is an Alternative Solution to the problem of which Serial Port to USB Adapter will work in this application for purposes of Datalogging:


I’m including all of the Screen Print Captures from one particular video to “Freeze Frame” the Key points worth remembering for ANY Wide Band O2 Sensor Installation on ANY Chevrolet Silverado or Other Full Size Truck. But the fact that HIS Truck is absolutely Identical to my own makes what follows particularly important to me:

AEMWIDEBANDSWITCHEDPOWERANDGROUND.jpgAEMWIDEBANDSWITCHEDPOWERANDGROUND1.jpgAEMWIDEBANDSWITCHEDPOWERANDGROUND6.jpgAEMWIDEBANDSWITCHEDPOWERANDGROUND7.jpgAEMWIDEBANDSWITCHEDPOWERANDGROUND8.jpgAEMWIDEBANDSWITCHEDPOWERANDGROUND10.jpgAEMWIDEBANDSWITCHEDPOWERANDGROUND11.jpgAEMWIDEBANDSWITCHEDPOWERANDGROUND12.jpgAEMWIDEBANDSWITCHEDPOWERANDGROUND14A.jpgAEMWIDEBANDSWITCHEDPOWERANDGROUND15.jpgAEMWIDEBANDSWITCHEDPOWERANDGROUND16.jpgAEMWIDEBANDSWITCHEDPOWERANDGROUND17.jpgAEMWIDEBANDSWITCHEDPOWERANDGROUND18.jpgAEMWIDEBANDSWITCHEDPOWERANDGROUND19.jpgAEMWIDEBANDSWITCHEDPOWERANDGROUND3.jpgAEMWIDEBANDSWITCHEDPOWERANDGROUND4.jpgAEMWIDEBANDSWITCHEDPOWERANDGROUND5.jpgAEMWIDEBANDSWITCHEDPOWERANDGROUND9.jpg
 

mrrsm

Original poster
Lifetime VIP Donor
Supporting Donor
Member
Oct 22, 2015
8,198
Tampa Bay Area
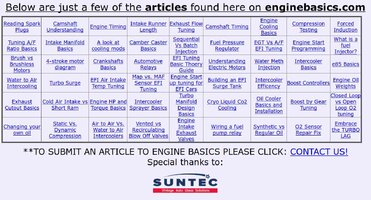
If you have decided to learn more about The Principles of Basic Engine Tuning... THIS site offers Specific Topic Tuning "How-Tos" and A WHOLE LOT MORE ABOUT THE BASICS OF ENGINE MECHANICS that will improve your understanding of General Automotive Mechanics as well as allow you to 'Get into the Mindset of Tuners' should you decide to take the plunge and Modify your Engine Components enough to NEED some PCM Programming Tuning Modifications:


ENGINEBASICSDOTCOM1.jpg
 

Forum Statistics

Threads
23,678
Posts
641,917
Members
19,128
Latest member
Bearwen